

Machine Detailing Thread

Thread Starter
EPIC TUNING
Joined: Sep 2002
Posts: 10,285
Likes: 0
From: WA
I know theres a detailing thread tucked away in the APC forum, but I figure this is a better place for one anyways. Post your tips and techniques 
I'll contribute some
Scratch and Swirl Removal
First, you are going to need at the very least a Porter Cable dual action polisher, or preferrably a rotary buffer. I like to use Orange foam pads for scratch and servere swirl removal, and white foam pads for light swirl removal and polishing.
Obviously wash the vehicle, and I like to clay bar the vehicle before I do any sort of restoring to the paint. when using a PC, work the polish in at speed 5-6. work 2'x2' sections at a time, and work in untill it is mostly gone. buff clean with microfiber. Remember to always try the most mild procedure 1st, and if it doesnt work move onto comething more aggressive. Also a product is only as aggressive as the pad used (to an extent). when using a rotary use a side to side motion followed by up and down. never move in circular or diagnal directions, and always keep it moving.
Paint Chip Repair
after washing vehicle, make sure chip is free of debris and rust. fill chip with laquer touch up paint and let dry. follow with wetsanding with 2000 then 3000 grit sandpaper (Meguiars Unigrit preferred). follow with buffing with a moderately aggressive polish to remove and sanding marks left behind. the chip should be smooth and unnoticable.
Honda-Tech Member
Joined: Apr 2007
Posts: 419
Likes: 0
From: RSM, Ca, United States
I like where this is going.
First and foremost I think a lot of people don't realize just how much defect correction you can do with a polisher, the right chemicals and a little bit of elbow grease. I see a lot of cars where the owner beleives that the car needs a full re-paint when in reality it just needs some good deep polishing and other corrective treatments.
Like E-Rok said you must ALWAYS wash your car before doing any type of polishing, if you polish on a dirty car you are going to make a bad situation worse.
Claying is always going to give you better results however this is not absolutely necessary, but you want your paint to have the super smooth glass like texture give it a hit with the claybar. I personally like Clay Magic blue with the claymagic clay lube. (You can usually get this as a "kit" at most auto supply stores)
A word on pads. There are many different manufacturers of pads, Wolfgang, Lake Country, Meguiars, Edge and Propel just to name a few. While this is awesome that there are so many different makers there is one drawback, none of them use the same color-coding for the aggressiveness of the pad. Meguiars Yellow pad is their least aggressive pad, while Yellow is the most aggressive pad that Lake Country makes, so if you are reading a DIY make sure that you are using the corresponding pad. i.e. light cut, heavy cut, polishing, or no cut.
A word of caution when using a rotary buffer, it is possible to burn right through your paint with this type of machine if it is left in one place too long. The forced direction spinning will generate a significant amount of heat, generally about 140 degrees is the temperature where your paint will fail and burn-through will take place, so ALWAYS keep it moving. The Porter Cable 7424 dual action polisher is a much more user friendly machine and is rather idiot proof, you can leave it in one spot for a couple minutes and not do very much damage to your paint. The reason is that the irregular motion of the pad with the machine creates very little heat. The trade off is that it takes longer to do with a Porter Cable what it takes to do with a rotary. I personally use the Porter Cable 7424 in addition to the Makita 9227C rotary polisher.
Now onto polishing. Tape off any trim or cracks and crevices where polish might get in, it is a major PITA to get it out once it is in there, also polishing can possibly ruin trim, so do yourself a favor and tape it off with some blue painters tape. For the PC I like to use the Poorboys line of SSR polishes. They are numbered for amount of agressiveness with 3 being the most aggressive and 1 being the least. I have found for the softer honda paint I can do significant correction using a light cut pad and SSR 2.5. Then simply follow that up with SSR1 on a polishing pad. If I am still not satisfied I can follow the SSR1 up with Optimum Polish on another polishing pad. Make sure you don't mix pads with diferent polishes on the same project.
When using the rotary buffer I prefer the Optimum Line of polishes, Extreme Cut is the most lethal of their polishes and Polish is the least. When rotary polishing make sure you stop and feel the surface as you go, if the panel is too hot to touch with your hand back up and let it cool down.
So now that you car is all shiney with no swirls it's time to protect that beautiful finish. Wax of course is one way to go, but wax only lasts a month or 2 at best, (less on darker cars because of the heat from the sun.) So this is where sealents come into play. A sealent is much like a wax in that it is applied the same way. However a sealent makes a chemical bond with your paint and lasts 3-4 times longer than wax. A good comparison is dipping your finger into hot candle wax, the wax bonds only to itself and after it cools you can pull the whole thing off, Sealent on the other hand is like dipping your finger into crazy glue, once it bonds it is now bonded to your skin AS WELL as the glue that it is touching.
My go-to sealent is Poorboys EX-P, but that is just me, there are lots of companys that make some other fantastic products so get out there and try a couple different ones and see whats best for you. ALWAYS let the sealent cure for at least 12 hours, preferably 24 before topping it with anything. Once your sealent is cured you can apply a layer or 2 of wax on top to really bring about some depth and wetness to your paint. Always use Pure Carnuba waxes, a cleaner wax will take off the layer of sealent you applied so carefully.
In my next post I will cover different washing techniques to preserve your finish.
Honda-Tech Member
Joined: Apr 2007
Posts: 419
Likes: 0
From: RSM, Ca, United States
OK so now that you have yourself a top notch finish free of swirls, micromarring and other generally lame stuff how do you keep it looking great? Your only have a finite amount of paint and every time you buff on it you are actually removing some clear coat. So in reality you can only buff your car completely down I would say 8-10 times before you are going to thin the clear out so much that it causes problems.
There are lots of things that cause swirl marks and small scratches. One of the things that causes the most amount of swirls, (if not the thing that causes the most period), is improper washing techniques.
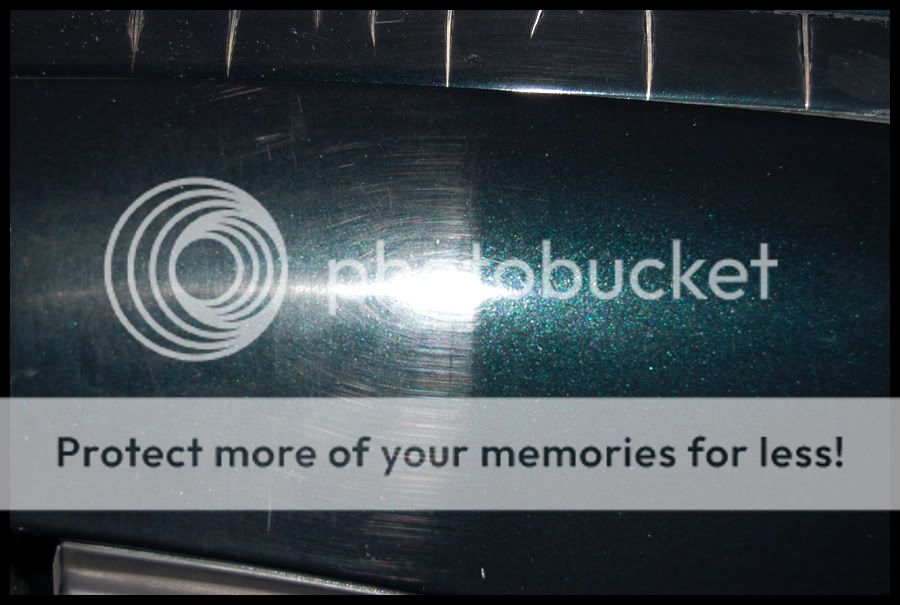
First and foremost NEVER EVER take your car through the tunnel wash system available at most gas stations. EVER! There is a reason it only costs five bucks. The weight of the pads just rubs the dirt into your finish, scratching it. And that is the best case scenario where there isn't already dirt on the things from the enormous amount of filthy cars to have gone through it already that day. Do yourself and your paint a favor and stay away from the "swirl-o-matic" as it known in the detailing industry.
Here is a good example of what going through the tunnel wash system does to your paint.
To do a proper wash you will need:
2 good quality wash mitts
2 Buckets (I like 5 Gallon variety)
Some dedicated car wash soap (leave the dawn in the kitchen)
A good water supply (garden hose sucka)
Some shade.
First fill up 1 of the buckets with water and soap and wash your wheels and tires.
Dump out that first bucket and refill it with clean water and mix in some soap.
DO NOT USE THE SAME WASH MITT ON YOUR WHEELS THAT YOU USE ON YOUR PAINT! Brake dust is acidic and will ruin your paint.
Take your second bucket and fill it with just clean water, NO SOAP.
Hose down the car front to back.
Now take your wash mitt and dunk it in the clean water, wring it out. This will help to get rid of the particles of dirt and whatnot that are in your mitt. Now dunk it in the sudsy water and start washing the car, from the highest point to the lowest point. Each time you finish a panel dunk the mitt in the clean water and get it as clean as possible before switching to the soapy water, this will prevent the dirt that you just washed off the car from getting into the soapy water and then back onto your paint where it might scratch it. There is no need to press hard when washing the car, the weight of your hand should be more than enough. Don't let soap dry on the paint. Now rinse the whole car car off.
Stage 2 Drying the car.
I like to use Microfiber Waffle Weave towels to dry my car. DO NOT USE BATH TOWELS. Now take your towel and BLOT the car dry, just lay the towel down and soak up the water and repeat. Try not to wipe the car as this contributes to swirling the paint. General rule of thumb is if it will scratch a CD it will scratch your paint. Got it?
If you use the two bucket method and the blotting method for drying you will take the washing process to the point where you are doing the least amount of damage to your paint and should maintain your finish for quite a long time.
There are lots of things that cause swirl marks and small scratches. One of the things that causes the most amount of swirls, (if not the thing that causes the most period), is improper washing techniques.
First and foremost NEVER EVER take your car through the tunnel wash system available at most gas stations. EVER! There is a reason it only costs five bucks. The weight of the pads just rubs the dirt into your finish, scratching it. And that is the best case scenario where there isn't already dirt on the things from the enormous amount of filthy cars to have gone through it already that day. Do yourself and your paint a favor and stay away from the "swirl-o-matic" as it known in the detailing industry.
Here is a good example of what going through the tunnel wash system does to your paint.
To do a proper wash you will need:
2 good quality wash mitts
2 Buckets (I like 5 Gallon variety)
Some dedicated car wash soap (leave the dawn in the kitchen)
A good water supply (garden hose sucka)
Some shade.
First fill up 1 of the buckets with water and soap and wash your wheels and tires.
Dump out that first bucket and refill it with clean water and mix in some soap.
DO NOT USE THE SAME WASH MITT ON YOUR WHEELS THAT YOU USE ON YOUR PAINT! Brake dust is acidic and will ruin your paint.
Take your second bucket and fill it with just clean water, NO SOAP.
Hose down the car front to back.
Now take your wash mitt and dunk it in the clean water, wring it out. This will help to get rid of the particles of dirt and whatnot that are in your mitt. Now dunk it in the sudsy water and start washing the car, from the highest point to the lowest point. Each time you finish a panel dunk the mitt in the clean water and get it as clean as possible before switching to the soapy water, this will prevent the dirt that you just washed off the car from getting into the soapy water and then back onto your paint where it might scratch it. There is no need to press hard when washing the car, the weight of your hand should be more than enough. Don't let soap dry on the paint. Now rinse the whole car car off.
Stage 2 Drying the car.
I like to use Microfiber Waffle Weave towels to dry my car. DO NOT USE BATH TOWELS. Now take your towel and BLOT the car dry, just lay the towel down and soak up the water and repeat. Try not to wipe the car as this contributes to swirling the paint. General rule of thumb is if it will scratch a CD it will scratch your paint. Got it?
If you use the two bucket method and the blotting method for drying you will take the washing process to the point where you are doing the least amount of damage to your paint and should maintain your finish for quite a long time.
Thread Starter
EPIC TUNING
Joined: Sep 2002
Posts: 10,285
Likes: 0
From: WA
For a really deep shine for well paying customers, I after the needed polishing wether it was swirl/scratch removal or just a light polishing, I like to follow with a Glaze, then followed by a wax or sealant as the customer desires. I like sealants as they last longer a as LastDetail said, they seem to produce a deeper shine, and they also hide slight swirls.
I also have found that selants go well onto hard black plastic parts such as mirrors and the cowl under the wiper blades. it makes it very deep and dark.
It is also a good idea to get a handful of microfibers and label them for various duties such as wheels, windows, interior, and I have dedicated towels for each polish/compound/sealant/etc. I keep them in marked ziplock bags as well as label the towels with a sharpie since you will need to wash them and that way you wont mix them up. the last thing you want to do is use a microfiber used on wheels, on your paint, even if it is freshly washed.
Target, Kmart, and Costco all have VERY good microfiber towels, you dont have to buy expensive name brand ones. however Meguiars make a really nice Microfiber specifically for buffing off wax. it has satin edges to prevent marring.
Also on interiors, if you can spare the extra $80, I highly reccomend picking up a Bissell Green Machine. It works far better than any vaccuum I have used. I an very pleased with the results for being a somewhat cheap machine. It works untill I break down and buy a real carpet extractor
Trending Topics
Thread Starter
EPIC TUNING
Joined: Sep 2002
Posts: 10,285
Likes: 0
From: WA
Honda owners are fortunate enough to have very soft clear on their paint. if you have swirls, try some Optimum Hyper Compound with an orange or yellow cutting pad (lake country colors), and it should remove the swirls with relative ease. be fortunate you dont have rock hard german car cleacoat.
Honda-Tech Member
Joined: Apr 2007
Posts: 419
Likes: 0
From: RSM, Ca, United States
Speaking of tips what took me forever to learn was when the polish was actually fully broken down. For years I wasn't working the polish long enough which resulted in so-so results. When working the polish typically you want to work a 2 by 2 foot section, although this can be altered depending on the contours of the panel you are working on. Now spread it around and start your polishing in the same pattern like E-Rok said. Now you want to keep working that pattern until the polish is almost transparent. This is where I would run into problems polish can take even up to a full 3 minutes to completely break down with the Porter Cable, just be patient and you will be rewarded.
Honda-Tech Member
Joined: Dec 2004
Posts: 2,930
Likes: 0
From: Las Vegas, NV
any tips for removing etched in water spots?? i tried wax, but it didnt work.
so i picked up some rubbing compound. any tips on applying that??
so i picked up some rubbing compound. any tips on applying that??
Thread Starter
EPIC TUNING
Joined: Sep 2002
Posts: 10,285
Likes: 0
From: WA
<TABLE WIDTH="90%" CELLSPACING=0 CELLPADDING=0 ALIGN=CENTER><TR><TD>Quote, originally posted by 95greenlude »</TD></TR><TR><TD CLASS="quote">any tips for removing etched in water spots?? i tried wax, but it didnt work.
so i picked up some rubbing compound. any tips on applying that??
</TD></TR></TABLE>
Wax isnt going to remove anything. Wax is simply a protectant.
1st, you can try a vinegar wash. If it is just water spots from mineral deposits, this usually works in removing them/making them less noticeable. you may need to compound afterwards.
If it is acid rain water spots, it is etched in the paint and will be difficult to remove. you can try compounding it but it may need wetsanding.
try the vinegar wash 1st. wash the vehicle and dry it, then wash it down with vinegar obviously. see if that helps.
Thread Starter
EPIC TUNING
Joined: Sep 2002
Posts: 10,285
Likes: 0
From: WA
Ok since there seems to be alot of thread of late about buffing, ill describe the process.
First you are going to judge how much compounding/buffing is needed. do you have light swirls, or do you have oxidation and a dull finish?
If you just have swirls, you should be fine with a more powerful polish or a lighter cutting compound. If the swirls are light, I like to use Optimum Polish and an Orange light cutting pad. if the swirls are severe, I like Optimum Compound or Hyper Compound and a Yellow foam pad for a foamed wool pad.
Now if you have Oxidation, scratched, neglected paint, I would step up to Optimum Hyper Compound and a foamed wool pad.
As mentioned above, buff a 2'x2' section at a time. 1200rpm on a rotary, the highest speed on a pc (6). allow for the product to be worked in. if you stop early the product will not break down and you not see results. you should work it in untill it is almost gone. put a spray of quick detailer on your pad for final buffing of surface.
once the compounding is finished, move on to polishing. the procedure is the same, work small areas at a time, allowing the product to break down. Again for polishing I like Optimum Polish since it has some cutting action and will take out light swirls. I use an orange foam pad if I have swirls to remove, or a white foam pad if the paint is in nice shape and it is just getting a polishing.
Now you should follow with a glaze. Glaze has no cutting powers, it simply adds oils to the paint for added gloss. I use a black foam finishing pad to apply it. work product until nearly clear.
Now you have a choice of wax or sealant. As Lastdetail mentioned, Selant bonds to your paint therefore lasting longer for added protection. I recomment Sealant. Apply with either a Black finishing pad for a blue fine finishing pad. buff onto vehicle covering the entire car, and allow to dry to a haze. then buff off.
and your done.
If you are working with a PC, it will take you considerably longer to compound so do not get discouraged.
Honda-Tech Member
Joined: Dec 2004
Posts: 2,930
Likes: 0
From: Las Vegas, NV
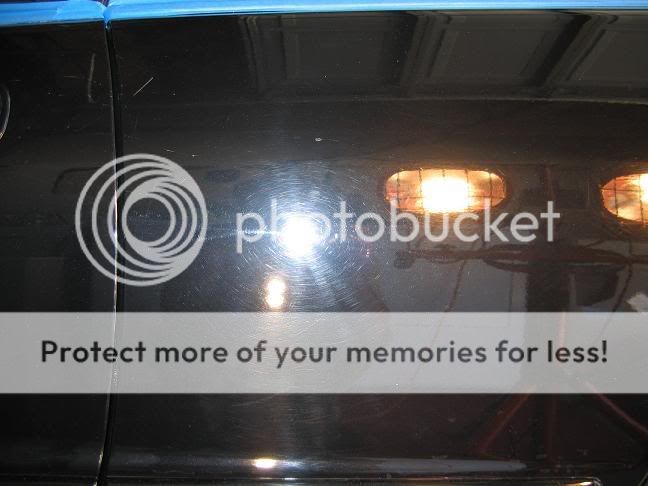
^well i actually i went a different way.
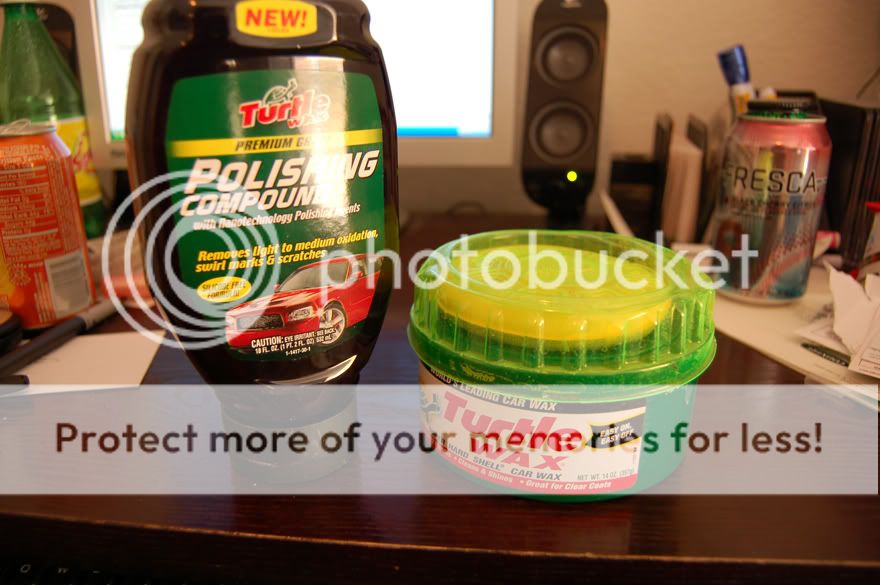
went to the store and grabbed some polishing compound and had some wax at my house....
this is what i picked up:
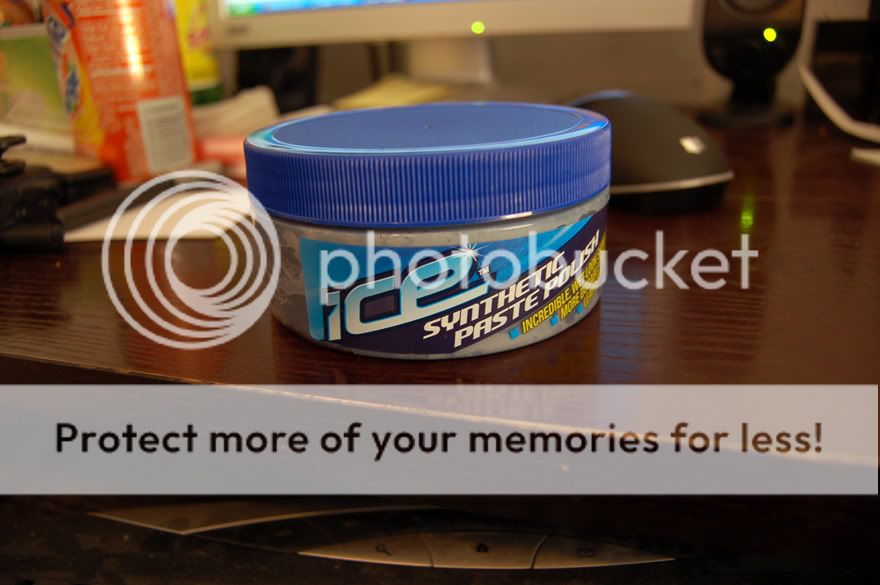
and i actually tried this wax( but ^^^that wax worked much better)
and this is the before and after
went to the store and grabbed some polishing compound and had some wax at my house....
this is what i picked up:
and i actually tried this wax( but ^^^that wax worked much better)
and this is the before and after
Thread Starter
EPIC TUNING
Joined: Sep 2002
Posts: 10,285
Likes: 0
From: WA
that came out pretty good, was that by hand or buffer?
that took some ***** to use turtle wax compound
and that ICE isnt a wax, its a polish.
that took some ***** to use turtle wax compound
and that ICE isnt a wax, its a polish.
Junior Member
Joined: Mar 2005
Posts: 910
Likes: 0
From: Bowling Green, KY, U.S.
You guys need to take notes on what LastDetail is posting..I consider my self pretty good/experienced at detailing, and LastDetail is key on with the advice hes giving. Anyone in here an Optimum No Rinse user? This stuff continues to blow me away after 6+ months of using it and thats even on soft aftermarket paint as well as OEM Honda paint. Another product I just cant find myself to get away from is Collinite 845 Insulator Wax. This wax amazes me everytime I use it. The protection is just unreal for a wax and the looks outperform most waxes IMO besides some of the few higher end waxes such as Pinnacle Souveran, DP MaxWax, or Poorboy's Nattys blue. For drying towels, I dont think you can beat the Huge Viking Microfiber that you can find at places like Orielly's Auto and K-mart. An awesome drying method Ive been using for awhile and i'm sure Erok and Lastdetail have practiced at some point in time is a term called "Flooding" the car dry after your last full rinse of the car right before your getting ready to dry it. After the final rinse, you should either kink or shut off the hose, and take of the nozzle you were using, so that all that is left is the bare end of the water hose. Turn the water back on, and let the high volume/low pressure water flood the car down, starting from the roof and moving down. By the time your finished, the water left standing on the car will probably be cut down by 75% compared to using the nozzle on your final rinse.
Thread Starter
EPIC TUNING
Joined: Sep 2002
Posts: 10,285
Likes: 0
From: WA
<TABLE WIDTH="90%" CELLSPACING=0 CELLPADDING=0 ALIGN=CENTER><TR><TD>Quote, originally posted by EJ8tunerman »</TD></TR><TR><TD CLASS="quote">You guys need to take notes on what LastDetail is posting..I consider my self pretty good/experienced at detailing, and LastDetail is key on with the advice hes giving. Anyone in here an Optimum No Rinse user? This stuff continues to blow me away after 6+ months of using it and thats even on soft aftermarket paint as well as OEM Honda paint. Another product I just cant find myself to get away from is Collinite 845 Insulator Wax. This wax amazes me everytime I use it. The protection is just unreal for a wax and the looks outperform most waxes IMO besides some of the few higher end waxes such as Pinnacle Souveran, DP MaxWax, or Poorboy's Nattys blue. For drying towels, I dont think you can beat the Huge Viking Microfiber that you can find at places like Orielly's Auto and K-mart. An awesome drying method Ive been using for awhile and i'm sure Erok and Lastdetail have practiced at some point in time is a term called "Flooding" the car dry after your last full rinse of the car right before your getting ready to dry it. After the final rinse, you should either kink or shut off the hose, and take of the nozzle you were using, so that all that is left is the bare end of the water hose. Turn the water back on, and let the high volume/low pressure water flood the car down, starting from the roof and moving down. By the time your finished, the water left standing on the car will probably be cut down by 75% compared to using the nozzle on your final rinse. </TD></TR></TABLE>
ALOT of people swear by ONR, I think I might give it a try.
</TD></TR></TABLE>ALOT of people swear by ONR, I think I might give it a try.
Junior Member
Joined: Mar 2005
Posts: 910
Likes: 0
From: Bowling Green, KY, U.S.
When I first heard about it, I said no way! My OEM Cypress green pearl Honda paint is soft as hell and if you barely touch it (WHICH I HATE IT SO BAD WHEN PEOPLE FREAKING DO THAT!), it will swirl up, so I thought no way can I do this and keep my paint swirl-free. I use a little bit different method than most people. I still keep the two bucket method and what not, as well as blotting it dry after cleaning each panel, but I start from the bottom instead, then work my way up, because the fact the if I start at the top I always get the mixture running down the car and if it dries up it obviously leaves unwanted water spots but you cant dry it with your drying media or else you'll get your drying microfiber (in my case) dirty. I have both QEW and ONR, but ONR kills QEW in every way. A big problem I think most people have with ONR marring the paint when they first start using it is dragging the drying media across the paint. I too did this when I started using ONR and got marring. When I switched to the blotting method, I couldnt ask for it to work any better!
Honda-Tech Member
iTrader: (1)
Joined: Jan 2005
Posts: 4,335
Likes: 0
From: Riding The Endorphin High
Just to clarify on chip repair...
Dab chip with touch-up paint.
Wetsand - 3M Wetsanding Paper 1500 grit
Wetsand - 3M Wetsanding Paper 2000 grit
Compound - Meguiars Fine-Cut Cleaner - To remove watermarks and light scratches
Polish - Meguiars Body Shop Hand Polish - To bring out the shine and glaze
Seal - Meguiars Synthetic Sealant - To well... seal up the shine and give depth
Wax - Meguiars Hi-tech Yellow Wax - To protect and add another layer of shine and depth
Opinions and comments are welcome (I'm still learning) 
Dab chip with touch-up paint.
Wetsand - 3M Wetsanding Paper 1500 grit
Wetsand - 3M Wetsanding Paper 2000 grit
Compound - Meguiars Fine-Cut Cleaner - To remove watermarks and light scratches
Polish - Meguiars Body Shop Hand Polish - To bring out the shine and glaze
Seal - Meguiars Synthetic Sealant - To well... seal up the shine and give depth
Wax - Meguiars Hi-tech Yellow Wax - To protect and add another layer of shine and depth
Opinions and comments are welcome (I'm still learning)
Thread Starter
EPIC TUNING
Joined: Sep 2002
Posts: 10,285
Likes: 0
From: WA
<TABLE WIDTH="90%" CELLSPACING=0 CELLPADDING=0 ALIGN=CENTER><TR><TD>Quote, originally posted by nholmes »</TD></TR><TR><TD CLASS="quote">Just to clarify on chip repair...
Dab chip with touch-up paint.
Wetsand - 3M Wetsanding Paper 1500 grit
Wetsand - 3M Wetsanding Paper 2000 grit
Compound - Meguiars Fine-Cut Cleaner - To remove watermarks and light scratches
Polish - Meguiars Body Shop Hand Polish - To bring out the shine and glaze
Seal - Meguiars Synthetic Sealant - To well... seal up the shine and give depth
Wax - Meguiars Hi-tech Yellow Wax - To protect and add another layer of shine and depth
Opinions and comments are welcome (I'm still learning) </TD></TR></TABLE>
I like to finish wetsanding with meguiars unigrit as 3m paper is notorious nor leaving sanding marks.
I recommend Optimum Hyper Compound over the Megs
everything else looks good, I own everything you listed except I have swirl free polish instead of hand polish. you might also want to follow polishing with a glaze.
Dab chip with touch-up paint.
Wetsand - 3M Wetsanding Paper 1500 grit
Wetsand - 3M Wetsanding Paper 2000 grit
Compound - Meguiars Fine-Cut Cleaner - To remove watermarks and light scratches
Polish - Meguiars Body Shop Hand Polish - To bring out the shine and glaze
Seal - Meguiars Synthetic Sealant - To well... seal up the shine and give depth
Wax - Meguiars Hi-tech Yellow Wax - To protect and add another layer of shine and depth
Opinions and comments are welcome (I'm still learning)
</TD></TR></TABLE>I like to finish wetsanding with meguiars unigrit as 3m paper is notorious nor leaving sanding marks.
I recommend Optimum Hyper Compound over the Megs
everything else looks good, I own everything you listed except I have swirl free polish instead of hand polish. you might also want to follow polishing with a glaze.
Thread Starter
EPIC TUNING
Joined: Sep 2002
Posts: 10,285
Likes: 0
From: WA
<TABLE WIDTH="90%" CELLSPACING=0 CELLPADDING=0 ALIGN=CENTER><TR><TD>Quote, originally posted by nholmes »</TD></TR><TR><TD CLASS="quote">What glaze do you suggest?</TD></TR></TABLE>
there are sooo many good glazes out there it is hard to go wrong. I have Meguiars only because that is what i 1st bought, but I might try Menzernas glaze next.
Zanio, Poorboys, Menzerna, Duragloss, Meguiars etc all make excellent glazes
there are sooo many good glazes out there it is hard to go wrong. I have Meguiars only because that is what i 1st bought, but I might try Menzernas glaze next.
Zanio, Poorboys, Menzerna, Duragloss, Meguiars etc all make excellent glazes
Honda-Tech Member
iTrader: (1)
Joined: Jan 2005
Posts: 4,335
Likes: 0
From: Riding The Endorphin High
<TABLE WIDTH="90%" CELLSPACING=0 CELLPADDING=0 ALIGN=CENTER><TR><TD>Quote, originally posted by E-Rok »</TD></TR><TR><TD CLASS="quote">I have Meguiars</TD></TR></TABLE>
Which?


Also, is this the polish you use?

Which?
Also, is this the polish you use?
Thread Starter
EPIC TUNING
Joined: Sep 2002
Posts: 10,285
Likes: 0
From: WA
<TABLE WIDTH="90%" CELLSPACING=0 CELLPADDING=0 ALIGN=CENTER><TR><TD>Quote, originally posted by nholmes »</TD></TR><TR><TD CLASS="quote">
Which?
Also, is this the polish you use?
</TD></TR></TABLE>
I have #3.
and yes, that is the polish I have. I am however about to buy some Optimum Polish and see how I like it. I just picked up their Hyper Compound and Compound and its great.
my product line as of now:
Meguiars Hi-Tech Yellow Wax, Megs Machine Glaze, Megs Synthetic Sealant, Megs Swirl Free Polish, Megs Dual Action Cleaner Polish, Megs Power Compound Cleaner, Optimum Compound, Optimum Hyper Compound
Which?
Also, is this the polish you use?
</TD></TR></TABLE>I have #3.
and yes, that is the polish I have. I am however about to buy some Optimum Polish and see how I like it. I just picked up their Hyper Compound and Compound and its great.
my product line as of now:
Meguiars Hi-Tech Yellow Wax, Megs Machine Glaze, Megs Synthetic Sealant, Megs Swirl Free Polish, Megs Dual Action Cleaner Polish, Megs Power Compound Cleaner, Optimum Compound, Optimum Hyper Compound