When you click on links to various merchants on this site and make a purchase, this can result in this site earning a commission. Affiliate programs and affiliations include, but are not limited to, the eBay Partner Network.
Damn it's that time, end of the year, everything is so jam packed with birthdays and Christmas coming up. Finally had some free time today to work on the wagon. Last Wednesday I had my RDO and my dad left work a tad early so we could drop the motor out of the wagon.
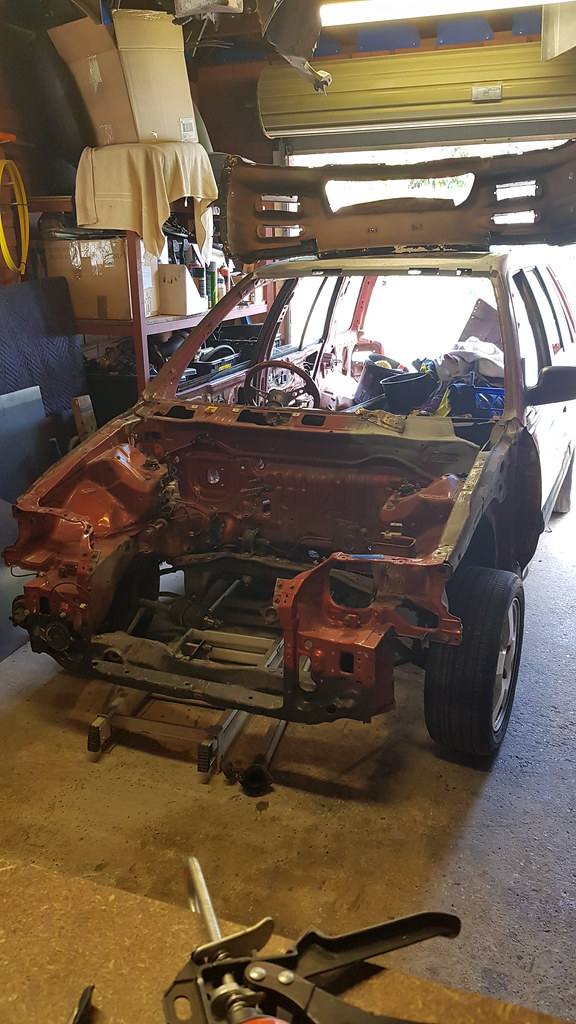
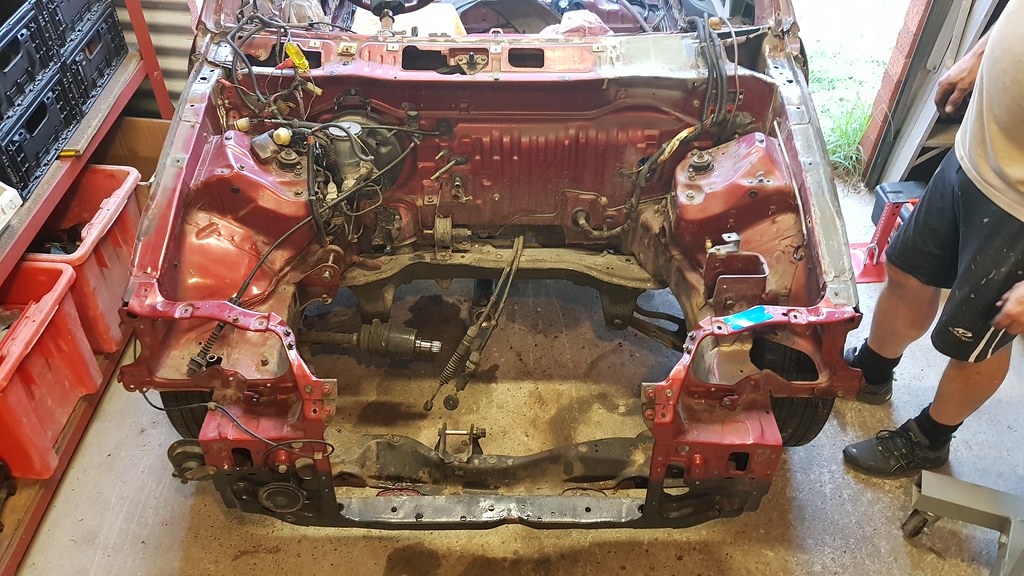
The previous weekend we were mucking around on the wagon and cleaning things up, finding a little bit more rust under the windscreen on the passenger side in the section we are already working on. We decided to go ahead and drop the motor so we could stand in the engine bay to give us some more room, and lets face it, it was going to come out anyways.
Why is the driver CV still in there? It's ceased and rusted up, used the worlds biggest breaker bar and still no luck, need a rattle gun. However we still wanted that motor out, a wee bit of an angle and she still popped out.
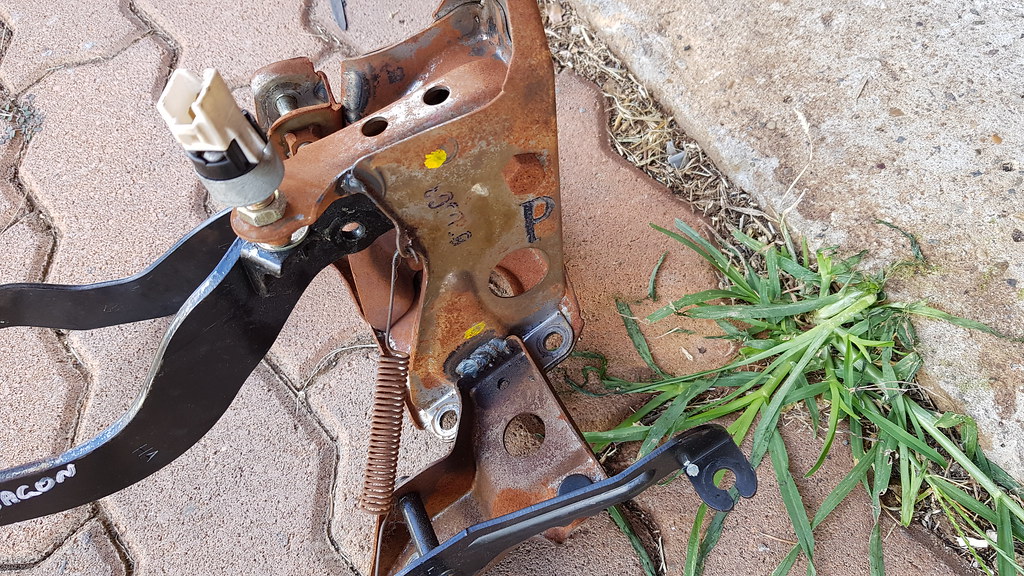
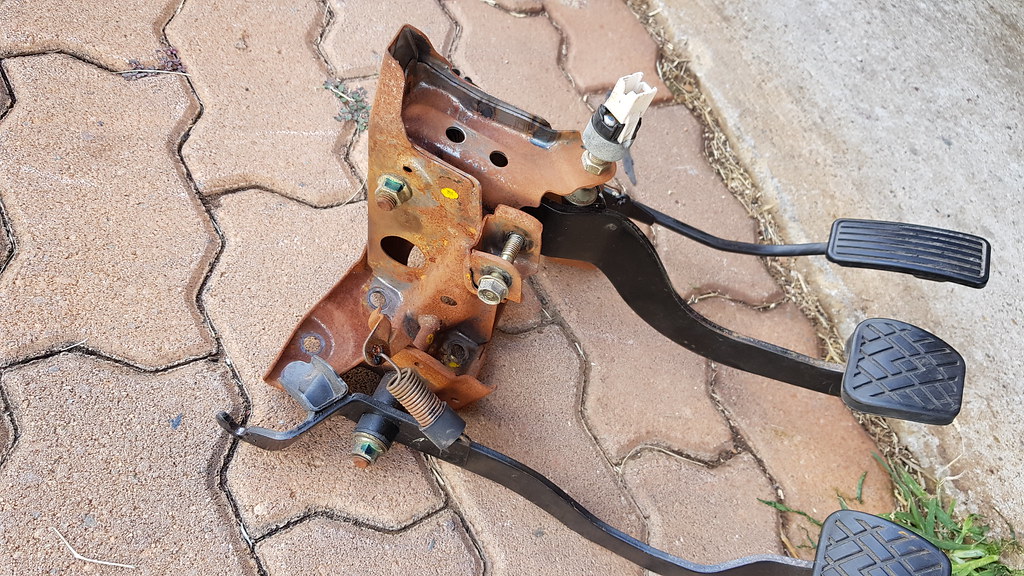
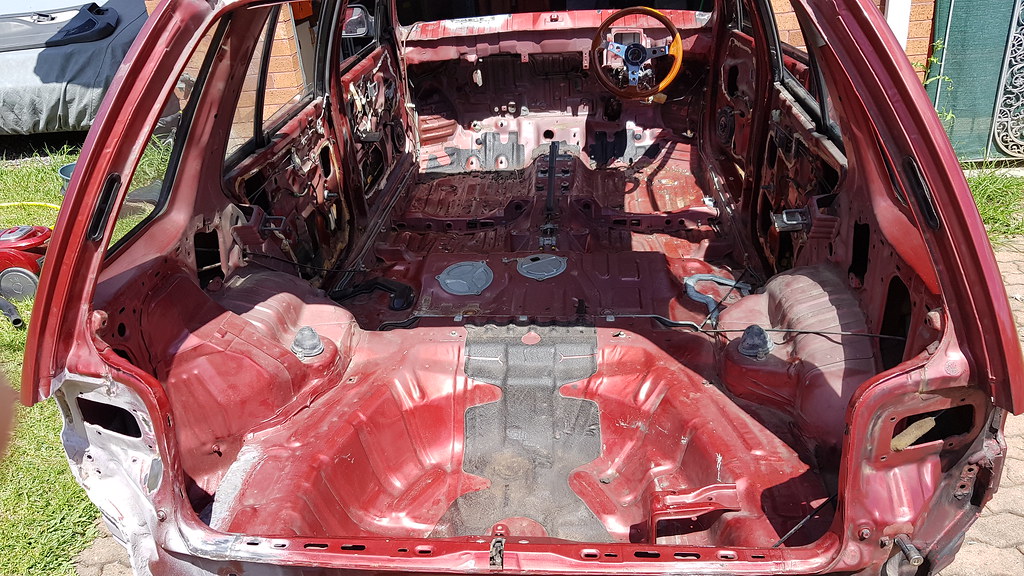
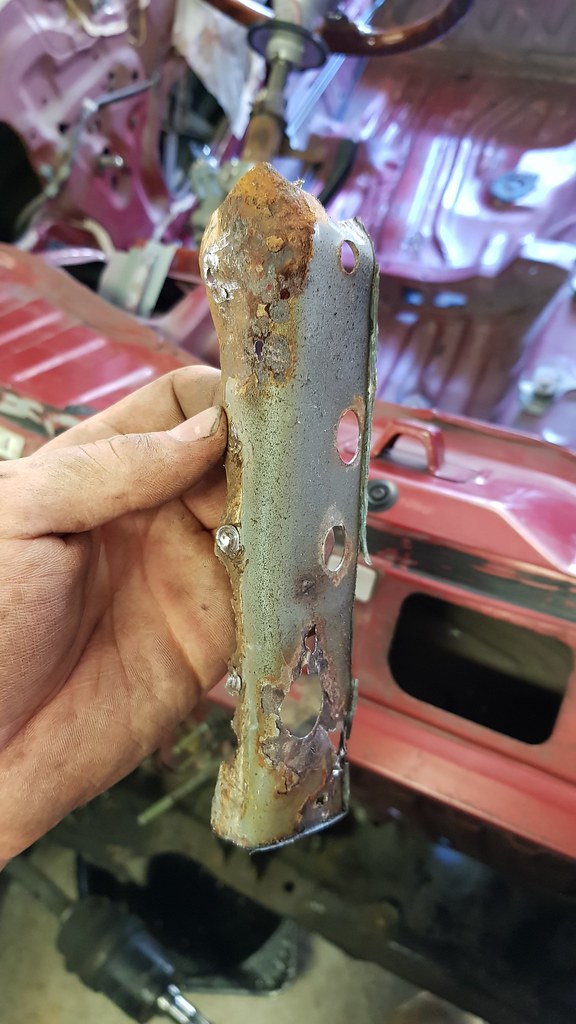
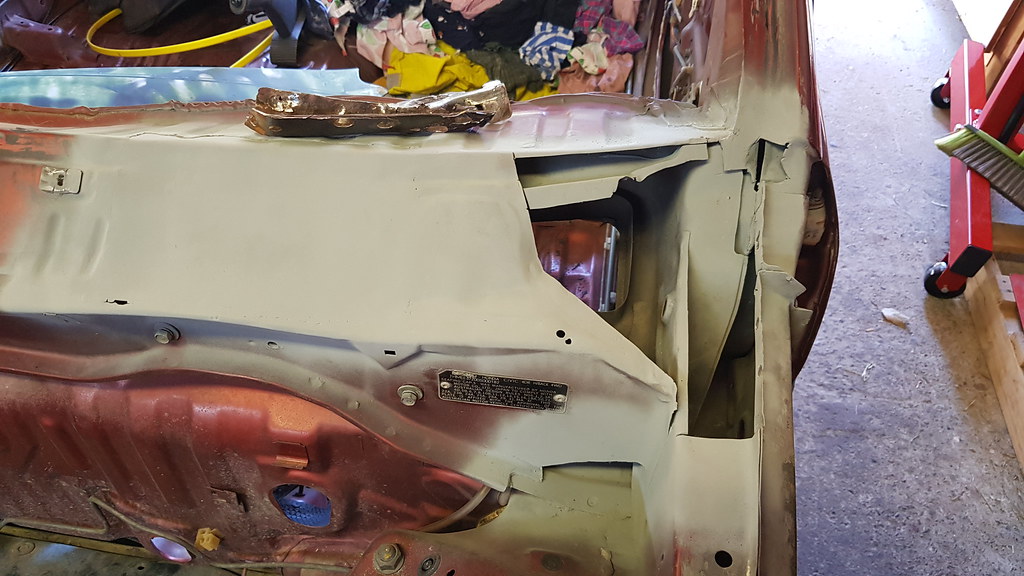
So with our time today, we decided to strip the rest of the inside out, everything thats normally behind the dash like AC, heater core, loom etc, came out. The pedal assembly is super crusty, looks like it's a replacement from the wreckers before and they've also rewelded it as well for some strength/to fix a previous break.
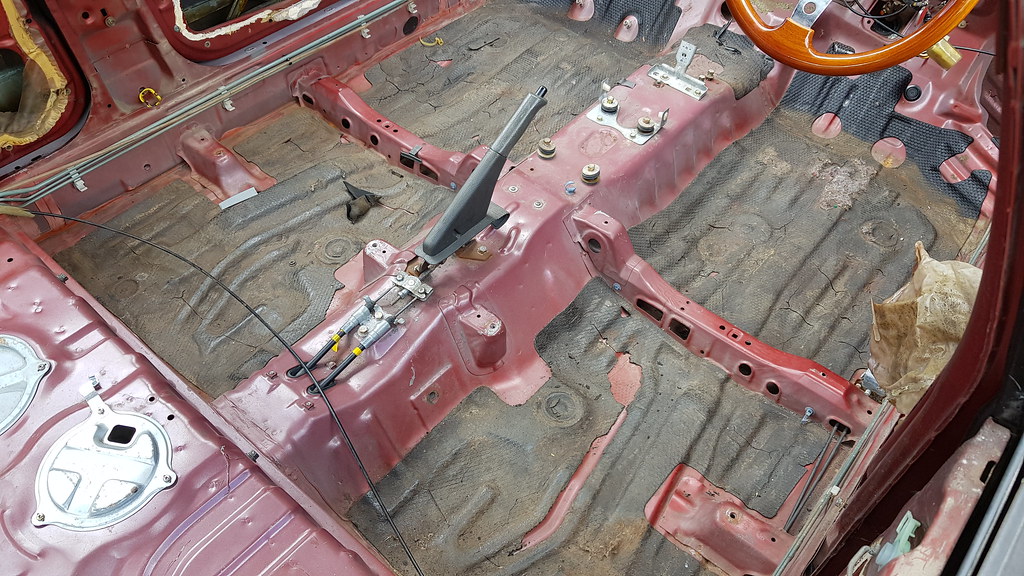
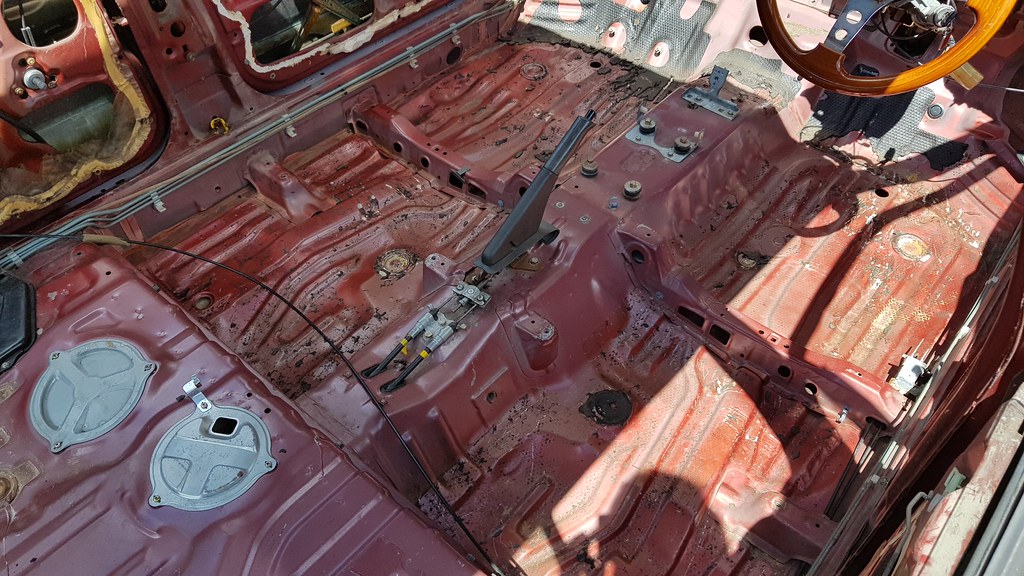
Annnd she's stripped. I started vacuuming the inside and noticed the sound deadening was already loose and coming up with ease, so for the next 1hr with a hammer and flat head me and dad got most of it out, the sun was shining on the front section thats left, it got hot and wouldn't pop off.
Was very suprised how easy it came out without dry ice, which I had to use on my hatch. I'm planning to lay dynamat throughout the entire car in the future as well before the interior goes back in.
BEFORE
AFTER
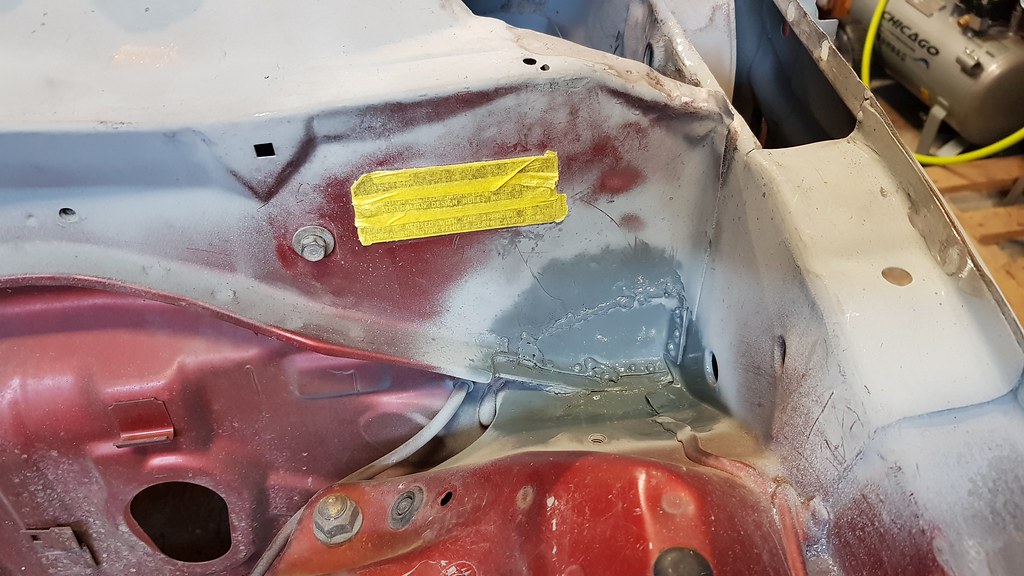
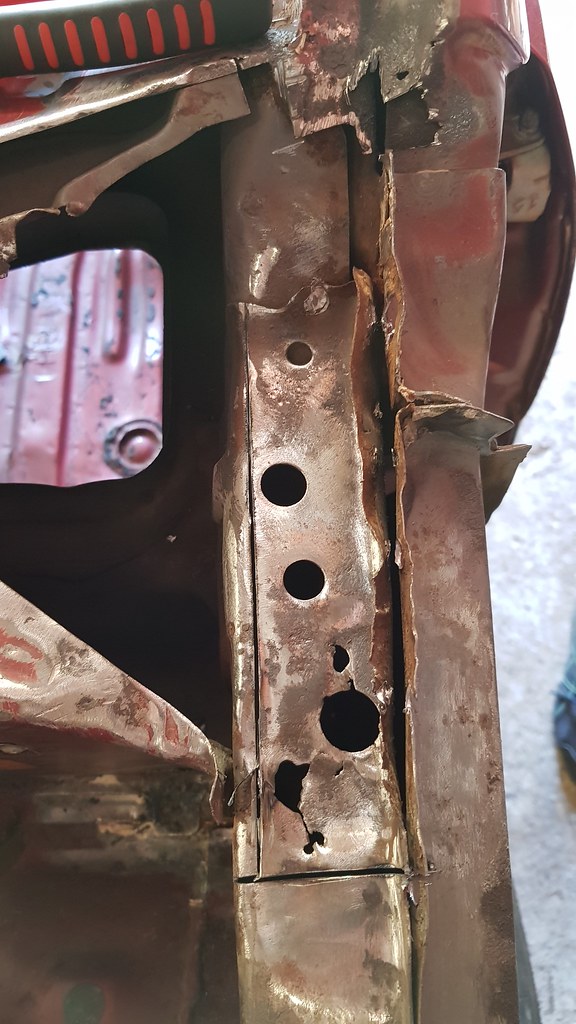
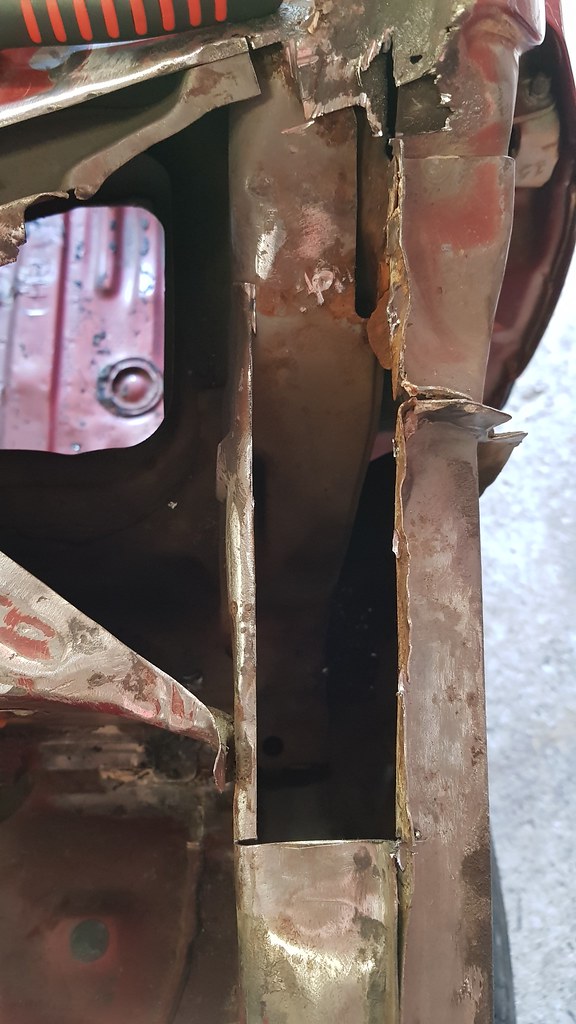
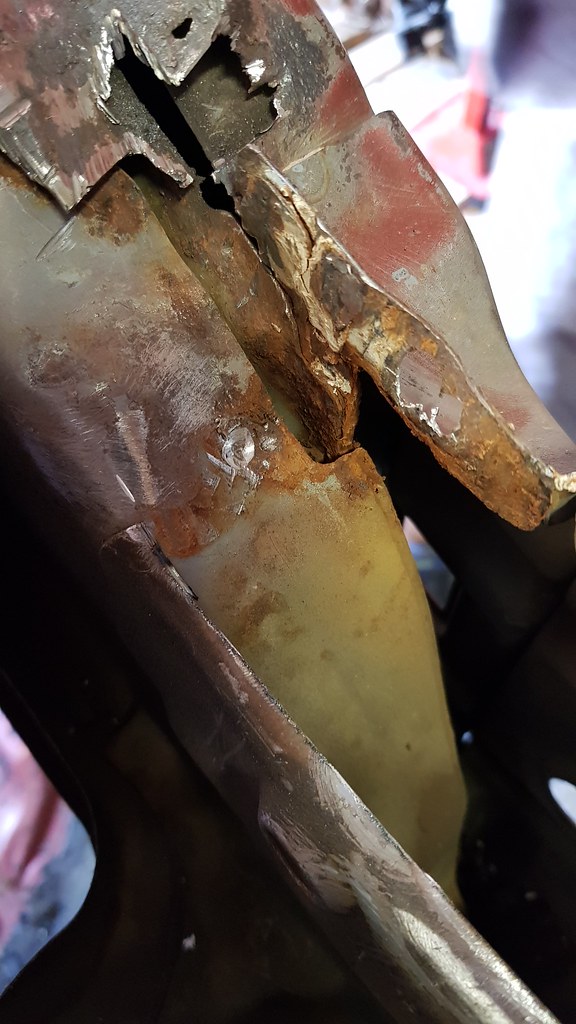
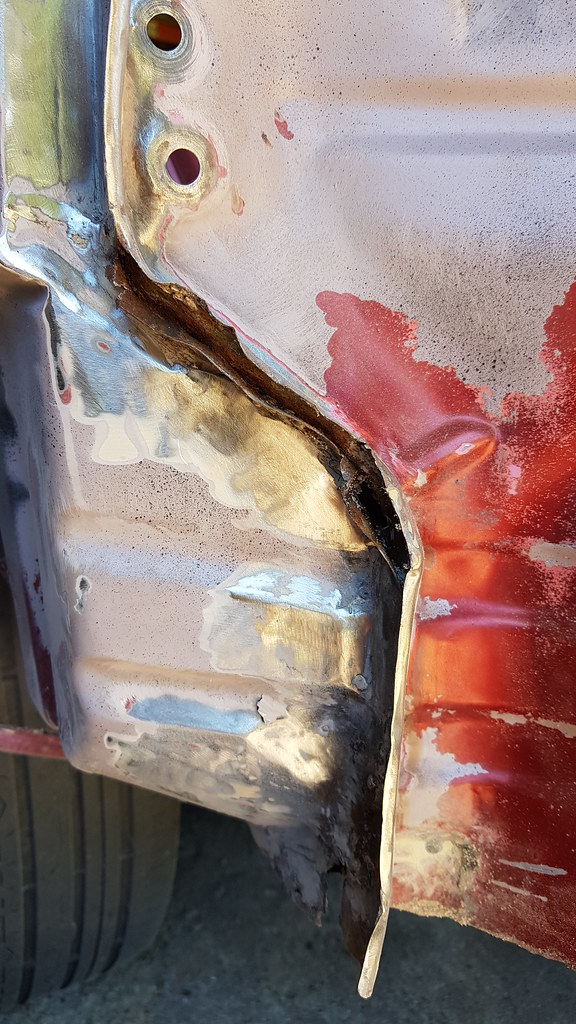
Back to rust, passenger side windscreen. The chassis part in the picture below is a little crusty where it goes up the side, so we decided we will just cut it out and replace. Upon cutting we were presented with where rust has run down the side of this join, wire brushed a little and only looks like surface rust. Will need an actual wired brush we can shove down the small hole, clean it up and then lay down some rust converter and paint. Will continue on Boxing day after some lunch I believe!
Now would be a good time to strengthen the clutch pedal. The Wagons specifically have a very weak pivot on the clutch. I have personally broken 4 of them.
They start out by creaking, then slightly bending off to the side, making it feel like you need a new clutch, you tighten the cable thinking it solved it, then the pedal snaps off. Now I use one that is never going to break.
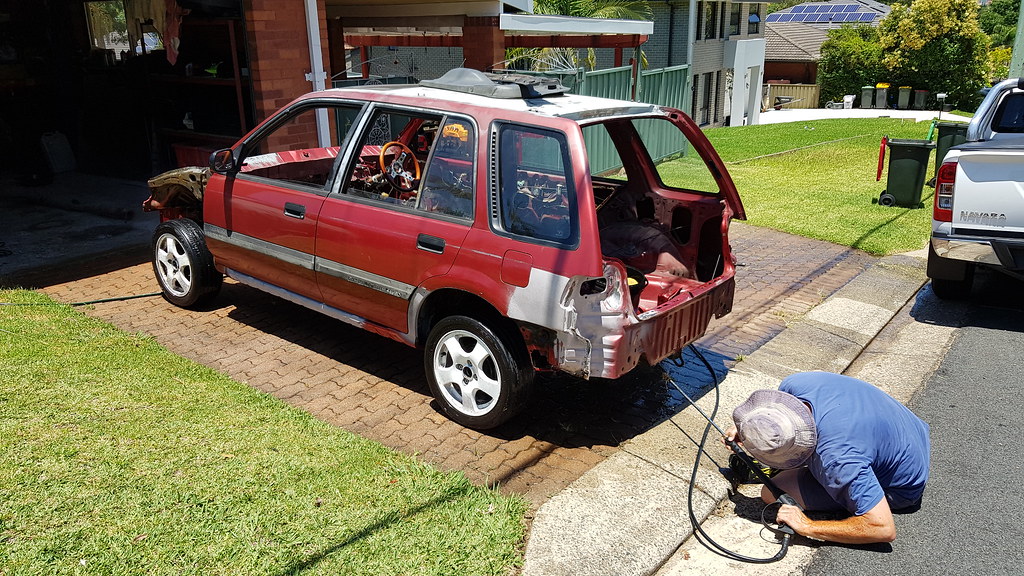
So the garage got a brand new 2 stroke pressure cleaner for Christmas, so to start off the day we decided to clean the entire car, so much crap in the wheel weels and engine bay! Some of the paint even came off from the chassis behind bumper bars etc
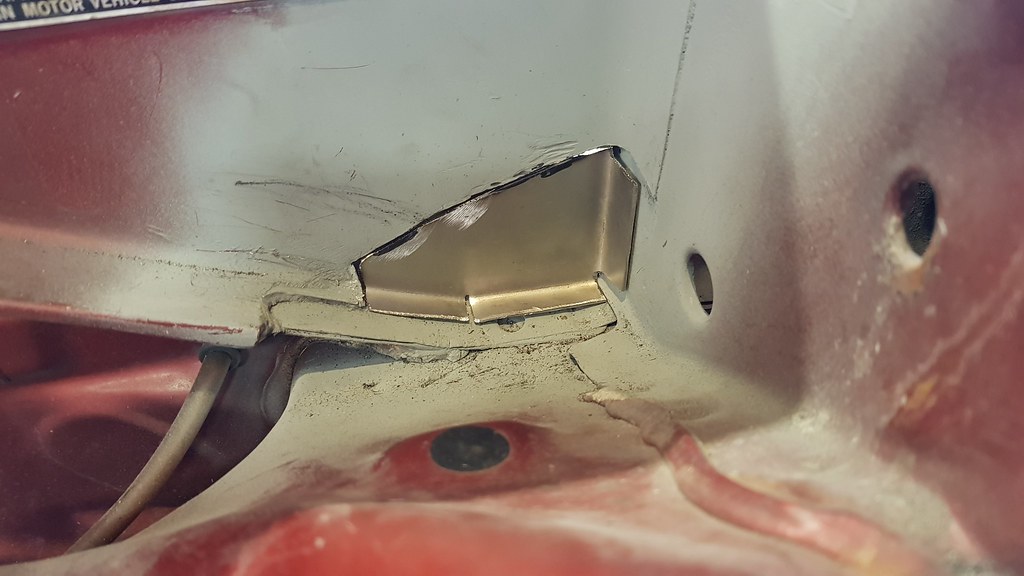
As I'm going away to Japan next Wednesday for 3 weeks we decided to just cut out any rust we could find as I got a new dremel for Christmas to get into those tight corners, and then spray in the weld through primer to protect it until I'm back, first off was the corner behind the passenger shock tower:
Before:
After:
Behind the rear wheel, passenger side Before:
After:
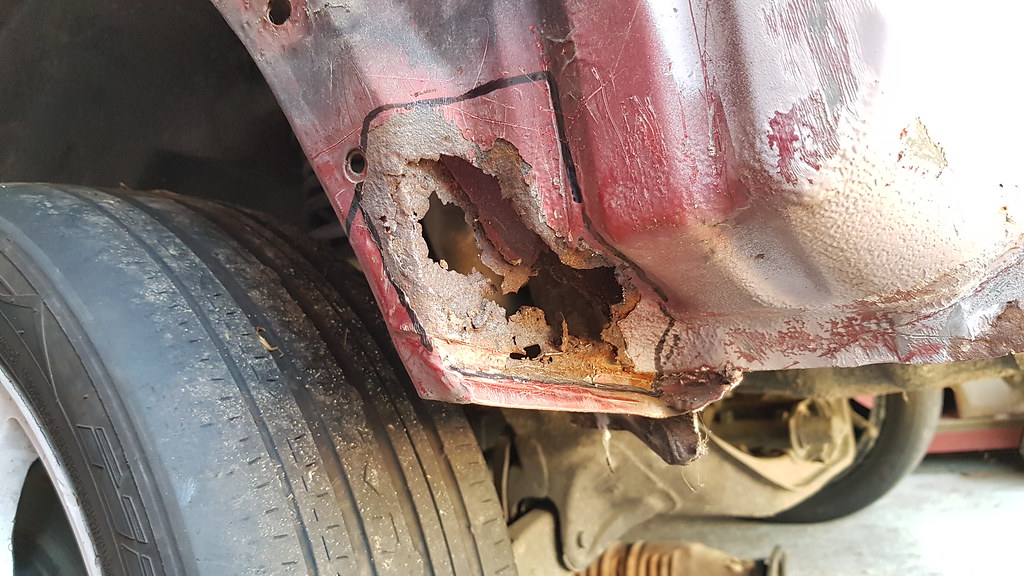
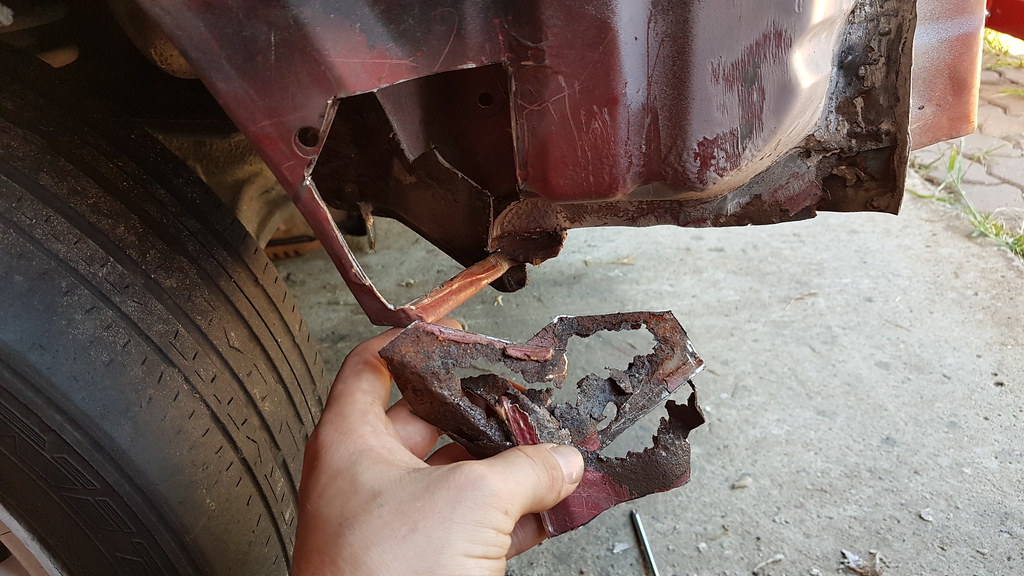
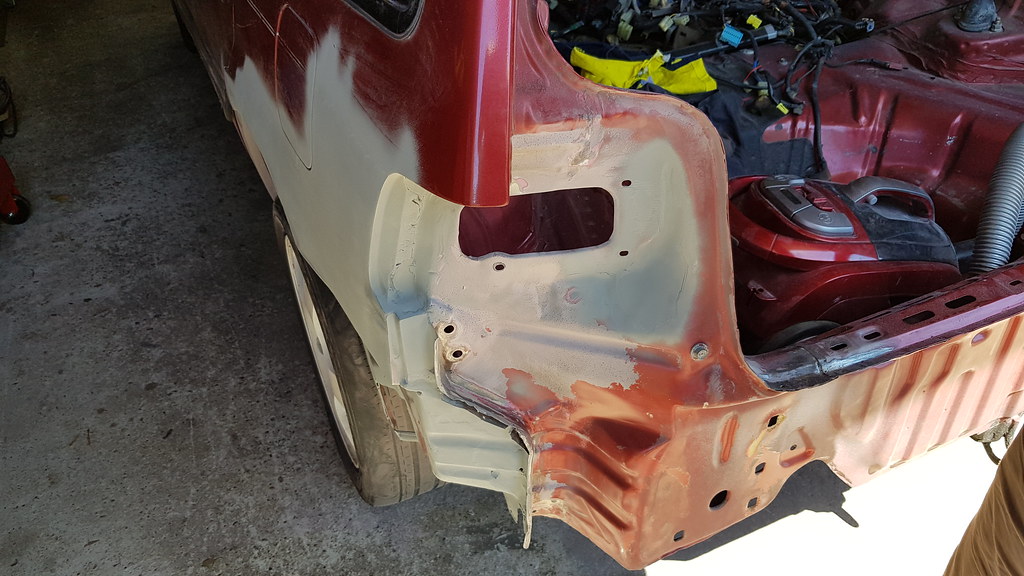
Next up was this crusty rear passenger corner, previous owner mentioned a rust repair around the tail light area (common rust spot) however it looks like whichever dodgy/useless 'panel beater' did this did a peasant job, and yes, now even worse with more rust.. Yep this one is interesting, kinda don't want to think about it until after Japan Before:
After:
Outside view:
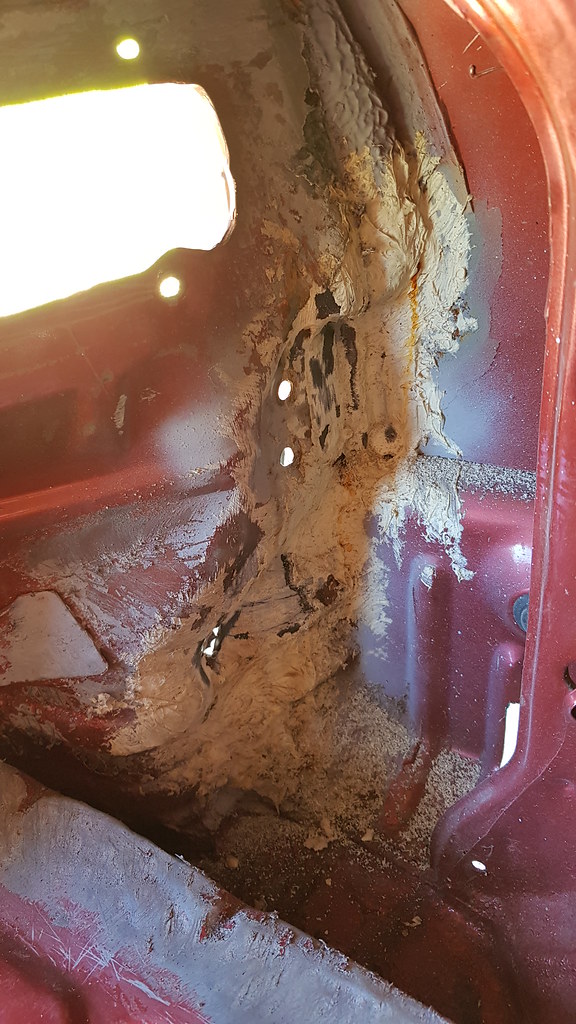
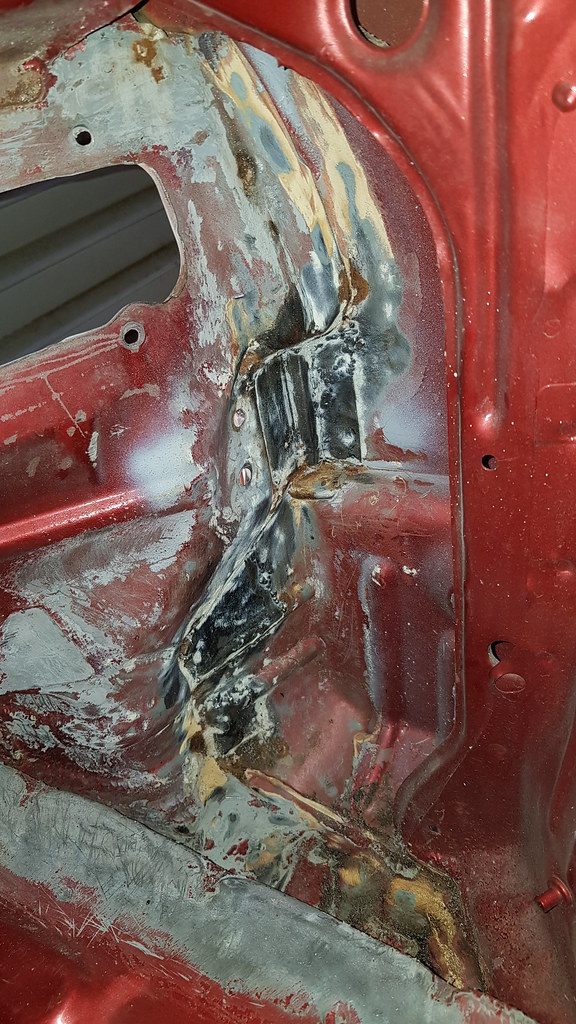
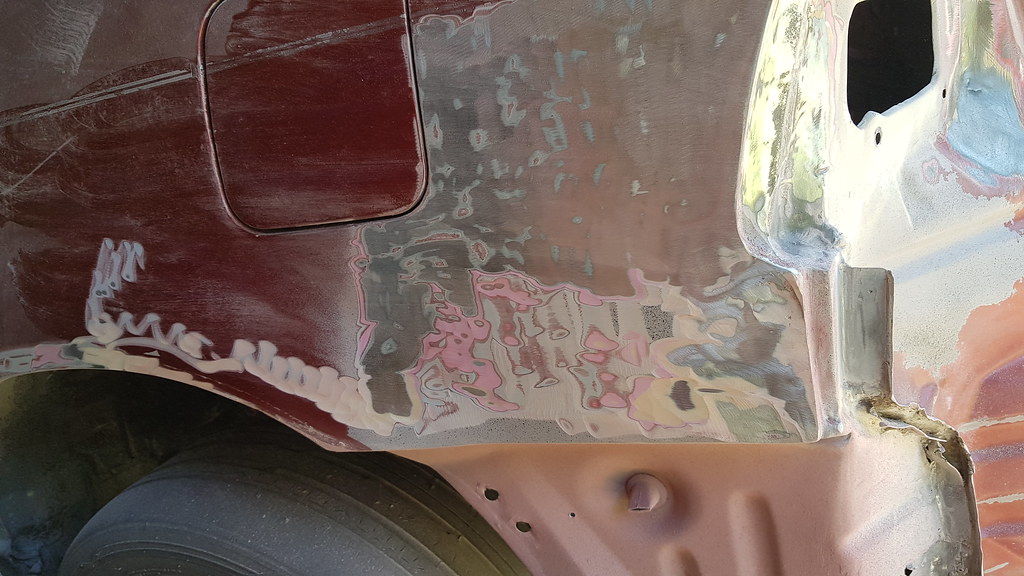
Annnnnnnd then the icing on the cake. You may have seen in previous photos, the passenger rear corner had primer on it from the previous tail light rust repair job, I decided to take back the primer to see why they sprayed so far up the panel.. sigh definitely a big toll to the build.
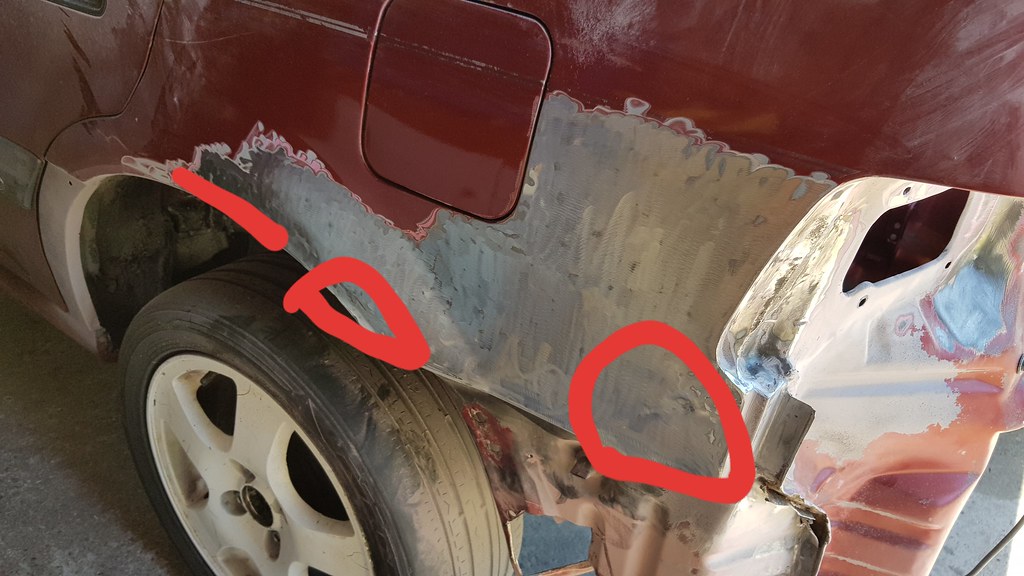
The circled areas are where the damage is, unsure what caused it but dented in panels, not going to lie when I found this I thought to myself why am I even bothering with this, but I'm not quitting on this so my father and I will sit down and look at it when back from Japan and go from there, try our best to pull it and fix it properly. I'm sure some bog will be required for the finishing touches, so with this I decided to just spray everything in primer and leave it at that.
Looking good - that much body work scares the crap out of me, haha. Sweet MotoCompo too...it looks like it's in great condition. Now you just need a City Turbo to go with it! Why does Japan get all the cool stuff?
Looking good - that much body work scares the crap out of me, haha. Sweet MotoCompo too...it looks like it's in great condition. Now you just need a City Turbo to go with it! Why does Japan get all the cool stuff?
Cheers! When I bought it I didn't intend on so much but oh well. The Motocompo is in bery good condition and yes I'd love a City Turbo
Well well well, been a while since an update. Went to Japan for my 3rd trip (awesome as always) and since back I've been so busy every weekend there has been no time for wago. Got a compressor for my birthday in Feb which is a nice addition to the garage, we also tidied it up with a big sort out of all the random car parts lying around. Now we are ready for progress!
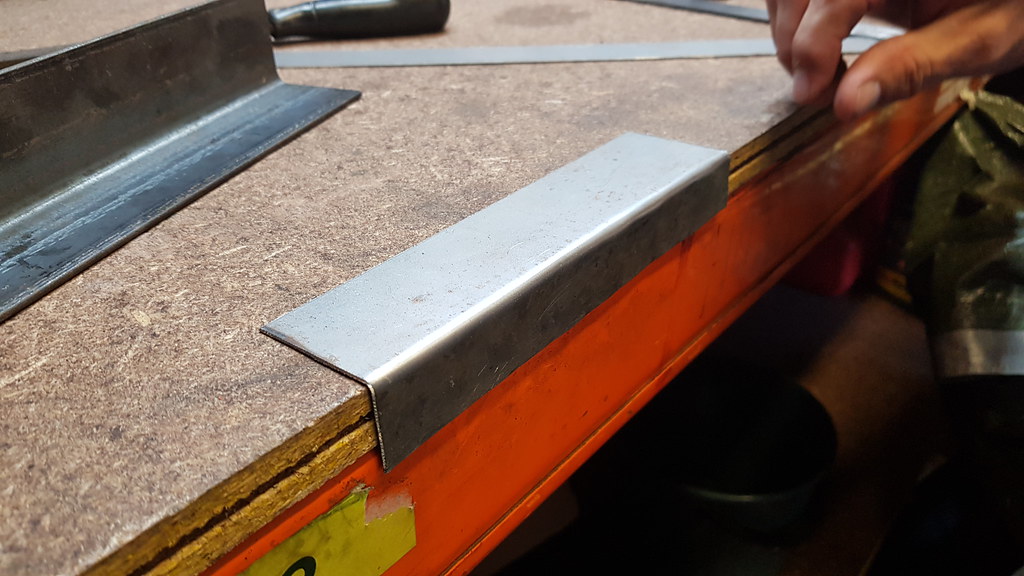
I want this rust sorted, I've owned the wagon for over a year and theres still tons of rust in it. First starting off with the passenger section under the window. Today we made up a piece for the lower section which is the frame of the car, quite easy to mock up. The factory piece has a bend in it however it would be hard to replicate that. We opted for this instead, fits in quite snug. Bent up the end to go up the frame with a slit cut as well as can see.
With this sorted we then went ahead for the lower part behind the shock tower. Similar process, cut a piece with a few slits to bend a flange on it (as we called it). I'll weld this piece in first as we have the hole above to shove our hand through to support the back of this piece when welding.
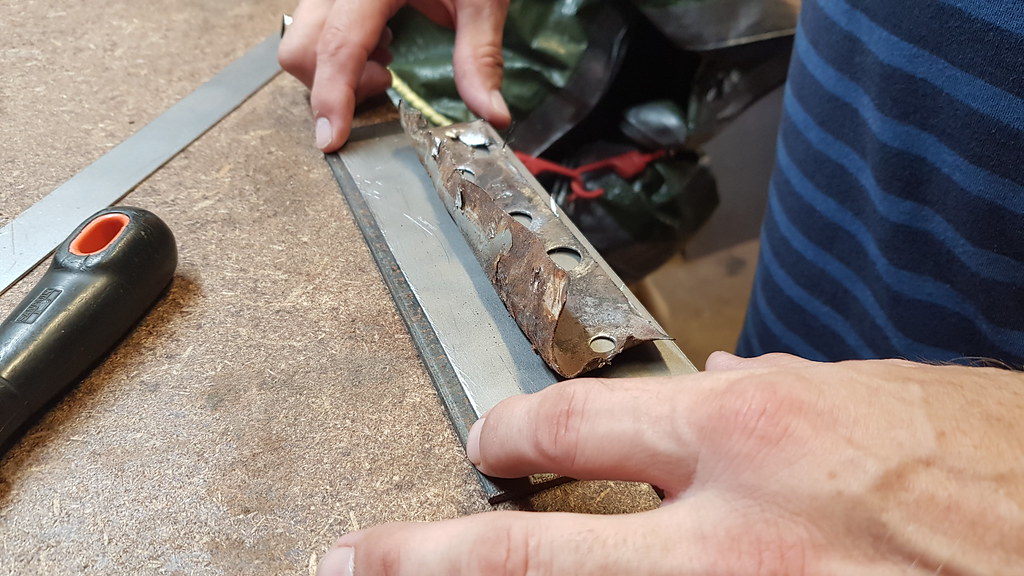
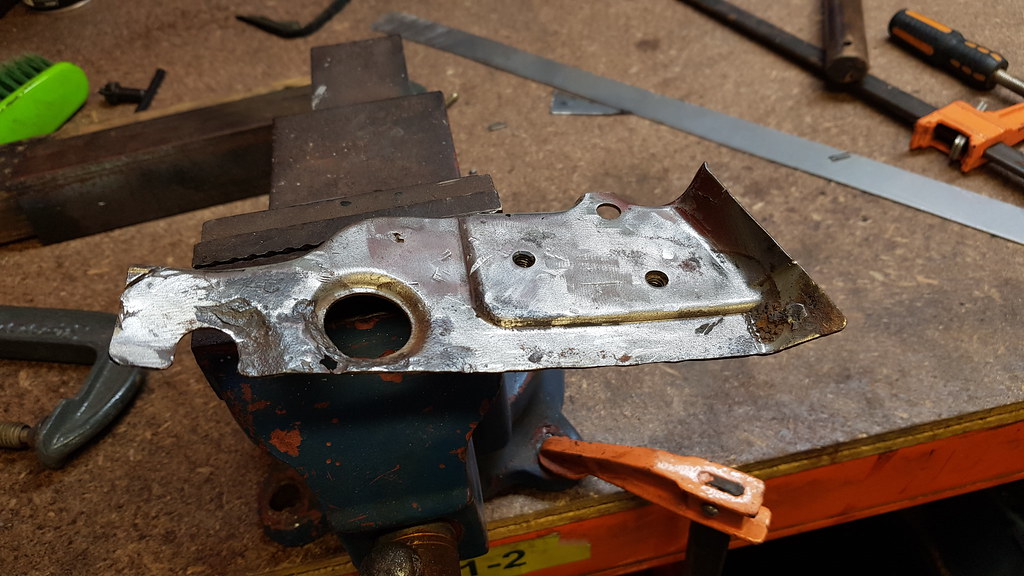
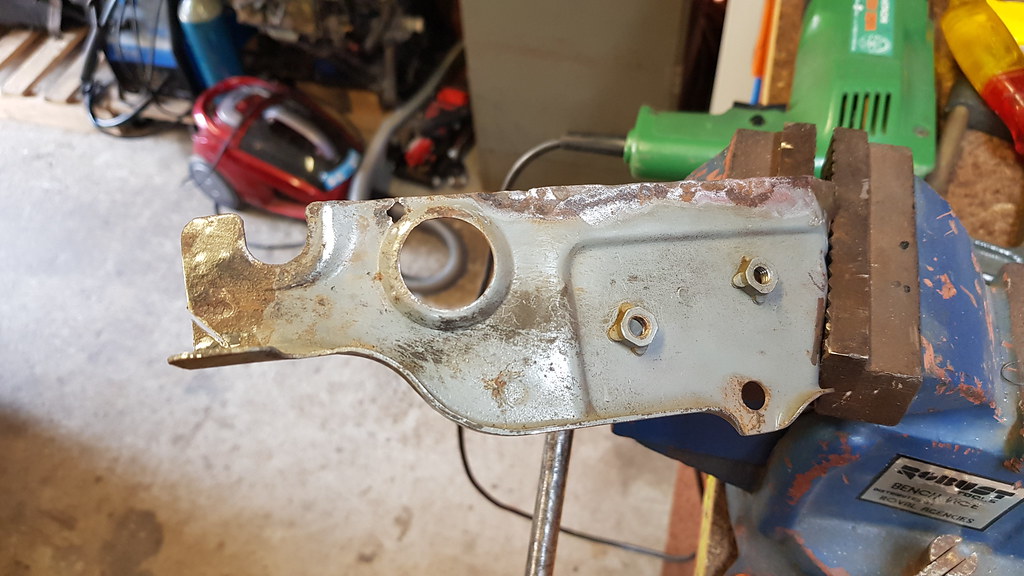
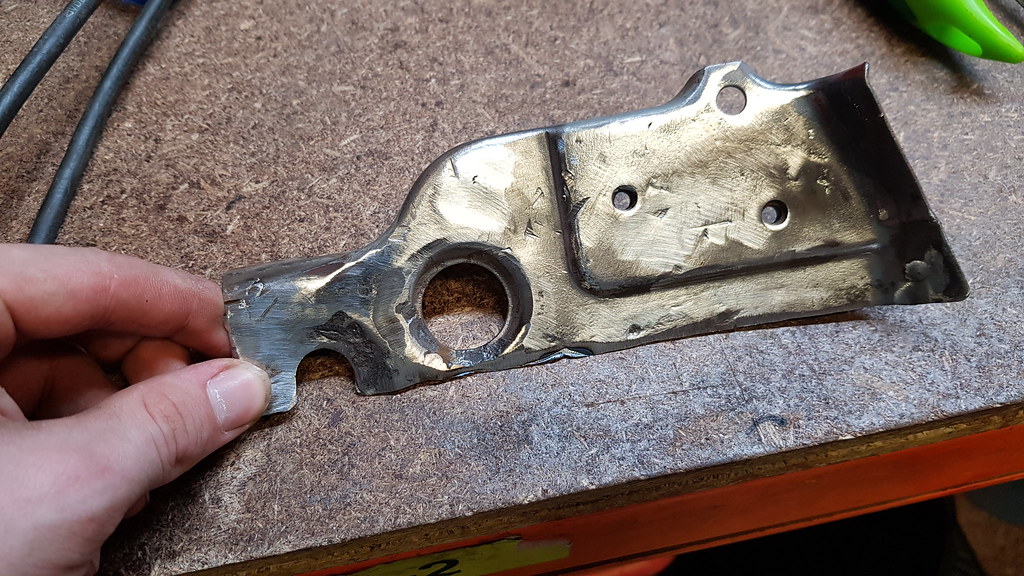
Last off for today was cleaning up this piece which goes on top of the frame piece we fabbed above. This came off the car with a bit of pitting here and there. Quite a strong piece with some angles in it we wouldn't be able to replicate including the bolt holes for the bonnet hinge, so I went about wire wheeling and grinding it back, and welding up some holes in it
Couldn't get the pitting out of the section near where I'm holding it, will have to go at it again with the dremel
Now would be a good time to strengthen the clutch pedal. The Wagons specifically have a very weak pivot on the clutch. I have personally broken 4 of them.
They start out by creaking, then slightly bending off to the side, making it feel like you need a new clutch, you tighten the cable thinking it solved it, then the pedal snaps off. Now I use one that is never going to break.
I battled this issue for years on my CRX, 4 broken assemblies, welded brackets to make them stronger, tried everything.
What ended up fixing it was a new OEM clutch cable, now it feels like a hydro tranny. No issues after years.
I battled this issue for years on my CRX, 4 broken assemblies, welded brackets to make them stronger, tried everything.
What ended up fixing it was a new OEM clutch cable, now it feels like a hydro tranny. No issues after years.
Ah nice, would be an awesome pedal feel. It looks as if someones re welded some sections on the pedal assembly that came in my wagon. Ill look into it though, maybe re weld and add some plate to support it. A new clutch cable does sound very nice as well
Been a little lazy on the updates, usual excuses.. Anyways I'm catching up on a couple weeks of content.
So I got a sand blaster as I wanted to give it a shot, first testing around the passenger corner sides I've been working on, under the windscreen. Got some cheap drop sheets and stappled them the the support beams above the car for the roof for the garage. It still went everywhere, and I wasn't overly impressed with the outcome as it didn't seem to remove as much as I thought. It was a fairly strong grit, maybe I need a stronger material.
After that we attended to the area behind the shock tower which we had cut out. Forgot to take pics of bending the piece but dad went ahead and got this fabbed up in no time. Drilled a few small holes on the flaps so I could weld it down as well. There was bit of a gap on the right side in the 2nd photo you can notice it, we bent it back when welding. Trying to grind this area was impossible with a normal grinder, so off to Bunnings Warehouse I went and get a die grinder to run off the compressor, lovely! Bloody grinding bit was more than the grinder itself -.-
Took about 3 attempts of grinding down, then welding up mini holes that appeared.. I'll admit, I wasn't too happy with some of the welds, just wasn't working for me plus in bit of a crammed corner which I couldn't get in with a good angle for the welder.. Oh well. This is what I got it grinded down to, sprayed with some primer and left for now. I'll go back later with a different tool to get some finer grinding done before paint.
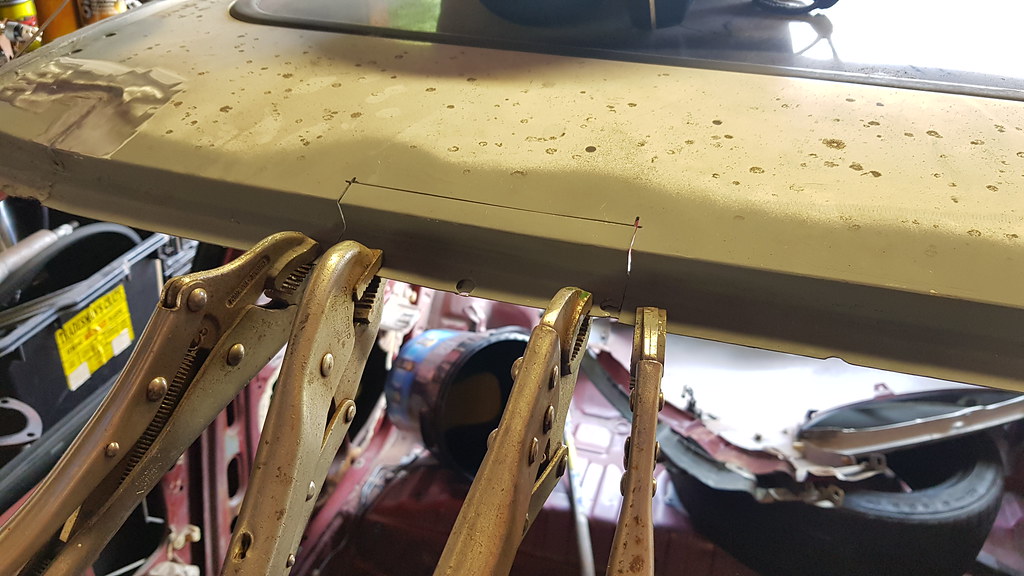
Next up I finally decided to go about welding in the 3 pieces across the front of the roof. I could of done this when I put the roof on, but for whatever reason I wasn't bothered and yeah.. So here we are, already have the pieces ready, just a simple matter of clamping them up, tacing and then welding completely. Started off with the piece closest to drivers side, it welded up very easily and I was happy with it. Had a little bit of trouble welding the section where it runs down vertically, gravity just stuffed with me..
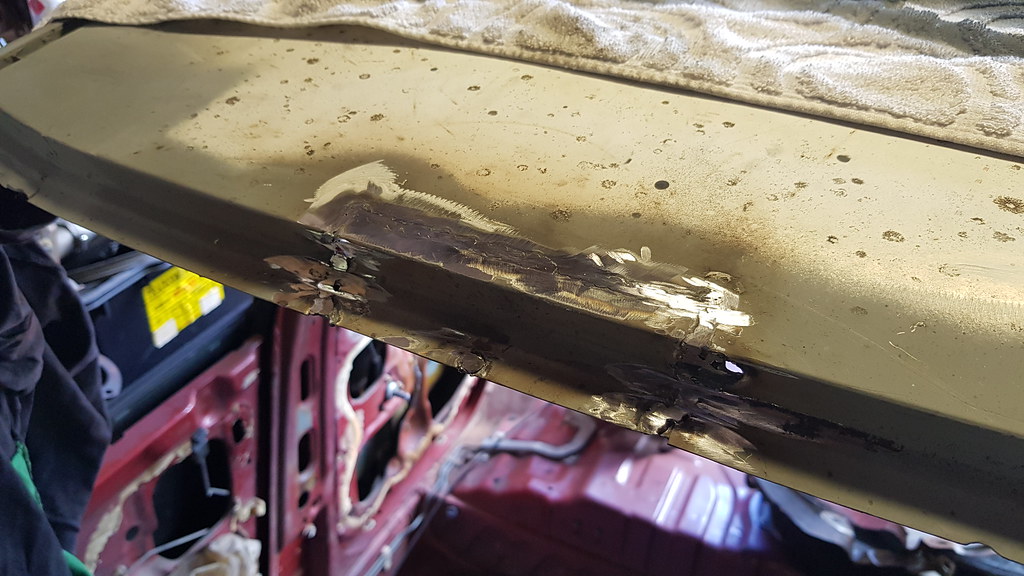
The two pieces on passenger side needed some persuasion with a flat head from under neath, to level the metal. Had a bit of a gap to fill in for the right piece, wasn't too hard. Trying different settings on the welder throughout welding this section as I couldn't find a setting I was comfortable with. Now I've found Amps on 2 and wire speed 3 or 4 works fairly well.
Annd all done, grinded each section back, there wasn't many holes at all to re-weld. Just needs some fine grinding and possibly some body filler when coming up for a final finish before paint, for now this will be just fine.
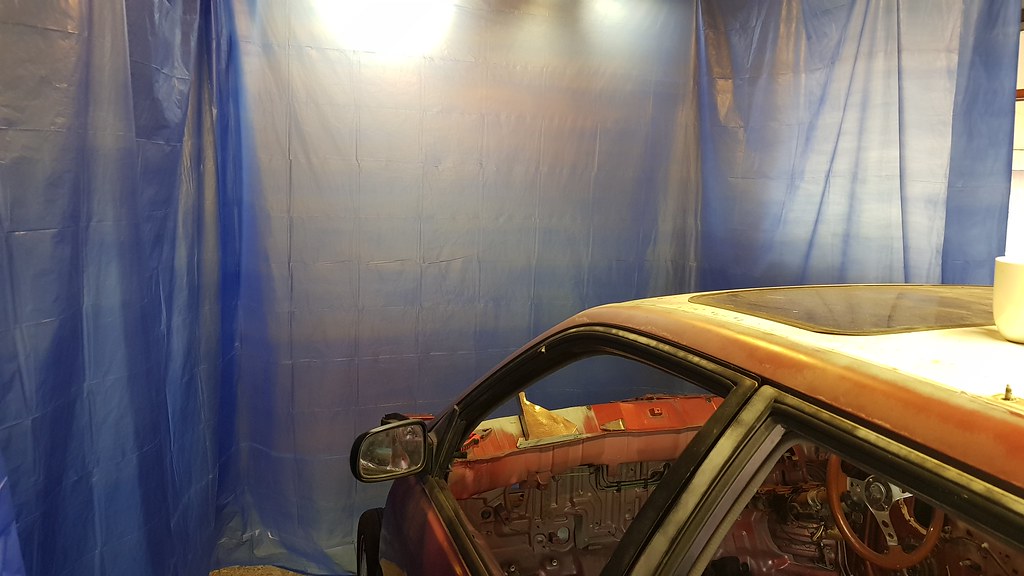
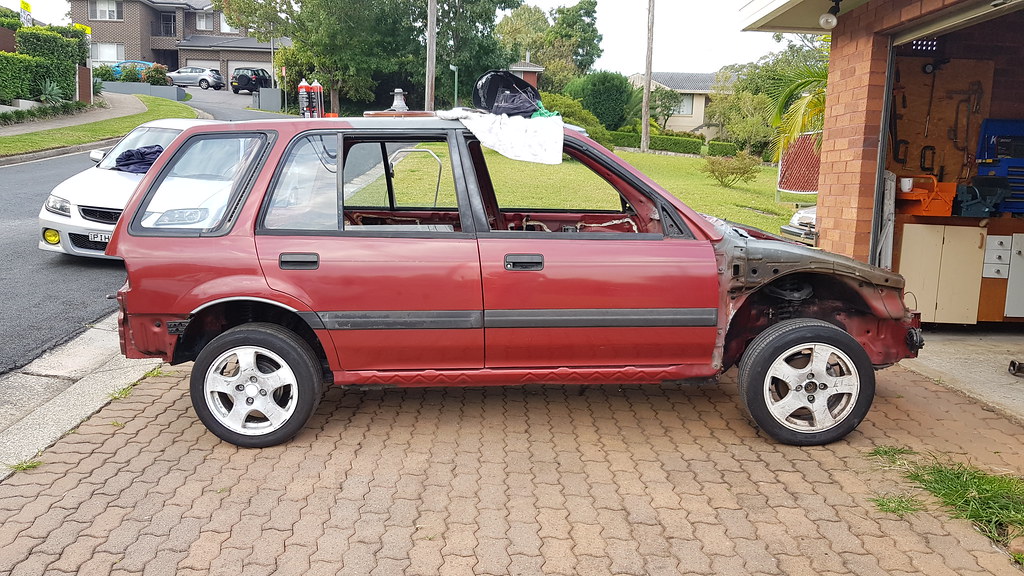
Rolled her outside for a bit of fresh air, nice to look at it from an angle like this. Cannot wait for the day I can drive it!
During the week, dad went out and bought himself a drill press as his been wanting one for a while, we need it to drill some holes for the bottom piece passenger side, and it would be a nice addition to the garage
Didn't get too much done today, bit sick + in pain from a wisdom tooth coming through.. Drew attention to the drivers side under the windscreen, we previously cut out some of the rust that was here, most of it was eaten away, should be photos at the start of the build thread but I'll include one here for reference.. Similar process for this side as the opposite side.
This is as must as we wanted to cut out, the bottom layer had to come out and there was some rust holes and as we are already here, might as well replace as well. The piece to replace this is below as well which we made up today. It's the shape it is as we can't go too far back as the top chunck which we have kept will be in the way to weld. Once this bottom layer piece is welded in (next weekend) we will decide what to do for the 2 layers above.. We have been thinking of just leaving what would be the middle piece and welding a piece onto the top layer to fill up this massive hole... Shall see
It's been a few months, was busy with end of university semester, then had a track day which took 2 weekends prior to prep, then the track day, followed by 2 weekends away.. So much time missed on the wagon, but we are back!
Last weekend we continued, first tackling the drivers chassis replacement piece which is in the last photo above. Went in easily, welding was a bit 50/50 as its been a while, however not too fussed as it's getting ground down.
Now to do the same with the passenger side, first tacking in then going around welding it, followed by grinding. Prior to all we drilled these holes which were mirror off the initial rusty piece which was cut out. A newly purchase set of christmas tree drill bits were used, first time using them and I must say they work the treat!
To finish off the day we bent the drivers side piece over, which after I realised it's meant to be the layer on top which is bent over (oh well). I was also given a free D16Y1 a few months ago to add to the 'collection', sorted some pallets from dads work with a bit of cutting, fitted quite nicely under the side bench.
Annnnd onto today. Started the day off by putting on both fenders, front bar and bonnet, and had some toast.
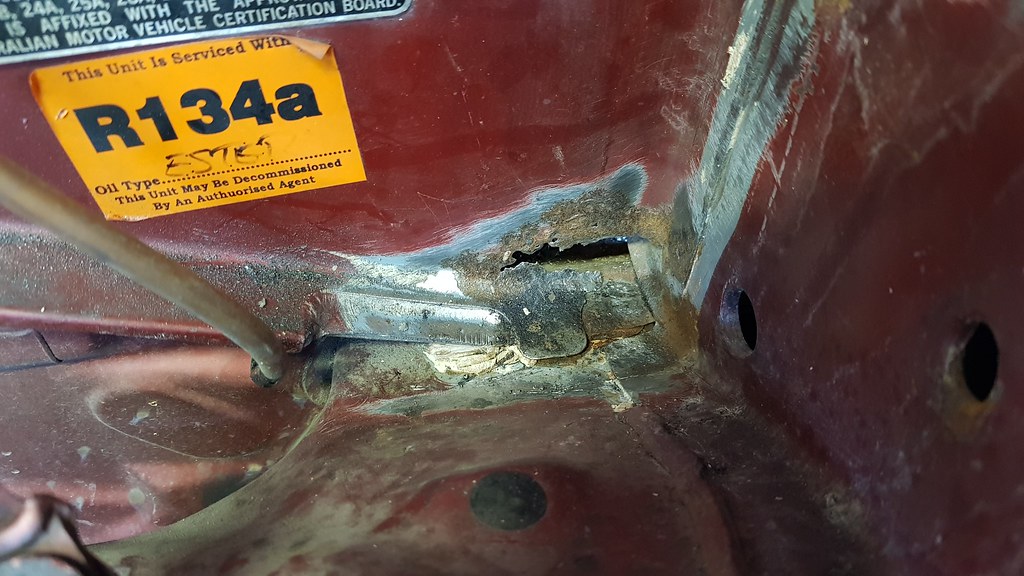
With the panels, we were able to bolt down the bonnet and align everything. This was because the next piece to weld in was the threaded piece for the bonnet on the passenger side. It was clamped in place whilst algining and then I cranked up the amps and pumped the weld into 2 spot welds on the piece. The top one which you can see below was there from factory, the bottom one we drilled ourselves. The top one was the only one we saw when initially removing it, no idea what else held it down apart from the layer which goes above. I did not want to take any chances with the bonnet flying off whilst driving. I'm still contemplating welding around the edges of it before putting the piece over it.
With this sorted my dad starting working a piece for the top of it, whilst he did this as it's a 1 man job I started on this, well horrible previous rust repair job by someone in the past, on the drivers door jam. My plan was to grind the aids back to level with the body and assess how bad it still is, as the door stopper piece is still quite solidly welded in there. Theres still some weld inside which has surface rust which the grinder won't reach to. I can either weld up some the holes around it to clean it up and leave it, or cut it all out and do again.. Still unsure what to do as there are 2 layers there..
]
Also grinded back this surface rust under the door hinges
And so this is where we are at, this is will cover the lower part, with a seperate piece to cover the upright. They will obviously be welded together. To make 1 whole piece seemed kinda tricky so dad thought this would be an easier method.

 12-23-2018, 02:06 AM


 Why does Japan get all the cool stuff?