
91 Civic Si Track Build - B18C-R|EF9 SIR Converted
 11-11-2013, 06:17 AM
#176
Crazy Honda Guy
darn, you should have let me know you were looking for one, a have a few, and in both styles, no worries though
 11-11-2013, 06:21 AM
#177
Thread Starter
Join Date: Oct 2005
Location: Tampa, FL
Posts: 1,470
Likes: 0
Received 0 Likes
on
0 Posts
Ahh man, I didnt know you had a bunch. Do you have the DIN style lower console? thats the one I really want, I just settled on this one to hold me over.
11-12-2013, 09:02 AM
#179
Honda-Tech Member
Join Date: Nov 2006
Location: Midwest Coast CHITown
Posts: 1,305
Likes: 0
Received 0 Likes
on
0 Posts
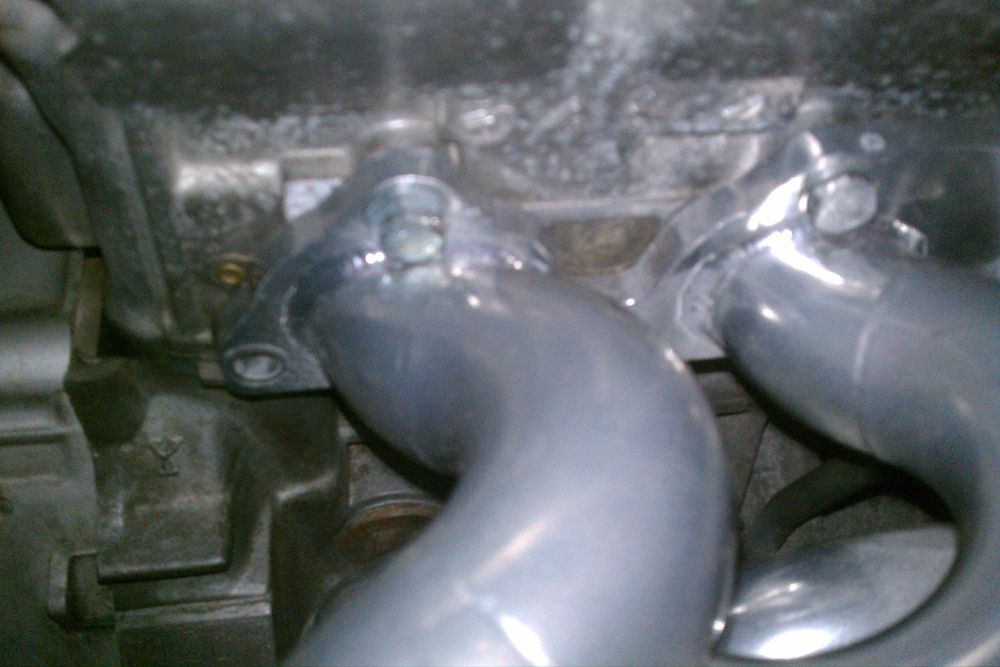
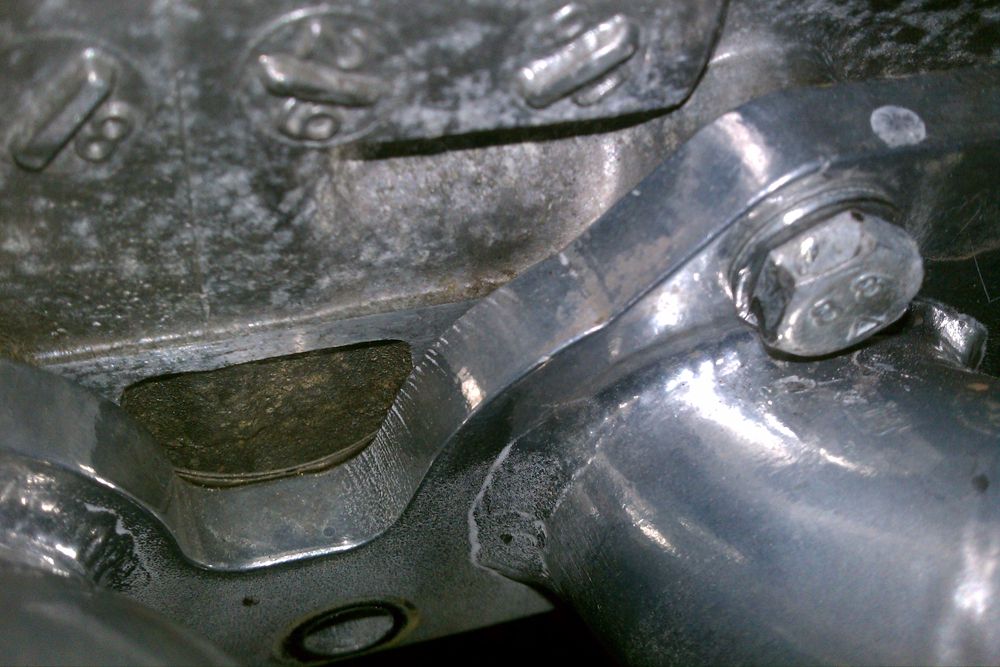
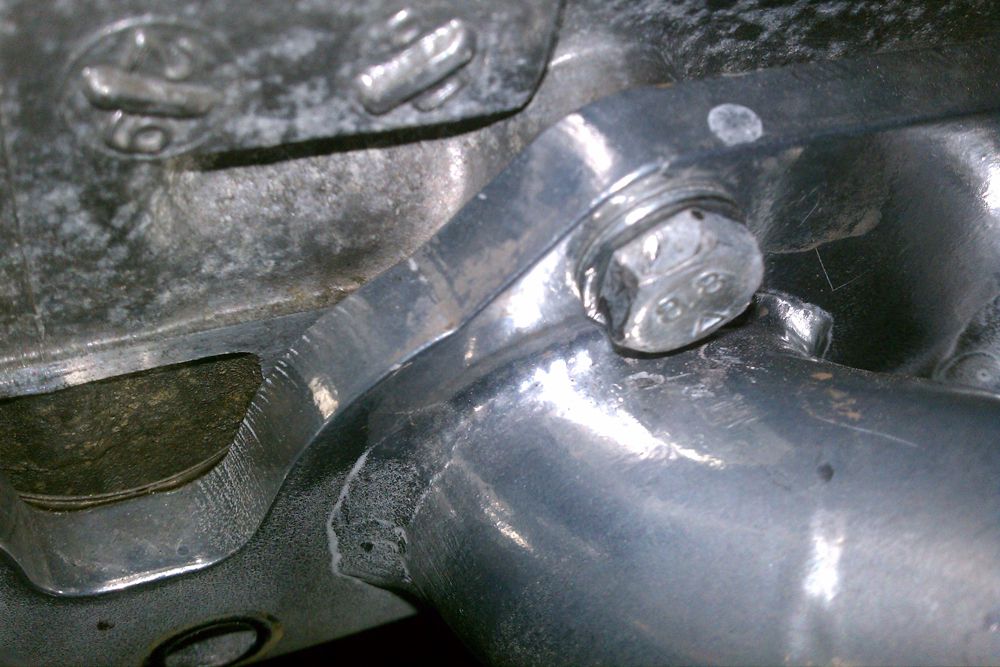
Due to the design of the primaries on this header, we were unable to get anything around the bolt head besides a open end wrench, which couldnt grasp well enough to turn. It would just either bend, fall off or strip the bolt head. I fought with it for a couple days, trying all sorts of trickery with no luck. I only had two more options, cut a slot into the bolt and use a impact driver or cut the bolt head completely off...
With luck, while using the dremel to make a slot in the bolt head, I managed to cut a slit into the washer which broke it. I had a "light bulb" moment and then I began to pry it out from underneath the bolt head to ease up tension on the bolt. The bolt practically came out using my fingers once the washer was removed.
If you have a "RMF" style replica header, DO NOT USE WASHERS or crappy hardware for the bolts going into the head. Once you tighten the bolts, it presses the washer into the weld, causing it to bend and apply a tremendous amount of pressure on the bolt, making it nearly impossible to remove.
11-12-2013, 10:13 AM
#180
Thread Starter
Join Date: Oct 2005
Location: Tampa, FL
Posts: 1,470
Likes: 0
Received 0 Likes
on
0 Posts
haha, thanks man! Im trying to keep quality parts on the car. Drew told me he thought it was a real one but wasnt sure since it had no markings. I tried looking around on google and this one didnt really look like any of the "real" ones i saw, so I figured it was a replica. Good to know!
11-12-2013, 10:15 AM
#181
Thread Starter
Join Date: Oct 2005
Location: Tampa, FL
Posts: 1,470
Likes: 0
Received 0 Likes
on
0 Posts
Got some more parts in today from Honda. Going to start assembling the bottom end tomorrow night.
OEM Headgasket
OEM Bottom End Gasket Kit
OEM Oil Pan Studs/Bolts
OEM Oil Pump O-ring
OEM Block orifice O-ring
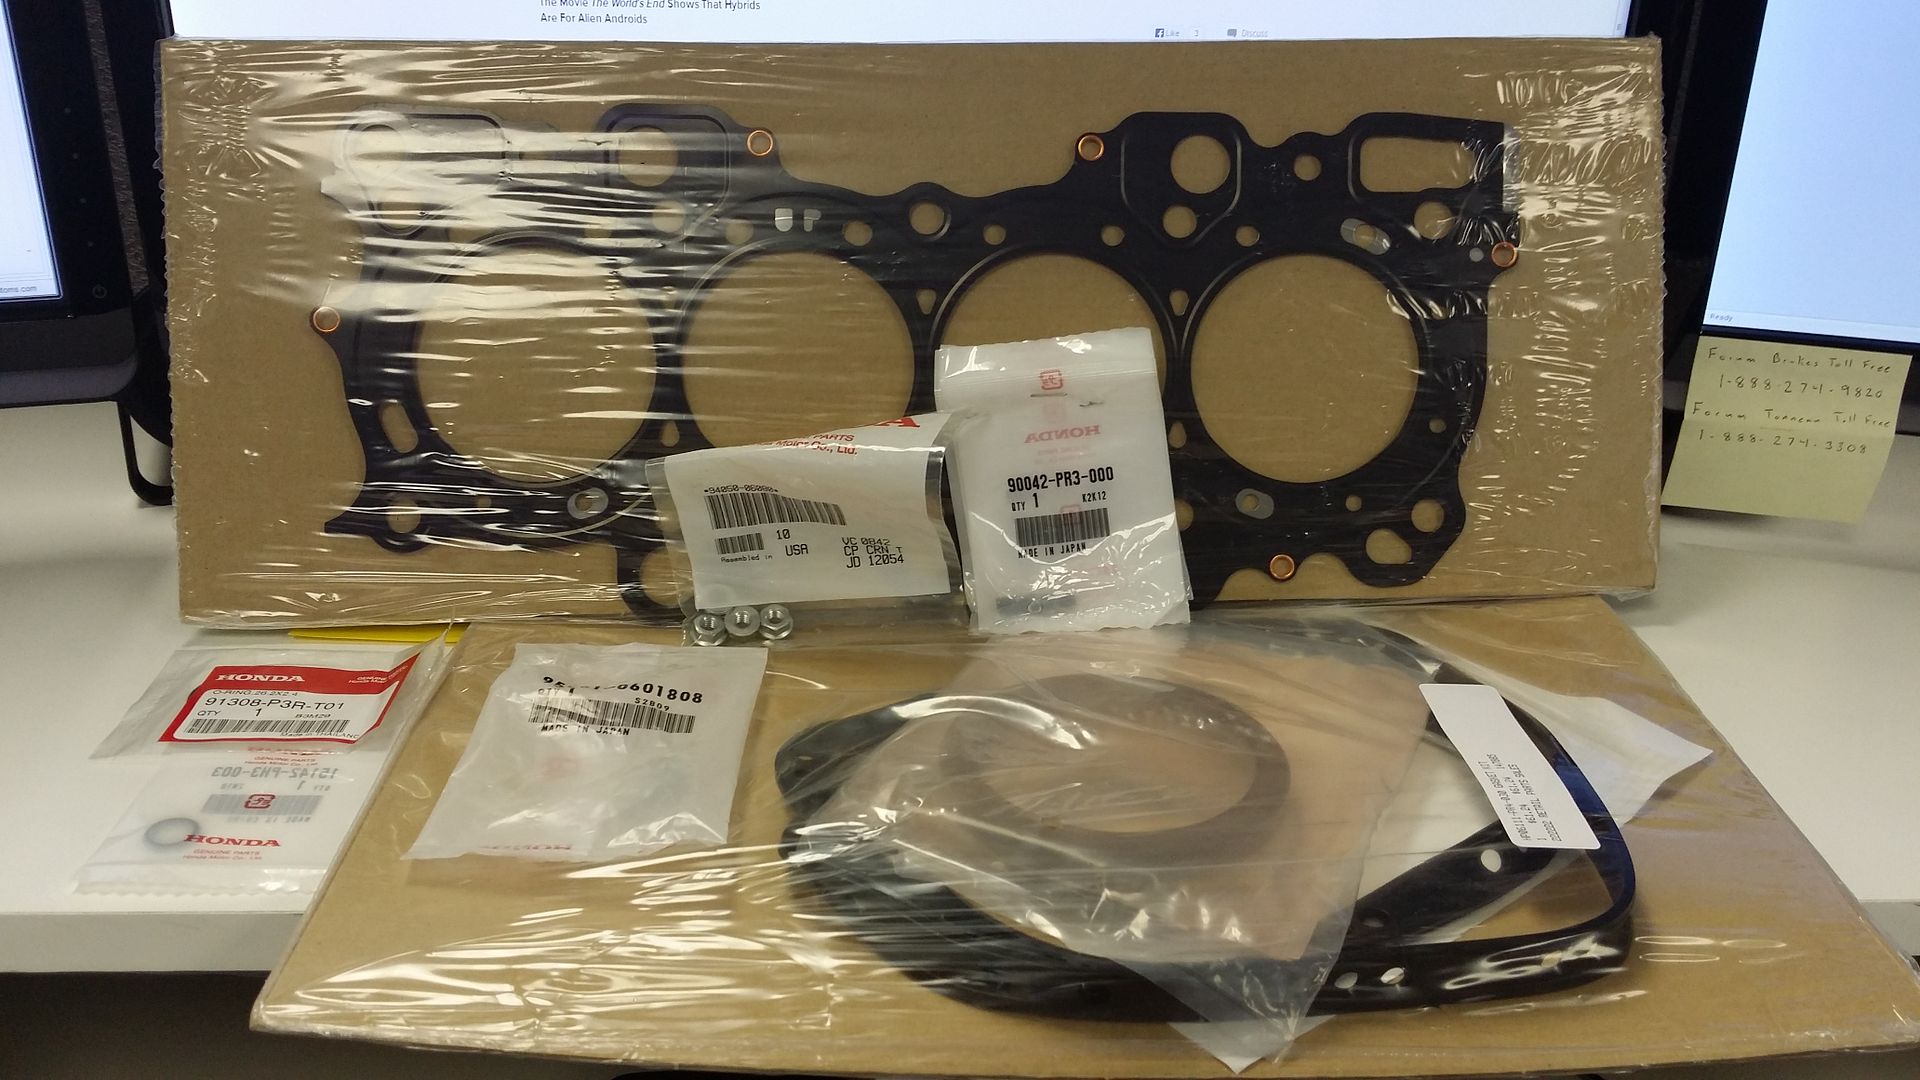
OEM Headgasket
OEM Bottom End Gasket Kit
OEM Oil Pan Studs/Bolts
OEM Oil Pump O-ring
OEM Block orifice O-ring
Last edited by Presidential_Detail; 02-23-2014 at 04:23 PM.
 11-12-2013, 12:50 PM
#183
Honda-Tech Member
iTrader: (3)
Join Date: Feb 2002
Location: MN
Posts: 12,561
Likes: 0
Received 0 Likes
on
0 Posts
you going to redo the head too?
one thing i took from brain/muckmans build was how he replaced all the oil pan bolts with studs into the block & studs into the oil pump..
studs part # 90042-PR3-000
and flanged 6M nuts # 94050-06080
..... you'll need 16 of each
RMFgood stuff mang.
I always preferred using stud & nut vs. bolt into the head since the load is more even.
I hated buying heads locally where i see kids accidently strip exhaust holes due to over torquing bolts.
If needed feel free to cut stud & shave down nut too!
My turbo manifold i have to do that to 1 of the studs. Putting the manifold flush to the head & then tighting nut won't work. You have to slide manifold flang part way only, so that the M10 nut could be placed in between runner/flang then slowly treaded onto stud until flang is flush with head.
Last edited by Charlie Moua; 11-12-2013 at 01:07 PM.
11-12-2013, 01:01 PM
#184
Thread Starter
Join Date: Oct 2005
Location: Tampa, FL
Posts: 1,470
Likes: 0
Received 0 Likes
on
0 Posts
11-12-2013, 01:02 PM
#185
Thread Starter
Join Date: Oct 2005
Location: Tampa, FL
Posts: 1,470
Likes: 0
Received 0 Likes
on
0 Posts
11-12-2013, 01:13 PM
#187
Thread Starter
Join Date: Oct 2005
Location: Tampa, FL
Posts: 1,470
Likes: 0
Received 0 Likes
on
0 Posts
you going to redo the head too?
one thing i took from brain/muckmans build was how he replaced all the oil pan bolts with studs into the block & studs into the oil pump..
studs part # 90042-PR3-000
and flanged 6M nuts # 94050-06080
..... you'll need 16 of each
RMFgood stuff mang.
I always preferred using stud & nut vs. bolt into the head since the load is more even.
I hated buying heads locally where i see kids accidently strip exhaust holes due to over torquing bolts.
If needed feel free to cut stud & shave down nut too!
My turbo manifold i have to do that to 1 of the studs. Putting the manifold flush to the head & then tighting nut won't work. You have to slide manifold flang part way only, so that the M10 nut could be placed in between runner/flang then slowly treaded onto stud until flang is flush with head.
one thing i took from brain/muckmans build was how he replaced all the oil pan bolts with studs into the block & studs into the oil pump..
studs part # 90042-PR3-000
and flanged 6M nuts # 94050-06080
..... you'll need 16 of each
RMFgood stuff mang.
I always preferred using stud & nut vs. bolt into the head since the load is more even.
I hated buying heads locally where i see kids accidently strip exhaust holes due to over torquing bolts.
If needed feel free to cut stud & shave down nut too!
My turbo manifold i have to do that to 1 of the studs. Putting the manifold flush to the head & then tighting nut won't work. You have to slide manifold flang part way only, so that the M10 nut could be placed in between runner/flang then slowly treaded onto stud until flang is flush with head.
On the header, I think the biggest problem was that there was a washer under the bolt and that washer was too large, so it was being crushed between the weld and the top of the bolt head. This made it damn near impossible to remove. When I go to put the header back on, I will figure out a way that wont be so difficult to remove it again.
11-14-2013, 10:24 AM
#190
Thread Starter
Join Date: Oct 2005
Location: Tampa, FL
Posts: 1,470
Likes: 0
Received 0 Likes
on
0 Posts
Truck is loaded up with engine parts, heading over to Apex Motorsports tonight to start assembling the motor. Cant wait to start her up again!
11-14-2013, 10:43 AM
#193
Honda-Tech Member
Orlando would be a better option. But talking about car shows, Simply Clean is saturday in daytona. Definitely worth the drive.
11-14-2013, 11:19 AM
#194
Yeah, but I have friends at USF that I could spend the weekend with and the car show would be a plus. Just worth asking. I don't think I'll be able to hit up Daytona with my car in it's condition right now.
11-14-2013, 11:32 AM
#195

 11-15-2013, 02:49 AM
#200
No offense but that header looks ridiculous. I have heard about the equal length headers giving an increase in HP before. However, that giant swoop looks like it would just be a fitment nightmare. It looks like it gets really close to the radius arms!