
♠ Shaved, Tucked, Customized Engine Bays - Pics, Theory, Discussion ♠
 09-15-2013, 06:05 AM
Honda-Tech Member
Join Date: Sep 2007
Location: jacksonville, fl, u.s.
Posts: 199
Likes: 0
Received 0 Likes
on
0 Posts

 09-15-2013, 12:27 PM
Who is Mr Robot?
iTrader: (2)
Join Date: Jul 2004
Location: ATL - Where the Pimps and Players dwell
Posts: 21,474
Likes: 0
Received 10 Likes
on
10 Posts
My 94 EJ and 92 EG fenders have been interchangeable. I don't know about going to the next 5 year series though. Here's a link selling the fenders applicable to your EK application. http://www.jhpusa.com/store/pc/viewP...dcategory=1614 If you choose to go that way, fit shouldn't be an issue for ya. Maybe price or availability will be, but not application fit. lol.
The app description from their product page. Just click the vehicle button.
Application
1997-2001 Acura IntegraType-RJDM, 1999-2000 Honda Civic Coupe, 1992-1995 Honda Civic Coupe, 1996-1998 Honda Civic Coupe, 1999-2000 Honda Civic Hatch, 1996-1998 Honda Civic Hatch, 1992-1995 Honda Civic Hatch, 1999-2000 Honda Civic Si
I don't think 15mm is worth it though. I've already rolled and pulled the stock fenders at all four corners more than that (I clear 15x8 offset wheels as is) I think my only option might be the 3 piece front end. I'll simply have to make a 4point mounting system that bolts the front lip /splitter/undertray straight to the chassis, this avoids any stress on the bumper itself and will more effectively transfer any downforce to the chassis
09-15-2013, 01:45 PM
Honda-Tech Member
iTrader: (1)
Join Date: Aug 2012
Location: South Eastern Corporate Police State
Posts: 328
Likes: 0
Received 0 Likes
on
0 Posts
Thanks. I searched high and low to see if they made an ek version but never found it
I don't think 15mm is worth it though. I've already rolled and pulled the stock fenders at all four corners more than that (I clear 15x8 offset wheels as is) I think my only option might be the 3 piece front end. I'll simply have to make a 4point mounting system that bolts the front lip /splitter/undertray straight to the chassis, this avoids any stress on the bumper itself and will more effectively transfer any downforce to the chassis
I don't think 15mm is worth it though. I've already rolled and pulled the stock fenders at all four corners more than that (I clear 15x8 offset wheels as is) I think my only option might be the 3 piece front end. I'll simply have to make a 4point mounting system that bolts the front lip /splitter/undertray straight to the chassis, this avoids any stress on the bumper itself and will more effectively transfer any downforce to the chassis
09-15-2013, 01:59 PM
Honda-Tech Member
Join Date: May 2012
Location: Michigan
Posts: 375
Likes: 0
Received 0 Likes
on
0 Posts
The previous owner of my hatch had some nylon spacers at the bottom bolt by the door and on the bracket by the turn signal. Bottom one was about an inch or a little more and the bracket was about half that. Very cheap and let him fit 245's.
09-15-2013, 03:27 PM
Who is Mr Robot?
iTrader: (2)
Join Date: Jul 2004
Location: ATL - Where the Pimps and Players dwell
Posts: 21,474
Likes: 0
Received 10 Likes
on
10 Posts
I had thought about that... but it would present an issue with mounting the sideskirts I plan on using
09-15-2013, 03:29 PM
Who is Mr Robot?
iTrader: (2)
Join Date: Jul 2004
Location: ATL - Where the Pimps and Players dwell
Posts: 21,474
Likes: 0
Received 10 Likes
on
10 Posts
I could do what some FormulaD guys do and get a set of fender flares and mount them off of the body with spacers, helps eliminate air in the wheel wells(avoiding lift) and would let me run wider rubber. The hard part is deciding how long the spacers should be to avoid making the car look horrible
09-15-2013, 03:59 PM
Honda-Tech Member

Join Date: Jul 2002
Location: nonvtec road, SoCali
Posts: 978
Likes: 0
Received 0 Likes
on
0 Posts

 09-15-2013, 07:15 PM
Honda-Tech Member
iTrader: (11)

Join Date: Oct 2011
Location: NC
Posts: 1,494
Likes: 0
Received 0 Likes
on
0 Posts
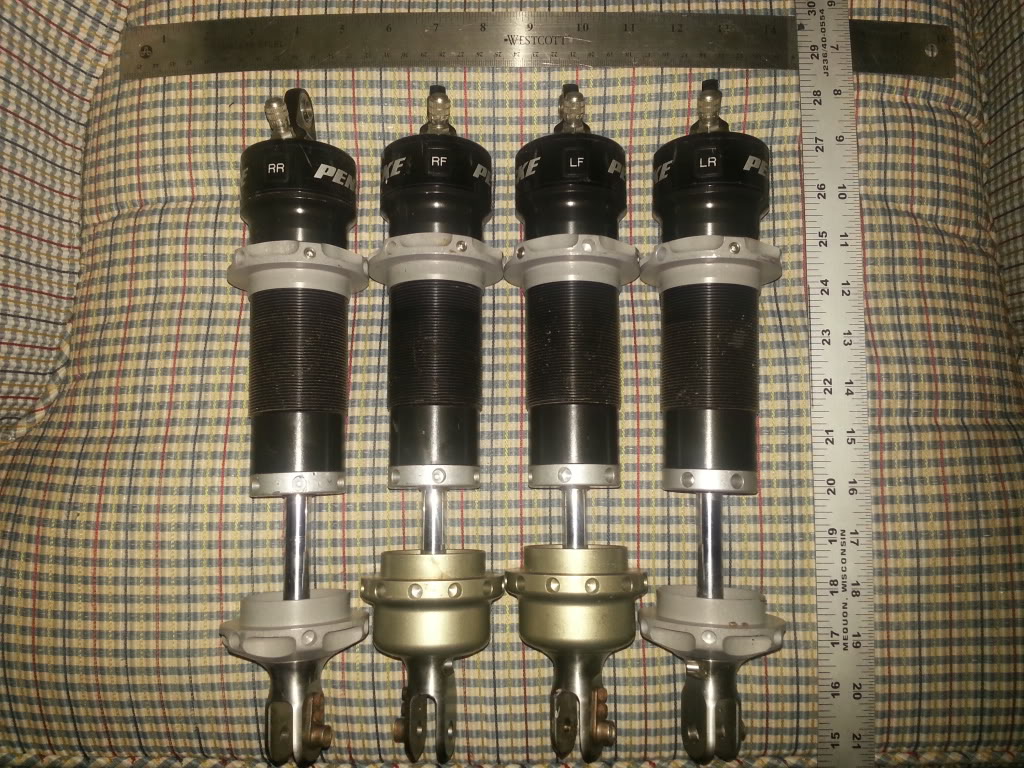
It's going to be a road race car, this setup allows me to have unlimited control. From how far the wheel moves vs shock travel, I can service and reshim the shocks on my own, the adjusters for compression and rebound don't affect each other as on most all commonly available coilovers for our cars. I have 80 clicks of adjustment on both circuits to allow for the best in fine tuning the suspension, also it moves weight inboard reducing unsprung mass and moving the center of gravity. These aren't megan racing parts here, I could buya nicely built civic for what just one of the coilovers cost. My brake setup is just as pricey, my front calipers were 2500 each
09-15-2013, 07:51 PM
we ran out of time and couldn't get a hood cut in time before the race as well as tidying up the bay a little more. Car was just finished Friday and took it to the track yesterday.

09-16-2013, 05:00 PM
Who is Mr Robot?
iTrader: (2)
Join Date: Jul 2004
Location: ATL - Where the Pimps and Players dwell
Posts: 21,474
Likes: 0
Received 10 Likes
on
10 Posts
And yes the main reason is to run high end dampers. When we called Penske to confirm certain things about the coilovers even they were amazed I had a set like this. That's saying a lot lol
09-16-2013, 06:48 PM
Honda-Tech Member
Join Date: Jun 2007
Location: Adrian, Mi, USA
Posts: 79
Likes: 0
Received 0 Likes
on
0 Posts
For the multiple ground question, just get a connector that's a larger size gauge a run all tge wires into one connector.
09-17-2013, 10:56 AM
Who is Mr Robot?
iTrader: (2)
Join Date: Jul 2004
Location: ATL - Where the Pimps and Players dwell
Posts: 21,474
Likes: 0
Received 10 Likes
on
10 Posts
Here are the coilovers I've been talking about. Roughly 13" long uncompressed.. fronts take a 2.25"id spring (same for the rears) that's 5" in length, rears take a 6" spring. They are double adjustable for compression and rebound and adjusting one does not affect the other. The shocks have roughly 80-85 clicks of adjustment on both circuits. There's a floating piston in tbe top of each unit that separates the nitrogen charge from the shock oil. Each is charged to 150psi. Plus I can service these on my own
The fronts had the shim stack redone for 800lb springs while the rears were done for 1000lb springs. I asked most of the guys that do road courses in my chassis and they said this was a good starting point as far as spring rates go
Coilovers next to a ground control sleeve and a stock 96-00 front strut
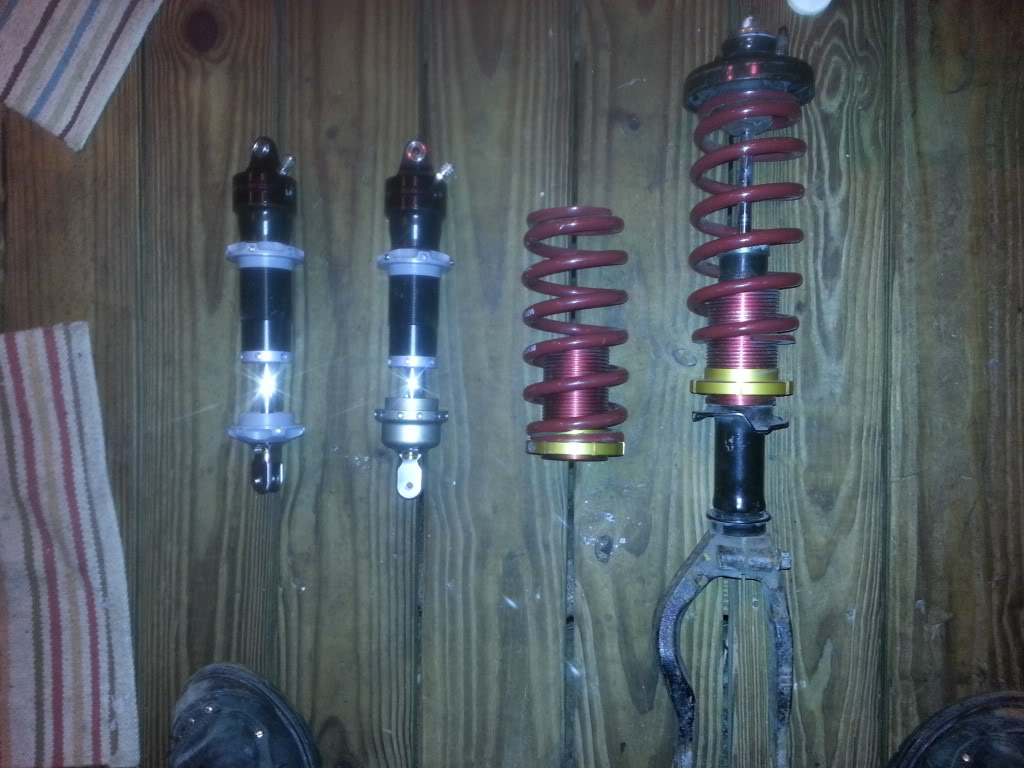
Next to the sleeve
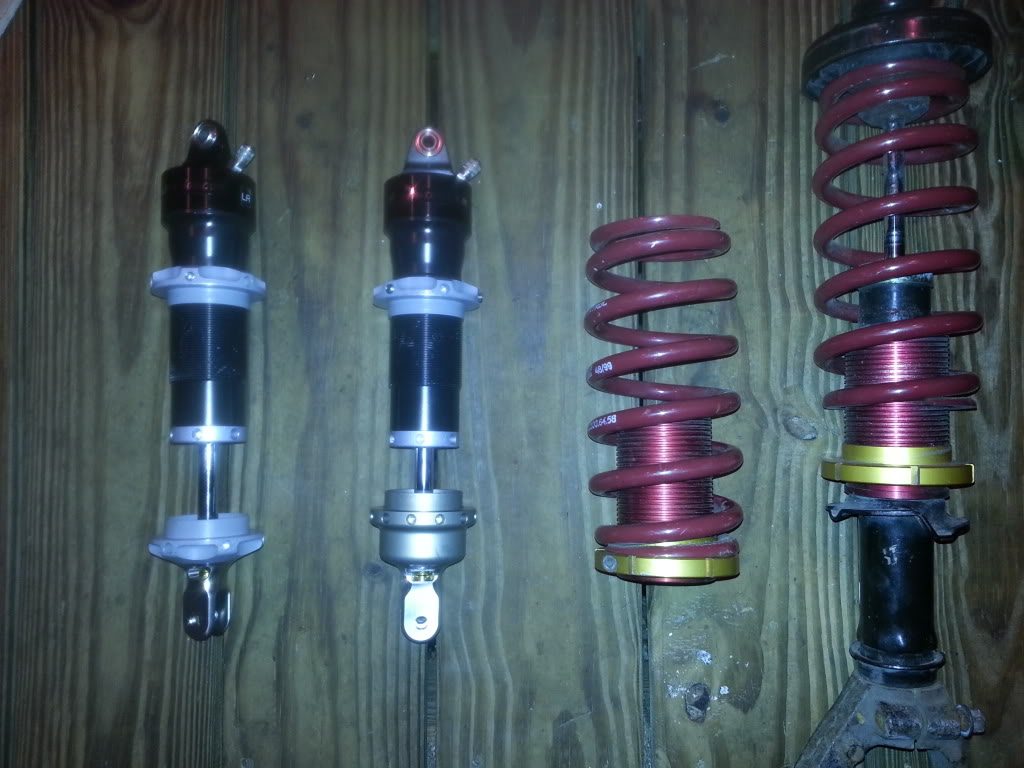
mounting the rears as an inboard cantilever setup is rather simple, the fronts are going to require extensive modifications to the front upper strut towers. This will probably mean lots of metal removal and bracing the area in which the shock is to be mounted. The nice thing about this particular set up is I can constantly change and fine tune the ratio between wheel travel and shock travel
The fronts had the shim stack redone for 800lb springs while the rears were done for 1000lb springs. I asked most of the guys that do road courses in my chassis and they said this was a good starting point as far as spring rates go
Coilovers next to a ground control sleeve and a stock 96-00 front strut
Next to the sleeve
mounting the rears as an inboard cantilever setup is rather simple, the fronts are going to require extensive modifications to the front upper strut towers. This will probably mean lots of metal removal and bracing the area in which the shock is to be mounted. The nice thing about this particular set up is I can constantly change and fine tune the ratio between wheel travel and shock travel
09-17-2013, 11:21 AM
Honda-Tech Member
Join Date: Oct 2008
Location: SE IA, United States
Posts: 515
Likes: 0
Received 0 Likes
on
0 Posts
Have a ? how much everyone is running their prop valves in the cabin of the car? Why not else where like under a fender etc?
09-17-2013, 11:42 AM
Who is Mr Robot?
iTrader: (2)
Join Date: Jul 2004
Location: ATL - Where the Pimps and Players dwell
Posts: 21,474
Likes: 0
Received 10 Likes
on
10 Posts
The plumbing off the prop valve has to be fairly equal in terms of length to each caliper. Plus under a fender road debris could potentially damage lines. Leaving you with no brakes other than the hand brake..also mounting it inside the car makes it easy to spot and repair any leaks
Personally I'm not using a stock prop valve due to my braking setup. I have dual master cylinders one for each braking circuit front and rear. These are mounted on a pedal with a balance bar and I'm using an inline wilwood prop valve on the rear circuit that will he mounted somewhere I can easily reach to adjust proportioning on the fly
Personally I'm not using a stock prop valve due to my braking setup. I have dual master cylinders one for each braking circuit front and rear. These are mounted on a pedal with a balance bar and I'm using an inline wilwood prop valve on the rear circuit that will he mounted somewhere I can easily reach to adjust proportioning on the fly
09-17-2013, 12:31 PM
Honda-Tech Member
Join Date: Jan 2011
Location: San Jose/Bay Area
Posts: 71
Likes: 0
Received 0 Likes
on
0 Posts
ANYONE???
Hey Guys,
What is everyone using to fill up that gap/channel circled in the picture?
I am assuming bondo? Can I use nothing but the Evercoat Metal Glaze for this? Is anyone doing this on high horsepower cars and will it crack under vibrations or at the track?
Thanks in advance!
What is everyone using to fill up that gap/channel circled in the picture?
I am assuming bondo? Can I use nothing but the Evercoat Metal Glaze for this? Is anyone doing this on high horsepower cars and will it crack under vibrations or at the track?
Thanks in advance!
09-17-2013, 01:49 PM
i was hoping someone would know where to get the OE style ring terminals.
09-17-2013, 03:42 PM
Who is Mr Robot?
iTrader: (2)
Join Date: Jul 2004
Location: ATL - Where the Pimps and Players dwell
Posts: 21,474
Likes: 0
Received 10 Likes
on
10 Posts
^that's really the only way. However I'm totally against body filler in the engine bay as it will eventually crack
If you seam weld that whole joint and have good angle grinder skills you can grind the welds down till they are perfectly smooth. Grind them down almost all the way then take a flapper wheel or sanding disc and do the final shaping. If the weld is porous and leaves holes, you can fill those in with something like jb weld if it's a pinhole sized deal. If it's larger lay another small weld (like a spot weld) and repeat the shaping process
Given my hatred of body filler, I'll be welding over any extra holes with a copper pad backing the hole, this makes the underside of the weld smooth amd stops weld boogers. And seams and stuff that won't work with welding I'll use the old hot rod trick of laying down lead to cover any seams and things like that. Then just shape it with a sanding disc
 Oh the fun ive had