


Howto: Refinishing Intercooler Piping


Thread Starter
Joined: Apr 2006
Posts: 251
Likes: 0
From: Edmonton, AB, Canada
 Howto: Refinishing Intercooler Piping
Okay well I searched for a post on how to do this, and it's not exactly rocket science, but there wasn't a post or a guide so I figured that using the help I got here on H-T I'd post up how I went about painting some used IC piping I had bought.
The piping was quite rusted and had some paint on it as well, which made it a good candidate for a write-up since I can't imagine a much worse case that could be fully restored.
Anyways enough with the preamble.
<U>Step 1: Materials & Tools</U>
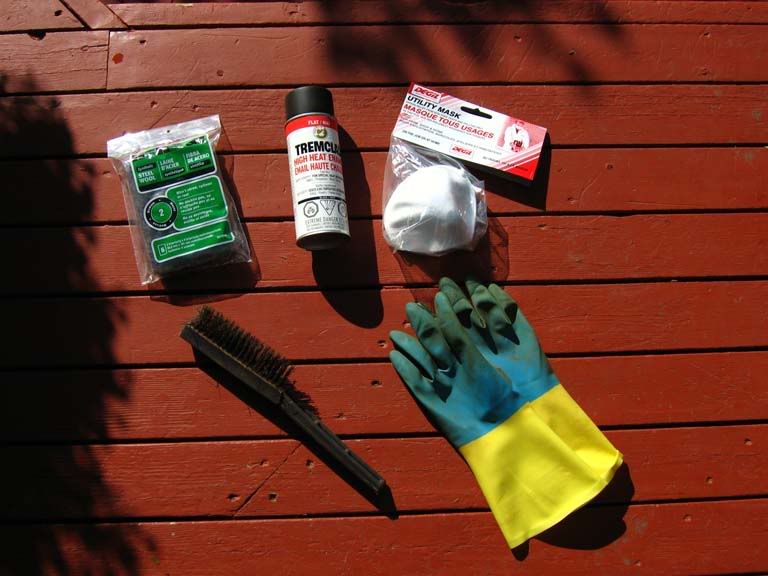
- 3M Synthetic Steel Wool Medium coarse
- Tremclad Flat Black High Temp (1200°F)
- Protective Face Mask
- Wire Brush
- Rubber Gloves
<U>Step 2: Preparing Piping for Paint</U>
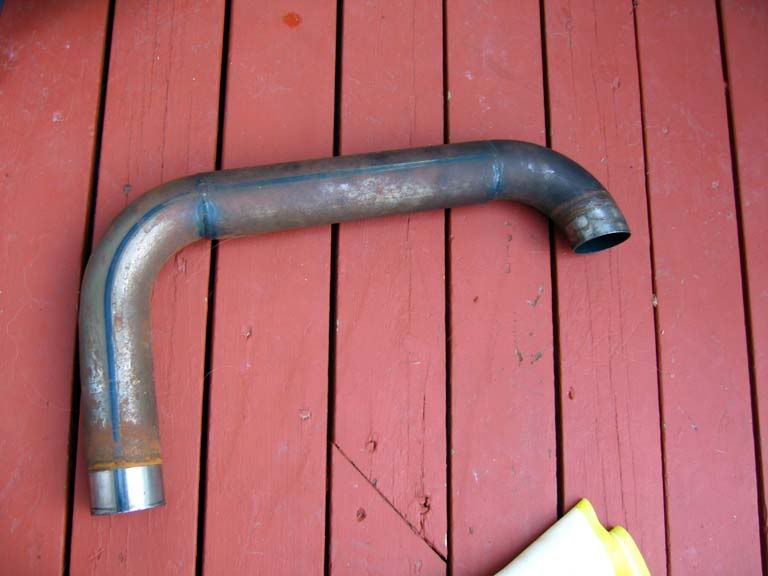
Okay so here is the sample piece for this write-up. Start out by using the wire brush, it makes a huge difference. I just used the steel wool on one piece and it look at least twice as long. Anyways, just keep getting all that main surface rust off until the piece has a uniform look to it (still reddish, but don't worry). It will feel like the brush has stopped doing anything to the pipe, thats when you switch to the steel wool.
Pull out the steel wool and being circular motions and watch the rust fly! I usually start with the harder places to get into and then take a bit of a "break" by doing the easy sections. Don't be afrtiad to use up multiple pads here, it's not exactly expensive material and shorting yourself on a few bucks isn't worth the not-so-nice results of poor preparation.
Also, be sure to wear the rubber gloves while sanding and handling the bare pipe. No need to get all your sweat and grease all over the pipe since the paint won't stick here and all your time would be wasted.
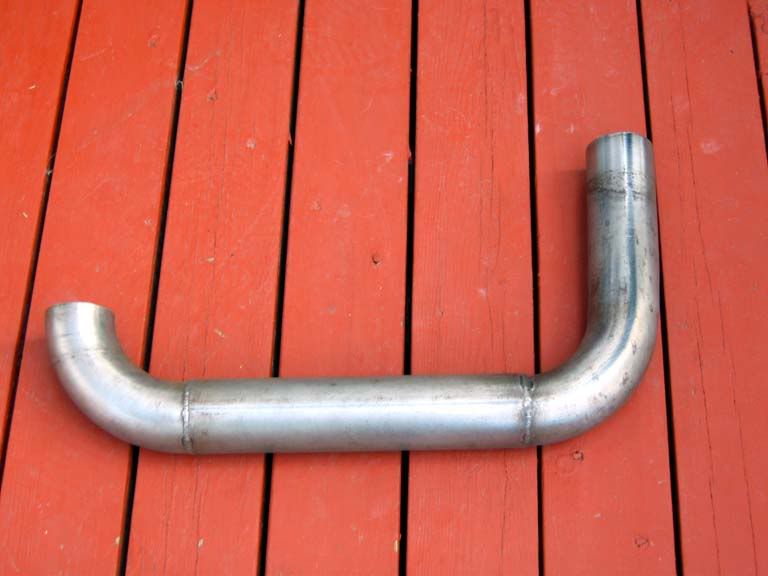
Here is a picture of the piece ready for paint:
<U>Step 3: Painting</U>
Okay so try and figure out some ingenious way to hang your piece. I used a coat hanger, and hung it off of a wire connected between 2 ladders. Now I don't reccommend painting outside due to wind and debris, but I had no choice here (and it was calm).
I'm sure you can read up with people who are more experienced in painting but what I did was lay a "tack coat" down, so a very light coat (I could just barely see the black). I let this sit for maybe 2 mins since the bottle said it was tackless in 5. After that, I did another final pass on the pipe, making sure to stay an even distance away from the piece.
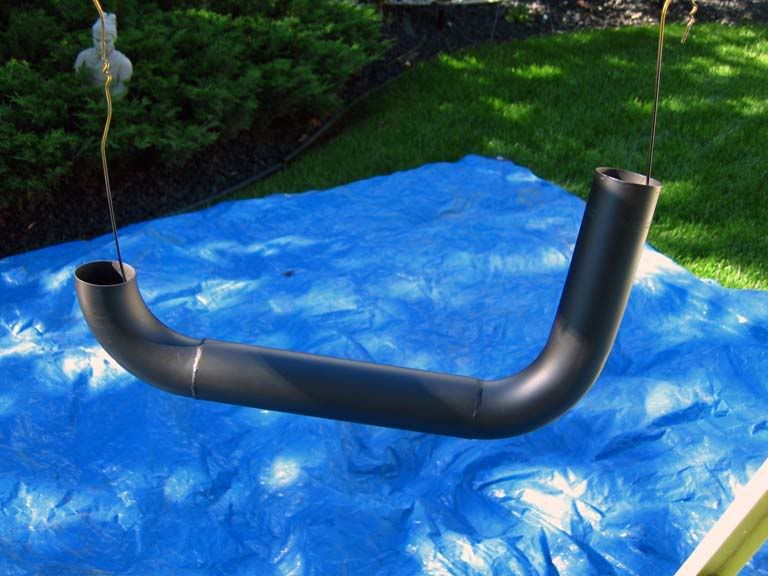
Just let it dry for a good while. I left it out there for an hour and then brought it into the garage to dry for another 24 hours, trying to touch it as little as possible.
Here is a comparison between the nice flat black and the rusty piece:

The piping was quite rusted and had some paint on it as well, which made it a good candidate for a write-up since I can't imagine a much worse case that could be fully restored.
Anyways enough with the preamble.
<U>Step 1: Materials & Tools</U>
- 3M Synthetic Steel Wool Medium coarse
- Tremclad Flat Black High Temp (1200°F)
- Protective Face Mask
- Wire Brush
- Rubber Gloves
<U>Step 2: Preparing Piping for Paint</U>
Okay so here is the sample piece for this write-up. Start out by using the wire brush, it makes a huge difference. I just used the steel wool on one piece and it look at least twice as long. Anyways, just keep getting all that main surface rust off until the piece has a uniform look to it (still reddish, but don't worry). It will feel like the brush has stopped doing anything to the pipe, thats when you switch to the steel wool.
Pull out the steel wool and being circular motions and watch the rust fly! I usually start with the harder places to get into and then take a bit of a "break" by doing the easy sections. Don't be afrtiad to use up multiple pads here, it's not exactly expensive material and shorting yourself on a few bucks isn't worth the not-so-nice results of poor preparation.
Also, be sure to wear the rubber gloves while sanding and handling the bare pipe. No need to get all your sweat and grease all over the pipe since the paint won't stick here and all your time would be wasted.
Here is a picture of the piece ready for paint:
<U>Step 3: Painting</U>
Okay so try and figure out some ingenious way to hang your piece. I used a coat hanger, and hung it off of a wire connected between 2 ladders. Now I don't reccommend painting outside due to wind and debris, but I had no choice here (and it was calm).
I'm sure you can read up with people who are more experienced in painting but what I did was lay a "tack coat" down, so a very light coat (I could just barely see the black). I let this sit for maybe 2 mins since the bottle said it was tackless in 5. After that, I did another final pass on the pipe, making sure to stay an even distance away from the piece.
Just let it dry for a good while. I left it out there for an hour and then brought it into the garage to dry for another 24 hours, trying to touch it as little as possible.
Here is a comparison between the nice flat black and the rusty piece:


Honda-Tech Member
Joined: Feb 2003
Posts: 7,355
Likes: 0
From: Margaritaville
Re: (igo4bmx)
<TABLE WIDTH="90%" CELLSPACING=0 CELLPADDING=0 ALIGN=CENTER><TR><TD>Quote, originally posted by igo4bmx »</TD></TR><TR><TD CLASS="quote">another cool tip would be to grind down the welds then smooth them out so you can't see them when its all painted</TD></TR></TABLE>
The welds are the JDM look yo!
The welds are the JDM look yo!

Honda-Tech Member
Joined: Aug 2004
Posts: 2,318
Likes: 0
From: Mechanicsville VA
Re: (igo4bmx)
<TABLE WIDTH="90%" CELLSPACING=0 CELLPADDING=0 ALIGN=CENTER><TR><TD>Quote, originally posted by igo4bmx »</TD></TR><TR><TD CLASS="quote">another cool tip would be to grind down the welds then smooth them out so you can't see them when its all painted</TD></TR></TABLE>
thats what I did, looks better imo
thats what I did, looks better imo

Trending Topics


Joined: Jan 2006
Posts: 399
Likes: 0
From: FL
Re: (mRek9R)
looks good. some mechanic told me to let it sit in vinegar for a couple of hours and any rust or defects will be removed by itself. heard it from like 3 different mechanics. haven't tried it myself yet though.

Honda-Tech Member
Joined: Oct 2003
Posts: 3,415
Likes: 0
From: Nor Cal
Re: (TypeSLO)
<TABLE WIDTH="90%" CELLSPACING=0 CELLPADDING=0 ALIGN=CENTER><TR><TD>Quote, originally posted by TypeSLO »</TD></TR><TR><TD CLASS="quote">looks good. some mechanic told me to let it sit in vinegar for a couple of hours and any rust or defects will be removed by itself. heard it from like 3 different mechanics. haven't tried it myself yet though. </TD></TR></TABLE>
works
osh guy told me to wipe it down with viniger before i paint to clean the surface
and rust went with it when wiping it down
works
osh guy told me to wipe it down with viniger before i paint to clean the surface
and rust went with it when wiping it down


Thread
Thread Starter
Forum
Replies
Last Post
Silverbullet86
Forced Induction
7
Mar 22, 2005 07:44 PM
