

My Project


Thread Starter
Honda-Tech Member
Joined: Feb 2006
Posts: 1,514
Likes: 0
From: Long Island, NY, USA
ok todays a new day .. anyone know what the wire to the fan switch on the back of the block goes to and what that wire coming off the engine temp sensor goes to?
Honda-Tech Member
Joined: May 2004
Posts: 2,844
Likes: 3
From: honky in, nc, usa
well, i went and looked at a old D i have sitting outside. the fan is next to the oil filter left of the oil pressure sensor two wire, you have to extend this for obd1 swap as the fan switch is on the t-stat housing.
under the dizzy is the engine temp sensor one wire.
under the dizzy is the engine temp sensor one wire.
Thread Starter
Honda-Tech Member
Joined: Feb 2006
Posts: 1,514
Likes: 0
From: Long Island, NY, USA
<TABLE WIDTH="90%" CELLSPACING=0 CELLPADDING=0 ALIGN=CENTER><TR><TD>Quote, originally posted by abnaasefmb »</TD></TR><TR><TD CLASS="quote">well, i went and looked at a old D i have sitting outside. the fan is next to the oil filter left of the oil pressure sensor two wire, you have to extend this for obd1 swap as the fan switch is on the t-stat housing.
under the dizzy is the engine temp sensor one wire.</TD></TR></TABLE>
yeha i knwo the fan switch is next to the oil filter and the plugs are put in
but is the engine temp sensor the same as i have a b16 and its obd0?
under the dizzy is the engine temp sensor one wire.</TD></TR></TABLE>
yeha i knwo the fan switch is next to the oil filter and the plugs are put in
but is the engine temp sensor the same as i have a b16 and its obd0?

Honda-Tech Member
Joined: Nov 2005
Posts: 3,394
Likes: 0
From: My Garage
<TABLE WIDTH="90%" CELLSPACING=0 CELLPADDING=0 ALIGN=CENTER><TR><TD>Quote, originally posted by abnaasefmb »</TD></TR><TR><TD CLASS="quote">Fix that wiring, solder and shrink tubing. </TD></TR></TABLE>
Yea thats what I did, does take alittle longer but looks great when finished.
Yea thats what I did, does take alittle longer but looks great when finished.
Thread Starter
Honda-Tech Member
Joined: Feb 2006
Posts: 1,514
Likes: 0
From: Long Island, NY, USA
yeha tahts how i did all my wires for the tuck ( that part i did not do)
<TABLE WIDTH="90%" CELLSPACING=0 CELLPADDING=0 ALIGN=CENTER><TR><TD>Quote, originally posted by Coolcat55 »</TD></TR><TR><TD CLASS="quote">a cowl hood on a civic? yikes.. but hey that car would smoke mine so who cares rly.</TD></TR></TABLE>
if you read the thread i got ride of that hood a week or 2 after i got the car1
not really an update but
primer and muffler should be here on friday
hood is coming next wedsnday!
Thread Starter
Honda-Tech Member
Joined: Feb 2006
Posts: 1,514
Likes: 0
From: Long Island, NY, USA
today not much done but i did sand last night just little more sanding to do then im going to start taping off the car and primer hopefully by early nexct week
today it was 2 cold like 35deg here on Long Island
so i just cleaned my tool box to make everythin easier to work
theres nothgin like a clean tool box
today it was 2 cold like 35deg here on Long Island
so i just cleaned my tool box to make everythin easier to work
theres nothgin like a clean tool box
Thread Starter
Honda-Tech Member
Joined: Feb 2006
Posts: 1,514
Likes: 0
From: Long Island, NY, USA
<TABLE WIDTH="90%" CELLSPACING=0 CELLPADDING=0 ALIGN=CENTER><TR><TD>Quote, originally posted by SIred91 »</TD></TR><TR><TD CLASS="quote">Great save man, good thread. I'm interested to see the finished car with shaved mouldings. </TD></TR></TABLE>
hey thanks bud, yea im interested to see the finished car with shaved moldings also lol
i was kinda upset when i saw i couldnt have the moldings but it might turn out looking good
i jsut need to find some side trim for the bottom and also the trim for under the fender
and i knwo there discontinued
hey thanks bud, yea im interested to see the finished car with shaved moldings also lol
i was kinda upset when i saw i couldnt have the moldings but it might turn out looking good
i jsut need to find some side trim for the bottom and also the trim for under the fender
and i knwo there discontinued
Honda-Tech Member
Joined: Nov 2005
Posts: 3,394
Likes: 0
From: My Garage
<TABLE WIDTH="90%" CELLSPACING=0 CELLPADDING=0 ALIGN=CENTER><TR><TD>Quote, originally posted by 91ed9 »</TD></TR><TR><TD CLASS="quote">hey thanks bud, yea im interested to see the finished car with shaved moldings also lol
i was kinda upset when i saw i couldnt have the moldings but it might turn out looking good
i jsut need to find some side trim for the bottom and also the trim for under the fender
and i knwo there discontinued </TD></TR></TABLE>
I just remembered I have never got those pictures for you of that trim. I still have 2 mint sets.
But I have to say if done right I think that shaved moldings look ok on a rex.
i was kinda upset when i saw i couldnt have the moldings but it might turn out looking good
i jsut need to find some side trim for the bottom and also the trim for under the fender
and i knwo there discontinued
</TD></TR></TABLE>I just remembered I have never got those pictures for you of that trim. I still have 2 mint sets.
But I have to say if done right I think that shaved moldings look ok on a rex.
Thread Starter
Honda-Tech Member
Joined: Feb 2006
Posts: 1,514
Likes: 0
From: Long Island, NY, USA
<TABLE WIDTH="90%" CELLSPACING=0 CELLPADDING=0 ALIGN=CENTER><TR><TD>Quote, originally posted by harmonator84 »</TD></TR><TR><TD CLASS="quote">I just remembered I have never got those pictures for you of that trim. I still have 2 mint sets.
yeah it was to cold today, jsut post them on here when you do, thanks!
But I have to say if done right I think that shaved moldings look ok on a rex.
yeha i hope so, </TD></TR></TABLE>
almost done with the body work im starting to get excited!
yeah it was to cold today, jsut post them on here when you do, thanks!
But I have to say if done right I think that shaved moldings look ok on a rex.
yeha i hope so, </TD></TR></TABLE>
almost done with the body work im starting to get excited!
Thread Starter
Honda-Tech Member
Joined: Feb 2006
Posts: 1,514
Likes: 0
From: Long Island, NY, USA
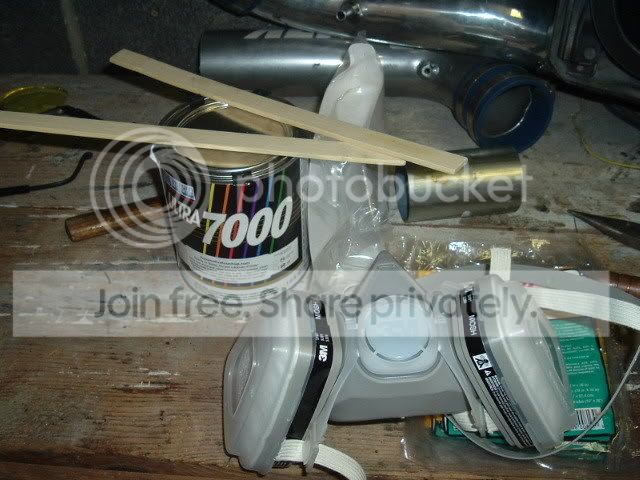
updates i got to work today on the car
Primers in and also some other stuffs my face mask also
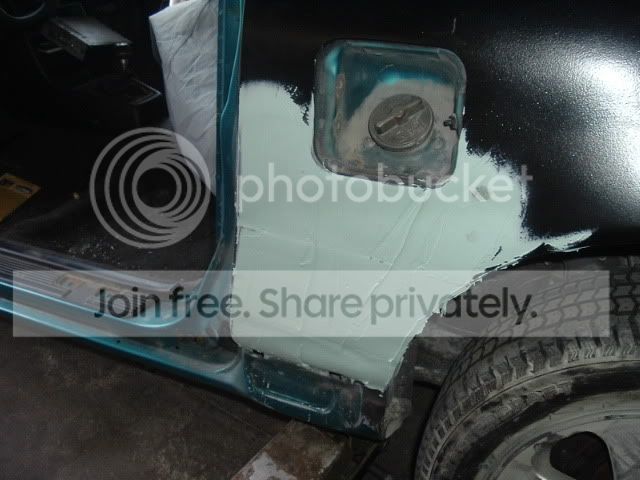
welded in the piece and started to bondo over to make it all nice a smooth
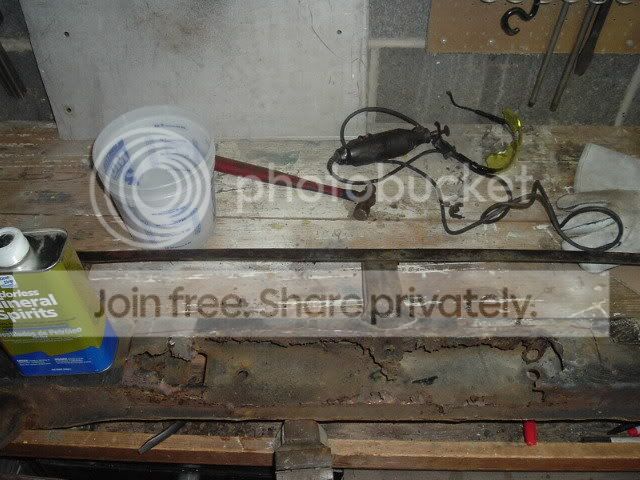
this is the rear bumper its rusted out really bad so imma cut a 4" wide out and weld a metal 2x4 in there instead of finding a used bumper
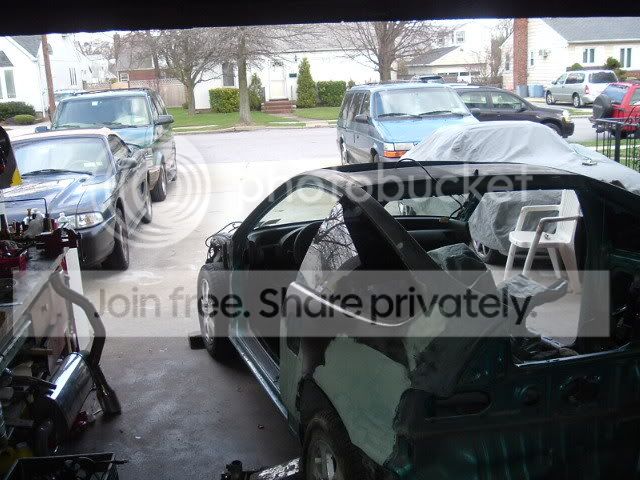
and a pic of how the car sits
thats about it for now the bondo is taking for ever to harden bc its cold out so ill wiat till tonight or tomorrow to finish up and then hopefully by the end of next week if weather permits imma start painting
harmonator84 any input on the primer issue i pm'd u about it?
Primers in and also some other stuffs my face mask also
welded in the piece and started to bondo over to make it all nice a smooth
this is the rear bumper its rusted out really bad so imma cut a 4" wide out and weld a metal 2x4 in there instead of finding a used bumper
and a pic of how the car sits
thats about it for now the bondo is taking for ever to harden bc its cold out so ill wiat till tonight or tomorrow to finish up and then hopefully by the end of next week if weather permits imma start painting
harmonator84 any input on the primer issue i pm'd u about it?
Honda-Tech Member
Joined: Nov 2005
Posts: 3,394
Likes: 0
From: My Garage
Everything looks pretty good.
Its really hard to do bodywork in the cold. I really wouldnt recommend it to be honest. The bondo really doesnt acure well in cold weather.
Some tips on using the bondo though.
1.) Make sure you grind/sand all around the area you are going to be appling the bondo. It gives you a better adhere to the surface.
2.) I hate to sand all day on bondo. What I do is wait untill the bondo is not tacky anymore.(way of telling is when you touch it you dont leave a finger print). Then take a cheese grader (they sell them at lowes or anywhere), and grade off to get the basic shape you are wanting. Then start sanding...you want to go with a ruffer grit to start out. Something like 80 or 120. Then work your way down to a finer grit like 400. It does take some extra time but you will get a nice finish.
3.)You want to sand diagonally, never up and down or side to side. You kinda wanna go from top right hand side and sand to the bottom left hand side, going all the way across.
4.) Make sure you feather all your edges, its hard to explain what I am trying to say here. You dont want any ruff ends in your bondo...it will kinda fade onto the metal.
5.) Use a block. Never do it by hand, you might not be able to see it till your paint is applied but 9 times out of 10 you are putting grooves into the bondo with your fingers.
That should get you started. After you get all that done then its time to guide coat. Guide coating is where you get your bondo perfect. I dont know if you know what guide coating is so if not just let me know and I will explain it to you better.
I dont mean to try to tell you how to do things. I just am trying to help you out by explaining the best I can on how to work with bodywork. I am in no way a pro at this stuff. I started working with bodywork when I graduated highschool. I then went into autobody repair where I got my certification. So I kinda know alittle but am still learning everyday.
Thread Starter
Honda-Tech Member
Joined: Feb 2006
Posts: 1,514
Likes: 0
From: Long Island, NY, USA
<TABLE WIDTH="90%" CELLSPACING=0 CELLPADDING=0 ALIGN=CENTER><TR><TD>Quote, originally posted by harmonator84 »</TD></TR><TR><TD CLASS="quote">
2.) I hate to sand all day on bondo. What I do is wait untill the bondo is not tacky anymore.(way of telling is when you touch it you dont leave a finger print). Then take a cheese grader (they sell them at lowes or anywhere), and grade off to get the basic shape you are wanting. Then start sanding...you want to go with a ruffer grit to start out. Something like 80 or 120. Then work your way down to a finer grit like 400. It does take some extra time but you will get a nice finish.
</TD></TR></TABLE>
yeah i bought one earlier and was using it on the other side it cuts down on time and makes it alot easier to sand
and im pritty sure that the guide coat is kinda like the final coat of bondo where you go over the intire surface to make everythign like perfect and **** somethign like that its wierd to explain but its the final coat of bondo lol
thanks for the info once again lol
edit: and in that picture of bondo by the gas filler it was the first layer of bondo and i didnt sand or do anythign to it!
Honda-Tech Member
Joined: Apr 2004
Posts: 2,785
Likes: 1
From: phoenix, az
<TABLE WIDTH="90%" CELLSPACING=0 CELLPADDING=0 ALIGN=CENTER><TR><TD>Quote, originally posted by harmonator84 »</TD></TR><TR><TD CLASS="quote">
Its really hard to do bodywork in the cold. I really wouldnt recommend it to be honest. The bondo really doesnt acure well in cold weather.
</TD></TR></TABLE>
bondo should be used at temps above 70 deg. when it's below 70 i've used a heat gun can to warm up the surface. spread out the filler, and speed up curing with a heat gun. works well IMO
<TABLE WIDTH="90%" CELLSPACING=0 CELLPADDING=0 ALIGN=CENTER><TR><TD>Quote, originally posted by 91ed9 »</TD></TR><TR><TD CLASS="quote">and im pritty sure that the guide coat is kinda like the final coat of bondo where you go over the intire surface to make everythign like perfect and **** somethign like that its wierd to explain but its the final coat of bondo lol
</TD></TR></TABLE>
icing or spot putty is used to make bondo perfect. it can fill in tiny dings in the surface and pinholes in your filler. guidecoat is used to pinpoint hi and lo spots in a panel.
for example you just applied icing. before you start sanding you'd use a different color (as a guidecoat) and spray over the icing and the surrounding area. knock down the icing and when the guidecoat is gone the area should be flat. clean up the sanding residue and do it again to double check your work. this time the guidecoat should disappaer much quicker. hope that helped.
Honda-Tech Member
Joined: Nov 2005
Posts: 3,394
Likes: 0
From: My Garage
<TABLE WIDTH="90%" CELLSPACING=0 CELLPADDING=0 ALIGN=CENTER><TR><TD>Quote, originally posted by eda6 »</TD></TR><TR><TD CLASS="quote">bondo should be used at temps above 70 deg. when it's below 70 i've used a heat gun can to warm up the surface. spread out the filler, and speed up curing with a heat gun. works well IMO</TD></TR></TABLE>
Not really a good thing to do. I mean I know it works but my teacher never would let us do this. Reason for this is because your causing the bondo to go through rapid tempature changes in which it could crack.
<TABLE WIDTH="90%" CELLSPACING=0 CELLPADDING=0 ALIGN=CENTER><TR><TD>Quote, originally posted by eda6 »</TD></TR><TR><TD CLASS="quote">icing or spot putty is used to make bondo perfect. it can fill in tiny dings in the surface and pinholes in your filler. guidecoat is used to pinpoint hi and lo spots in a panel.
for example you just applied icing. before you start sanding you'd use a different color (as a guidecoat) and spray over the icing and the surrounding area. knock down the icing and when the guidecoat is gone the area should be flat. clean up the sanding residue and do it again to double check your work. this time the guidecoat should disappaer much quicker. hope that helped.</TD></TR></TABLE>Your right but its kinda confussing..haha.
What eda6 means that after you are finished with your bondo and you have the shape pretty much built right then you use a product they call "icing". What this does is fill in any little pin holes that might be in the bondo. You just put a SMALL layer over the troubled spots and go back over sanding it with a really fine grit paper.
<TABLE WIDTH="90%" CELLSPACING=0 CELLPADDING=0 ALIGN=CENTER><TR><TD>Quote, originally posted by 91ed9 »</TD></TR><TR><TD CLASS="quote">and im pritty sure that the guide coat is kinda like the final coat of bondo where you go over the intire surface to make everythign like perfect and **** somethign like that its wierd to explain but its the final coat of bondo lol </TD></TR></TABLE>
Well some people might call that a guide coat but actually a guide coat is where you use sparypaint. Eda6 was right but Ill explain alittle more in depth.
When your bondo is where you want it you take a cheap can of spray paint ( I use walmart 99 cent stuff)and spray a LIGHT mist over the area. Also you will want a color that you can see well...black, red, etc.
When the paint is dry you just sand it all still going diagonally like I stated before. Make sure you are also using sanding block, the biggest one you have. Now dont sit and work in one area on the bondo. You must keep going over the entire area in one stroke. When the spraypaint is sanded off you should see some low spots and scratches. You will be able to spot them because there will be a spot of paint in the dip.
Its pretty simple, when you see a spot of paint it means you have a low spot and you need to go back with another layer of bondo in that spot to build it back up. Then go back doing the guide coat again. You can do this as many times as you want...the more you do the more perfect it will look at the end. What you are doing now will make or break your final overall look of your paint. Someone that knows what they are doing can walk up and look under the paint..haha, I know it sounds silly but if you look hard enough you can see it. You can spot all the little sanding scratchs in the paint...try it sometime.
When you think it looks good enough then your ready to primer. But thats another long post..haha. I will help you out when you get to that point. Sorry about posting such a big post in your thread. Just trying to help another crx out. Hmm I can remember posting all this to someone else...dont you eda6.
Thread Starter
Honda-Tech Member
Joined: Feb 2006
Posts: 1,514
Likes: 0
From: Long Island, NY, USA
hah yeah eda6's comment wa a little confuseing but i understood what he was sayign and you jjust cleared it up even more, thanks both of you for the information
and i much appriciate those long *** posts (give the most information) most of the time
but even though today is easter sunday im still going to work on my car haha
i also have to put a radio in my niece's car(my old 88 accord which was mint!!)
now this "icing" what is it and where can i pic up some?
once again thanks for the information!