

my project


Thread Starter
Honda-Tech Member
Joined: Apr 2004
Posts: 2,785
Likes: 1
From: phoenix, az
<TABLE WIDTH="90%" CELLSPACING=0 CELLPADDING=0 ALIGN=CENTER><TR><TD>Quote, originally posted by seeaclearerskyxx »</TD></TR><TR><TD CLASS="quote">wow! you make me want to do this...if only i had another car to drive... </TD></TR></TABLE>
sounds like it's time for you to get another ED/EE/EF and make it happen.
<TABLE WIDTH="90%" CELLSPACING=0 CELLPADDING=0 ALIGN=CENTER><TR><TD>Quote, originally posted by Lookinaround »</TD></TR><TR><TD CLASS="quote">Man i really loved your home made paint booth set up. Seems to have worked great!</TD></TR></TABLE>
although it fell down twice the booth worked well. if anyone plans to duplicate it put tape on the top of the plastic, cut slits in the tape, run your ziptie through the slits and screw it to the wall. use of a ziptie that screws to the wall is imperative or it will fall down.
<TABLE WIDTH="90%" CELLSPACING=0 CELLPADDING=0 ALIGN=CENTER><TR><TD>Quote, originally posted by harmonator84 »</TD></TR><TR><TD CLASS="quote">hey looks good eda6..by the way did you use base/clear or what???
let me know and ill fill you in on some more tips about buffing that way your car will shine!!!</TD></TR></TABLE>
used omni au urethane paint w/o clear
.<TABLE WIDTH="90%" CELLSPACING=0 CELLPADDING=0 ALIGN=CENTER><TR><TD>Quote, originally posted by Squallie »</TD></TR><TR><TD CLASS="quote">wow, first post in months....and i come back to a thread like this . i myself have plans on doing something somewhat similar. looking to do mine in a NHBP or even a Cranberry color that came on the Lexus's. very good thread though. any other plans for it?</TD></TR></TABLE>
thank you. after the paint is done and the car is reconstucted i'm going to attend efi 101. After that i'm going to do a build (most likely an all motor poormans R) and tune it myself.
<TABLE WIDTH="90%" CELLSPACING=0 CELLPADDING=0 ALIGN=CENTER><TR><TD>Quote, originally posted by 1991civicsi »</TD></TR><TR><TD CLASS="quote">Great job! That looks better than some local body shops by me. We all really appreciate you taking the time to document your progress by taking all those photos.</TD></TR></TABLE>
thanks. i checked out local body and paint shops and wasn't impressed, not even a little bit. Plus i'm paranoid about leaving my car at a shop anyways so this had to be a diy project. The car didn't turn out perfect, but it looks 10x better than a job from a production shop. i saved hella money and learned alot and i'm sure people who read this also learned something.
i'm glad everyone is enjoying the pics so here's more....
the flaws....i don't know how the happened.... must have been the fumes.
Looks bad now but it will look good when i'm done with it.
Look at the middle of the door below and to the right of the handle. i thought there was something on my screen until i started sanding Lol. i'm working on making that spot disappear.
fender is almost done. Notice how the color changes from front to rear.

fender up close

update-started wetsanding with 1500 and 2000 wet yesterday. seems like each panel is going to require a 1/2 sheet of paper so i need to stock up. still looking for a buffer and buffing compounds.
Modified by eda6 at 5:07 PM 5/16/2006
sounds like it's time for you to get another ED/EE/EF and make it happen.
<TABLE WIDTH="90%" CELLSPACING=0 CELLPADDING=0 ALIGN=CENTER><TR><TD>Quote, originally posted by Lookinaround »</TD></TR><TR><TD CLASS="quote">Man i really loved your home made paint booth set up. Seems to have worked great!</TD></TR></TABLE>
although it fell down twice the booth worked well. if anyone plans to duplicate it put tape on the top of the plastic, cut slits in the tape, run your ziptie through the slits and screw it to the wall. use of a ziptie that screws to the wall is imperative or it will fall down.
<TABLE WIDTH="90%" CELLSPACING=0 CELLPADDING=0 ALIGN=CENTER><TR><TD>Quote, originally posted by harmonator84 »</TD></TR><TR><TD CLASS="quote">hey looks good eda6..by the way did you use base/clear or what???
let me know and ill fill you in on some more tips about buffing that way your car will shine!!!</TD></TR></TABLE>
used omni au urethane paint w/o clear
.<TABLE WIDTH="90%" CELLSPACING=0 CELLPADDING=0 ALIGN=CENTER><TR><TD>Quote, originally posted by Squallie »</TD></TR><TR><TD CLASS="quote">wow, first post in months....and i come back to a thread like this . i myself have plans on doing something somewhat similar. looking to do mine in a NHBP or even a Cranberry color that came on the Lexus's. very good thread though. any other plans for it?</TD></TR></TABLE>
thank you. after the paint is done and the car is reconstucted i'm going to attend efi 101. After that i'm going to do a build (most likely an all motor poormans R) and tune it myself.
<TABLE WIDTH="90%" CELLSPACING=0 CELLPADDING=0 ALIGN=CENTER><TR><TD>Quote, originally posted by 1991civicsi »</TD></TR><TR><TD CLASS="quote">Great job! That looks better than some local body shops by me. We all really appreciate you taking the time to document your progress by taking all those photos.</TD></TR></TABLE>
thanks. i checked out local body and paint shops and wasn't impressed, not even a little bit. Plus i'm paranoid about leaving my car at a shop anyways so this had to be a diy project. The car didn't turn out perfect, but it looks 10x better than a job from a production shop. i saved hella money and learned alot and i'm sure people who read this also learned something.
i'm glad everyone is enjoying the pics so here's more....
the flaws....i don't know how the happened.... must have been the fumes.
Looks bad now but it will look good when i'm done with it.
Look at the middle of the door below and to the right of the handle. i thought there was something on my screen until i started sanding Lol. i'm working on making that spot disappear.
fender is almost done. Notice how the color changes from front to rear.
fender up close
update-started wetsanding with 1500 and 2000 wet yesterday. seems like each panel is going to require a 1/2 sheet of paper so i need to stock up. still looking for a buffer and buffing compounds.
Modified by eda6 at 5:07 PM 5/16/2006
Junior Member
Joined: Jul 2005
Posts: 695
Likes: 0
From: greenwood lake, ny, usa
awsome diy paint job man, mad probs for that ****. one tip i'll give ya on your wetsanding though is don't sand it until your ready to buff it, once you cut into the paint your opening up more pores in the paint and allowing it to cure faster so you'll notice it'll probably take you 2-3x the time to buff a panel that was sanded even as little as a 1/2 day prior than it would if your were to just sand and buff right away. when you buff make sure you get 2 different pads, i usually use a wool pad with a medium grit mechanical cut compound for actually melting out the scratches than i use a foam polishing pad and a nice 3M finishing polish for getting rid of swirl marks and bringin it up to shine. good luck
Thread Starter
Honda-Tech Member
Joined: Apr 2004
Posts: 2,785
Likes: 1
From: phoenix, az
^^^thank you and thanks for the info.
update-I spent about 12 hrs over a 3 day period wetsanding with 1500.
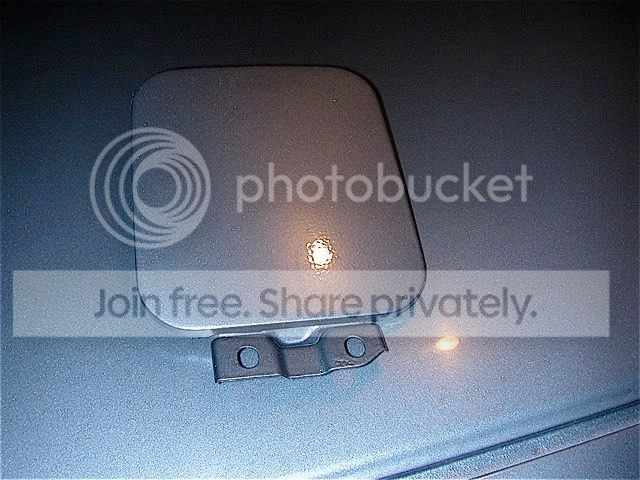
roof was wetsanded. The gas lid still needs to be done.
haven't found the right buffer yet so i hand buffed it for now.

primered the floor last night.
update-I spent about 12 hrs over a 3 day period wetsanding with 1500.
roof was wetsanded. The gas lid still needs to be done.
haven't found the right buffer yet so i hand buffed it for now.
primered the floor last night.


Honda-Tech Member
Joined: Nov 2005
Posts: 2,032
Likes: 0
From: CA, US
Looks great! 
What kinds of buffers are you looking at? I just ordered a Porter Cable myself last night, but I'm assuming you're looking more into the "professional" department?
What kinds of buffers are you looking at? I just ordered a Porter Cable myself last night, but I'm assuming you're looking more into the "professional" department?
Joined: May 2006
Posts: 1
Likes: 0
From: La Jolla, CA, USA
Whatever time and expense you put into it, you will realize a safe investment. I've seen my '91 Hatchback go from $1200 to $3200 valuation (avg listing in media) since the gas prices started rising. In the meantime, you have probably the best handling compact on the planet. At least, in the 4-5 passenger category. And the styling is still ahead of the competition. Good luck and have fun!
Thread Starter
Honda-Tech Member
Joined: Apr 2004
Posts: 2,785
Likes: 1
From: phoenix, az
<TABLE WIDTH="90%" CELLSPACING=0 CELLPADDING=0 ALIGN=CENTER><TR><TD>Quote, originally posted by Tippyman »</TD></TR><TR><TD CLASS="quote">How u gonna fix the hatch part?</TD></TR></TABLE>
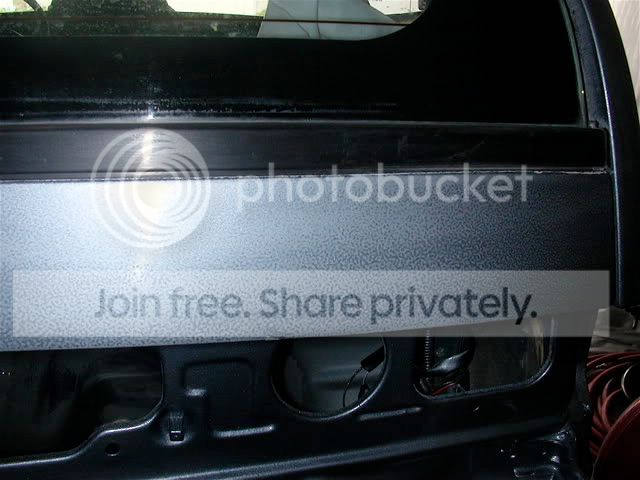
When i removed the tape from under the rear window i didn't like the transition and there's that spot where the hose touched the hatch. I have a bad habit of sanding too much so i ended up burning through an edge on the fender. There's a few more edges that i didn't burn through, but took away too much paint. All the flaws justifiy a respray.
<TABLE WIDTH="90%" CELLSPACING=0 CELLPADDING=0 ALIGN=CENTER><TR><TD>Quote, originally posted by 1989CivicSi »</TD></TR><TR><TD CLASS="quote">Looks great!
What kinds of buffers are you looking at? </TD></TR></TABLE>
thank you. I'm considering this one. The specs look good plus i can pick it up and save on shipping.
<TABLE WIDTH="90%" CELLSPACING=0 CELLPADDING=0 ALIGN=CENTER><TR><TD>Quote, originally posted by 1989CivicSi »</TD></TR><TR><TD CLASS="quote">I just ordered a Porter Cable myself last night, but I'm assuming you're looking more into the "professional" department?</TD></TR></TABLE>
nope, i'm looking for the one that's the most bang for the buck.
update-I've been reading up on repainting and orangepeel and i got my hands on a PPG Fleet Refinish Training Handbook. I'm not going to follow the manufacturers instructions when mixing the paint this time. I'm going to play with the blend to get a lower viscosity and increase dry time hoping to reduce orangepeel and minimalize wetsanding afterwards.
after i'm done wetsanding the booth will be reconstructed.

Thread Starter
Honda-Tech Member
Joined: Apr 2004
Posts: 2,785
Likes: 1
From: phoenix, az
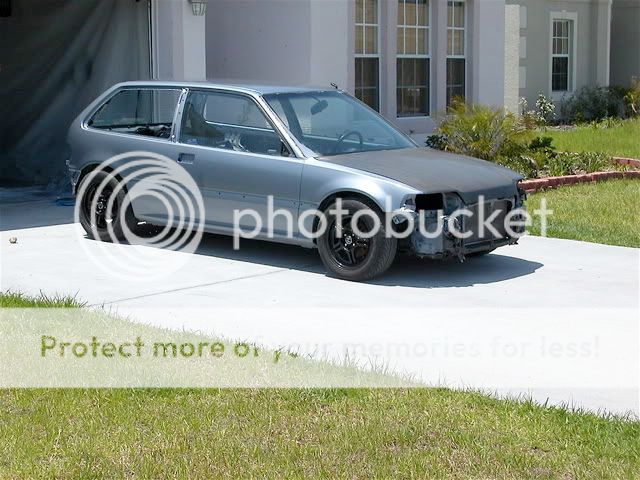
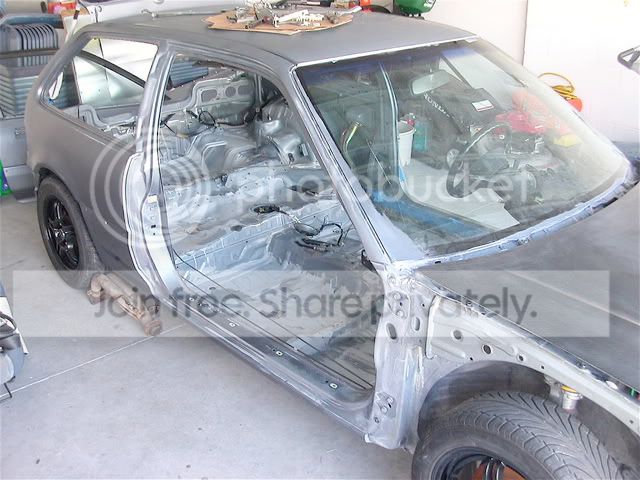
update-exterior is ready for more paint. used electrical tape to protect the edges while I wetsanded the car with 800. I've been going back and forth on painting the interior and door jams and decided i'm going to paint them.
remembered i had this spray bottle in the van, so at 1am this morning i filled it up and started wetsanding the interior. 2 heinekens, 3 hours and 4 refills later the interior was finally done.
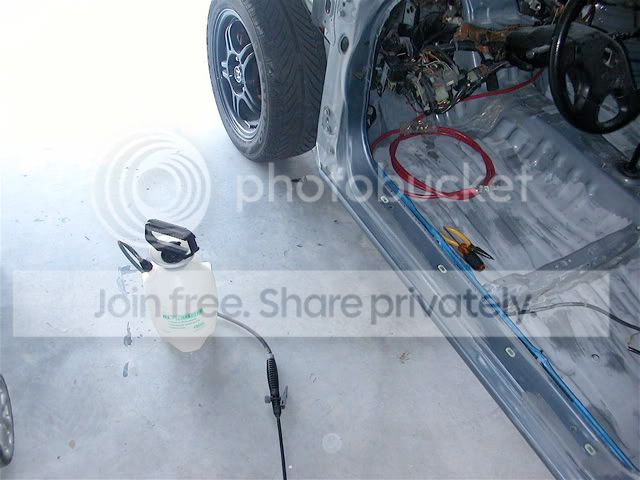
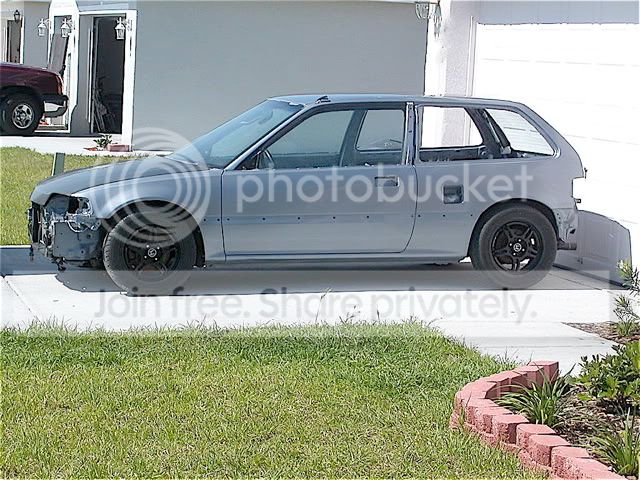
As usual i got carried away. next thing i know the doors and cable ties were removed. the clips holding the brake lines were removed and a couple clips were temporarily relocated. I was careful removing the clips and cable ties so that they could be reused. Once i removed the ebrake the car started rolling forward. That header is my temporary ebrake.
I appreciate the postive comments. thanks guys.
remembered i had this spray bottle in the van, so at 1am this morning i filled it up and started wetsanding the interior. 2 heinekens, 3 hours and 4 refills later the interior was finally done.
As usual i got carried away. next thing i know the doors and cable ties were removed. the clips holding the brake lines were removed and a couple clips were temporarily relocated. I was careful removing the clips and cable ties so that they could be reused. Once i removed the ebrake the car started rolling forward. That header is my temporary ebrake.
I appreciate the postive comments. thanks guys.