


my project


Junior Member
Joined: Nov 2004
Posts: 488
Likes: 0
From: Ricerville, New York
 Re: (Burlyirishdude)
<TABLE WIDTH="90%" CELLSPACING=0 CELLPADDING=0 ALIGN=CENTER><TR><TD>Quote, originally posted by Burlyirishdude »</TD></TR><TR><TD CLASS="quote">I am so impressed with this thread. IT's threads like this one that make up for all the stupid comments/questions/.flames on this site. Kudos bro. You make me wanna clear my whole week just to rip everything apart and bust out a toothbrush and tackle my car.  </TD></TR></TABLE>
Thats sooo true great DIY project. and with being a bodyman myself. thats a really ood job that you did. good luck with the rest of the project
</TD></TR></TABLE>Thats sooo true great DIY project. and with being a bodyman myself. thats a really ood job that you did. good luck with the rest of the project




Thread Starter
Honda-Tech Member
Joined: Apr 2004
Posts: 2,785
Likes: 1
From: phoenix, az
Re: (revvolutions)
update-I cleaned out the parts car at the junkyard and removed the dash. Every screw/bolt from the dash was labeled and placed in a ziplock bag. snapped about 40 pics and went home and started reconstructing the dash. The ductwork will be reinstalled first. i'm going to modify some insulation to make sure it's sealed.
picked up another quart of b-35m so i can repaint the metal under the tail/head lights, spoiler, and gas fill lid. once that's done i can bolt up the bumpers. interior chassis wiring harness is reinstalled. installed the fenders and had to realign the doors.
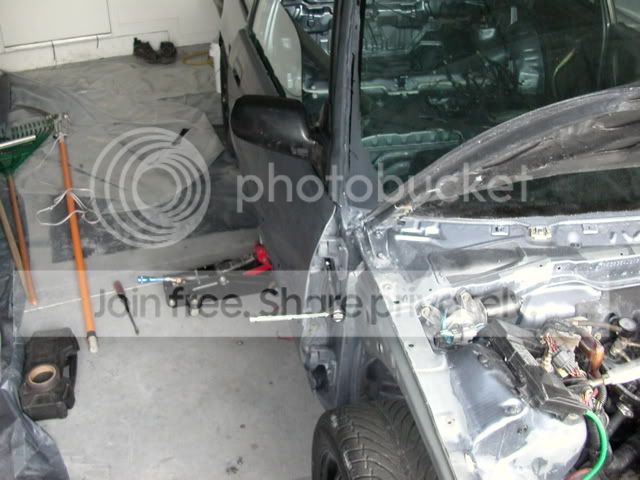
when removing/reinstalling fenders, remove this pin from the detent rod. when this pin is removed the door opens another 12".
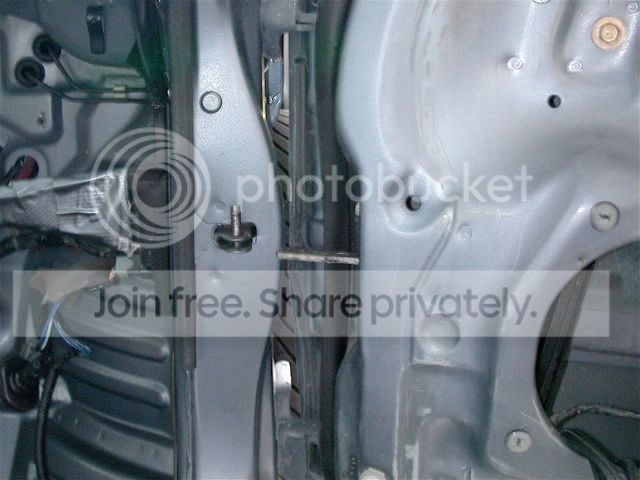
i recommend a 1/4" socket set for these fender bolts

door realignment pics. could take anywhere from 5 minutes to two hours per door.
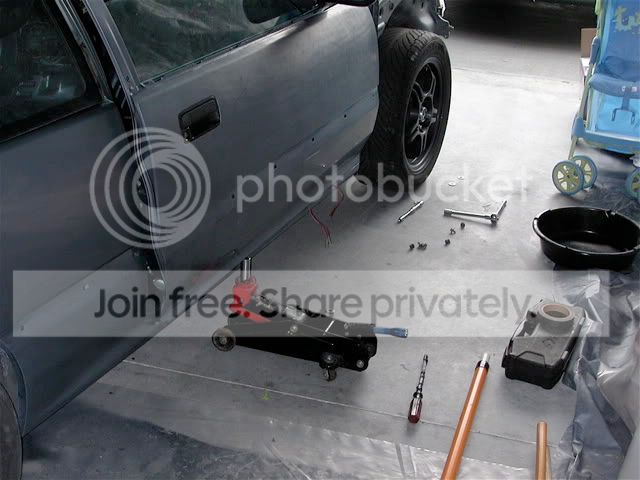
loosen these bolts if the door needs to be moved up/down or forwards/backwards.
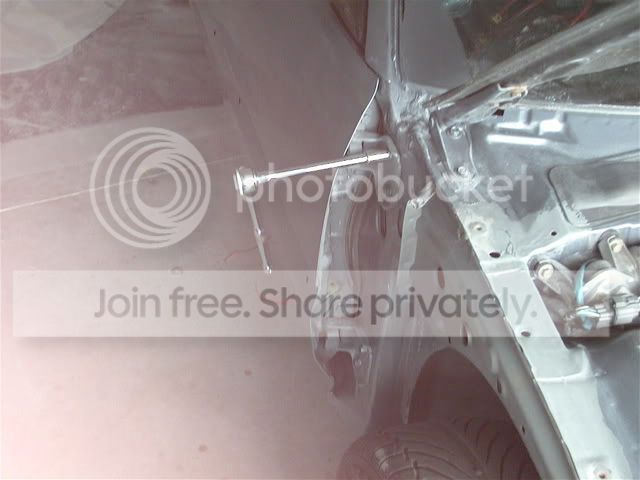
IMO there's no reason to loosen these bolts. they allow the door to be pulled out/pushed in. The latch should be installed after the door is properly aligned.
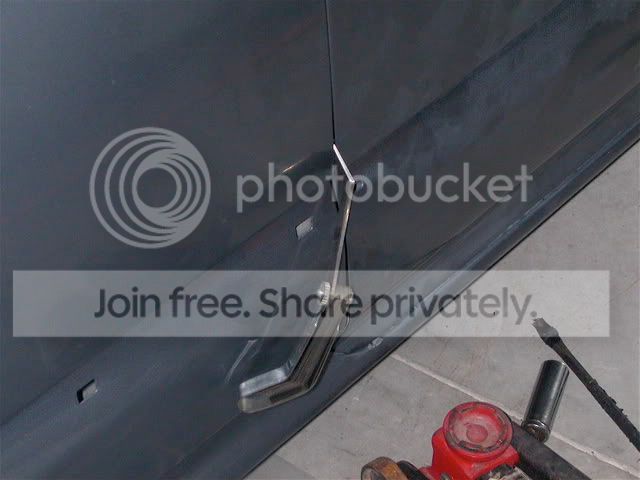
i wanted to make sure the gap was the same between the door/1/4 panel and door/fender.
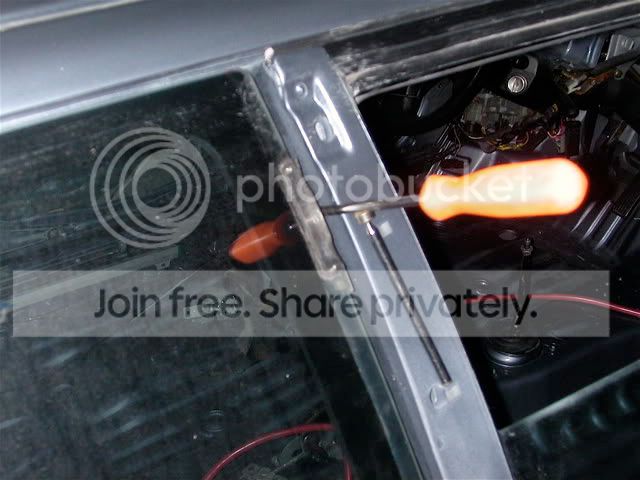
the fasteners for the front of the 1/4 windows require a magnetic screwdriver.
all comments much appreciated
Modified by eda6 at 6:26 PM 6/30/2006
picked up another quart of b-35m so i can repaint the metal under the tail/head lights, spoiler, and gas fill lid. once that's done i can bolt up the bumpers. interior chassis wiring harness is reinstalled. installed the fenders and had to realign the doors.
when removing/reinstalling fenders, remove this pin from the detent rod. when this pin is removed the door opens another 12".
i recommend a 1/4" socket set for these fender bolts
door realignment pics. could take anywhere from 5 minutes to two hours per door.
loosen these bolts if the door needs to be moved up/down or forwards/backwards.
IMO there's no reason to loosen these bolts. they allow the door to be pulled out/pushed in. The latch should be installed after the door is properly aligned.
i wanted to make sure the gap was the same between the door/1/4 panel and door/fender.
the fasteners for the front of the 1/4 windows require a magnetic screwdriver.
all comments much appreciated
Modified by eda6 at 6:26 PM 6/30/2006

The Boot
Joined: Dec 2001
Posts: 9,841
Likes: 0
From: Arizona, US
Re: (UberJDMeg6)
<TABLE WIDTH="90%" CELLSPACING=0 CELLPADDING=0 ALIGN=CENTER><TR><TD>Quote, originally posted by UberJDMeg6 »</TD></TR><TR><TD CLASS="quote">do you have any motor plans?? if i missed it in the thread my bad.. lol</TD></TR></TABLE>yeah...he mentioned something about a poormans r...
while we are on the subject...lets get that freshly painted bitch an engine!
while we are on the subject...lets get that freshly painted bitch an engine!


Thread Starter
Honda-Tech Member
Joined: Apr 2004
Posts: 2,785
Likes: 1
From: phoenix, az
update-the ductwork has been cleaned out and reinstalled.
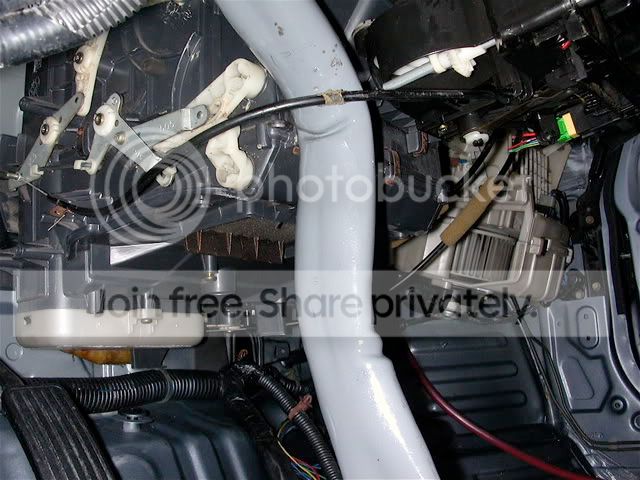
installed a new climate control unit. The sh3 unit was replaced with a sh5 unit from a 90 civic wagon. these climate controls are fragile so i recommend disconnecting the cables from the linkages instead of disconnecting cables from the control unit. familiarize yourself with the cables and linkages before installing. the levers and linkages must be in the same position before the cable is connected or it will bind and/or break.
the temp **** has two cables. the one closest to where it says sh5 connects to the bottom of the heater core. The other one goes through the firewall to the valve. The blue cable goes to the blower motor housing. factory insulation was removed and replaced with 3/8"x1/2" spongerubber type insulation. the cables were insulated where they touched plastic to reduce rattles.
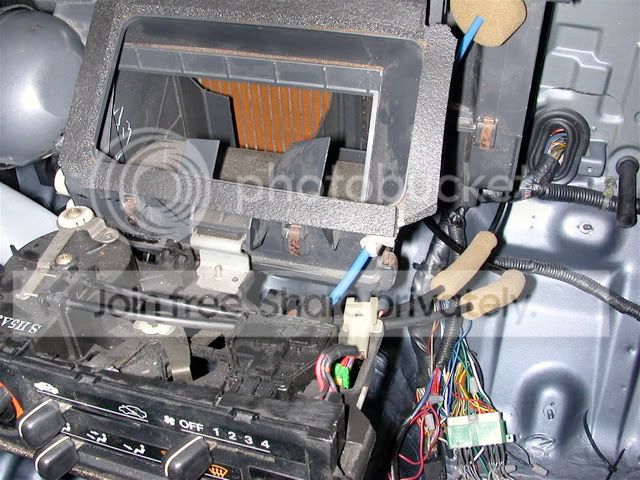
The bottom cable on the sh-5 unit is too long for hatches, you'll need to reuse the sh-3 cable.
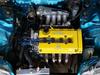
<TABLE WIDTH="90%" CELLSPACING=0 CELLPADDING=0 ALIGN=CENTER><TR><TD>Quote, originally posted by UberJDMeg6 »</TD></TR><TR><TD CLASS="quote">do you have any motor plans?? if i missed it in the thread my bad.. lol</TD></TR></TABLE>for now i'm going to fix the b16 and enjoy that for a while. It's going to get new cams, prelude lmas w/.04" washers, fitv will be removed and finally a new tune.
thanks for the positive feedback
installed a new climate control unit. The sh3 unit was replaced with a sh5 unit from a 90 civic wagon. these climate controls are fragile so i recommend disconnecting the cables from the linkages instead of disconnecting cables from the control unit. familiarize yourself with the cables and linkages before installing. the levers and linkages must be in the same position before the cable is connected or it will bind and/or break.
the temp **** has two cables. the one closest to where it says sh5 connects to the bottom of the heater core. The other one goes through the firewall to the valve. The blue cable goes to the blower motor housing. factory insulation was removed and replaced with 3/8"x1/2" spongerubber type insulation. the cables were insulated where they touched plastic to reduce rattles.
The bottom cable on the sh-5 unit is too long for hatches, you'll need to reuse the sh-3 cable.
<TABLE WIDTH="90%" CELLSPACING=0 CELLPADDING=0 ALIGN=CENTER><TR><TD>Quote, originally posted by UberJDMeg6 »</TD></TR><TR><TD CLASS="quote">do you have any motor plans?? if i missed it in the thread my bad.. lol</TD></TR></TABLE>for now i'm going to fix the b16 and enjoy that for a while. It's going to get new cams, prelude lmas w/.04" washers, fitv will be removed and finally a new tune.
thanks for the positive feedback


Honda-Tech Member
Joined: Jul 2004
Posts: 2,575
Likes: 0
From: JEDBURG,SC
Wow, You my man get madddd props for doing all this yourself. Everything looks good, I'll be doing the same with my EF. Definately going to refer to this thread/ you for tips. Once again very nice.
MODS.... This thread should be a sticky!
MODS.... This thread should be a sticky!


Honda-Tech Member
Joined: Jan 2006
Posts: 1,119
Likes: 0
From: Tallahassee, Fl
Re: (89efhatchcrap)
<TABLE WIDTH="90%" CELLSPACING=0 CELLPADDING=0 ALIGN=CENTER><TR><TD>Quote, originally posted by 89efhatchcrap »</TD></TR><TR><TD CLASS="quote">haha notice the HONDA lawnmower in the background...</TD></TR></TABLE>
I got your lawn mower right here:
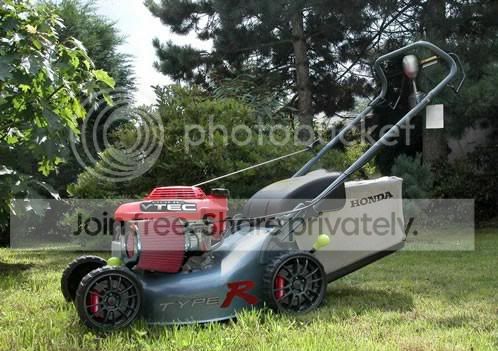
It's a one-of-one Type R mower.... VERY RARE!!!
awsome project. keep it rollin! (and get that b16 purrin like a champ. you can't have a show-car-quality paintjob and get pwned by a Neon... )
haha
I got your lawn mower right here:
It's a one-of-one Type R mower.... VERY RARE!!!
awsome project. keep it rollin! (and get that b16 purrin like a champ. you can't have a show-car-quality paintjob and get pwned by a Neon... )
haha

Honda-Tech Member
Joined: Feb 2005
Posts: 4,038
Likes: 3
From: Kitchener, On, Canada
Re: (bakerboy4679)
<TABLE WIDTH="90%" CELLSPACING=0 CELLPADDING=0 ALIGN=CENTER><TR><TD>Quote, originally posted by bakerboy4679 »</TD></TR><TR><TD CLASS="quote">awsome project. keep it rollin! (and get that b16 purrin like a champ. you can't have a show-car-quality paintjob and get pwned by a Neon... )
haha</TD></TR></TABLE>
My friends NA SOHC Neon can run mid to low 14s? That's alot of jam in my opinion. And he said poorman's Type R...do you read?
Don't make fun of neons, I'm sure and SRT4 is a **** loads faster then your car (And mine, so I give them respect).
haha</TD></TR></TABLE>
My friends NA SOHC Neon can run mid to low 14s? That's alot of jam in my opinion. And he said poorman's Type R...do you read?
Don't make fun of neons, I'm sure and SRT4 is a **** loads faster then your car (And mine, so I give them respect).

Joined: Jul 2006
Posts: 69
Likes: 0
From: New Glasgow, NS, Can
Re: (ludesrv)
We blew away some kid that thought he was cool with a white neon with a spoiler, the thing is....my buddy got a engine swap for a b22 prelude engine from japan. And a full exhaust system and a high performance air filter its running 220hp with NO turbo or any of that stuff. needless to say it will make allot of cars look bad.
Thread Starter
Honda-Tech Member
Joined: Apr 2004
Posts: 2,785
Likes: 1
From: phoenix, az
Draft:
update-painted the metal under the tail/head lights, spoiler, and gas fill lid in the backyard yesterday. The parts were wetsanded and installed tonight. installed a new diffuser on the bottom of the heater core. Misplaced one of the brackets for the evap housing so i picked up a replacement from the junkyard. I need to remove the wirenuts and solder/heatshrink the wiring for my si cig lighter/ashtray into the dash harness. after the wiring is fixed the dash will be ready to install.
my registration expired. Once the cluster is reinstalled the odometer and vin # number can be verified. I'll need a new title and then i can register the car. In florida registration fees are based on weight and there's no emissions testing
<TABLE WIDTH="90%" CELLSPACING=0 CELLPADDING=0 ALIGN=CENTER><TR><TD>Quote, originally posted by joeny12985 »</TD></TR><TR><TD CLASS="quote">nice build man just keep it going your going to get it done i can tell. look great. enjoy the motor build</TD></TR></TABLE>
thanks
<TABLE WIDTH="90%" CELLSPACING=0 CELLPADDING=0 ALIGN=CENTER><TR><TD>Quote, originally posted by ludesrv »</TD></TR><TR><TD CLASS="quote">And he said poorman's Type R...do you read?</TD></TR></TABLE>
I mentioned a poormans r in the beginning of this thread. After paying the bills, mortgage and providing for my wife and daughter there's no money for the build. For now i'm going to get new cams for the b16, replace the lmas, delete the fitv, and get it tuned. I already have the p72 b18c block. i'm looking for a second job, cars to paint, and AC work on the side to finish this project.
camera battery is charging and pics will be up tomorrow.
thanks for the replies.
my registration expired. Once the cluster is reinstalled the odometer and vin # number can be verified. I'll need a new title and then i can register the car. In florida registration fees are based on weight and there's no emissions testing
<TABLE WIDTH="90%" CELLSPACING=0 CELLPADDING=0 ALIGN=CENTER><TR><TD>Quote, originally posted by joeny12985 »</TD></TR><TR><TD CLASS="quote">nice build man just keep it going your going to get it done i can tell. look great. enjoy the motor build</TD></TR></TABLE>
thanks
<TABLE WIDTH="90%" CELLSPACING=0 CELLPADDING=0 ALIGN=CENTER><TR><TD>Quote, originally posted by ludesrv »</TD></TR><TR><TD CLASS="quote">And he said poorman's Type R...do you read?</TD></TR></TABLE>
I mentioned a poormans r in the beginning of this thread. After paying the bills, mortgage and providing for my wife and daughter there's no money for the build. For now i'm going to get new cams for the b16, replace the lmas, delete the fitv, and get it tuned. I already have the p72 b18c block. i'm looking for a second job, cars to paint, and AC work on the side to finish this project.
camera battery is charging and pics will be up tomorrow.
thanks for the replies.

Honda-Tech Member
Joined: May 2004
Posts: 3,024
Likes: 0
From: A racetrack near you, CA, USA
Re: (mitch4x4)
<TABLE WIDTH="90%" CELLSPACING=0 CELLPADDING=0 ALIGN=CENTER><TR><TD>Quote, originally posted by mitch4x4 »</TD></TR><TR><TD CLASS="quote">We blew away some kid that thought he was cool with a white neon with a spoiler, the thing is....my buddy got a engine swap for a b22 prelude engine from japan. And a full exhaust system and a high performance air filter its running 220hp with NO turbo or any of that stuff. needless to say it will make allot of cars look bad.</TD></TR></TABLE>
lmao im seriously contemplating using this in my sig....great build eda6
lmao im seriously contemplating using this in my sig....great build eda6