

REAR DISK BRAKE CONVERSION w/pics

Thread Starter
Honda-Tech Member
Joined: Sep 2006
Posts: 7,709
Likes: 12
From: NoRthERn Cali
hey eveyone just this past weeken my buddy's rear brake shoes went out on his 91 hatchback so he was basically metal to metal on the shoes with the drums. i had been puttin off doin his rear disk conversion, mainly cuz i hate dealin with the stupid gas tank, LOL. but i finally gave in and decided to take some pics while in the proccess of doin it. takin pics made the swap take longer than i had hoped but oh well its for a good cause i hope u enjoy......
NO NEED TO DROP THE GAS TANK I DID ANOTHER BRAKE CONVERSION ON MY HATCH last week and i did not need to drop the tank.
well here we go.
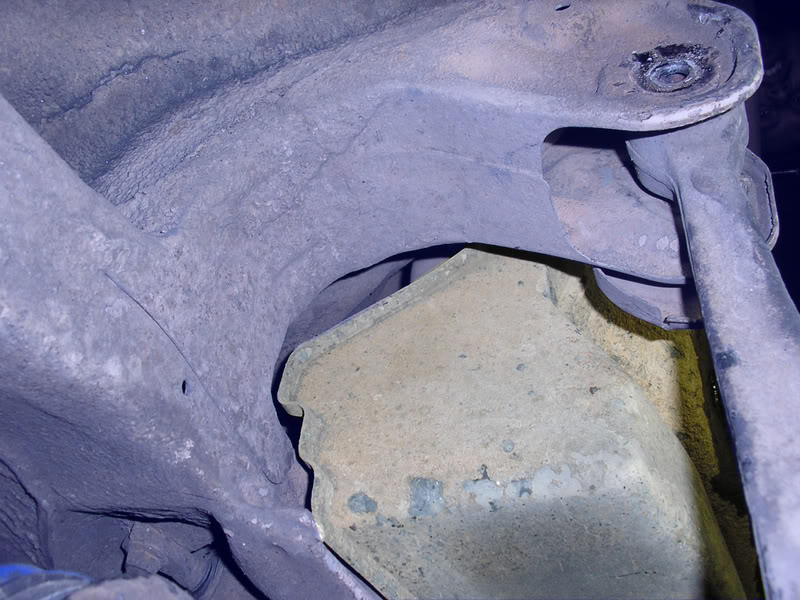
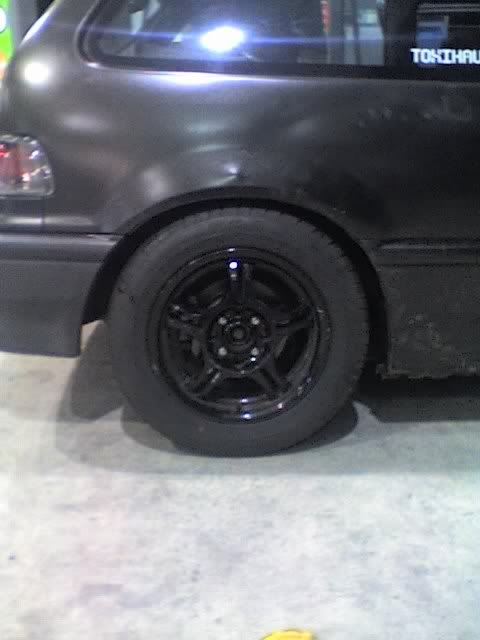
here is wat his rear brakes looked like b4 i started workin on it....


1. start out by removing the rear seats so u can access the fuel pump connector.
2. next remove the shifter/e-brake console, u should then see this....

i went ahead at this point and un hinged the e-brake cables from the handle so i wouldnt have to get back inside the car untill near the end.
3. remove the tires and raise the car on jacks.
4. drain the left over fuel, i would suggest use it up as much as possible before starting this. this is where the drain plug is located near the rear left corner of the fuel tank.....


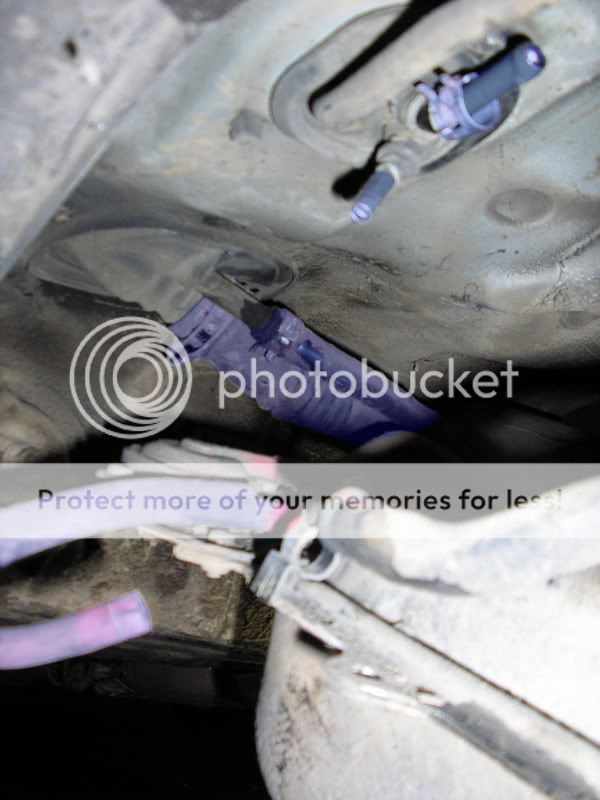
5. after enough or all fuel has been drained u will then remove the fuel line cover...

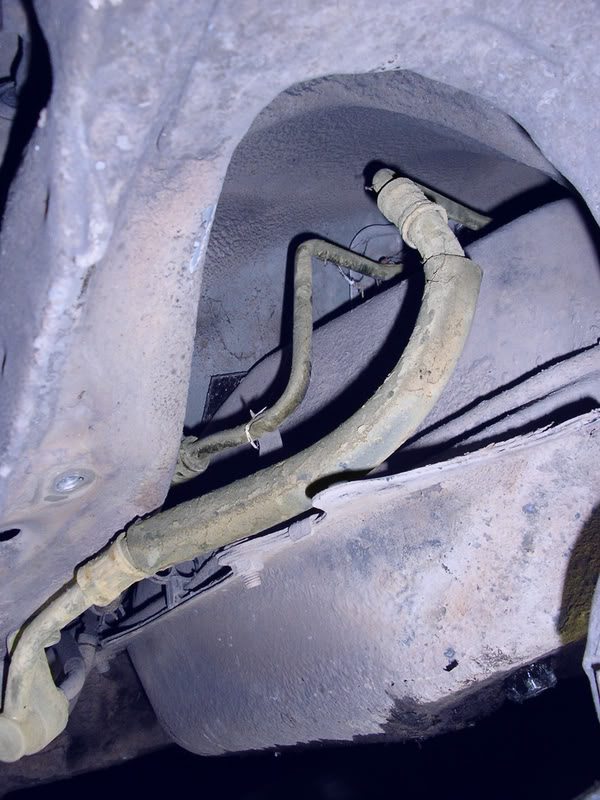
6. next after removing the cover u will then have to disconnect a total of 5 fuel lines. 3 near the rear of the tank and 2 near the front by the filler neck....
6. after u have diconnected the fuel lines proceed to remove the gas tank enough so u can see the bolts that hold the brake cable to the chassis
7. after the tank has been moved go ahead and remove the following bolts i like to leave these 2 boltsf or last because they can hold up ur rear brakes while ur workin on the rest of the bolts....
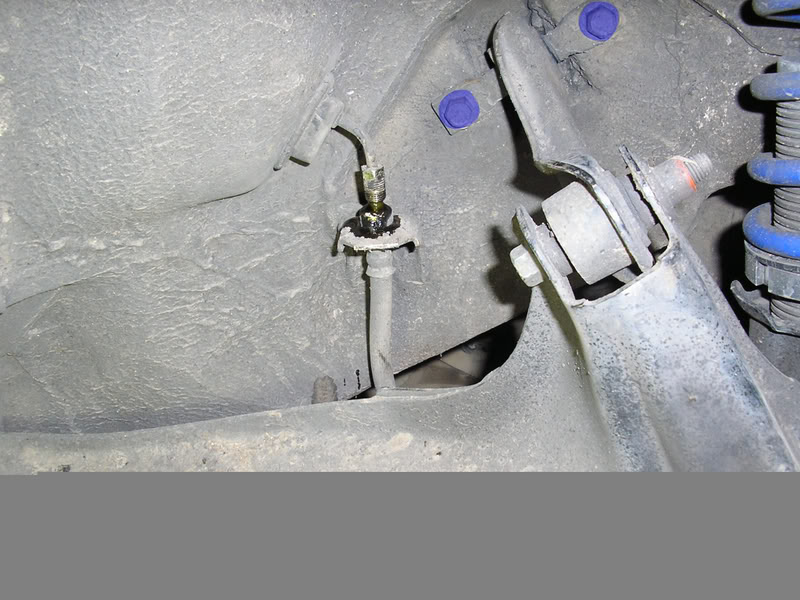

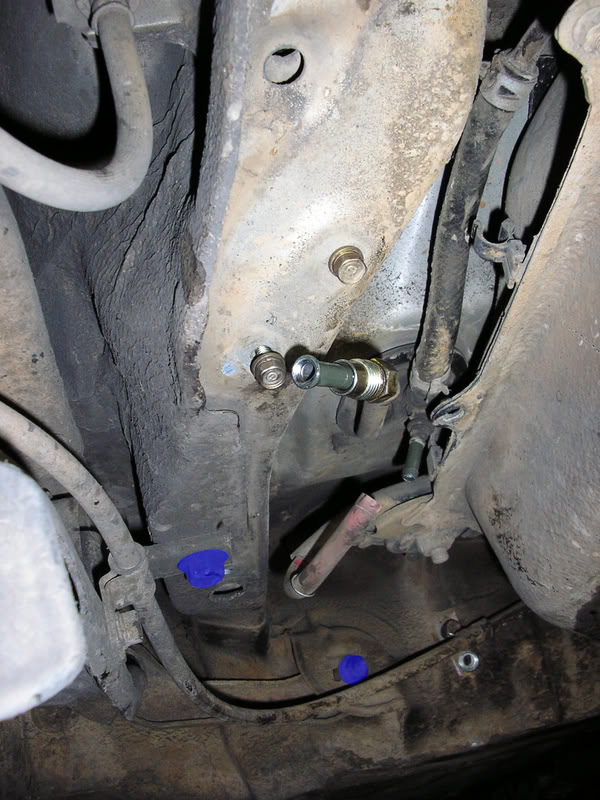
8. now before u undo that last 2 bolts dont forget to remove the clip and unscrew the brake hose....
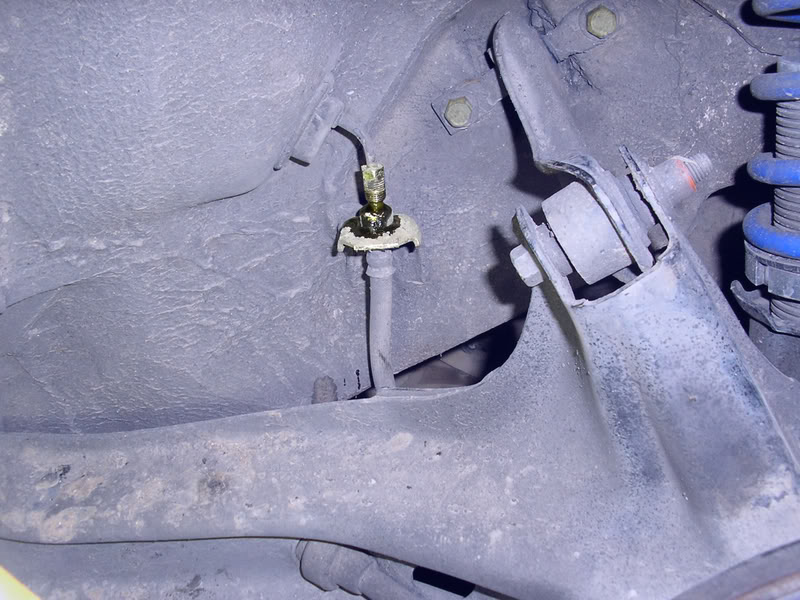
9. now after u remove the brake hose go ahead and remove the last 2 bolts....

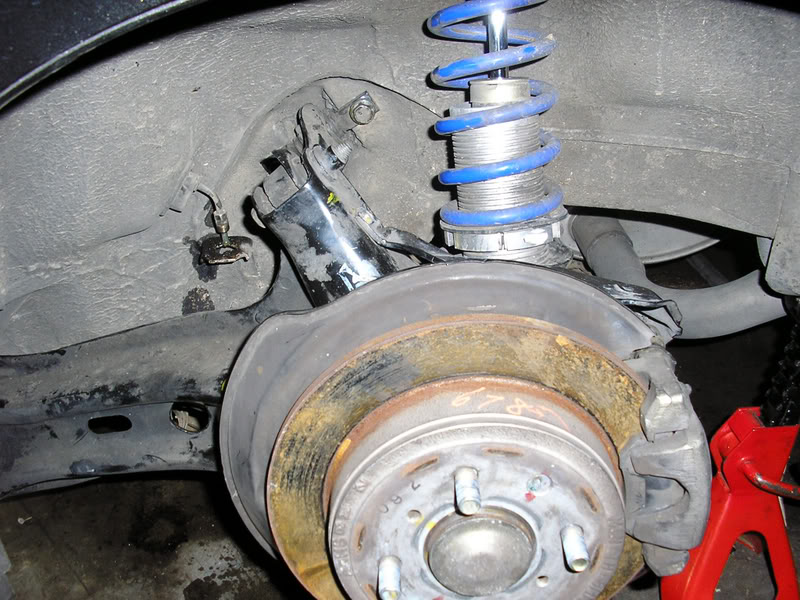
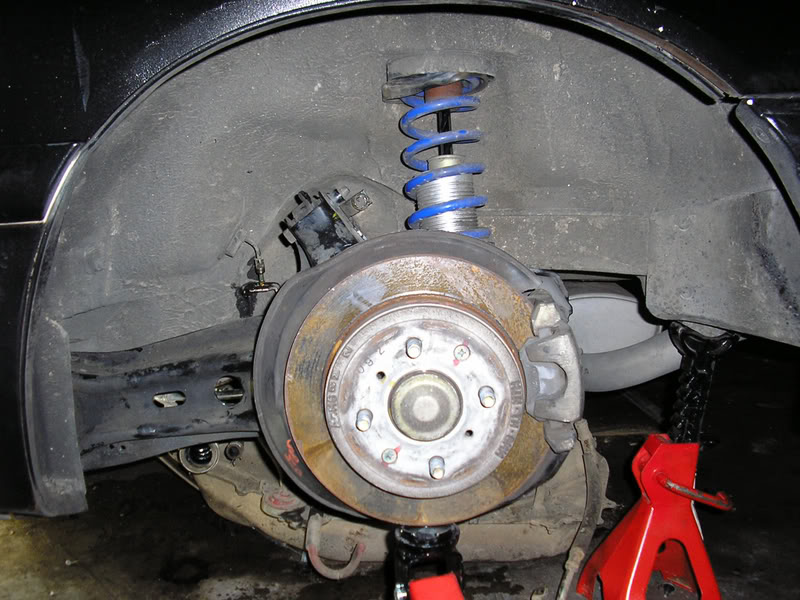
10. now u have successfully removed ur rear brakes. now the only thing left is to do the whole proccess backwards. here is wat the final product should look like....
one thing i would also like to suggest is that u get some new hose clamps because i personally dont like the stock ones. but then again thats just me. after installin ur new brakes all u have to do is just bleed the system. wat du u guys think of my write up? i wasnt sure if it was already covered but i thought it would be informative to post.
yea i i kno i told my buddy to get rid of those lights. total time was about 4.5hrs until it was completely done bleeding included and takin pics along the way, cuz i got hungry. lol
Modified by crx_si-r at 10:30 PM 3/24/2007
NO NEED TO DROP THE GAS TANK I DID ANOTHER BRAKE CONVERSION ON MY HATCH last week and i did not need to drop the tank.
well here we go.
here is wat his rear brakes looked like b4 i started workin on it....
1. start out by removing the rear seats so u can access the fuel pump connector.
2. next remove the shifter/e-brake console, u should then see this....
i went ahead at this point and un hinged the e-brake cables from the handle so i wouldnt have to get back inside the car untill near the end.
3. remove the tires and raise the car on jacks.
4. drain the left over fuel, i would suggest use it up as much as possible before starting this. this is where the drain plug is located near the rear left corner of the fuel tank.....
5. after enough or all fuel has been drained u will then remove the fuel line cover...
6. next after removing the cover u will then have to disconnect a total of 5 fuel lines. 3 near the rear of the tank and 2 near the front by the filler neck....
6. after u have diconnected the fuel lines proceed to remove the gas tank enough so u can see the bolts that hold the brake cable to the chassis
7. after the tank has been moved go ahead and remove the following bolts i like to leave these 2 boltsf or last because they can hold up ur rear brakes while ur workin on the rest of the bolts....
8. now before u undo that last 2 bolts dont forget to remove the clip and unscrew the brake hose....
9. now after u remove the brake hose go ahead and remove the last 2 bolts....
10. now u have successfully removed ur rear brakes. now the only thing left is to do the whole proccess backwards. here is wat the final product should look like....
one thing i would also like to suggest is that u get some new hose clamps because i personally dont like the stock ones. but then again thats just me. after installin ur new brakes all u have to do is just bleed the system. wat du u guys think of my write up? i wasnt sure if it was already covered but i thought it would be informative to post.
yea i i kno i told my buddy to get rid of those lights. total time was about 4.5hrs until it was completely done bleeding included and takin pics along the way, cuz i got hungry. lol
Modified by crx_si-r at 10:30 PM 3/24/2007
Honda-Tech Member
Joined: Sep 2005
Posts: 2,758
Likes: 0
From: CA
<TABLE WIDTH="90%" CELLSPACING=0 CELLPADDING=0 ALIGN=CENTER><TR><TD>Quote, originally posted by mat18 »</TD></TR><TR><TD CLASS="quote">that was a great write up.  </TD></TR></TABLE>
</TD></TR></TABLE>
Thread Starter
Honda-Tech Member
Joined: Sep 2006
Posts: 7,709
Likes: 12
From: NoRthERn Cali
no everything bolts right up. unless ur rear shocks are blown then i dont see y u would need to replace them. u should be fine.
Honda-Tech Member

Joined: Jul 2003
Posts: 9,638
Likes: 1
From: Near Charlotte
Great write up!
However there is no need to drop the tank at all. I have done several brake conversions on CRX's and hatch's it is not something that needs to be done. All bolts, and cables can be removed easily without dropping the tank.
However there is no need to drop the tank at all. I have done several brake conversions on CRX's and hatch's it is not something that needs to be done. All bolts, and cables can be removed easily without dropping the tank.
Trending Topics

Honda-Tech Member
Joined: Sep 2004
Posts: 318
Likes: 0
From: High River, Ab, Canada
Yep me too didn't have to drop the tank at all. No interference at all.
Just unbolt the drum trailing arm and bolt up the disc trailing arm.
Oh and you missed changing the proportioning valve. 4040
Just unbolt the drum trailing arm and bolt up the disc trailing arm.
Oh and you missed changing the proportioning valve. 4040
Thread Starter
Honda-Tech Member
Joined: Sep 2006
Posts: 7,709
Likes: 12
From: NoRthERn Cali
no i didnt miss it cuz he didnt have it. lol. how did u undo the e-brake cables without touching the tank? im gonna be doin the rear brakes on my hatch in couple of weeks. im curious cuz when i did my crx i had to move the tanks also.
Honda-Tech Member
Joined: Jul 2003
Posts: 9,638
Likes: 1
From: Near Charlotte
<TABLE WIDTH="90%" CELLSPACING=0 CELLPADDING=0 ALIGN=CENTER><TR><TD>Quote, originally posted by crx_si-r »</TD></TR><TR><TD CLASS="quote">no i didnt miss it cuz he didnt have it. lol. how did u undo the e-brake cables without touching the tank? im gonna be doin the rear brakes on my hatch in couple of weeks. im curious cuz when i did my crx i had to move the tanks also.</TD></TR></TABLE>
The bolts in front of the tank can be taken out with a wrench. As the bolts approach there last thread they can be take out over the top of the lip on the tank. You will need your fingers to do this. It just saves a lot of hassle that is associated with dropping the tank.
The bolts then go back in the exact same way.
Honda-Tech Member
Joined: Sep 2004
Posts: 685
Likes: 0
From: NJ, USA
<TABLE WIDTH="90%" CELLSPACING=0 CELLPADDING=0 ALIGN=CENTER><TR><TD>Quote, originally posted by crx_si-r »</TD></TR><TR><TD CLASS="quote"> how did u undo the e-brake cables without touching the tank?</TD></TR></TABLE>
i pulled like wholy hell 
i pulled like wholy hell
<TABLE WIDTH="90%" CELLSPACING=0 CELLPADDING=0 ALIGN=CENTER><TR><TD>Quote, originally posted by Super79Dave »</TD></TR><TR><TD CLASS="quote">Yep me too didn't have to drop the tank at all. No interference at all.
Just unbolt the drum trailing arm and bolt up the disc trailing arm.
Oh and you missed changing the proportioning valve. 4040</TD></TR></TABLE> Can you or someone pleae corlaborate more on this please...
Just unbolt the drum trailing arm and bolt up the disc trailing arm.
Oh and you missed changing the proportioning valve. 4040</TD></TR></TABLE> Can you or someone pleae corlaborate more on this please...
Honda-Tech Member
Joined: Oct 2004
Posts: 4,915
Likes: 1
From: jimmysville VT,, NY, USA
You definitely do not have to drop the tank. all bolts can be accessed with an open end wrench its tight but it can be done pretty easy. And you do not need the 40/40 valve to function properly. Im using the stock valve and prefer the bias compared to the 40/40 valve
Thread Starter
Honda-Tech Member
Joined: Sep 2006
Posts: 7,709
Likes: 12
From: NoRthERn Cali
yea im runnin the stock prop valve. i dunno i just never thought of squeezing my hands in between there. but now i know. so it will make my conversion that much easier when i do my hatch. thanks for the help and helping me see things a bit clearer now.
Honda-Tech Member
Joined: Jan 2002
Posts: 26,519
Likes: 3
From: Los Angeles, CA, USA
<TABLE WIDTH="90%" CELLSPACING=0 CELLPADDING=0 ALIGN=CENTER><TR><TD>Quote, originally posted by ED9man »</TD></TR><TR><TD CLASS="quote">I didn't have to touch the tank on my CRX, maybe the hatch is different.</TD></TR></TABLE>
That's what I was going to say!
That's what I was going to say!
Honda-Tech Member
Joined: Feb 2006
Posts: 392
Likes: 0
From: Honolulu, HI, USA
BTW for the guy asking about the 88 struts...you will either have to replace them or find rear trailing arms that are the same setup for the struts with a bolt through and not the fork over. 90-91 CRXsi/Civic si trailing arms use that different mounting. 
Honda-Tech Member
Joined: Apr 2002
Posts: 18,961
Likes: 76
From: I am Tyson
yeah i dont see the point of touching anything with the fuel lines or draining the tank.
but A for effort and clear pics with highlights to what youre talking about.
you also forgot to mention to tighten the bolts AT RIDE HEIGHT. which means jacking up the suspension so all the weight is on that corner before tightening all the suspension parts. it saves bushings.
and dont forget to get the wheels ALIGNED. it saves TIRES.
Honda-Tech Member
Joined: Apr 2005
Posts: 2,679
Likes: 2
From: Where the wild things are in, NY, United States of America
NYET! use DA trailing arms and brakes. And also, i didn't have to touch my tank what so ever on my 91 sedan... as far as I'm concerned the only aligning I needed done afterwards was a rear toe setting..just my .02
on the nice write up tho.
on the nice write up tho.