

danteisme's 1996 DB8-Found and Rebuild Thread

Thread Starter


Joined: Jul 2003
Posts: 3,254
Likes: 48
From: South Western PA
So i was browsing Craiglist the other day for teg parts (because i do that often lol) and i came across some floormats. After i contacted the owner of the ad, i realized the area code looked way off. Somehow, i jumped over to the harrisburg CL. After talking to the guy, he agreed he would ship them to me. Now, these are for a coupe, so they dont fit perfect but they do fit quite well. Best part, they are brand new. I mean, look at the rubber backing, no wear dirt or anything else. Well worth the $50!


Thread Starter
Joined: Jul 2003
Posts: 3,254
Likes: 48
From: South Western PA
Nother nother update....got some work in on the car this weekend.
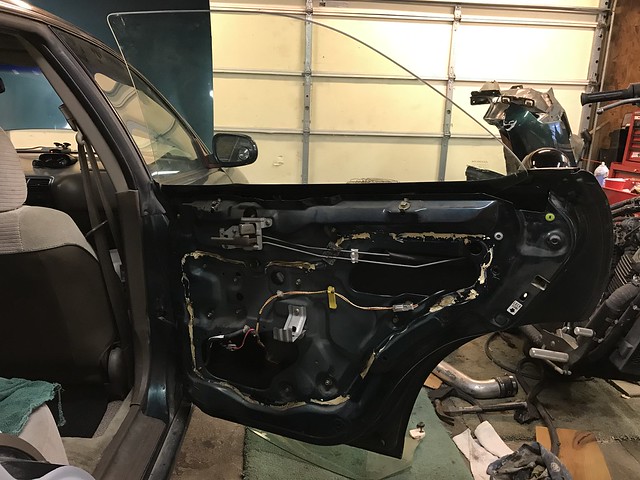
i jumped to the rear window motors because they are dead as door nails. I also turned my attention to addressing some of the trim and replacing the destroyed weather stripping around the door. Here are some pics:


I'll be making a new moisture barrier for the door after i'm all done.

Also replacing my scratched up door glass with some non scratched up door glass (still oem glass).
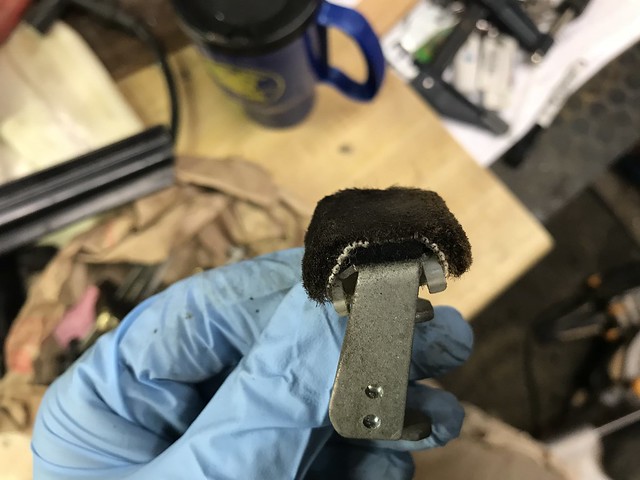
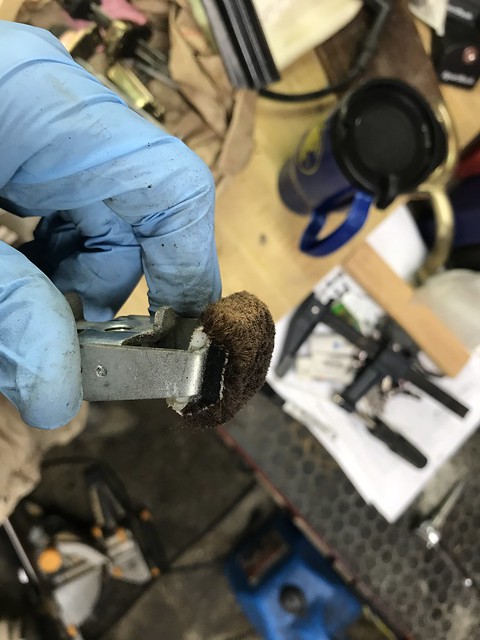
And i found out why my windows are getting all scratched up, check out the back of the lower trim.


The replacement trim is just as bad. I'm having a hard time finding if you can order just these replacement pads from honda. I think i might have found it for the fronts, but i'm not sure about the rear. I'm gonna just order one and see what shows up. If i cant use it on the rear, any ideas on what i can use the cover these up so the glass slides on something other than metal??
Here is what i found on acura's breakdown


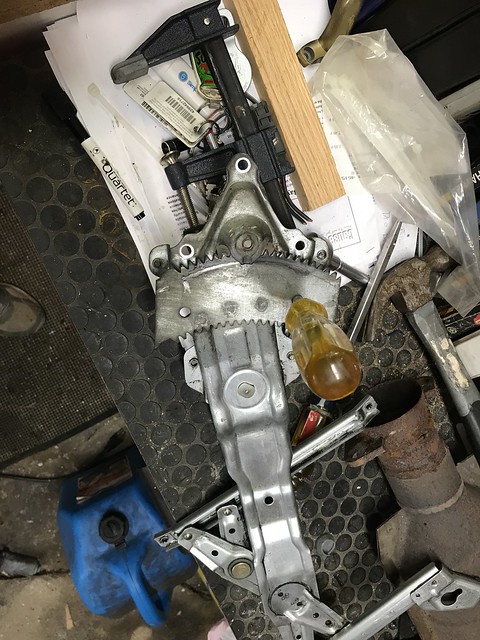
Window regulator out, cleaned up and re-greased. They leave out an important step in the manual, unless i completely missed it. These things are super spring loaded lol i pinched my fingers between the gears when i removed the old window motor.

i also replaced these in the door, mine were pretty worn and the set i got from the junkard were a little bit better. I fluffed up the fabric with a nylon brush before reinstalling.
i'm waiting on re-installing everything until i figure out a good solution to keep the glass off of those metal portions that used to have the pad to slide on, but its still progress.
i jumped to the rear window motors because they are dead as door nails. I also turned my attention to addressing some of the trim and replacing the destroyed weather stripping around the door. Here are some pics:
I'll be making a new moisture barrier for the door after i'm all done.
Also replacing my scratched up door glass with some non scratched up door glass (still oem glass).
And i found out why my windows are getting all scratched up, check out the back of the lower trim.
The replacement trim is just as bad. I'm having a hard time finding if you can order just these replacement pads from honda. I think i might have found it for the fronts, but i'm not sure about the rear. I'm gonna just order one and see what shows up. If i cant use it on the rear, any ideas on what i can use the cover these up so the glass slides on something other than metal??
Here is what i found on acura's breakdown
Window regulator out, cleaned up and re-greased. They leave out an important step in the manual, unless i completely missed it. These things are super spring loaded lol i pinched my fingers between the gears when i removed the old window motor.
i also replaced these in the door, mine were pretty worn and the set i got from the junkard were a little bit better. I fluffed up the fabric with a nylon brush before reinstalling.
i'm waiting on re-installing everything until i figure out a good solution to keep the glass off of those metal portions that used to have the pad to slide on, but its still progress.
Honda-Tech Member
iTrader: (1)
Joined: Aug 2003
Posts: 7,616
Likes: 1
From: Left Coast : High Altitude, Top Floor
Glass Setting Tape & Liners - Page 1 - Restoration Specialties and Supply, Inc.
Check out the moleskin and the black wool felt liners in the glass setting tape / liners section.

Thread Starter
Joined: Jul 2003
Posts: 3,254
Likes: 48
From: South Western PA
Dude yes! This is exactly what i was looking for! I was googling all of the wrong words to try and find this stuff lol
 Glad I could help....
Thread Starter
Joined: Jul 2003
Posts: 3,254
Likes: 48
From: South Western PA
I have some small updates from the weekend's work.
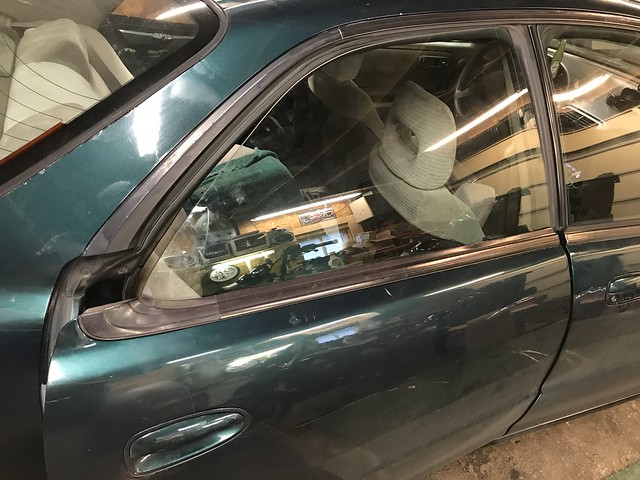
Passenger rear door is done minus the vapor barrier and the door panel. New to me door glass is in, the new motor moves that thing so fast lol. Glass all aligned correctly and didnt hear any issues. Also replaced the window trim piece with one that was much better looking than the one that was on there.
I also changed out the door's weather stripping with again the new to me weather stripping. Mine had a couple of tears at the bottom of the door and the replacements were solid.
I also cleaned out the door checks on both doors, the doors now open smoothly and easily. Before, it felt like i was dragging the doors across something.
While i was working on the driver's side, i noticed something about the felt pads on the window rides on. I initially thought the felt was worn away on a few of these, turns out it was just that dirty and matted down.
Before (not the best example, others were way worse but i had already cleaned them by the time i decided to take a picture)
After about 2 minutes with a nylon brush
All of the extras all cleaned up too
Unless i missed it in the manual, they dont really list a good method on removing the window motor from the regulator. And it is spring loaded as i found out with the first one, not sure why i didnt think of that but it scared the crap out of me when **** when flying. So here is the method i used to keep everything aligned while changing out the motor.
Motor and regulator back in the door.
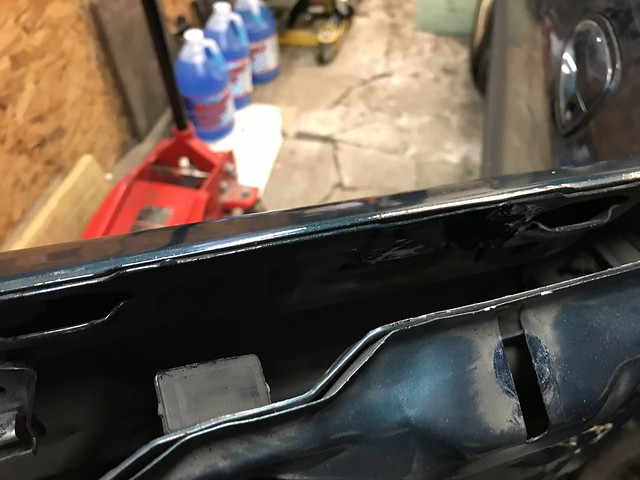
I didnt put the new glass back in yet, i found a couple of rust spots where the door trim sat that i wanted to treat before i put the glass back in. Hard to see, but i sanded the rust down and put 2 coats of chassis saver in the spots.
Once the new glass is installed, i'll do the front 2. Hopefully that goes just as smooth as the rears, then after i'm done with the doors i'll move back up to the front of the car and work on swapping out that core support. Stay tuned!
Passenger rear door is done minus the vapor barrier and the door panel. New to me door glass is in, the new motor moves that thing so fast lol. Glass all aligned correctly and didnt hear any issues. Also replaced the window trim piece with one that was much better looking than the one that was on there.
I also changed out the door's weather stripping with again the new to me weather stripping. Mine had a couple of tears at the bottom of the door and the replacements were solid.
I also cleaned out the door checks on both doors, the doors now open smoothly and easily. Before, it felt like i was dragging the doors across something.
While i was working on the driver's side, i noticed something about the felt pads on the window rides on. I initially thought the felt was worn away on a few of these, turns out it was just that dirty and matted down.
Before (not the best example, others were way worse but i had already cleaned them by the time i decided to take a picture)
After about 2 minutes with a nylon brush
All of the extras all cleaned up too

Unless i missed it in the manual, they dont really list a good method on removing the window motor from the regulator. And it is spring loaded as i found out with the first one, not sure why i didnt think of that but it scared the crap out of me when **** when flying. So here is the method i used to keep everything aligned while changing out the motor.
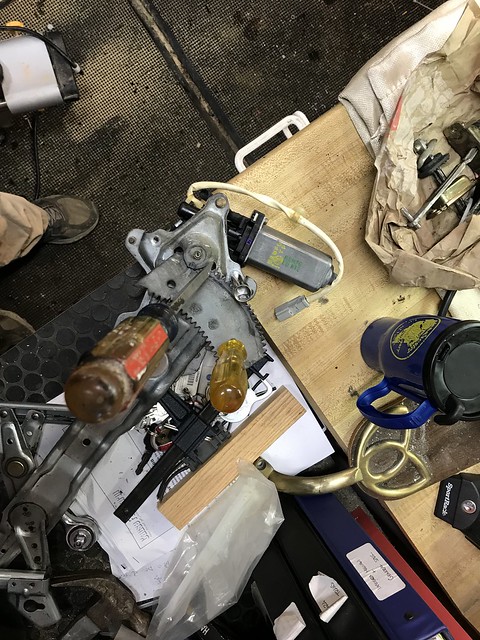
Motor and regulator back in the door.
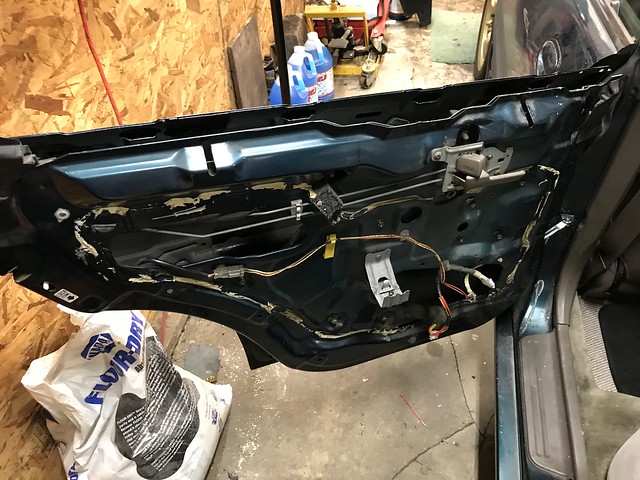
I didnt put the new glass back in yet, i found a couple of rust spots where the door trim sat that i wanted to treat before i put the glass back in. Hard to see, but i sanded the rust down and put 2 coats of chassis saver in the spots.
Once the new glass is installed, i'll do the front 2. Hopefully that goes just as smooth as the rears, then after i'm done with the doors i'll move back up to the front of the car and work on swapping out that core support. Stay tuned!
Thread Starter
Joined: Jul 2003
Posts: 3,254
Likes: 48
From: South Western PA
Its so true, this will be so much better than me having to hold down the window switch while pushing (or pulling) the glass to get it to go up or down lol

Thread Starter
Joined: Jul 2003
Posts: 3,254
Likes: 48
From: South Western PA
I lucked out and got the pieces in the same spot they were originally. On this side anyways, i wont know if i got the other side right until i get the glass in there and try it. Fingers crossed!
Honda-Tech Member
iTrader: (1)
Joined: Aug 2003
Posts: 7,616
Likes: 1
From: Left Coast : High Altitude, Top Floor
Must be luck. I even marked the original positions of the stoppers/guides...didn't even matter. lol. I'll get it right when I start playing around with the DB again.
Thread Starter
Joined: Jul 2003
Posts: 3,254
Likes: 48
From: South Western PA
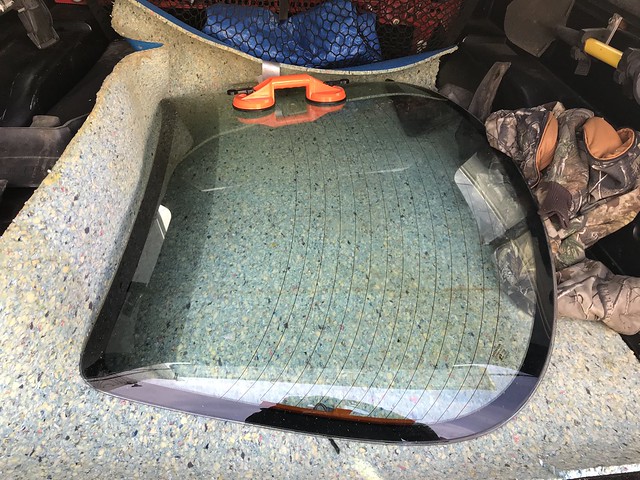
i used a combination of a couple of tools.
This tool worked awesome where it could, but that ended up only being along the bottom. It cut through the entire bottom adhesive in less than a minute.
https://www.harborfreight.com/windsh...ool-60298.html
There wasnt quite enough room to fish it in where i needed along the sides and the top.
This worked everywhere else.
https://www.harborfreight.com/profes...kit-96339.html
i bought a kit that had real basic piano wire, but that kept breaking. This braided stuff was a miracle. I sawed through that adhesive on the three sides of this windshield in no time at all.
Thread Starter
Joined: Jul 2003
Posts: 3,254
Likes: 48
From: South Western PA
yeah i see what you mean now. I didnt think about it until yesterday. Both rears are done and all aligned exactly how they were. The manual says to mark reference points for the front so you align it up correctly again. Well, how does one do that if when you replace the front window motors and regulators since they are all one piece? You are removing and replacing your reference points for the glass alignment...unless i am missing something? So the fronts seem like they will be trickier. Got the one side disassembled, hopefully will re-assemble soon. The door glass gave me a heck of a time coming out. The manual said to remove the glass stoppers (on the glass itself) so you can slide the glass out. I tried loosening the bolt, but once it broke loose it just kept spinning.
Honda-Tech Member
iTrader: (1)
Joined: Aug 2003
Posts: 7,616
Likes: 1
From: Left Coast : High Altitude, Top Floor
yeah i see what you mean now. I didnt think about it until yesterday. Both rears are done and all aligned exactly how they were. The manual says to mark reference points for the front so you align it up correctly again. Well, how does one do that if when you replace the front window motors and regulators since they are all one piece? You are removing and replacing your reference points for the glass alignment...unless i am missing something? So the fronts seem like they will be trickier. Got the one side disassembled, hopefully will re-assemble soon. The door glass gave me a heck of a time coming out. The manual said to remove the glass stoppers (on the glass itself) so you can slide the glass out. I tried loosening the bolt, but once it broke loose it just kept spinning.

Thread Starter
Joined: Jul 2003
Posts: 3,254
Likes: 48
From: South Western PA
well that's annoying, unless i missed a step the manual says to remove those first. Can you even get to the rear bolt in the door so you can use a couple of wrenches on that?
Honda-Tech Member
iTrader: (1)
Joined: Aug 2003
Posts: 7,616
Likes: 1
From: Left Coast : High Altitude, Top Floor

Thread Starter
Joined: Jul 2003
Posts: 3,254
Likes: 48
From: South Western PA
Ah i see what you're talkin about now, i'm picking up what you're putting down lol
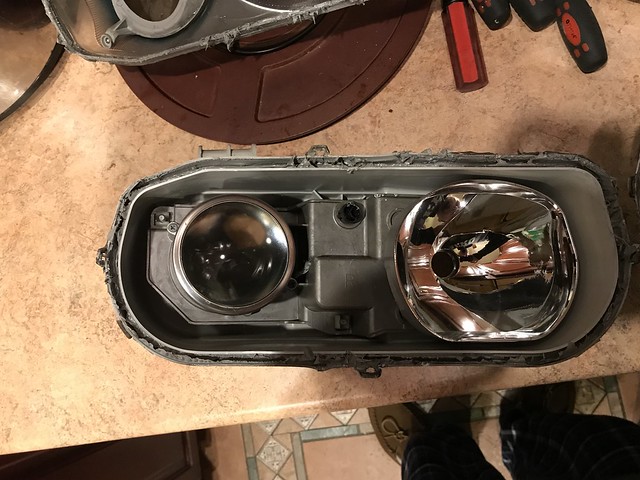
Last night i decided to separate my extra set of headlights so i can practice my cutting etc.. for my S2000 retrofit project.
The first one was good.
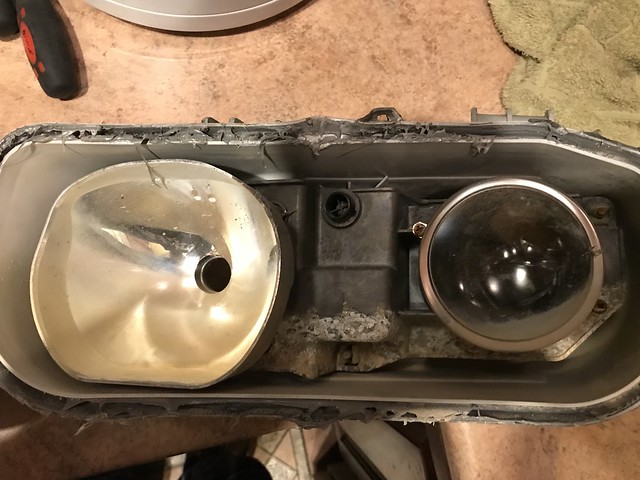
The other side is junk, looks like its been leaking for a while and just ruined the high beam shield and the mounting bracket itself.
so i have one i can practice with for now, i think i have one other extra headlight assembly, but i cant remember what side of the car its for.
Last night i decided to separate my extra set of headlights so i can practice my cutting etc.. for my S2000 retrofit project.
The first one was good.
The other side is junk, looks like its been leaking for a while and just ruined the high beam shield and the mounting bracket itself.
so i have one i can practice with for now, i think i have one other extra headlight assembly, but i cant remember what side of the car its for.
Looks to me like most of the gunk on the bracket could be removed with a wire brush (or failing that, bead blasting), so you can still do the retrofit on that bracket then just swap it into the good housing that's on the car when you finish with it. The high beam reflector is very easy to remove and swap, just three phillips screws on the back of the bracket and it's a good idea to remove it while working anyways to keep it from getting damaged.
And also, do not touch the reflective surface on the high beam bowl, not even a little bit with a microfiber towel, it scratches and scuffs VERY easily. Pretty much all you can do without hurting it is blow it with compressed air.
And also, do not touch the reflective surface on the high beam bowl, not even a little bit with a microfiber towel, it scratches and scuffs VERY easily. Pretty much all you can do without hurting it is blow it with compressed air.