When you click on links to various merchants on this site and make a purchase, this can result in this site earning a commission. Affiliate programs and affiliations include, but are not limited to, the eBay Partner Network.
Use a small flathead screwdriver and push the metal clip holding the plug on the injector outward, slowly wiggle the injector out being sure that both sides of the metal clip clear the plastic tabs on the injector. Looks great, subscribed!
Thanks for the advice. I'm going to have to try that this weekend. Everything is wrapped up in a plastic bag and off to the side at the moment.
[SIZE="5"]Question[/SIZE]
Would the reason for the gunk in my intake plenums be a result of worn valve guides? I was getting some smoke when VTEC engaged while the engine was running and I was told that worn valve guides was the common reason.
Number 4 Intake Plenum
Picture taken with a Nikon Coolpix S3100 using the Macro Scene setting.
[SIZE="6"]Answer:[/SIZE] No. It's from the Positive Crankcase Ventilation (PCV) system. When the pressure is being vented from the block due to blow by around the piston rings, oil vapors are entrained in the gases of incomplete combustion and routed back into the intake system to improve vehicle emissions. Please read more on the PCV system here: Link 1 and 2
Last edited by CX-Adam; 01-02-2017 at 03:53 PM.
Reason: Linked to answer
I was able to drain the engine oil after some jury rigging. I wish I had done this prior to pulling the engine but, you know the saying. “The most valuable thing you can make is a mistake. You can’t learn anything from being perfect” ~ Adam Osborne (or whatever version you may have read).
The transmission is ready to come off but I decided I didn't want to try it by myself. I'll wait until tomorrow or this weekend.
I also pulled the:
Distributor
VTEC Solenoid
PCV Unit
and other bits.
Also, I've been taking my time and labeling everything in plastic sandwich bags.
Well, the car has been sitting. Like many of you, other projects around the house and work have been beating me down and the car project has dropped down on the list of importance.
However, I have made some progress.
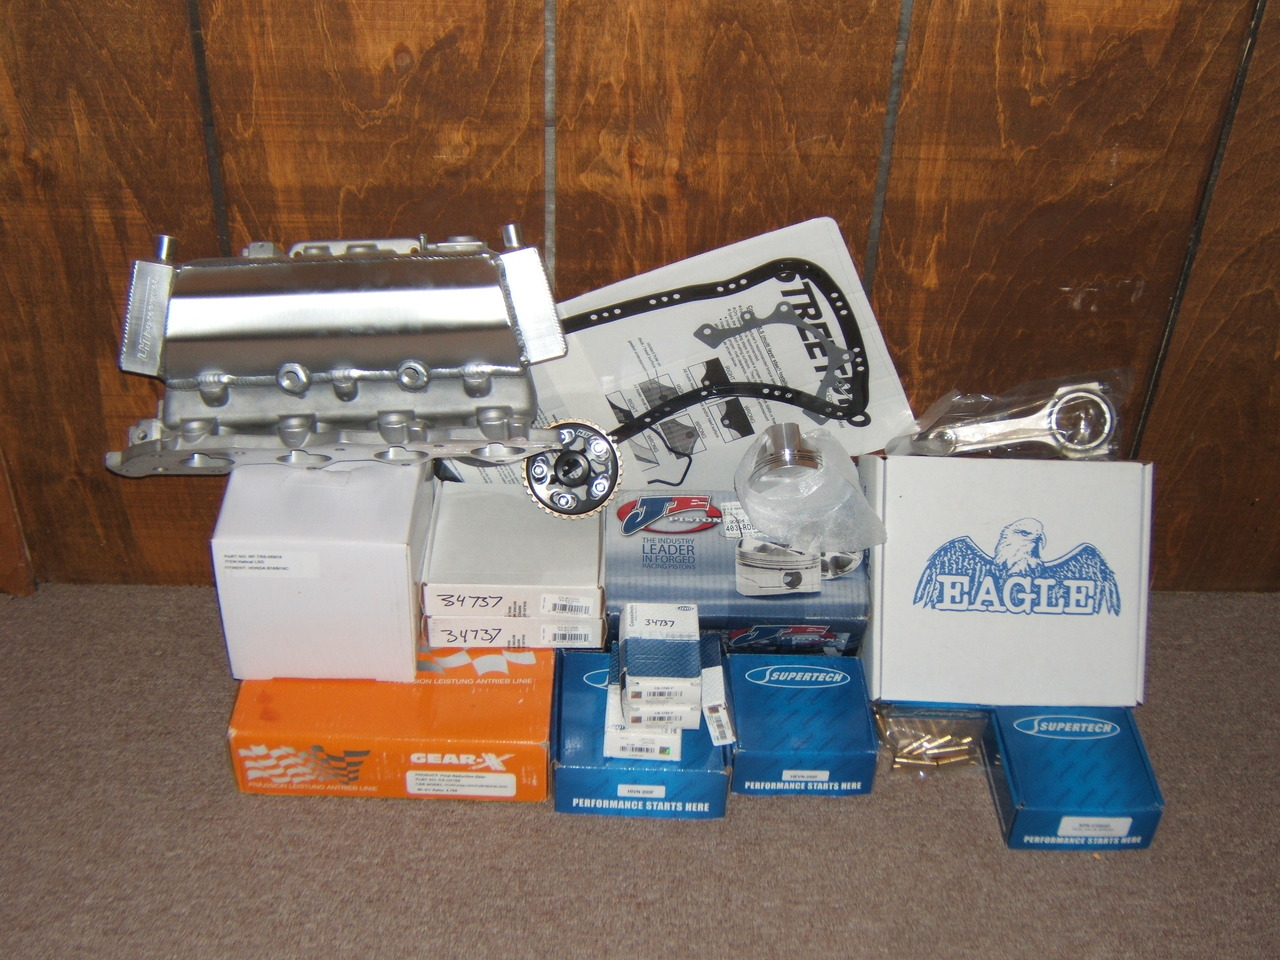
I purchased everything I need for the Transmission. Hopefully I will be able to begin reassembling this week.
As for the engine, I'll be meeting with a machinist this week to discuss the work that I want to get done. To prepare, I've finished disassembling the block. Nothing new for you hardcore veterans of engine building and nothing flashy or anodized for the people who come to enjoy pictures. Sorry.
I've attached a bunch of images.
The first two are of my bare(ish) block and the best tool any Honda engine builder can own. I don't know what it's called and I had to borrow it from a friend but I'll refer to it as the the crank pulley tool.
The next two are of my P72 head: Cylinders 3 & 4, Cylinders 1 & 2.
The next three are of my Block: Cylinder 1, Cylinder 2, Cylinders 3 & 4.
EVERYTHING has been labeled. Every wiring harness plug, every bolt, every nut. Tapped together or in a sandwich baggy. I won't remember what these are but I can read and write.
Camshafts stored on end and wrapped in oil.
Chipped crank pulley.
Nah. The pictures may look bad but the pistons and cylinder walls are in great condition. There appears to be no tapper. If there's any at all, it's minimal. The flaking carbon build up on the pistons is most likely because some moisture got into the cylinder while the engine was sitting. The fact that there's any sludge in the cylinder at all probably means everything is a little worn down. I didn't see any one glaring problem. It was smoking while running but new valve guides, a 3-angle valve job, and new piston rings should correct the smoking. Everything looked really clean under the valve cover and the oil pan. Minimal sludge buildup and no metal chunks. The cams appear to be in great condition. I was really happy with the condition of the engine.
Solved See bottom of post for links to responses from fellow HT members.
I'm having problems spec'ing my internal engine components. I'm waffling on my piston selection to achieve the static compression I'm looking for. I've been doing a lot of reading on piston selection with respect to static/dynamic compression, manufacturing processes, and combustion characteristics. There's a ton of good information out there and I've provided some links at the bottom to stuff I've read.
Maybe you, the reader of this post, can point out a key piece of information that I'm missing when I look at the information the manufacturers provide.
I've read a lot of what a fellow Honda-Tech memeber, Veris, has to say with respect to engine dynamics when building an engine utilizing a Jackson Racing Super Charger (JRSC). Most of my reading has been through this thread "What JRSC Setup are you Running" and from his website "FTL Racing". I've purchased my JRSC unit and I've already sent it to LHTPerformance for the aftercooler installation which, by the way, looks awesome. Props to them for the quality work and ridiculously fast turn around time. The key items to note that I've picked up on while trying to maximize the output of the JRSC setup are: Reduction of Inlet Air Temperatures (IAT), Minimization of Valve Timing Overlap, and Maximization of Compression.
So, I did what everyone has said and I purchased the LHT aftercooler to reduce IATs and the GSR/ITR intake/exhaust cam combo with adjustable cam gears to tune in the valve timing.
Now, onto my piston selection problem, Veris, seems to have done the most work in determining the "best" configuration. According to this article, a 10.5:1 STATIC compression ratio is optimal. Sounds easy enough to get, right? Well, that's not what I'm finding.
Background
Some basic background information on what I'm doing and why:
I'm not building a race car. I'm building something to be proud of that I can enjoy for a long time. That means that I want to build something that's fast, but easy to drive, and reliable. That being said, here's what I've discussed with the machinist who currently has my B18C1 block and P72 head.
Mild Intake/Exhaust Port match and Polish
Installation of new valvetrain (I've already selected new Supertech guides/70lbs springs/Ti Retainers/Flat Faced Black Nitride Valves (std sized))
3 Angle Valve Job
Micro Polished Crank
Bored to 81.5mm (to ensure near perfect cylinder roundness)
Decked ~0.005in
Head Milled ~0.005"
Inputs
81.5mm Piston Options for Compression Ratio Calculation:
Now, onto the compression calculator: Zeal Autoworks B-Series Compression Calculator
Block: B18C1
Crank: B18C1
Bore: 81.5mm
Stroke: 87.2mm
Deck: 212.39mm
Head: B18C1
Combustion Chamber Volume: 41.6mm (the valve job will increase the volume and the flat face valves will decrease volume. I don't have the head to measure per this article: link. Based on these two articles, the flat faced valves will reduce the chamber volume by 0.7cc Link1Link2)
Piston: Other
Dome: See Above
Comp Height: (30.0mm for all but Wiseco: 29.85mm)
Connecting Rod: B18C1 (137.9/138)
Head Gasket: OEM 3 layer
Thickness: 0.026in
Bore Diff: 0.00mm
Mill+Deck: 0.01in
Max. RPM: 8500mm
Elevation: 579ft
Boost: 9psi (why isn't this psig?)
Results:
JE: 10.05:1 (low)
Wiseco: 9.56:1 (WAY WAY WAY LOW does -4FT not mean -4cc?)
Supertech: 9.94:1 (way low)
Mahle: 10.22:1 (OK)
CP: ???
Endyn: 9.61:1 (WAY WAY low)
Conclusions So, I'm I stuck with something close to the stock GSR Compression Ratio? Should I get a thinner head gasket? Who makes them? Did I use the Zeal calculator incorrectly?
I'll be purchasing the JE pistons and milling the head. I'll also CC my combustion chambers (see link provided above for methodology) to determine the actual CR. Thanks for the help H-T.
Honda-Tech Responses:
Thanks to Veris, MRGRIM, and Garage 808 hatch for helping me pull my head from the clouds.
Originally Posted by MRGRIM
I realy dont understand why your trying so hard to get this comp ratio
as you could use p72-00 piston this would give around 10.7:1
I think Veris description 10.5:1 is to guide people
as to where the middle comfort zone is with compression and the JRSC set up
as a lot of people fall for the ""got boost go low compression like a turbo idea""
Im running 10.8:1 with 9.2 psi soon to be at 13.5 psi
Yes it is a B16B
but lots of people have done this with the ITR motor @11.01:1 with 9psi
and not have any issues
you need to take into account the effective comp ratio 10.7:1 @9psi is 17.00:1
the small amount of increased comp ratio will only add a small amout of performance
but will also not detract from the total performance or longevity of the engine
I would also sudgest you look at the calc and play with the comp ration with your set up you will soon see what the little diffrences are
If you send me a PM with your email i can send you the pdf file as its not on the FTL site
this calc has sea level, comp ratio,and lht adjustments (will talk to Veris about getting it put up)
CX-Adam. who will be tuning your car? what fuel will you be running? What boost level/power level are you trying to achieve?
If you feel you just absolutely HAVE TO HAVE 10.5:1 compression, have the head milled a little bit to make up for the difference. Or just run the Mahles and be done with it.
I also have a degree in mechanical engineering and have taken one basic engine dynamics class as well as several material properties, mechanics, dynamics classes.
Last edited by CX-Adam; 07-18-2012 at 04:44 AM.
Reason: added responses to the original question
very nice work, I see that it has come a long way. Atleast you are doing it nice simple and clean, and not like these stupid stanced out builds with stupid bike racks and other crap. Just dont kill the car with a raspy fart can exhaust. Other than that its really coming along nicely. Your dad is like my dad and is very talented at all kinds of mechanical work!
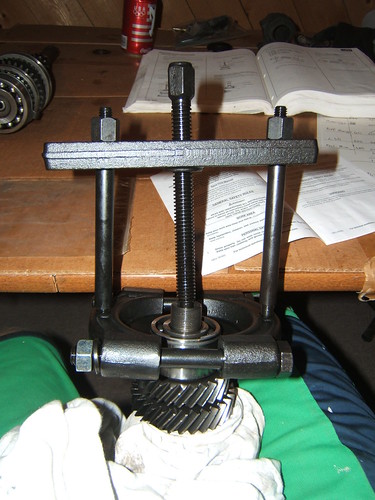
I got some Transmission work done last night. I began to disassembly/reassembly by Counter and Main Shafts. I used the Helms manual for my Y80 transmission. There's a ton of good info out on the web if you don't have one. Here's a good link.
I purchased all new Bearings, Seals, and Carbon Lined Syncros from Gearspeed. I also picked up the MFactory LSD (@ Gearspeed @ MFactory) and the Gear-X 4.785 Final Drive Gear (@ Gearspeed).
I used a bearing puller and a press. Both Purchased from Habor Freight.
Bearing Puller to remove the ball bearing and roller bearing on the Counter Shaft.
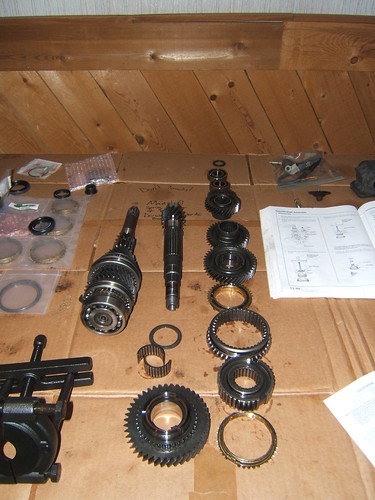
Completely Disassembled Counter Shaft and the Main Shaft (at left)
I got most of my JHPUSA order yesterday. The only thing missing is a back ordered suspension piece that won't hold me up at all. Prompt notification of the back order so I'm not upset in the least bit.
I also got confirmation that my Real Street order is shipping. Thanks to Tommy at Real Street for being helpful and hooking it up. Excellent customer service. Check out their sales threads in H-T's Sponsor Market Place. Best prices I've seen so far. And, use the "talk to a representative" feature on RealStreet's website. It ended up saving me a few bucks.
Well, I finally got off my *** a did a little bit with the car today.
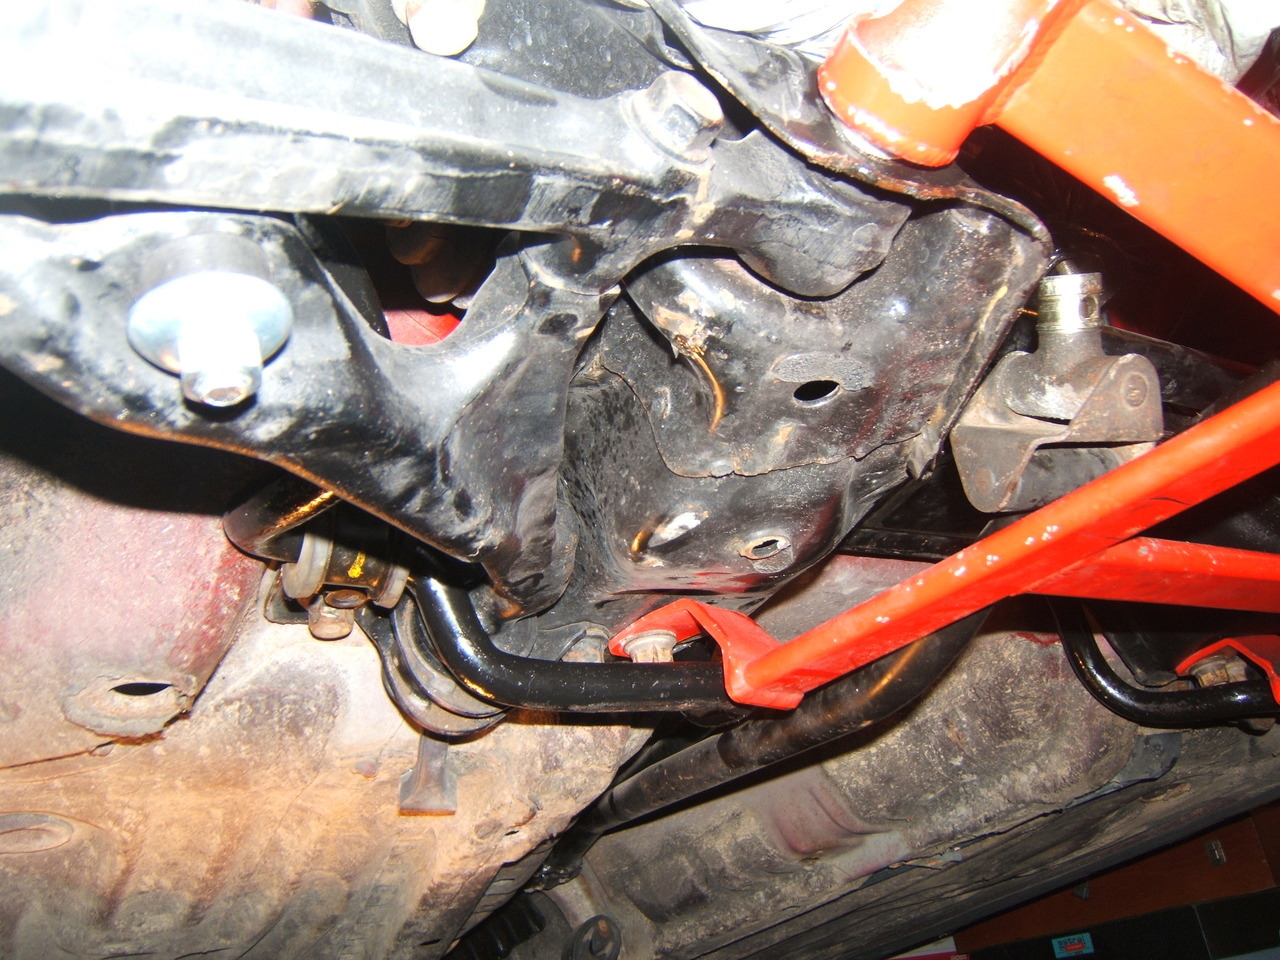
While the engine is out, I figured it'd be a good idea to install my front sway bar. Doing it now is easier than waiting and having to deal with the roll pin in my shift linkage.
But, I DID have to deal with the annoying "H" brace on my engine cradle.
In order to install the bar I had to remove the brace. Which involves two under carrage bolts and the forward most bolts on the front lower control arms. The ones that go through the engine cradle. Once I removed the brace I was able to move the shift linkage out of the way and start fastening the sway bar down. But, the female thread on the engine cradle were too gunked up with POR15 to thread the d-bracket bolts into. Luckily, I was able to borrow an M9 1.25 thread tapper and die. So, I chased the threads with the tapper and everything went together. Here are some HOW-TO writeups I found on the internet: Description, Pictures
I put the H brace back on.
Then I realized I hadn't put the shift linkage back correctly...
I took the H brace off (most of the way) and move the shift linkage.
I put the H brace back on.
Then I realized that one of the axel shafts had slipped and the inner CV was below the brace. I couldn't move it so...
I took the H brace off, adjusted the axle and put the H brace on.
Easy enough, right?
The bushing kit for the end links didn't come with instuctions so I tightened the nut down enough for one full thread to be showing. I figured that'd be tight enough to be safe but not so tight that it causes premature wear of the bushings.
What you need:
Tools for the sway bar:
2 Jack Stands
1 Floor Jack
12 mm socket (either deep well or shallow with a short extension)
1 ratchet (3/8" is fine)
Tools specific to removing the H brace:
18 mm socket (for the engine cradel to FLCA bolts)
19 mm socket
3/8" ratchet
3/8" ratchet extension, short
floor jack
If your engine is in and your shift linkage is connected you will need a punch that is the size of the roll pin and a hammer or c-clamp. With a hammer: writeup. With a C-clamp: writeup.
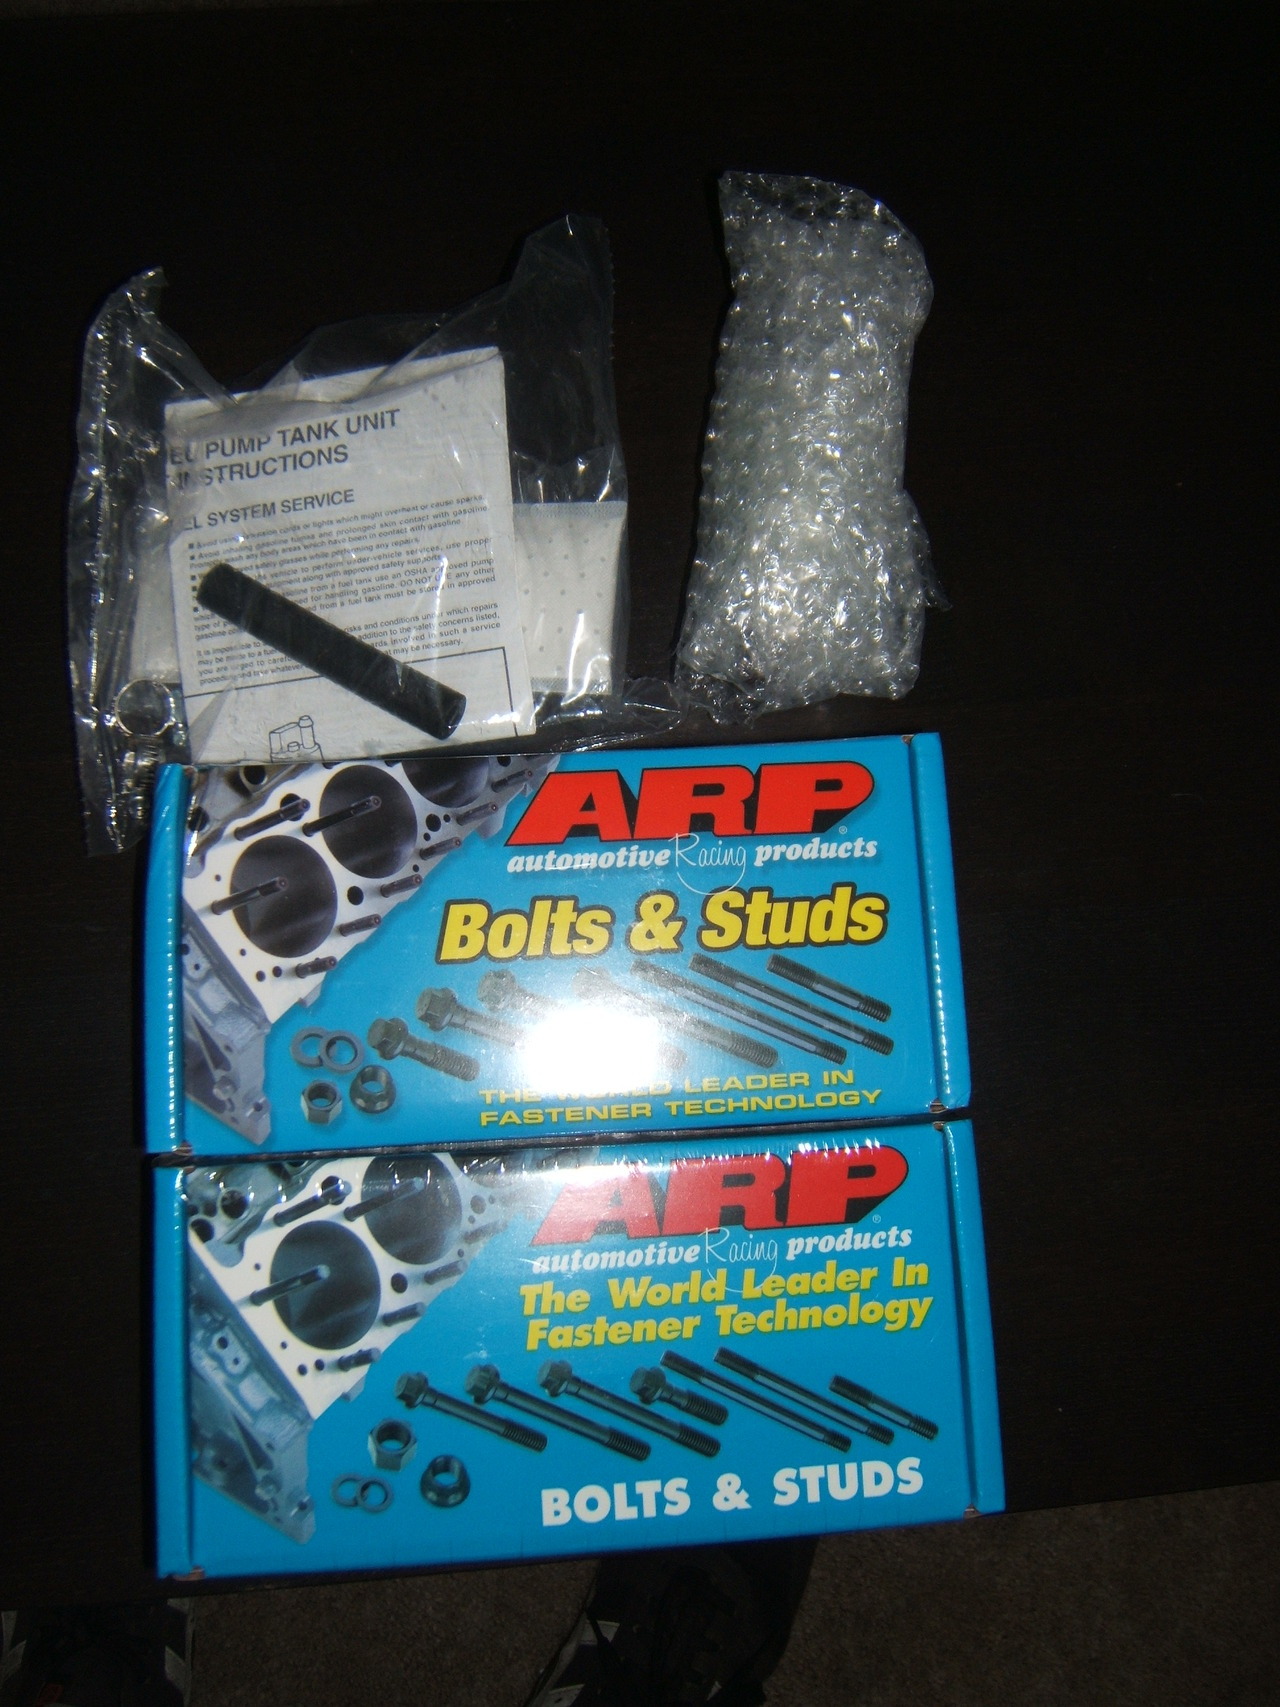
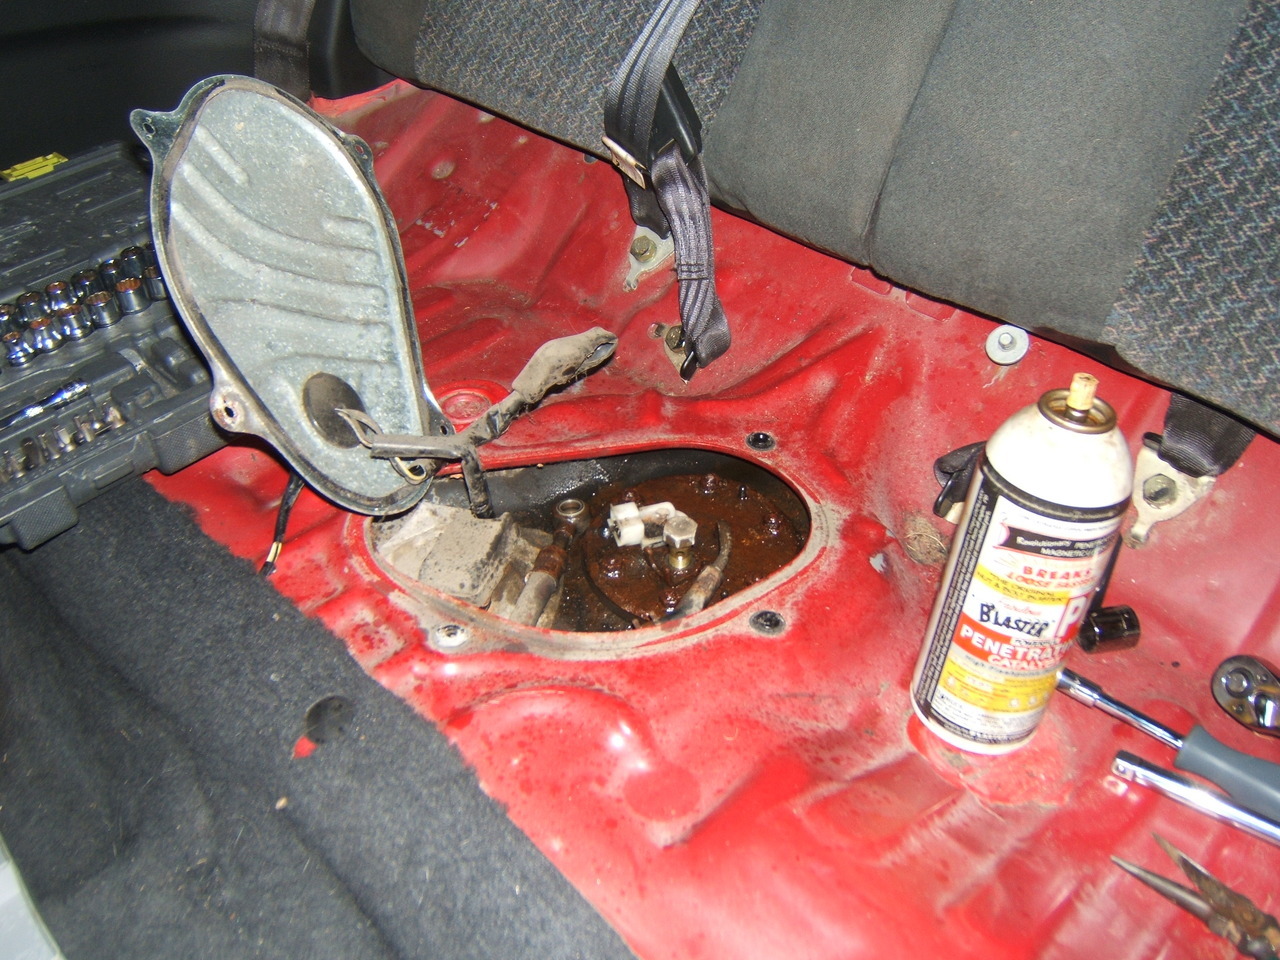
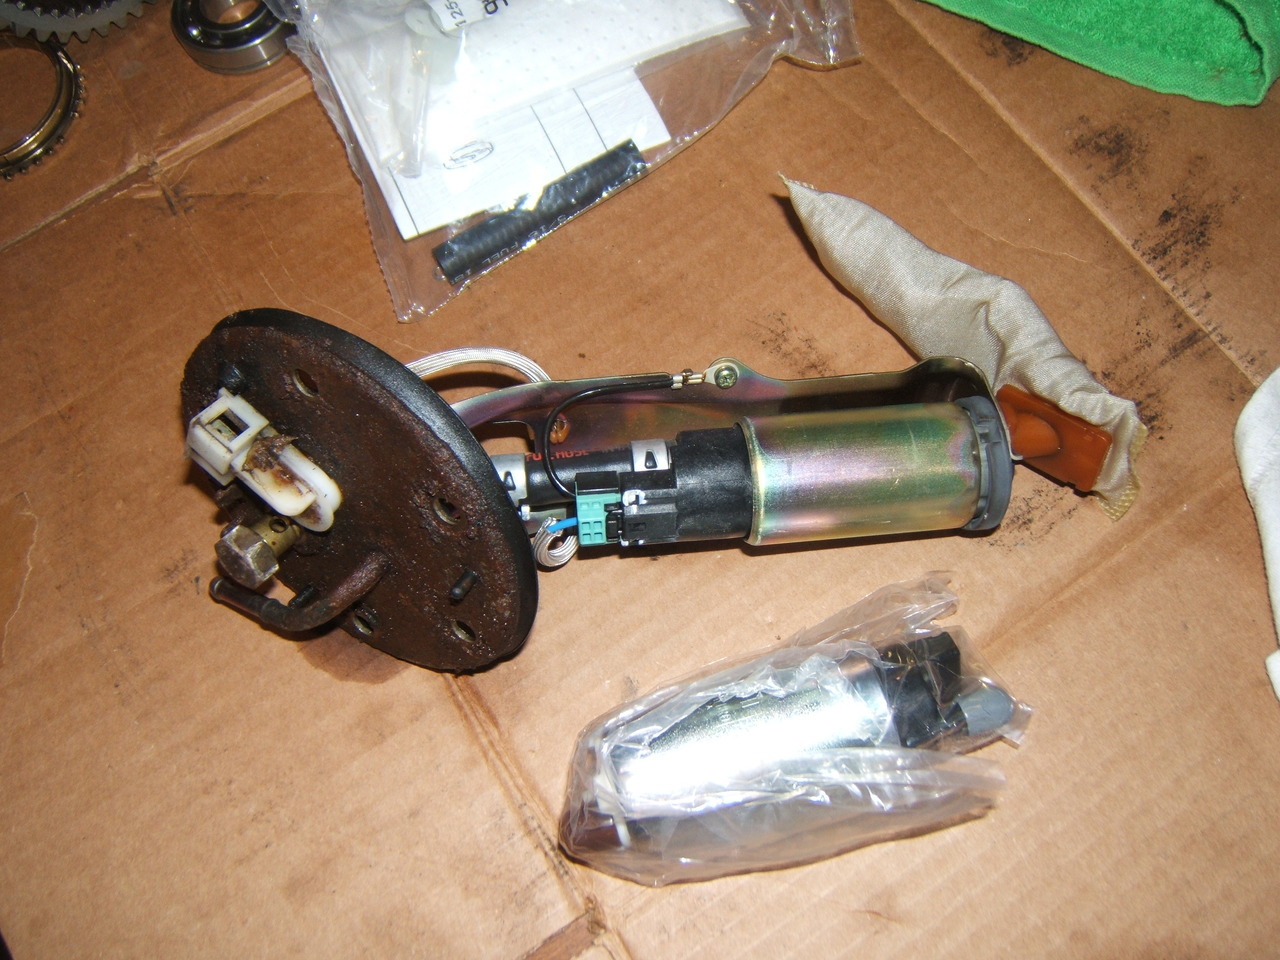
Received my Walbro 255lph fuel pump and my head studs and main studs. I decided to change the fuel pump but ran out of time. All I need to do is trim the replacement hose down a bit and reassemble. All in all the fuel pump replacement is pretty easy. The nuts holding the tank hatch down were rusted as all hell but I soaked them in PB Blaster and used a 9mm 6-point socket to turn them off. I'll need to hit up the hardware store for some new ones before I put everything back together.
I bought the Head Studs, Main Studs, and Fuel Pump Kit from Lightning Motorsports. They had the best prices I could find. Hit up their sales threads in the Performance forum.

 03-13-2012, 07:02 PM