

HOW TO: Construct a simple, cheap, and effective EF catch can.

Thread Starter
Honda-Tech Member
Joined: Jul 2004
Posts: 9,846
Likes: 0
From: VA, USA
This is a How-To for a forced induction catch can to be used mainly on an EF, but I guess it can be applied elsewhere. This is also for a D16A6, not sure if other engines use the same "black box" or not.
<u>Materials from Home Depot:</u>
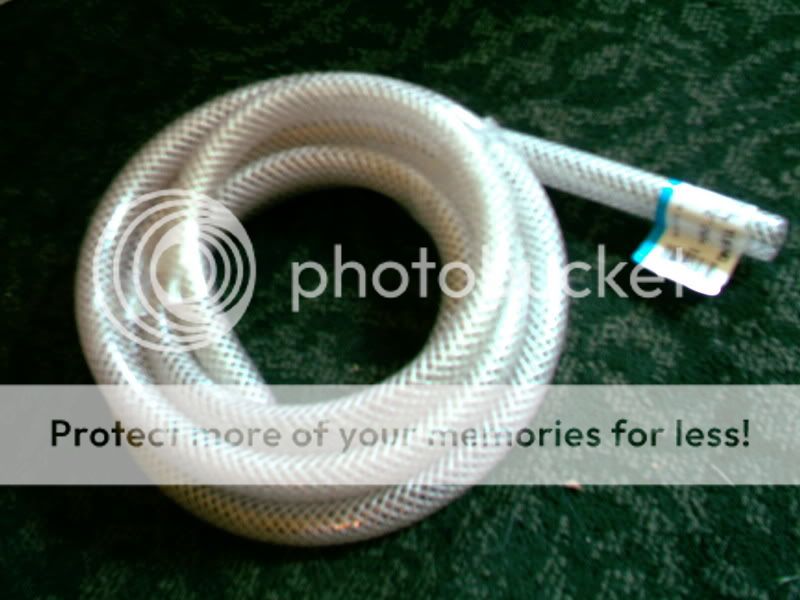
- (x1) 10 ft. length of braided vinyl tubing (3/4" outside diameter x 1/2" inside diameter) <--- Homedepot only sold this in 10 ft. lengths.
- (x3) I.D. Hose Barb to MIP adapter (1/2" x 1/2") <--- I am sure that bulkhead fittings would work better in this situation, but I couldn't find any at the time, plus this is a budget build.

<u>Materials from NAPA:</u>
- (x1) APC intake breather

- (x1) VersaChem Plastic Welding system. <--- I chose this because it said "Perfect for bonding plastic to metal." right on the package.

<u>Materials from junkyard or your random parts pile:</u>
- EF Coolant overflow reservoir

<u>Costs:</u>
Braided Hose: $11
Fittings: $7.50
Overflow reservoir: $4.25 from local junkyard.
APC breather: $10
Plastic Weld: $5
<FONT SIZE="3"><u>Total Cost: $37.75</u></FONT>
-----------------------------------------------------
HOW TO:
1) Begin by cleaning the coolant overflow reservoir. Mine was completely filled with mold, gunk, and old nasty coolant. You don't really want that in your catch can.
Remove the lid and throw away that rubber hose and 90 degree nipple that is stuck to it. You won't need that.
I filled the catch can 1/2 full with bleach and 1/2 full with water and let it soak for a few hours. Then just scrub away with a brush small enough to fit in it. (Simple Green does wonders as well.)
2) Drill two holes in the catch can for the fittings.
The reason why I even chose to use an EF coolant overflow reservoir in the first place is because of ease of mounting it. If you're like me and removed your charcoal canister to allow more space in the engine bay, then the reservoir fits perfectly in it's place! It's a perfect mounting location.
You will want to drill the holes in a spot that won't interfere with mounting or cause a kink in the hose.
I chose to drill here:

Choose a drill bit that is only just smaller than the diameter of the threaded part of the barb. When you push the barb into the catch can, it should be a really tight fit.
If you are using the exact same fittings that I did, use a 3/4" hole saw. It's PERFECT. The fitting basically threads itself in. I used a wrench and just tightened it down.


3) Drill a hole in the lid for the breather filter.
Remove the stock elbow off of the lid, and, using the same drill bit as before, drill a hole in the lid and screw the fitting in.


4) Seal all the fittings.
Take the Plastic Weld and mix a liberal amount on a piece of cardboard. Apply it inside and out all around the fitting. Don't be shy with it! Also, to get a really good seal, put some on the threads of the fitting before you screw it in the drilled hole.
5) Install the breather element.
Simply shove the breather filter onto the barb to let the catch can breathe.

6) Remove the stock PCV system.
Remove the stock PCV valve and the hoses that go along with it. It is pictured here:

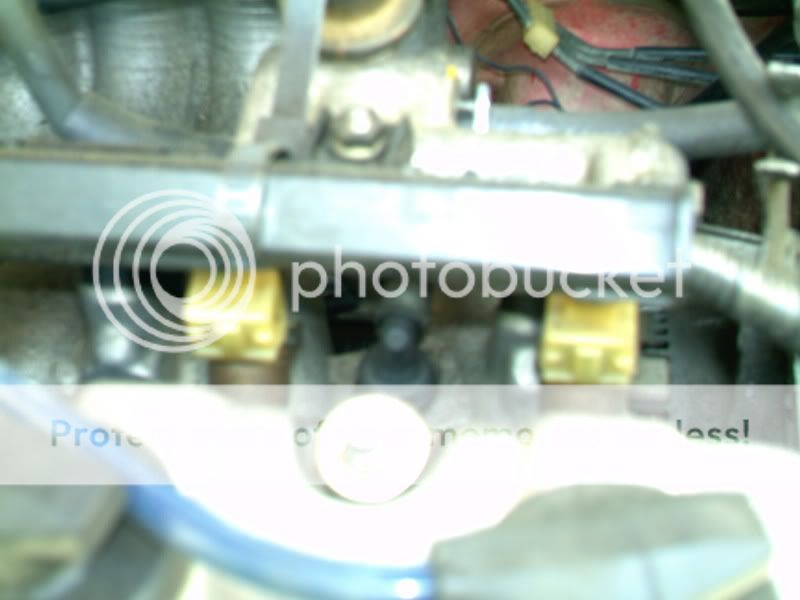
There is one hose that goes to the intake manifold. Just plug the nipple on the intake manifold with a screw or with a vacuum plug. It is the middle hose pictured here:

The other hose goes to the "black box" on the backside of the engine. The "black box" is where your crankcase actually breathes from. If you were to take it off, you can see the hole in the crankcase. Leave the box on as we will actually use it in the catch can, but remove the hose on the nipple of the "black box."

You can see the nipple on the left hand side of the picture.
7) Run the hoses.
Stick the catch can in the charcoal canister slot or wherever you want it, and then run a length of vinyl braided hose coming from the stock valve cover nipple to one of the fittings.
Run another length of braided vinyl hose from the nipple on the "black box" to the other fitting in the catch can.
-----------------------------------------------------
That's it! It may look somewhat goofy and it may not be quite as effective as an expensive Endyn setup or a vacuum assisted system, but it it extremely cheap and easy to use. Another nice thing about it is that since the reservoir is clear, you can see when it is filling up and empty it. Simply unscrew the lid and empty it out!
<u>Materials from Home Depot:</u>
- (x1) 10 ft. length of braided vinyl tubing (3/4" outside diameter x 1/2" inside diameter) <--- Homedepot only sold this in 10 ft. lengths.
- (x3) I.D. Hose Barb to MIP adapter (1/2" x 1/2") <--- I am sure that bulkhead fittings would work better in this situation, but I couldn't find any at the time, plus this is a budget build.
<u>Materials from NAPA:</u>
- (x1) APC intake breather
- (x1) VersaChem Plastic Welding system. <--- I chose this because it said "Perfect for bonding plastic to metal." right on the package.
<u>Materials from junkyard or your random parts pile:</u>
- EF Coolant overflow reservoir
<u>Costs:</u>
Braided Hose: $11
Fittings: $7.50
Overflow reservoir: $4.25 from local junkyard.
APC breather: $10
Plastic Weld: $5
<FONT SIZE="3"><u>Total Cost: $37.75</u></FONT>
-----------------------------------------------------
HOW TO:
1) Begin by cleaning the coolant overflow reservoir. Mine was completely filled with mold, gunk, and old nasty coolant. You don't really want that in your catch can.
Remove the lid and throw away that rubber hose and 90 degree nipple that is stuck to it. You won't need that.
I filled the catch can 1/2 full with bleach and 1/2 full with water and let it soak for a few hours. Then just scrub away with a brush small enough to fit in it. (Simple Green does wonders as well.)
2) Drill two holes in the catch can for the fittings.
The reason why I even chose to use an EF coolant overflow reservoir in the first place is because of ease of mounting it. If you're like me and removed your charcoal canister to allow more space in the engine bay, then the reservoir fits perfectly in it's place! It's a perfect mounting location.
You will want to drill the holes in a spot that won't interfere with mounting or cause a kink in the hose.
I chose to drill here:
Choose a drill bit that is only just smaller than the diameter of the threaded part of the barb. When you push the barb into the catch can, it should be a really tight fit.
If you are using the exact same fittings that I did, use a 3/4" hole saw. It's PERFECT. The fitting basically threads itself in. I used a wrench and just tightened it down.
3) Drill a hole in the lid for the breather filter.
Remove the stock elbow off of the lid, and, using the same drill bit as before, drill a hole in the lid and screw the fitting in.
4) Seal all the fittings.
Take the Plastic Weld and mix a liberal amount on a piece of cardboard. Apply it inside and out all around the fitting. Don't be shy with it! Also, to get a really good seal, put some on the threads of the fitting before you screw it in the drilled hole.
5) Install the breather element.
Simply shove the breather filter onto the barb to let the catch can breathe.
6) Remove the stock PCV system.
Remove the stock PCV valve and the hoses that go along with it. It is pictured here:
There is one hose that goes to the intake manifold. Just plug the nipple on the intake manifold with a screw or with a vacuum plug. It is the middle hose pictured here:
The other hose goes to the "black box" on the backside of the engine. The "black box" is where your crankcase actually breathes from. If you were to take it off, you can see the hole in the crankcase. Leave the box on as we will actually use it in the catch can, but remove the hose on the nipple of the "black box."
You can see the nipple on the left hand side of the picture.
7) Run the hoses.
Stick the catch can in the charcoal canister slot or wherever you want it, and then run a length of vinyl braided hose coming from the stock valve cover nipple to one of the fittings.
Run another length of braided vinyl hose from the nipple on the "black box" to the other fitting in the catch can.
-----------------------------------------------------
That's it! It may look somewhat goofy and it may not be quite as effective as an expensive Endyn setup or a vacuum assisted system, but it it extremely cheap and easy to use. Another nice thing about it is that since the reservoir is clear, you can see when it is filling up and empty it. Simply unscrew the lid and empty it out!
Honda-Tech Member
Joined: Jan 2003
Posts: 808
Likes: 0
From: Eastern Shore, Maryland, usa
nice writeup. all you need now is a valve on the bottom so you can drain it. The other option would be to buy one of those suction tools to get it out from the top when it needs to be emptied.
Thread Starter
Honda-Tech Member
Joined: Jul 2004
Posts: 9,846
Likes: 0
From: VA, USA
<TABLE WIDTH="90%" CELLSPACING=0 CELLPADDING=0 ALIGN=CENTER><TR><TD>Quote, originally posted by chadmasterc »</TD></TR><TR><TD CLASS="quote">nice writeup. all you need now is a valve on the bottom so you can drain it. The other option would be to buy one of those suction tools to get it out from the top when it needs to be emptied.</TD></TR></TABLE>
Unscrew top.
Turn upside down.
Done.
Unscrew top.
Turn upside down.
Done.
Honda-Tech Member
Joined: Feb 2004
Posts: 4,459
Likes: 0
From: Quakertown,pa
<TABLE WIDTH="90%" CELLSPACING=0 CELLPADDING=0 ALIGN=CENTER><TR><TD>Quote, originally posted by Tippyman »</TD></TR><TR><TD CLASS="quote">
Unscrew top.
Turn upside down.
Done.</TD></TR></TABLE>i that's what i was going to say.lol good write up
Unscrew top.
Turn upside down.
Done.</TD></TR></TABLE>i that's what i was going to say.lol good write up
Honda-Tech Member
Joined: Jan 2005
Posts: 7,015
Likes: 7
From: b00sting my D16s, SoWis, USA
<TABLE WIDTH="90%" CELLSPACING=0 CELLPADDING=0 ALIGN=CENTER><TR><TD>Quote, originally posted by Tippyman »</TD></TR><TR><TD CLASS="quote">
Unscrew top.
Turn upside down.
Done.</TD></TR></TABLE>
lol, as they say - when in the ghetto, do as the ghetto does A valve would be 1/3 of the kit alone!
Unscrew top.
Turn upside down.
Done.</TD></TR></TABLE>
lol, as they say - when in the ghetto, do as the ghetto does
A valve would be 1/3 of the kit alone!
Trending Topics
Member
Joined: May 2004
Posts: 2,992
Likes: 0
From: Nashville, TN, U.S.A
Thread Starter
Honda-Tech Member
Joined: Jul 2004
Posts: 9,846
Likes: 0
From: VA, USA
<TABLE WIDTH="90%" CELLSPACING=0 CELLPADDING=0 ALIGN=CENTER><TR><TD>Quote, originally posted by Autoworks »</TD></TR><TR><TD CLASS="quote"> from me.
Now where are you going to put it??</TD></TR></TABLE>
Where the charcoal canister used to be. The coolant resevoir mounts in that slot perfectly with no modification whatsoever. That's the main reason I went with the overflow tank in the first place.
from me.Now where are you going to put it??</TD></TR></TABLE>
Where the charcoal canister used to be. The coolant resevoir mounts in that slot perfectly with no modification whatsoever.
That's the main reason I went with the overflow tank in the first place.
Honda-Tech Member
Joined: Jan 2004
Posts: 11,129
Likes: 36
From: GO AUTOWORKS DOT COM
<TABLE WIDTH="90%" CELLSPACING=0 CELLPADDING=0 ALIGN=CENTER><TR><TD>Quote, originally posted by Tippyman »</TD></TR><TR><TD CLASS="quote">
Where the charcoal canister used to be. The coolant resevoir mounts in that slot perfectly with no modification whatsoever. That's the main reason I went with the overflow tank in the first place.</TD></TR></TABLE>
Really? that's interesting. There's a spot on the firewall as well, next to the fuel filter that looks like the same "bracket"
Where the charcoal canister used to be. The coolant resevoir mounts in that slot perfectly with no modification whatsoever.
That's the main reason I went with the overflow tank in the first place.</TD></TR></TABLE>Really? that's interesting. There's a spot on the firewall as well, next to the fuel filter that looks like the same "bracket"
Thread Starter
Honda-Tech Member
Joined: Jul 2004
Posts: 9,846
Likes: 0
From: VA, USA
<TABLE WIDTH="90%" CELLSPACING=0 CELLPADDING=0 ALIGN=CENTER><TR><TD>Quote, originally posted by Autoworks »</TD></TR><TR><TD CLASS="quote">
Really? that's interesting. There's a spot on the firewall as well, next to the fuel filter that looks like the same "bracket"</TD></TR></TABLE>
Lol, that is the charcoal canister bracket.
Really? that's interesting. There's a spot on the firewall as well, next to the fuel filter that looks like the same "bracket"</TD></TR></TABLE>
Lol, that is the charcoal canister bracket.
Honda-Tech Member
Joined: Jan 2004
Posts: 11,129
Likes: 36
From: GO AUTOWORKS DOT COM
<TABLE WIDTH="90%" CELLSPACING=0 CELLPADDING=0 ALIGN=CENTER><TR><TD>Quote, originally posted by Tippyman »</TD></TR><TR><TD CLASS="quote">
Lol, that is the charcoal canister bracket.</TD></TR></TABLE>
lol...the TheraFlu is kicking my *** right now... I don't even know what I could have thought you were talking about just then...or what I was just thinking about...expletive it nevermind...going to laydown and pray I'm not getting sick
Lol, that is the charcoal canister bracket.</TD></TR></TABLE>
lol...the TheraFlu is kicking my *** right now... I don't even know what I could have thought you were talking about just then...or what I was just thinking about...expletive it nevermind...going to laydown and pray I'm not getting sick
Honda-Tech Member
Joined: Nov 2004
Posts: 931
Likes: 0
From: cortland, ohio, usa
since those filters dont really need clamped, take it off and pull out the rubber piece. trim the part that orginally stuck out then put it inside the filter so the grommet fits around the hole, then just sl;ide the filter over the fittingsome, tada, your filter is no longer sticking an inch above yout can. ive done it to mine, ill take a picture later if anyone cares
Member
Joined: Apr 2002
Posts: 1,029
Likes: 0
From: Dallas, Tx, USA
<TABLE WIDTH="90%" CELLSPACING=0 CELLPADDING=0 ALIGN=CENTER><TR><TD>Quote, originally posted by raiden571 »</TD></TR><TR><TD CLASS="quote">since those filters dont really need clamped, take it off and pull out the rubber piece. trim the part that orginally stuck out then put it inside the filter so the grommet fits around the hole, then just sl;ide the filter over the fittingsome, tada, your filter is no longer sticking an inch above yout can. ive done it to mine, ill take a picture later if anyone cares</TD></TR></TABLE>
i care and i loooooove pictures lol
post up your girlfriend to as she needs evalutation... jk
i care and i loooooove pictures lol
post up your girlfriend to as she needs evalutation... jk
Thread Starter
Honda-Tech Member
Joined: Jul 2004
Posts: 9,846
Likes: 0
From: VA, USA
<TABLE WIDTH="90%" CELLSPACING=0 CELLPADDING=0 ALIGN=CENTER><TR><TD>Quote, originally posted by raiden571 »</TD></TR><TR><TD CLASS="quote">since those filters dont really need clamped, take it off and pull out the rubber piece. trim the part that orginally stuck out then put it inside the filter so the grommet fits around the hole, then just sl;ide the filter over the fittingsome, tada, your filter is no longer sticking an inch above yout can. ive done it to mine, ill take a picture later if anyone cares</TD></TR></TABLE>
That's a good idea. The breather would slide nicely right over the barb. However, to be honest with you, I don't really care how it looks!
That's a good idea. The breather would slide nicely right over the barb. However, to be honest with you, I don't really care how it looks!

Thread
Thread Starter
Forum
Replies
Last Post
Tippyman
Honda CRX / EF Civic (1988 - 1991)
15
May 29, 2007 09:46 PM
civbeater90
Honda CRX / EF Civic (1988 - 1991)
1
Feb 24, 2003 03:30 PM