

Paint Maintenance

98civdx and myself got into a lengthy discussion about paint maintenance, anywhere from wetsanding, cutting and buffing to what type of glazes, sealants, polishes and waxes we use. 98civdx is currently a detailer (professional) and I was a cut/buffer at a body shop for 4 years. 15 years later I'm still into taking care of my paint and correcting any flaws in it.
This thread will be for anyone with questions of how to do something, or experts to share different knowledge/tips of the trade. What waxes do what, what steps are needed to get your paint to look its best etc.
This is Honda Tech after all, maybe we can get some paint tech going in here.
This thread will be for anyone with questions of how to do something, or experts to share different knowledge/tips of the trade. What waxes do what, what steps are needed to get your paint to look its best etc.
This is Honda Tech after all, maybe we can get some paint tech going in here.
Now that I'm not half asleep and have some time I will go over a few things to help your car look better and your paint be healthy.
Washing and drying
99% of light paint scratches come from washing and drying your car incorrectly. Before you wash your car next time, run the back side of your hand lightly on the paint and feel how rough it is. All of those particles you feel is what is scratching your paint every time you wash it.
Sponges and/or Mitts
Always use some form of sponge or a wash mitt, the deeper the compartments in the sponge or mitt the better as they will trap the dirt/contaminants better. Terry cloth towels or even microfiber towels are not porous enough so the dirt/contaminants remain on top of the towel scratching your paint as you are washing. If using natural sea sponges make sure to rinse them out first to ensure there is no sand/grit left inside of them. I personally use a microfiber finger mitt (will show pictures)
USE 2 BUCKETS
One of the biggest mistakes made is only using 1 bucket to wash your car. Have you ever noticed how dirty your water is after washing your car? When the water is that dirty, your sponge or mitt is not getting cleaned properly when rinsing. The 2 bucket technique is super simple and start the paint correction process. 1 bucket of clean water and 1 bucket of your soapy water (NEVER USE DISH SOAP, will go into this later) Get your sponge/mitt soapy and proceed to wash your car, when the sponge/mitt starts to dry out or lose soap, rinse it out in the water only bucket, what this does is remove the dirt first before you reapply the soapy water, it ensures you are not using dirty soapy water to wash your car.
Drying
Towel or chamois? This discussion could go on forever so I'll keep it simple. Microfiber towels are the softest to your paint (a regular bath towel can scratch your paint) but will take longer to dry, a good leather chamois is much faster at drying your car but can drag dirt/contaminants across your paint if you didn't properly wash it (as the chamois isn't that porous)
Here are some pictures of sponges/mitts. The 1st bright yellow sponge is not the best as it is not that porous, in the 2nd picture (brown sponge) you can see how much deeper the sponge compartments are which are better for trapping dirt/contaminants. The 3rd picture is a microfiber mitt (which I use), I feel they are the softest for my paint and provide excellent surface area/compartments for trapping dirt/contaminants.
Here are a couple quick pictures to give you an idea of how much better your paint could look with proper care.
Last edited by TypeRfit; Aug 20, 2013 at 10:00 AM.
And Please, if you have any questions don't be afraid to ask them. No one is going to talk **** that you're trying to take care of your car.
Here is an update from 98civdx on Clay baring.
Here is an update from 98civdx on Clay baring.
Okay, been I've slacking...
Clay baring. ( do this after you wash/dry, or during the process. Wash, clay, dry.)
Clay baring is where you take clay, and a clay lubricant and rub it on the paint surface. This will remove surface contaminants that make the paint feel rough to the touch.
This step can remove road tar, paint overspray and other contaminates.
something to note is clay baring won't always remove everything, there are times where you may need a more aggressive step. (we'll get into this later)
Paint that has been clayed will be smooth to the touch... Example: Smooth as a babies ***.
How to clay?
Step 1: obtain your clay. There are tons of different types of clay, they are basicly all the same. Get whatever is the best deal.
2: Lubricant. This is very important. You need this to properly clay the car.
3: Prep the car.
4: Unwrap the clay and tear a small piece off. You don't need to the hole brick of clay, just a small section. spray some lube on the paint, and the clay.
5: Place the clay on the car and rub back and forth with medium pressure. Start with approximately a 2x2 section. If you feel the clay sticking, spray more lube on it. There is no such thing as too much lube!
6: As soon as you the paint feels smooth to the touch, dry the car off and move to another section.
7: KNEAD THE CLAY. Kneading the clay will get you clean clay for the next section.
8: Repeat steps 5 threw 8 until you have completed the car.
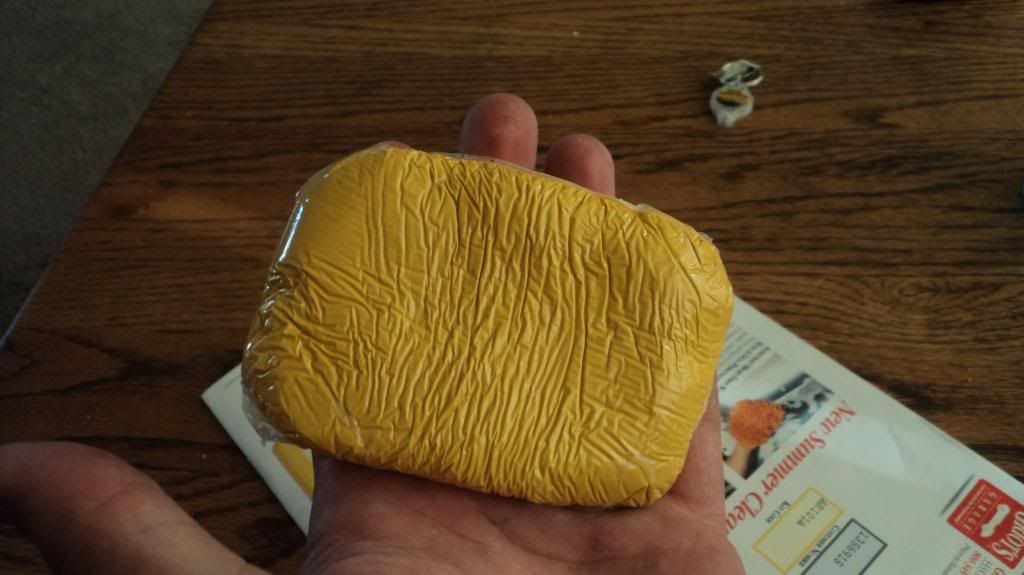
If you've never seen clay before, here's an example. No it's not your kids play doh, leave that in the toy chest. (This is Griots Garage clay)
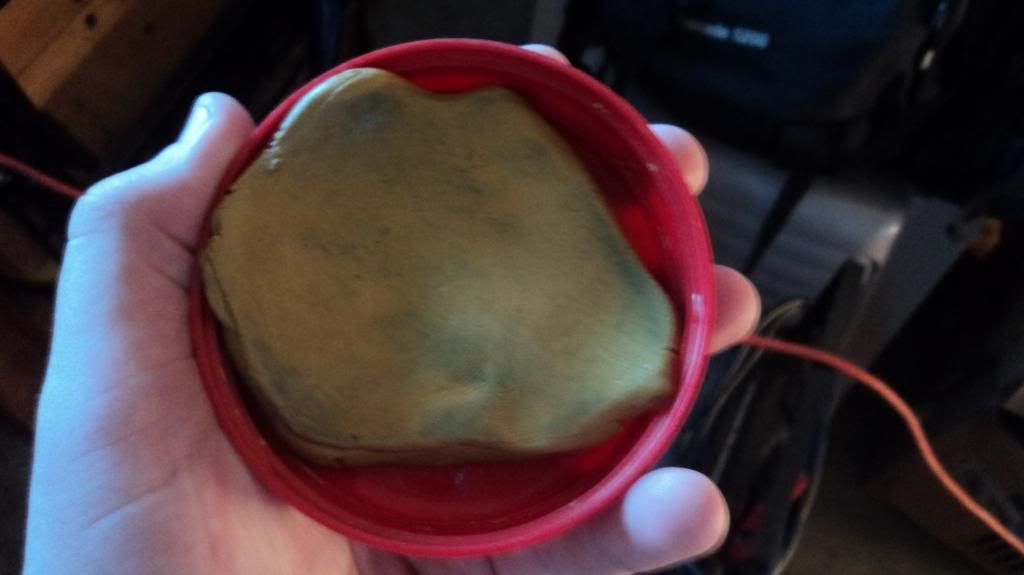
Here's an example what you could possibly see on the clay:
you don't want that!!
Tips: if you drop it, throw it away.
-constantly knead the clay to keep it clean, if it becomes too soiled throw it away and a new piece.
- if you see anything stuck in the clay stop. You don't want to cause damage to the car by dragging crap against the paint.
- Keep it lubed, you NEED lubricant to do this correctly!
When does the car need to be clayed? There is so much discussion on this, and there really is no wrong answer. Some say every time you wax, some every other. Personally I clay my car after winter, and again as needed.
I will be adding pictures of how to clay bar, and any other informations that needs to be added. If you feel I missed something, or need to explain something better let me know!
Clay baring. ( do this after you wash/dry, or during the process. Wash, clay, dry.)
Clay baring is where you take clay, and a clay lubricant and rub it on the paint surface. This will remove surface contaminants that make the paint feel rough to the touch.
This step can remove road tar, paint overspray and other contaminates.
something to note is clay baring won't always remove everything, there are times where you may need a more aggressive step. (we'll get into this later)
Paint that has been clayed will be smooth to the touch... Example: Smooth as a babies ***.
How to clay?
Step 1: obtain your clay. There are tons of different types of clay, they are basicly all the same. Get whatever is the best deal.
2: Lubricant. This is very important. You need this to properly clay the car.
3: Prep the car.
4: Unwrap the clay and tear a small piece off. You don't need to the hole brick of clay, just a small section. spray some lube on the paint, and the clay.
5: Place the clay on the car and rub back and forth with medium pressure. Start with approximately a 2x2 section. If you feel the clay sticking, spray more lube on it. There is no such thing as too much lube!
6: As soon as you the paint feels smooth to the touch, dry the car off and move to another section.
7: KNEAD THE CLAY. Kneading the clay will get you clean clay for the next section.
8: Repeat steps 5 threw 8 until you have completed the car.
If you've never seen clay before, here's an example. No it's not your kids play doh, leave that in the toy chest. (This is Griots Garage clay)

Here's an example what you could possibly see on the clay:
you don't want that!!

Tips: if you drop it, throw it away.
-constantly knead the clay to keep it clean, if it becomes too soiled throw it away and a new piece.
- if you see anything stuck in the clay stop. You don't want to cause damage to the car by dragging crap against the paint.
- Keep it lubed, you NEED lubricant to do this correctly!
When does the car need to be clayed? There is so much discussion on this, and there really is no wrong answer. Some say every time you wax, some every other. Personally I clay my car after winter, and again as needed.
I will be adding pictures of how to clay bar, and any other informations that needs to be added. If you feel I missed something, or need to explain something better let me know!
Last edited by TypeRfit; Aug 20, 2013 at 10:01 AM.
Honda-Tech Member
Joined: Feb 2006
Posts: 3,280
Likes: 1
From: Lebanon, PA, USA
huh never thought about using a second bucket..... I used a seperate bucket for the rims that I do first before the wash...
Ive been doing details on the side to make up for income lost on my other job....
Quick question
Ive notice this on some darker colored cars...
but I just do a hand wax for customers so I dont have to worry about buffing through their paint... And after Im done I get like a glare... its reflexive to the sun and moves with your eyes.. kinda hard to explain.
Could this be from the shitty microfiber pads Ive been using? The rewashable ones..
Do your wheels last, brake dust is no joke. That's the last thing you want on your sponge/mitt (unless you use a separate sponge/mitt for wheels)
Do they look something like this?
Do they look something like this?
Honda-Tech Member
Joined: Feb 2006
Posts: 3,280
Likes: 1
From: Lebanon, PA, USA
I always do them seperate-- the wheels get a bucket and a mit of their own... that water goes flying and spreads the junk...
Thats why I do them first...
Yes, thats just about it... just not as bad-- its usually one big fatty- those give me headaches... looks like theyre hovering above the paint three inches
Thats why I do them first...
Yes, thats just about it... just not as bad-- its usually one big fatty- those give me headaches... looks like theyre hovering above the paint three inches
Trending Topics
I always do them seperate-- the wheels get a bucket and a mit of their own... that water goes flying and spreads the junk...
Thats why I do them first...
Yes, thats just about it... just not as bad-- its usually one big fatty- those give me headaches... looks like theyre hovering above the paint three inches
Thats why I do them first...
Yes, thats just about it... just not as bad-- its usually one big fatty- those give me headaches... looks like theyre hovering above the paint three inches
on the wheels. Just get yourself a 2nd bucket for the paint. Those are swirl marks, pretty simple to get rid of. Depending on what wax you're using it can do that if not completely wiped off. Get yourself a bottle of swirl remover. Steps of cleaning should look something like this (depending on level of correction needed)
1) Wash and Dry
2) Clay bar (if paint feels rough to touch after washing)
3) Rubbing compound (if heavy correction needed, ie, deeper scratches, oxidation etc)
4) Cleaner wax (removes all old wax buildup for your new clean wax)
5) Swirl remover
6) Polish
7) Sealant (can end here if happy with shine, sealant protects for a few months)
7) Carnauba wax of your choice (just remember you get what you pay for, Carnauba wax is what gives you the rich deep paint)

Honda-Tech Member
Joined: Sep 2003
Posts: 7,056
Likes: 0
good thread. been detailing for 8 years and still learn something new with every job I do.
another tip in regards to washing microfiber towels...dont use the powder-type detergent as it can actually get embedded in the fibers and not dissolve. i actually just use a teaspoon of dawn or you can buy the spendy stuff that sell specifically for microfiber towels.
another tip in regards to washing microfiber towels...dont use the powder-type detergent as it can actually get embedded in the fibers and not dissolve. i actually just use a teaspoon of dawn or you can buy the spendy stuff that sell specifically for microfiber towels.
Please feel free to show some pictures of work performed, products you use etc. I would really like this thread to be around for awhile to help people out. I didn't know that about powder detergents, I guess it's a good thing I use the little all in one gel thingys.
Honda-Tech Member
Joined: Jun 2007
Posts: 1,305
Likes: 0
From: IN
I bought some OEM touch up paint for my car (Galaxy Gray) and used the brush part to "dot" a couple of rock chips in the fender and bumper. Well needless to say they stand out a lot from certain angles. What's the fix for this? Is there a way to blend them? I'm a complete noob when it comes to paint, but trying to change that.
I bought some OEM touch up paint for my car (Galaxy Gray) and used the brush part to "dot" a couple of rock chips in the fender and bumper. Well needless to say they stand out a lot from certain angles. What's the fix for this? Is there a way to blend them? I'm a complete noob when it comes to paint, but trying to change that.
Honda-Tech Member
Joined: Jun 2007
Posts: 1,305
Likes: 0
From: IN
I have access to a buffer, though I've never used one before. I only have waxes and polishing compounds. I'd like to get a complete kit of everything I need to keep my paint looking good as I intend to keep this car for awhile.
Kits are easy to get ahold of. How much are you wanting to spend?
Master Detailer
Joined: Nov 2007
Posts: 15,511
Likes: 22
DA's are great choice for beginners and they can get great results with the right pad/compound.
$200-400 can get you get you a quality kit.
Check this out:
http://www.autogeek.net/meguiars-da-correction-kit.html
Of course you always piece together a kit and really tailor it to your needs.
Ok, I had a big long post typed up, and some how I lost it.
 So I'll type it again when I get a chance.
Honda-Tech Member
Joined: Jun 2007
Posts: 1,305
Likes: 0
From: IN
The buffer is my dads, he said its an orbital buffer he got from sears. He said he'd text me later the exact model, but he uses it on his truck. I don't really have a set number on how much I'm looking to spend. That kit in the link is nice but I'm probably going to just use his buffer instead of buying a new one. Here's my car
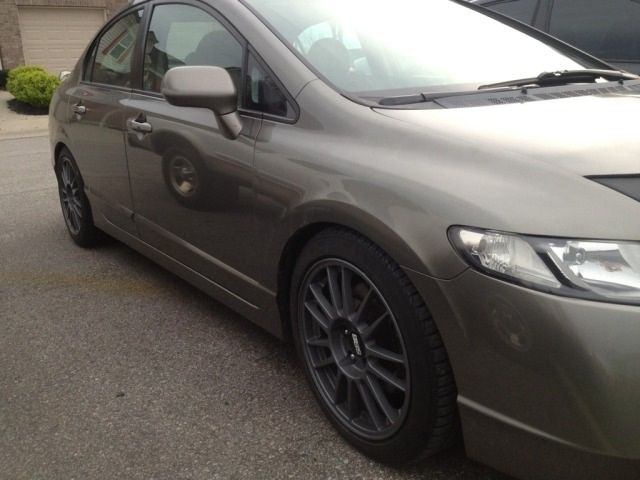
I've always heard that 8ths have thin paint but I've never really had any issues with mine. It may just be the darker colors.
I've always heard that 8ths have thin paint but I've never really had any issues with mine. It may just be the darker colors.
The buffer is my dads, he said its an orbital buffer he got from sears. He said he'd text me later the exact model, but he uses it on his truck. I don't really have a set number on how much I'm looking to spend. That kit in the link is nice but I'm probably going to just use his buffer instead of buying a new one. Here's my car
I've always heard that 8ths have thin paint but I've never really had any issues with mine. It may just be the darker colors.
I've always heard that 8ths have thin paint but I've never really had any issues with mine. It may just be the darker colors.
Here is a link to probably one of the best kits to buy (I know that 98civdx showed you a Meguiars setup which is what he learned on and still uses)
http://www.autogeek.net/poca74pofcop.html
That is an entry level kit with a great machine and will give you everything you need to polish the car out real nice, once you've gotten the hang of it better you will try different pads, compounds etc.
Oh hey buddy. How you doing? I like how you mentioned the Porter Cable DA, I've actually been thinking of buying one just to try it out, definitely won't burn through paint as easily as a rotary.
Master Detailer
Joined: Nov 2007
Posts: 15,511
Likes: 22
I actually learned on a Griot's DA.  Use the Meguiars at work. I own both the 6'' and 3'' Griot's DA's.
Any of those are great choices though.
I really don't even use my rotary. 9 times out of 10 I reach for a DA.
Use the Meguiars at work. I own both the 6'' and 3'' Griot's DA's.Any of those are great choices though.
I really don't even use my rotary. 9 times out of 10 I reach for a DA.
That's what I'm thinking, I don't need the cutting power of a rotary, but it's all I've ever used so I've stuck with it. What do you think we should cover next? How to wax/buff or what waxes do what?
Master Detailer
Joined: Nov 2007
Posts: 15,511
Likes: 22
I use them at work but only with the D300 compound. Even then they work very well.
Stripping and clay baring. That's the post I lost.
Master Detailer
Joined: Nov 2007
Posts: 15,511
Likes: 22
Honda-Tech Member
Joined: Feb 2006
Posts: 3,280
Likes: 1
From: Lebanon, PA, USA
on the wheels. Just get yourself a 2nd bucket for the paint. Those are swirl marks, pretty simple to get rid of. Depending on what wax you're using it can do that if not completely wiped off. Get yourself a bottle of swirl remover. Steps of cleaning should look something like this (depending on level of correction needed)
1) Wash and Dry
2) Clay bar (if paint feels rough to touch after washing)
3) Rubbing compound (if heavy correction needed, ie, deeper scratches, oxidation etc)
4) Cleaner wax (removes all old wax buildup for your new clean wax)
5) Swirl remover
6) Polish
7) Sealant (can end here if happy with shine, sealant protects for a few months)
7) Carnauba wax of your choice (just remember you get what you pay for, Carnauba wax is what gives you the rich deep paint)