
Fixing Up a Turd: A Build Thread


 01-27-2015, 10:04 AM
#28
Honda-Tech Member
Join Date: Jun 2006
Location: Grand Prairie, Texas, USA
Posts: 2
Likes: 0
Received 0 Likes
on
0 Posts
Reminds me of just about all my projects. but i do it on purpose. Nice work. Cant wait to see some pics on the paint..........
01-27-2015, 01:52 PM
#29

I wasn't able to get it done before school started last Tuesday (senior year, computer engineering) so progress might be slow. In an ideal world, unless I get slammed with schoolwork in the next week, I hope to drop it off at the shop for paint by February 9th. Last weekend wasn't very productive as I had some maintenance to do on my Civic.
02-22-2015, 01:15 AM
#30
The whole car is now primed with the exception of the hood which has original paint.
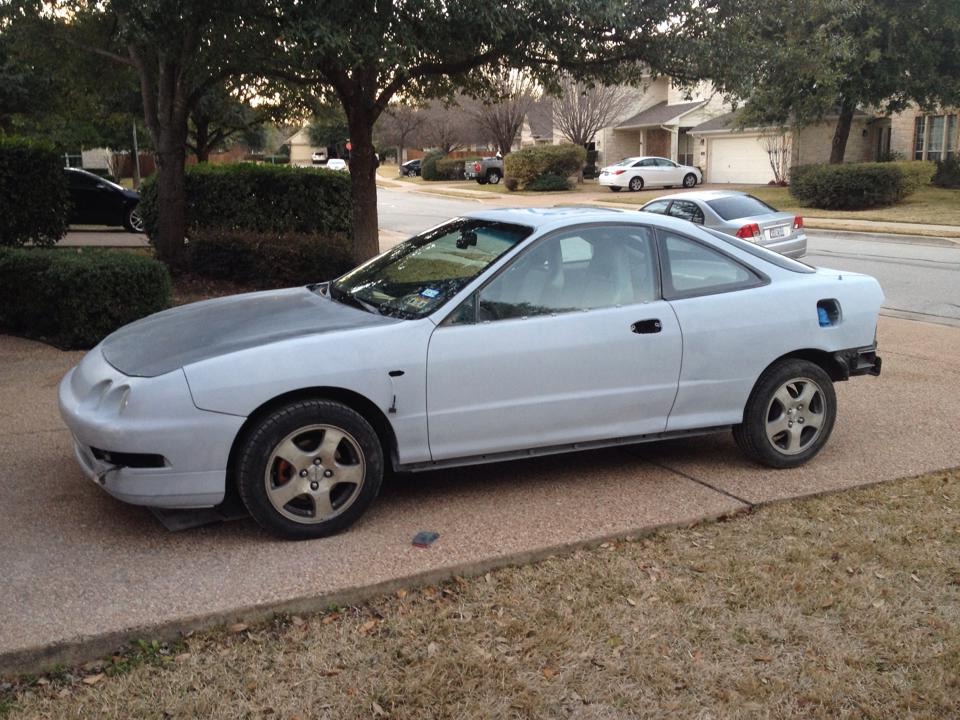
And I've decided to spray the doorjambs myself, since it's more expensive to have a shop do it and it doesn't need to be perfect. That said, it came out pretty well. The whole process took about a week since I had to let the base coat cure completely. The catalyzed 2-component clear coat I used does not play well with it otherwise.
Here is a picture of everything masked off.
And here's one after it's all done.
Part 4
Last edited by MotorMouth93; 08-06-2017 at 08:53 AM.
02-27-2015, 09:31 AM
#32
Honda-Tech Member
Join Date: Feb 2015
Location: Pensacola, FL
Posts: 52
Likes: 0
Received 0 Likes
on
0 Posts
Wow, nice zombie build. Way to bring it back from the dead. Looking at the before pics makes me think some people should not be allowed to modify cars.
03-29-2015, 02:25 PM
#33
The entire car has been primed and sanded smooth and is waiting for me to have time to drive it down to my buddies shop for paint. Hoping for this or next weekend, but that will depend on school. You've already seen pictures of this, just without the hood painted so I won't bother posting again.
The paint color I selected is the "Candy White" that VW uses. Since everyone uses taffeta white and championship white over and over and over this should be a bit different. Ordered a gallon of paint and 2 gallons of clear coat.
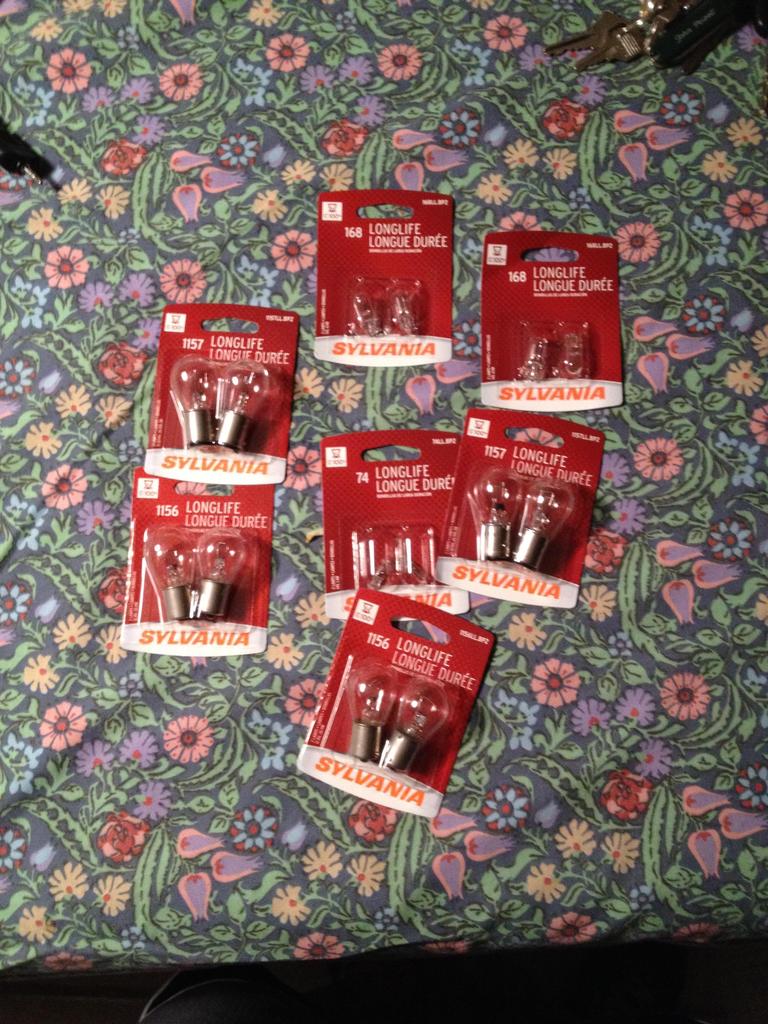
I replaced all exterior light bulbs (except headlights, not sure if I want to use LEDs or get TSX projectors for a HID conversion) since they were burning out every 20 minutes despite my rarely turning the car on.
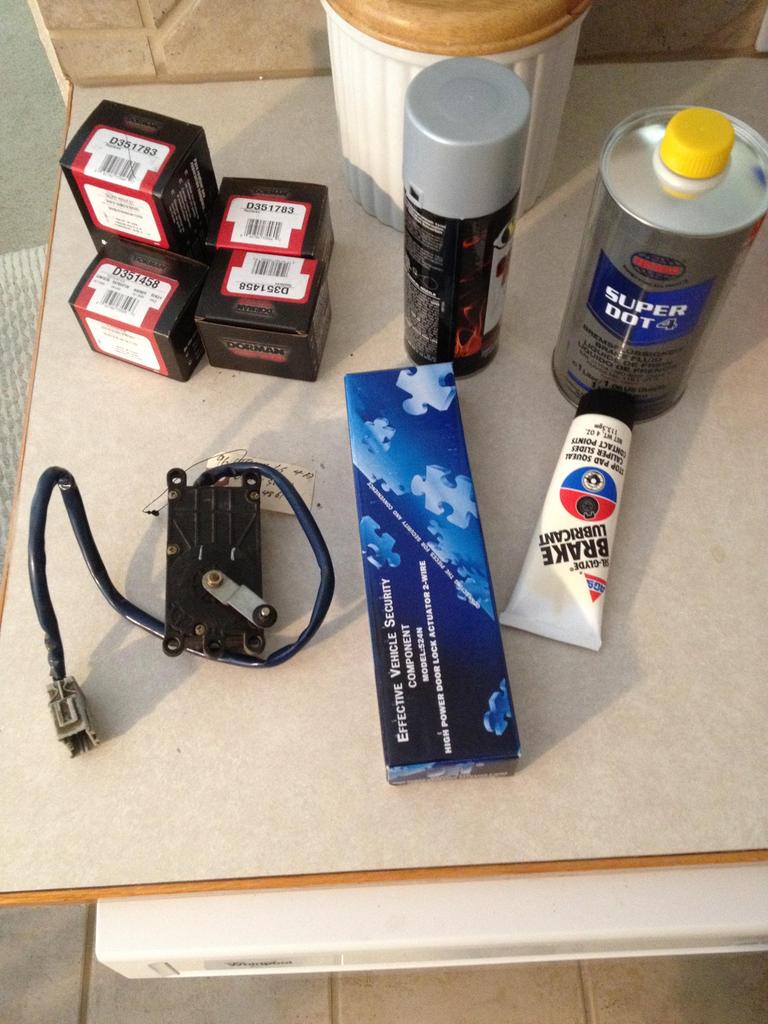
I also ordered brake seal kits for all 4 corners since one of my rear calipers was frozen. When I took it apart I discovered that it was rusted out on the inside so sourced another one from a local Craigslist part-out. Powder-coating the calipers would be ideal, but $50/caliper is more than I want to spend on something that really wouldn't improve the car, so I'm settling for paint. Also shown is a DEI 524N door lock actuator I used to fix the electronic trunk latch as well as a replacement climate control switcher motor.
Installing the climate control switcher was pretty easy, just removed the 2 screws and unplugged the connector. No removing of the dash required.
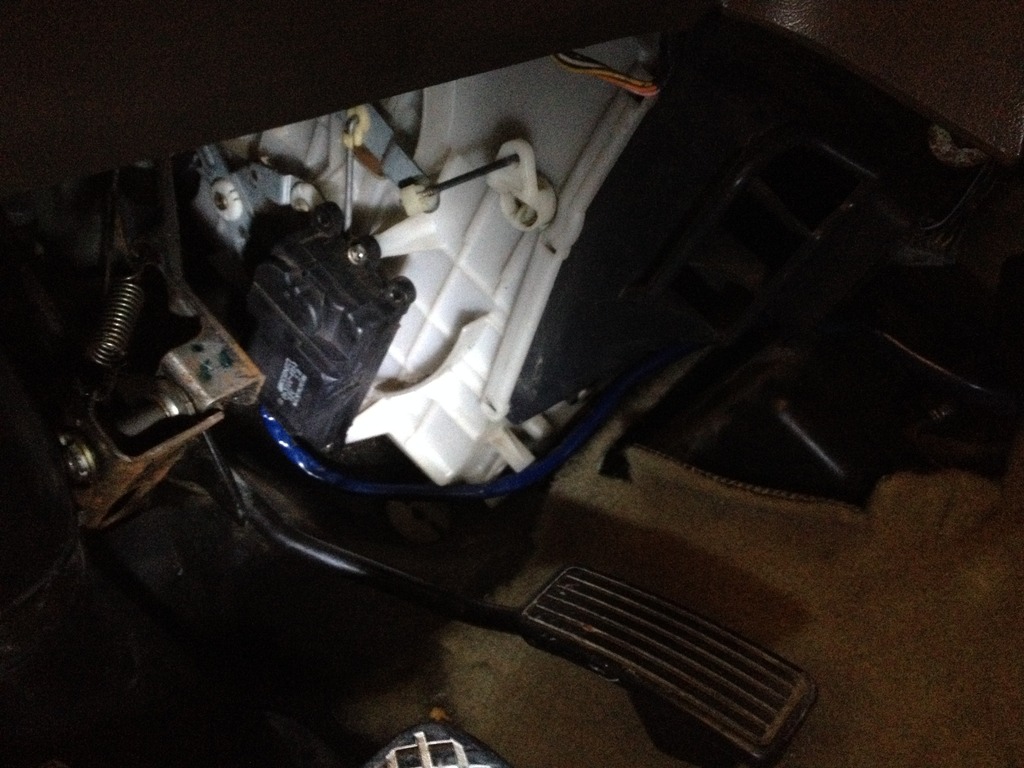
I got the idea to use the DEI 524N actuator from this forum post, but I didn't like OPs implementation. I widened the lower left hole to accomodate the mounting screws that came with the 524N as well as added another hole by the curve in the bracket near the middle of the image. This let me mount the new actuator in the same position as the old one.
[imghttp://johnwalterpowell.com/projects/1999_integra/0089.jpg
Here is the final result, I removed the connector from the OEM unit and soldered it onto the 524N unit, looks pretty good for a hackjob workaround IMO.
In a few weeks I'll have the update we've all been waiting for.
Part 5
The paint color I selected is the "Candy White" that VW uses. Since everyone uses taffeta white and championship white over and over and over this should be a bit different. Ordered a gallon of paint and 2 gallons of clear coat.
I replaced all exterior light bulbs (except headlights, not sure if I want to use LEDs or get TSX projectors for a HID conversion) since they were burning out every 20 minutes despite my rarely turning the car on.
I also ordered brake seal kits for all 4 corners since one of my rear calipers was frozen. When I took it apart I discovered that it was rusted out on the inside so sourced another one from a local Craigslist part-out. Powder-coating the calipers would be ideal, but $50/caliper is more than I want to spend on something that really wouldn't improve the car, so I'm settling for paint. Also shown is a DEI 524N door lock actuator I used to fix the electronic trunk latch as well as a replacement climate control switcher motor.
Installing the climate control switcher was pretty easy, just removed the 2 screws and unplugged the connector. No removing of the dash required.
I got the idea to use the DEI 524N actuator from this forum post, but I didn't like OPs implementation. I widened the lower left hole to accomodate the mounting screws that came with the 524N as well as added another hole by the curve in the bracket near the middle of the image. This let me mount the new actuator in the same position as the old one.
[imghttp://johnwalterpowell.com/projects/1999_integra/0089.jpg
Here is the final result, I removed the connector from the OEM unit and soldered it onto the 524N unit, looks pretty good for a hackjob workaround IMO.
In a few weeks I'll have the update we've all been waiting for.
Part 5
Last edited by MotorMouth93; 08-30-2017 at 06:42 AM.
 04-05-2015, 02:47 PM
#35
My paint was shipped via UPS and they had a delay for whatever reason, so it still hasn't showed up yet. It should be here tomorrow though, and if I have time this weekend I'm going to try to get it painted.
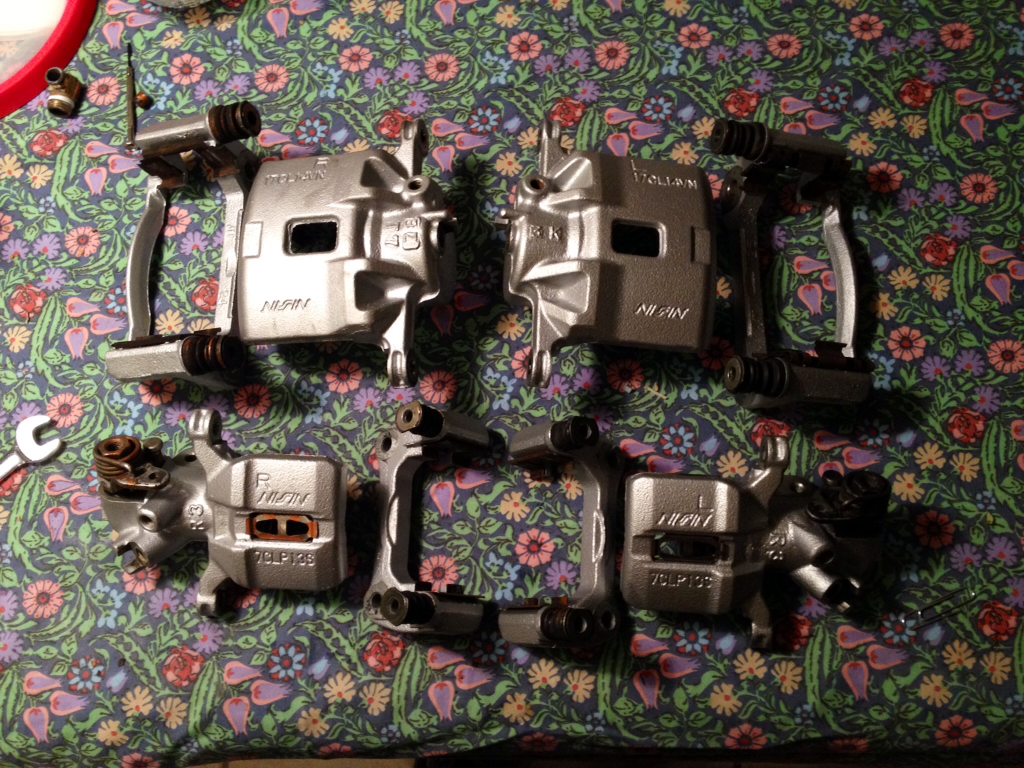
However, I did finish my caliper rebuild. After doing that, I hope never to do it again. It was the single most tedious thing I've done to the car aside from bodywork.
The process was remove calipers, disassemble them, wire-wheel everything to remove brake dust, wash with hot water, scouring pad, and soap to remove any remaining grime, paint with 3 coats of silver VHT caliper paint spaced out by 10-20 minutes, install new seals, then reassemble everything. The fronts were very straightforward as they have one giant piston, a seal, and a dust boot, but the rears were a different story. I can make a tutorial on rebuilding them if anyone is interested, I couldn't find a guide online anywhere.
Removing the front pistons was interesting as I don't have a compressor. I ended up using one of these, some electrical tape wrapped around it to make it wider and seal with the caliper, and a gas station compressor that you put 4 quarters into. It worked great but made a loud-*** bang when the caliper popped out and people were staring at me.
A sight for sore eyes.
Part 6
Last edited by MotorMouth93; 08-30-2017 at 06:43 AM.
04-06-2015, 10:21 AM
#36
My paint was shipped via UPS and they had a delay for whatever reason, so it still hasn't showed up yet. It should be here tomorrow though, and if I have time this weekend I'm going to try to get it painted.
However, I did finish my caliper rebuild. After doing that, I hope never to do it again. It was the single most tedious thing I've done to the car aside from bodywork.
The process was remove calipers, disassemble them, wire-wheel everything to remove brake dust, wash with hot water, scouring pad, and soap to remove any remaining grime, paint with 3 coats of silver VHT caliper paint spaced out by 10-20 minutes, install new seals, then reassemble everything. The fronts were very straightforward as they have one giant piston, a seal, and a dust boot, but the rears were a different story. I can make a tutorial on rebuilding them if anyone is interested, I couldn't find a guide online anywhere.
Removing the front pistons was interesting as I don't have a compressor. I ended up using one of these, some electrical tape wrapped around it to make it wider and seal with the caliper, and a gas station compressor that you put 4 quarters into. It worked great but made a loud-*** bang when the caliper popped out and people were staring at me.
A sight for sore eyes.
https://i.imgur.com/UaCMSFd.png
I might be worthwhile to invest in a small (oiled) compressor from Harbor Freight as I've had one for several years. They can be had for less than $100 and can save you some grief!
BTW, I'm located in SW Austin in a retirement community.
 05-23-2015, 05:02 PM
#38
So my buddy and I were going to get it painted today, but 15 minutes away from his shop it started pouring rain. You can't paint a car covered in dirty road water, and you also can't paint a car when it's really humid or the paint won't stick.
Based on the weather forecast it's not good, we might have a shot tomorrow or Monday but I'm doubtful at this point. If Monday comes and goes and it still isn't painted, then it gets pushed back to August because my job is taking me across the country from June to August.
Anyways, will update on Monday, wish me luck. :-)
UPDATE: Painting was rained out, and I am now 2000 miles away for work. I'll be back in Texas in late August with lots of money though, so I'll finally be able to get it painted, replace all the fucked up bushings, and get some nice wheels for it.
Part 7
Last edited by MotorMouth93; 06-10-2016 at 11:22 AM.
 08-08-2015, 01:09 PM
#41
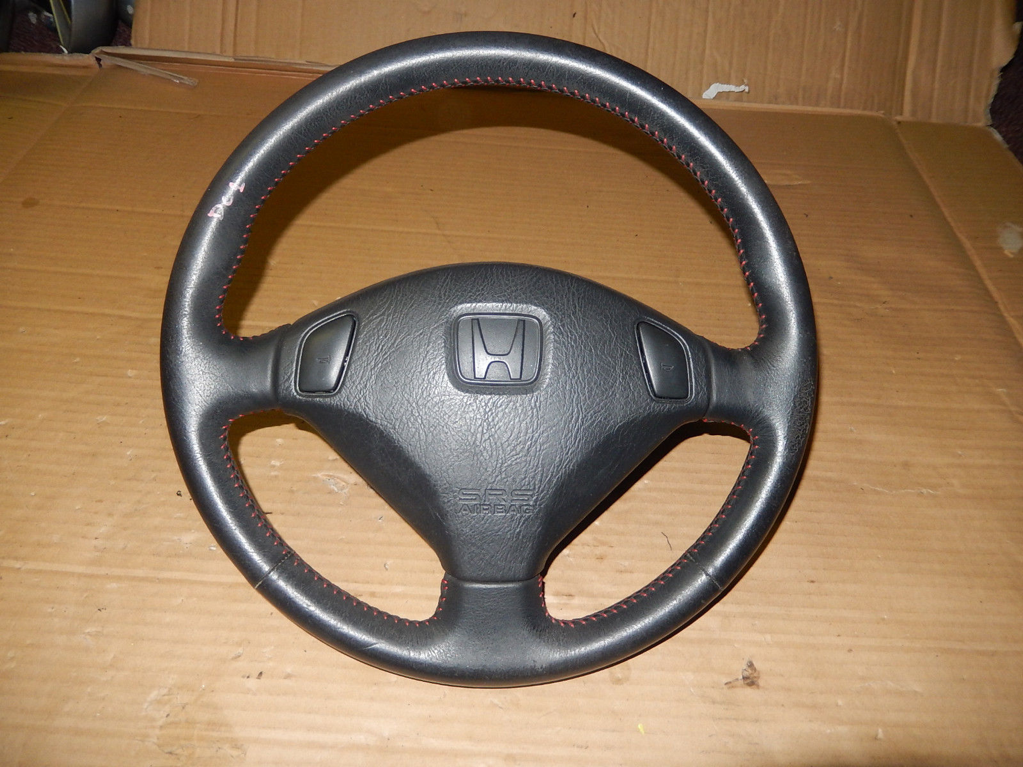
My flight back home is scheduled for Saturday the 22nd. I have an SIR-G steering wheel and a few other things waiting for me when I get back, so the updates should start coming soon. I have decided to redo some of the bodywork so paint is still a ways off though. I'd feel bad having it sprayed when I know I could do better.
09-25-2015, 11:45 AM
#42
First real update in a while. I found a JDM Sir-G steering wheel on eBay for a decent price so I bought it, and am currently looking for someone to reupholster it for me. I'm also debating whether I want to cut the ring off and weld on a smaller, wider one.
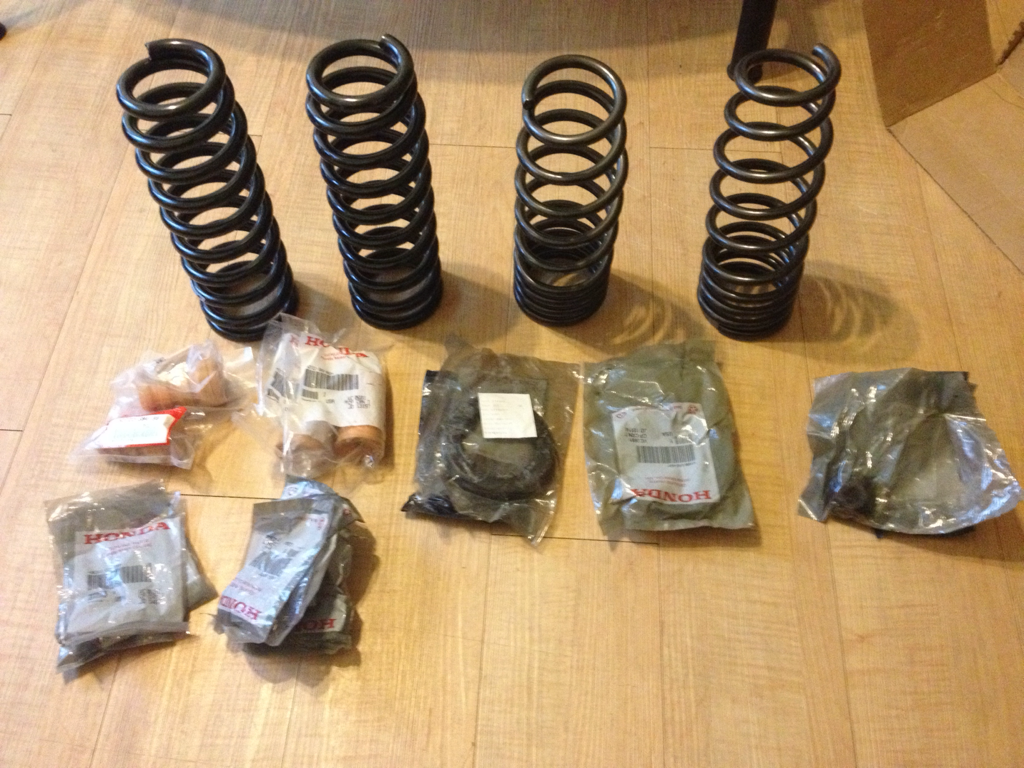
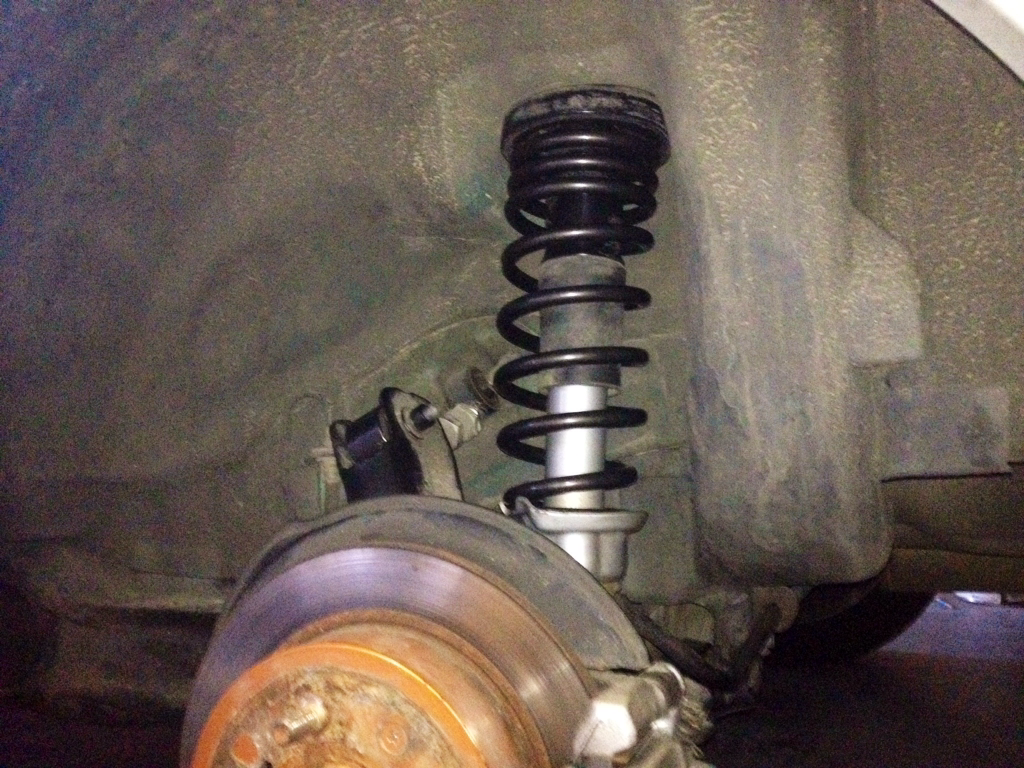
I've also started on my suspension overhaul. I replaced the old and sagging OEM springs with Eibach Pro Kit springs and the difference is amazing. The old rear springs were so bad that the previous owner had put spacers in them just to keep it from sagging too low. I also went ahead and replaced all the cracking rubber parts in the shock assemblies as well.
Eibach springs were purchased on Amazon and everything else is OEM from Delray Acura.
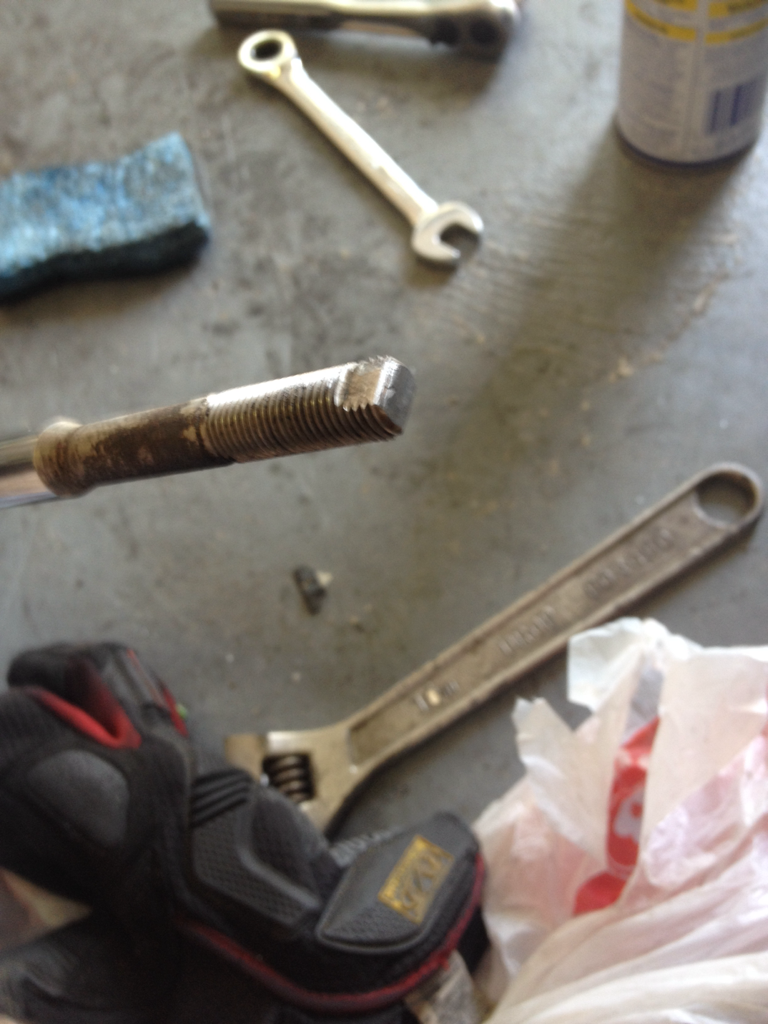
I had a tab snap off of one of the shocks, so I had to get the Dremel and cut a new one. Fortunately there was enough room at the top to do it without interfering with the lock nut.
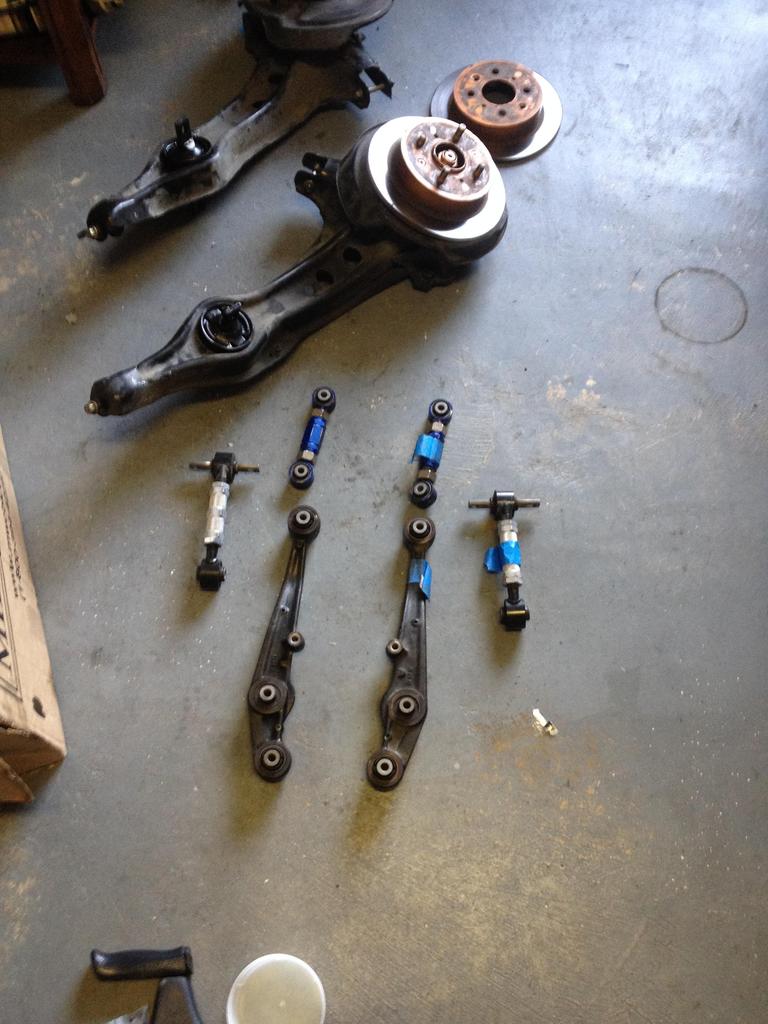
Everything pulled apart.

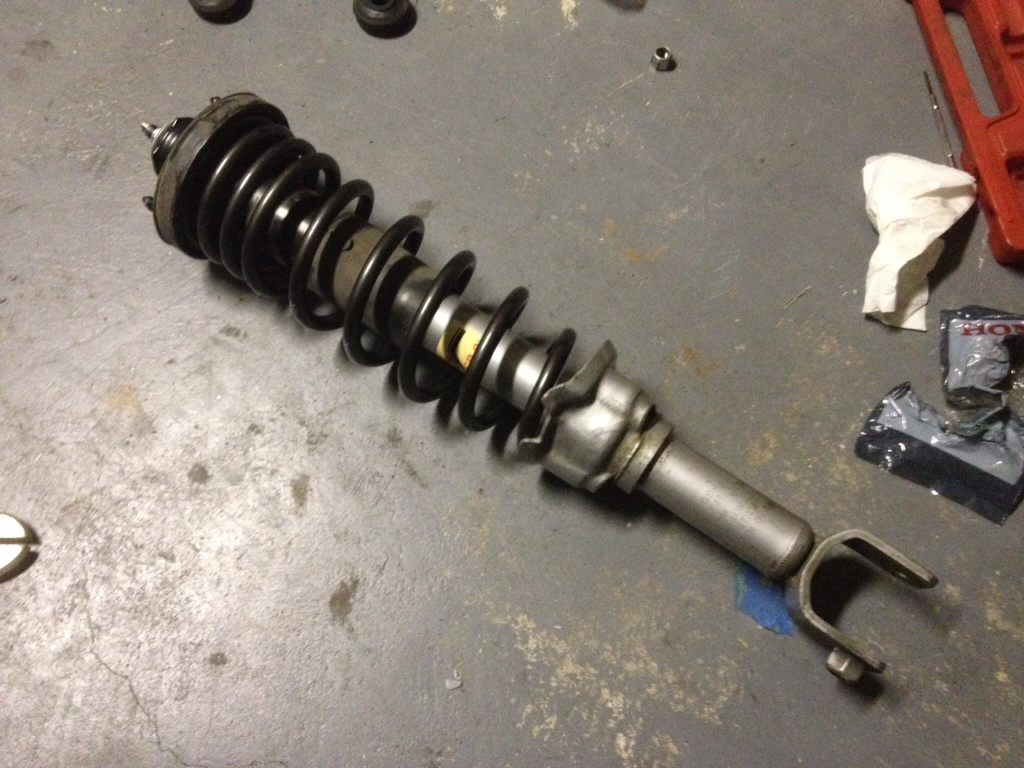
Cleaned up a bit and reassembled with the new parts. The Eibach springs were nice because I didn't have to use the spring compressor to put them on. I'm sticking with the KYB GR2 shocks for now as I'm happy with the way it rides.
Reinstalled.
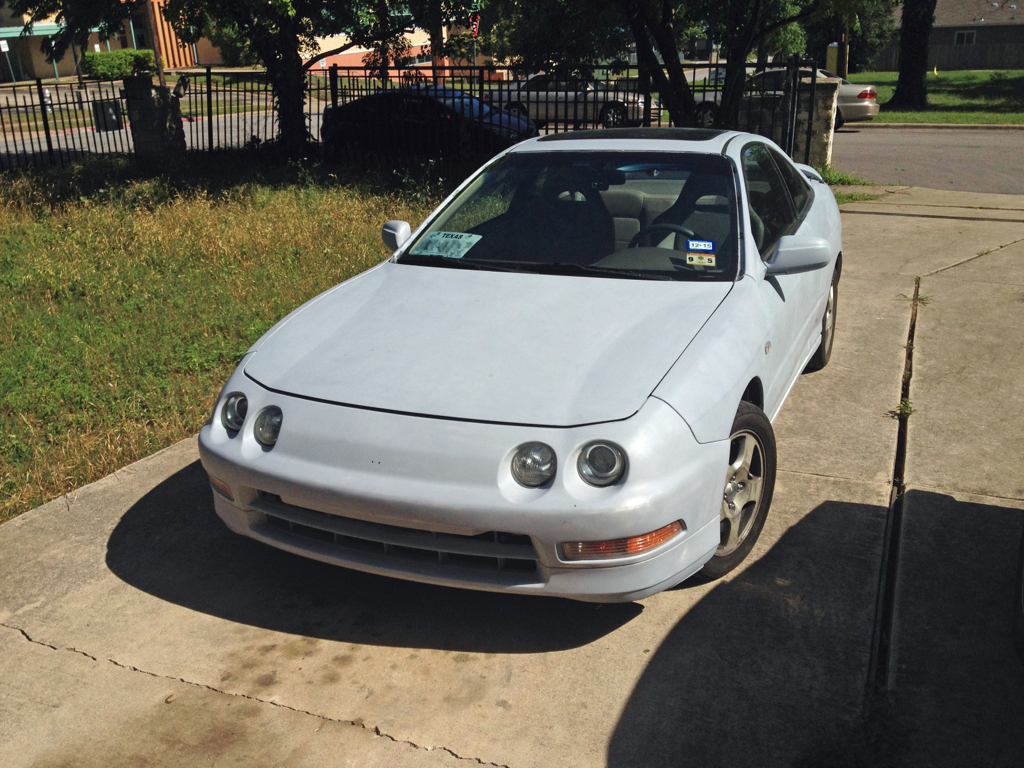
The car as it is now.
Part 8
I've also started on my suspension overhaul. I replaced the old and sagging OEM springs with Eibach Pro Kit springs and the difference is amazing. The old rear springs were so bad that the previous owner had put spacers in them just to keep it from sagging too low. I also went ahead and replaced all the cracking rubber parts in the shock assemblies as well.
Eibach springs were purchased on Amazon and everything else is OEM from Delray Acura.
I had a tab snap off of one of the shocks, so I had to get the Dremel and cut a new one. Fortunately there was enough room at the top to do it without interfering with the lock nut.
Everything pulled apart.
Cleaned up a bit and reassembled with the new parts. The Eibach springs were nice because I didn't have to use the spring compressor to put them on. I'm sticking with the KYB GR2 shocks for now as I'm happy with the way it rides.
Reinstalled.
The car as it is now.
Part 8
Last edited by MotorMouth93; 08-30-2017 at 06:45 AM.
 10-03-2015, 06:39 PM
#44
I'm hoping to finally get painted sometime in October or November, I found a shop that will spray my paint on it for me for relatively cheap. Then DD it for a while until I can afford another car.
At the moment I'm in the middle of replacing the suspension bushings, I finished the back end yesterday and will drop the front control arms off at the shop on Monday. When that's done I can finally get a proper alignment. (rear toe was slightly out of whack before so I picked up a cheapo toe adjustment kit on eBay and swapped the bushings out for Hard Race)
I graduate with a BSEE in December so if I can find a job before then I'll probably have another car by next June, and if I haven't gotten bored of it by then I'll probably rebuild the motor and piece together a turbo setup. If I don't want to mess with it anymore I'll just throw in a high compression B20 and call it a day.
Last edited by MotorMouth93; 11-09-2015 at 10:44 PM.
 11-17-2015, 06:03 PM
#48
I really don't know
 11-18-2015, 10:08 PM
#49
I'm not sure what you mean about my house decorations. Some pictures are at my grandparents house, some are at my parents house, and some are at the dumpy house I rented with some friends.
But anyways, I finished with the suspension overhaul. Hard Race rubber bushings all around, new sway bar endlinks on the front since both of them were shot, and all new OEM rubber parts in the strut assembly and the new springs as I posted earlier.
And I've come to realize how terrible my choices in primer are and how terrible the lime green paint job was. If I'm going to do it right, I need to remove everything that isn't a factory finish by either sanding until I get to the dark green or just chemically stripping it to the metal and starting over. I'll probably go with the chemical stripper because it would be much faster than sanding the whole car.
What I really need to do is just spend a week in the garage and redo all of the bodywork, and I'll probably have time to do that after I graduate in December since I don't start working full time until January.
Every time I look at the car I just want to cry. I wasted so much time working in the wrong direction, but at this point I can't bring myself to get rid of it either, so I just have to finish it.
Part 9
Last edited by MotorMouth93; 08-30-2017 at 06:46 AM.
12-24-2015, 07:56 PM
#50
It's finally happening. I convinced my parents to let me turn their carport into a paint booth for a few days and I have a day or so more of spraying before it's all done.
My ghetto paint booth:
Fenders:
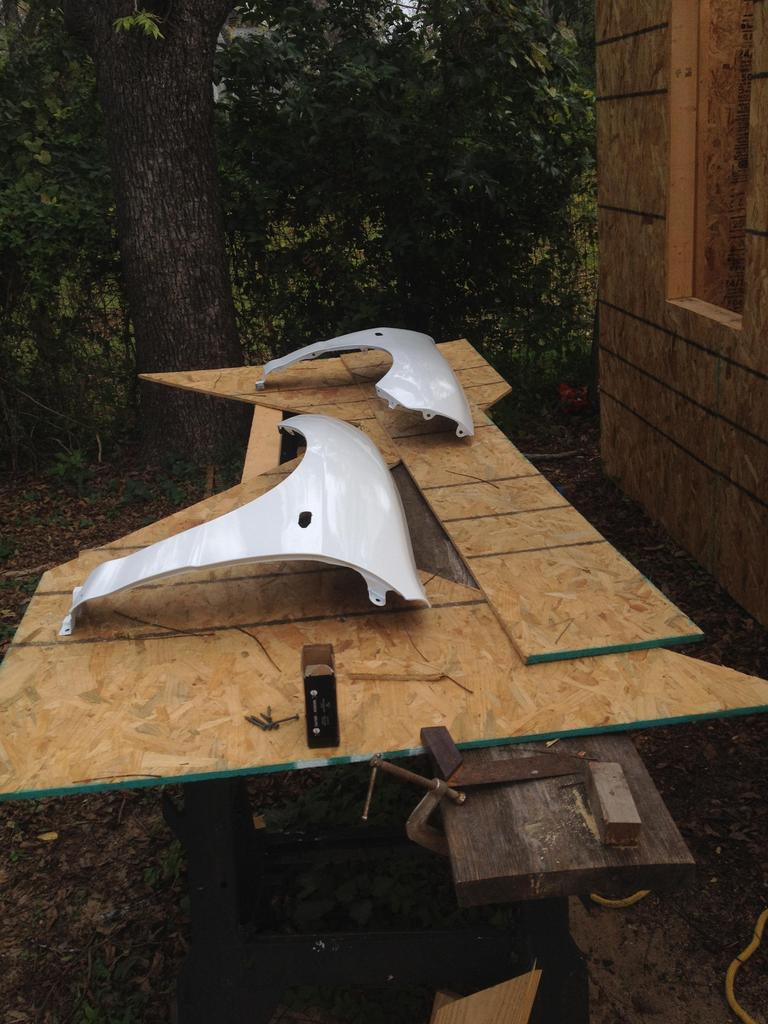
Rear Bumper:
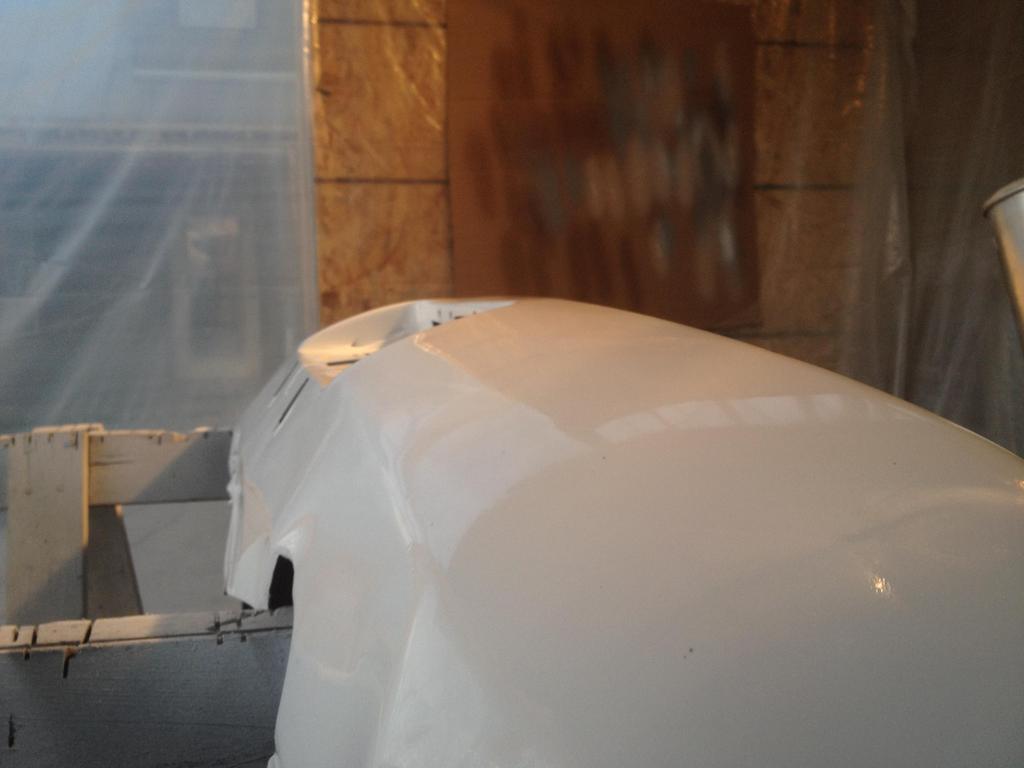
Pics of the painted car should be up within about a week or so.
Part 10
My ghetto paint booth:
Fenders:
Rear Bumper:
Pics of the painted car should be up within about a week or so.
Part 10
Last edited by MotorMouth93; 08-30-2017 at 06:47 AM.