
Fixing Up a Turd: A Build Thread
 12-31-2014, 06:28 PM
#1

Back in late June of this year, I made the fatal mistake of buying this car for $1200. Why? Because I was an ignorant 21 year old and too eager to start my project. Had I waited two weeks, I could have had a GS-R with 100k miles for $2000, had I waited a few months, I could have had a GS-R with 160k miles for $1200...Yes, I'm bitter, but I like to finish what I start. I guess the clean title is an upside.
A bit about how this thread is organized, at the end of each post is a link to the next part, and there's a list of all parts so far right below here. There's also more pictures than shown in this album ( Fixing Up a Turd - Album on Imgur ) on my Imgur account but I have since migrated to Photobucket so it hasn't been updated in a while.
Contents
Part 1 (you are here)
Part 2
Part 3
Part 4
Part 5
Part 6
Part 7
Part 8
Part 9
Part 10
Part 11
Part 12
Part 13
Part 14
Part 15
Part 16
Part 17
Part 18
Part 19
Part 20
Part 21
Part 22
Part 23
Part 24
Part 25
Part 26
Part 27
Part 28
Part 29
Part 30
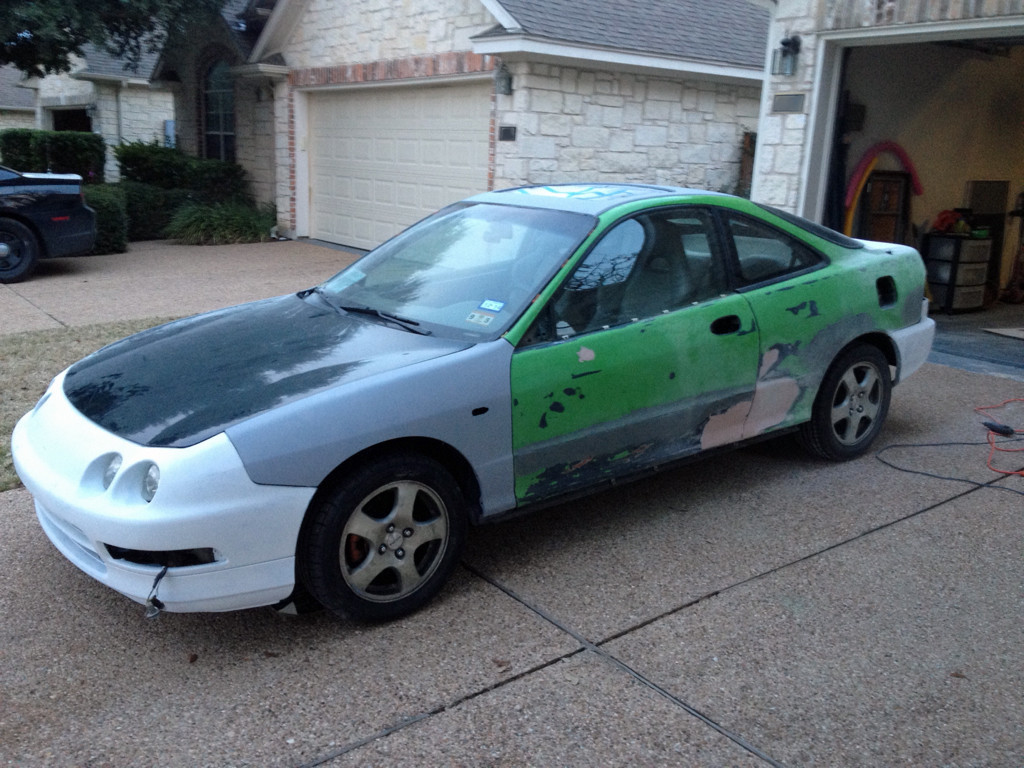
Anyways...
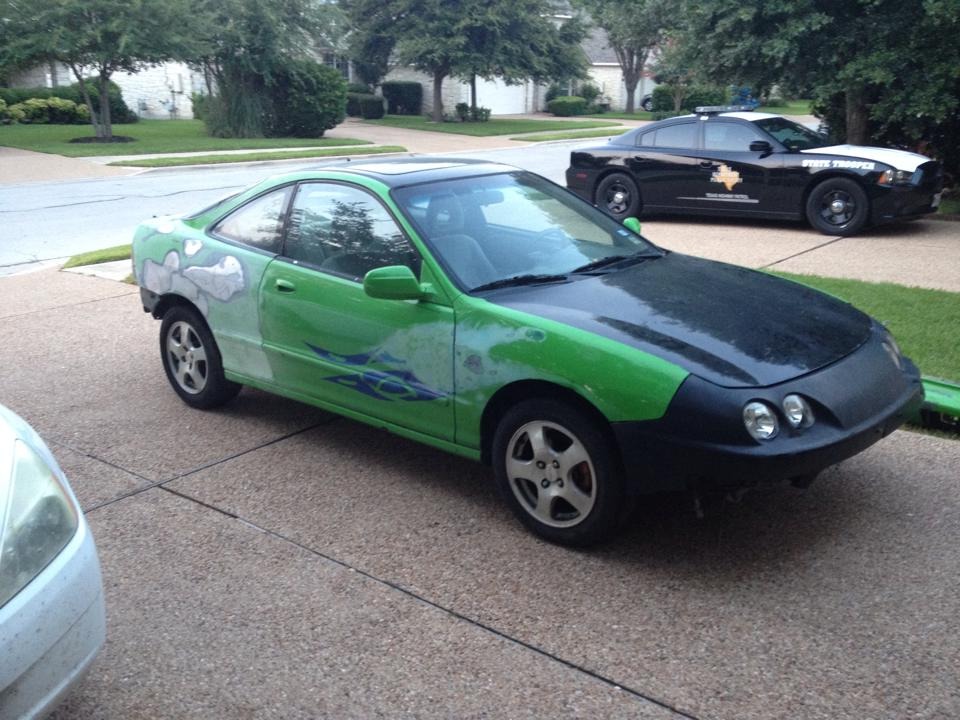
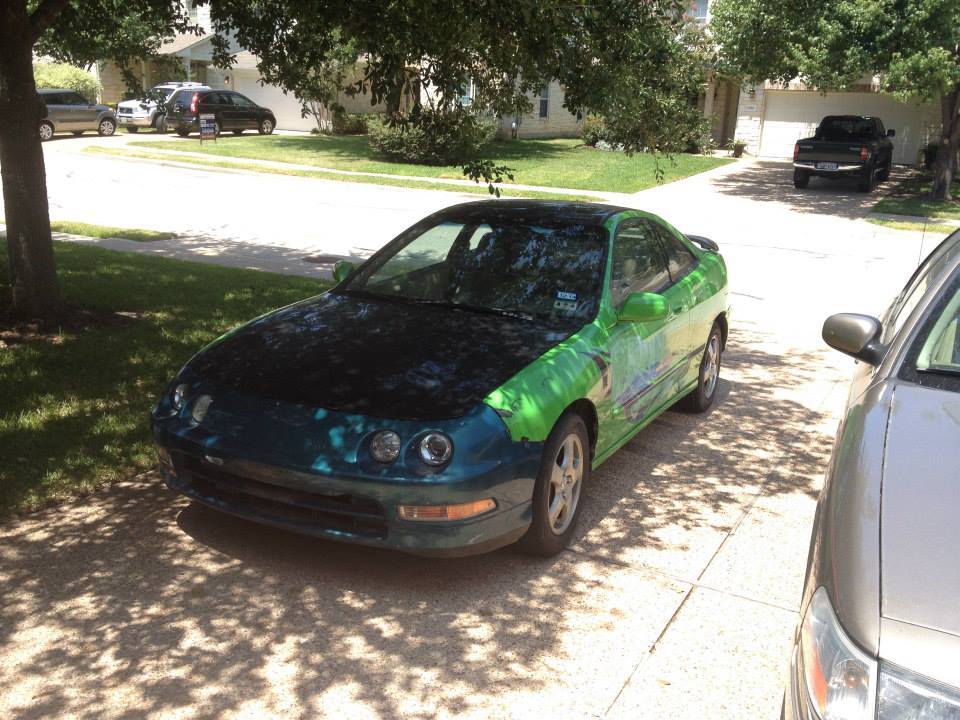
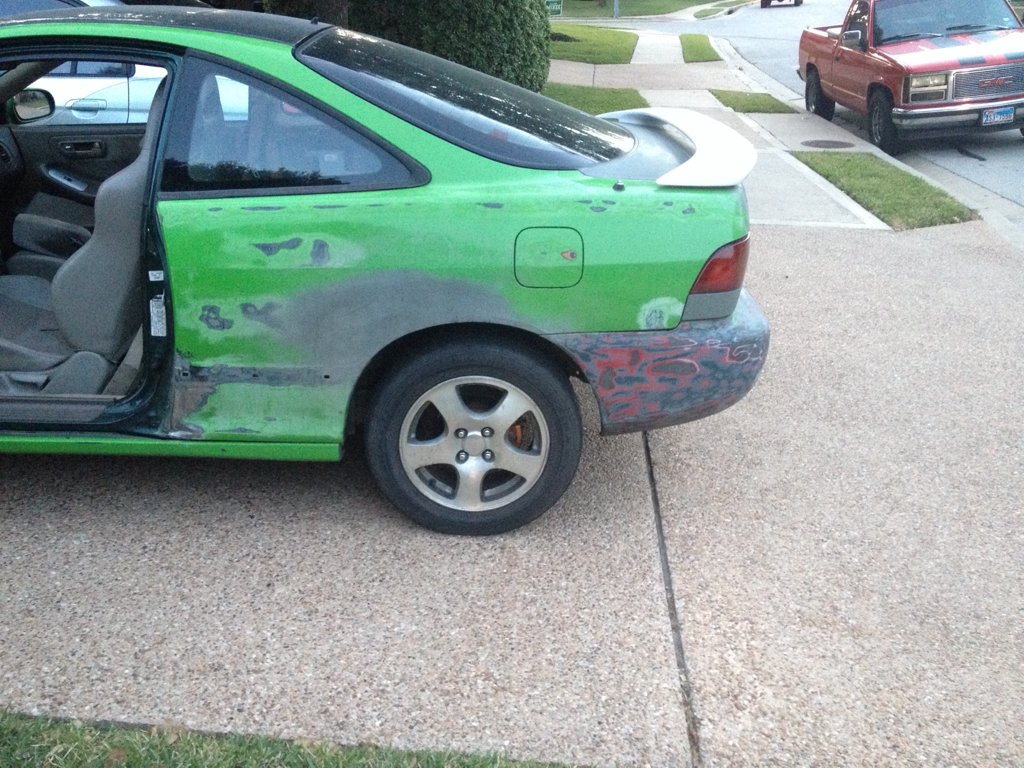
Here she is, in all her terrible glory.


The car is a 1999 Integra GS, but somebody swapped out the leather interior and put in a beat up cloth one. According to the AutoCheck report I have, it was stolen and then recovered, so maybe it happened then.
A semi-up-to-date list of everything I've done so far in no particular order:
Engine/Drivetrain
- OEM muffler
- Timing belt/tensioner/water pump
- Coolant flush
- Valve adjustment
- Fuel filter
- ICM and ignition coil
- O2 sensors, catalytic converter, downstream O2 sensor spacer
- Replaced various evap components, evap system still leaks
- JDM high compression B20B with all new oil seals
- Synchrotech carbon lined synchronizers
- OBX helical LSD (cleaned up tool marks, new bolts, new washers)
- New OEM transmission bearings
- New OEM transmission seals
- Rebuilt shift linkage
Suspension/Wheels
- Hard Race suspension bushings
- Blox camber kits, front and back
- Blox sway bar end links
- Adjustable rear toe arms
- Eibach Pro Kit springs
- KYB GR2 shocks
- OEM rubber parts in the shock assemblies
- Sparco Assetto Gara wheels, bronze, 15x7
- Dunlop Direzza DZ102 tires in 205/50R15
Interior
- Red Integra Type-R Recaro seats (front)
- Tan OEM leather seats (rear)
- Black leather shift boot
- Red leather armrest cover
- Red leather door inserts
- Red LED footwell lighting
- Aluminum shift ****/shortened shifter
- Shifter bezel painted gloss black
- Warm white LED interior lighting
- Amber cluster backlight
- Infinity Reference 6030CS component speakers in the front
- Infinity Reference 6032CF coaxial speakers in the back
- Pioneer DEH3300UB head unit
- Bazooka 150W RMS 8" subwoofer tube
- Leather wrapped JDM Integra SiR-G steering wheel with airbag
Aesthetic
- Rear window wiper/sprayer delete
- Reroute hood release cable
- 5500K 35W HIDs, Hella/Audi ballasts, Morimotor FX-R projectors, projector bezels painted black
- Side markers
- Removed side moldings
- LED license plate lights
- Filled "Integra" moldings on front and rear bumpers
- Front license plate mounting holes sanded flush and filled, license plate in front windshield.
- Entire car painted VW candy white
Anyways, here's the build thread.
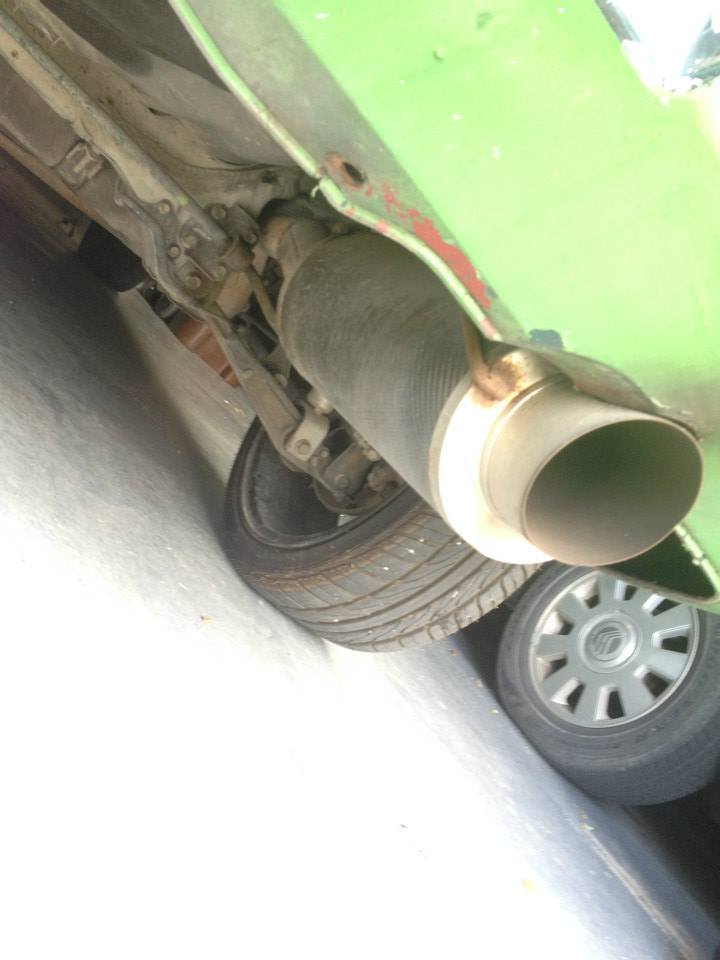
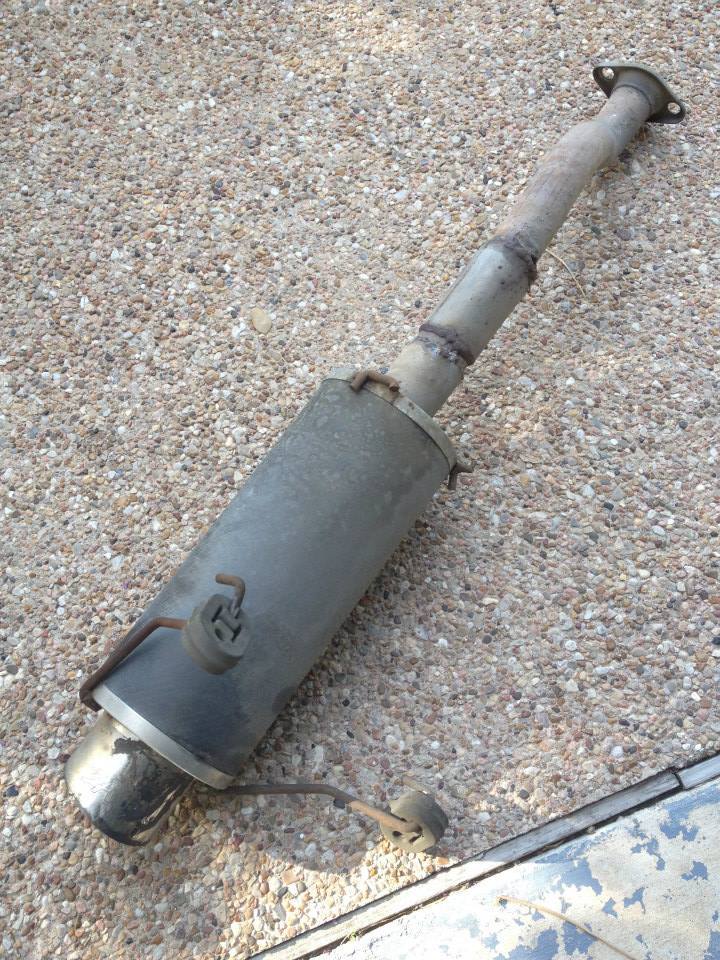
First order of business, get rid of the fart can. Fortunately the local pick-your-part junkyard had an OEM axleback muffler for $25.
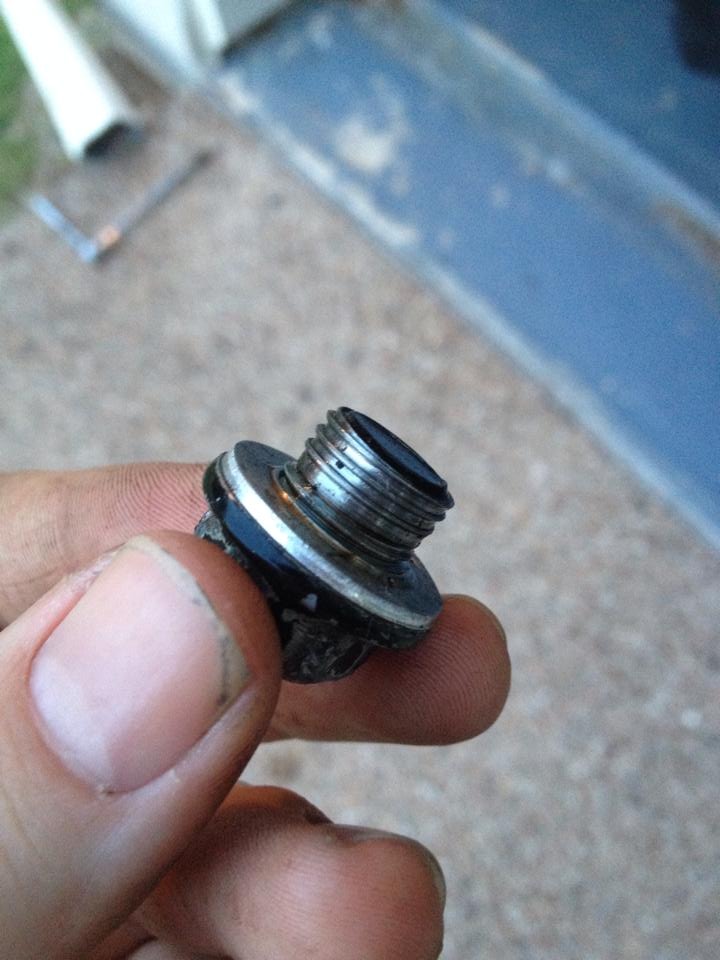
And of course the oil pan drain has been tightened down by a 15 year old kid at Iffy-Lube using an air gun.
I was able to find a guy willing to buy the ugly-a** 17" curb-rashed-to-he** wheels for $100, but now I don't have any wheels.
Fortunately it was only a few days until I was able to find some Fat-Fives for $150. I've stripped one of them and re-clear coated it and it actually looks pretty good. (not shown)
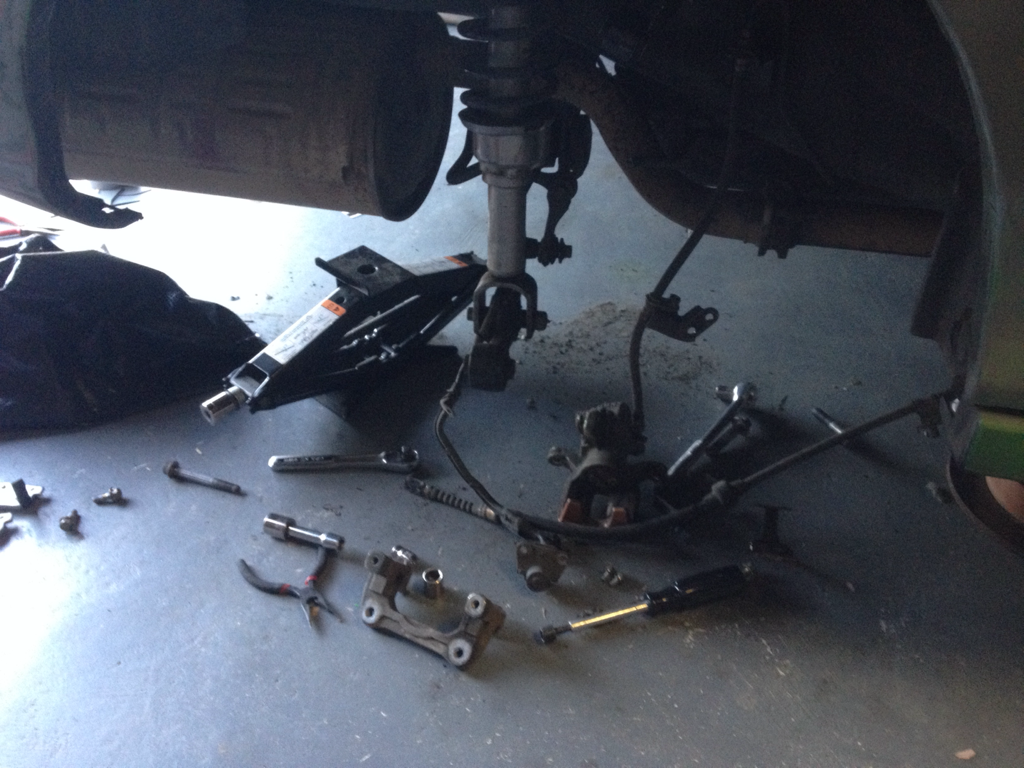
Who knows how old the timing belt was, so I might as well spend a day changing it. In the retrospect, I probably shouldn't have used two scissor jacks to hold the car up.
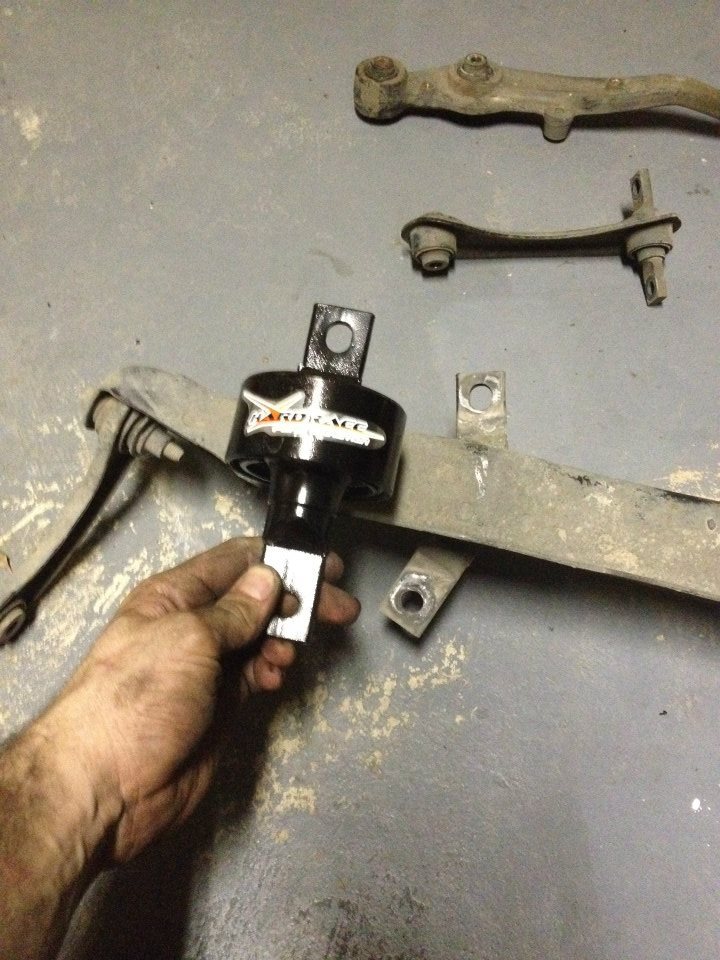
I don't want to know how this trailing arm bushing got bent like this, but I'm sure it wasn't anything good. I had a machine shop press in the bushings for me as I don't have access to tools or the skill to properly do it.
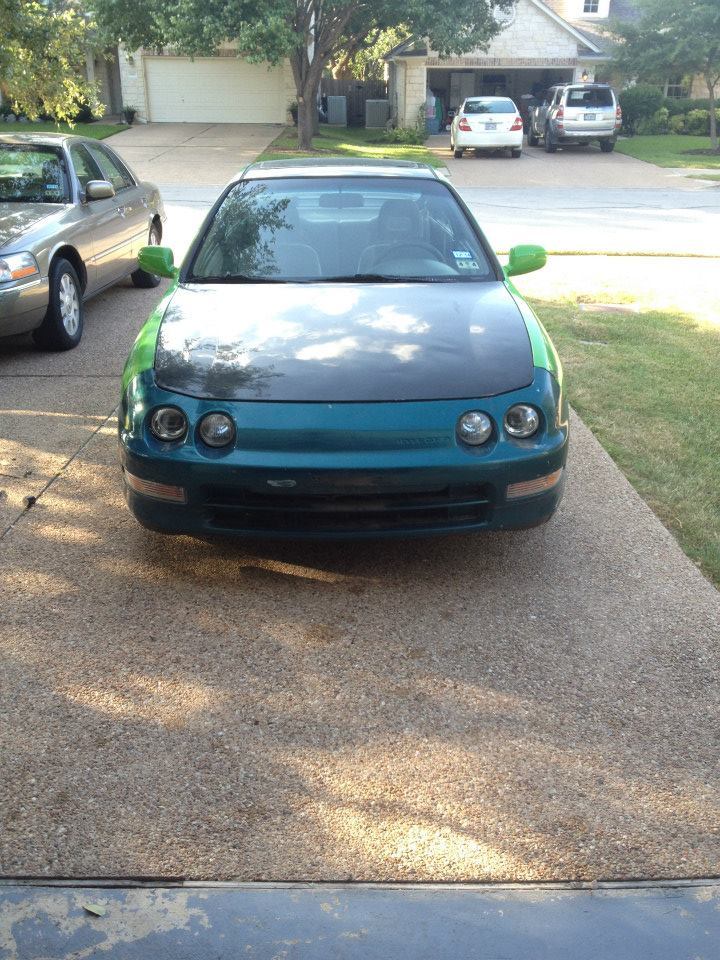
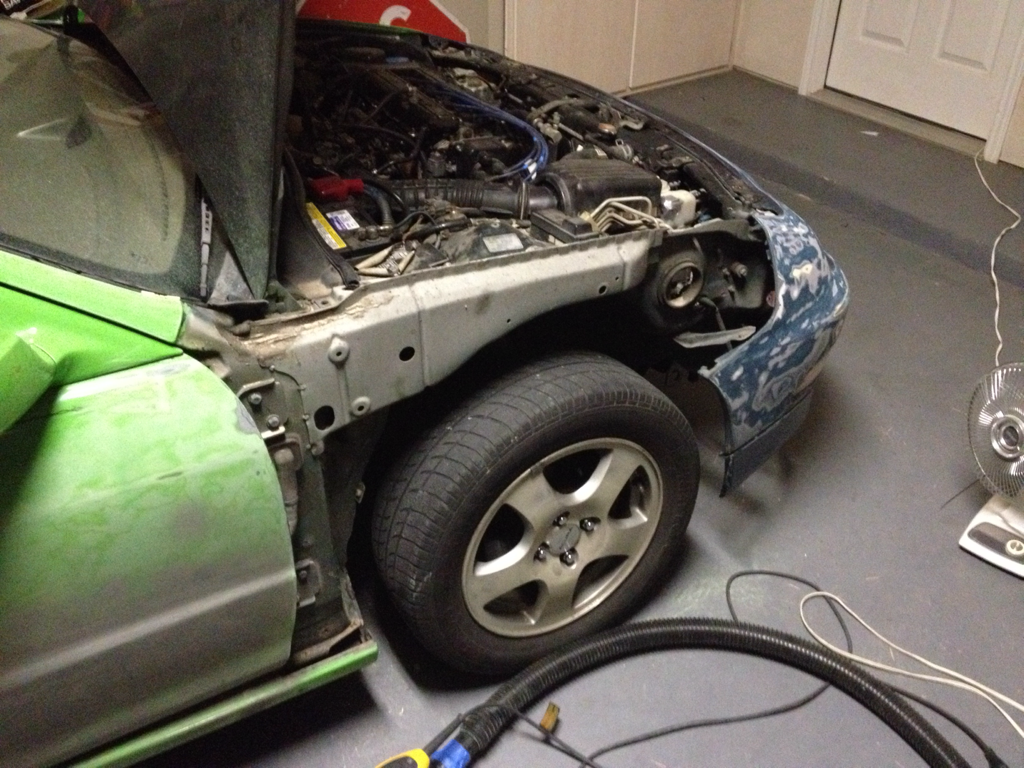
New front end, I hadn't been able to find one for several months at this point, so I just bought a 94-97 front end. It doesn't bother me much, but sometimes I wish I had held out for a 98-01. Later I would discover that it had been poorly repainted, and then spend hours sanding away the crappy peeling paint.
Cleaning up the headlights.

Well sh*t. Some a**hole had left a giant hole in the bottom of the intake pipe. This could explain why the car all of the sudden started burning a bit of oil higher in the rev range.

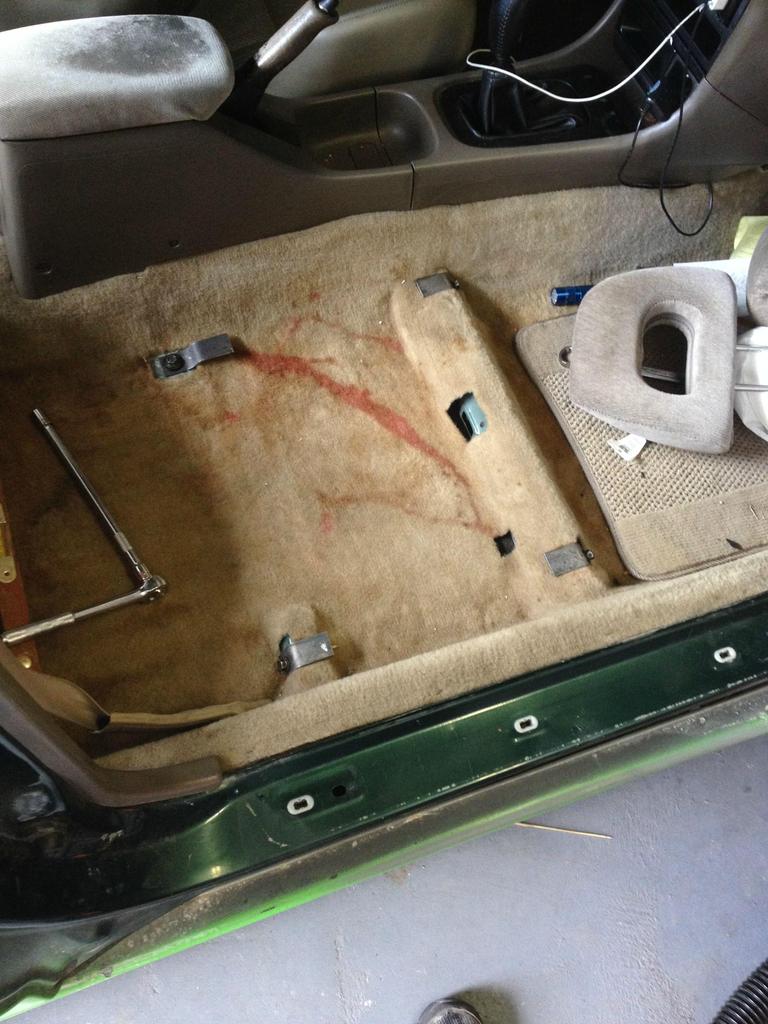
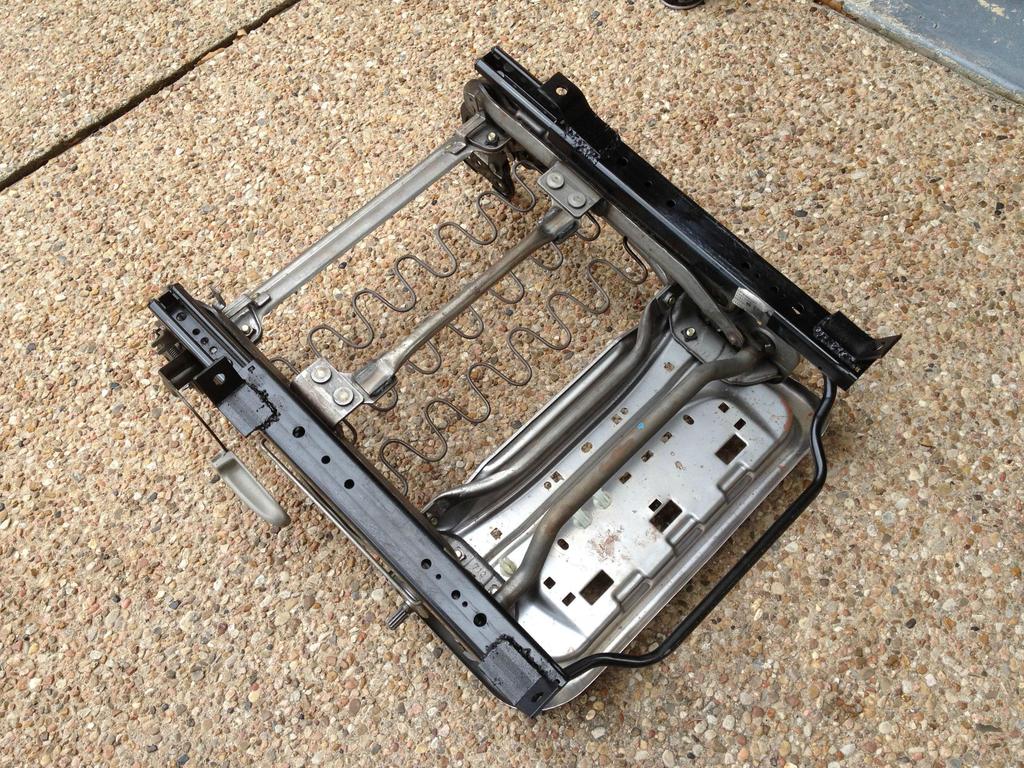
I hate the stock seats, I'm 6'1" and they are just too small, my shoulders go up past the top of the seat back. I found a guy selling a set of leather RSX seats for $60 and went for it, even though they have some rips. Installation was a massive pain, if I didn't have a welder I wouldn't have been able to do it. It probably took 15 - 20 hours total.
Mounts bolted in.
Lining up the seat pan for welding.
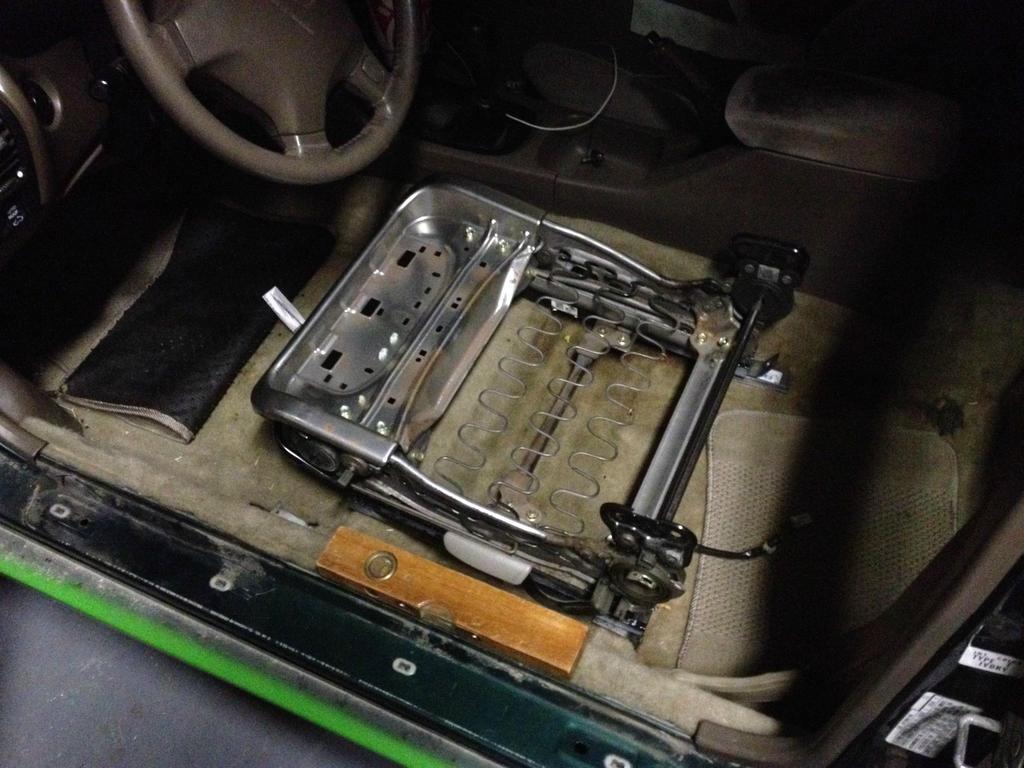
Spot welding the mounts in place to hold them while I weld later. My carpet was already nasty beyond cleaning, a few weld burns won't make it much worse.
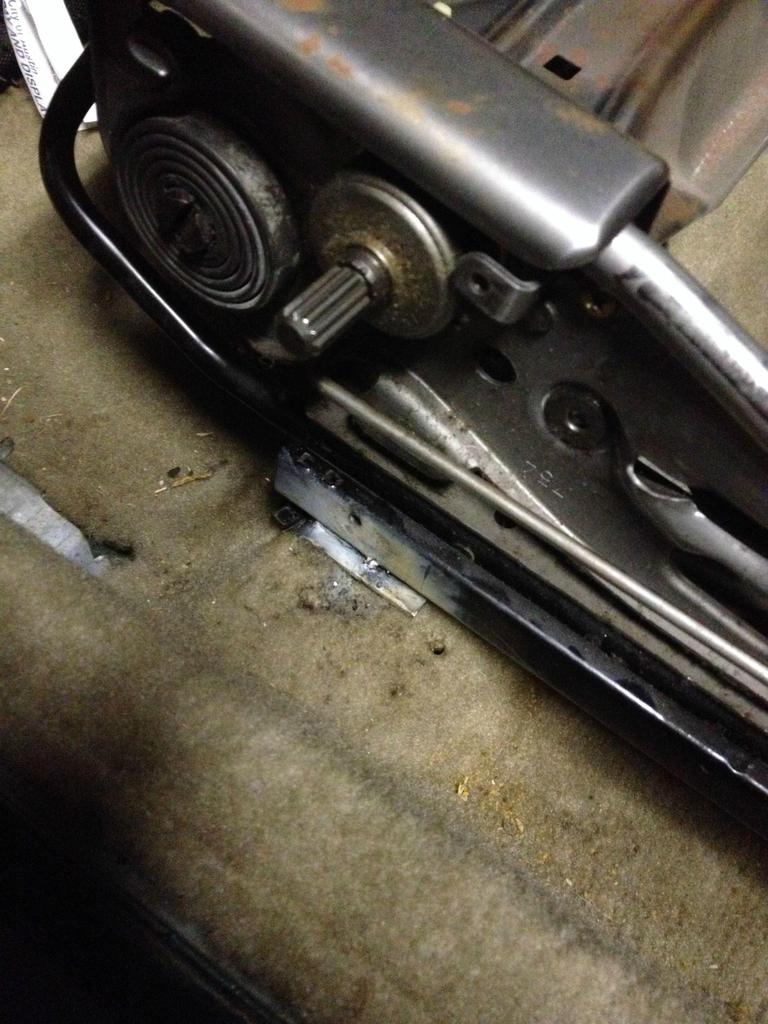
After welding and painting to discourage rust.
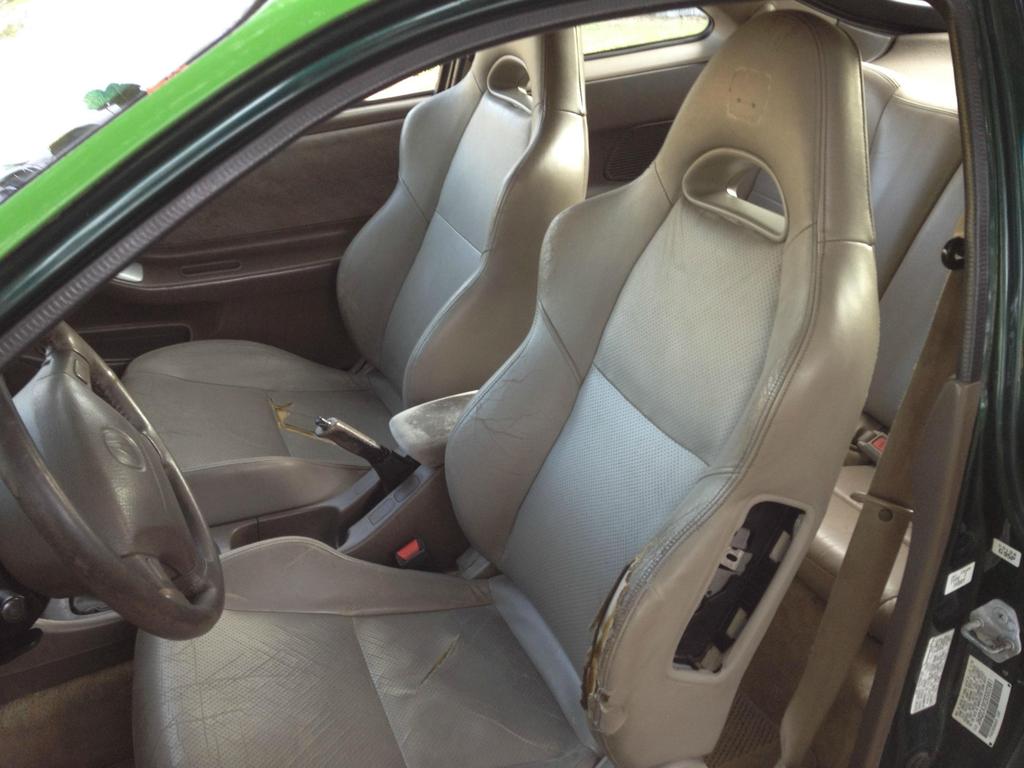
After installation.
Also found some mint rear leather seats for $130 shipped.

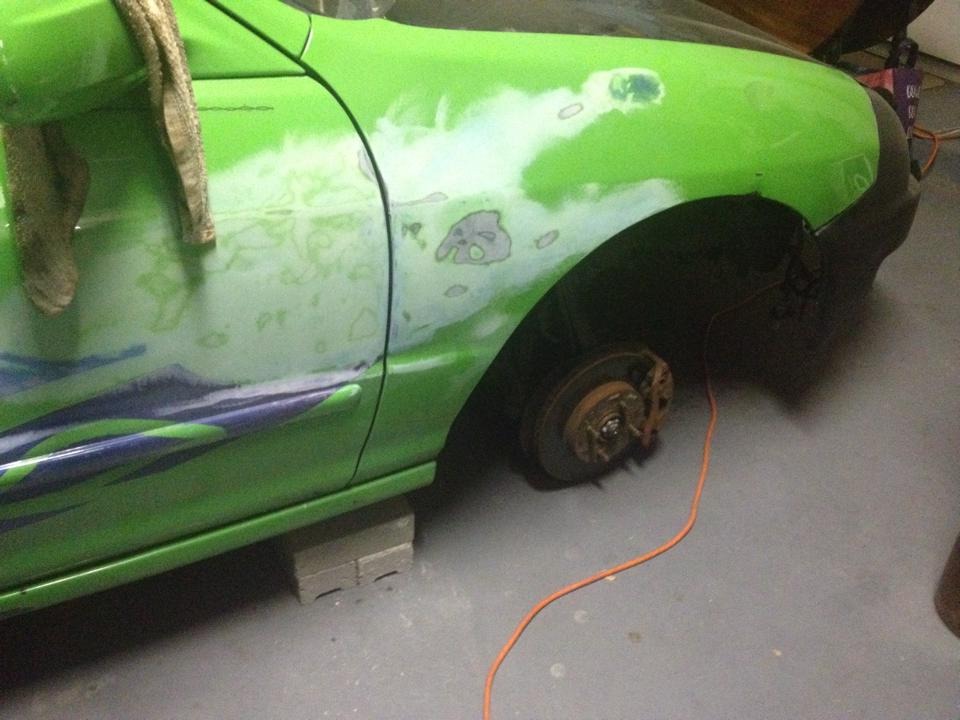
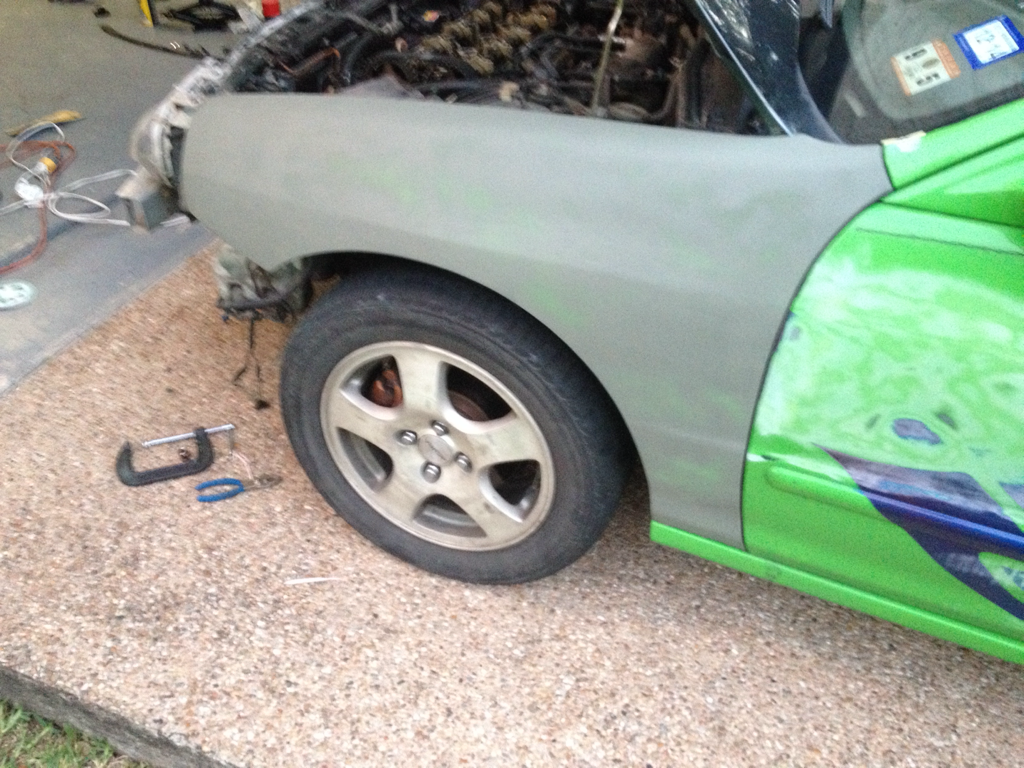
Pulling fenders for dent repair.

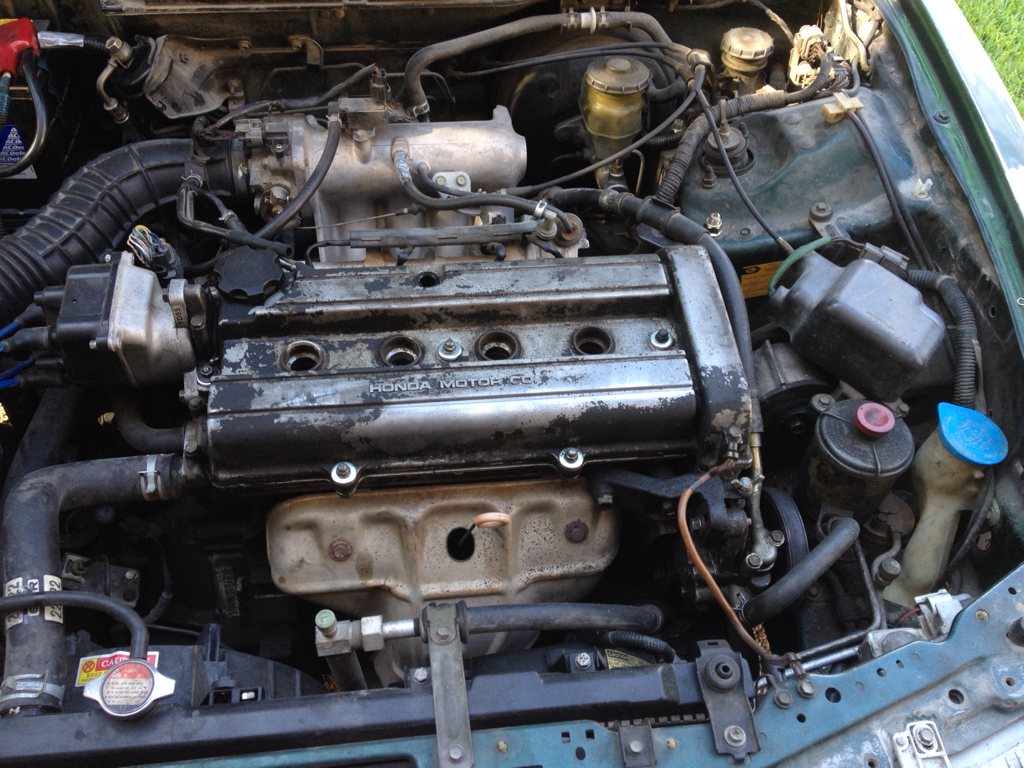
The valve cover was in terrible shape, as tends to be the case on these cars. I stripped off the peeling powder coat (?) with a wire brush, cleaned off any remaining grease with brake cleaner, then sprayed it with 3 coats of red VHT engine enamel, then 3 coats of their clear coat. The result was a slightly dimpled, glossy finish.
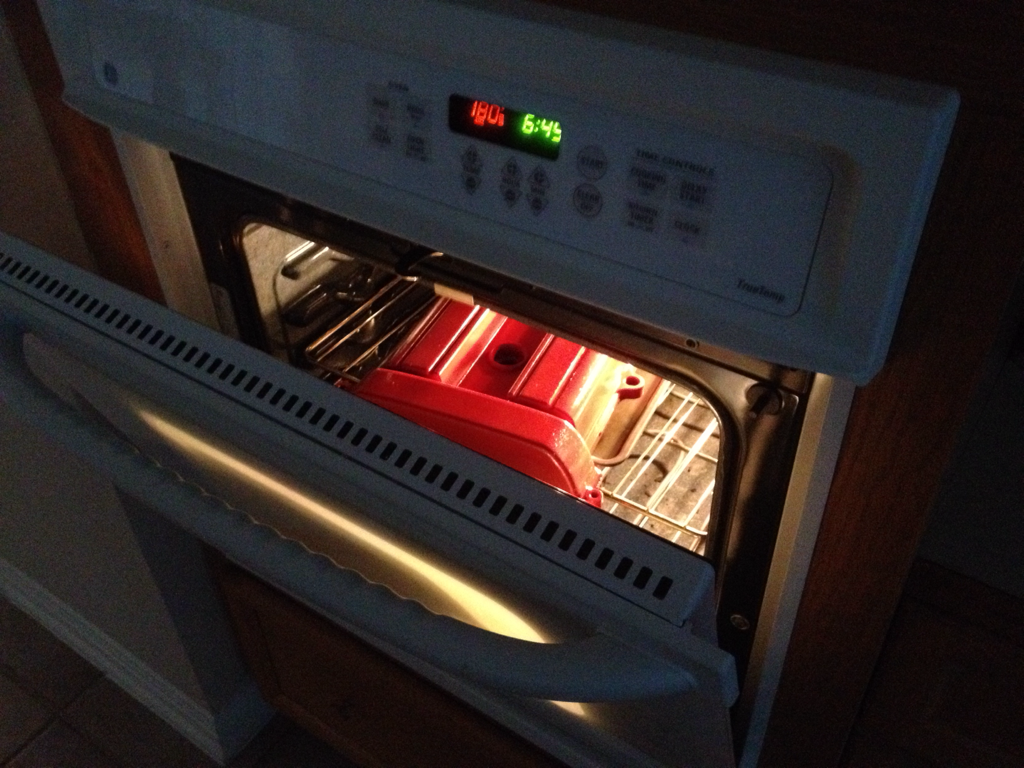
No one else will be home for a while, so I'll cure it in the oven.
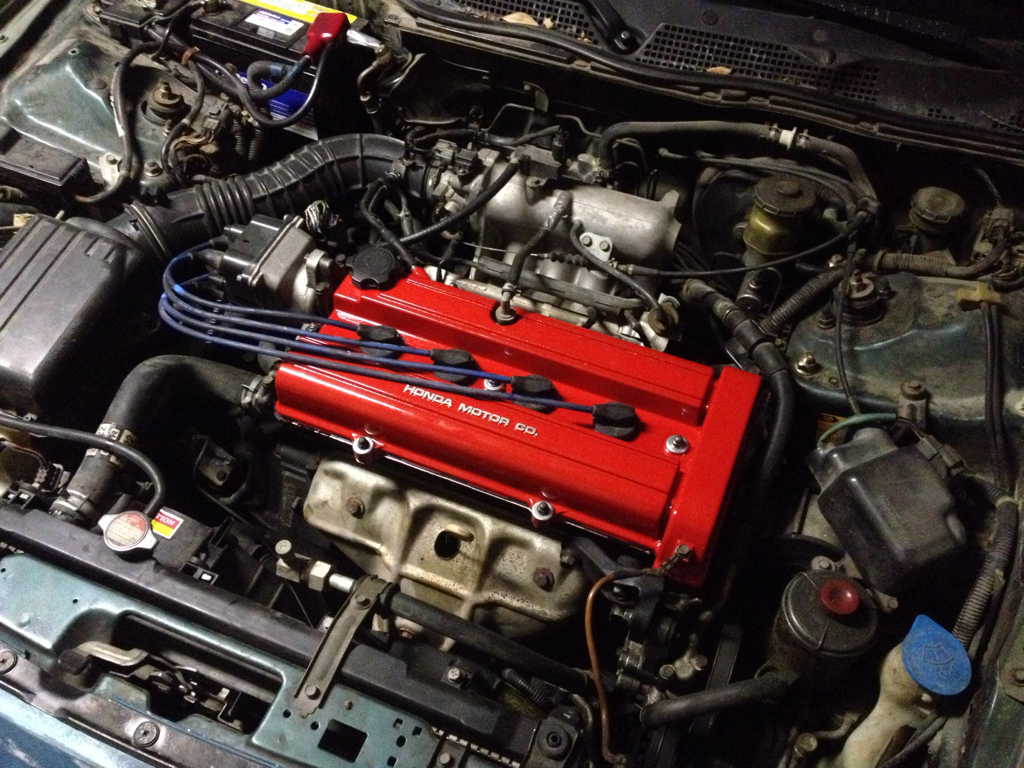
Reinstalled, looks pretty good IMO.
I actually posted on here about my loose steering wheel and most people pointed me towards the rack adjustment bolt under the car. That wasn't it, and it turned out these U-joints were just not tightened. After tightening them up, everything was great.

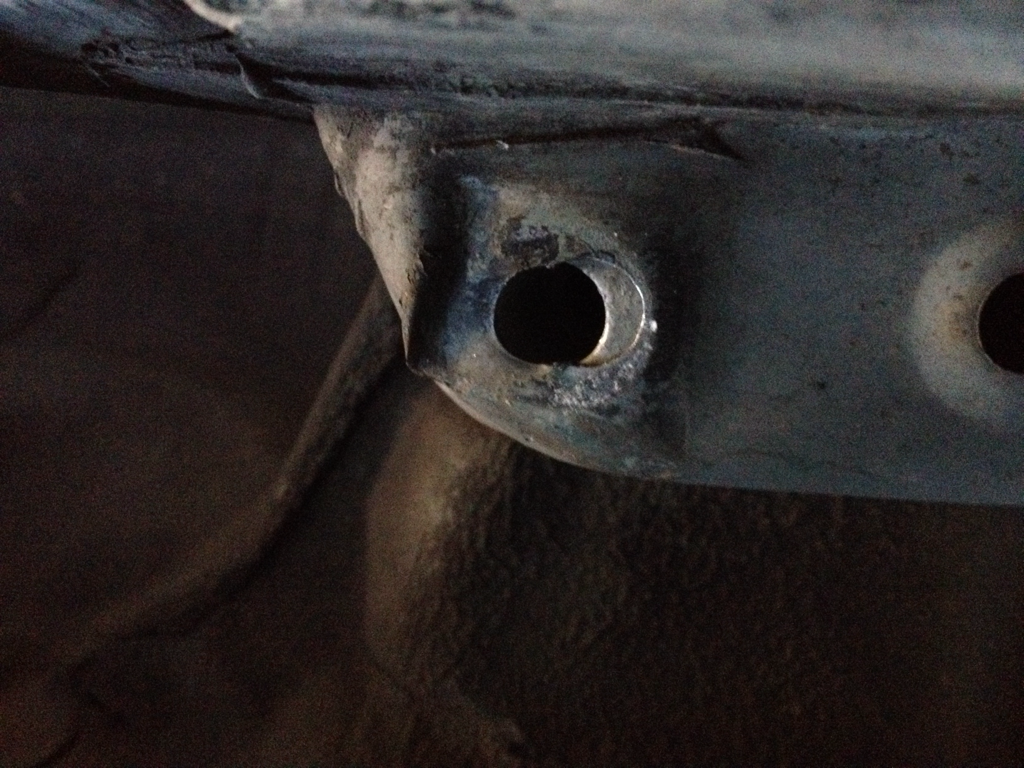
One of the many issues that I didn't notice when buying the car was that the passenger side rear wheel had been shifted back, presumable by whatever bent the trailing arm bushing so badly. After talking to my uncle, who used to own a body shop, he said that the mount points were probably designed to shift a bit, and that I should just try beating them back into place with a hammer and tightening the bolts back down to hold it in place. Surprisingly, it worked.
Suspension disassembled.
Mount points.
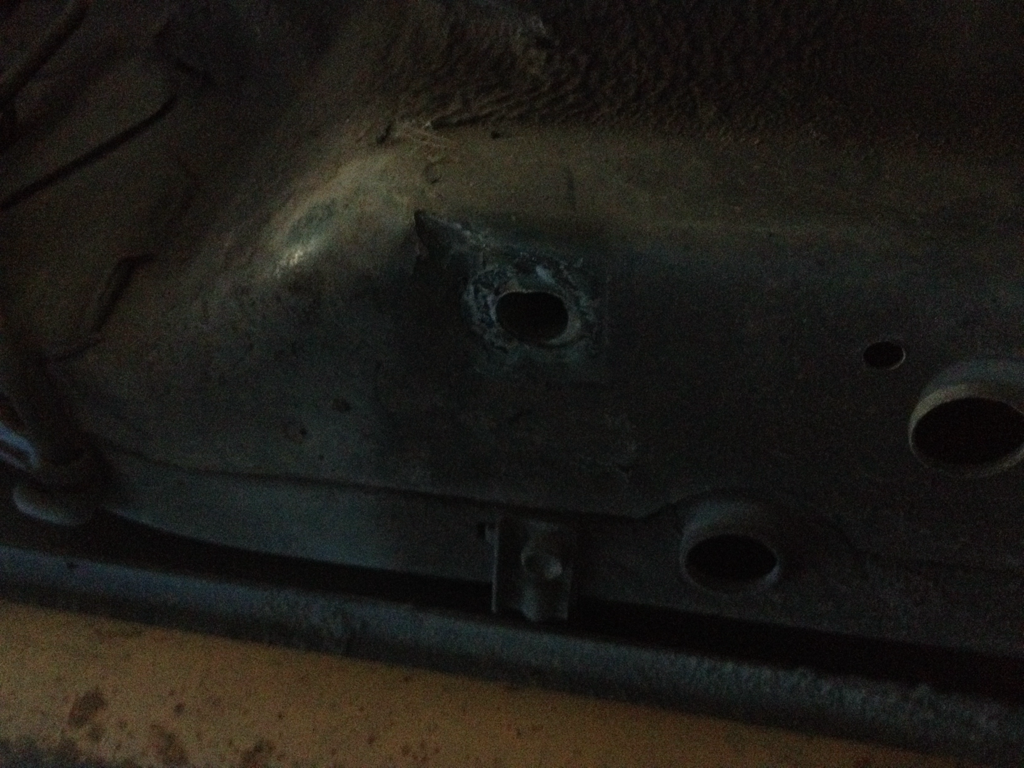
After repair.

Other side for comparison.
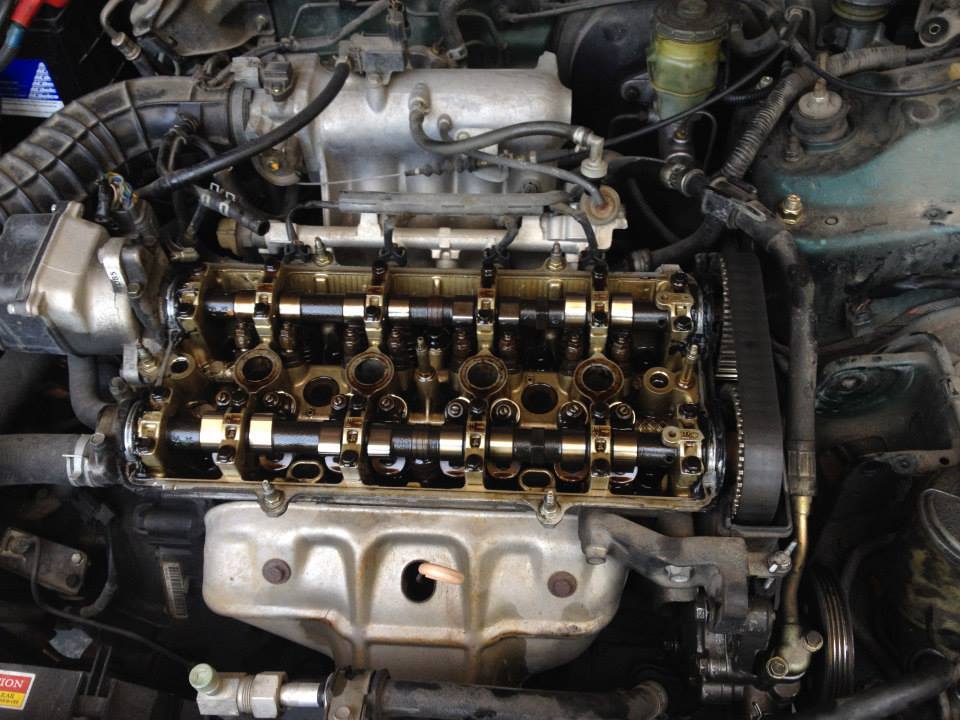
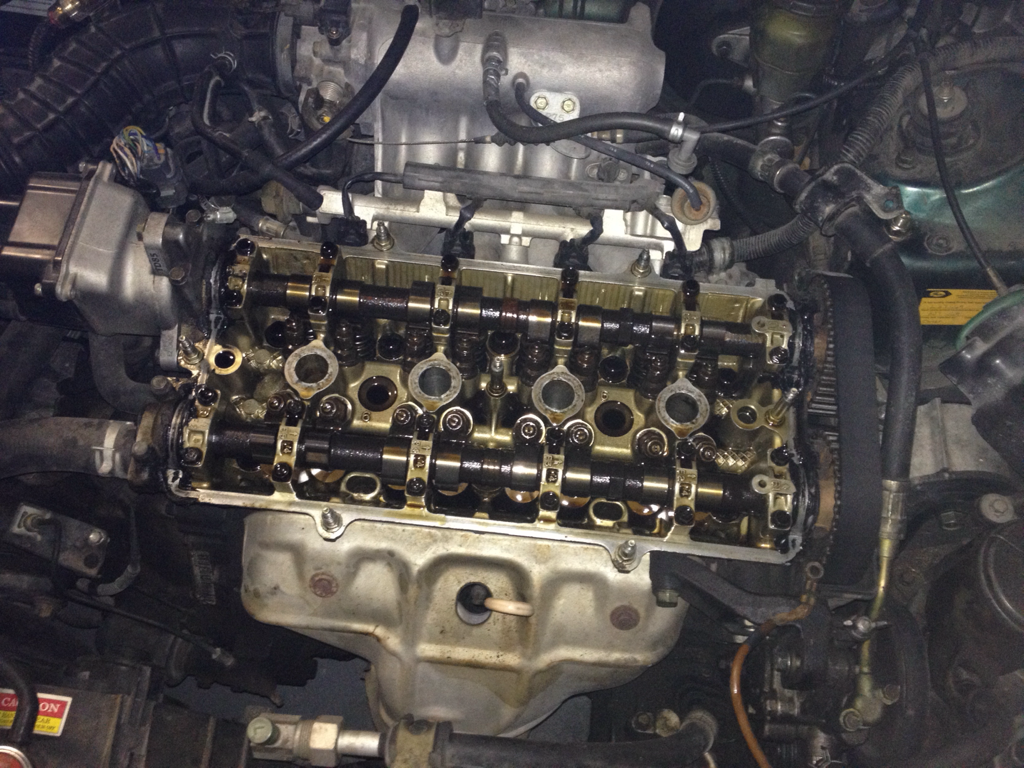
I decided to do a valve adjustment, and every valve was off. 15 were far too loose, and 1 was far too tight. Like everything else you've seen here, I'd never done it before, so I took my time and eventually got everything perfectly spaced and torqued back to spec, then checked again just to make sure nothing had shifted.
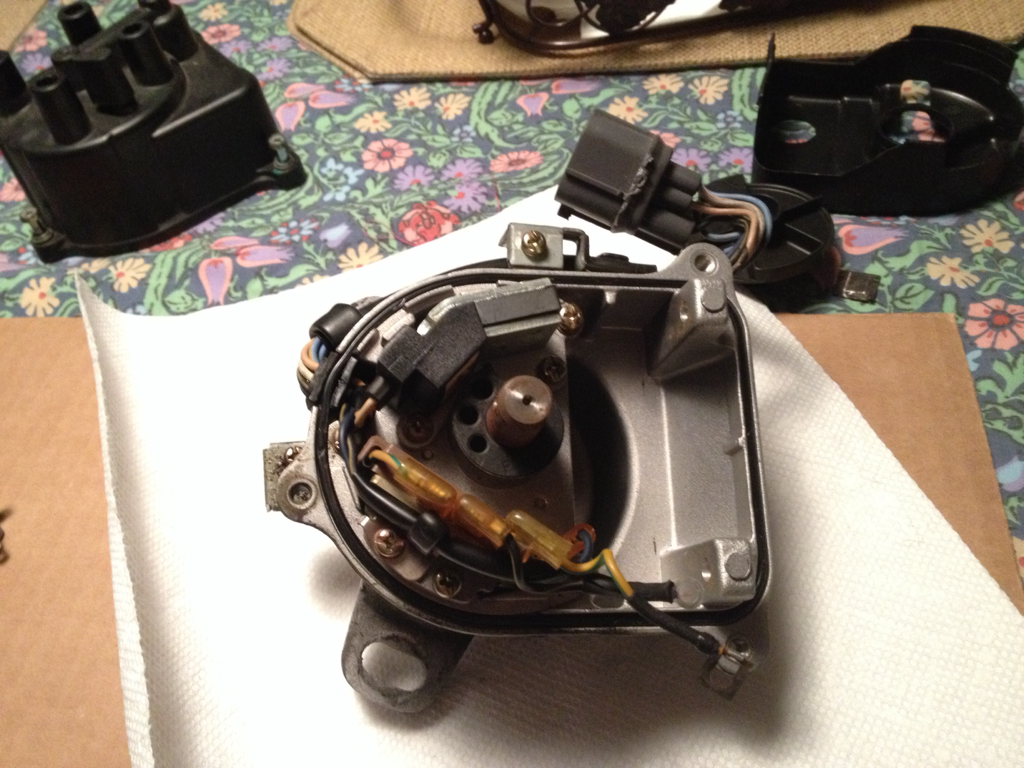
The car had an issue cold-starting, and eventually just wouldn't start at all. I traced the issue to the ICM in the distributor and pulled one from a DA Integra distributor. It started up like a charm, but gave me twitchy tachometer readings while cruising. (I DD'd the car for a bit because it was more fun to drive than my 2005 Civic.) I eventually found a guy selling a brand new OEM ICM on Craigslist for $30, and it worked perfectly. I used some Arctic Silver 5 on the back plate to help keep it from heating up too much in the future.
I removed the side moldings because I don't like the way they look, and they weren't holding up very well anyways. This is a picture of me priming the spots where I had patched the holes.
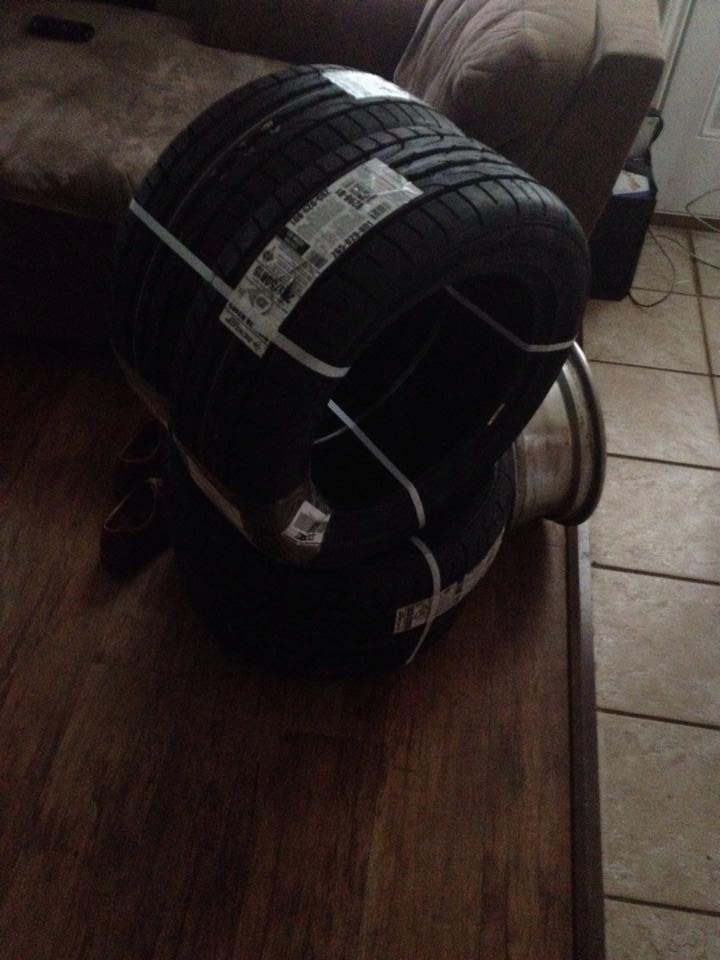
Ordered some Direzza DZ102 tires in 205/50R15 from TireRack. Here in Texas, I see no reason not to run summer tires year-round.
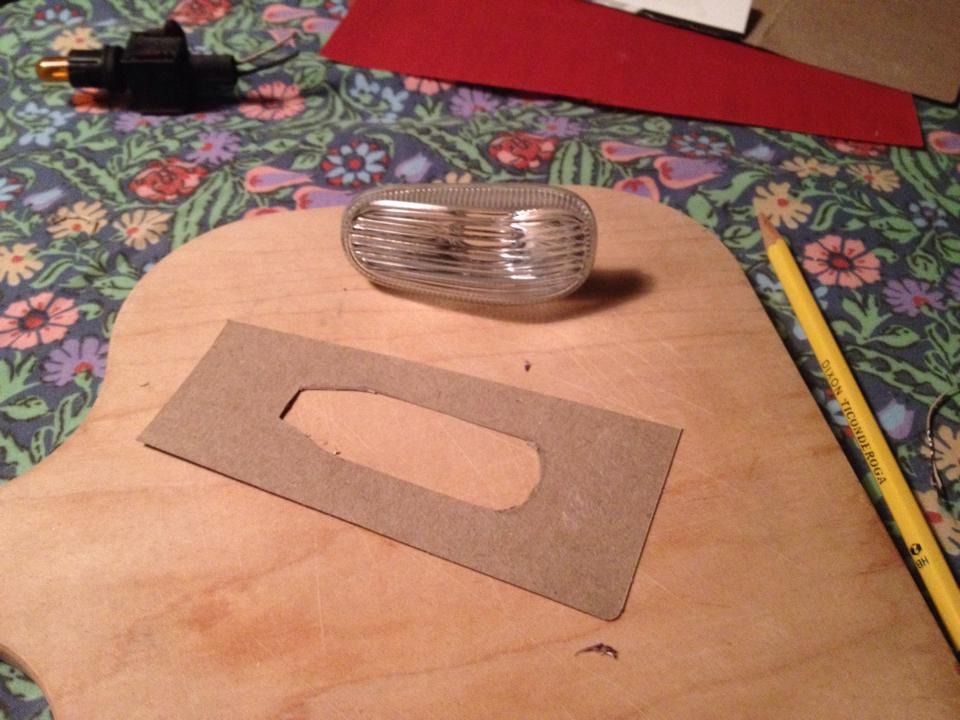
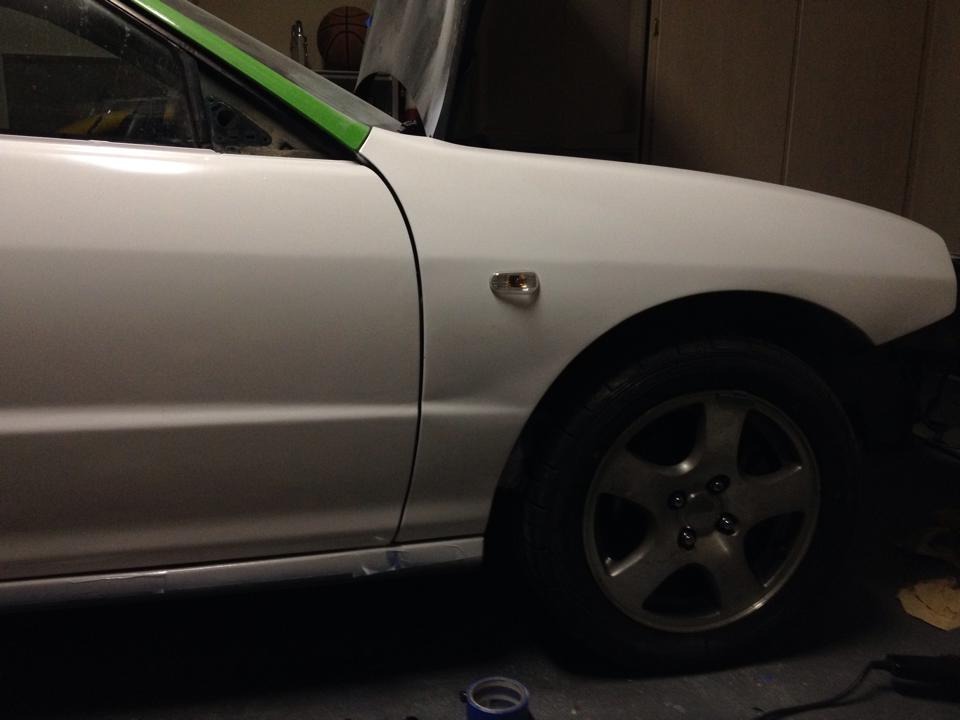
I found some clear side markers at the junkyard on some old Saab, so I went ahead and bought them because they were only $5 each. Installing them took a couple hours but I like the end result.
I made a template out of cardboard for the holes.
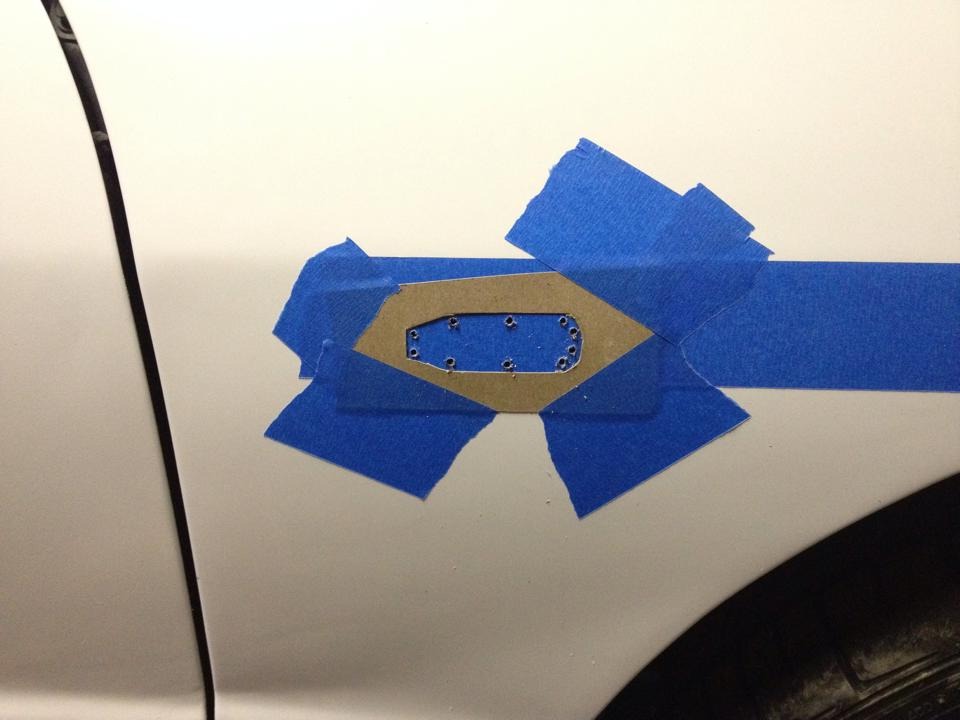
Template aligned, and pilot holes drilled. (I painted a couple panels white as an experiment at one point, but sanded it off later.)
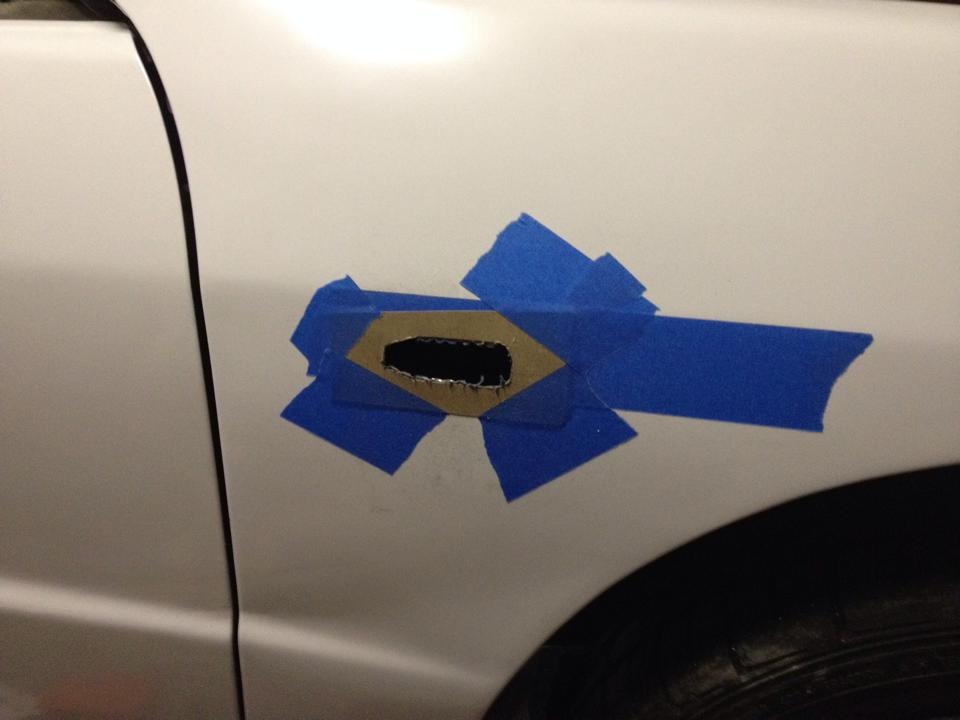
Hole roughly cut out, I ended up drilling a bunch more pilot holes to make "connecting the dots" with a dremel cutoff wheel easier.
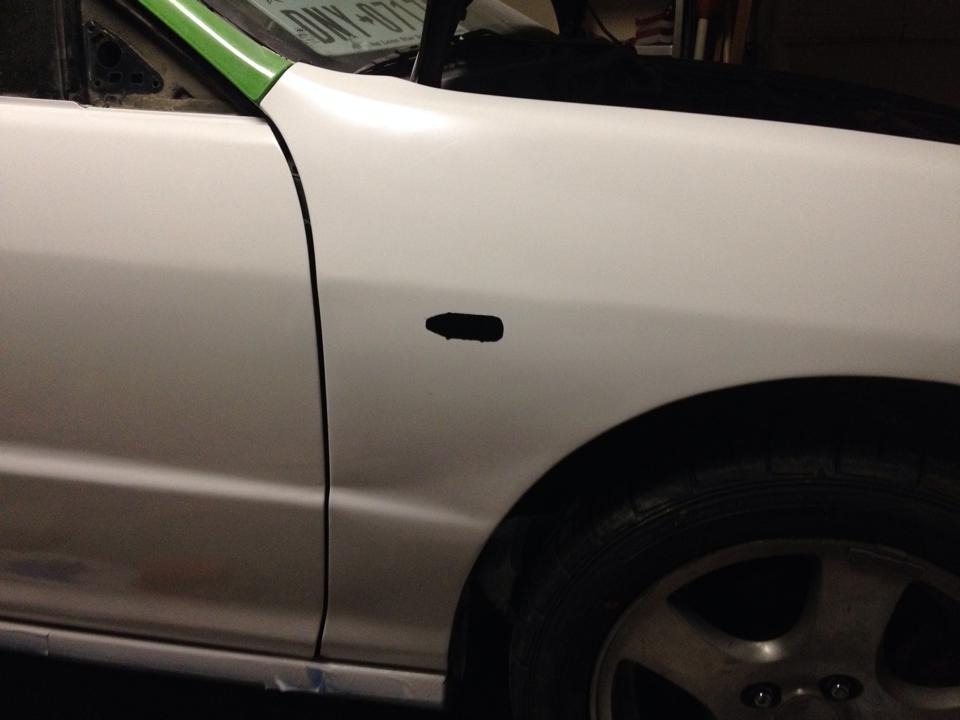
Finished hole.
Side marker installed.
My hood was a mess, so I bought one on Craigslist. Driving the Civic 20 miles in bad traffic, going 40mph the whole time wasn't much fun, but I made it.
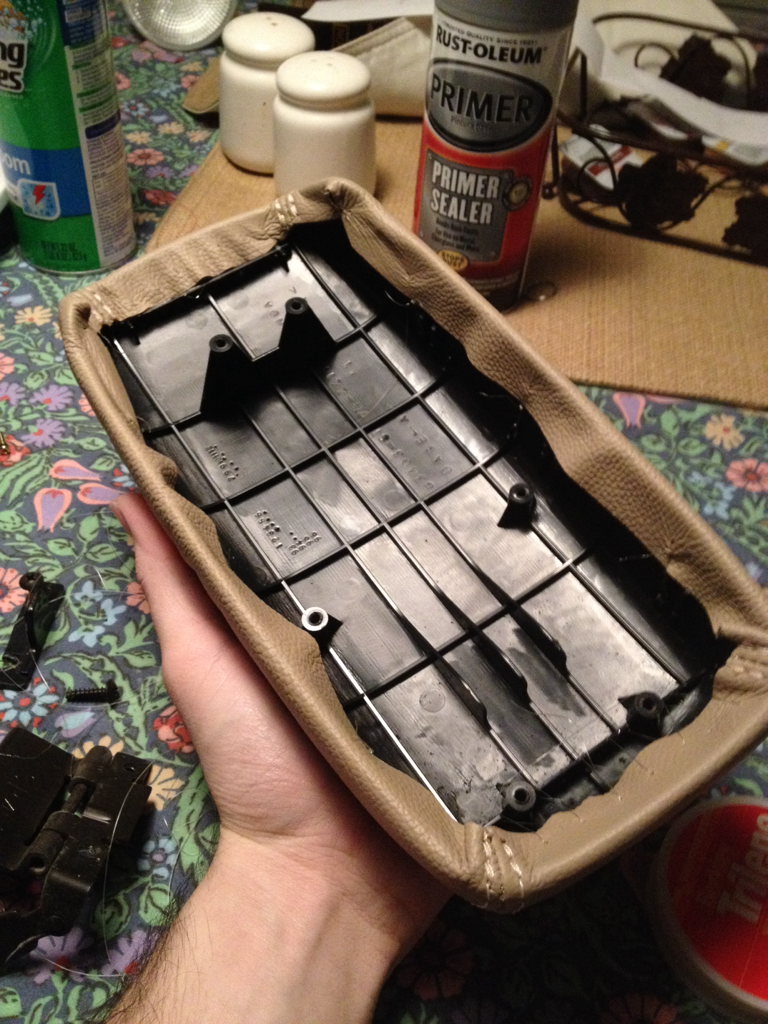
I decided to take a break from body work and do some more interior stuff, so I decided to reupholster my armrest. It had come with the interior console that I got at the junkyard, and was in terrible shape.
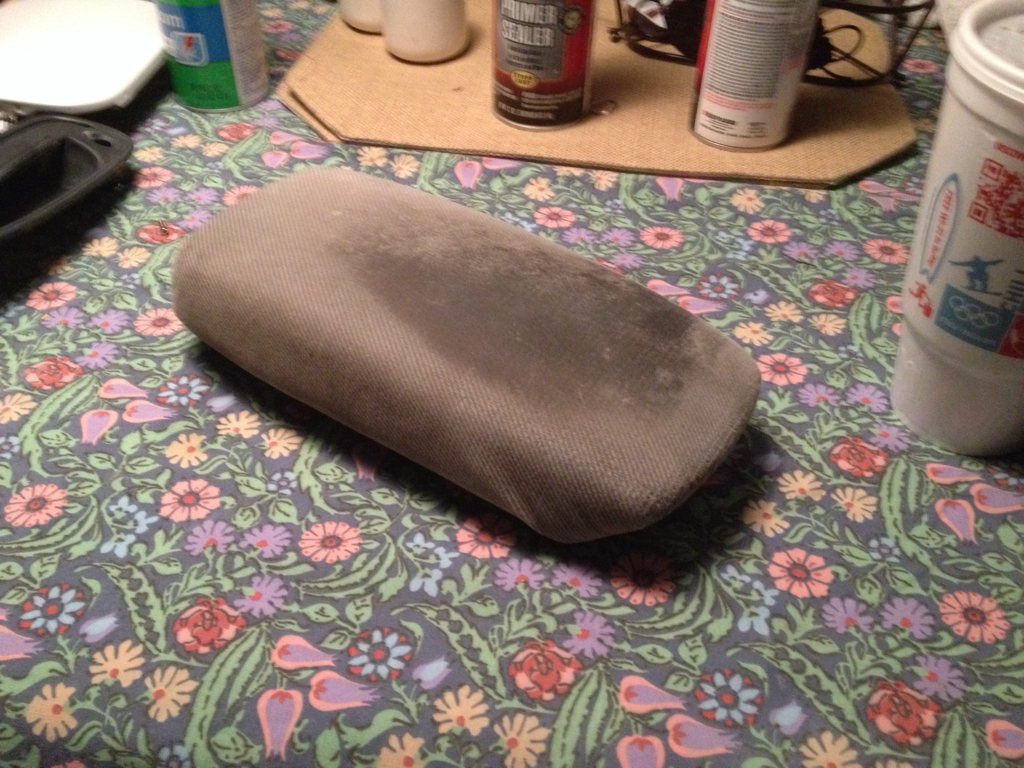
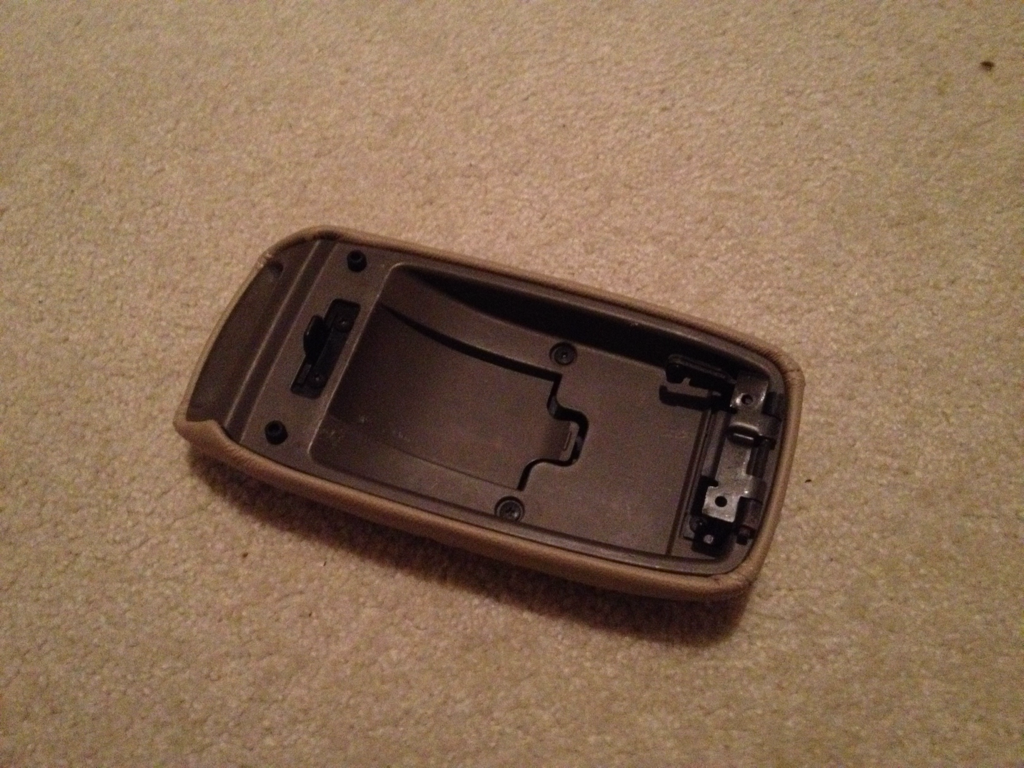
I peeled the old cloth off and got this, the foam is almost collapsed on top, but I don't really mind.
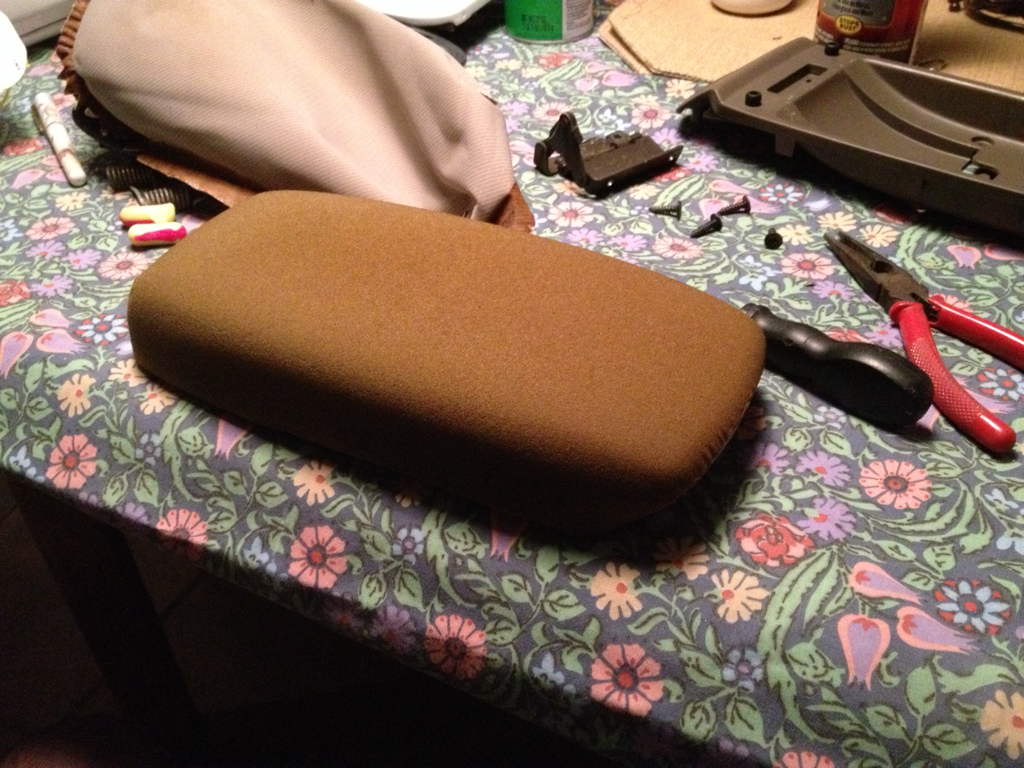
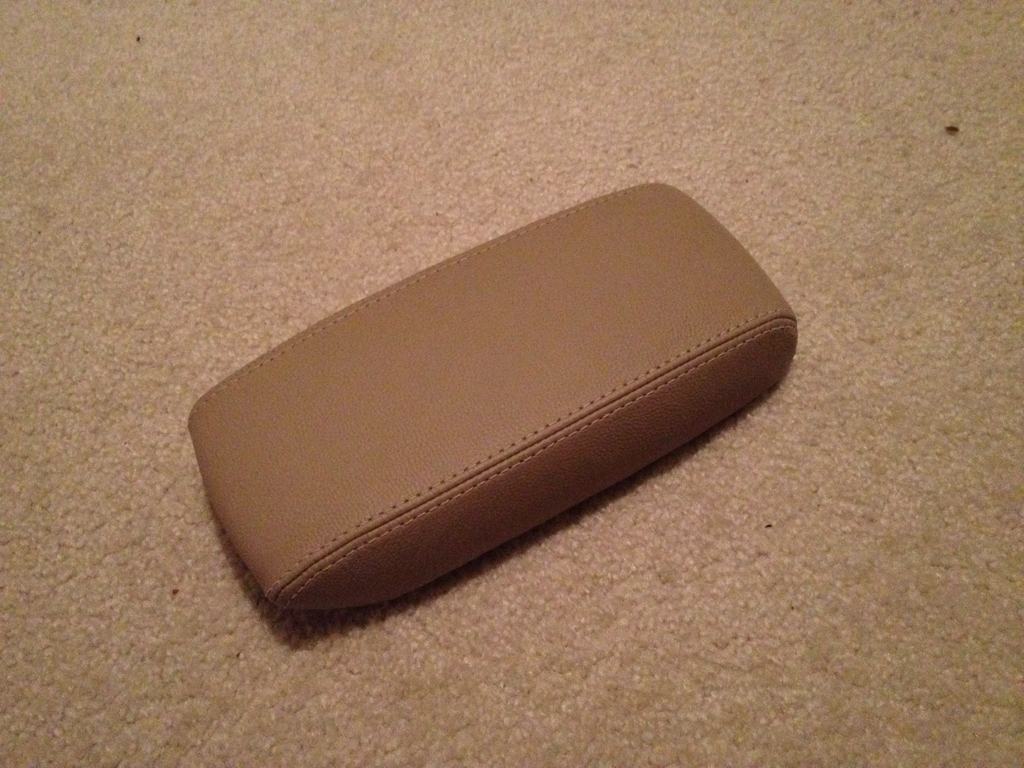
I found a guy on eBay selling leather armrest covers for $20, so I took the chance and bought one. The quality is far better than the factory leather covers, the fit is spot on, but the color didn't match perfectly. Oh well, I guess I can live with it for now.
I attached it by stitching it on with fishing line, using holes and grooves cut in the underside of the armrest to thread through.
Finished! Looks factory, except the color is slightly off.
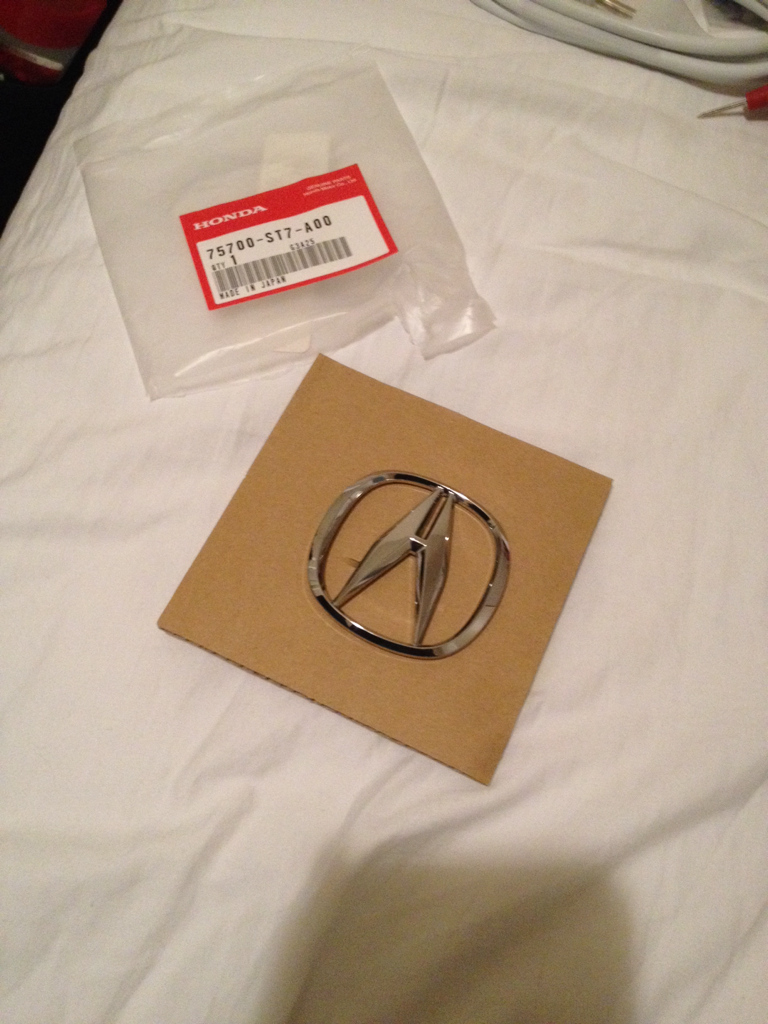
Since my front Acura badge was missing, and so was the one from every Integra in the junkyard, I sucked it up and bought one new. $30 seems steep, but I guess it's about normal.
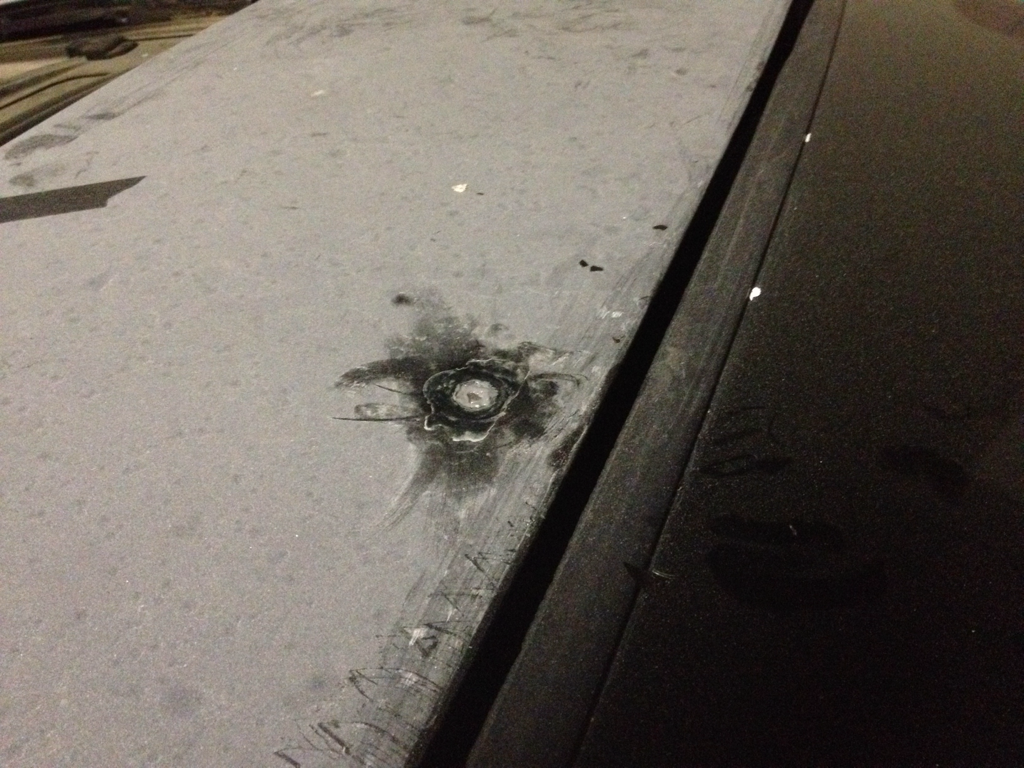
I removed the headliner so I could remove the rear water sprayer, since I removed the rear wiper as well.
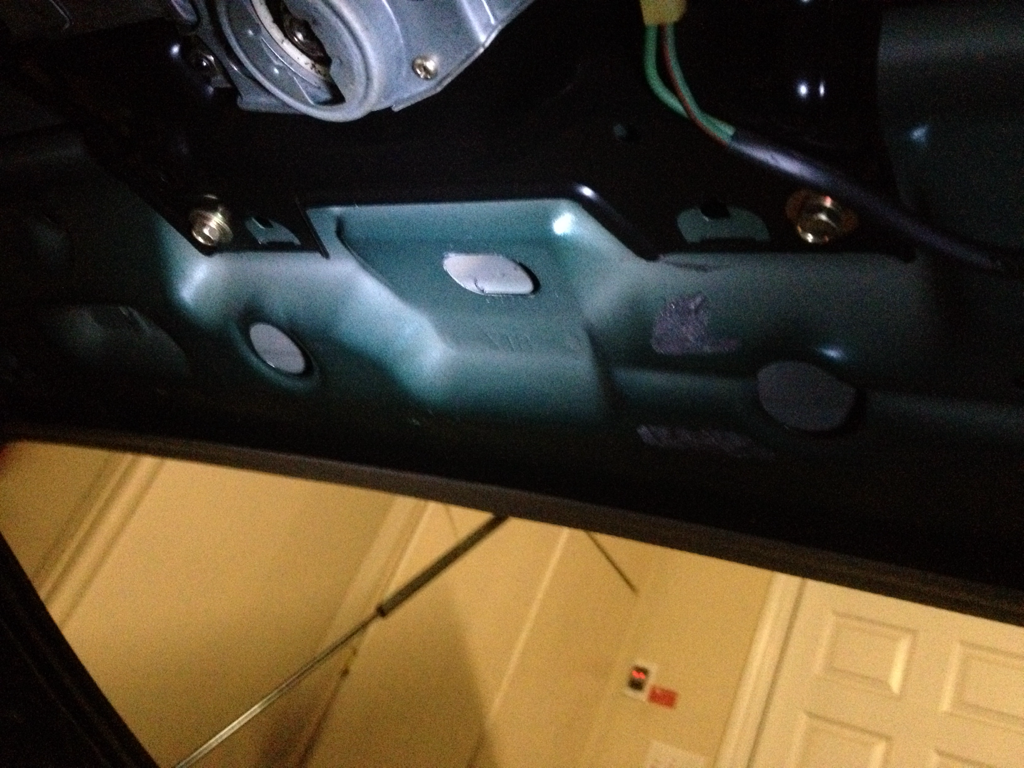
After patching the hole. Now to add filler and sand it smooth.
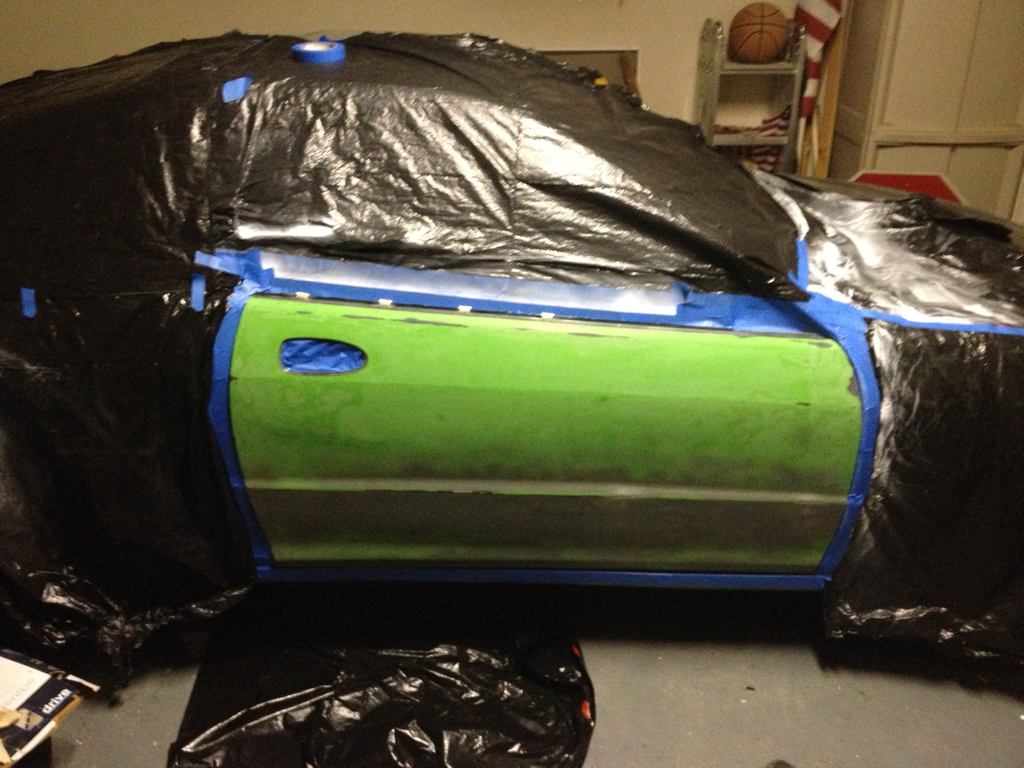
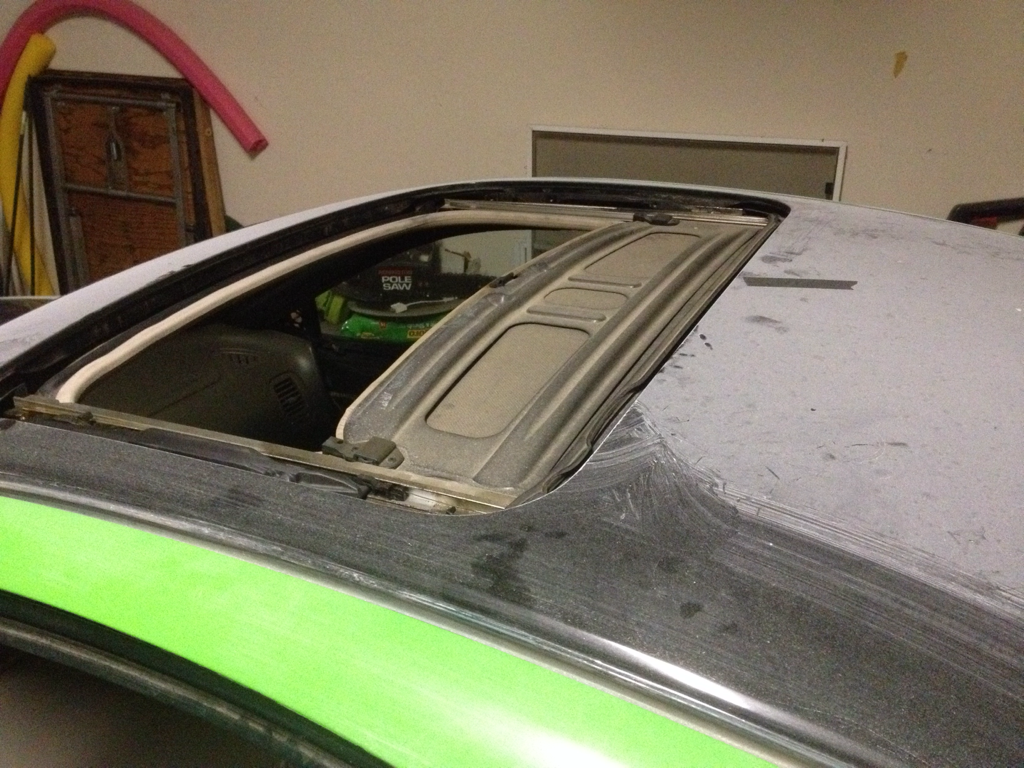
Also removed the moon roof glass to make painting easier. When one of the previous owners had this thing painted like this, they didn't both to remove any trim and instead masked everything. so it's peeling all over the place, I' hoping to avoid making the same mistake when I get it repainted.
Part 2
A bit about how this thread is organized, at the end of each post is a link to the next part, and there's a list of all parts so far right below here. There's also more pictures than shown in this album ( Fixing Up a Turd - Album on Imgur ) on my Imgur account but I have since migrated to Photobucket so it hasn't been updated in a while.
Contents
Part 1 (you are here)
Part 2
Part 3
Part 4
Part 5
Part 6
Part 7
Part 8
Part 9
Part 10
Part 11
Part 12
Part 13
Part 14
Part 15
Part 16
Part 17
Part 18
Part 19
Part 20
Part 21
Part 22
Part 23
Part 24
Part 25
Part 26
Part 27
Part 28
Part 29
Part 30
Anyways...
Here she is, in all her terrible glory.
The car is a 1999 Integra GS, but somebody swapped out the leather interior and put in a beat up cloth one. According to the AutoCheck report I have, it was stolen and then recovered, so maybe it happened then.
A semi-up-to-date list of everything I've done so far in no particular order:
Engine/Drivetrain
- OEM muffler
- Timing belt/tensioner/water pump
- Coolant flush
- Valve adjustment
- Fuel filter
- ICM and ignition coil
- O2 sensors, catalytic converter, downstream O2 sensor spacer
- Replaced various evap components, evap system still leaks
- JDM high compression B20B with all new oil seals
- Synchrotech carbon lined synchronizers
- OBX helical LSD (cleaned up tool marks, new bolts, new washers)
- New OEM transmission bearings
- New OEM transmission seals
- Rebuilt shift linkage
Suspension/Wheels
- Hard Race suspension bushings
- Blox camber kits, front and back
- Blox sway bar end links
- Adjustable rear toe arms
- Eibach Pro Kit springs
- KYB GR2 shocks
- OEM rubber parts in the shock assemblies
- Sparco Assetto Gara wheels, bronze, 15x7
- Dunlop Direzza DZ102 tires in 205/50R15
Interior
- Red Integra Type-R Recaro seats (front)
- Tan OEM leather seats (rear)
- Black leather shift boot
- Red leather armrest cover
- Red leather door inserts
- Red LED footwell lighting
- Aluminum shift ****/shortened shifter
- Shifter bezel painted gloss black
- Warm white LED interior lighting
- Amber cluster backlight
- Infinity Reference 6030CS component speakers in the front
- Infinity Reference 6032CF coaxial speakers in the back
- Pioneer DEH3300UB head unit
- Bazooka 150W RMS 8" subwoofer tube
- Leather wrapped JDM Integra SiR-G steering wheel with airbag
Aesthetic
- Rear window wiper/sprayer delete
- Reroute hood release cable
- 5500K 35W HIDs, Hella/Audi ballasts, Morimotor FX-R projectors, projector bezels painted black
- Side markers
- Removed side moldings
- LED license plate lights
- Filled "Integra" moldings on front and rear bumpers
- Front license plate mounting holes sanded flush and filled, license plate in front windshield.
- Entire car painted VW candy white
Anyways, here's the build thread.
First order of business, get rid of the fart can. Fortunately the local pick-your-part junkyard had an OEM axleback muffler for $25.
And of course the oil pan drain has been tightened down by a 15 year old kid at Iffy-Lube using an air gun.
I was able to find a guy willing to buy the ugly-a** 17" curb-rashed-to-he** wheels for $100, but now I don't have any wheels.
Fortunately it was only a few days until I was able to find some Fat-Fives for $150. I've stripped one of them and re-clear coated it and it actually looks pretty good. (not shown)
Who knows how old the timing belt was, so I might as well spend a day changing it. In the retrospect, I probably shouldn't have used two scissor jacks to hold the car up.
I don't want to know how this trailing arm bushing got bent like this, but I'm sure it wasn't anything good. I had a machine shop press in the bushings for me as I don't have access to tools or the skill to properly do it.
New front end, I hadn't been able to find one for several months at this point, so I just bought a 94-97 front end. It doesn't bother me much, but sometimes I wish I had held out for a 98-01. Later I would discover that it had been poorly repainted, and then spend hours sanding away the crappy peeling paint.
Cleaning up the headlights.
Well sh*t. Some a**hole had left a giant hole in the bottom of the intake pipe. This could explain why the car all of the sudden started burning a bit of oil higher in the rev range.
I hate the stock seats, I'm 6'1" and they are just too small, my shoulders go up past the top of the seat back. I found a guy selling a set of leather RSX seats for $60 and went for it, even though they have some rips. Installation was a massive pain, if I didn't have a welder I wouldn't have been able to do it. It probably took 15 - 20 hours total.
Mounts bolted in.
Lining up the seat pan for welding.
Spot welding the mounts in place to hold them while I weld later. My carpet was already nasty beyond cleaning, a few weld burns won't make it much worse.
After welding and painting to discourage rust.
After installation.
Also found some mint rear leather seats for $130 shipped.
Pulling fenders for dent repair.
The valve cover was in terrible shape, as tends to be the case on these cars. I stripped off the peeling powder coat (?) with a wire brush, cleaned off any remaining grease with brake cleaner, then sprayed it with 3 coats of red VHT engine enamel, then 3 coats of their clear coat. The result was a slightly dimpled, glossy finish.
No one else will be home for a while, so I'll cure it in the oven.
Reinstalled, looks pretty good IMO.
I actually posted on here about my loose steering wheel and most people pointed me towards the rack adjustment bolt under the car. That wasn't it, and it turned out these U-joints were just not tightened. After tightening them up, everything was great.
One of the many issues that I didn't notice when buying the car was that the passenger side rear wheel had been shifted back, presumable by whatever bent the trailing arm bushing so badly. After talking to my uncle, who used to own a body shop, he said that the mount points were probably designed to shift a bit, and that I should just try beating them back into place with a hammer and tightening the bolts back down to hold it in place. Surprisingly, it worked.
Suspension disassembled.
Mount points.
After repair.
Other side for comparison.
I decided to do a valve adjustment, and every valve was off. 15 were far too loose, and 1 was far too tight. Like everything else you've seen here, I'd never done it before, so I took my time and eventually got everything perfectly spaced and torqued back to spec, then checked again just to make sure nothing had shifted.
The car had an issue cold-starting, and eventually just wouldn't start at all. I traced the issue to the ICM in the distributor and pulled one from a DA Integra distributor. It started up like a charm, but gave me twitchy tachometer readings while cruising. (I DD'd the car for a bit because it was more fun to drive than my 2005 Civic.) I eventually found a guy selling a brand new OEM ICM on Craigslist for $30, and it worked perfectly. I used some Arctic Silver 5 on the back plate to help keep it from heating up too much in the future.
I removed the side moldings because I don't like the way they look, and they weren't holding up very well anyways. This is a picture of me priming the spots where I had patched the holes.
Ordered some Direzza DZ102 tires in 205/50R15 from TireRack. Here in Texas, I see no reason not to run summer tires year-round.
I found some clear side markers at the junkyard on some old Saab, so I went ahead and bought them because they were only $5 each. Installing them took a couple hours but I like the end result.
I made a template out of cardboard for the holes.
Template aligned, and pilot holes drilled. (I painted a couple panels white as an experiment at one point, but sanded it off later.)
Hole roughly cut out, I ended up drilling a bunch more pilot holes to make "connecting the dots" with a dremel cutoff wheel easier.
Finished hole.
Side marker installed.
My hood was a mess, so I bought one on Craigslist. Driving the Civic 20 miles in bad traffic, going 40mph the whole time wasn't much fun, but I made it.
I decided to take a break from body work and do some more interior stuff, so I decided to reupholster my armrest. It had come with the interior console that I got at the junkyard, and was in terrible shape.
I peeled the old cloth off and got this, the foam is almost collapsed on top, but I don't really mind.
I found a guy on eBay selling leather armrest covers for $20, so I took the chance and bought one. The quality is far better than the factory leather covers, the fit is spot on, but the color didn't match perfectly. Oh well, I guess I can live with it for now.
I attached it by stitching it on with fishing line, using holes and grooves cut in the underside of the armrest to thread through.
Finished! Looks factory, except the color is slightly off.
Since my front Acura badge was missing, and so was the one from every Integra in the junkyard, I sucked it up and bought one new. $30 seems steep, but I guess it's about normal.
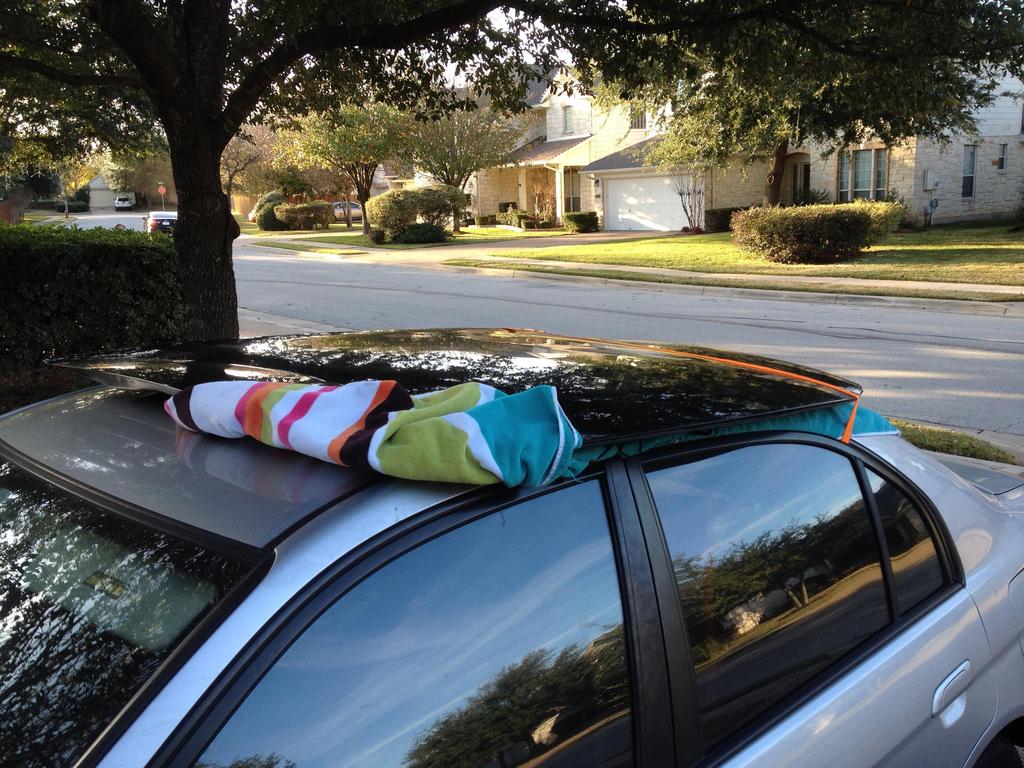
I removed the headliner so I could remove the rear water sprayer, since I removed the rear wiper as well.
After patching the hole. Now to add filler and sand it smooth.
Also removed the moon roof glass to make painting easier. When one of the previous owners had this thing painted like this, they didn't both to remove any trim and instead masked everything. so it's peeling all over the place, I' hoping to avoid making the same mistake when I get it repainted.
Part 2
Last edited by MotorMouth93; 07-25-2021 at 03:27 PM. Reason: Added update.
 12-31-2014, 07:35 PM
#2
Honda-Tech Member
if you can... get the suspension all bolted up and get an alignment read out, while it may be fixed I'm not sure how much it will throw things off. Aside from being stuck in 2001 that car looks "rust free" bug I guess they all are in TX?. looks like a good start my first integra was a mess but I had tons of fun fixing, do paint it all one colour a clean stock integra is extremely rare.
12-31-2014, 08:26 PM
#3
I had it aligned when I had the tires put on. The only measurement that's out of spec is the driver side rear toe where the adjustment is maxed out, but it wouldn't cause any issues if I properly kept up tire rotation. I'm going to have a welder shorten the toe arm a bit.
Yup, Texas. Zero rust on the entire car besides a few spots of surface rust that I sanded and primed.
Some things I forgot to take pictures of, right now the bodywork is almost done and I'm planning on getting the whole thing painted white in a few weeks. I would have pictures of the whole car but it's 40 degrees outside and I don't feel like backing it out of the garage to take pictures.
Some things that aren't mentioned:
Brake job, but I'm going to go ahead and rebuild all the calipers in a week or so
New fuel filter
Flushed coolant, replaced water pump, new timing belt tensioner
Evap canister and purge valve (junkyard)
Catalytic converter and O2 sensors (craigslist for cat, new O2 sensor)
Lots and lots of bodywork
Replaced driver side fender as it had a small tear on the edge
Rear window wiper delete
Filled in the "Integra" logos in the front and rear bumpers, instead I have the name badge from a DA Integra that I'm going to use
Replaced some beat up tan interior parts (junkyard)
Replaced some interior parts that the PO had painted silver
Replaced shift boot with a real leather one
Fake Type-R shift ****
Shifter cut down an inch so I could bolt the shift boot up to the bottom of the ****
Added wiring for amplifiers in the trunk
Replaced blown out rear speakers with Infinity Reference 6032CF speakers, front speakers to be determined
Replaced cheapo aftermarket radio with a Pioneer unit
I'm not really going for stock so much as "what I like", at this point, I'd consider the car too beat up to make going back to stock worthwhile.
Last edited by MotorMouth93; 12-31-2014 at 08:49 PM. Reason: Adding stuff
12-31-2014, 08:33 PM
#4
Honda-Tech Member
there's adjustable toe arms if you wanted to go down that route, they're around $80 good luck with your build look forward to seeing it while.
is -10*c here so 14*F... yah I'd love it to be 40*F lol
is -10*c here so 14*F... yah I'd love it to be 40*F lol
12-31-2014, 08:36 PM
#5
Honda-Tech Member
Looking good! i kind of like how it looked when it was a turd.. lol jk hey i got my acura badges all from my 98 integra gsr if you want them it should be the whole set lmk ill ship em just shoot me like $5 if you want.

Trending Topics
01-05-2015, 03:10 PM
#11
Honda-Tech Member
Did you weld up the holes on the doors and 1/4 panels?
why did you put that junk rice fender marker in, not to mention in the wrong spot as well? i was all for this until that happened.
amazing job on the arm rest though
why did you put that junk rice fender marker in, not to mention in the wrong spot as well? i was all for this until that happened.
amazing job on the arm rest though
01-06-2015, 07:59 AM
#12
No, my uncle owned a body shop for years, I talked to him about how to patch the holes and he recommended I cut a piece of sheet metal of the same thickness slightly larger than the hole, scuff up both surfaces, then use JBweld to attach them. Flux MIG welding on sheet metal doesn't really work, and paying someone to TIG weld the holes costs a lot more than I care to spend.
Because orange OEM fender markers would not have looked good with the clear front turn signals.
Because orange OEM fender markers would not have looked good with the clear front turn signals.
Last edited by MotorMouth93; 01-06-2015 at 03:27 PM.

 01-13-2015, 06:44 PM
#15
Honda-Tech Member
No, my uncle owned a body shop for years, I talked to him about how to patch the holes and he recommended I cut a piece of sheet metal of the same thickness slightly larger than the hole, scuff up both surfaces, then use JBweld to attach them. Flux MIG welding on sheet metal doesn't really work, and paying someone to TIG weld the holes costs a lot more than I care to spend.
well hopefully they dont rust though and bubble
Because orange OEM fender markers would not have looked good with the clear front turn signals.
well hopefully they dont rust though and bubble
Because orange OEM fender markers would not have looked good with the clear front turn signals.
honda makes OEM clear side markers.
01-15-2015, 09:47 PM
#16
The store was called autotrimming, here is a link to the eBay storefront. Also, Redline Accessories (www.redlinegoods.com) is worth a look. I bought a leather shift boot from them and it's very nice, the leather they use is nicer than what the eBay seller has and you can customize everything about your order, including color, thread color, stitch style, size, cut pattern, etc. The downside is that it's more expensive and shipping from Europe takes about two weeks. I'll take some better pictures of both of them tomorrow if you'd like.
That would require the patches to be exposed to the atmosphere, which none are. I pulled the interior plastic and door panels, then sprayed the back side of each patch with etching primer, and the front side is filled with Bondo, primed, and painted.
I guess I should have searched, too late now though. �\_(ツ)_/�
Last edited by MotorMouth93; 01-15-2015 at 09:57 PM. Reason: Adding links.
01-16-2015, 07:09 PM
#18
longest project ever
Join Date: Sep 2009
Location: on the south side of dixie, 1986 Accord Hatch
Posts: 3,494
Likes: 0
Received 2 Likes
on
2 Posts
No, my uncle owned a body shop for years, I talked to him about how to patch the holes and he recommended I cut a piece of sheet metal of the same thickness slightly larger than the hole, scuff up both surfaces, then use JBweld to attach them. Flux MIG welding on sheet metal doesn't really work, and paying someone to TIG weld the holes costs a lot more than I care to spend.
Because orange OEM fender markers would not have looked good with the clear front turn signals.
Because orange OEM fender markers would not have looked good with the clear front turn signals.
01-17-2015, 03:32 PM
#19
the JB weld will cause headaches later on, the idea is fine, but you need to use the 3M body adhesive, it's designed to attach metal to metal in non structural use, and it's designed to stop rust at the junction, thats the same way I'm going to put steel behind some of these excess firewall holes, it would be a nightmare to weld them in my situation, the 3M panel adhesive is designed to permanently put panels together and then be primed and painted over, once it's there, it's there for good
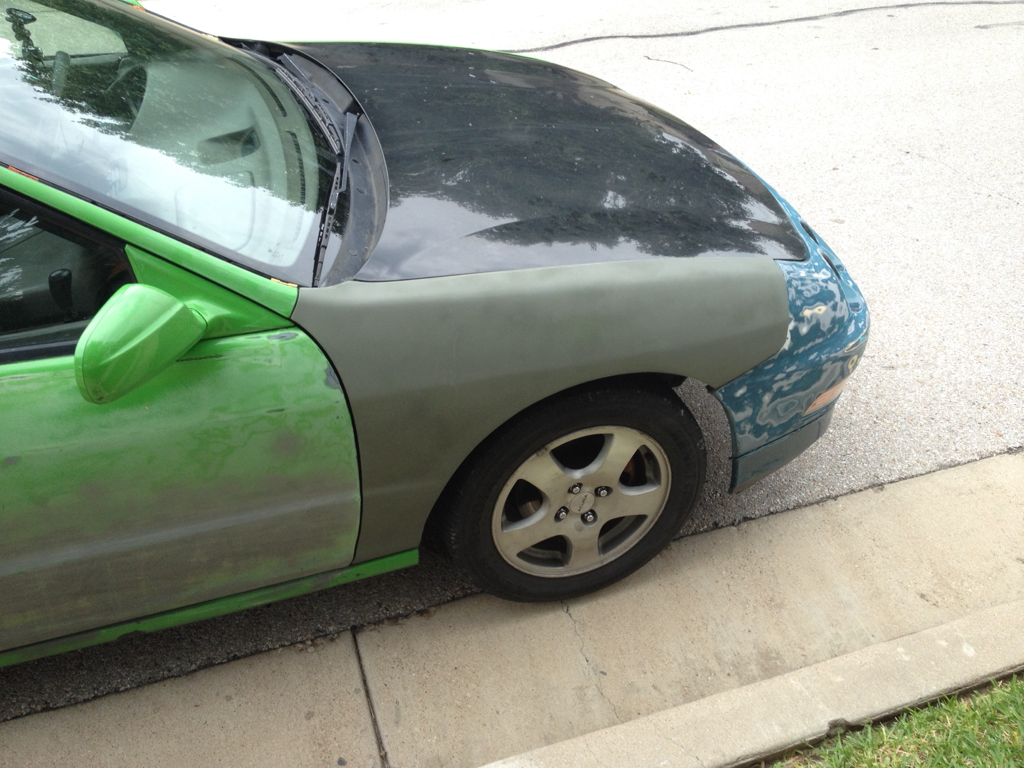
The weather was nice today (70F and partly cloudy!) so I pulled the car out of the garage and spent all day on it. I also finally got some decent pictures of the car's current state, it's been a while since I took any of these.
I've sprayed primer sealer on the panels that I'm done working on, the car will hopefully go to the shop for paint in the next couple weeks. Can't wait to see it white instead of green.

Passenger side:
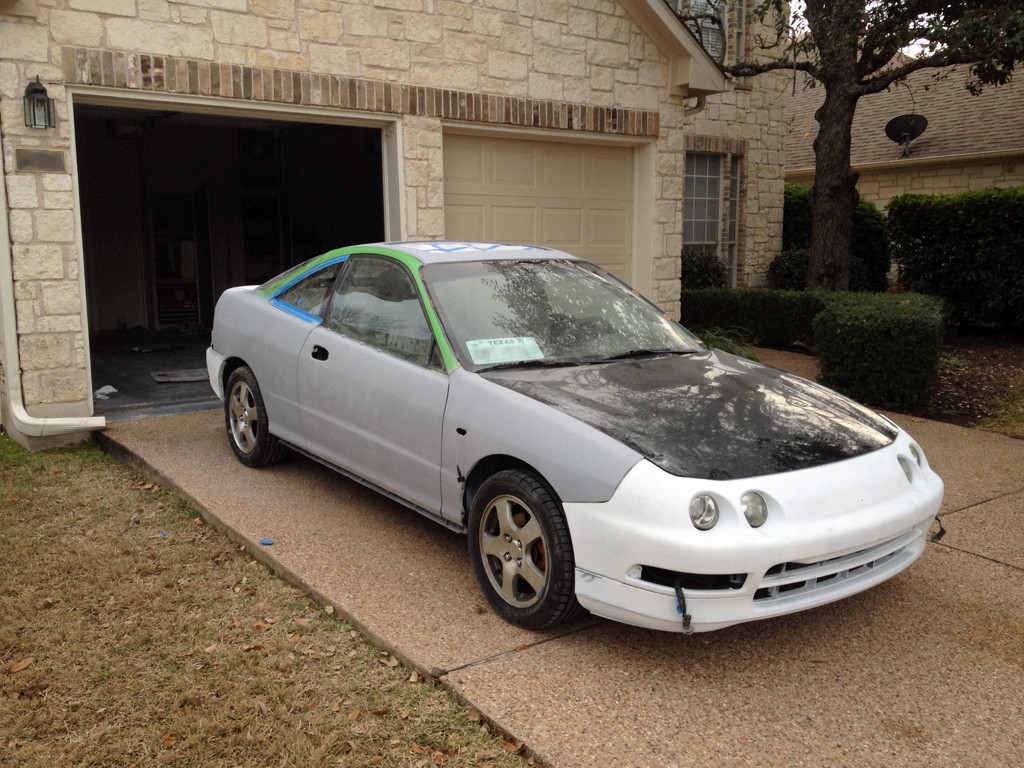
Driver side:
Part 3
Last edited by MotorMouth93; 08-06-2017 at 08:50 AM.
01-17-2015, 06:58 PM
#20
Honda-Tech Member
its also known as panel bond, its basically how cars are built now, BUT jb weld, and the steel of the door with eventually crack, the two materials will contract and expand differently with different temperatures.
01-17-2015, 10:12 PM
#21
I appreciate the input, and I do agree that purpose-specific panel bond would most likely be superior. However, it's already done and my uncle ran a successful body shop for years, I'm going to assume that he knows what he's talking about.
I may eat my words down the line though.
I may eat my words down the line though.
 01-22-2015, 05:28 PM
#23

Ahhh... The adventures of inexperienced youth that carry through the years to guys like me who still have an attachment to Gen II Civics. LIke you, I'm in austin and appreciate the mild weather although this year, such has been a rarity.
Hope that it all works out for you..
Hope that it all works out for you..
