
B_Swapped's 2nd integra build
 12-26-2014, 05:15 PM
#126
Honda-Tech Member
Thread Starter
 12-26-2014, 05:28 PM
#127
Honda-Tech Member
Thread Starter
So today was boxing day, I of course went to Teknotik and stood inline 2 hours before they opened lolz wish I had some pics the line was HUGE. Either way I picked up a few things but not everything I wanted due to the mass amount of ppl and some of the stuff I wanted was special order. I got skunk2 F/R camber kit and NRG hub/ gen 3.0 QR(one with the big paddles) and a Tial Q bov, I was on the fence about BOV's. Torn between the HKS SSQV and tial after many youtube vids the SSQV sounds like a sneeze... the tial just sounds mean. The main thing I was after was a Vertex F.O.R.E.V.E.R steering wheel, its a 3-4 months wait apparently but I want one SOOO bad. I got my down pipe while I was there but forgot to get a V-band clamp so I cant actually do anything, going to Honda tomorrow to get my ball joints and pass-side shock fork. I have the rear on it's wheels finally just need these last things to get the front down, I'm pretty excided this is coming along alot after then I thought even though I've had to buy alot of big ticket items for work. I still need to get a catch can before I can get the head on the block I don't want to be messing behind the block with the head on, I still need to figure out the coolant hoses too. I'm going to give the garage a good clean tomorrow and do a little more sanding, things are kind of on hold till next week when my stuff comes in.
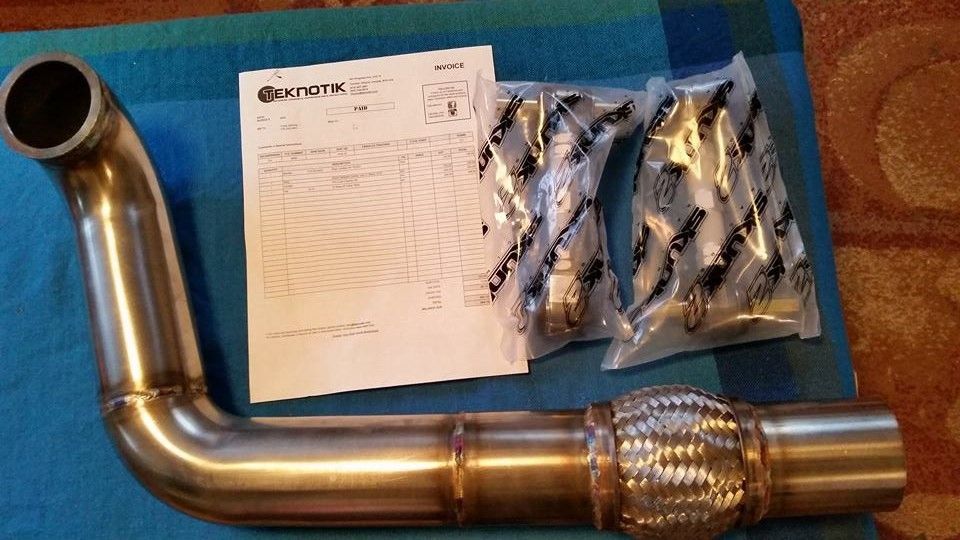
DP and rear camber kit is all I walked out with...better then last year where I walked out with a slip of paper, I wont post the prices I got but I basically could have gone any day of the week and got the same thing. Sort of annoying but ohh well I did save a little on that gen 3.0 QR basically got the hub free, I do highly advise anyone who lives in the GTA to go here.

Coilover reassembly doing it right out of the box these things were all messed up(height wise), that's why I felt the need to completely strip them down and redo them.
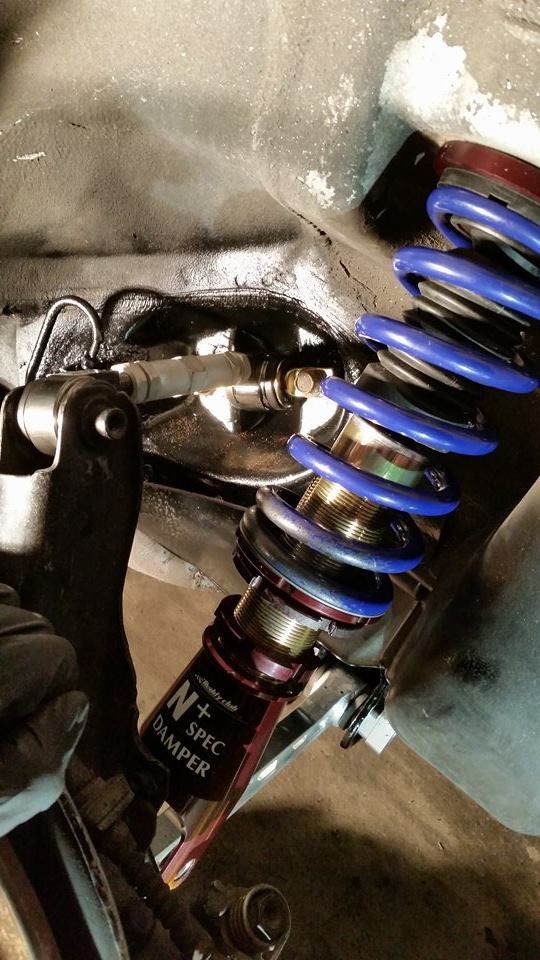
The first on either the front or rear is always the hardest you spent lots of time trying to get it just right to base the 2nd one off it, I think I messed with this side for a good 20 mins. 2nd side is easy just measure and replicate it over I know the driver side will have more weight so I always make the passenger a few cm(1-2) lower, I do want to get it corner balanced once I get real wheels and R compound tires.
One thing I am happy about is the S2's ability to bend on the side that is bolted to the car, on my last one it was stationary and made lining it up/adjusting it living hell. only reason I rocked the Megan racing one was due to the insane negative camber it could provide.
It's not fully adjust the bolts are just hand tight for now I'll clock all the bushings once it has all its weight back. I like it tho seems pretty good those tires look WAY too thin tho they're 205's, should move up to a x8 and run a beefy 205 like an R888 don't think I'll keep these I just need rims to roll around on for the winter.
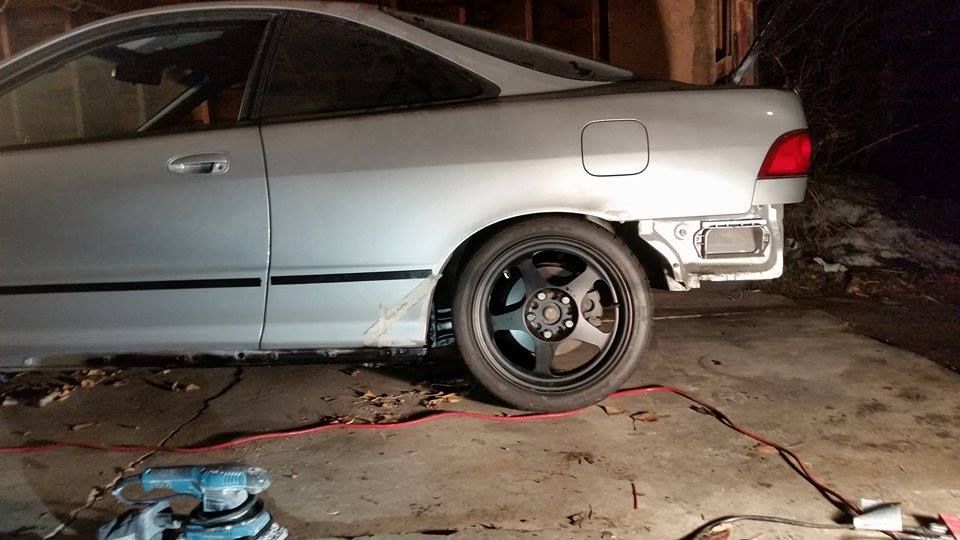
Side shot 16x7 with 205/40/16 these will either be my temp wheels or I'll get some Hoosier r6's for them...all I know is I don't like the idea of rota's being on the car(no hate if you run them) that's just my preference.
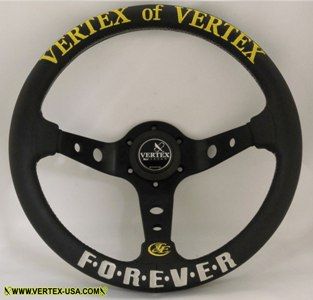
Had to post this too amazing looking not too, sold my MOMO wheel that I got back when I bought the car I just need to go back when they have more time and we can work out a good price for me.

DP and rear camber kit is all I walked out with...better then last year where I walked out with a slip of paper, I wont post the prices I got but I basically could have gone any day of the week and got the same thing. Sort of annoying but ohh well I did save a little on that gen 3.0 QR basically got the hub free, I do highly advise anyone who lives in the GTA to go here.

Coilover reassembly doing it right out of the box these things were all messed up(height wise), that's why I felt the need to completely strip them down and redo them.

The first on either the front or rear is always the hardest you spent lots of time trying to get it just right to base the 2nd one off it, I think I messed with this side for a good 20 mins. 2nd side is easy just measure and replicate it over I know the driver side will have more weight so I always make the passenger a few cm(1-2) lower, I do want to get it corner balanced once I get real wheels and R compound tires.

One thing I am happy about is the S2's ability to bend on the side that is bolted to the car, on my last one it was stationary and made lining it up/adjusting it living hell. only reason I rocked the Megan racing one was due to the insane negative camber it could provide.

It's not fully adjust the bolts are just hand tight for now I'll clock all the bushings once it has all its weight back. I like it tho seems pretty good those tires look WAY too thin tho they're 205's, should move up to a x8 and run a beefy 205 like an R888 don't think I'll keep these I just need rims to roll around on for the winter.

Side shot 16x7 with 205/40/16 these will either be my temp wheels or I'll get some Hoosier r6's for them...all I know is I don't like the idea of rota's being on the car(no hate if you run them) that's just my preference.

Had to post this too amazing looking not too, sold my MOMO wheel that I got back when I bought the car I just need to go back when they have more time and we can work out a good price for me.
Last edited by B_Swapped93; 12-26-2014 at 09:39 PM.
12-26-2014, 09:31 PM
#128
Trial User

Join Date: Dec 2014
Posts: 1
Likes: 0
Received 0 Likes
on
0 Posts
Nice build , I'm working on a 1990 integra , bough it as a rolling shell , I just put in a b18b today in the morning , and I'm debating on staying all motor or turbo . I also bought some all polished rotas 15x7 with some street slick tires , For cheap.
12-27-2014, 05:40 AM
#129
Honda-Tech Member
Thread Starter
Thanks, if you're going to stay "all motor" VTEC is a must... if not Turboing the b18b isn't a bad idea it will seem like alot of money at the begging but the after reward is well worth it, there's cheaper ways to do it then what I've done. I don't like that they're 16's tires are considerably more then for a 15 so maybe I'll need 3 sets of rims lol its not unheard of alot of my friends have multiple sets, I do like the look of them the picture isn't really a good illustration of how they look plus they're really dirty.
12-28-2014, 10:22 AM
#130
Honda-Tech Member
Thread Starter
Went to TorontoJDM yesterday and got a few things I needed, got 2 almost new shock forks and a JDM ITR shift linkage and generic ball joints. As much I dislike overhyped "JDM" stuff this linkage is pretty much new, like ppl say the JDM ITR linkage is in fact alot thicker then the usdm one. I'll be ordering a K-tuned pro-circuit shifter I loved the original but always felt it was short/flimsy, I'll get around to putting that all together just before I do the exhaust, Honda was closed for some reason so i'll order the bolts Monday. just waiting on my boxing day order then I can roll the car around in the garage.
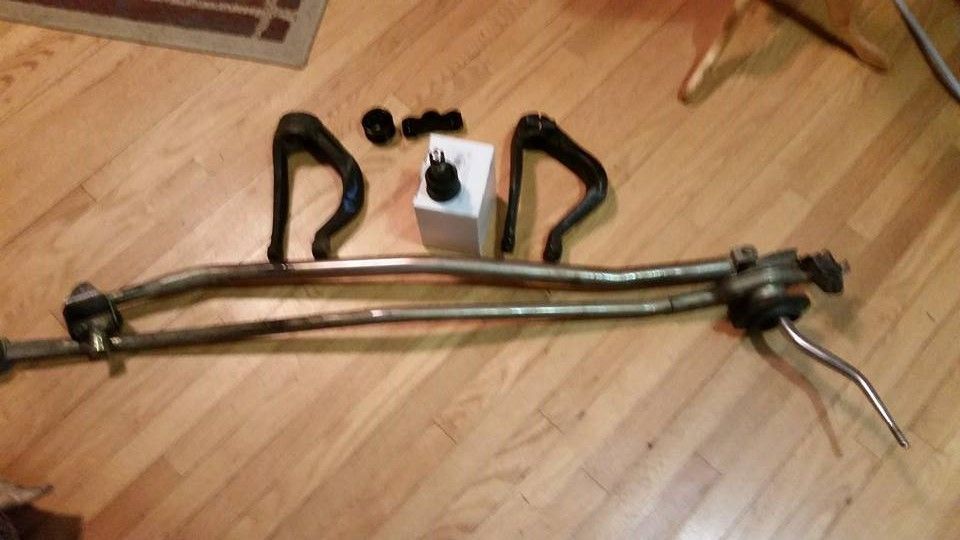
I'll do a close up pic of the linkage when I get the old one off, but I think you can tell this one is alot thicker. Also its brass/bronze unlike the painted black usdm ones, it came with some random short shifter have looked for a brand maybe its spoon lol.
It was nice to have 4 days off but I didn't get as much accomplished as I wanted, most of the delays come from stuff not being in stock... however Teknotik is moving!! bigger and better things coming for us in 2015.
Last edited by B_Swapped93; 12-28-2014 at 11:05 AM.
12-30-2014, 03:10 PM
#131
Honda-Tech Member
Thread Starter
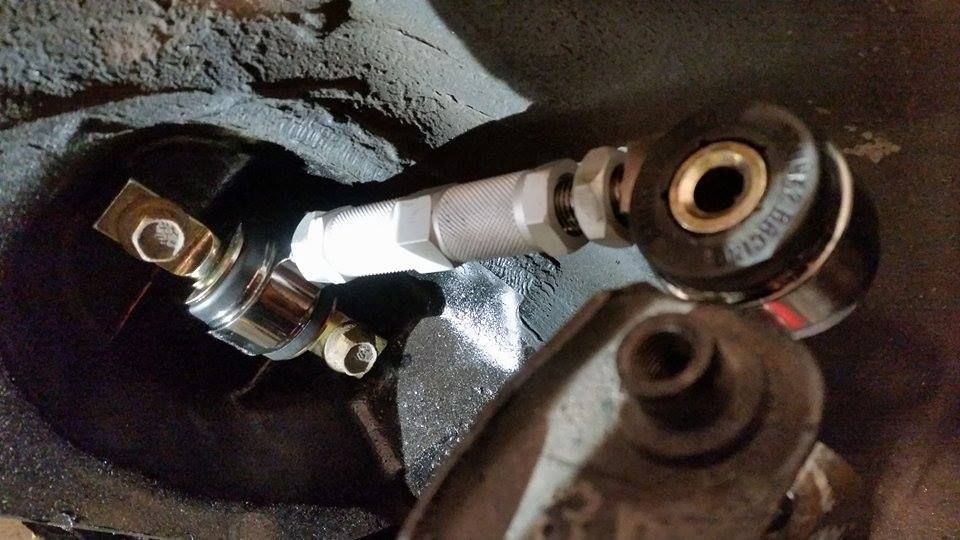
Ordered a whole slew of new nuts and bolts/misc from Honda, when we were looking them over at the parts counter I forgot what half of them were for. They threw in a few extras for me also like the shock bolts which was nice, I always loose those/can never have too many M10 nuts. Decided the only knock off part so far on my car is the slips... returned the cheap ball joints and bought new OEM Honda ones, honestly I don't think I trust a $25 ball joint was probably still hungover when I bought those. Got them pressed in at little lake auto ran me $40 which seemed a little steep compared to the $20 the last time I brought my civic ones in, ohh well. I don't have a pic of the old ones but they were to the point where they couldn't even stay straight they just dropped to ground from gravity. No word on my boxing week order I'm guessing i'll have to wait till Teknotik moves to their new location, things are on hold till then.
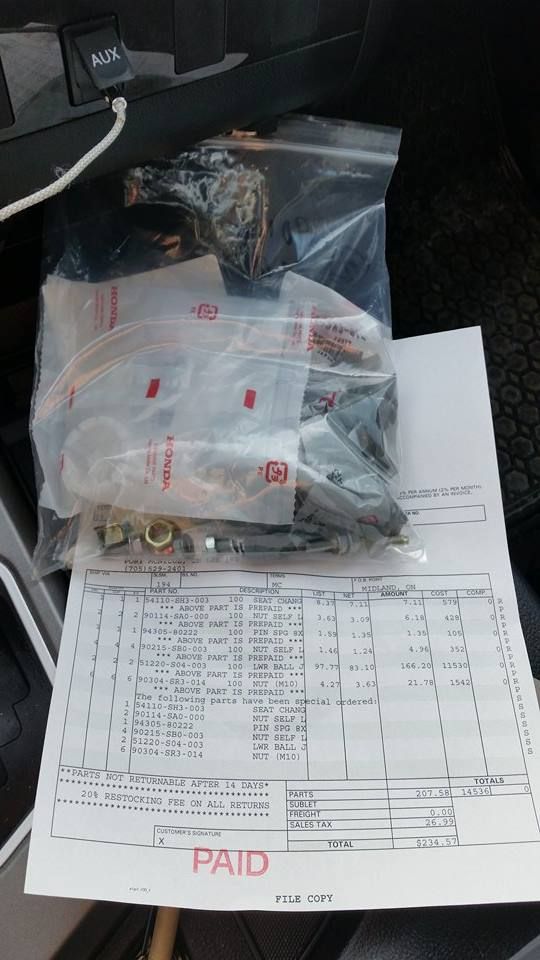
Everything from shock bolts to the "bitch pin" could have got those down-star bolts for around the same price I'm paying for this but that's just ricey to me.
Not the best pic but you get the idea.

Everything from shock bolts to the "bitch pin" could have got those down-star bolts for around the same price I'm paying for this but that's just ricey to me.

Not the best pic but you get the idea.
12-31-2014, 07:01 AM
#132
Honda-Tech Member
iTrader: (1)
Join Date: Aug 2003
Location: Left Coast : High Altitude, Top Floor
Posts: 7,616
Likes: 0
Received 1 Like
on
1 Post
Ordered a whole slew of new nuts and bolts/misc from Honda, when we were looking them over at the parts counter I forgot what half of them were for. They threw in a few extras for me also like the shock bolts which was nice, I always loose those/can never have too many M10 nuts. Decided the only knock off part so far on my car is the slips... returned the cheap ball joints and bought new OEM Honda ones, honestly I don't think I trust a $25 ball joint was probably still hungover when I bought those. Got them pressed in at little lake auto ran me $40 which seemed a little steep compared to the $20 the last time I brought my civic ones in, ohh well. I don't have a pic of the old ones but they were to the point where they couldn't even stay straight they just dropped to ground from gravity. No word on my boxing week order I'm guessing i'll have to wait till Teknotik moves to their new location, things are on hold till then.
Everything from shock bolts to the "bitch pin" could have got those down-star bolts for around the same price I'm paying for this but that's just ricey to me.
Everything from shock bolts to the "bitch pin" could have got those down-star bolts for around the same price I'm paying for this but that's just ricey to me.
Nevertheless, carry on with the build.
 01-10-2015, 07:12 PM
#133
Honda-Tech Member
Thread Starter
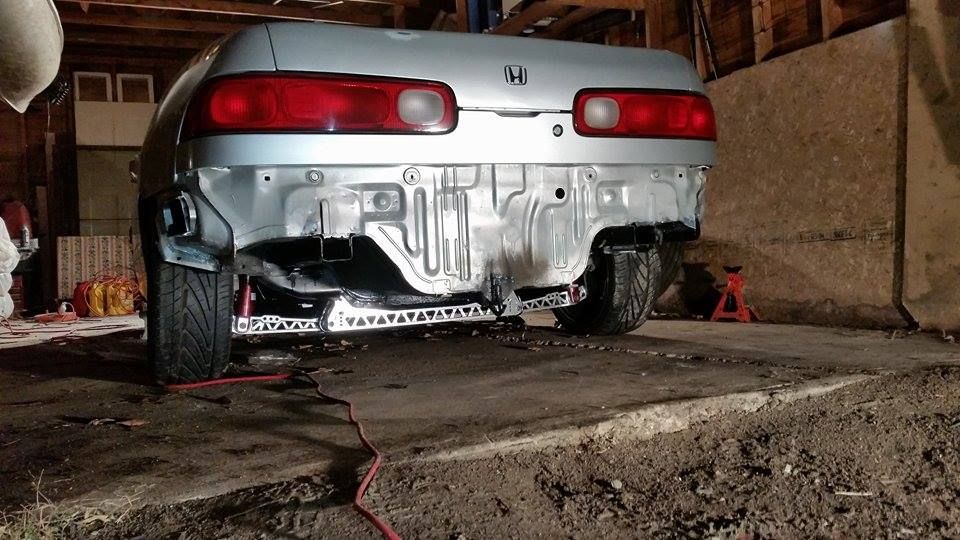
I've been a little slow on updates main reason being it's in the range of -15*C(5*F) so being in the garage isn't really an option. My stuff still isn't in which is a bit annoying but I have a few things I can do/to get ready while I wait. Main thing is having the car as a rolling shell as its been on jack stands since late September and I really need to move it up in the garage, but I need my UCA's before that can happen. did the battery relocation mock up tonight going to try and get the wire and ring terminals this week, its alot simpler after having looked at it. Parts wise I have a small list for the Honda dealer mostly nuts and bolts, I want to have electrical power so I can give that radio one last shot then be able to put the dash back.
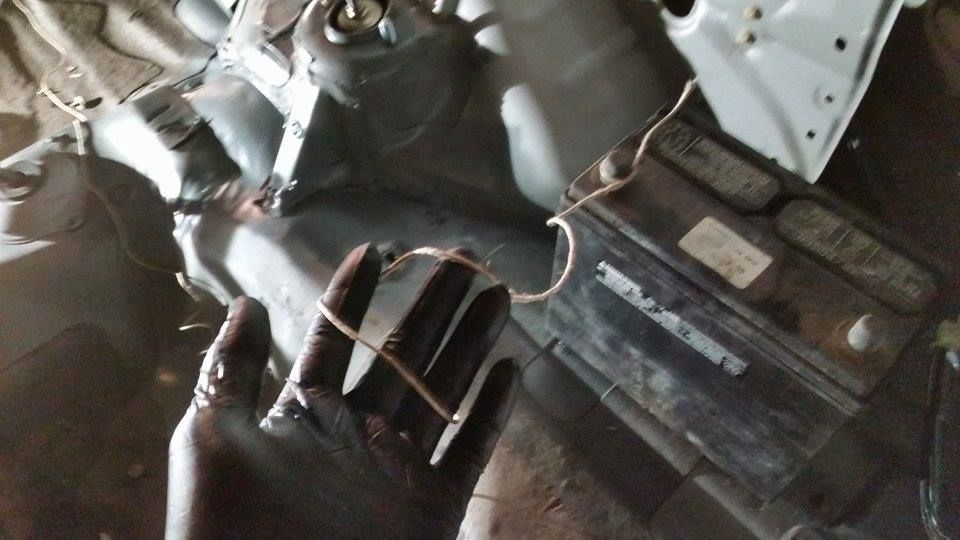
Battery mock up/wire gauging decided string was the best representation made 2 lines, one for battery to starter and battery to fuse box I may have to do one more but I think that's it.
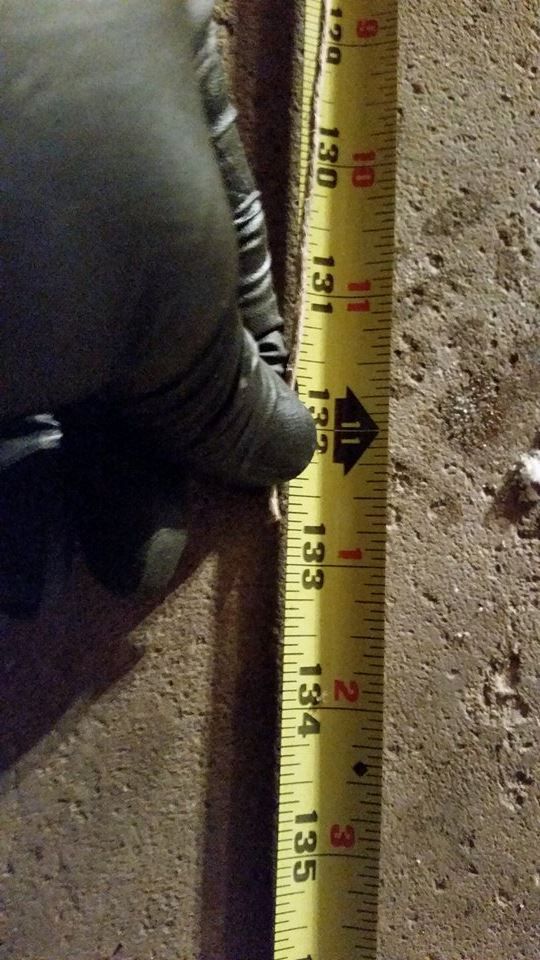
First one came in at just over 11ft this is the batt to fuse box and will be an 8G, running it along the pass side under the trim.
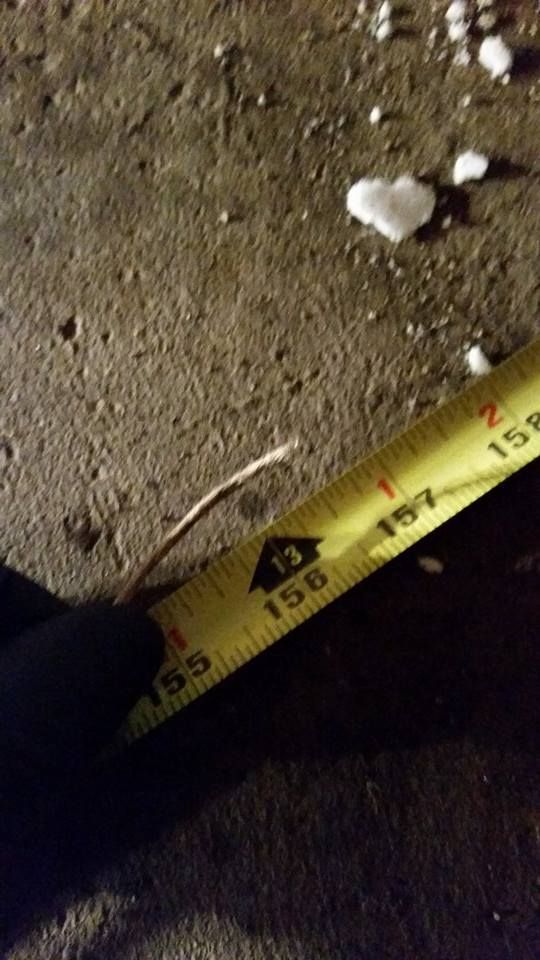
Batt to starter coming in at 13.1ft this will be 4G, on all my wires i'll go over a ft or so as its easy to remove material vs adding it. Fuse/shut of wise I'm not sure what I'm doing.
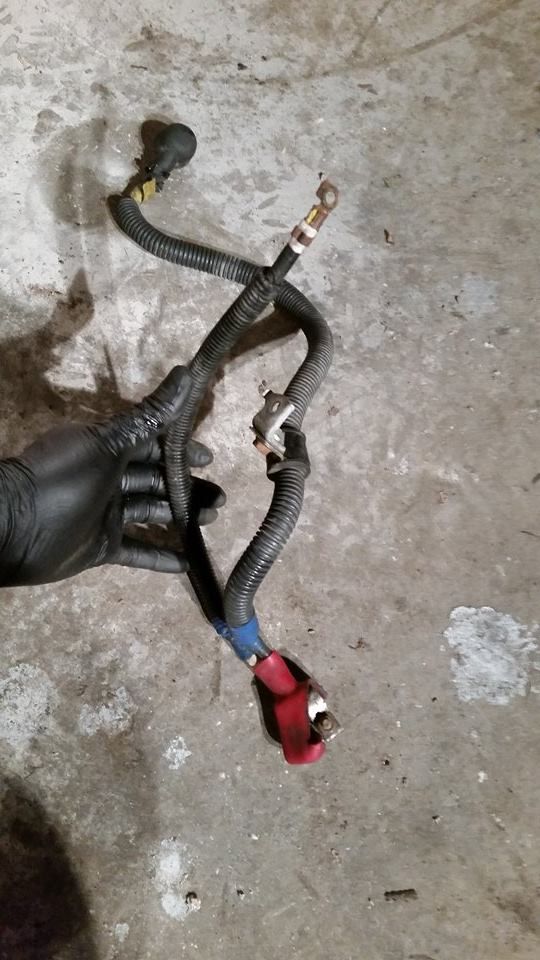
AFAIK this is what you replace/extend when you do a batt relocation if so that's alot easier then I thought may try and do a little DIY when I have the materials.
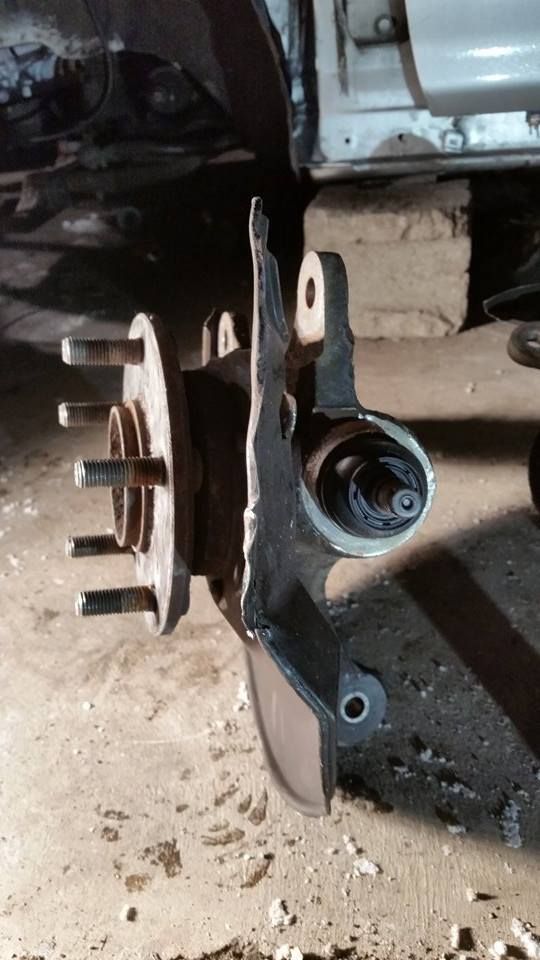
Anyone who'd had to pry stuck ball joints out knows you end up bending your brake dust shield, and in turn scrapes your rotor or just make that annoying scraping sound. So I figured I'd trim the shield I don't want to remove it completely, first time doing this while I did do it as proper as I could it doesn't look mint. Plus you have to be carful not to slip and run the grinder into the boot, I did the vertical cuts from the back and then the horizontal from the front.
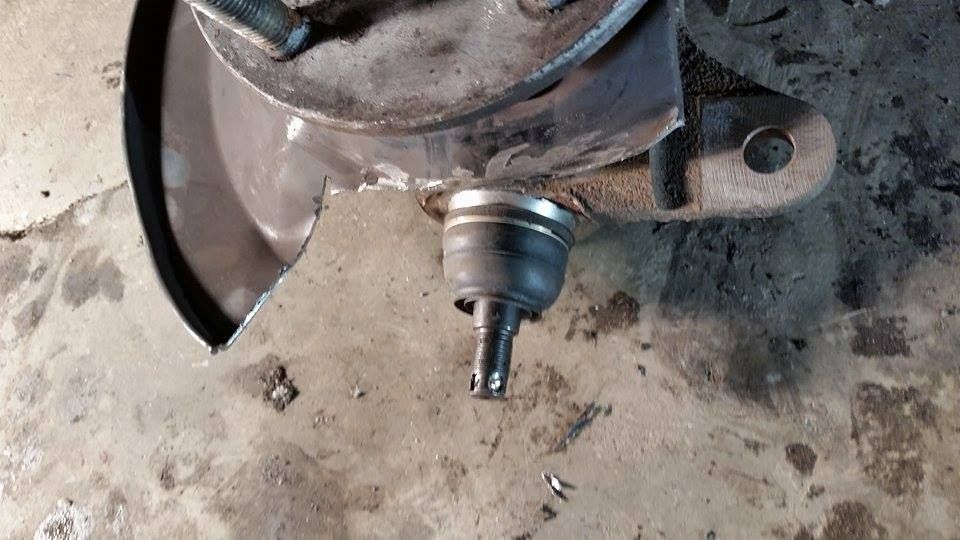
It does look rough but some of that is due to riding up on the shield good thing is I didn't slip and cut the boot I'd have really been pissed then.
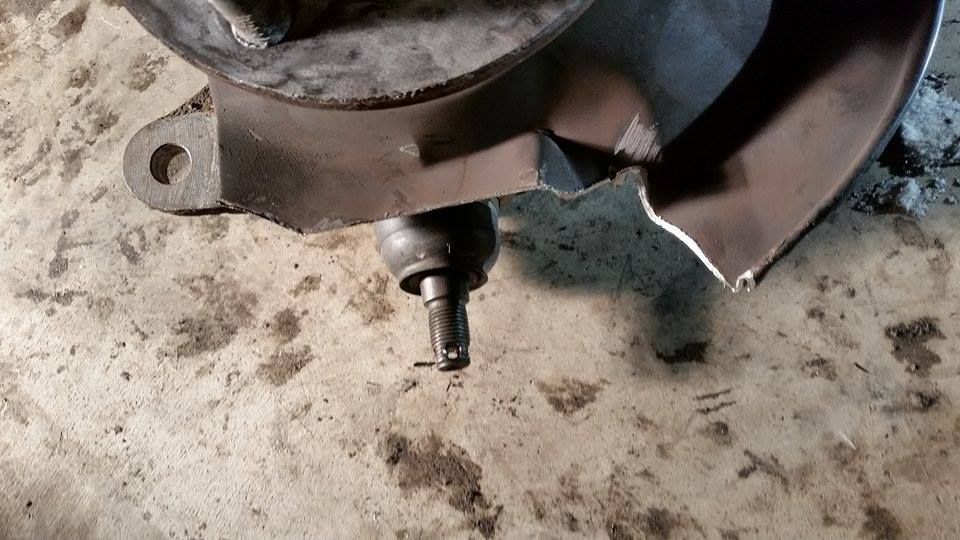
This one turned out alot better imo it was the 2nd one after all, I don't see a need to paint them they don't look like they will rust. This isn't an easy procedure and would be best suited for a dermel tool not a 4 1/2'' angle grinder. I do recommend this tho it still looks good and with steady hands it would look great instead of bending your shied to ****.
So till I get my boxing day goodies there's sadly not too much I can really do, it got too cold to finish what I had planned I'm going to tackle that last rust spot on the driver side quarter and if need be cut it out but I hope I don't have too.
Last edited by B_Swapped93; 01-10-2015 at 07:34 PM.
01-11-2015, 01:21 PM
#135
Honda-Tech Member
Thread Starter
Got a start on some of the body clean up, took some of the sound deadening out and sanded the "good" side quarter from what I can tell I won't need to remove any metal. Cleaned the head out and scraped any paint that had gone over the tape.
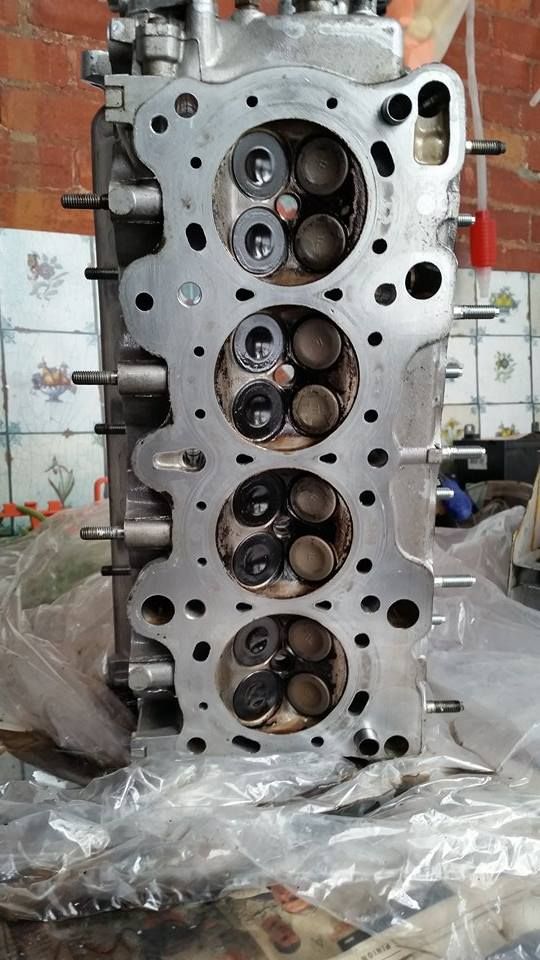
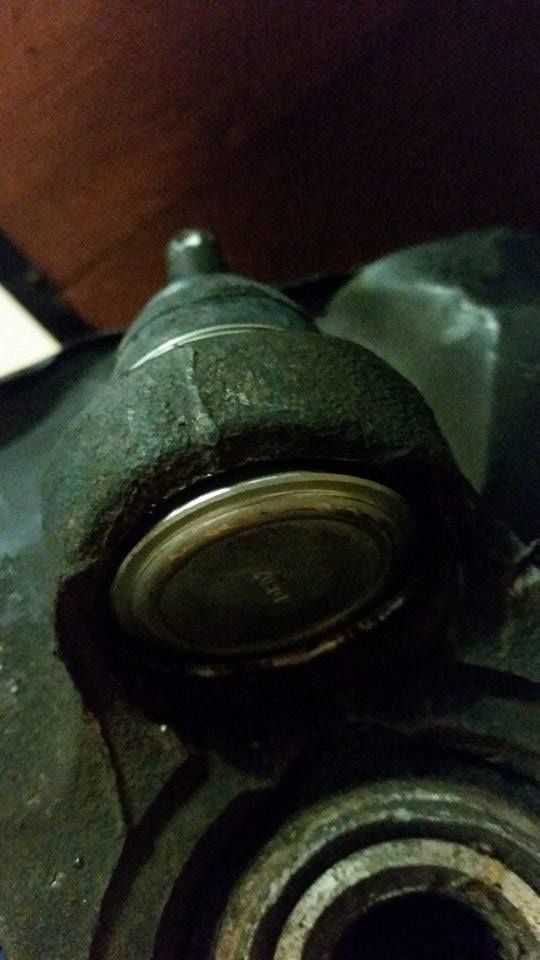
All nice and clean head is staying stock for now, no need for cams or valve train upgrades yet.

Guessing my PCV system wasn't working the best this is all out of the intake side nasty mix of oil and sludge, the ex side just had soot nothing big. Ditched the pcv still have to order a catch can set up.
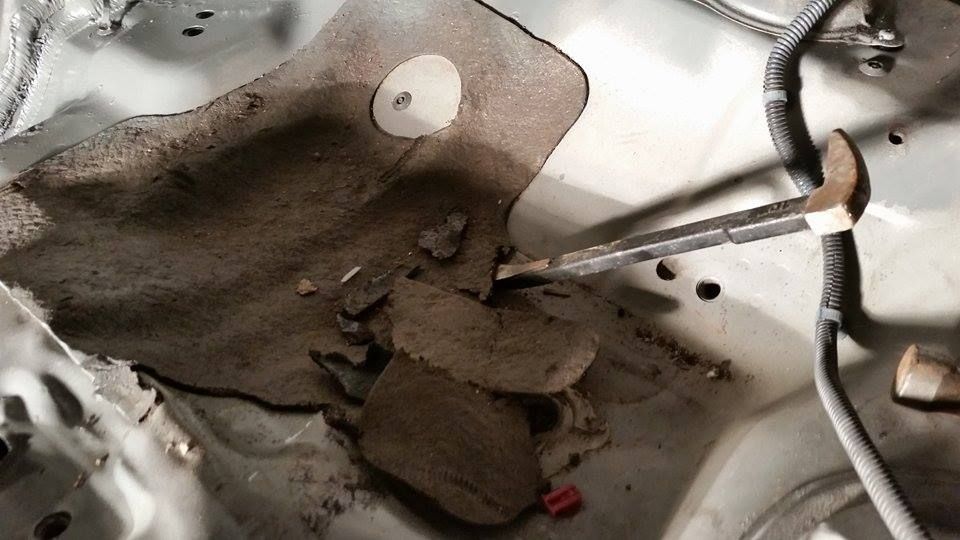
For some reason dry ice is really hard to find here no real clue why there was one place that came up in Toronto but I'm not going to drive that far for some ice. Prybar and putty knife it is... works ok so long as the stuff comes off in big chunks which it has been doing.
Got both passenger seat wells and half of the trunk as you can see where it is gules down it leaves that nasty glue, i'll need to find something to remove that then paint over it.
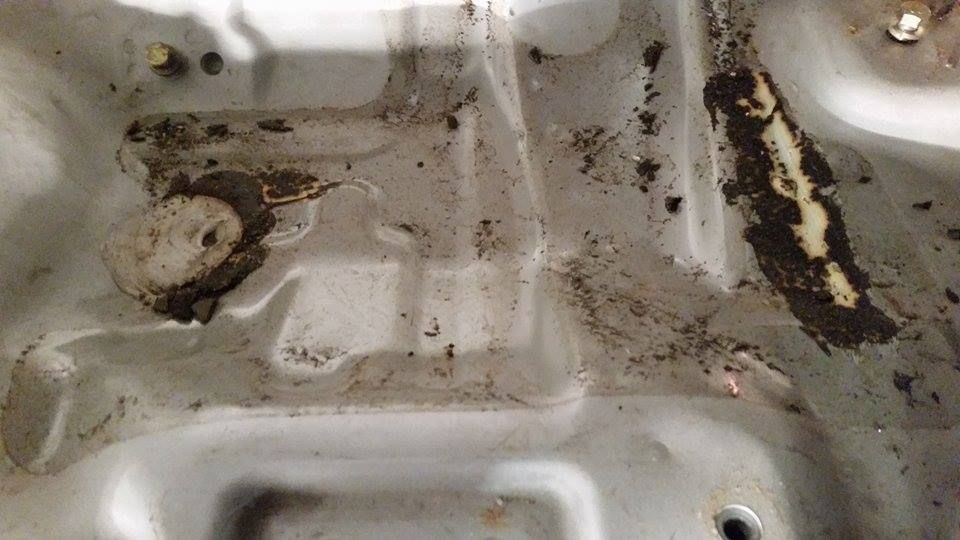
I've looked over this area well it had a little surface rust that came off first pass of the sander and the metal looks smooth underneath so I think we're clear. I'll leave it bare and see how it holds up I'm not going to attempt are real body work my self, just eliminating the rust it'll get it all painted in the spring professionally.
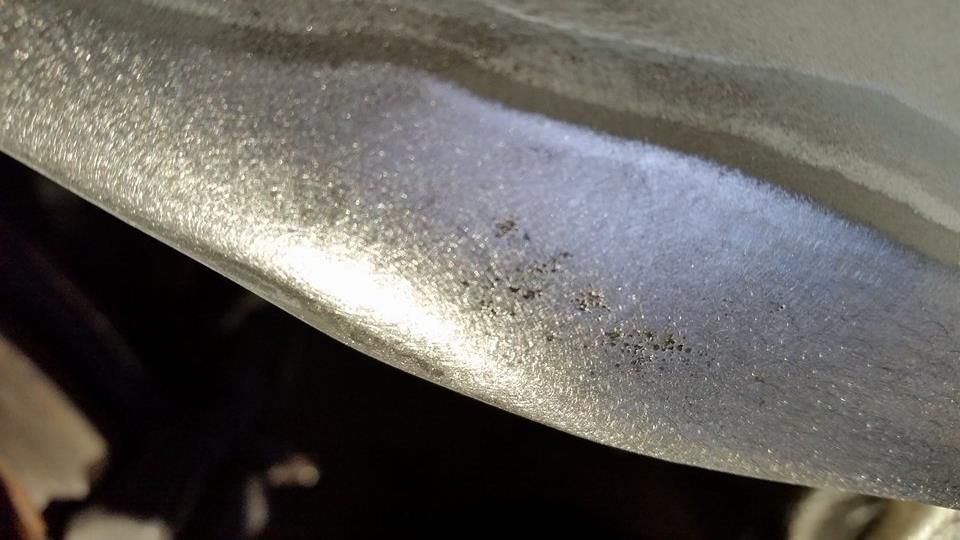
This is the only thing I'm a little dubious about...the metal has that strange texture and looks like it's been eaten by the rust, however since I "fixed it" back I September it only had a little surface rust. The sander isn't doing enough so i'll get the drill wire brush and see what I can do, as for the inside of the wheel well I'll have to get my proper clothing before I start sanding/grinding in there. I just had my normal jacket so I'm not about to go sit in the dirt, need my mask and all that stuff.

All nice and clean head is staying stock for now, no need for cams or valve train upgrades yet.

Guessing my PCV system wasn't working the best this is all out of the intake side nasty mix of oil and sludge, the ex side just had soot nothing big. Ditched the pcv still have to order a catch can set up.

For some reason dry ice is really hard to find here no real clue why there was one place that came up in Toronto but I'm not going to drive that far for some ice. Prybar and putty knife it is... works ok so long as the stuff comes off in big chunks which it has been doing.

Got both passenger seat wells and half of the trunk as you can see where it is gules down it leaves that nasty glue, i'll need to find something to remove that then paint over it.

I've looked over this area well it had a little surface rust that came off first pass of the sander and the metal looks smooth underneath so I think we're clear. I'll leave it bare and see how it holds up I'm not going to attempt are real body work my self, just eliminating the rust it'll get it all painted in the spring professionally.

This is the only thing I'm a little dubious about...the metal has that strange texture and looks like it's been eaten by the rust, however since I "fixed it" back I September it only had a little surface rust. The sander isn't doing enough so i'll get the drill wire brush and see what I can do, as for the inside of the wheel well I'll have to get my proper clothing before I start sanding/grinding in there. I just had my normal jacket so I'm not about to go sit in the dirt, need my mask and all that stuff.
01-13-2015, 06:25 PM
#136
Honda-Tech Member
Thread Starter
Some of my boxing day stuff arrived, sadly my front camber kit got lost...so I'll have to wait another week or so. Some really good news (if the deal goes through) a teammate has the VERTEX wheel I want and is switching to an OMP set up and said he'd sell me the FOREVER one within the next few week for $380-CDN, this would be a $500+ wheel if I were to order it new so I hope he keeps his word.
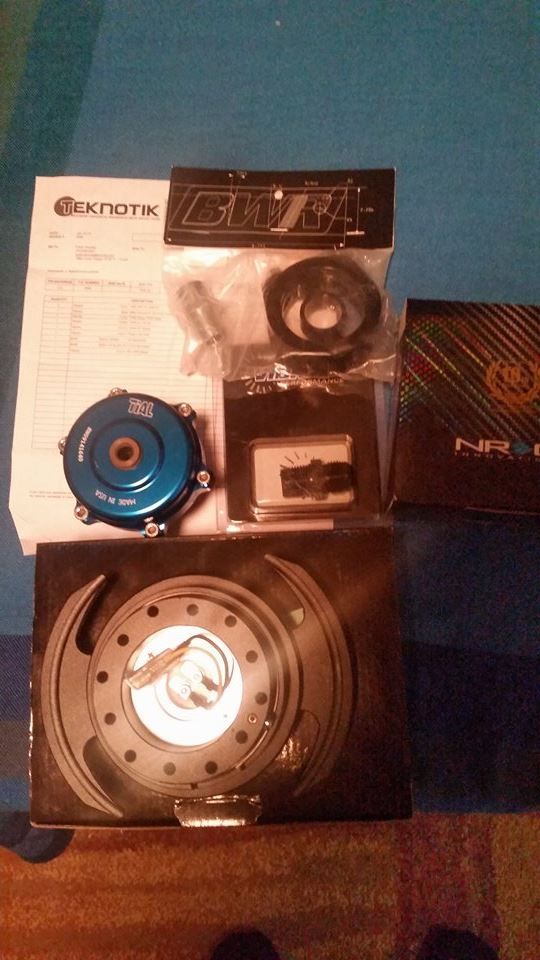
Tial Q w/8 psi spring/oil sandwich adapter/NRG gen 3.0+hub/my -10 AN fitting. I should be able to get a few things done this weekend now. Buying slews parts will be on hold for a little while as I'm going to pay that Voltex GT wing off.

Tial Q w/8 psi spring/oil sandwich adapter/NRG gen 3.0+hub/my -10 AN fitting. I should be able to get a few things done this weekend now. Buying slews parts will be on hold for a little while as I'm going to pay that Voltex GT wing off.
01-14-2015, 06:30 AM
#137
Honda-Tech Member
iTrader: (1)
Join Date: Aug 2003
Location: Left Coast : High Altitude, Top Floor
Posts: 7,616
Likes: 0
Received 1 Like
on
1 Post
Run to the hardware store and pick up a can of Xylene. You should find it in the paint aisle or where they have the acetone/mineral spirits located. Just work in a ventilated area, pour some in a spray bottle, spray on the tar area, let sit for a few minutes, wipe/scrape away.
01-14-2015, 06:17 PM
#138
Honda-Tech Member
Thread Starter
Run to the hardware store and pick up a can of Xylene. You should find it in the paint aisle or where they have the acetone/mineral spirits located. Just work in a ventilated area, pour some in a spray bottle, spray on the tar area, let sit for a few minutes, wipe/scrape away.
01-17-2015, 10:50 AM
#140
Honda-Tech Member
Thread Starter
Got the stuff I need to do the battery relocation aside from the 8G to m5 hole ring terminal, I looked everywhere but the issue is with the ring that small they don't make them to accept 8G wire. I've thought about sniping the end of the "to fuse box" section and somehow attaching it to the new wire but I'm not sure if that's possible. One thing I've realized now is that there are 2 wires coming off the fuse box I hope I can get the other one to reach without having to extend it, I think its for the alt but I'm not sure it disappears into the harness loom. Going to try and clean out the wheel well where the fender was rolled and get some more tar out, also looking to get the head back on and get the BWR catch can.
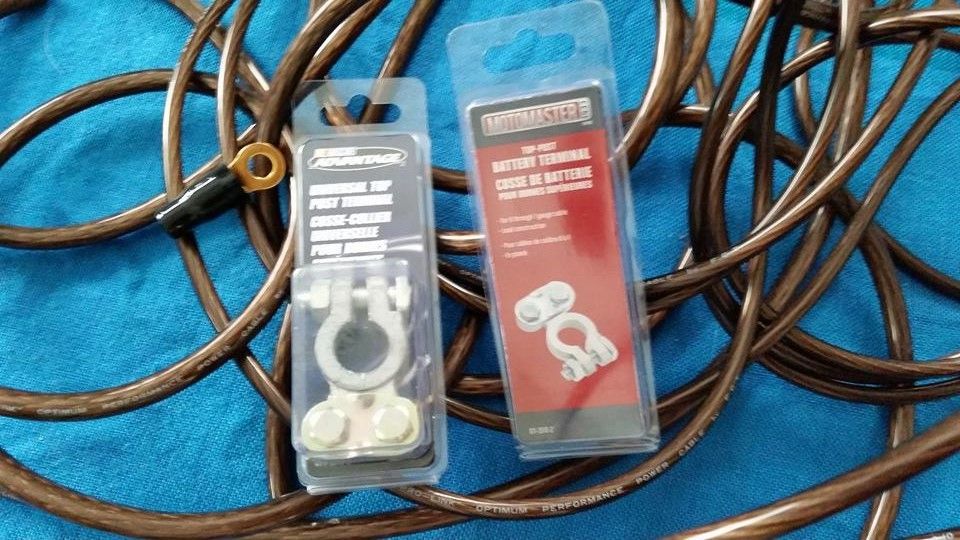
13ft of 4G wire and 13ft of 8G nothing special for the terminals I had these before and liked them, forgot a need a ground but I'll probs have some spare 4G left over. On the look out for a 8g to M5 ring terminal going to need to do a bit of work to get that too fit all the ones I could find were only for a 14g wire which is way too small.

Space is limited and the fact that the screw holding it is an M5 makes it real difficult to find a terminal, however it was suggested that I could grind the outer ring of the terminal down and use a washer to clamp it if the inner hole was too big.
Last edited by B_Swapped93; 01-18-2015 at 04:48 AM.
01-18-2015, 03:02 PM
#141
Honda-Tech Member
Thread Starter
Found someone on ebay selling and integra dash harness for cheap so I bought it, had enough of trying to get the hack up radio plug to work. Did a little more body work aka rust removal, sadly I had to cut another section out on the other fender edge this one wasn't too big tho and the lower portion by the rocker is salvageable. I'll just need to put some body seam filler or what ever that stuff is called NOT bondo this stuff is on from the factory I just have to find the name/where to get it. Looked a bit more for a connector for the batter to fuse box no luck, one resource I didn't check is Teknotik they do tons of stuff like this so on my next trip I'll ask.
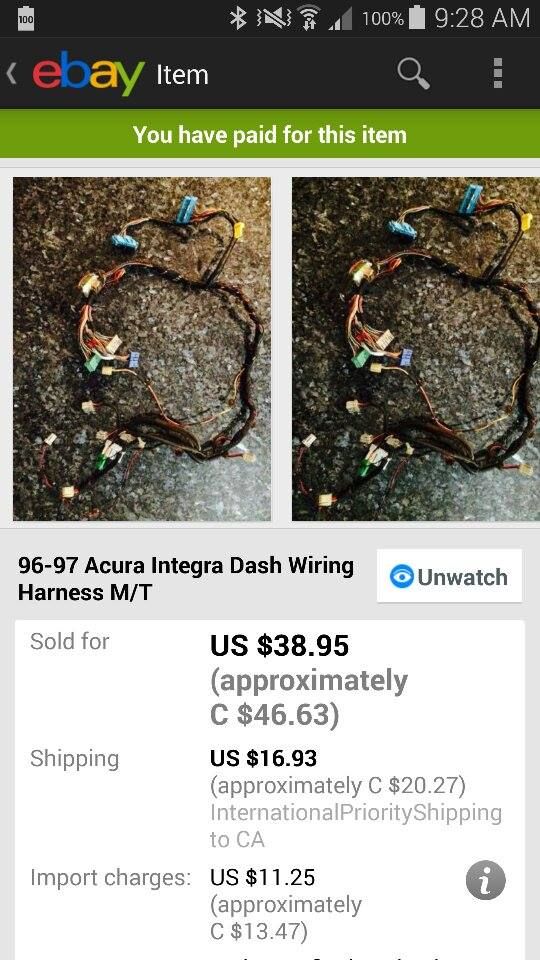
Not sure why the seller said "96-97" there's nothing special about those years on integra's, either way it was half of what most ppl were asking so I figured why not.
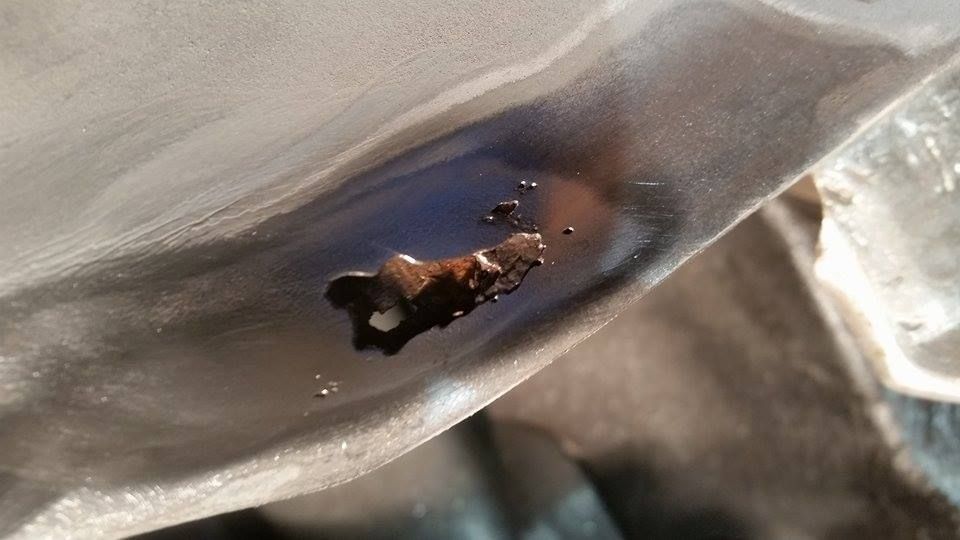
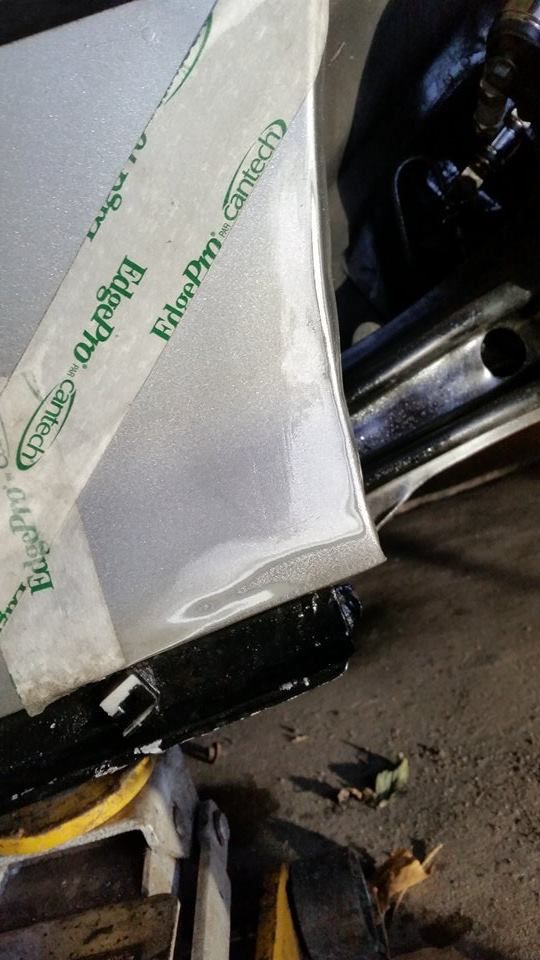
If you scroll up a bit you'll remember me saying I was uncertain about his section...well turns out it rusted from the inside out. Thankfully it was just a small section from the idiot rolling the fenders but I really wish that had never been done.
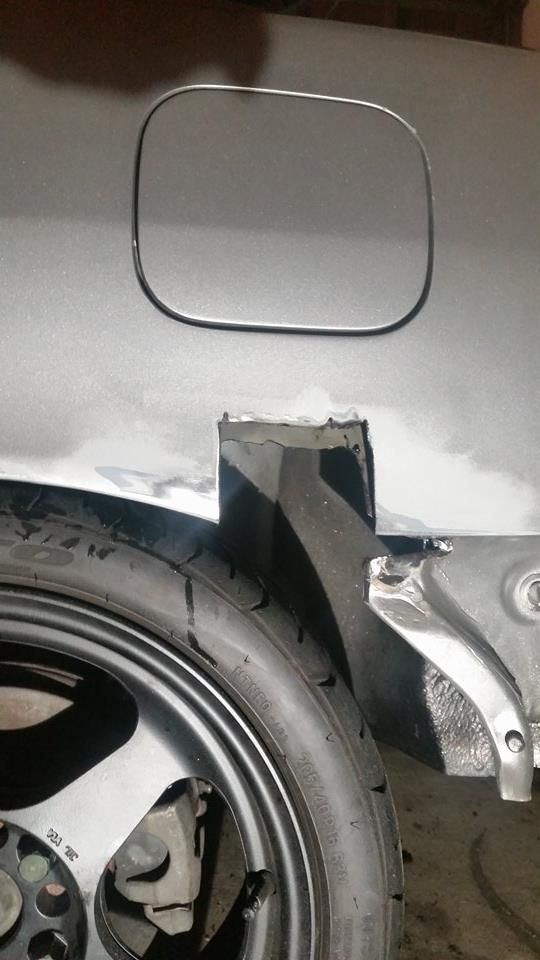
Could be worse it was just an isolated spot one thing that really bugs me is that my white tegg had less rust and that I ultimately should have kept it. But times were tough and I had no job and needed to sell it plus there were alot of my learning mistakes on it.
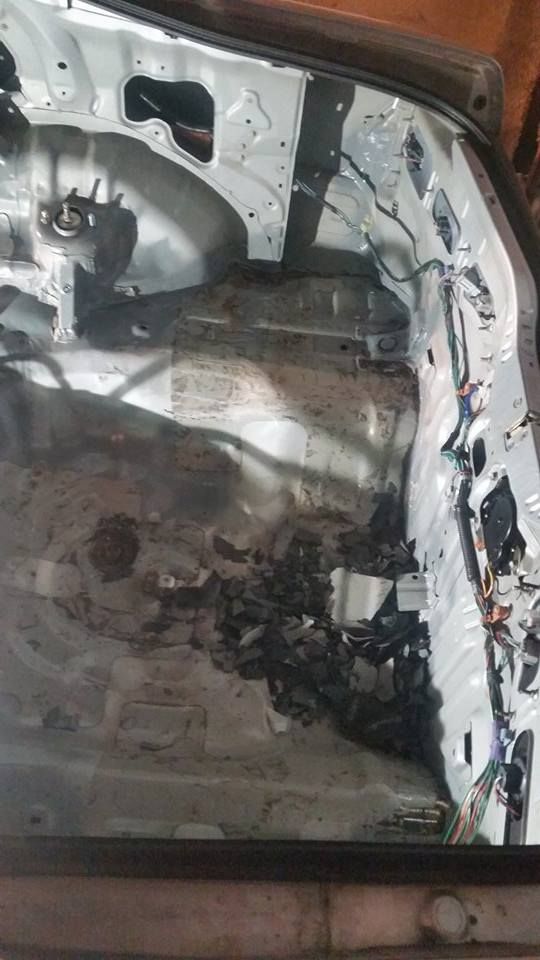
Trunks cleared I will be painting over all the metal that's been exposed, and i'm keeping all the sound deadening and will weigh it at the end so far it not looking like much over 5-10lbs if that. The rear weight reduction comes from under the dash, thus I removed all the HVAC components.

Not sure why the seller said "96-97" there's nothing special about those years on integra's, either way it was half of what most ppl were asking so I figured why not.

If you scroll up a bit you'll remember me saying I was uncertain about his section...well turns out it rusted from the inside out. Thankfully it was just a small section from the idiot rolling the fenders but I really wish that had never been done.

Could be worse it was just an isolated spot one thing that really bugs me is that my white tegg had less rust and that I ultimately should have kept it. But times were tough and I had no job and needed to sell it plus there were alot of my learning mistakes on it.

Trunks cleared I will be painting over all the metal that's been exposed, and i'm keeping all the sound deadening and will weigh it at the end so far it not looking like much over 5-10lbs if that. The rear weight reduction comes from under the dash, thus I removed all the HVAC components.
Last edited by B_Swapped93; 01-18-2015 at 03:44 PM.
01-21-2015, 08:41 AM
#144
Honda-Tech Member
Thread Starter
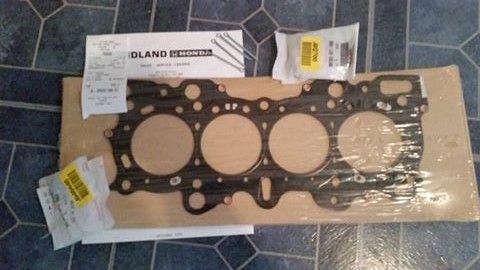
Decided the HG was an import part for me to get some real progress done so I ordered an OEM head gasket and a few other little nuts and bolts I needed. Also ordered a black BWR catch can set up so hopefully within the next weeks i'll have the engine fully together, I have all the parts save from the IC/charge piping I just need to find the time. I'm getting real excited to see the engine all complete still need to do something about my ugly valve cover but I'm pretty set on just buying a new ITR one from Honda. And once my upper control arms come in i'll have a roll able car which is a huge step in my eyes then I can start wiring up the gauges and get the dash back in.
 01-21-2015, 03:24 PM
#145
Honda-Tech Member
Decided the HG was an import part for me to get some real progress done so I ordered an OEM head gasket and a few other little nuts and bolts I needed. Also ordered a black BWR catch can set up so hopefully within the next weeks i'll have the engine fully together, I have all the parts save from the IC/charge piping I just need to find the time. I'm getting real excited to see the engine all complete still need to do something about my ugly valve cover but I'm pretty set on just buying a new ITR one from Honda. And once my upper control arms come in i'll have a roll able car which is a huge step in my eyes then I can start wiring up the gauges and get the dash back in.
01-21-2015, 05:00 PM
#146
Honda-Tech Member
Thread Starter
Had a rare "short day" at work so I decided to get some stuff done, got the head on the turbo manifold on and 3/4 bolt for the turbo I need to find a shorter 4th bolt. for this weekend/Friday i'm hoping to do the timing belt and a few adjustments with the oil feed/drain lines. It's a low km engine so I see no need to do the water pump/tensioner the belt I wanted a new one tho.
Caked the studs and washers in this torque lube or what ever ARP calls it, i'm guessing its a thread locker of sorts.
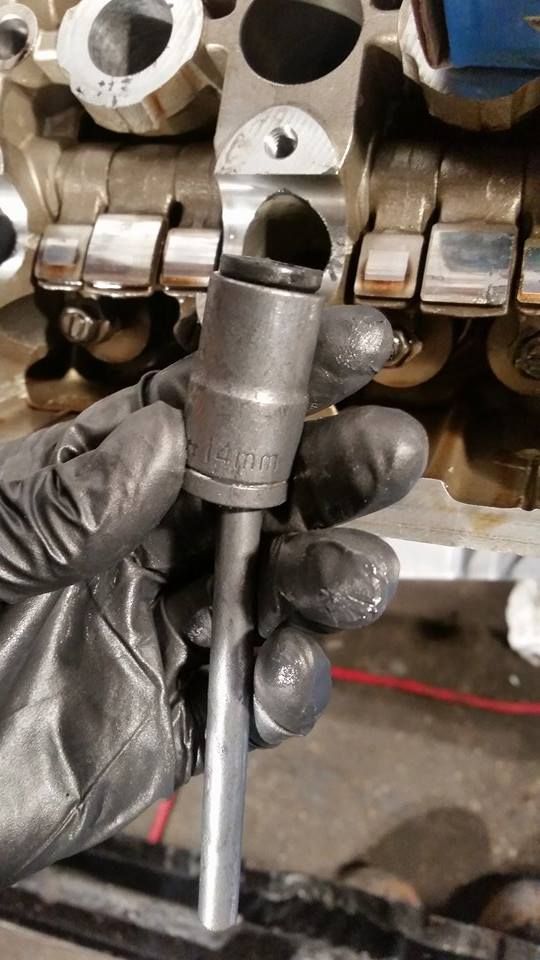
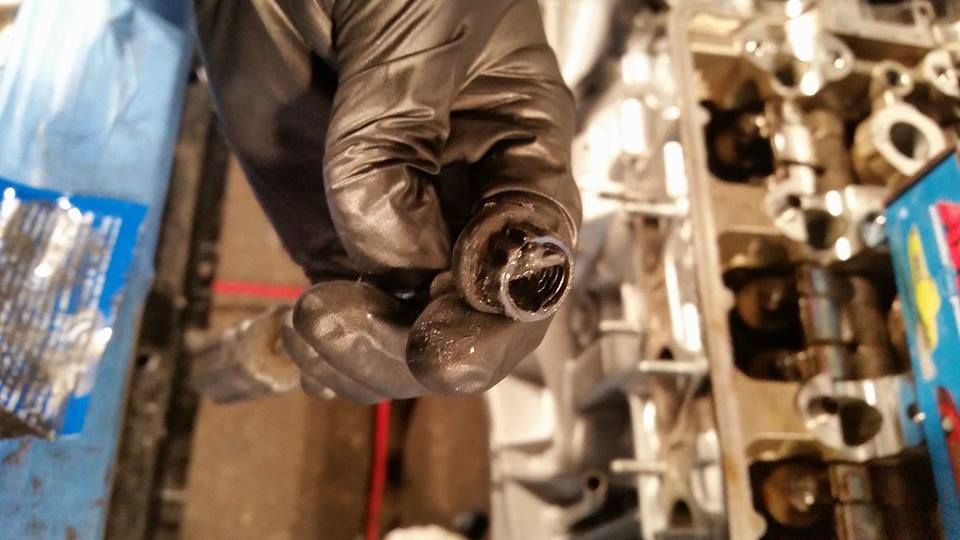
at first I thought I could get away with using a 6pt on the 12pt arp nuts, not the case I started slipping just after 20lb ft. thankfully they are tough so nothing bad came of it however finding a 12pt socket is almost impossible here.
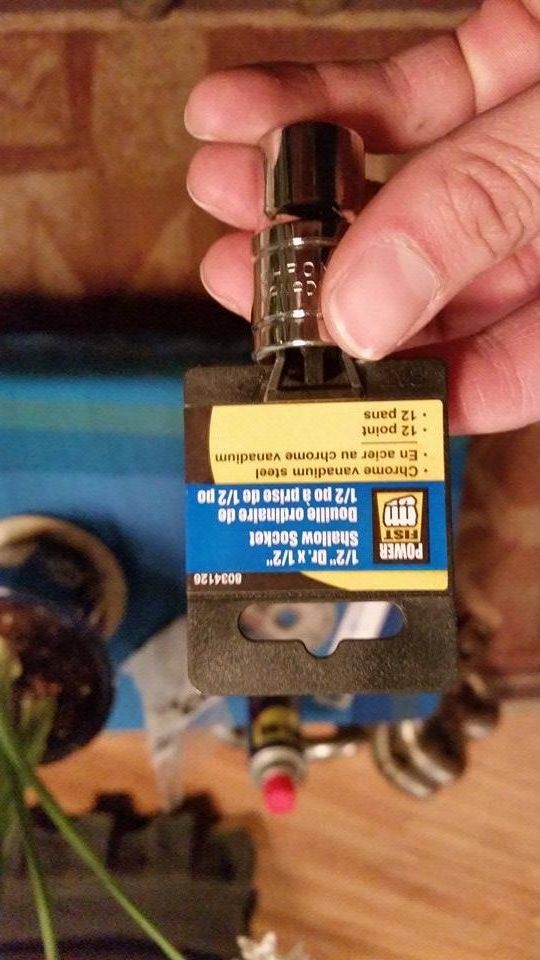
turns out it's a 1/2'' good thing princess auto carries 12pt's still most of the time I have any tools needed but I get caught off guard now and then.

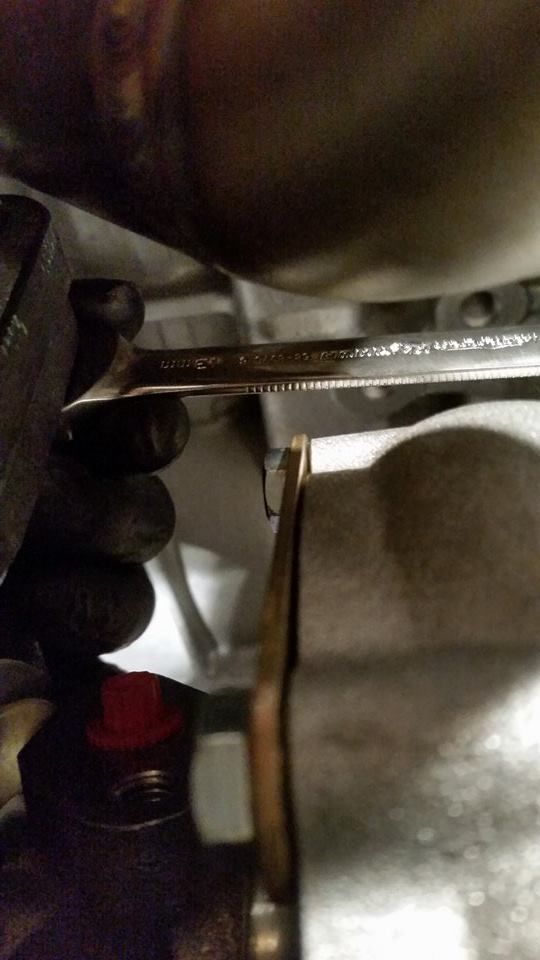
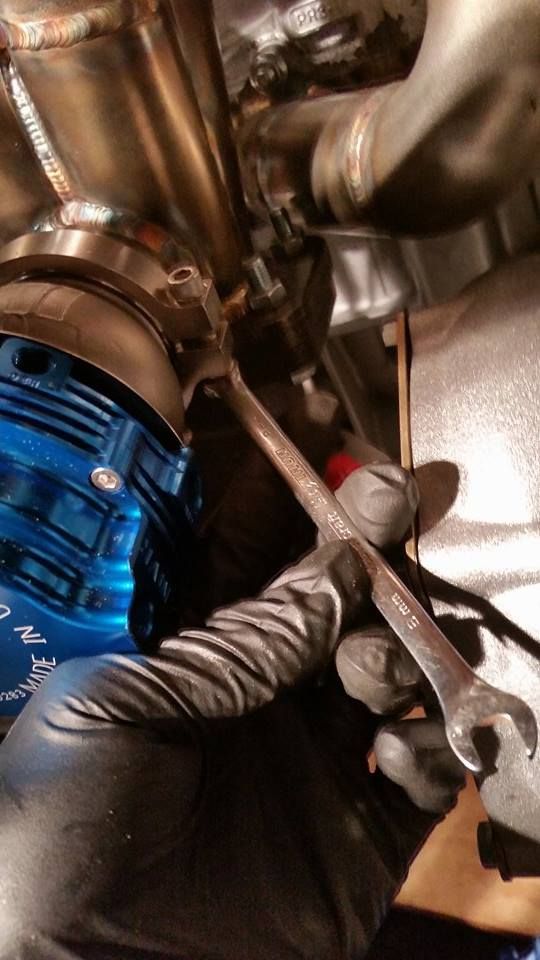
Figured while I was out to not be cheap and finally buy some flexible gear-wrenches, they came in very handy when doing the turbo/manifold grabbed a few other things I had run out off too. So far I've gotten away without needed any lubricants to get bolts undone which I'm pretty proud of seeing as its seen winters.
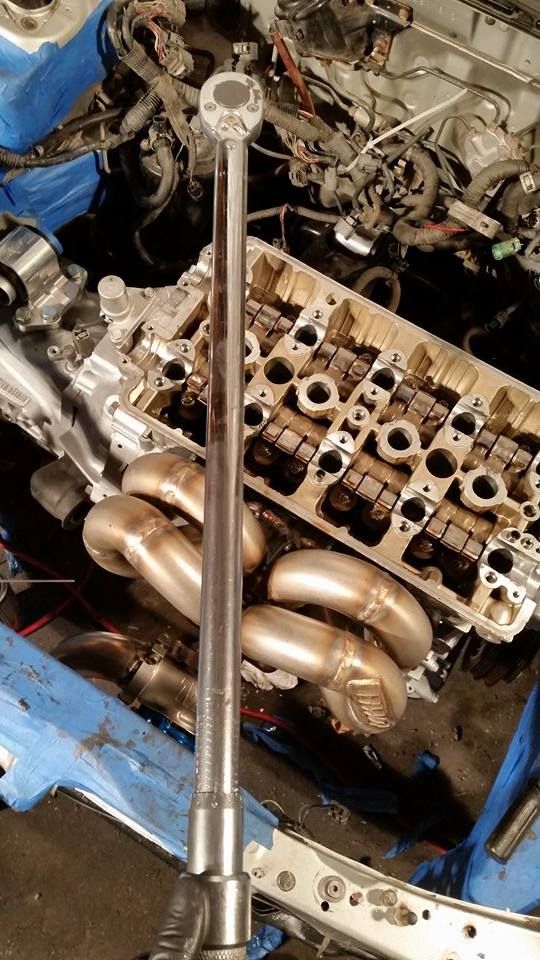
The instructions ARP gives are 3 equal steps to 80ft lbs, I never liked doing such a big jump on the final step so my numbers were 20/40/60 and final 80 with a x2 on each nut. same pattern as OEM I did use a smaller 3/8th for the 20/40.
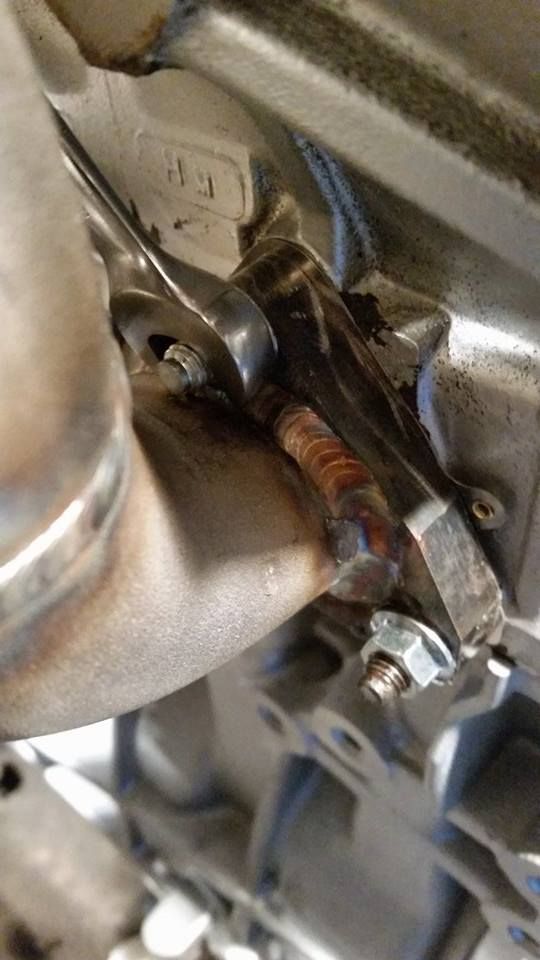
The nuts or the top of the flange are by far the worst ever, I really with the runners extended forward more like the "outlaw" manifolds even just by an inch this would have been easier. I wasn't able to use the gear-wrench feature due to the ratchet assembly being too big so each one got hand turned, on the bottom/side I was able to which made a huge diff I highly recommend a set of gear wrenches to anyone.
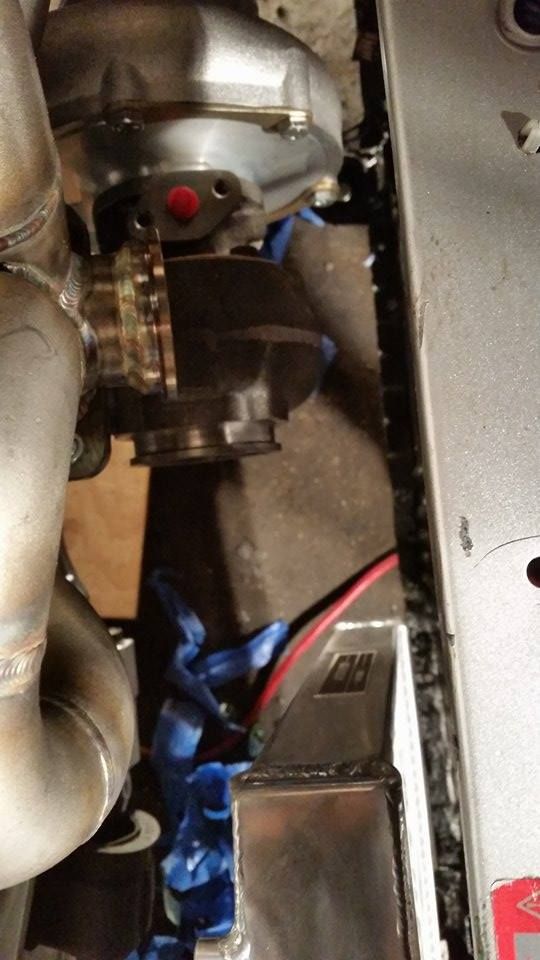
I don't have any pics of my lifting the turbo into place to be bolted up to the manifold as this was probably the hardest part so far, that thing is heavy as **** and awkward shaped. Add that plus trying to feed the bolts through and keep the gasket in place made it almost impossible, the next hardest was doing the back right bolt you have maybe 3 inches of sweep with the wrench and have to turn it around after each sweep. Yes I could have taken the compressor housing off but that's just more trouble and I don't want dirt getting all in it.
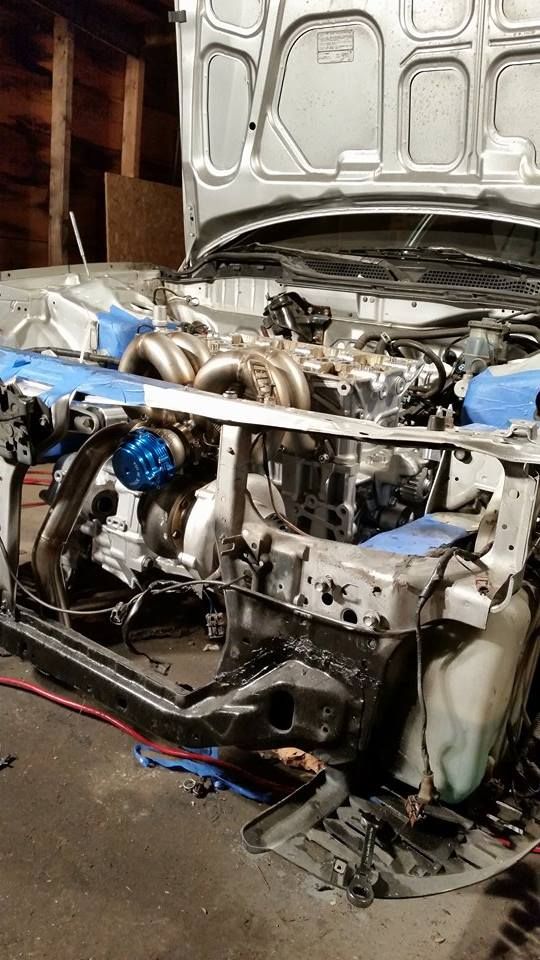
And this is where we sit now just need 1 more bolt for the turbo to manifold and we're good there, the waste gate will need to be adjusted as i'm having clearance issues with the dump tube. I'll be busy for a while and with the parts i'm waiting on i'll have even more to do, I do have to take the -AN lines to get clamped as I don't have a vice. But that's where i'm at hopefully i'll have some more frequent updates

Caked the studs and washers in this torque lube or what ever ARP calls it, i'm guessing its a thread locker of sorts.

at first I thought I could get away with using a 6pt on the 12pt arp nuts, not the case I started slipping just after 20lb ft. thankfully they are tough so nothing bad came of it however finding a 12pt socket is almost impossible here.

turns out it's a 1/2'' good thing princess auto carries 12pt's still most of the time I have any tools needed but I get caught off guard now and then.

Figured while I was out to not be cheap and finally buy some flexible gear-wrenches, they came in very handy when doing the turbo/manifold grabbed a few other things I had run out off too. So far I've gotten away without needed any lubricants to get bolts undone which I'm pretty proud of seeing as its seen winters.

The instructions ARP gives are 3 equal steps to 80ft lbs, I never liked doing such a big jump on the final step so my numbers were 20/40/60 and final 80 with a x2 on each nut. same pattern as OEM I did use a smaller 3/8th for the 20/40.

The nuts or the top of the flange are by far the worst ever, I really with the runners extended forward more like the "outlaw" manifolds even just by an inch this would have been easier. I wasn't able to use the gear-wrench feature due to the ratchet assembly being too big so each one got hand turned, on the bottom/side I was able to which made a huge diff I highly recommend a set of gear wrenches to anyone.

I don't have any pics of my lifting the turbo into place to be bolted up to the manifold as this was probably the hardest part so far, that thing is heavy as **** and awkward shaped. Add that plus trying to feed the bolts through and keep the gasket in place made it almost impossible, the next hardest was doing the back right bolt you have maybe 3 inches of sweep with the wrench and have to turn it around after each sweep. Yes I could have taken the compressor housing off but that's just more trouble and I don't want dirt getting all in it.

And this is where we sit now just need 1 more bolt for the turbo to manifold and we're good there, the waste gate will need to be adjusted as i'm having clearance issues with the dump tube. I'll be busy for a while and with the parts i'm waiting on i'll have even more to do, I do have to take the -AN lines to get clamped as I don't have a vice. But that's where i'm at hopefully i'll have some more frequent updates
Last edited by B_Swapped93; 01-21-2015 at 07:22 PM.
01-21-2015, 10:18 PM
#147
Honda-Tech Member
iTrader: (1)
Join Date: Aug 2003
Location: Left Coast : High Altitude, Top Floor
Posts: 7,616
Likes: 0
Received 1 Like
on
1 Post
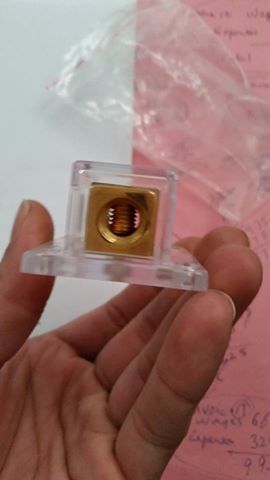
Ring terminal end width: .379 inches
Max wire size (AWG) : 8GA
Stud Size : M5

19193-0202 - MOLEX - TERMINAL, RING TONGUE, M5, CRIMP | Newark element14 US
Its not exactly like the original terminal, but should work with the fuse box and accomodate your new wire size.
01-23-2015, 07:49 PM
#148
Honda-Tech Member
Thread Starter
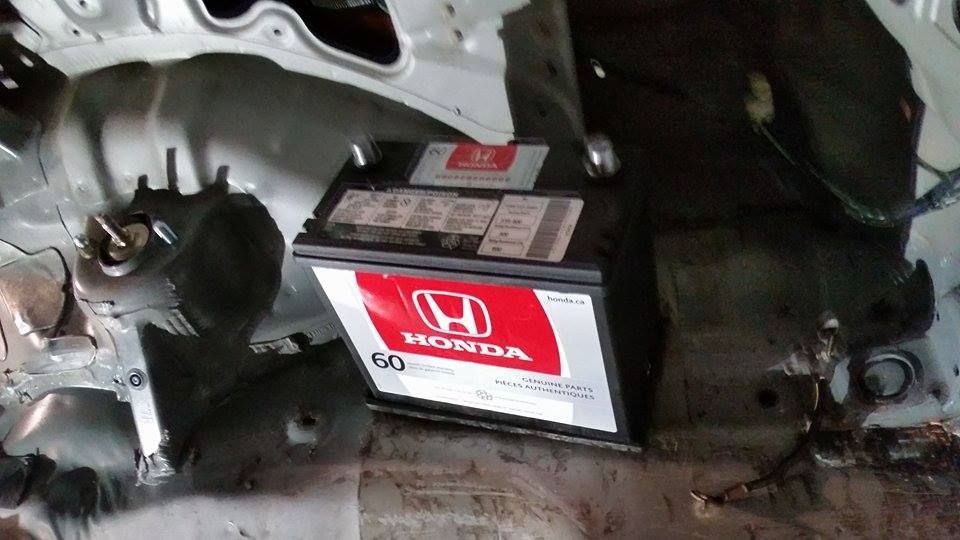
Picked up another "major contributing part" a battery took alot of deciding for me but I got a regular sized one...why? well I looked at the specs of my anti-gravity one there's no way I could play music from the radio and still be able to start the car later. Along with that one requires special terminals and a special tray, honestly didn't seem worth saving the weight and adding a major damper on drivability. For $99+60 m/o warranty you really cant go wrong with OEM Honda, got a few things in all categories done tonight.
Distribution block, was not able to find a properly sized 8G ring terminal so I made a pigtail out of the to fuse box section and will just connect them this way. ordering online wasn't really an option for something this small but I can just hide this inside the cabin.
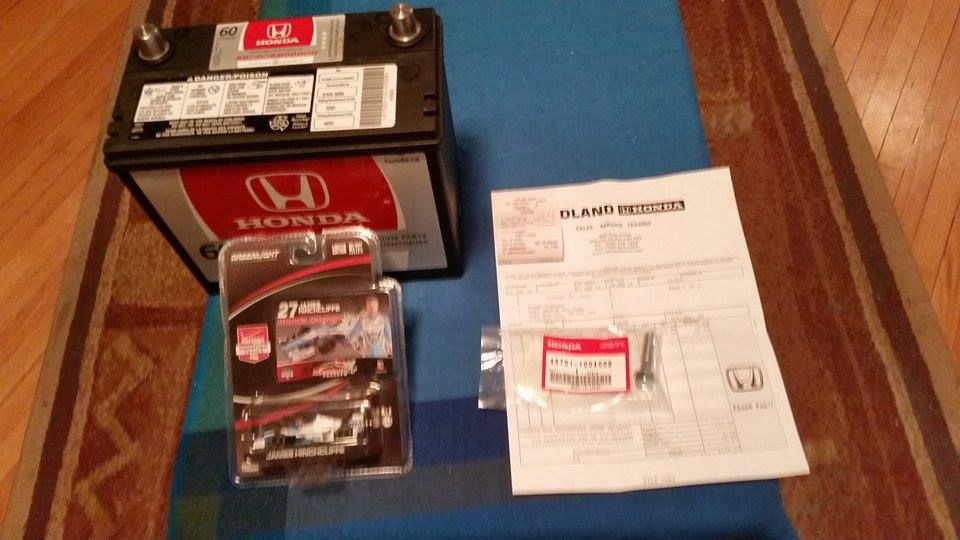
OEM Honda battery and that infamous starter bolt that deserved it's own thread... Honda decided to put it under "engine harness clamp" which makes zero sense and even then its confusing as to which it is. As for that "race car" you see in the pic they decided to just give me that as a joke, i'm 90% sure they just make fun of me now seeing as i'm there a few days every week(its all in good fun).
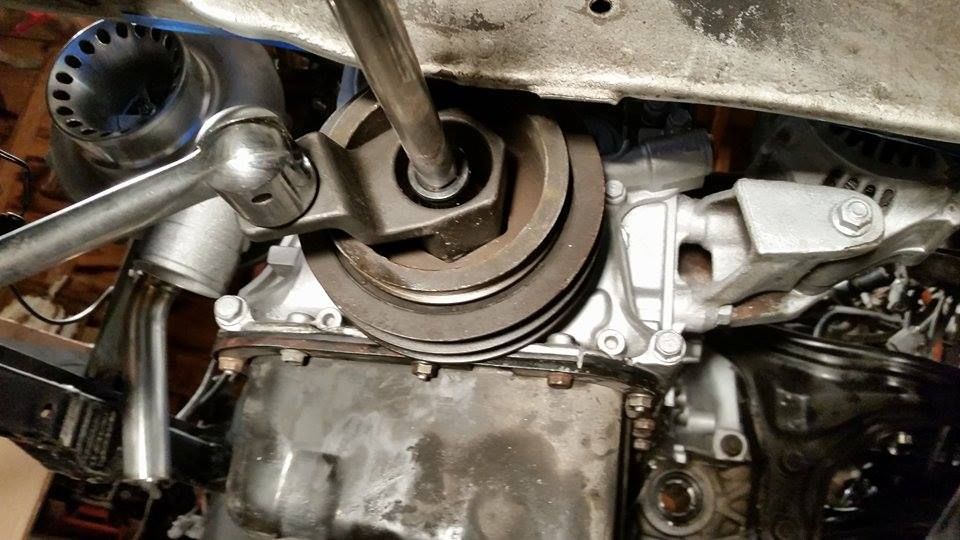
being the scholar I am(not) I forgot to put the timing belt and cover on when I had the pulley off and was doing the clutch, this is a giant pain with the engine in the car I have never enjoyed this or found it easy.
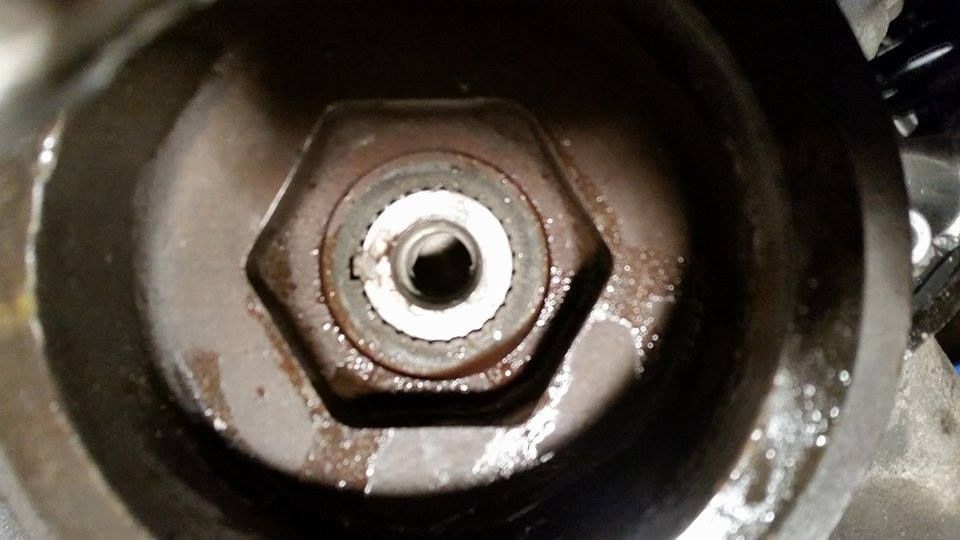
Instead of hitting the pulley on I sprayed it with some wd-40 to lube it up made things much easier, thread locker was used on the pulley bolt again last thing I need is that coming off. It's just hand tight for now i'll make sure I don't need to remove it again before final torque process, which also means getting the cams etc in tomorrow.
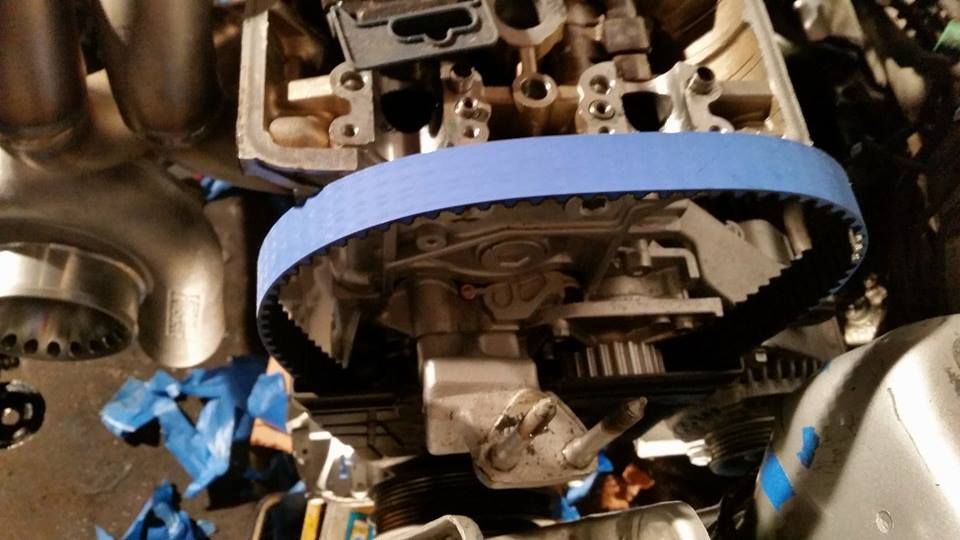
Like I said before I was no need to do the tensioner and pump its a low km engine and hasn't given me any issues worst case i'll just pull the car off the road and deal with it in the summer should something happen, but I think ppl worry too much about the timing belt stuff. As for the belt i'm using it's a "gates racing belt" I had this on 3 of my past Honda's and loved it even on my stock civic(d16y8) its just a tuff belt.
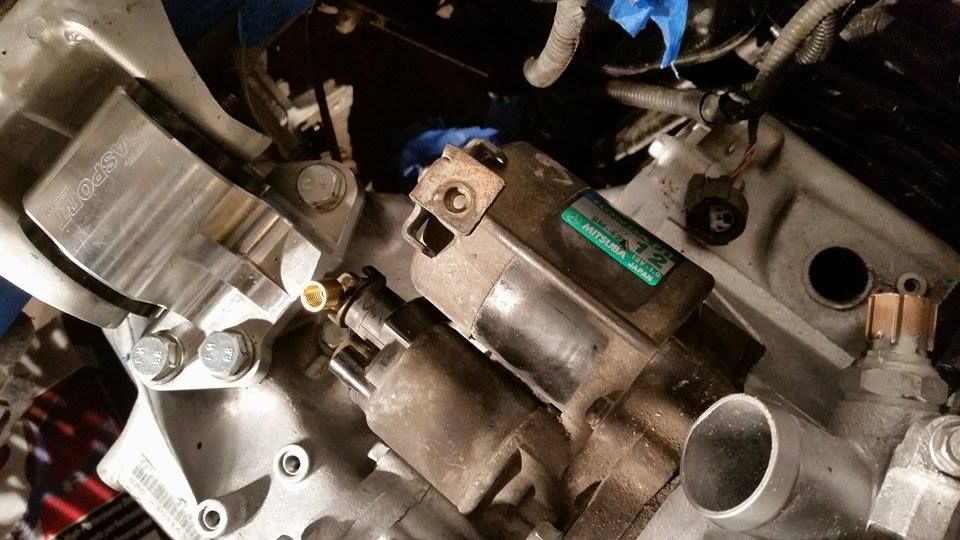
Starters on thank God that bot worked probz would have broke something had it not lol, ring terminal is just loosely fitted i'm going to try and get the wiring done tomorrow but I need a few stores that were obv closed at 11pm.
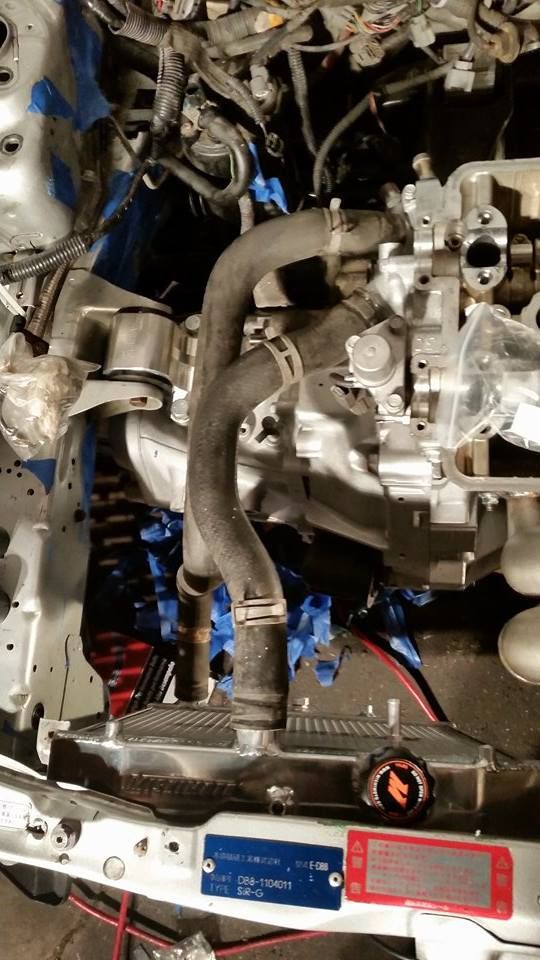
Rad fitting time, there is almost no room just with the dump-tube I don't imagine it will be easier with the big 3'' down pipe, going to bring the headlight out and see if I have clearance issues on that side. For the over flow tank i'll just do what I did last time and tuck it in the fender liner, i'll 100% need to make up 2 custom brackets and drill a new one at the top.

Kind of neat you get some hose lube I assume its just to crater a better seal on the outlets, better then the stupid junk2 one I had last time.
Tial and dump tube are coming back off for now till I get a better sensor of clearance room.
Honestly a lot of time I just spent messing with little bolts and such and I imagine a lot more messing will need to be done, it is fun but in the cold it gets hard and really makes you want to call it a day and go inside.

Going to just the plastic battery tray and get new j bolts and drill into the body and hook them from underneath, from what I can tell this should be fine. Did have to trim the ***** off before it would sit flush I need to keep the metal one for the catch can other wise i'd just use that and do a bead at each corner.
Ready to go for my next update which will be the electrical most likely, for the ground i'll just get a extra ft of 4g and shorten it down and use a nut/bolt to clam the ring terminal to the body as there is no threaded hole for a bolt.
If you're wondering about all the blue tape i'm starting to take it off, one thing that skipped my mind is how long I left it...its extremely hard to get off now. I'll do a big clean up of the bay once i'm finished all the messing around.

Distribution block, was not able to find a properly sized 8G ring terminal so I made a pigtail out of the to fuse box section and will just connect them this way. ordering online wasn't really an option for something this small but I can just hide this inside the cabin.

OEM Honda battery and that infamous starter bolt that deserved it's own thread... Honda decided to put it under "engine harness clamp" which makes zero sense and even then its confusing as to which it is. As for that "race car" you see in the pic they decided to just give me that as a joke, i'm 90% sure they just make fun of me now seeing as i'm there a few days every week(its all in good fun).

being the scholar I am(not) I forgot to put the timing belt and cover on when I had the pulley off and was doing the clutch, this is a giant pain with the engine in the car I have never enjoyed this or found it easy.

Instead of hitting the pulley on I sprayed it with some wd-40 to lube it up made things much easier, thread locker was used on the pulley bolt again last thing I need is that coming off. It's just hand tight for now i'll make sure I don't need to remove it again before final torque process, which also means getting the cams etc in tomorrow.

Like I said before I was no need to do the tensioner and pump its a low km engine and hasn't given me any issues worst case i'll just pull the car off the road and deal with it in the summer should something happen, but I think ppl worry too much about the timing belt stuff. As for the belt i'm using it's a "gates racing belt" I had this on 3 of my past Honda's and loved it even on my stock civic(d16y8) its just a tuff belt.

Starters on thank God that bot worked probz would have broke something had it not lol, ring terminal is just loosely fitted i'm going to try and get the wiring done tomorrow but I need a few stores that were obv closed at 11pm.

Rad fitting time, there is almost no room just with the dump-tube I don't imagine it will be easier with the big 3'' down pipe, going to bring the headlight out and see if I have clearance issues on that side. For the over flow tank i'll just do what I did last time and tuck it in the fender liner, i'll 100% need to make up 2 custom brackets and drill a new one at the top.

Kind of neat you get some hose lube I assume its just to crater a better seal on the outlets, better then the stupid junk2 one I had last time.

Tial and dump tube are coming back off for now till I get a better sensor of clearance room.

Honestly a lot of time I just spent messing with little bolts and such and I imagine a lot more messing will need to be done, it is fun but in the cold it gets hard and really makes you want to call it a day and go inside.

Going to just the plastic battery tray and get new j bolts and drill into the body and hook them from underneath, from what I can tell this should be fine. Did have to trim the ***** off before it would sit flush I need to keep the metal one for the catch can other wise i'd just use that and do a bead at each corner.

Ready to go for my next update which will be the electrical most likely, for the ground i'll just get a extra ft of 4g and shorten it down and use a nut/bolt to clam the ring terminal to the body as there is no threaded hole for a bolt.
If you're wondering about all the blue tape i'm starting to take it off, one thing that skipped my mind is how long I left it...its extremely hard to get off now. I'll do a big clean up of the bay once i'm finished all the messing around.
Last edited by B_Swapped93; 01-23-2015 at 08:22 PM.
01-24-2015, 09:37 AM
#149
Honda-Tech Member
Join Date: Jul 2013
Location: sleeping in a 368k 95 gs-r
Posts: 1,975
Likes: 0
Received 41 Likes
on
41 Posts
cool i need a new battery pretty soon and this deal is cheaper than the brand x battery at fartmart:
Acura Parts @ AcuraOEMparts.com - Genuine Acura OEM Parts from Delray Acura
Acura Parts @ AcuraOEMparts.com - Genuine Acura OEM Parts from Delray Acura
01-24-2015, 04:06 PM
#150
Honda-Tech Member
Thread Starter
My plan was to get some used drive shafts since I gave mine to a friend who broke both his and needed them, Torontojdm was closed for some odd reason I figured i'd check out "Garage-16". I'm not a fan of this place they seem to appeal largely to the JDM fan boys and stance kids and over charge BUT they do have a TON of stuff in stock and carry some neat stuff so i'm not hating. I'll probably go back to be honest for some small things like a UKDM fog light etc, either way got a new VC and my K-tuned pro circuit shifter and the OEM ITR oil cap. Ended up spending way more then I wanted on that stuff but ohh well, as of now that valve cover is my favorite part I've bought... it's soooo mint.
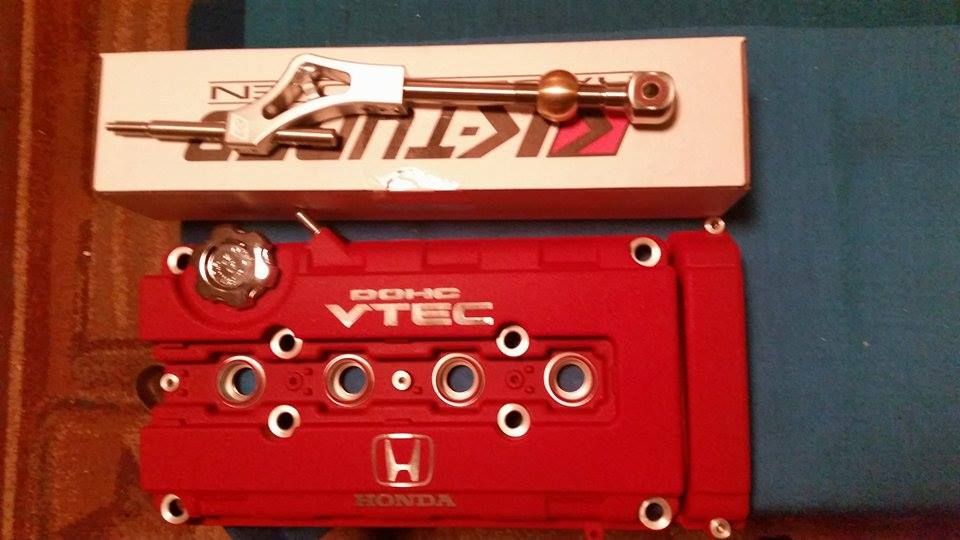
First time to Garage 16...better then I was expecting from what I've seen either way i'm very happy with my JDM ITR valve cover and oil cap.

One more shot cause it looks sooooo nice(phone camera doesn't do it justice), it crossed my mind I probs could have gotten the P/N and ordered it at my local dealer but i'm not sure "JDM" part number work over here. The sad part is i'll be welding 2 oil bungs to it very soon for the catch can.