

Fixing Up a Turd: A Build Thread


Thread Starter


Joined: Jul 2014
Posts: 937
Likes: 43
From: Austin, TX
I was really leaning towards the B20VTEC setup, but last night I finally did a leakdown test on the engine while it was hot and was pretty disappointed. #1 was around 5%, #2 was 15%, and #3 and #4 were aroun 10%. I'm not comfortable using a motor with numbers like that as a base for a build so at this point I think I'm going to cancel my plans to make this car fast and start saving for an early 90's NSX. My credit is pretty good so I think I should have enough for a decent down payment and low interest rate by the beginning of next year. 
I might just slap the GSR head as-is on the B20 with some ARP head studs as cheaply as possible though since I already have it and then tune it myself. B20's are cheap enough that if I blow it up I can just buy another one.
I did finally get around to replacing the broken wheel studs on my driver side rear wheel so I'll probably start taking it to autocross occasionally. And after my friends repeatedly told me how shitty the seat covers looked I finally took them off and the interior really does look a hell of a lot nicer.


Honda-Tech Member
Joined: Feb 2009
Posts: 77
Likes: 0
From: Oregon
so yes they detonate, because of inadequate wall thickness... I never said they couldn't be done, I said you better have a good tuner.

I was really leaning towards the B20VTEC setup, but last night I finally did a leakdown test on the engine while it was hot and was pretty disappointed. #1 was around 5%, #2 was 15%, and #3 and #4 were aroun 10%. I'm not comfortable using a motor with numbers like that as a base for a build so at this point I think I'm going to cancel my plans to make this car fast and start saving for an early 90's NSX. My credit is pretty good so I think I should have enough for a decent down payment and low interest rate by the beginning of next year.
I might just slap the GSR head as-is on the B20 with some ARP head studs as cheaply as possible though since I already have it and then tune it myself. B20's are cheap enough that if I blow it up I can just buy another one.
I did finally get around to replacing the broken wheel studs on my driver side rear wheel so I'll probably start taking it to autocross occasionally. And after my friends repeatedly told me how shitty the seat covers looked I finally took them off and the interior really does look a hell of a lot nicer.
Thread Starter
Joined: Jul 2014
Posts: 937
Likes: 43
From: Austin, TX
Yup, I've wanted one since I first found out they existed and there won't ever be a better time for me to buy one. Currently no family obligations or mortgage payment to deal with and decent income. I looked at a few other cars such as an S2000, Cayman S, new Mustang (for about 2 minutes lol) and WRX but if I bought any of those I'd still wish I'd have bought an NSX.


i meant to ask a while back, but skimming through the last 4 pages i dont think i ever asked. since i plan on doing a similar garage type paint job on my car next year, what was your setup for the gun and compressor? i'm still doing some shopping for odds and ends, but i like to see what other people have used and what has worked.
Thread Starter
Joined: Jul 2014
Posts: 937
Likes: 43
From: Austin, TX
Wall of text incoming.
My paint gun was a something with decent reviews I found on Amazon for $70 or so, I bought one with a 1.4mm tip so I could spray both base and clear with it.
As for the compressor, I tried spraying with a Husky 20 gallon/150psi unit, a Dewalt 15 gallon/200psi unit, and a Dewalt 4.5 gallon/200psi unit, and the 4.5 was the only one that could make it through spraying the whole car in one go since it can pump up so fast and run continuously. The 4.5 runs about $350 new but I borrowed it from a friend and loved it, it's super quiet too. Oddly, they were all rated at 5cfm@90psi.
If I could do it over I'd have paid a few hundred bucks to rent a spraybooth for a day or tried to find a small shop that would let me supply the materials, do the prep, etc. and just have them spray it for a few hundred bucks. One shop I talked to about that said they'd do it for $200 if I did everything up to and including masking.
I'd have also used a Tyvek or similar paint suit, my paint has a bunch of dirt in it that came off my clothes. And use a full face organic vapor respirator at minimum, but supplied air would be ideal. Also, if you do it in your garage, seal off any doors to other parts of the house and cover everything with plastic, and get a few box fans with AC filters to keep air moving. I didn't have good ventilation so the clear ended up kinda dull since the overspray was able to settle on the surface instead of blowing out.
Also, find a paint system of sealer, primer, base, and clear coat and buy it all from the same manufacturer and follow the directions to the T. You can usually get away with a different clear coat but the safe route is to buy it all from the same manufacturer. And whatever you do, don't use Bondo for body filler, I made this mistake and now I have spots where the white paint turned yellow despite using the exact sealer recommended by my paint manufacturer that's intended to prevent such issues. Bondo is trash, pay a bit more and order the real stuff.
And if you choose to do it yourself, be prepared to spent a lot of time wetsanding and polishing afterwards. You'll probably have a few runs in the clear coat and a few places with terrible orange peel. And make sure to put at least 3 layers of clear coat on so you have plenty of room for error when buffing.
Thread Starter
Joined: Jul 2014
Posts: 937
Likes: 43
From: Austin, TX
First pictures in a while...I finally finished my HID retrofit, you know, the one that I started about six months ago. I finally bought a heat gun and I wish I had months ago, putting these things back together is far easier with one than just using the oven.
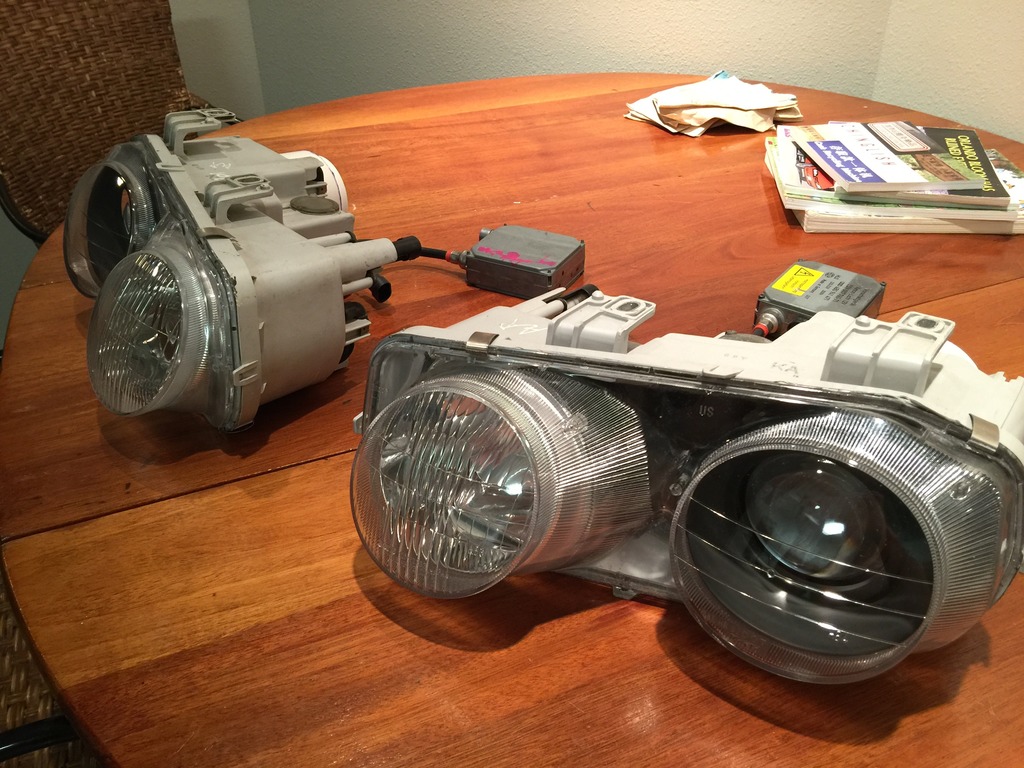
Last time I messed with my headlights I painted the projector shrouds gloss black, and while I liked the look, I went with flat black this time and I think it looks a bit better. To protect the lenses from UV I used this guys method, which was shown to me by wunfstgsr in a thread I started a while back. So far it seems to have worked very well, the finish is near perfect and it was incredibly easy to apply. I tried 2K clear coat the first time around and it reacted badly with the plastic so I had to sand it all off.
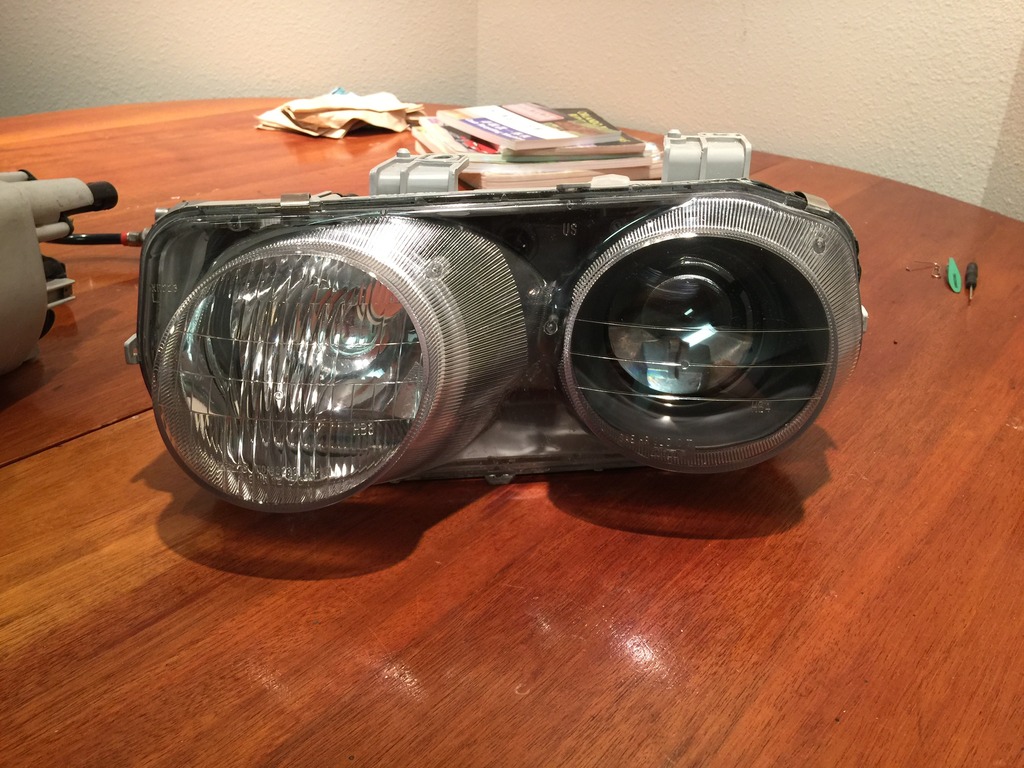
I spent a long time trying to devise a good solution for the caps to cover the igniters. Most of the retrofit threads I've seen have been pretty bad in this area, and the first retrofit I did last year was terrible, I melted one of the housings in the oven and used rubber gloves to "seal" the back. In the end, I cut the lip off the rubber grommet to make an O-ring, cut the tabs off the plastic ring, sanded it smooth with 60 grit sandpaper, and glued it to a piece of PVC cap using the Loctite Plastics Bonding System since the ring (and the housings) is polypropylene which is difficult to glue using anything else. That particular glue seems to have worked pretty well, when I was leak testing the caps one of them sealed perfectly but I didn't use quite enough glue on the other so it had a small drip, which I fixed by going all the way around the joint with clear RTV.
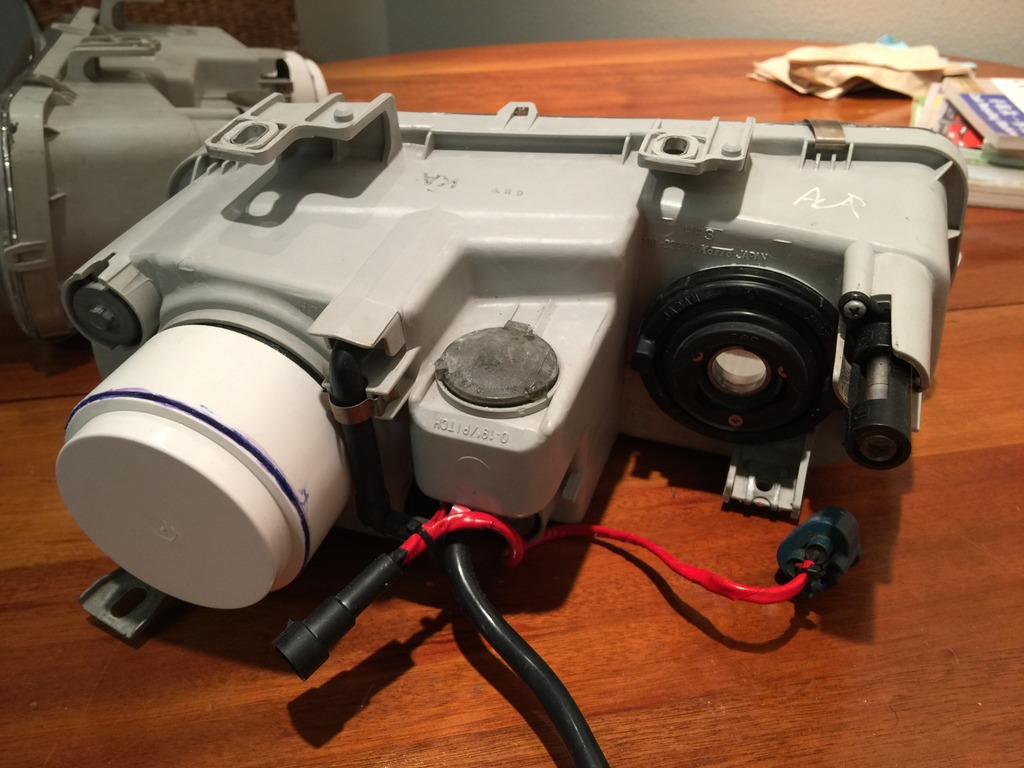


At some point I may paint the caps grey to better match the housings.
I made a harness to allow me to use the 65W 9005 bulbs along with the bi-xenon HID projectors for the high beams for max light output. Tomorrow I'm going to swap in these headlights and get them lined up properly, it's been raining today so I didn't want to expose the freshly sealed lenses to the elements just yet.
Backdrop has changed since I just moved, no more dumpy college apartment lol. :D
Last time I messed with my headlights I painted the projector shrouds gloss black, and while I liked the look, I went with flat black this time and I think it looks a bit better. To protect the lenses from UV I used this guys method, which was shown to me by wunfstgsr in a thread I started a while back. So far it seems to have worked very well, the finish is near perfect and it was incredibly easy to apply. I tried 2K clear coat the first time around and it reacted badly with the plastic so I had to sand it all off.
I spent a long time trying to devise a good solution for the caps to cover the igniters. Most of the retrofit threads I've seen have been pretty bad in this area, and the first retrofit I did last year was terrible, I melted one of the housings in the oven and used rubber gloves to "seal" the back. In the end, I cut the lip off the rubber grommet to make an O-ring, cut the tabs off the plastic ring, sanded it smooth with 60 grit sandpaper, and glued it to a piece of PVC cap using the Loctite Plastics Bonding System since the ring (and the housings) is polypropylene which is difficult to glue using anything else. That particular glue seems to have worked pretty well, when I was leak testing the caps one of them sealed perfectly but I didn't use quite enough glue on the other so it had a small drip, which I fixed by going all the way around the joint with clear RTV.
At some point I may paint the caps grey to better match the housings.
I made a harness to allow me to use the 65W 9005 bulbs along with the bi-xenon HID projectors for the high beams for max light output. Tomorrow I'm going to swap in these headlights and get them lined up properly, it's been raining today so I didn't want to expose the freshly sealed lenses to the elements just yet.
Backdrop has changed since I just moved, no more dumpy college apartment lol. :D
Last edited by MotorMouth93; Dec 14, 2017 at 08:52 AM.
Thread Starter
Joined: Jul 2014
Posts: 937
Likes: 43
From: Austin, TX
Update on the headlights, I installed them the other night and lined them up in my work parking garage since it's been raining like crazy here in ATX.
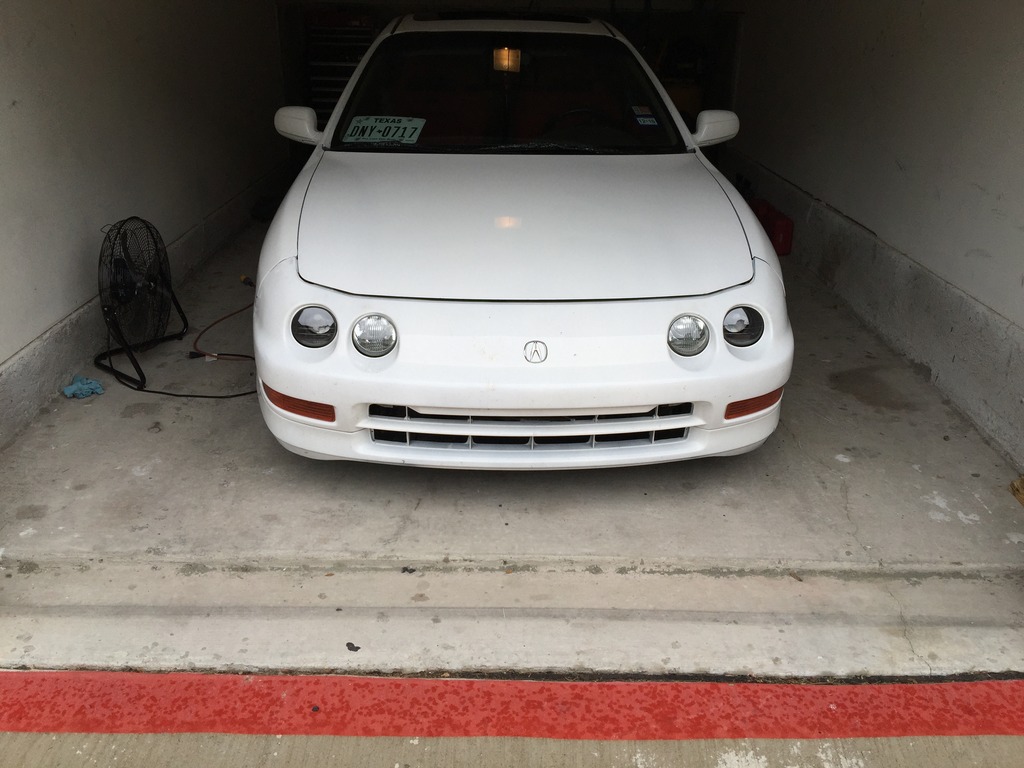
This picture is the cutoff about 100 feet in front of the car.
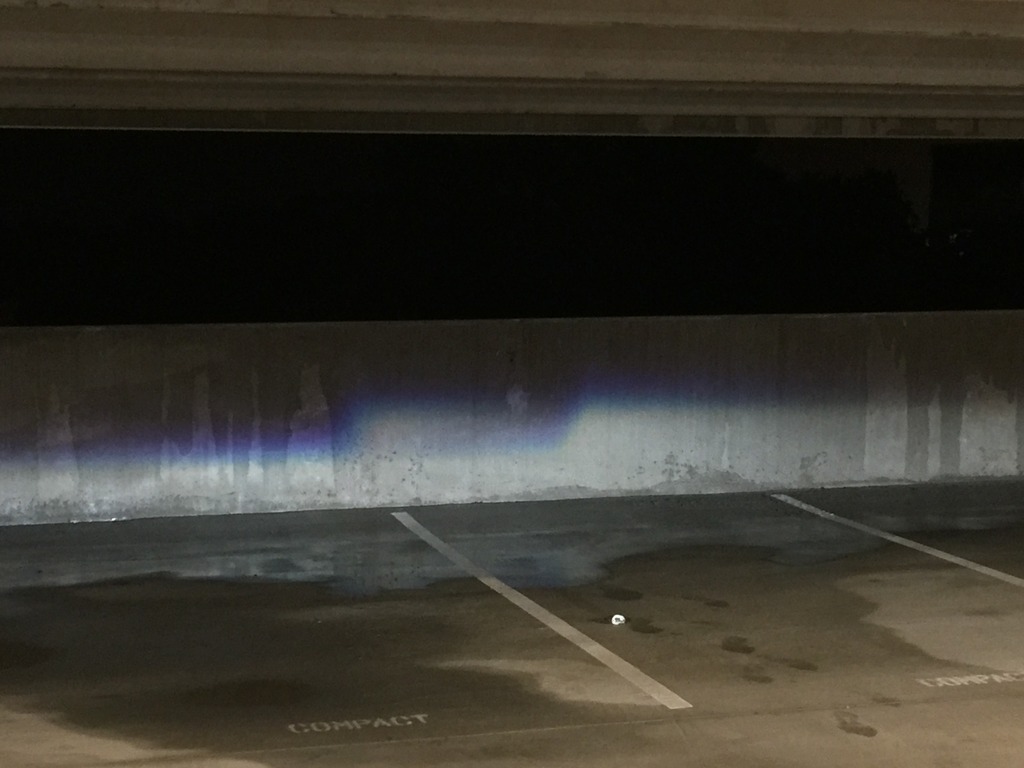
Light output with just the low beams is great, the factory headlight lenses don't diminish it near as much as I had expected. For a $110 set of Morimoto FX-R 3.0 projectors and a $50 set of Morimoto 5500K bulbs, I'm very impressed. You'd be hard pressed to find better projectors out of the box short of S2000 projectors (which cost 3x as much). Definitely a worthwhile upgrade IMO.
This picture is the cutoff about 100 feet in front of the car.
Light output with just the low beams is great, the factory headlight lenses don't diminish it near as much as I had expected. For a $110 set of Morimoto FX-R 3.0 projectors and a $50 set of Morimoto 5500K bulbs, I'm very impressed. You'd be hard pressed to find better projectors out of the box short of S2000 projectors (which cost 3x as much). Definitely a worthwhile upgrade IMO.
Last edited by MotorMouth93; Dec 14, 2017 at 08:53 AM.
looks good! i'll be referencing this page when i get around to doing my retro fit. i was looking at all sorts of different options. please post a pic a night out on the road!

Thread Starter
Joined: Jul 2014
Posts: 937
Likes: 43
From: Austin, TX
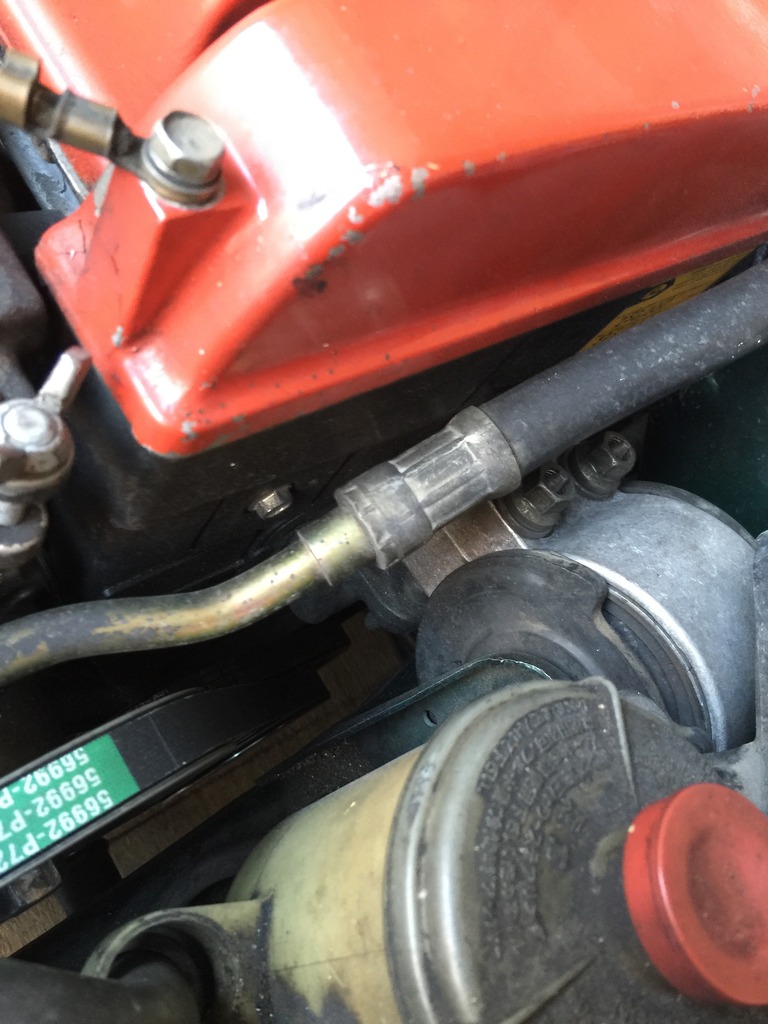
It's been a few months of not much progress, but a while back I started to notice a clunk coming from somewhere in the drivetrain in the front driver side of the engine bay. I noticed that the driveshaft felt pretty loose so I replaced it, but the clunk was still there. Then I noticed that the intermediate shaft bearing had started to develop a tiny bit of play, so I replaced it too, but still the clunk remained. So I gave up for a time and just ignored it, until one day I had the hood up for whatever reason and I noticed that the driver side engine mount nuts were backed way out and it looked like this. I torqued them down properly and haven't had any issues since, but really bugs me that I have no idea when I loosened them in the first place.
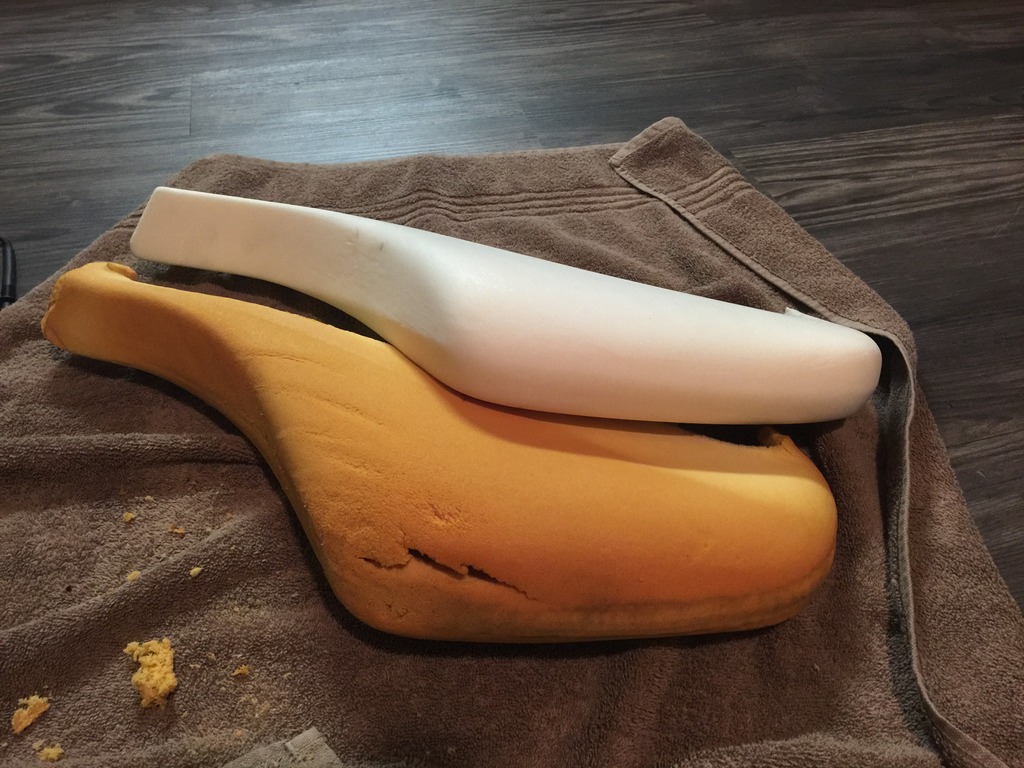
I also finally got around to installing the new seat bolster foam I bought for the passenger seat. Since the seats are from a JDM ITR, my passenger side seats right hand bolster wasn't doing so well, and a company based in the UK sells replacement Recaro seat parts. The total was about $90 after shipping which seems pretty steep, but there's not much else you can do about it. Here is a comparison of the new foam and the old.
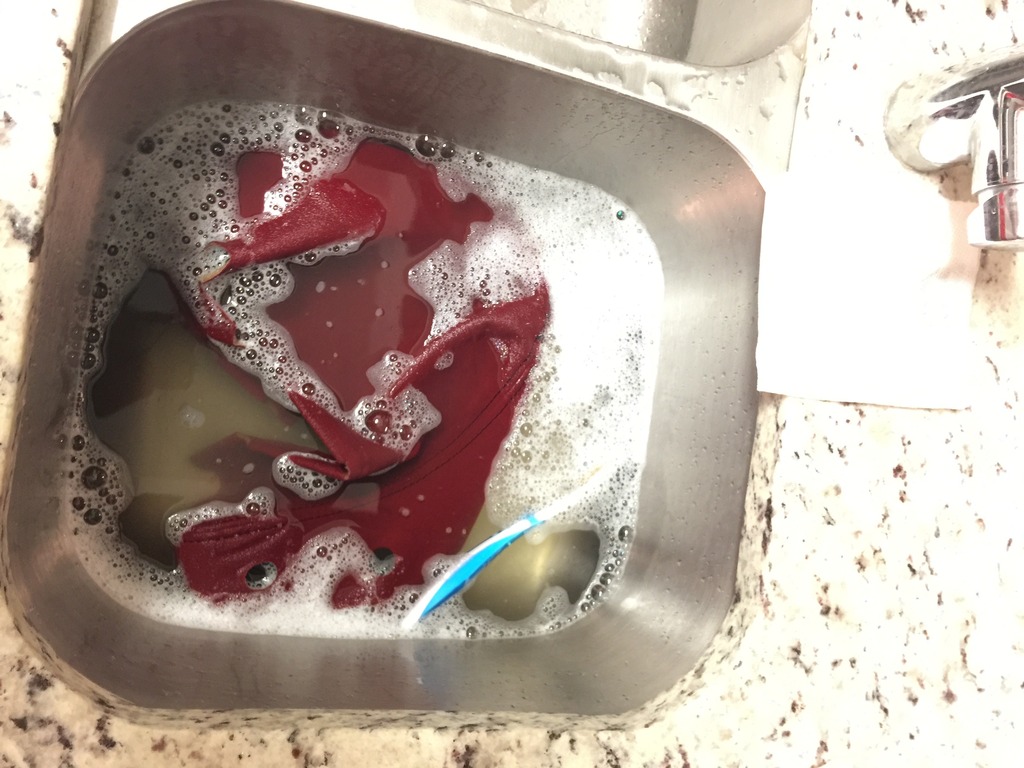
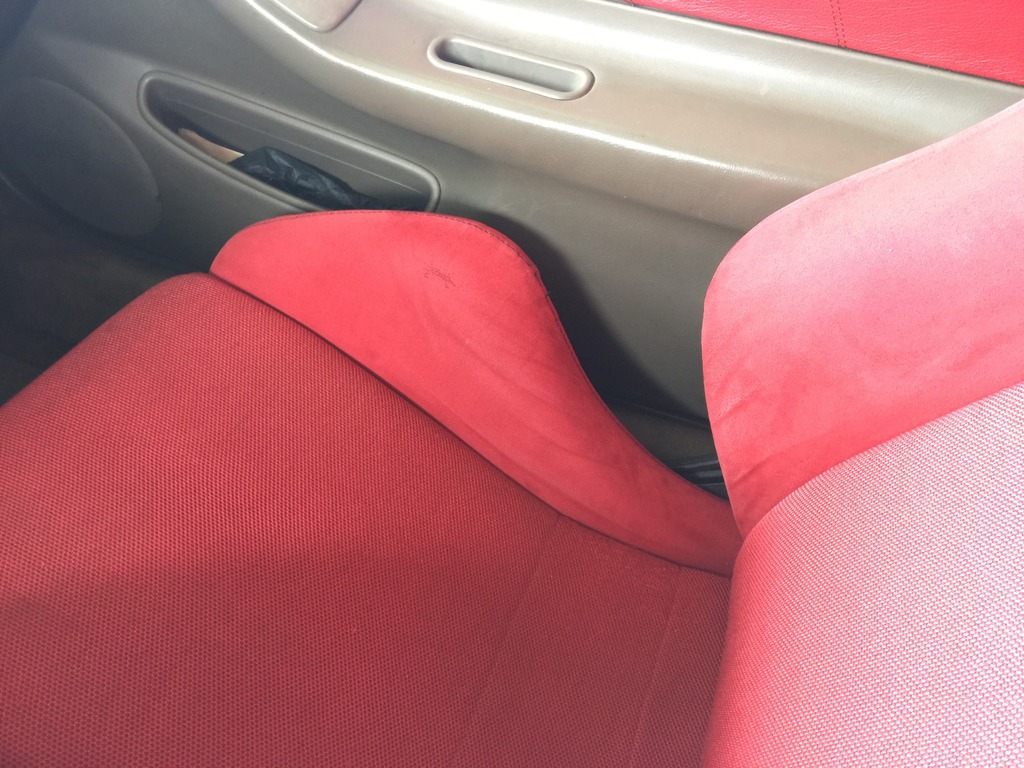
While I had the bolsters off I went ahead and washed them. I filled the sink up with a few inches of warm water and a bit of laundry detergent, then scrubbed the Alcantara with a soft bristled toothbrush. It worked pretty well but there's only so much you can do to something worn like this. Lastly, I let them air dry overnight.
After the seat is reassembled and installed back in the car. The fabric isn't actually wrinkled anymore, but it discolored where it was folded in on itself with the collapsed foam bolster.
I also have a Type-R style wing and front lip that arrived this week, I'll paint and install them this weekend and post some pictures afterwards. Even though it's a knockoff, the fitment of the lip is perfect, it's way better than I expected for less than $50 shipped. I'm really glad I ruined the last lip in the painting process (primer didn't dry long enough and lifted when the base coat was sprayed), this one is far nicer.
I also finally got around to installing the new seat bolster foam I bought for the passenger seat. Since the seats are from a JDM ITR, my passenger side seats right hand bolster wasn't doing so well, and a company based in the UK sells replacement Recaro seat parts. The total was about $90 after shipping which seems pretty steep, but there's not much else you can do about it. Here is a comparison of the new foam and the old.
While I had the bolsters off I went ahead and washed them. I filled the sink up with a few inches of warm water and a bit of laundry detergent, then scrubbed the Alcantara with a soft bristled toothbrush. It worked pretty well but there's only so much you can do to something worn like this. Lastly, I let them air dry overnight.
After the seat is reassembled and installed back in the car. The fabric isn't actually wrinkled anymore, but it discolored where it was folded in on itself with the collapsed foam bolster.
I also have a Type-R style wing and front lip that arrived this week, I'll paint and install them this weekend and post some pictures afterwards. Even though it's a knockoff, the fitment of the lip is perfect, it's way better than I expected for less than $50 shipped. I'm really glad I ruined the last lip in the painting process (primer didn't dry long enough and lifted when the base coat was sprayed), this one is far nicer.
Last edited by MotorMouth93; Dec 14, 2017 at 08:54 AM.
^ Very nice! That seat looks great man even with a little discoloring. You really can't tell much. Also agreed on the front lip. I got a replica and the fitment is identical to OEM. A coworker who has a legit one on his teg compared with mine and there seems to be a company making a pretty damn legit rep at the moment because we couldn't see a single visual difference. The fact mine is poly makes me like the rep more.
Thread Starter
Joined: Jul 2014
Posts: 937
Likes: 43
From: Austin, TX
I hate to say it but at this point this build is pretty much as done as it will ever be. The Type-R replica wing doesn't fit in the factory holes on the trunk and I'm not willing to make bigger holes so that isn't going to happen, and I just have absolutely no motivation to bother with painting the front lip by itself. And the real killer is that I picked up a 1994 NSX (yes, it's a manual for all you purists) last weekend so most of my interest in working on the Integra is gone beyond routine maintenance and washing it obsessively since I plan on keeping it basically forever given the amount of time I've put into it, and it makes a fun daily driver.
I still might post occasionally if I get around to doing stuff on the Integra, but in the mean time, thanks for all the kind words and advice, it's been a fun few years. <3
I still might post occasionally if I get around to doing stuff on the Integra, but in the mean time, thanks for all the kind words and advice, it's been a fun few years. <3
Last edited by MotorMouth93; Nov 2, 2016 at 10:06 PM.
**** man, who cares about the integra lol. If one day I buy an NSX myself i'd be focusing all my attention on it and just driving the integra into the ground. Make a thread in the NSX section and keep us updated! Congratulations btw!
Last edited by Prudz_lude; Nov 3, 2016 at 09:57 AM.