
HOW TO make your own camera mount for $5. (2006+ Si)
 09-10-2008, 12:23 PM
#1
Honda-Tech Member
Thread Starter
Join Date: Nov 2007
Location: Jersey
Posts: 2,740
Likes: 0
Received 0 Likes
on
0 Posts
Welcome...I was tired of watching videos of people filming themselves driving, while they hold the camera, or with it taped to their steering wheel. I actually don't intend to film myself driving too much, but I thought I would help my fellow car enthusiasts. This is made from PVC that I had laying around, and under $3 in hardware purchased from Home Depot. Keep in mind, that this mount is made specifically for my car (2008 Si) and specifically for my camera (Casio Exilim). It mounts onto the passenger side headrest posts, and is made that I can have my car comfortably full of people without them (or I) hitting the camera mount. You may need to make adjustments to make it work for you, but you should still be able to follow my basic plan. Read through the entire post before you decide to tackle this, so you can better understand what you need, and what needs to be done.
*Seat posts for 2006+ SIs are 6 5/8" apart (to the center) so if yours are the same, you can pretty much follow this verbatum*
What you'll need for this project:
Length of 1/2" PVC pipe (14 3/8" to be exact)
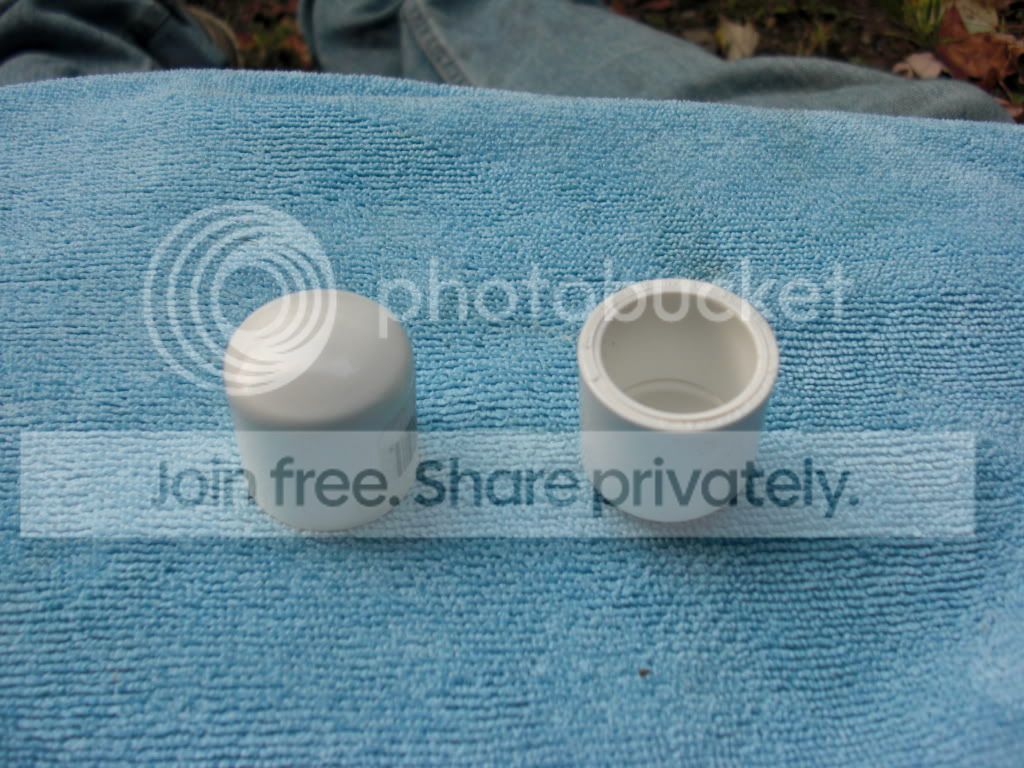
(2) 1/2" PVC end caps
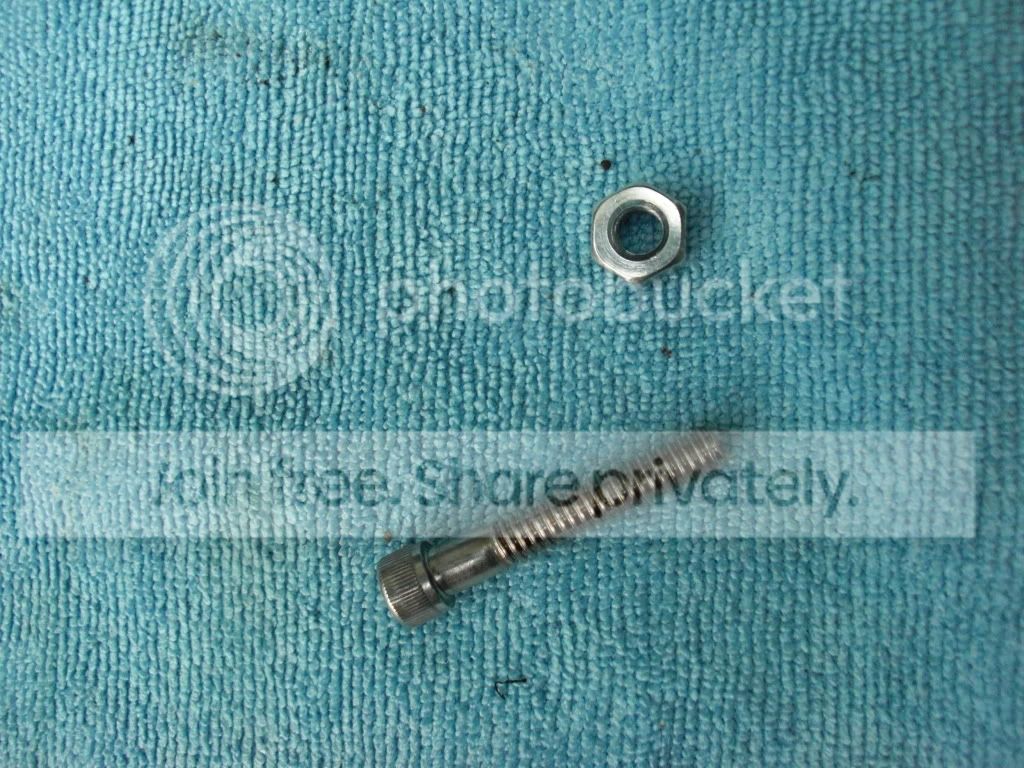
Cap Screw Socket (1/4" x 1.5" with 3/16" allen socket in top) and 7/16" nut that fits the 1/4" cap screw. Best to bring your camera in Home Depot with you to check if the screw is the proper thread for the mount hole in the bottom.
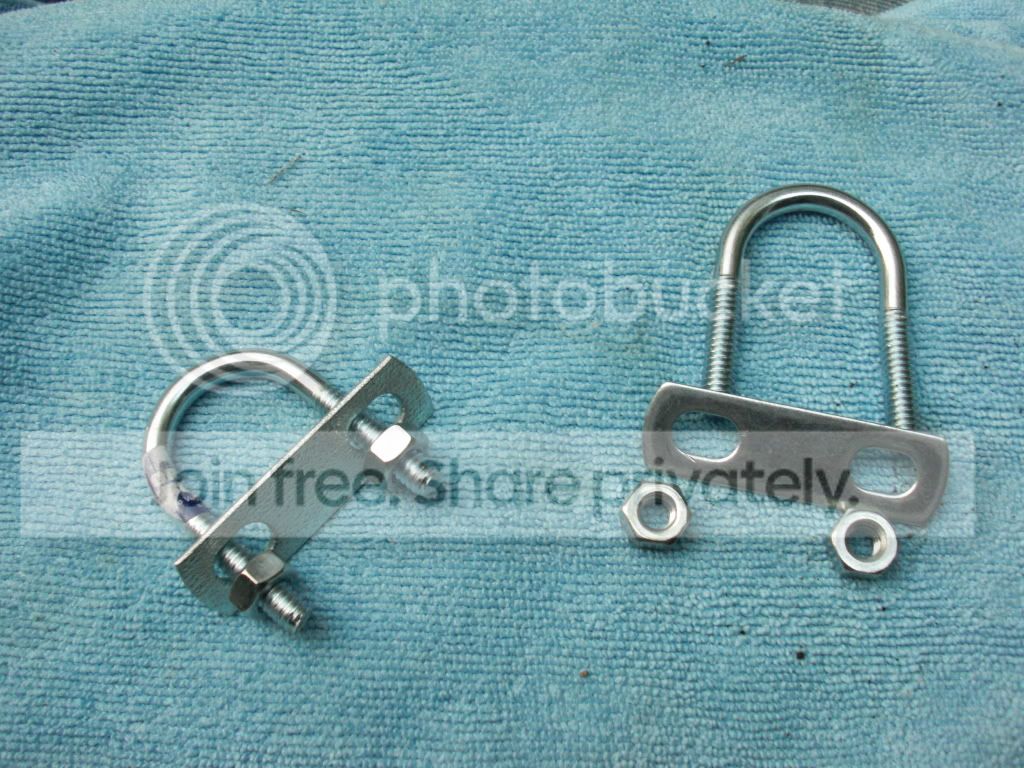
(2) 1/4" U-bolts (they come assembled as shown below). The space between the two threaded pieces should be 1 1/4".
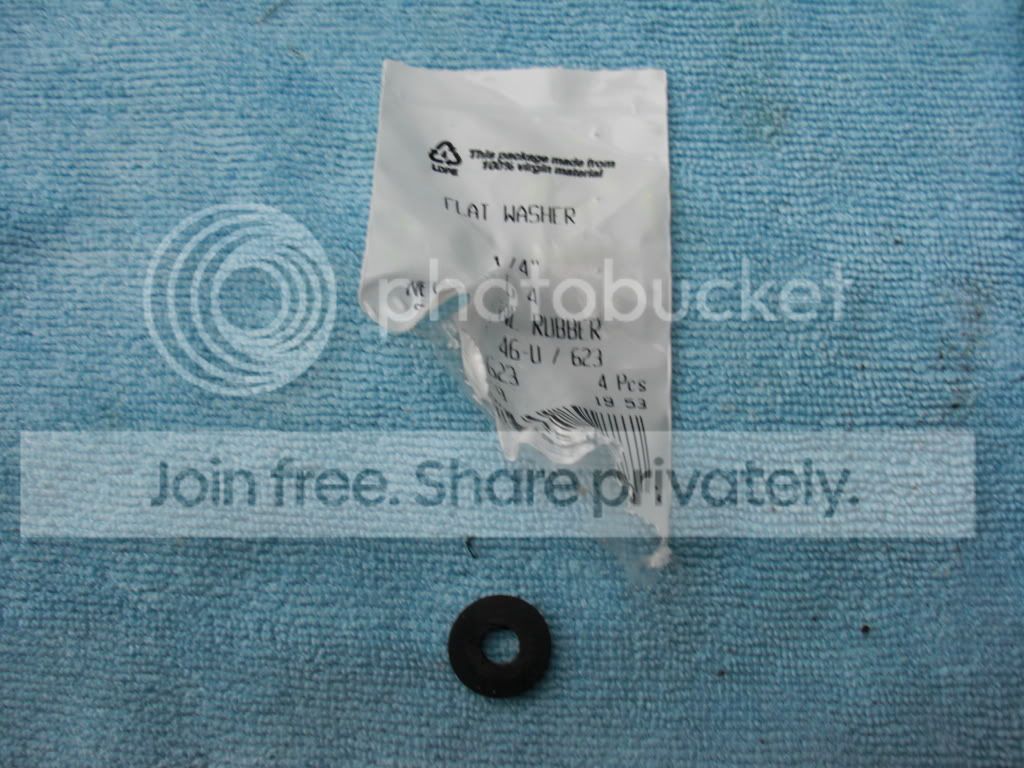
(8) 1/4" Rubber washers. The ones I got came in bags of 4.
(4) 1/4" Rubber screw caps

Hacksaw
7/16" Wrench
3/16" Allen Key
Drill w/ 1/4" bit
Optional (if you plan to paint it):
400 grit sandpaper or steel wool
1000 (or higher) sandpaper
Primer
Paint of choice
Now...the fun part.
Step 1:
Cut the PVC to length (14 3/8") with the hacksaw. Gently sand away the burrs on the end(s).
Step 2:
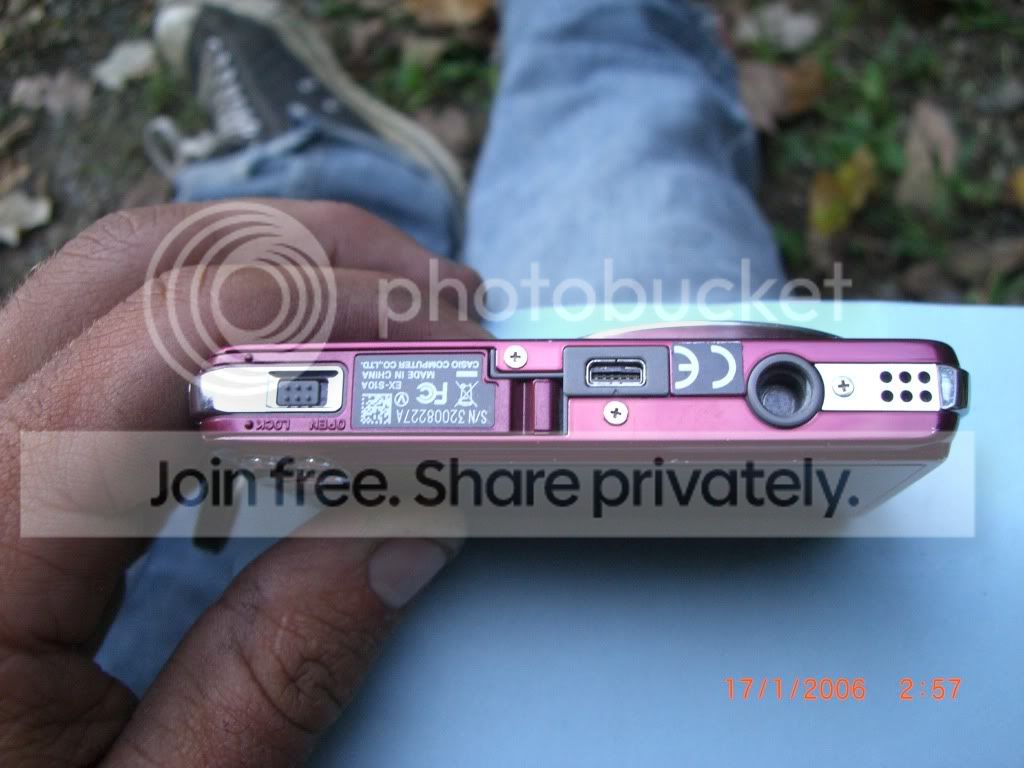
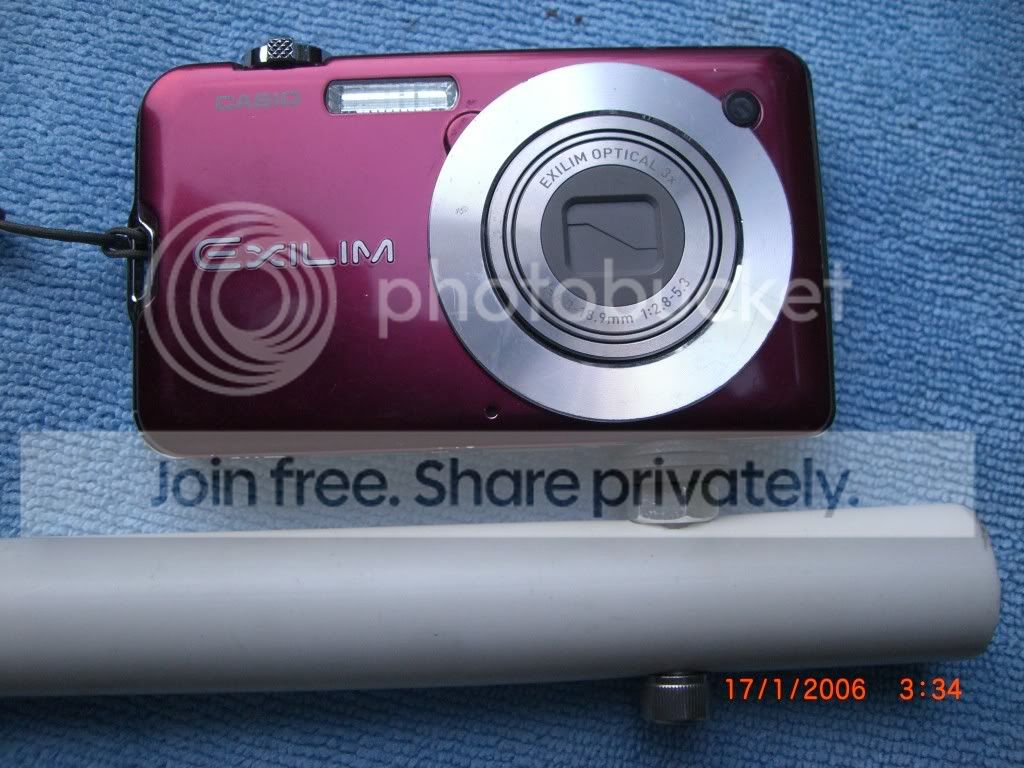
Measure for camera mount. Mine is 1 5/8" from the end of the pvc, set up for my Casio Exilim with this offset mounting hole. You may need to adjust the measurement either way if you mounting hole is in another location.
Notice how mounting hole is not is center of camera.
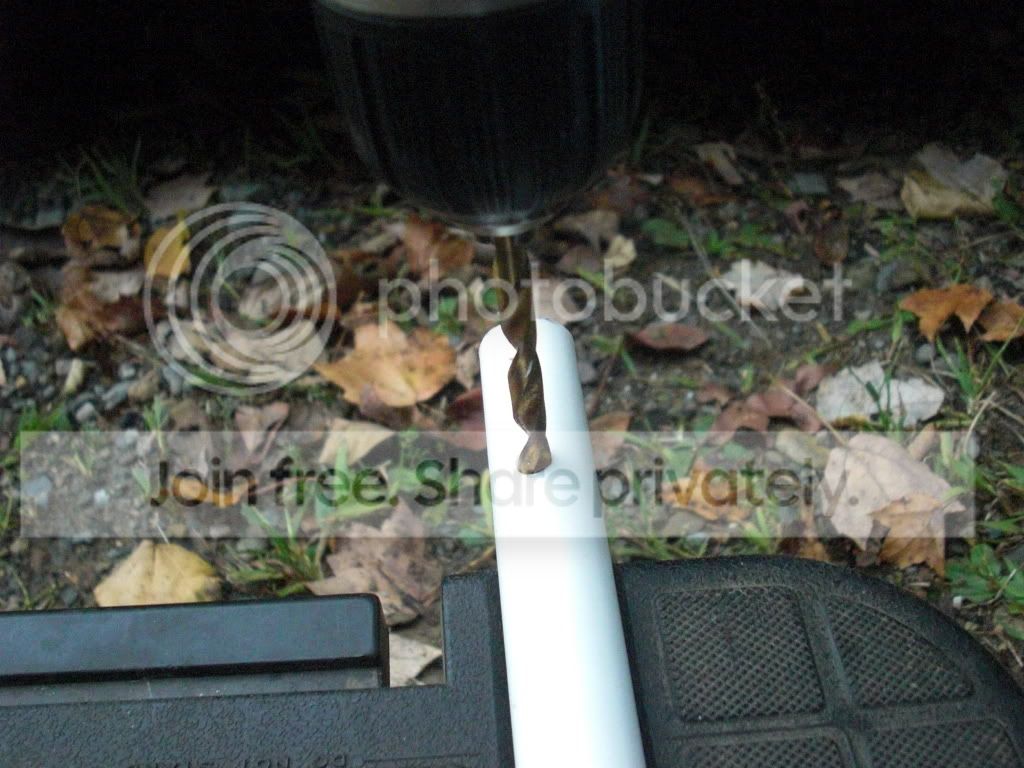
Step 3:
Drill hole for camera mounting screw. Keep the drill as close to square as possible. *A drill press comes in handy for this process. I used a drill press to drill all of my holes, and they came out perfectly square. I just took the pictures with my drill/bit in the holes, for the majority of you who don't have a drill press*
Step 4:
Assemble cap screw and nut as shown, but don't put the washer(s) on yet.
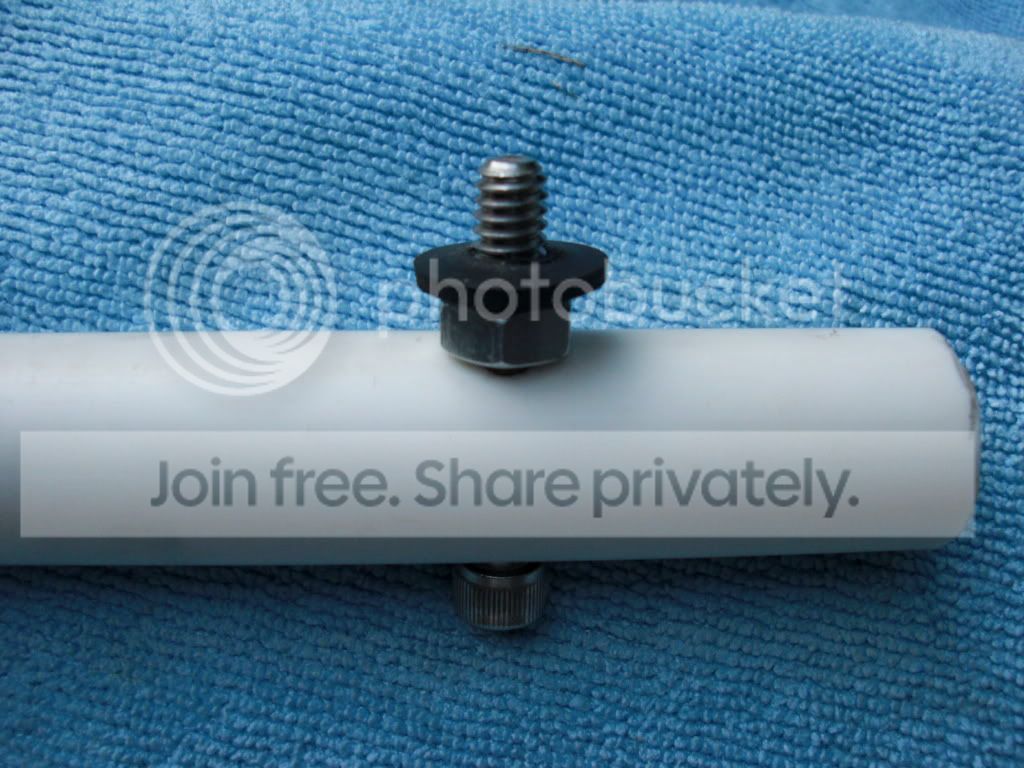
Step 5:
Tighten mount snugly with 7/16" wrench and 3/16" allen key (3/16" allen bit in my screw driver). Do not overtighten as it will start to squeeze the pvc pipe.

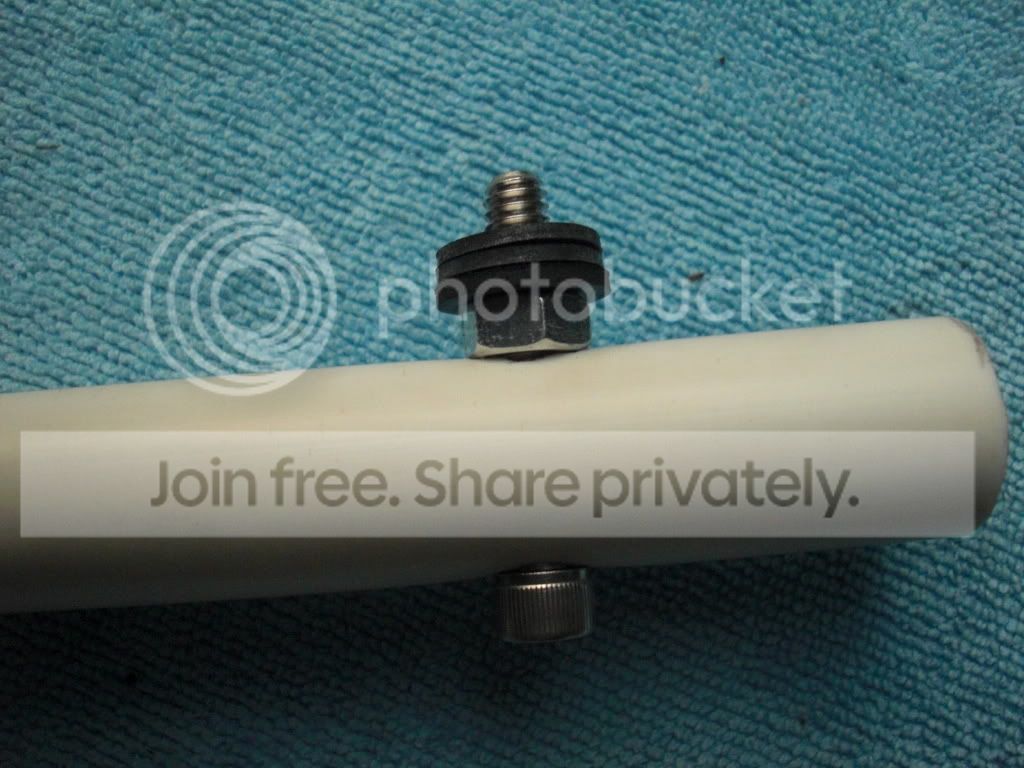
Step 6:
Put 4 rubber washers on. I know there are only 3 in this pic, but put 4 on.
Step 7:
Screw camera onto mount. Do not overtighten as you strip your camera's thread. Add or remove washers as needed until it looks like this.
Step 8:
Remove camera from mount, so that you don't scratch it while working.
Step 9:
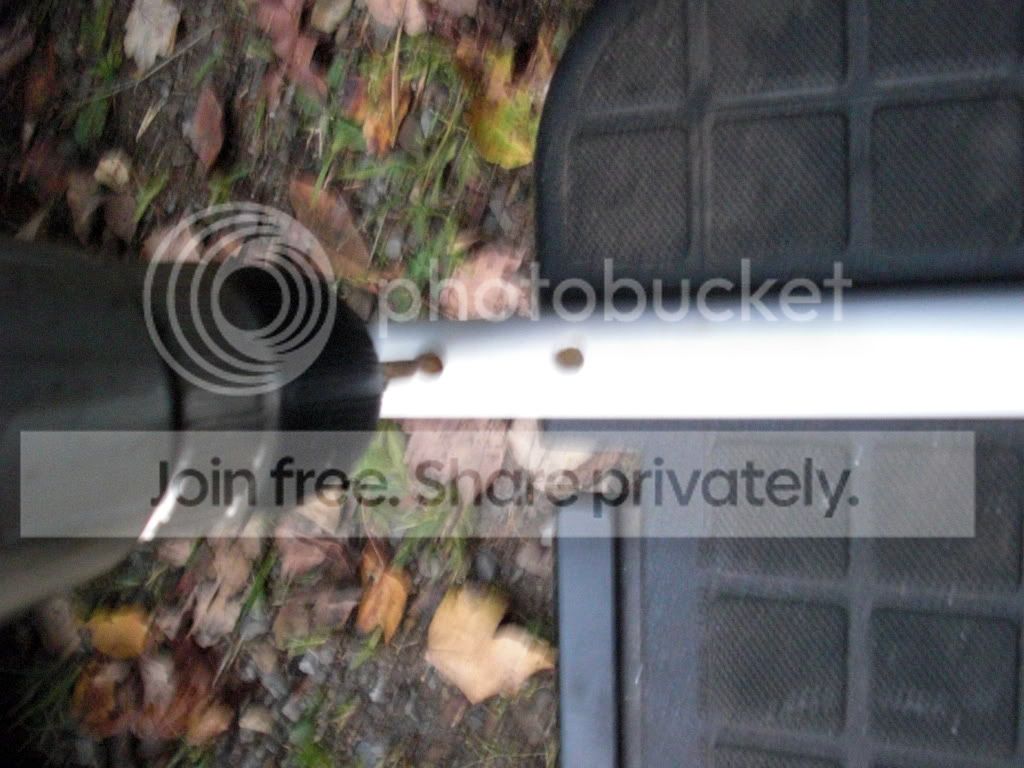
Measure from the other end of the pvc (opposite the camera mount). These holes will be drilled perpendicular to the camera mount so measure accordingly. Make marks at 7/8", 2 1/8", 7" & 8 1/4".
Step 10:
Drill a 1/4" hole at each mark. Keep each hole as square as possible to the camera mount bolt to ensure your camera will film the road ahead, and not the sunroof or floormat.
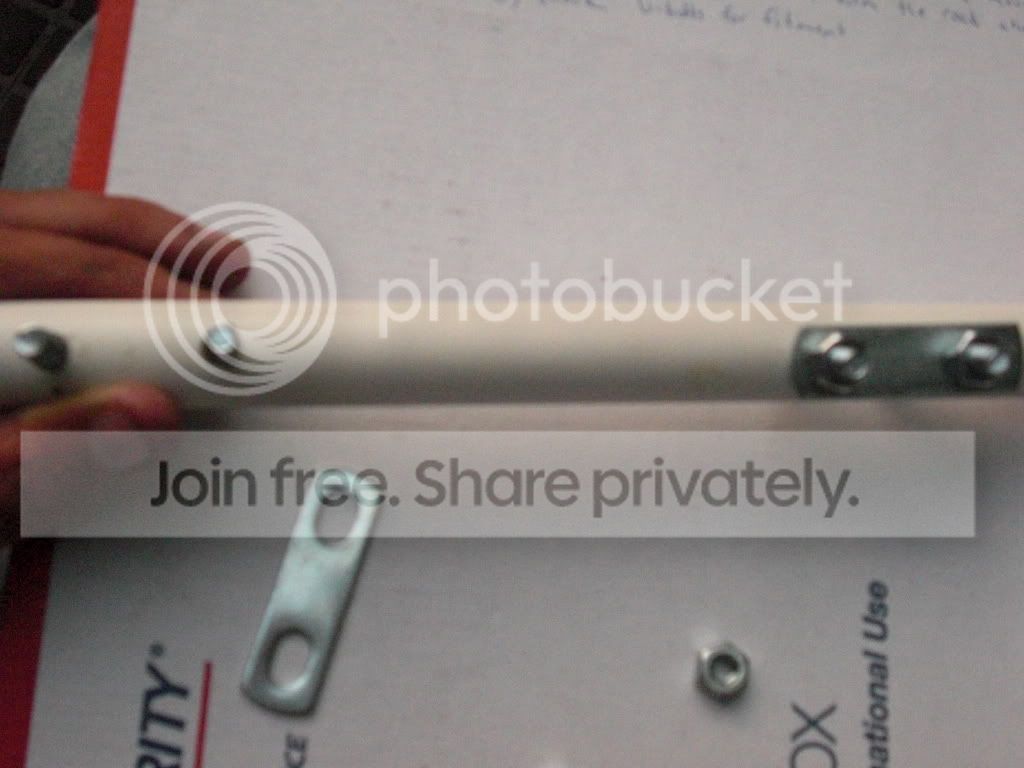
Step 11:
Check U-bolts for fitment.
Step 12:
Remove U-bolts and go to the car with everything.
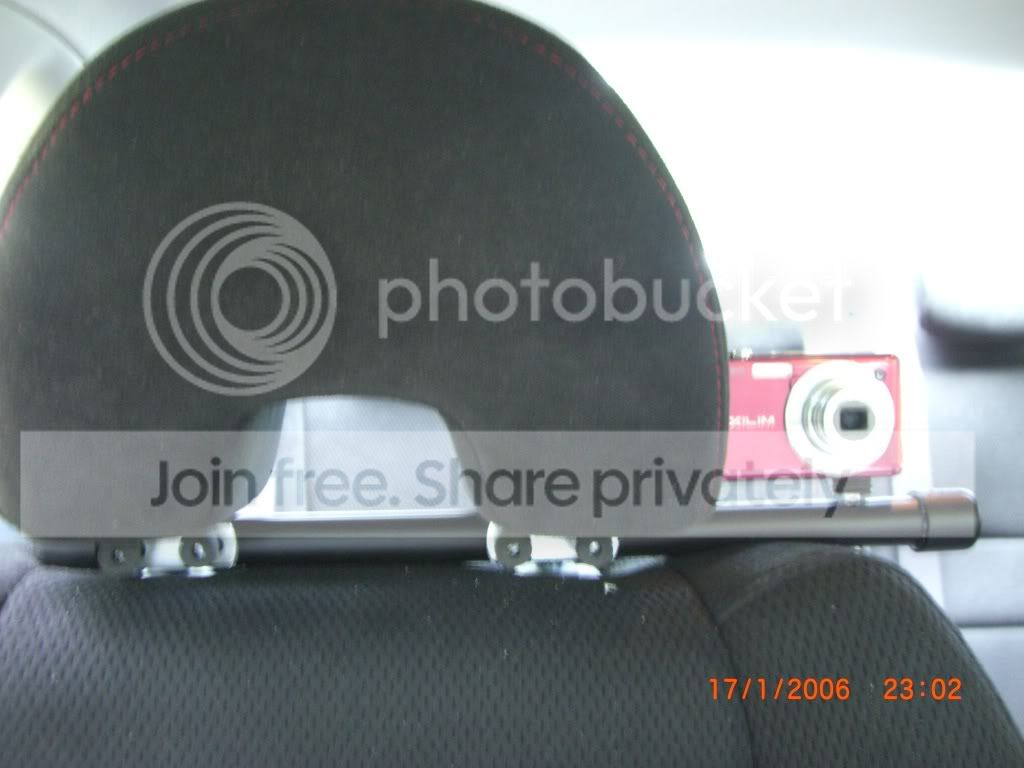
Step 13:
Install the setup on your passenger side seat. If you can't figure out how to assemble it from this picture, you probably shouldn't be doing this by yourself.
This was only a mock-up to check for fitment so don't tighten anything. If you followed my directions, it should have been perfect.

Step 14:
Install the end caps on the pvc pipe. Do not push them all of the way on, as they will interfere with the u-bolts. Just push them on a little until snug.
*If you aren't going to paint the setup, skip ahead to step 19.*
Step 15:
Remove all of bolts and mounts from the pvc, leaving just the pipe with it's two installed end caps. Gently scuff the entire thing with the sandpaper or steel wool to give the primer something to grip. Wipe down with mineral spirits and allow to dry.
Step 16:
Once dry, spray the pvc with the primer in a well ventilated area. *Run a piece of wire through a hole and hang from something to make painted easier.* Allow primer to completely dry.
Step 17:
Sand with fine grit sandpaper to remove any fuzzies or whatever. I used 1500 but 1000 is fine. Clean well with damp rag and allow to dry.
Step 18:
Spray the pvc with your paint. I chose flat black to match the interior plastic colors, and it matches very well. Allow to fully dry.
Step 19:
Assemble the setup on your seat.
Step 20:
Put screw covers on and screw camera onto mount.
If it is all done correctly, it should look like this.
 I ended up not using the original screw covers that I bought, because they were white, and didn't match. I ended up cutting some rubber/carbon plugs things I had, and they threaded right on the end of the u-bolts.
I hope this helps you out. If you have any questions, post them in here, or pm me.
Modified by 2008fijibluesi at 1:32 PM 9/10/2008
Modified by 2008fijibluesi at 4:22 PM 11/15/2008
*Seat posts for 2006+ SIs are 6 5/8" apart (to the center) so if yours are the same, you can pretty much follow this verbatum*
What you'll need for this project:
Length of 1/2" PVC pipe (14 3/8" to be exact)
(2) 1/2" PVC end caps
Cap Screw Socket (1/4" x 1.5" with 3/16" allen socket in top) and 7/16" nut that fits the 1/4" cap screw. Best to bring your camera in Home Depot with you to check if the screw is the proper thread for the mount hole in the bottom.
(2) 1/4" U-bolts (they come assembled as shown below). The space between the two threaded pieces should be 1 1/4".
(8) 1/4" Rubber washers. The ones I got came in bags of 4.
(4) 1/4" Rubber screw caps
Hacksaw
7/16" Wrench
3/16" Allen Key
Drill w/ 1/4" bit
Optional (if you plan to paint it):
400 grit sandpaper or steel wool
1000 (or higher) sandpaper
Primer
Paint of choice
Now...the fun part.
Step 1:
Cut the PVC to length (14 3/8") with the hacksaw. Gently sand away the burrs on the end(s).
Step 2:
Measure for camera mount. Mine is 1 5/8" from the end of the pvc, set up for my Casio Exilim with this offset mounting hole. You may need to adjust the measurement either way if you mounting hole is in another location.
Notice how mounting hole is not is center of camera.
Step 3:
Drill hole for camera mounting screw. Keep the drill as close to square as possible. *A drill press comes in handy for this process. I used a drill press to drill all of my holes, and they came out perfectly square. I just took the pictures with my drill/bit in the holes, for the majority of you who don't have a drill press*
Step 4:
Assemble cap screw and nut as shown, but don't put the washer(s) on yet.
Step 5:
Tighten mount snugly with 7/16" wrench and 3/16" allen key (3/16" allen bit in my screw driver). Do not overtighten as it will start to squeeze the pvc pipe.
Step 6:
Put 4 rubber washers on. I know there are only 3 in this pic, but put 4 on.
Step 7:
Screw camera onto mount. Do not overtighten as you strip your camera's thread. Add or remove washers as needed until it looks like this.
Step 8:
Remove camera from mount, so that you don't scratch it while working.
Step 9:
Measure from the other end of the pvc (opposite the camera mount). These holes will be drilled perpendicular to the camera mount so measure accordingly. Make marks at 7/8", 2 1/8", 7" & 8 1/4".
Step 10:
Drill a 1/4" hole at each mark. Keep each hole as square as possible to the camera mount bolt to ensure your camera will film the road ahead, and not the sunroof or floormat.
Step 11:
Check U-bolts for fitment.
Step 12:
Remove U-bolts and go to the car with everything.
Step 13:
Install the setup on your passenger side seat. If you can't figure out how to assemble it from this picture, you probably shouldn't be doing this by yourself.
This was only a mock-up to check for fitment so don't tighten anything. If you followed my directions, it should have been perfect.
Step 14:
Install the end caps on the pvc pipe. Do not push them all of the way on, as they will interfere with the u-bolts. Just push them on a little until snug.
*If you aren't going to paint the setup, skip ahead to step 19.*
Step 15:
Remove all of bolts and mounts from the pvc, leaving just the pipe with it's two installed end caps. Gently scuff the entire thing with the sandpaper or steel wool to give the primer something to grip. Wipe down with mineral spirits and allow to dry.
Step 16:
Once dry, spray the pvc with the primer in a well ventilated area. *Run a piece of wire through a hole and hang from something to make painted easier.* Allow primer to completely dry.
Step 17:
Sand with fine grit sandpaper to remove any fuzzies or whatever. I used 1500 but 1000 is fine. Clean well with damp rag and allow to dry.
Step 18:
Spray the pvc with your paint. I chose flat black to match the interior plastic colors, and it matches very well. Allow to fully dry.
Step 19:
Assemble the setup on your seat.
Step 20:
Put screw covers on and screw camera onto mount.
If it is all done correctly, it should look like this.
I ended up not using the original screw covers that I bought, because they were white, and didn't match. I ended up cutting some rubber/carbon plugs things I had, and they threaded right on the end of the u-bolts. I hope this helps you out. If you have any questions, post them in here, or pm me.
Modified by 2008fijibluesi at 1:32 PM 9/10/2008
Modified by 2008fijibluesi at 4:22 PM 11/15/2008

 11-15-2008, 02:43 PM
#6
Honda-Tech Member
Join Date: Jun 2006
Location: ...and then along comes the fcuking policia, PA
Posts: 2,975
Likes: 0
Received 0 Likes
on
0 Posts
great idea! I am going to try it with 1" pvc, so that I can drill holes for the headrest to slide directly into and eliminate the need for the "U" clamps. I think the thicker tube should help support the weight of my video camera better as well.
11-15-2008, 03:12 PM
#7
Honda-Tech Member
Thread Starter
Join Date: Nov 2007
Location: Jersey
Posts: 2,740
Likes: 0
Received 0 Likes
on
0 Posts
Originally Posted by attentionwhore
great idea! I am going to try it with 1" pvc, so that I can drill holes for the headrest to slide directly into and eliminate the need for the "U" clamps. I think the thicker tube should help support the weight of my video camera better as well.
The only problem I foresee with not using the u-bolt/clamps is that the mount will move up and down. If you have the headrest pushed all of the way down against the top of the seat (like mine is shown in the picture), it will pull up into the lowest notch without hitting the button. I'm not saying the headrest will jump up to the notch while you are driving, but the pipe might move up and down on the posts by millimeters, or enough to produce a shaky video. My first trial recording, I left my mount all of the way down, like it is shown in my pictures. It recorded amazing and had very little shake. But on the next trial, I clicked the headrest up into the lowest notch, and it produced much better results. Not only did it completely diminish all shaking, it also provided a better recording angle to the road/track. I have not taken off the mount, as I just like to have it ready. Also, it is stealthy enough that it is almost not noticeable. When I am not using the camera, the headrest is all of the way down, because that is where it is most aesthetically pleasing to me. When I use it, I click it up into the lowest notch.
If you can make a stop or something (or don't mind a little shake), your idea would work fine.
Trending Topics

 08-27-2009, 01:36 PM
#13
Honda-Tech Member
Join Date: Aug 2002
Location: ca
Posts: 1,799
Likes: 0
Received 0 Likes
on
0 Posts
nice mod. i have a similar setup with 2 holes on the bar where the headrest goes in. do you notice if the camera tends to shake a lot from road vibration? because mine does.

Thread
Thread Starter
Forum
Replies
Last Post
ChinitodeNJ
Honda Civic / Del Sol (1992 - 2000)
11
08-10-2009 01:45 PM
itsJDMyo
Honda Civic / Del Sol (1992 - 2000)
3
07-14-2009 08:21 PM
2008fijibluesi
Honda Civic (2006 - 2015)
18
09-13-2008 09:48 AM
SpoonMe
Road Racing / Autocross & Time Attack
16
08-26-2003 08:53 AM