

92-95 civic power door conversion the right way. tons of pics the end all for the swap

Thread Starter
Honda-Tech Member
Joined: Feb 2005
Posts: 735
Likes: 2
From: casper, wy, usa
ok I have seen so many write ups on the power door conversions for the 92-95 civics. none of them have been complete or correct. now before you say its correct because it works, this is the way it should be done.
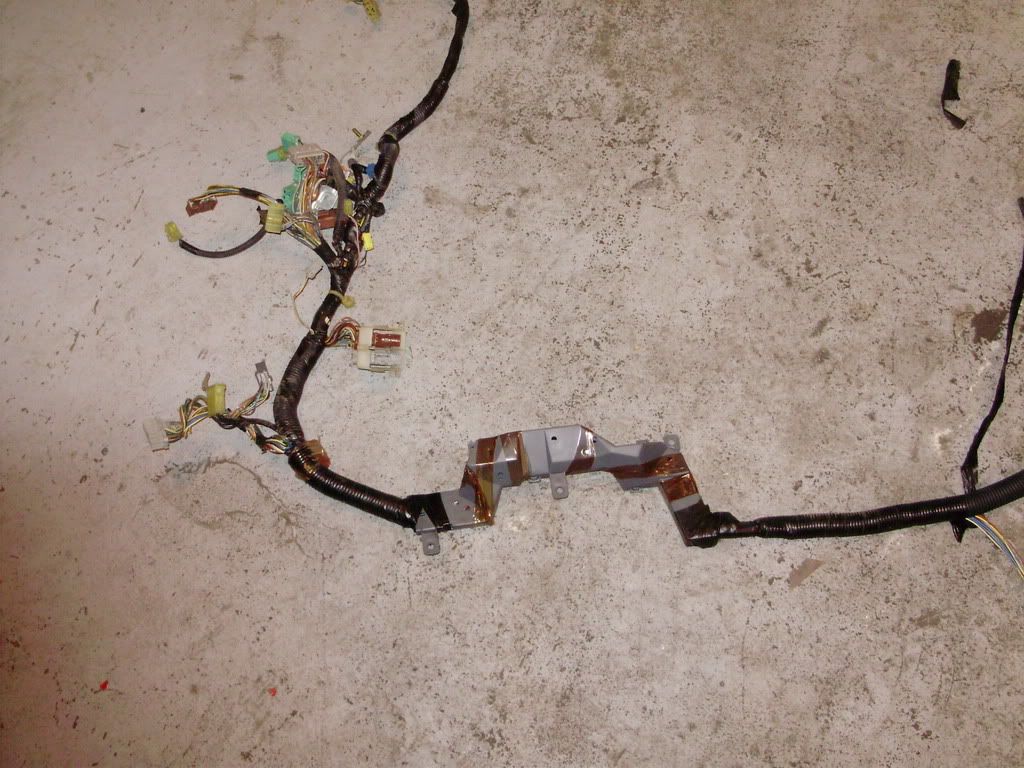
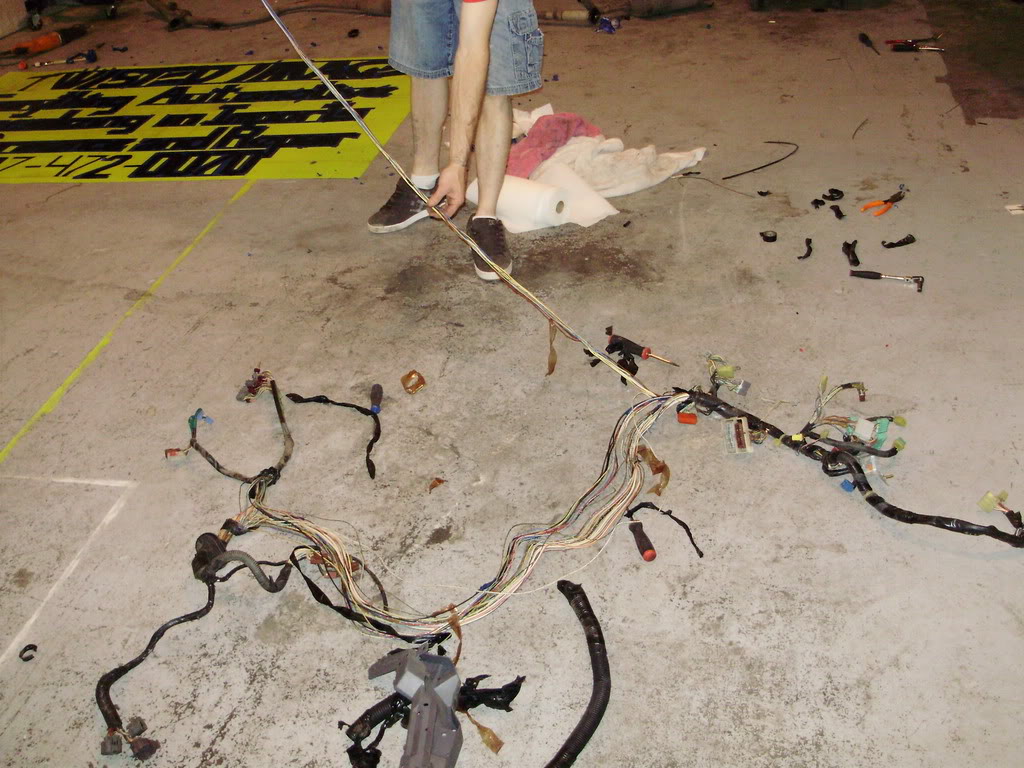
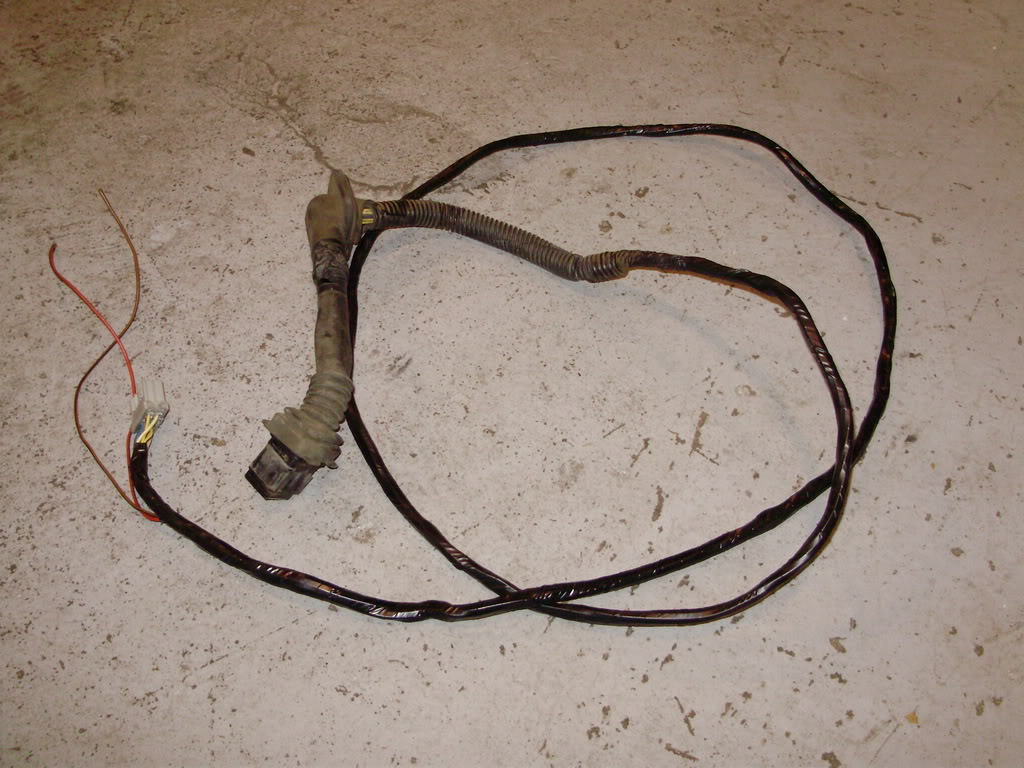
we will start here, this is a complete car harness for a civic ex coupe.
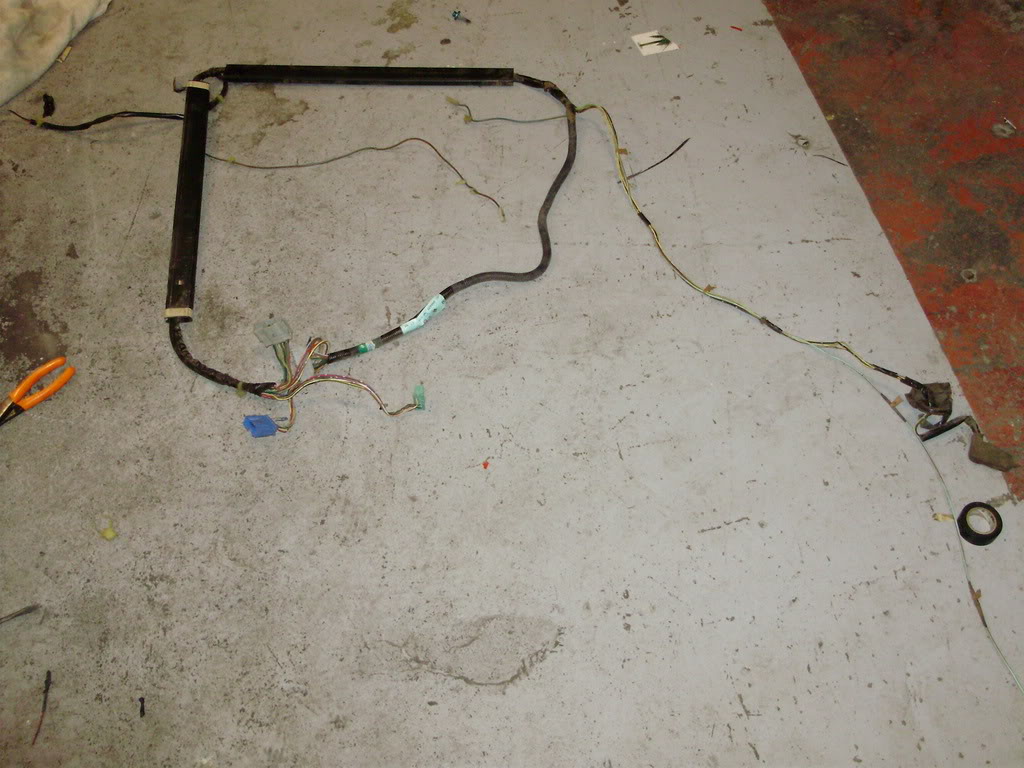
start by taking it apart
you will notice the plug that plus into the pass door will start to seperate out this is the wires on the left
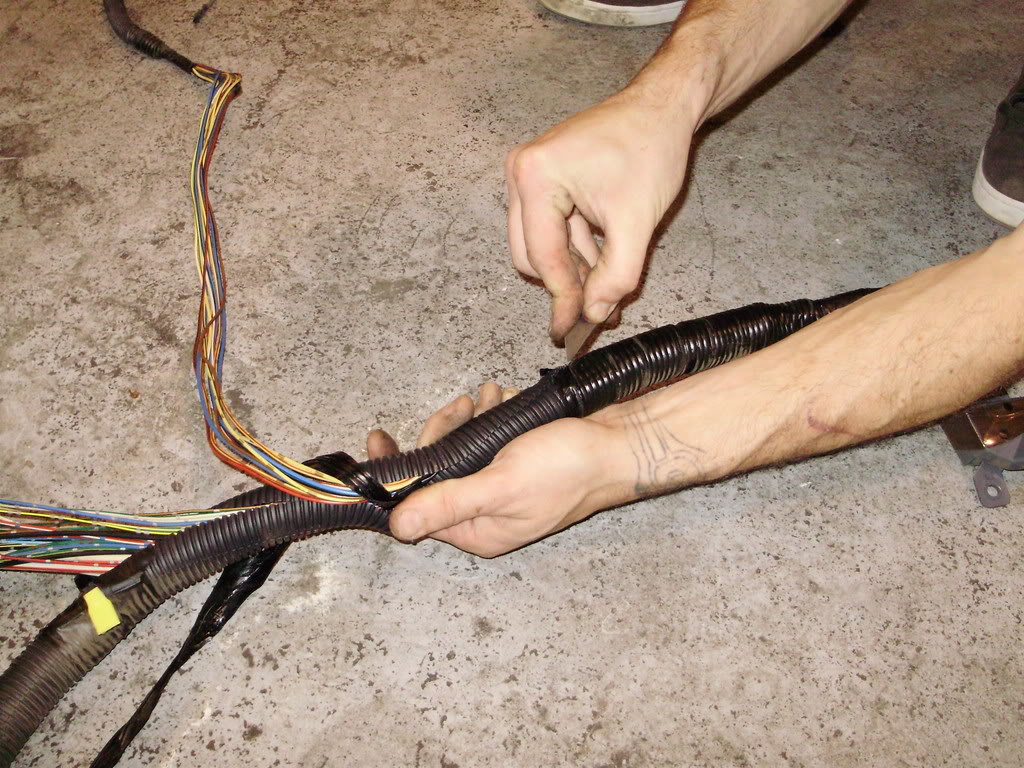
then you will come to the part that is mounted to the fire wall on your donar harness. you will need to strip the tape of it as well. (notice the plug for the door in the back round, it is still attached to the wires.)
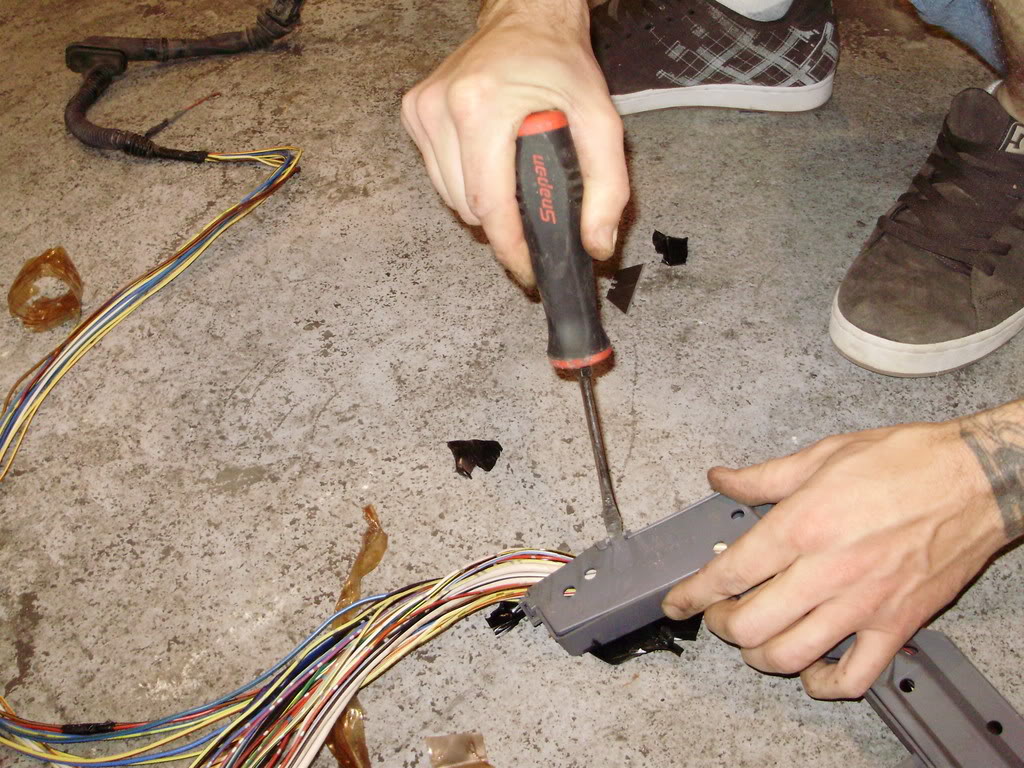
then we will take apart the grey plactic surround. it is held togher with a series of clips use a flat head to seperate them
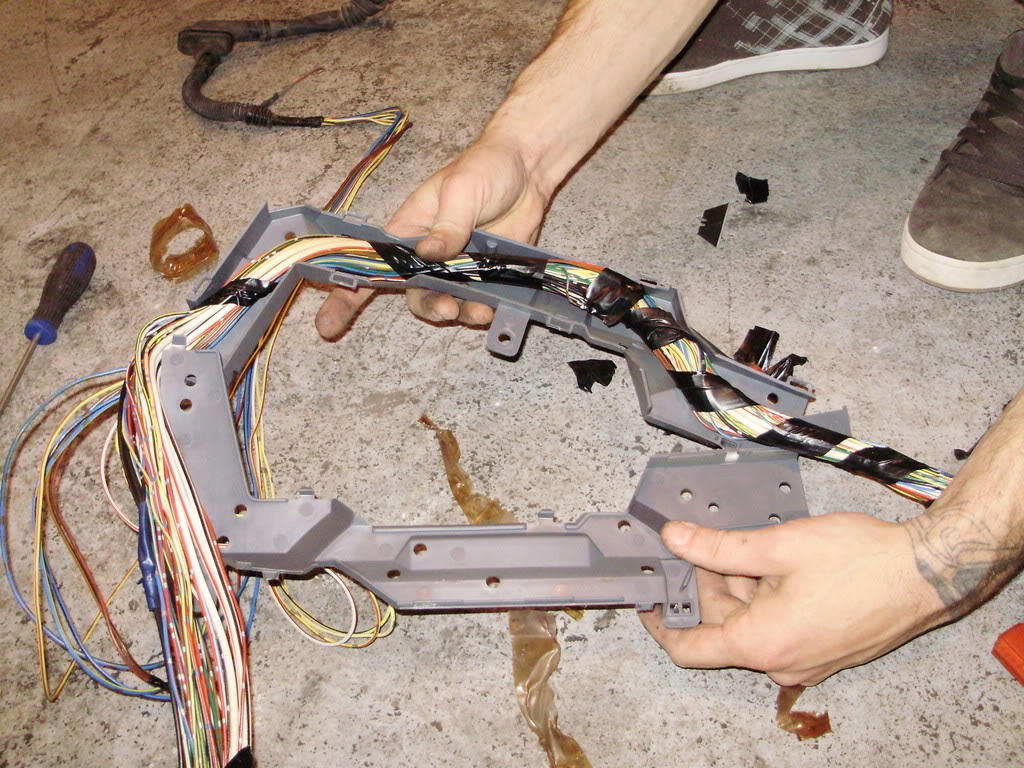
this is how it will come apart
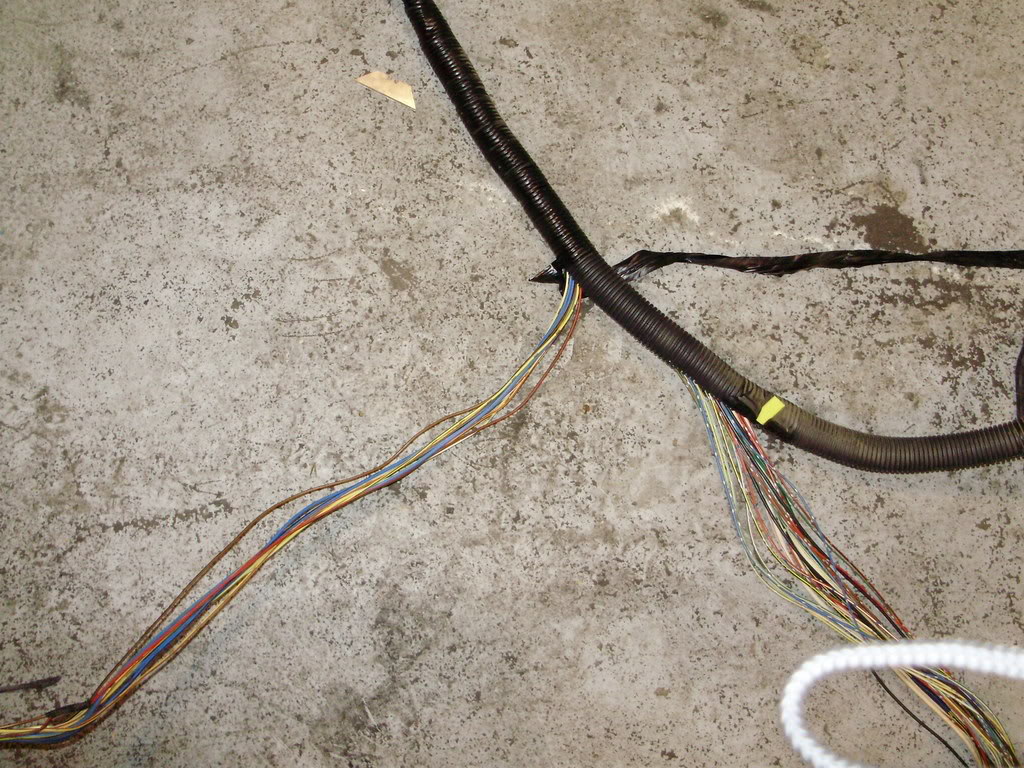
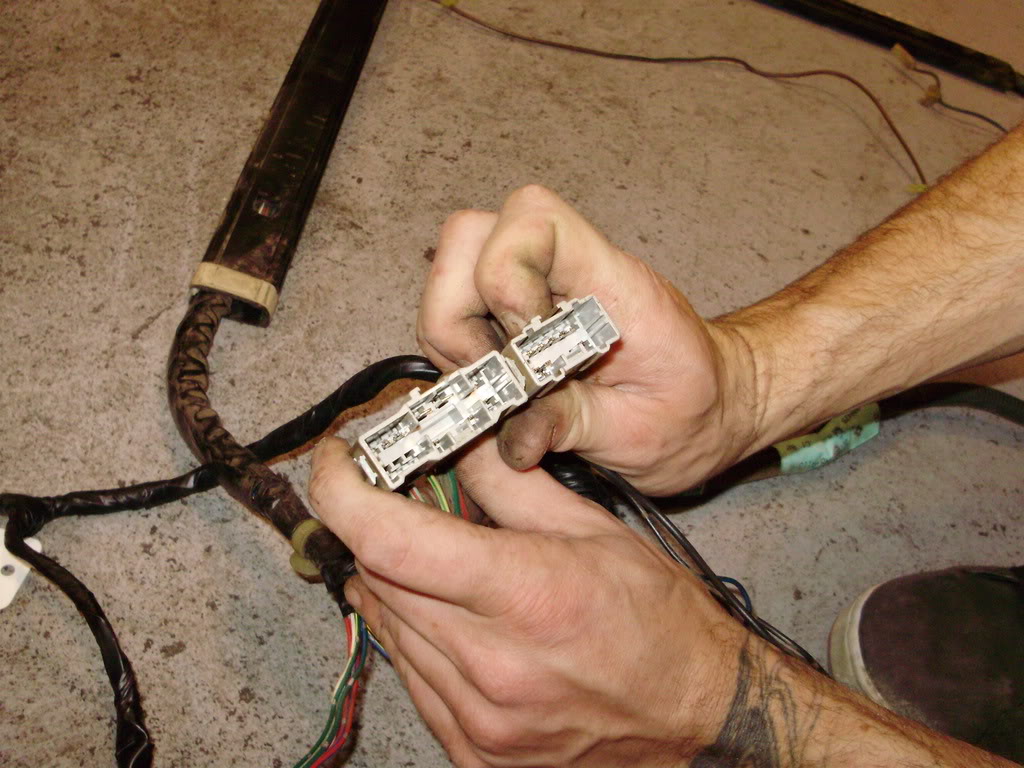
then continue stripping you wires out for your new sub harness
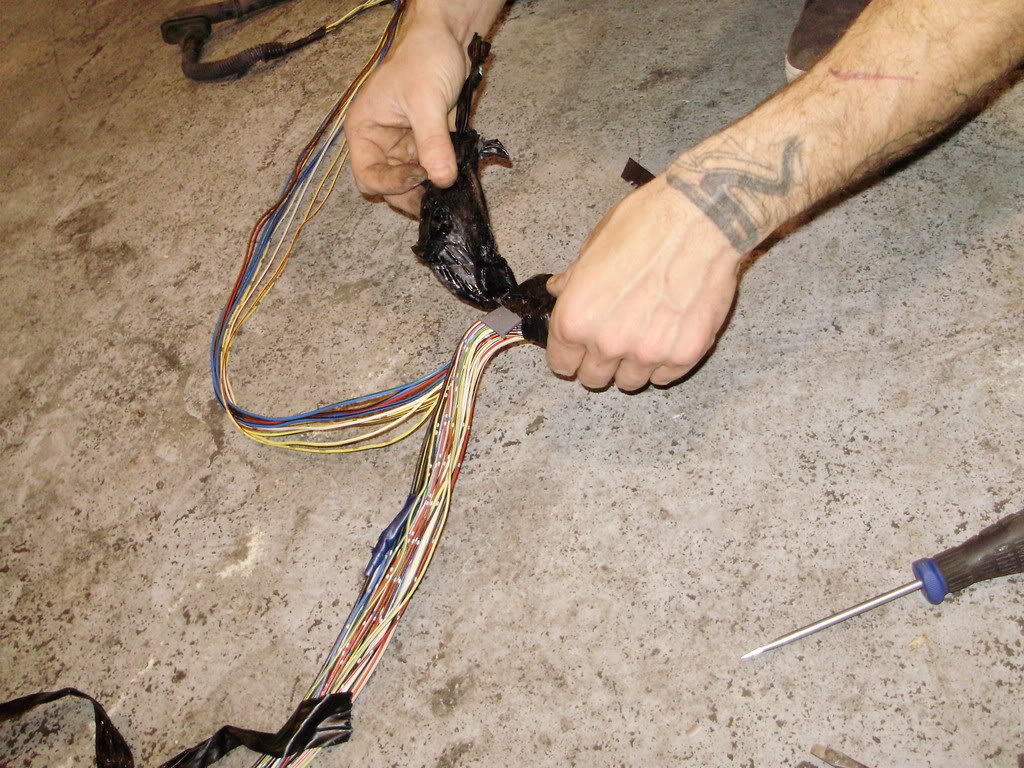
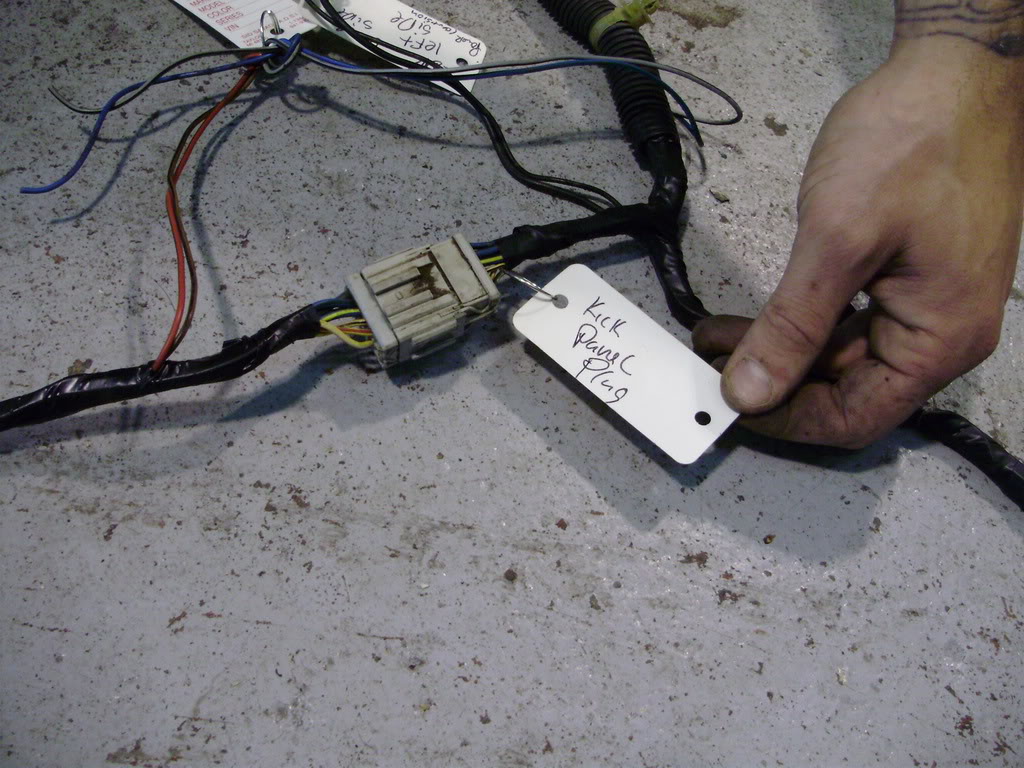
then you will end at a series of 3 plugs. the plug in my right hand will be the one you keep.
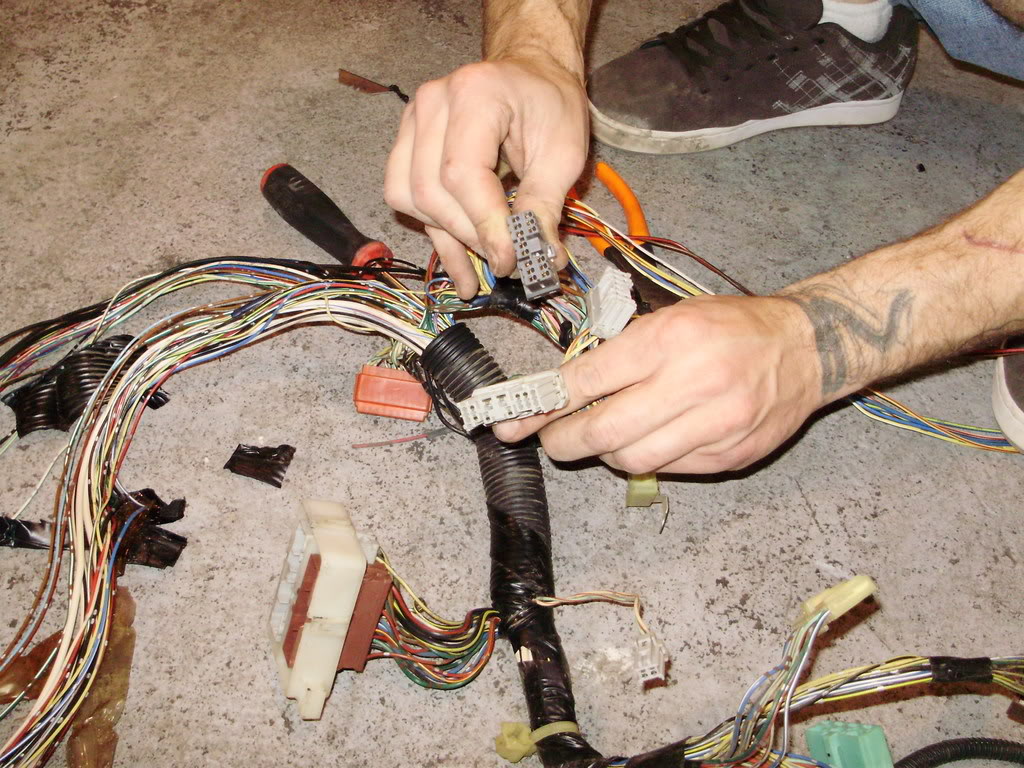
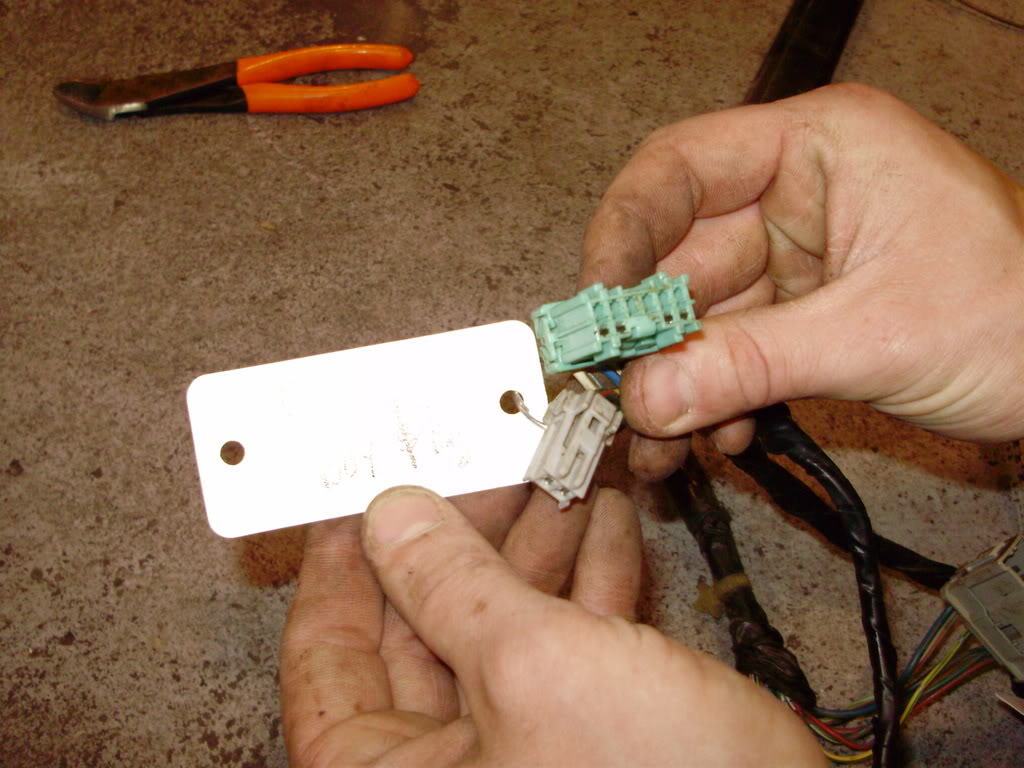
here is what it looks like
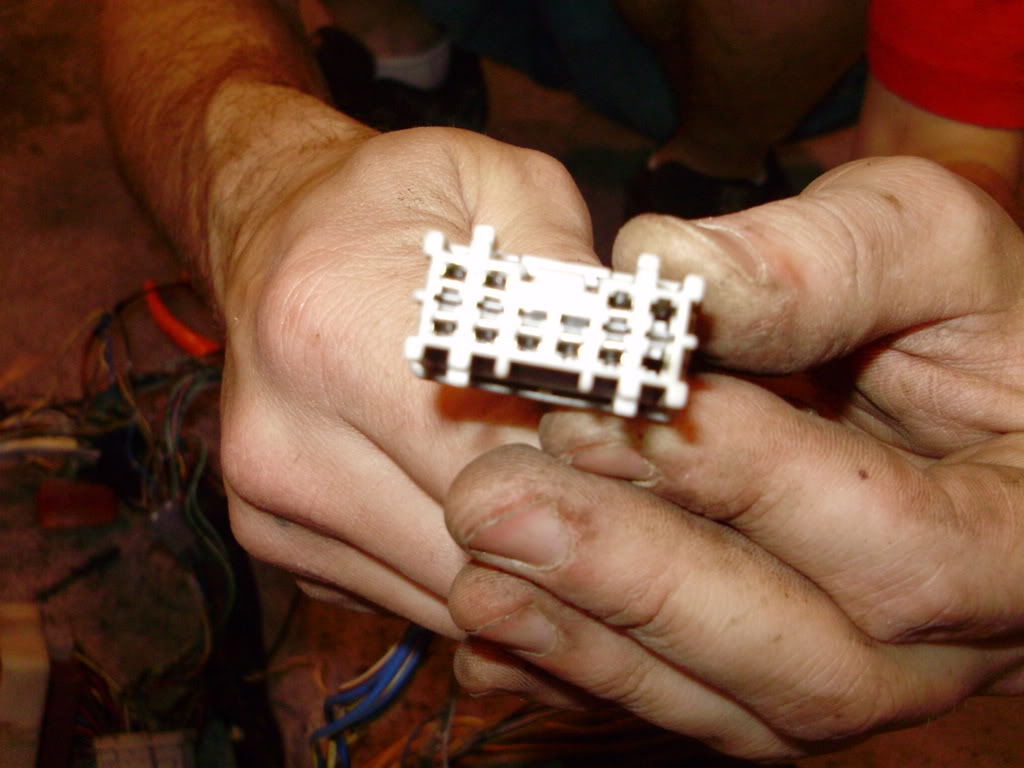
this is the back side of it. this is all the wires for your conversion.
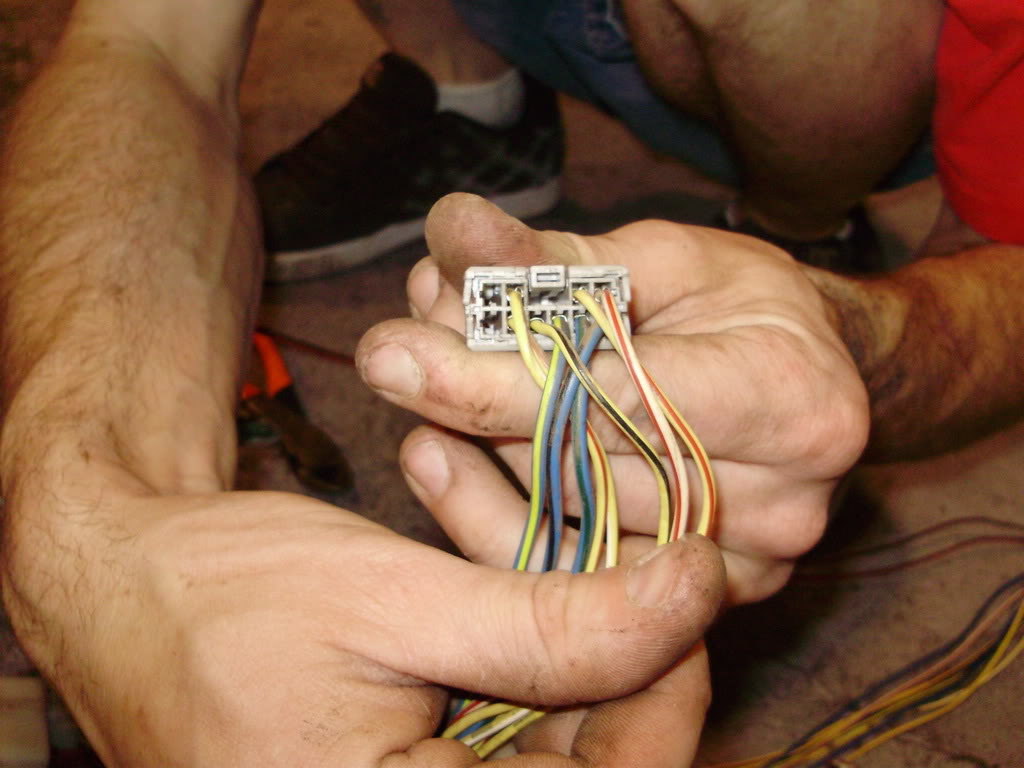
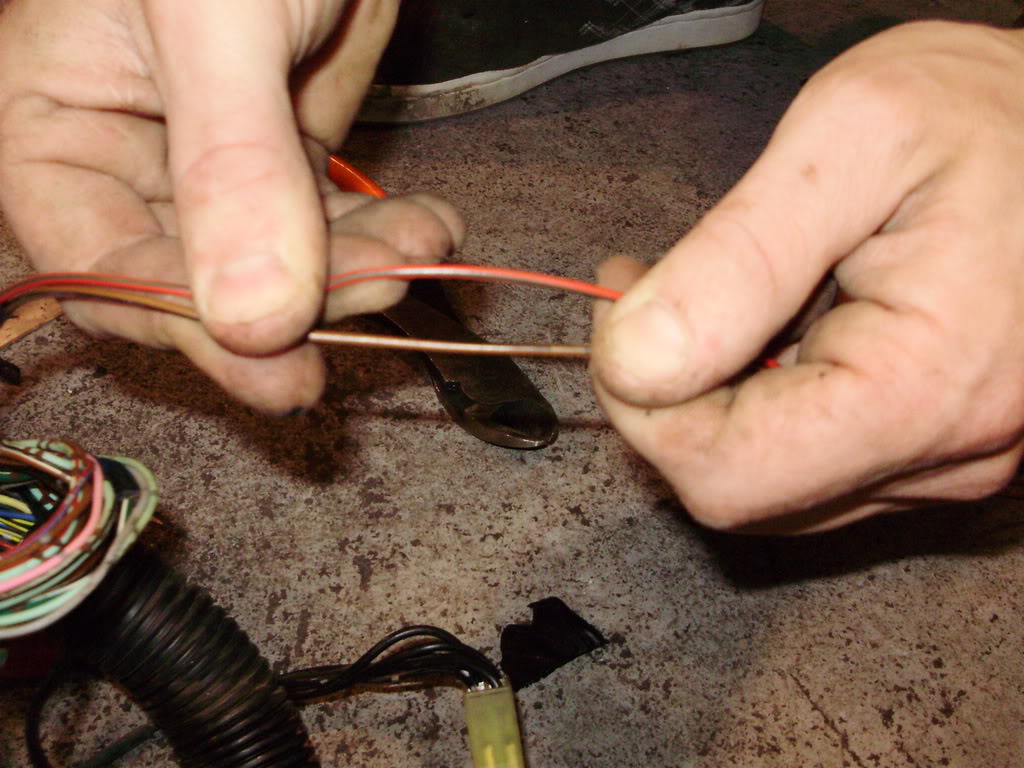
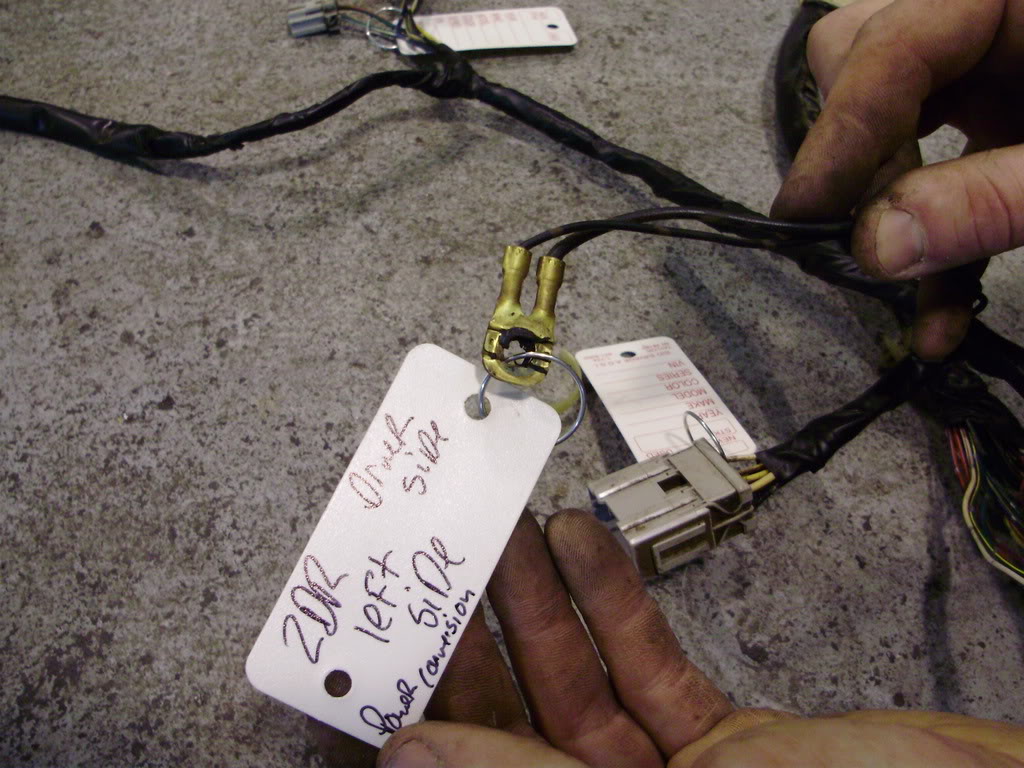
but then you will notice that you have 2 wires that are still in the main harness. if you follow these 2 wires they will end up in a nother plug.
you do not need to follow them that far, but if you do they will end up here
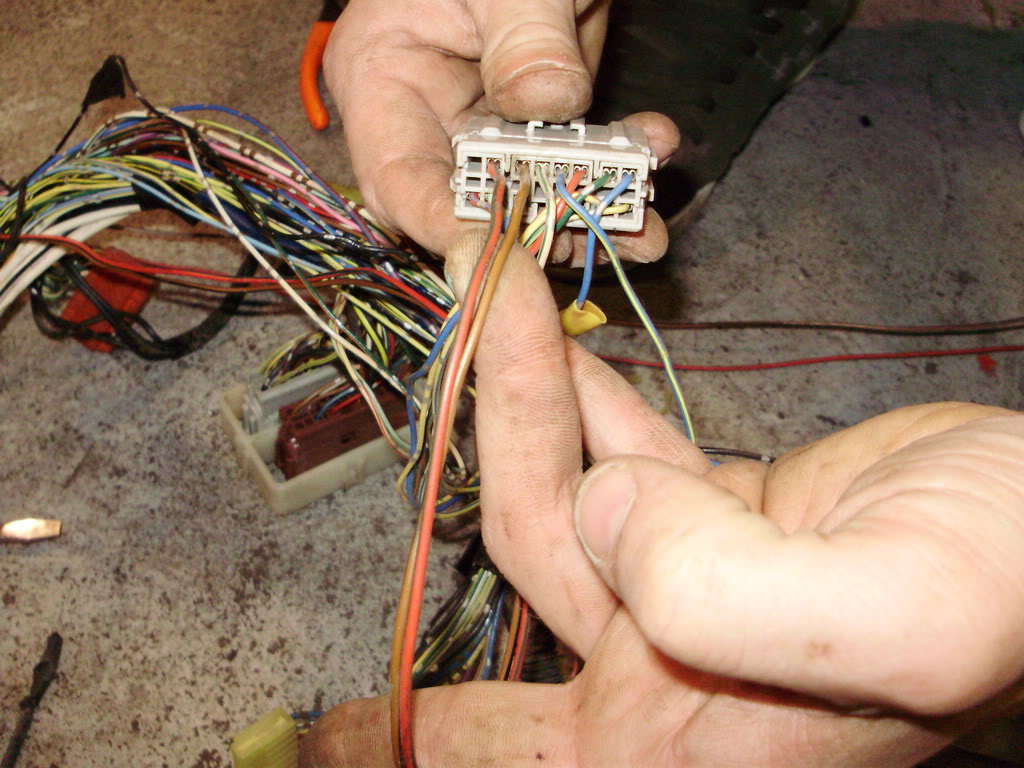
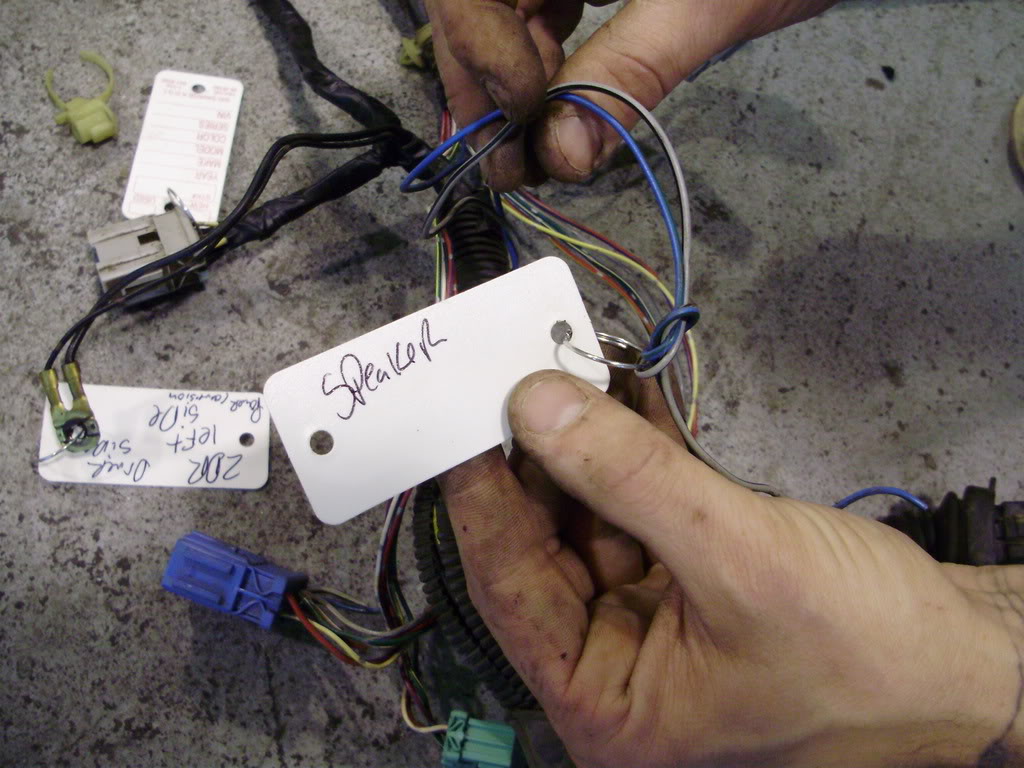
cut them

then you will end up with these 2 wires. a brown/black tracer and a red/green tracer I belive these are the correct colors. (dont have the harness in front of me at the moment)
these 2 wires are for your door speaker. when you take out your other harnees door harnees to install the new door harness you will notice that it is only 2 wires. connect the cabin side of that 2 ire harness to these 2 wires.
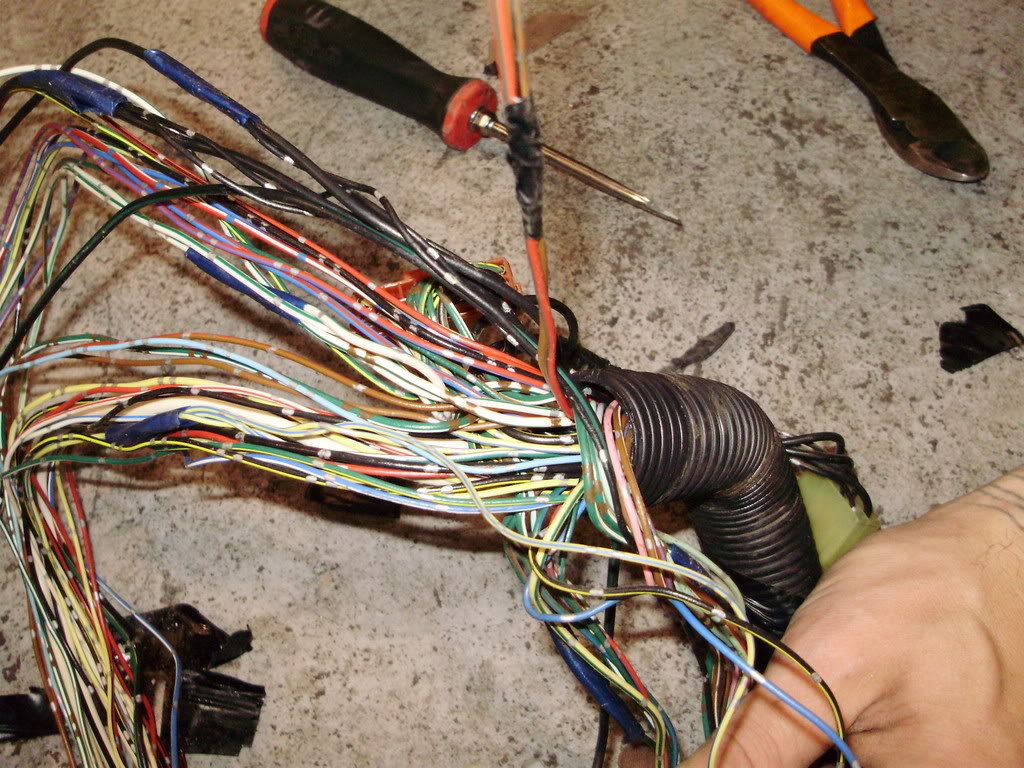
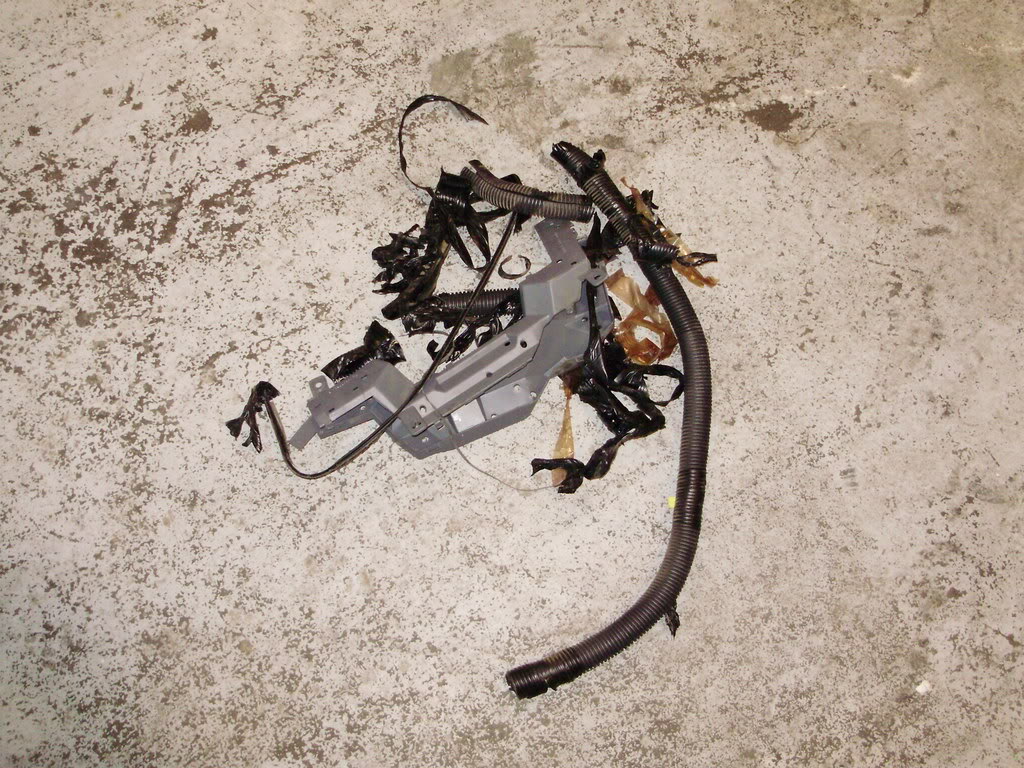
here is whats left of the main harness

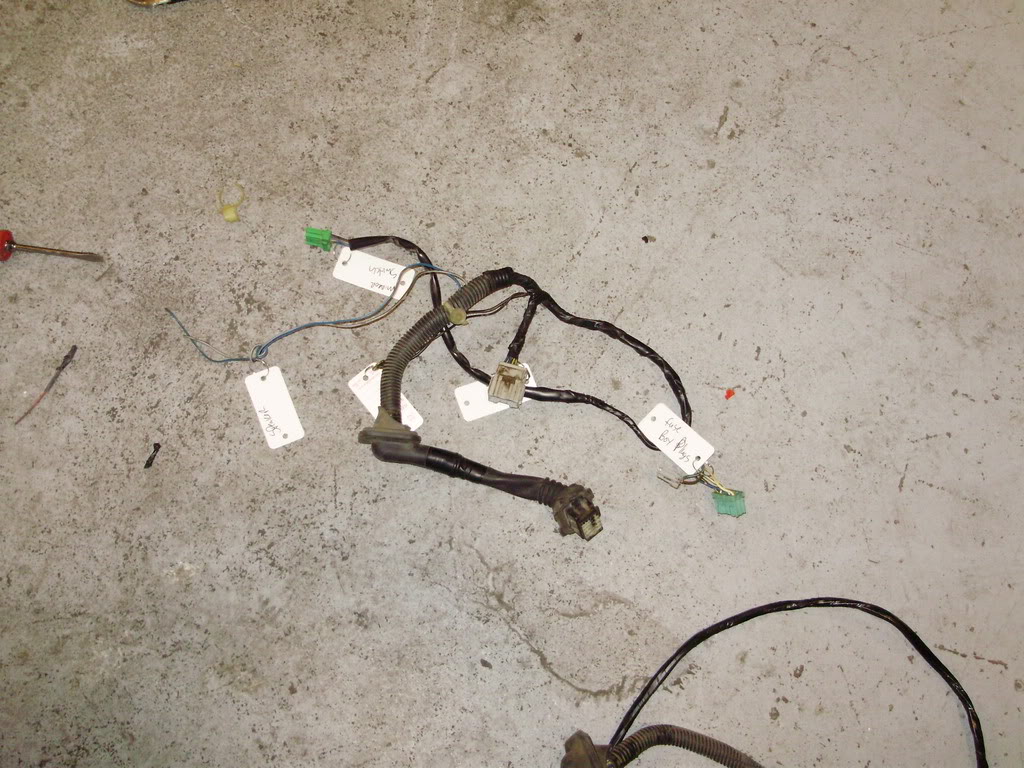
after that mess of stuff this is what you will be left with.
after you are done seperating it all out this is what you will be left with
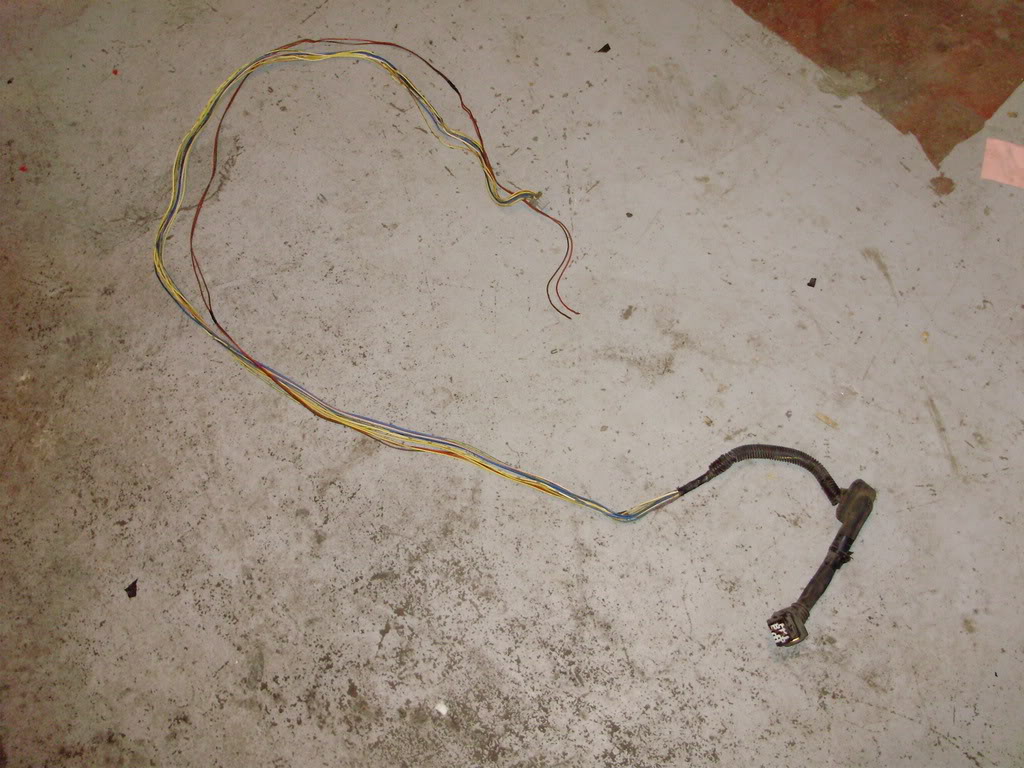
grab some good e-tape and tape it up
now you will have your pass door sub harness, that you made out of the main harness
ok now we need a power drivers door dont we! so you will start with the main part of the drivers side harness
and like the other side find the door harness and start seperating it out you will get to this point and find these 2 plugs they are clipped togher. seperate the clips as we will only be using the smaller one
when you strip some more out of the harness you will find this green plug as well.
the green plug will plug into the fuse box and the grey plug is not used
you will also notice this long green plug . that goes to your dash and will be the plug you use for the power mirror switch

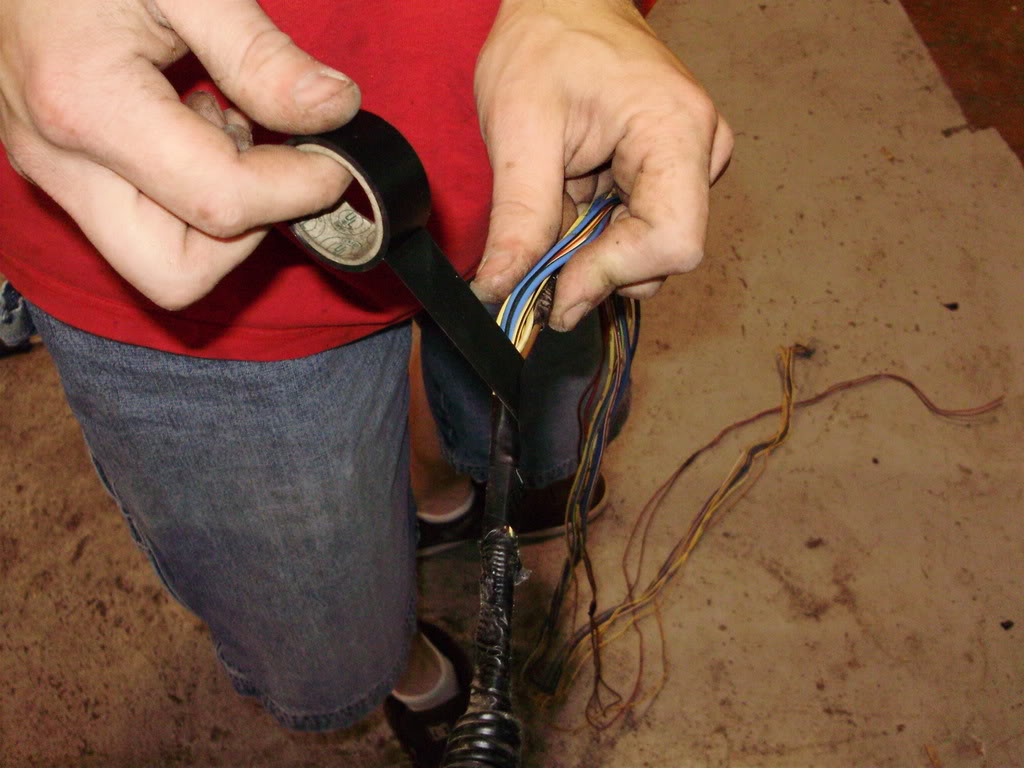
and as before you will have to cut just 2 wires they are the blue and grey ones shown here these are the speaker wires for the driver side. you will splice these the same way you did the pass side
another pic of that grey plug on the drivers side and a ground strap. when you hook this all up there are a ton of spots on the drivers side where you can ground this
drivers side sub harness shoud be e-taped up like the pass side
now you can install these sub harness in your car however you want. I usually run them along side the main harness of the car I am working on.
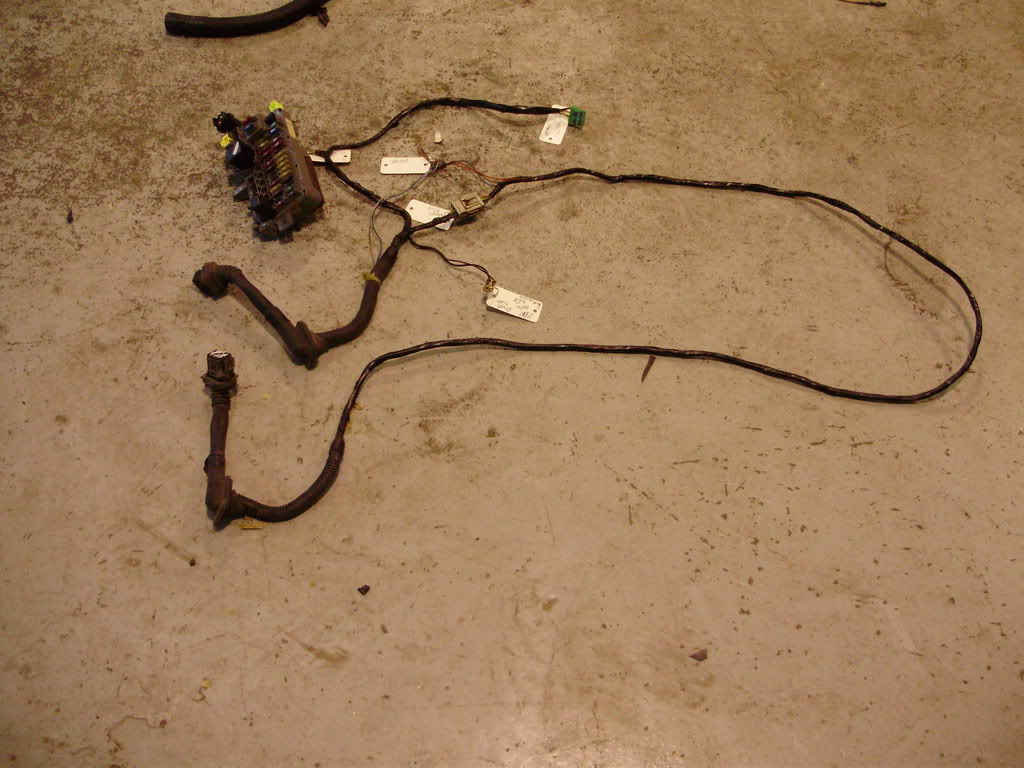
this is what you should have now minus the fuse box
this is the install part. I will be showing you this on the ground with the fuse box out of the car. this way everyone can see clearly how this goes in.once you get that far you will plug in both grey clips from the pass side and the drivers side.
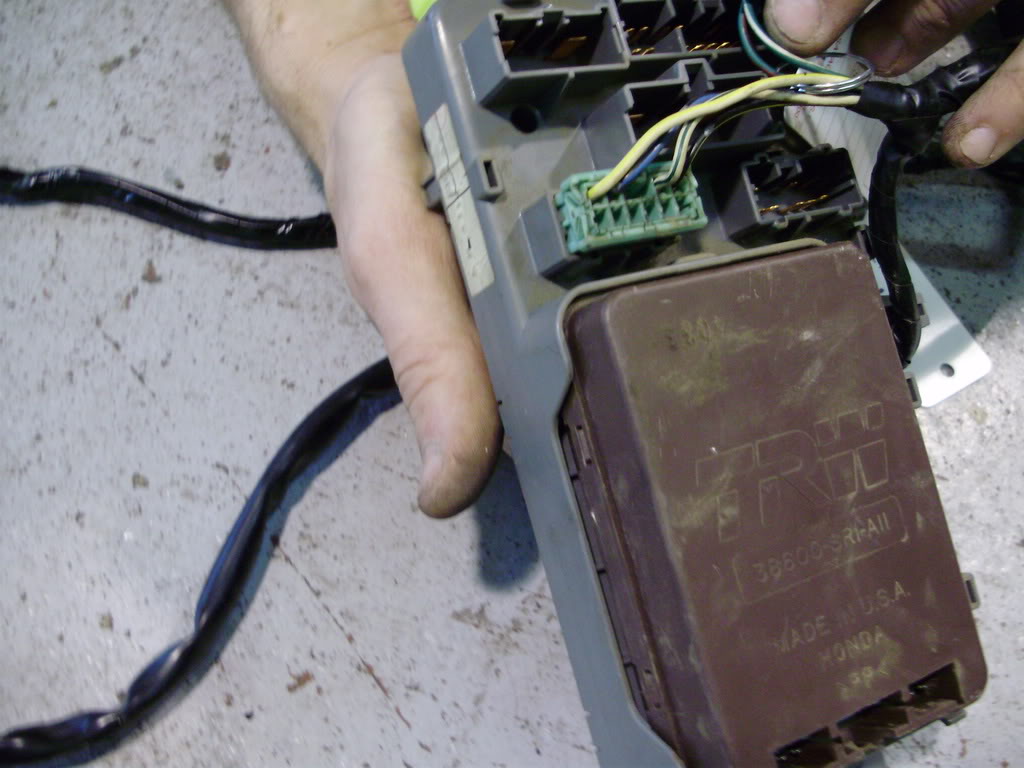
the green plug on the drivers harness plugs into the back of the fuse box. you do not<U></U> need to use the EX fuse box all the fuse boxes are the same internally.
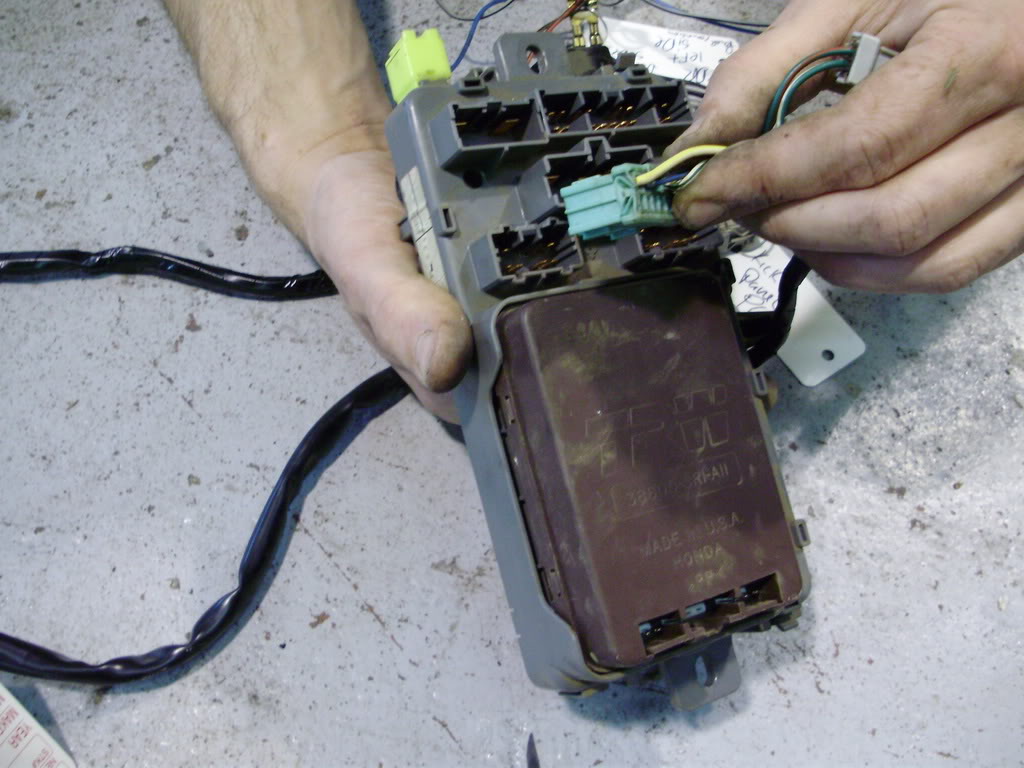
just another pic to show exactly where to plug it in
then on the front of the fuse block you will have to add a 4 pin relay into this spot.

this is what it should look like if you did it correct
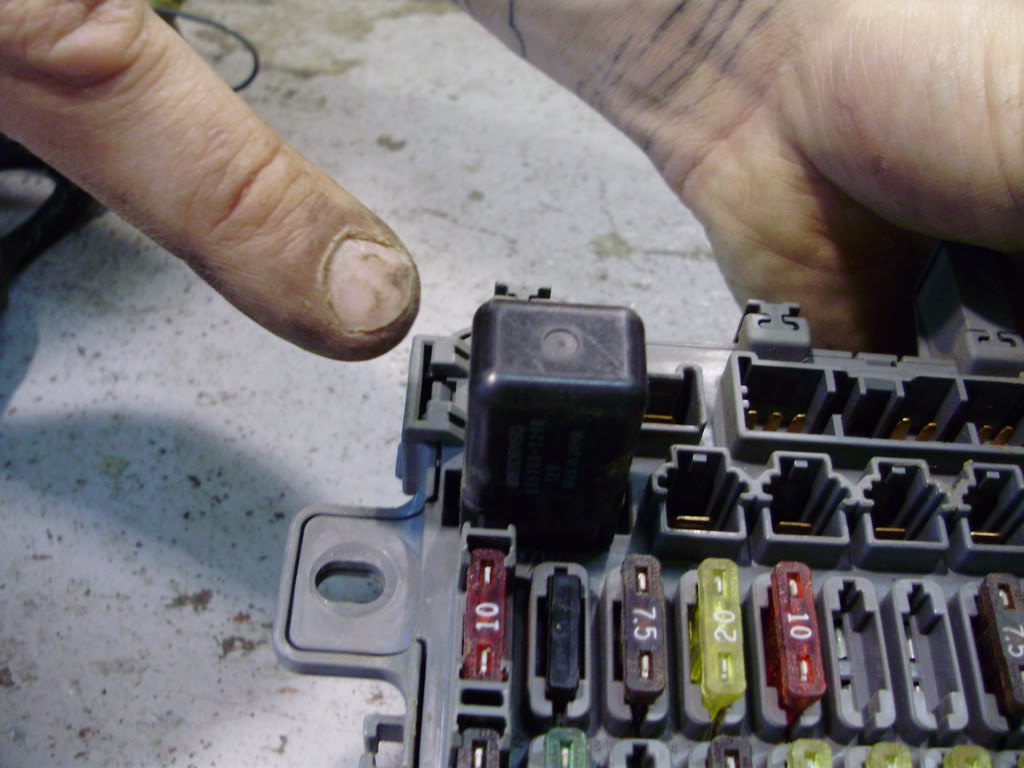
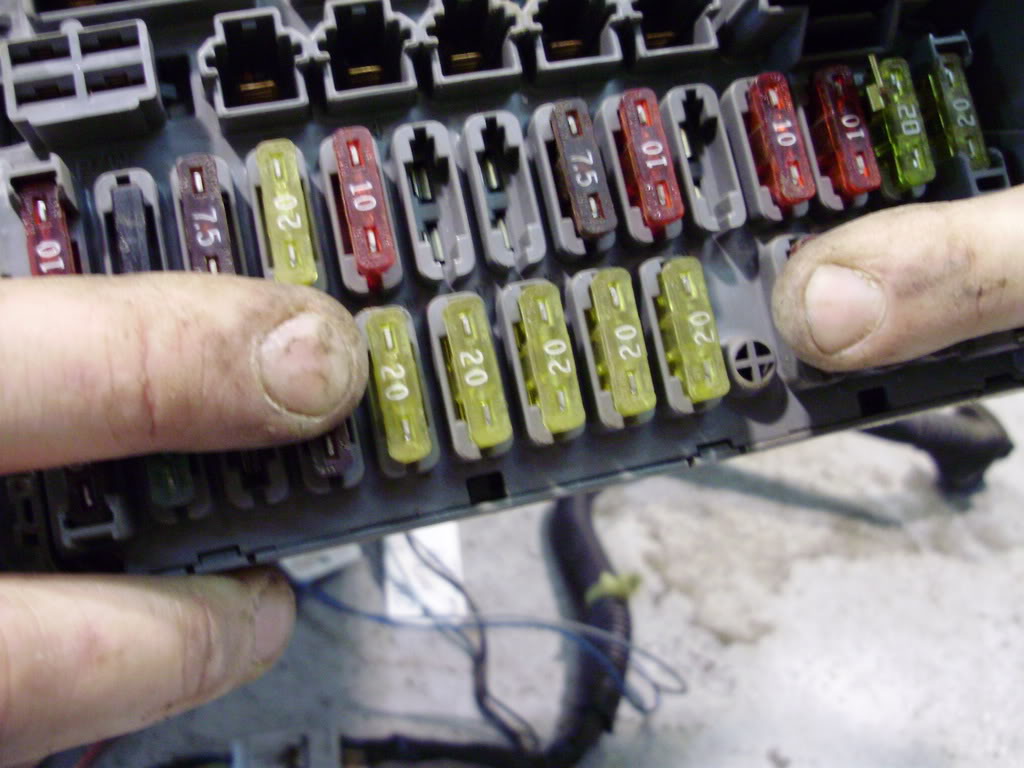
now you need to add 5 20 amp fuses for all this power stuff you will put them here
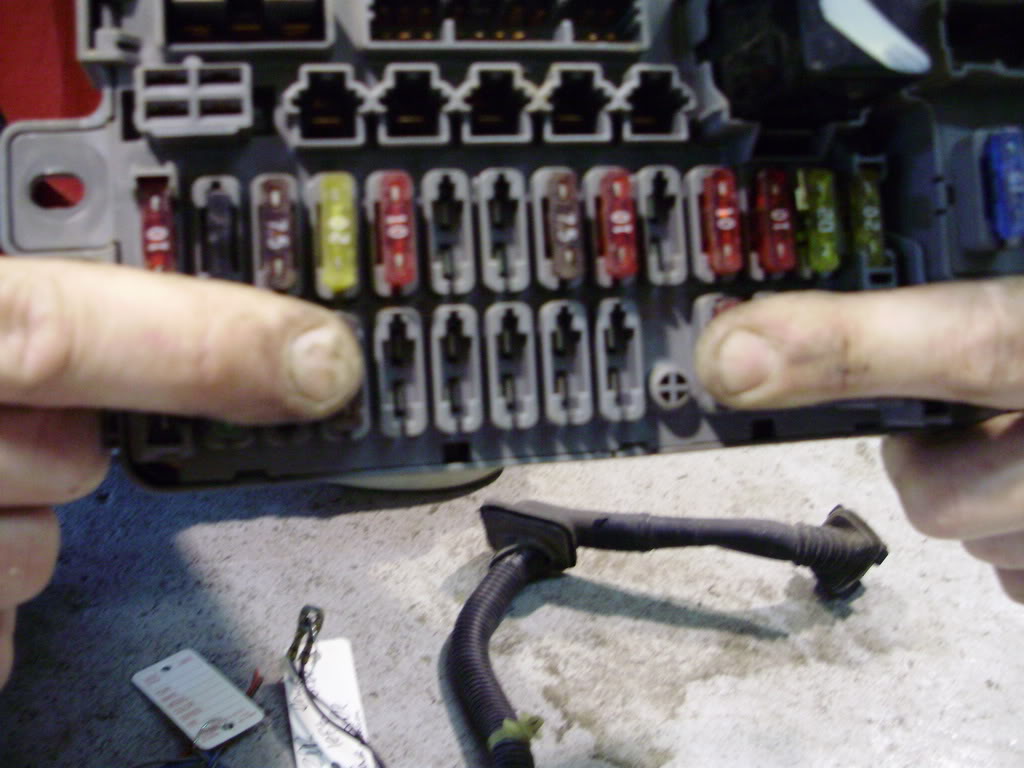
then it should look like this
now enjoy your power windows locks and mirrors.
i did not take any pics of installing the door lock actuators, window regulators or mirrors. i figure you have this all installed by now.
you will need all this stuff for the conversion, including both door wire harness and the relay in the drivers door. if you guys need pics of the door stuff hit me up.
thanks guys
Modified by twistedimage at 10:21 AM 7/6/2008
Modified by twistedimage at 10:27 AM 7/6/2008
we will start here, this is a complete car harness for a civic ex coupe.
start by taking it apart
you will notice the plug that plus into the pass door will start to seperate out this is the wires on the left
then you will come to the part that is mounted to the fire wall on your donar harness. you will need to strip the tape of it as well. (notice the plug for the door in the back round, it is still attached to the wires.)
then we will take apart the grey plactic surround. it is held togher with a series of clips use a flat head to seperate them
this is how it will come apart
then continue stripping you wires out for your new sub harness
then you will end at a series of 3 plugs. the plug in my right hand will be the one you keep.
here is what it looks like
this is the back side of it. this is all the wires for your conversion.
but then you will notice that you have 2 wires that are still in the main harness. if you follow these 2 wires they will end up in a nother plug.
you do not need to follow them that far, but if you do they will end up here
cut them
then you will end up with these 2 wires. a brown/black tracer and a red/green tracer I belive these are the correct colors. (dont have the harness in front of me at the moment)
these 2 wires are for your door speaker. when you take out your other harnees door harnees to install the new door harness you will notice that it is only 2 wires. connect the cabin side of that 2 ire harness to these 2 wires.
here is whats left of the main harness
after that mess of stuff this is what you will be left with.
after you are done seperating it all out this is what you will be left with
grab some good e-tape and tape it up
now you will have your pass door sub harness, that you made out of the main harness
ok now we need a power drivers door dont we! so you will start with the main part of the drivers side harness
and like the other side find the door harness and start seperating it out you will get to this point and find these 2 plugs they are clipped togher. seperate the clips as we will only be using the smaller one
when you strip some more out of the harness you will find this green plug as well.
the green plug will plug into the fuse box and the grey plug is not used
you will also notice this long green plug . that goes to your dash and will be the plug you use for the power mirror switch
and as before you will have to cut just 2 wires they are the blue and grey ones shown here these are the speaker wires for the driver side. you will splice these the same way you did the pass side
another pic of that grey plug on the drivers side and a ground strap. when you hook this all up there are a ton of spots on the drivers side where you can ground this
drivers side sub harness shoud be e-taped up like the pass side
now you can install these sub harness in your car however you want. I usually run them along side the main harness of the car I am working on.
this is what you should have now minus the fuse box
this is the install part. I will be showing you this on the ground with the fuse box out of the car. this way everyone can see clearly how this goes in.once you get that far you will plug in both grey clips from the pass side and the drivers side.
the green plug on the drivers harness plugs into the back of the fuse box. you do not<U></U> need to use the EX fuse box all the fuse boxes are the same internally.
just another pic to show exactly where to plug it in
then on the front of the fuse block you will have to add a 4 pin relay into this spot.
this is what it should look like if you did it correct
now you need to add 5 20 amp fuses for all this power stuff you will put them here
then it should look like this
now enjoy your power windows locks and mirrors.
i did not take any pics of installing the door lock actuators, window regulators or mirrors. i figure you have this all installed by now.
you will need all this stuff for the conversion, including both door wire harness and the relay in the drivers door. if you guys need pics of the door stuff hit me up.
thanks guys
Modified by twistedimage at 10:21 AM 7/6/2008
Modified by twistedimage at 10:27 AM 7/6/2008


Trending Topics

Junior Member
Joined: Nov 2006
Posts: 10
Likes: 0
Hey great write up! I was going to do this swap this weekend and now this helps a lot; I'm glad I found this thread. Seems like it's better to get the wires you need rather than swapping the whole harness.
I don't know if you mentioned this, but how do you go about getting the new harness from the cabin to the doors. I bought the swap a whole ago and it came with a bunch of parts and like a million plugs on the harness. I remember it came with a little box has a few plugs on it or something. I only need to have the power windows. My car already has power mirrors. And what are the brown speaker wires for
I'm sorry if you mentioned this already but I didn't see it after reading this thread about 3 times. Thanks for this guide.
Junior Member
Joined: Nov 2006
Posts: 10
Likes: 0
Ok so I looked at my harness today and it looked so much different than the one in your pictures. Anyways the box I was talking about was labeled door lock control (which I won't be using). Only need the power windows. I'm still a bit confused about all of this, and I'm gonna take another look at the harness before I start cutting it up. It also had these 2 huge plugs that don't seem to plug into each other.
Honda-Tech Member
Joined: Apr 2002
Posts: 4,147
Likes: 0
From: 32514, fl, usa
<TABLE WIDTH="90%" CELLSPACING=0 CELLPADDING=0 ALIGN=CENTER><TR><TD>Quote, originally posted by twistedimage »</TD></TR><TR><TD CLASS="quote">why that would be way more of a pain. plus a coupe harness will not fit a hatch unless highly modified. so why not just take what you need.</TD></TR></TABLE>
What are the big differences between the coupe and hatch harnesses? I have a complete EX harness along with power door/power folding mirror wiring and was going to swap it all over in one go but after you saying this I'm curious about what problems I'm going to run into.
What are the big differences between the coupe and hatch harnesses? I have a complete EX harness along with power door/power folding mirror wiring and was going to swap it all over in one go but after you saying this I'm curious about what problems I'm going to run into.
Junior Member
Joined: Aug 2006
Posts: 252
Likes: 0
From: Your moms house, CA, 90670
That was great straight forward and to the point.  Love it. I wish I had this when i ripped out my floor harness and swapped in the EX one that only opens my driver side windows and still no power locks! That was some bullshit. But you simplify everything that must be done and its clean! Can't wait to tear mines appart! Thank you Can you say Sticky!?
Love it. I wish I had this when i ripped out my floor harness and swapped in the EX one that only opens my driver side windows and still no power locks! That was some bullshit. But you simplify everything that must be done and its clean! Can't wait to tear mines appart! Thank you Can you say Sticky!?
Honda-Tech Member
Joined: Apr 2002
Posts: 4,147
Likes: 0
From: 32514, fl, usa
<TABLE WIDTH="90%" CELLSPACING=0 CELLPADDING=0 ALIGN=CENTER><TR><TD>Quote, originally posted by twistedimage »</TD></TR><TR><TD CLASS="quote">thanks guys they put this in the faq section. and like stated before just take what you need out of the ex harness. life will be much easier</TD></TR></TABLE>
Possibly.. but I have more to worry about than just wiring up windows/locks/mirrors. The previous owner of my car butchered the harness where it plugs into the ECU and I've been dealing with grounding problems ever since I've had the car. My plan was to replace the entire harness and do away with one problem while adding the power options at the same time.. I do have the Helms manual, I suppose I can just get out the wiring diagrams side by side and compare and see what's different.
Possibly.. but I have more to worry about than just wiring up windows/locks/mirrors. The previous owner of my car butchered the harness where it plugs into the ECU and I've been dealing with grounding problems ever since I've had the car. My plan was to replace the entire harness and do away with one problem while adding the power options at the same time.. I do have the Helms manual, I suppose I can just get out the wiring diagrams side by side and compare and see what's different.
Thread Starter
Honda-Tech Member
Joined: Feb 2005
Posts: 735
Likes: 2
From: casper, wy, usa
<TABLE WIDTH="90%" CELLSPACING=0 CELLPADDING=0 ALIGN=CENTER><TR><TD>Quote, originally posted by d357r0y »</TD></TR><TR><TD CLASS="quote">
Possibly.. but I have more to worry about than just wiring up windows/locks/mirrors. The previous owner of my car butchered the harness where it plugs into the ECU and I've been dealing with grounding problems ever since I've had the car. My plan was to replace the entire harness and do away with one problem while adding the power options at the same time.. I do have the Helms manual, I suppose I can just get out the wiring diagrams side by side and compare and see what's different. </TD></TR></TABLE>
damn that sucks
good luck
Honda-Tech Member
Joined: Nov 2007
Posts: 134
Likes: 1
Not being a ***** but your second pic shows you cradling the harness in your left arm and slicing with a razor blade TOWARDS you with the right. I was doing a similar motion on a trailing arm bushing and slipped, cuttting into my thumb quite deep. I then changed my cutting strokes to AWAY from the body. I still can't feel 100% out of the thumb and it healed months ago! Your scar on the left forearm in the same pic tells me that you're also a bit like me and keep doing whatever works, and not necessarily the safest thing, lol. Nice post otherwise. There should be a hell of a lot more diys like these.