

JDM Headlight fix!


Thread Starter
Joined: Feb 2005
Posts: 370
Likes: 0
From: PR...now in FL, Puerto Rico
<TABLE WIDTH="90%" CELLSPACING=0 CELLPADDING=0 ALIGN=CENTER><TR><TD>Quote, originally posted by silverlude15 »</TD></TR><TR><TD CLASS="quote">hmm i would like to know this. mine has a similar problem on the top right corner, but not NEARLY as bad.
if you cover them with some polish tehy hide it, but i think you'd need to fix it somehow.</TD></TR></TABLE>
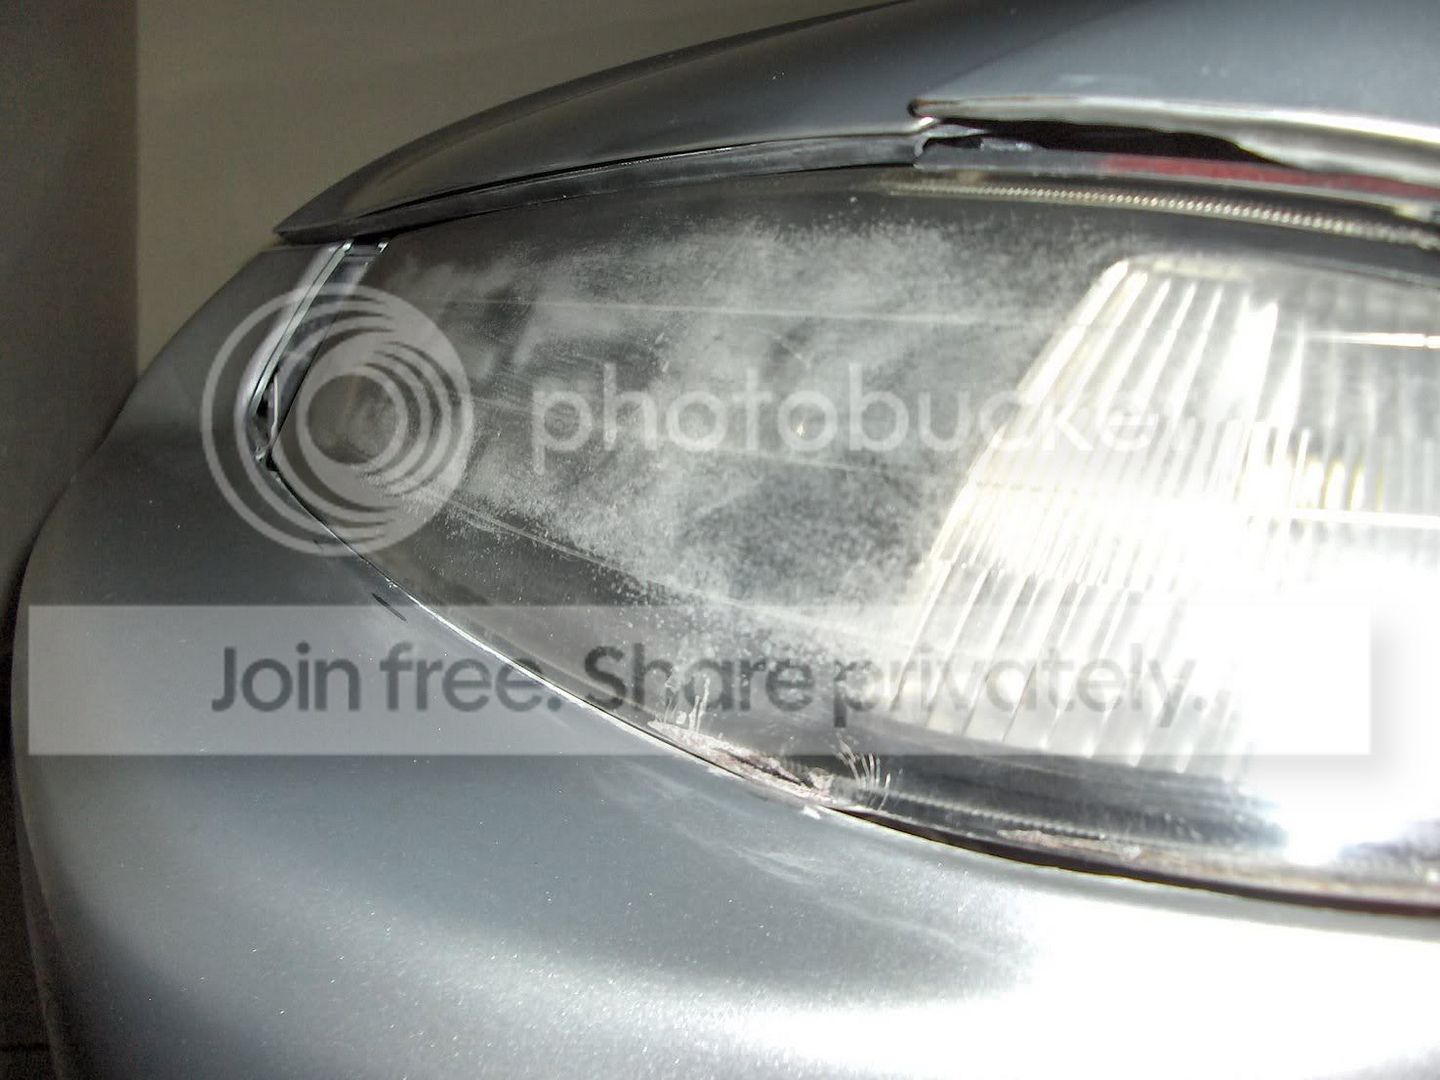
I already tried some plastic polish... didn't do nothing. It sucks having the lens like that, it looks bad plus the light output sucks. And no i haven't put them in the oven.
if you cover them with some polish tehy hide it, but i think you'd need to fix it somehow.</TD></TR></TABLE>
I already tried some plastic polish... didn't do nothing. It sucks having the lens like that, it looks bad plus the light output sucks. And no i haven't put them in the oven.
Joined: Jan 2005
Posts: 88
Likes: 0
From: San Luis Obispo, CA, USA
I've heard of people wetsanding their headlights to make them like new again. Search around in the archives.
heres one example:
https://honda-tech.com/zerothread?id=1492212
heres one example:
https://honda-tech.com/zerothread?id=1492212
Honda-Tech Member
Joined: Apr 2003
Posts: 298
Likes: 0
From: Richmond, Va, US
if sanding it down doesnt help your pretty much at a loss. is the clear coming off or is it hazing? i cant really tell by the pictures. but i would start trying to source some lenses. find some jdm headlights with chrome housing and pull the lens off, usually those are cheaper than the black housing. 
Trending Topics
Thread Starter
Joined: Feb 2005
Posts: 370
Likes: 0
From: PR...now in FL, Puerto Rico
Those blemishes are like stuck in the plastic. I didn't think that they had to much of a fix but asking never hurts. If somebody has a spare lens pm me. Thanx.
Junior Member
Joined: Dec 2004
Posts: 144
Likes: 0
From: Norcal
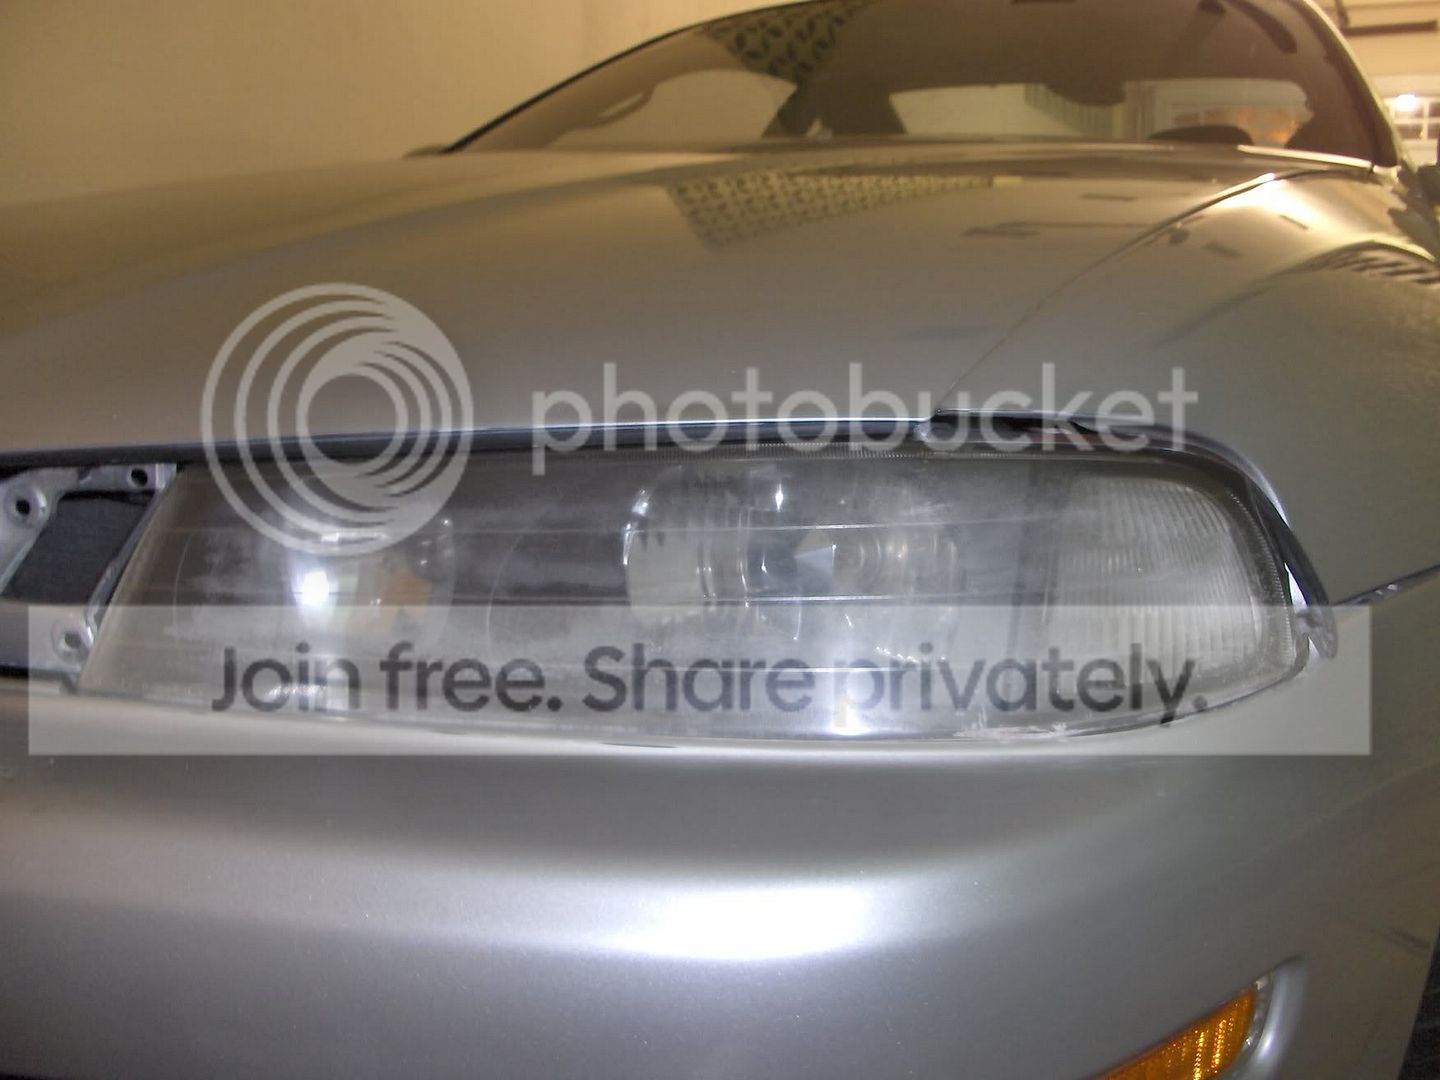
did you have any type of improvement after polishing or wetsanding? what grit sandpaper did you use? from the pics, it looks like the clear coat is messed up but it could be that the lenses are scuffed very badly. are you sure the outside is the problem? you could try taking the lense off and polishing the inside as well. BTW, is the passenger side lense the same as the driver side in the pic?
Honda-Tech Member
Joined: Dec 2005
Posts: 90
Likes: 0
I recently just buffed mine.. i used Mothers Plastic Polish (http://www.superiorcarcare.net/moplpo.html) and a Mothers Power Ball (http://www.superiorcarcare.net/mo5140.html). I'm really happy with the results and it only takes like 15-20 minutes of work (although mine weren't quite as bad as yours.. still worth a shot).
Thread Starter
Joined: Feb 2005
Posts: 370
Likes: 0
From: PR...now in FL, Puerto Rico
Not sure if it is on the outside only but my guess is that it is in the whole plastic, and no the passengers side is not like this one, the other one is really clean.
Junior Member
Joined: Aug 2003
Posts: 437
Likes: 0
From: Warsaw, Poland, poland
Here's how to:
1. Wetsand with waterproof paper grade 2000 until you have a flat, matt surface - can be seen by wiping the surface with a dry soft cloth during wetsanding (takes some time...)
2. Polish the surface with some professional polish (takes time too)
3. Spray clearcoat - preferably at a paint shop
4. When the paint is hardened well wetsand again with 2000 paper (but only few wetsanding to not to remove paint, just to make its surface flat
5. Polish the clearcoat surface with professional polish
Then you obtain the headlights like new. That's exactly what I did with mines, however they were not in such catastrophic condition...
Honda-Tech Member
iTrader: (1)
Joined: Oct 2004
Posts: 888
Likes: 1
From: Tucson...Cactus Town, Az, usa
<TABLE WIDTH="90%" CELLSPACING=0 CELLPADDING=0 ALIGN=CENTER><TR><TD>Quote, originally posted by wstef »</TD></TR><TR><TD CLASS="quote">Here's how to:
1. Wetsand with waterproof paper grade 2000 until you have a flat, matt surface - can be seen by wiping the surface with a dry soft cloth during wetsanding (takes some time...)
2. Polish the surface with some professional polish (takes time too)
3. Spray clearcoat - preferably at a paint shop
4. When the paint is hardened well wetsand again with 2000 paper (but only few wetsanding to not to remove paint, just to make its surface flat
5. Polish the clearcoat surface with professional polish
Then you obtain the headlights like new. That's exactly what I did with mines, however they were not in such catastrophic condition...
</TD></TR></TABLE>
do that and try 4000 grit sandpaper.
Thread Starter
Joined: Feb 2005
Posts: 370
Likes: 0
From: PR...now in FL, Puerto Rico
Thanks for the replies, but the thing is that it is kind of integrated in the palstic and when the lights are turned on the plastic looks like it has little lines running accros the blemishes. So I'm thinking that wetsanding them won't do the job. But I'll try it anyways.
But still if somebody has the lens just pm me.
But still if somebody has the lens just pm me.

Thread
Thread Starter
Forum
Replies
Last Post