

Removing/Installing Steering Wheel

Thread Starter
Honda-Tech Member
Joined: Oct 2004
Posts: 1,261
Likes: 0
From: Oregon
Here is a "How-To" Removal and Installation of an SRS Steering Wheel from a Honda Civic 92-95 and an Acura Integra 94-01.
Step 1:
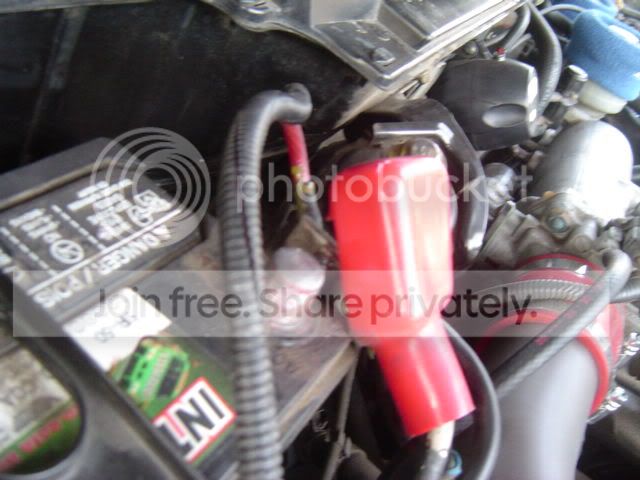
Disconnect battery. Honda reccomends waiting apprx. 3 minutes before starting work on the steering wheel.
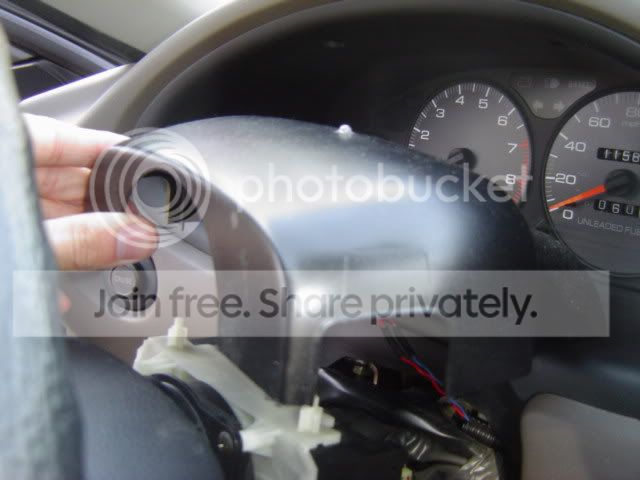
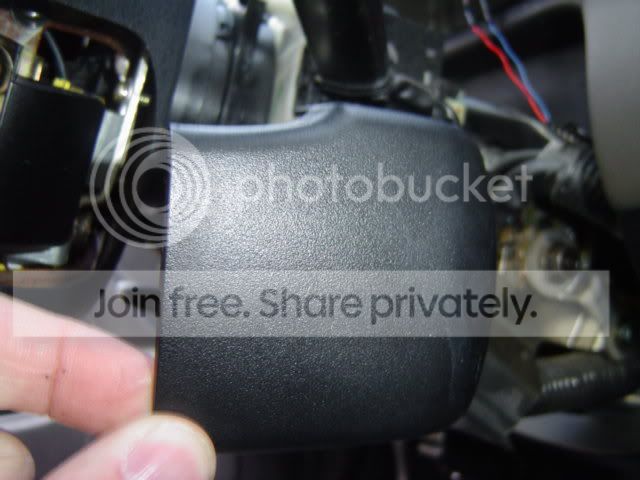
Step 2: Remove steering column cover. There are three screws on the bottom of the cover. Once you remove those three screws the bottom can now un-snap from the top peice. Be careful taking it apart, the tabs can break easily.

Step 3: On the bottom of the steering wheel itself there is a small cover. There will be one screw holding it in place. Remove the screw and slide off the cover. When the cover is removed, you will see a yellow connector. This connects the SRS airbag to the car. Unplug the cable and then plug it into the red connector on the back of the plastic cover.

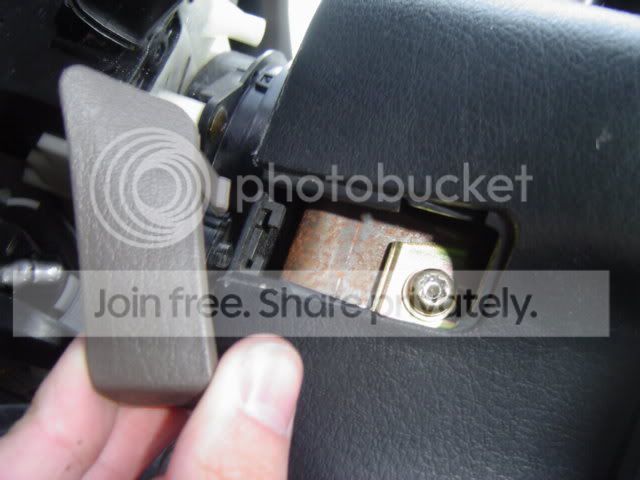
Step 4: On the left side of the steering wheel there will be small platic cover. You can use a small flat head screw driver to remove this. Once removed, this will reveal a small torx screw. This will require a torx T-30 bit. This will take some time to remove, they are real tight. This screw holds down the left side of the airbag. Be very careful removing the torx screws.
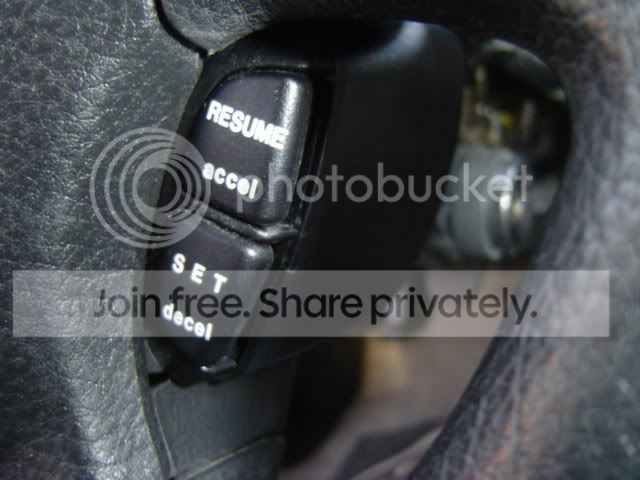
Step 5: On the right side of the steering wheel, you will notice the cruise control unit. Remove the plastic cover from the unit. There will be two small screws holding this unit in place, once removed the unit will just pull out. Once removed, this is where the next torx screw is holding in the right side of the airbag. Remove this screw.
Step 5: You should now have both torx screws removed from either side of the airbag. On the bottom of the steering wheel, unplug the airbag from the plastic panel as described earlier. Once unplug, you can now pull out the air bag.

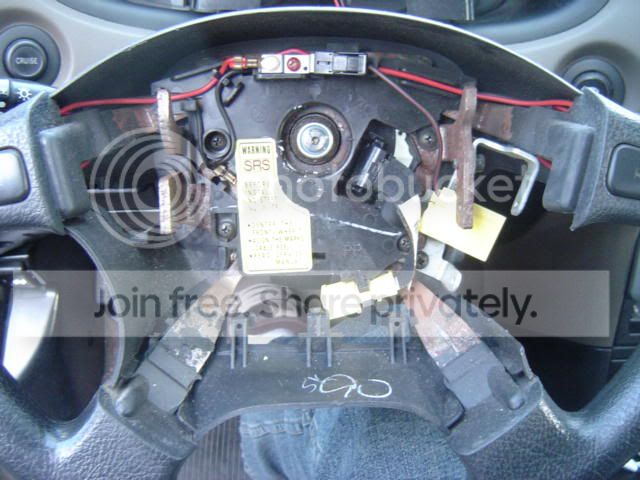
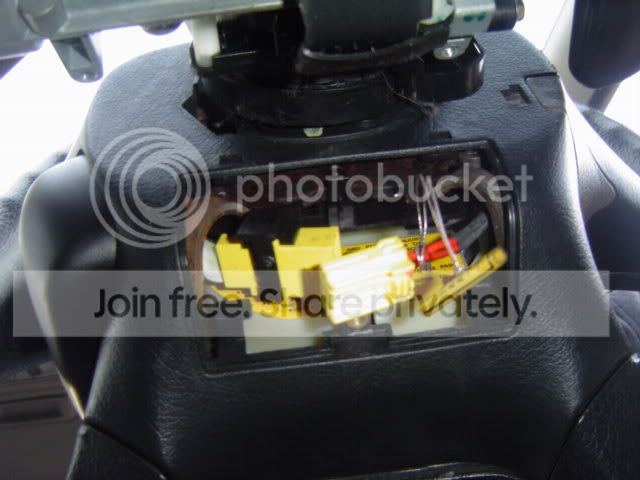
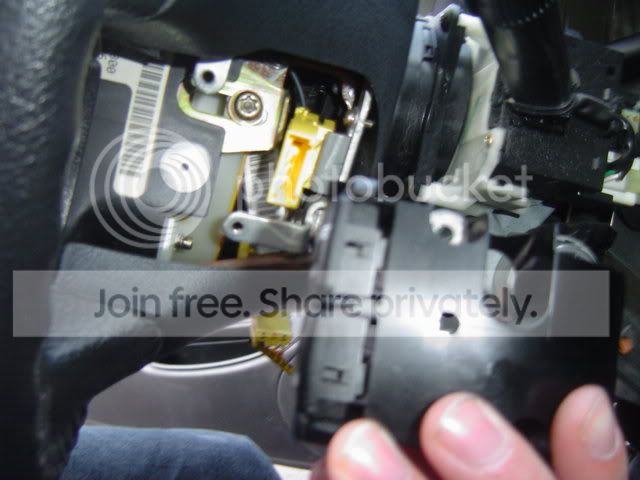
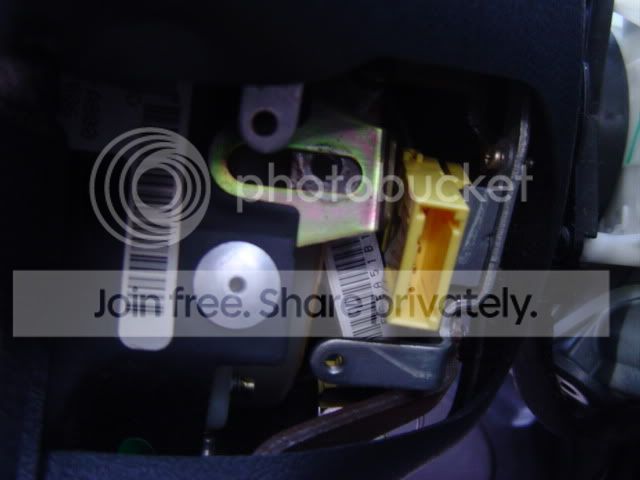
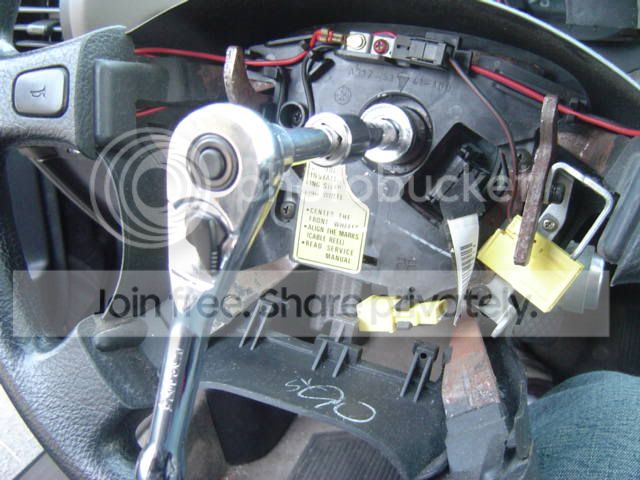
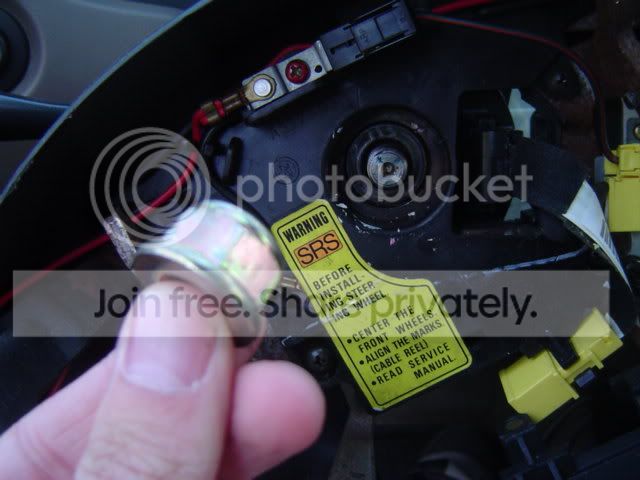
Step 6: In the center of the steering wheel you will notice a 19mm nut. Before removing this, make sure that the steering wheel is completely lined up, and that your front tires are both straight. If you need a second set of hands to hold the wheel in place, use them. Remove the 19mm nut while keeping the wheel in place. There will be three wires, two yellow connectors which you will need to unhook, and a black connector (red wire), unhook these three wires and feed them through as you remove the steering wheel.
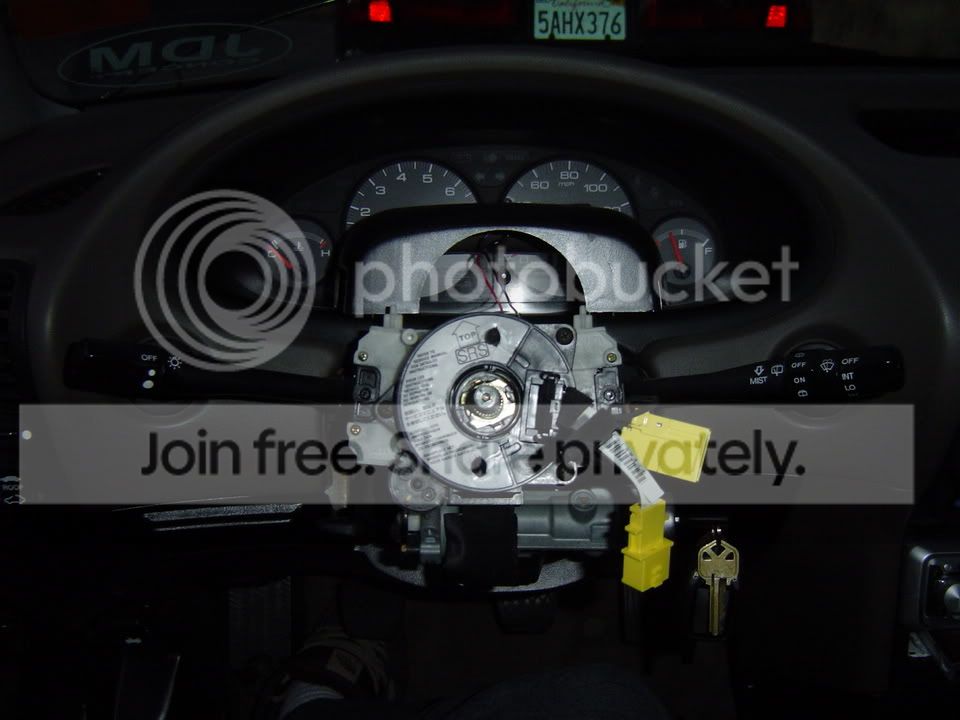
Step 6: If you are replacing your wheel with the same type (such as different color, or a new one) then these directions will show you how to reinstall the wheel. Make sure the hub is still centered and then you can replace the steering wheel while feeding the wires back through the wheel.
Reconnect all wires and harnesses. Replace the 19mm nut and tighten while keeping the wheel straight.
Step 7: Once the nut has been tightened, you can put the airbag back on the steering wheel. Make sure you feed the airbag harness through the hole in the back of the wheel. At this point plug that harness back into the red harness on the back of the bottom cover.
Step 8: On either side of the steering wheel, reinstall the two torx screws. Make sure they are pretty tight, but be careful not to strip them. They strip easily. After the replacing the two torx screws replace the cover on the left side.
Step 9: You can now reinstall your cruise control unit. It will just slide back into place. Screw in the two small screws and then replace the cruise control cover.
Step 10: At this point you can unplug the airbag harness and reconnect it to the other yellow connector. Then replace the bottom cover, and screw in the single screw.
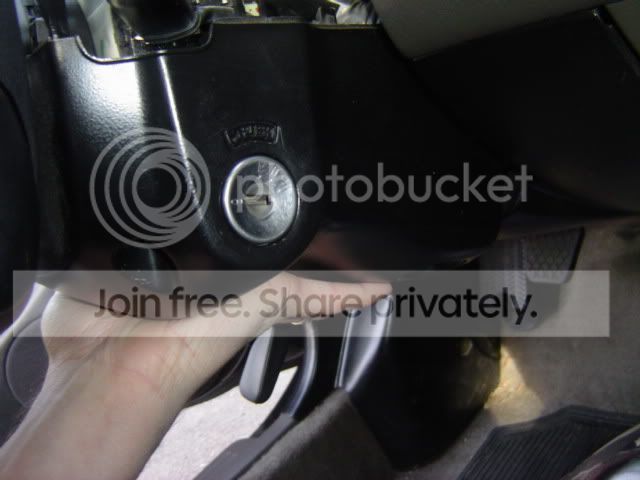
Step 11: You can now replace the steering column covers. Put on both covers and snap them together before you screw them down. Make sure it lines up around the ignition. Replace the three screws.
Step 12: Reconnect your battery. Test out the horn, take it for a spin and make sure you lined of the steering wheel correctly. Test of your cruise control as well. If you the horn or cruise control dont work, I found that disconnecting everything again and reconnecting fixed the problem. If your steering wheel did not line up and is not straight as you drive, you will have to remove it again and try lining it up better. Be sure to have the wheels straight, and to keep the steering wheel straight as you work on it.
Good luck and if you have any questions, feel free to ask.
Modified by elephantegra at 8:01 PM 10/12/2005
Modified by elephantegra at 1:06 AM 10/13/2005
Step 1:
Disconnect battery. Honda reccomends waiting apprx. 3 minutes before starting work on the steering wheel.
Step 2: Remove steering column cover. There are three screws on the bottom of the cover. Once you remove those three screws the bottom can now un-snap from the top peice. Be careful taking it apart, the tabs can break easily.
Step 3: On the bottom of the steering wheel itself there is a small cover. There will be one screw holding it in place. Remove the screw and slide off the cover. When the cover is removed, you will see a yellow connector. This connects the SRS airbag to the car. Unplug the cable and then plug it into the red connector on the back of the plastic cover.
Step 4: On the left side of the steering wheel there will be small platic cover. You can use a small flat head screw driver to remove this. Once removed, this will reveal a small torx screw. This will require a torx T-30 bit. This will take some time to remove, they are real tight. This screw holds down the left side of the airbag. Be very careful removing the torx screws.
Step 5: On the right side of the steering wheel, you will notice the cruise control unit. Remove the plastic cover from the unit. There will be two small screws holding this unit in place, once removed the unit will just pull out. Once removed, this is where the next torx screw is holding in the right side of the airbag. Remove this screw.
Step 5: You should now have both torx screws removed from either side of the airbag. On the bottom of the steering wheel, unplug the airbag from the plastic panel as described earlier. Once unplug, you can now pull out the air bag.
Step 6: In the center of the steering wheel you will notice a 19mm nut. Before removing this, make sure that the steering wheel is completely lined up, and that your front tires are both straight. If you need a second set of hands to hold the wheel in place, use them. Remove the 19mm nut while keeping the wheel in place. There will be three wires, two yellow connectors which you will need to unhook, and a black connector (red wire), unhook these three wires and feed them through as you remove the steering wheel.
Step 6: If you are replacing your wheel with the same type (such as different color, or a new one) then these directions will show you how to reinstall the wheel. Make sure the hub is still centered and then you can replace the steering wheel while feeding the wires back through the wheel.
Reconnect all wires and harnesses. Replace the 19mm nut and tighten while keeping the wheel straight.
Step 7: Once the nut has been tightened, you can put the airbag back on the steering wheel. Make sure you feed the airbag harness through the hole in the back of the wheel. At this point plug that harness back into the red harness on the back of the bottom cover.
Step 8: On either side of the steering wheel, reinstall the two torx screws. Make sure they are pretty tight, but be careful not to strip them. They strip easily. After the replacing the two torx screws replace the cover on the left side.
Step 9: You can now reinstall your cruise control unit. It will just slide back into place. Screw in the two small screws and then replace the cruise control cover.
Step 10: At this point you can unplug the airbag harness and reconnect it to the other yellow connector. Then replace the bottom cover, and screw in the single screw.
Step 11: You can now replace the steering column covers. Put on both covers and snap them together before you screw them down. Make sure it lines up around the ignition. Replace the three screws.
Step 12: Reconnect your battery. Test out the horn, take it for a spin and make sure you lined of the steering wheel correctly. Test of your cruise control as well. If you the horn or cruise control dont work, I found that disconnecting everything again and reconnecting fixed the problem. If your steering wheel did not line up and is not straight as you drive, you will have to remove it again and try lining it up better. Be sure to have the wheels straight, and to keep the steering wheel straight as you work on it.
Good luck and if you have any questions, feel free to ask.
Modified by elephantegra at 8:01 PM 10/12/2005
Modified by elephantegra at 1:06 AM 10/13/2005

Trending Topics
Thread Starter
Honda-Tech Member
Joined: Oct 2004
Posts: 1,261
Likes: 0
From: Oregon
<TABLE WIDTH="90%" CELLSPACING=0 CELLPADDING=0 ALIGN=CENTER><TR><TD>Quote, originally posted by 00IntegrAllmotoR »</TD></TR><TR><TD CLASS="quote">made it a sticky, very nice write up! beer for you.</TD></TR></TABLE>
thanks man. its my first write up too!
thanks man. its my first write up too!
New User
Joined: Aug 2001
Posts: 4,879
Likes: 3
If would help that you mention that they need a torx T-30 bit 
Also, if you start to take the torx bolt out and it feels like it's going to strip, stop what you're doing and spray some WD-40 on the bolt. Let it sit for a minute or so and then tighten and loosen and tighten and loosen back & forth to work the threads. I've had to help somebody drill a torx screw out before.... PITA cause there's no room to work with unless you cut/destroy the plastic cover on the back side of the steering wheel.
Also, if you start to take the torx bolt out and it feels like it's going to strip, stop what you're doing and spray some WD-40 on the bolt. Let it sit for a minute or so and then tighten and loosen and tighten and loosen back & forth to work the threads. I've had to help somebody drill a torx screw out before.... PITA cause there's no room to work with unless you cut/destroy the plastic cover on the back side of the steering wheel.
Thread Starter
Honda-Tech Member
Joined: Oct 2004
Posts: 1,261
Likes: 0
From: Oregon
<TABLE WIDTH="90%" CELLSPACING=0 CELLPADDING=0 ALIGN=CENTER><TR><TD>Quote, originally posted by Newman »</TD></TR><TR><TD CLASS="quote">If would help that you mention that they need a torx T-30 bit </TD></TR></TABLE>
thanks!! i knew i would forget something ill edit that in
</TD></TR></TABLE>thanks!! i knew i would forget something ill edit that in
Thread Starter
Honda-Tech Member
Joined: Oct 2004
Posts: 1,261
Likes: 0
From: Oregon
<TABLE WIDTH="90%" CELLSPACING=0 CELLPADDING=0 ALIGN=CENTER><TR><TD>Quote, originally posted by fistandauntilus »</TD></TR><TR><TD CLASS="quote">awesome write up bro!</TD></TR></TABLE>
thanks. this is my first and hopefully not last.
thanks. this is my first and hopefully not last.


Junior Member
Joined: Oct 2005
Posts: 673
Likes: 0
From: Seattle, Wa, USA
So what changes have to be made to switch to an aftermarket (preferably with locking/removable hub) Not sure if I'd ever really wanna do that other than theft prevention but it is something that tickles my curiousity.

Thread
Thread Starter
Forum
Replies
Last Post
Civic_07
Honda Civic / Del Sol (1992 - 2000)
5
Jun 26, 2008 12:23 PM
Mr.Highlife
Honda Civic / Del Sol (1992 - 2000)
14
Apr 6, 2008 10:18 AM