

Quarter Panel replacement

Thread Starter
Honda-Tech Member
Joined: Feb 2007
Posts: 1,155
Likes: 0
From: spokane
i have read a lot of threads on rust problems and damaged quarter panels, so i took some pic's of a recent car i had to fix hoping it might answer some questions ht members have or will soon have.
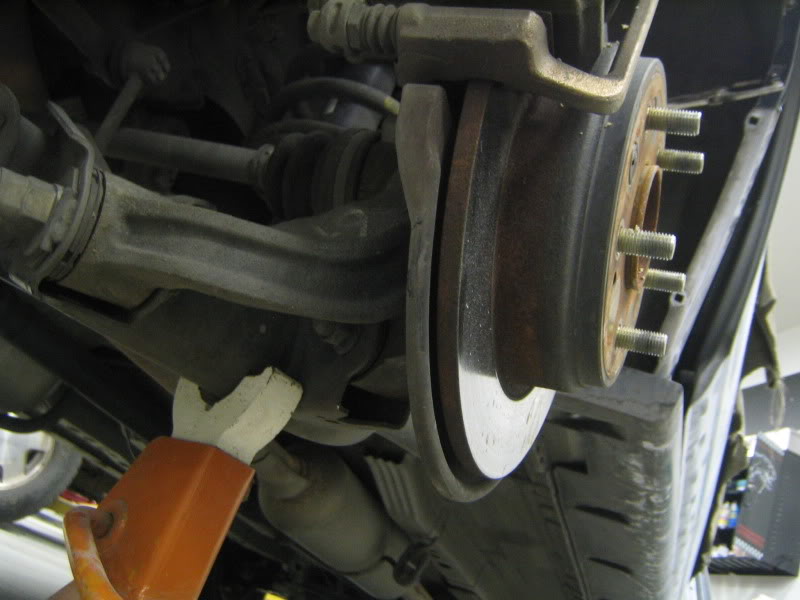
you will need to take the tire off and load the suspension. uni-body design is strong but it's a rule of thumb so the car sits even. cover everything with welding blankets and remove interior that's in danger or in the way.
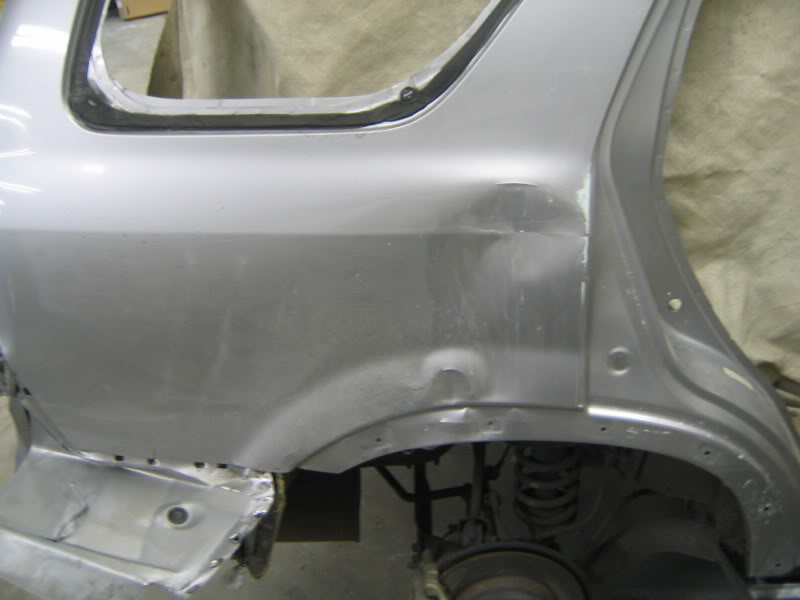
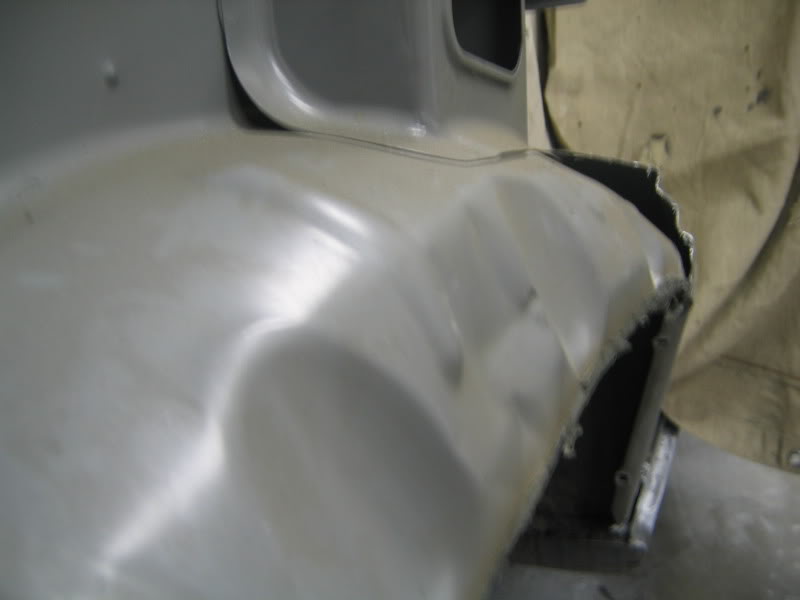
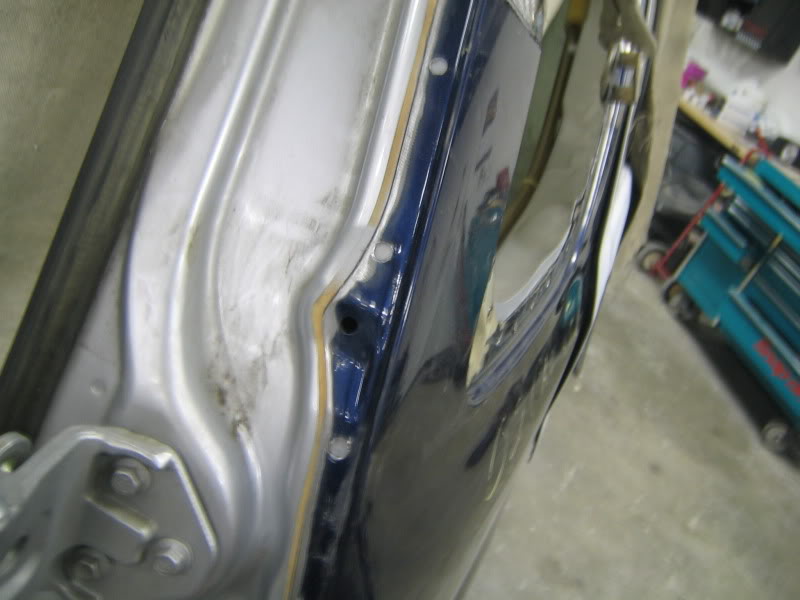
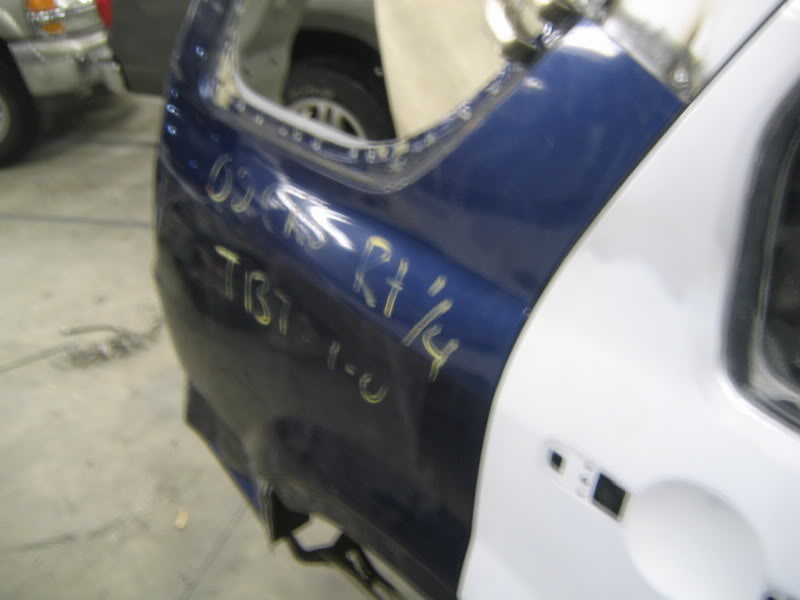
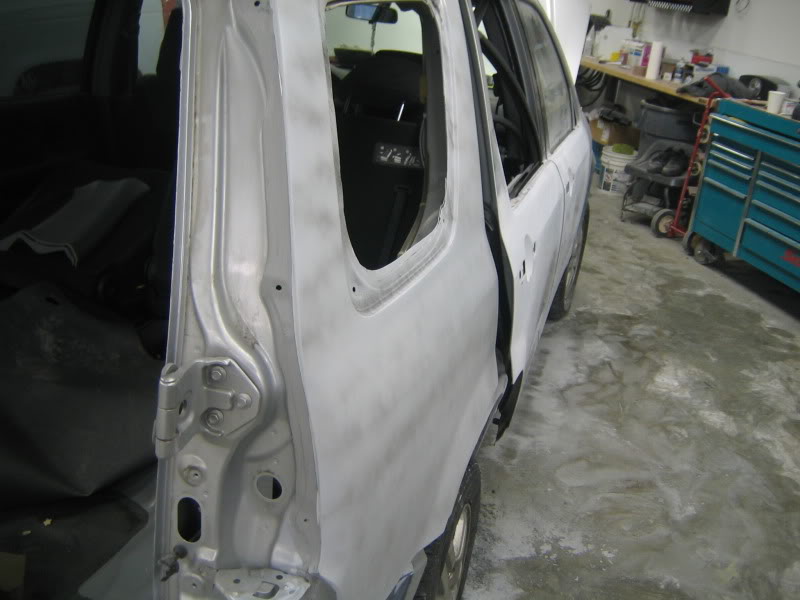
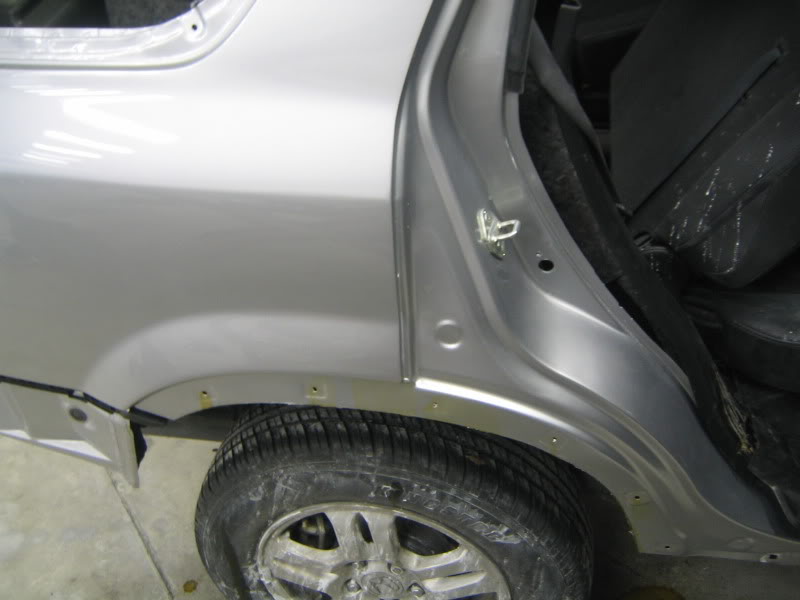
this quarter took a good amount of pressure. the door opens and shuts fine but the door gap is badly distorted.
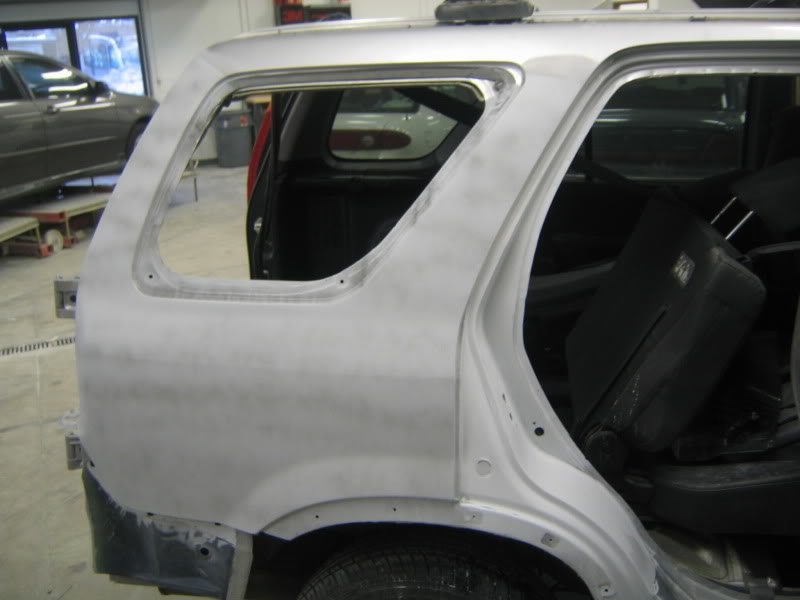
the quarter panel i'm getting will be coming from a wrecking yard. it's in good shape.

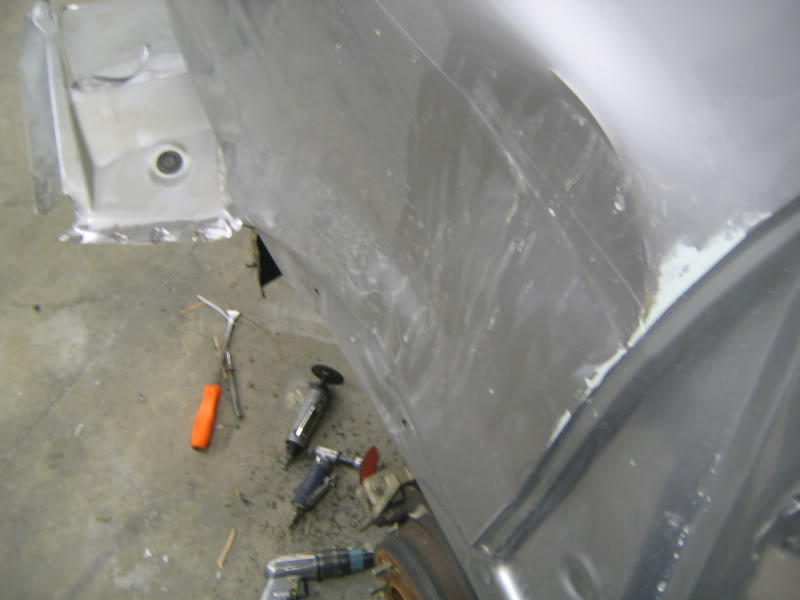
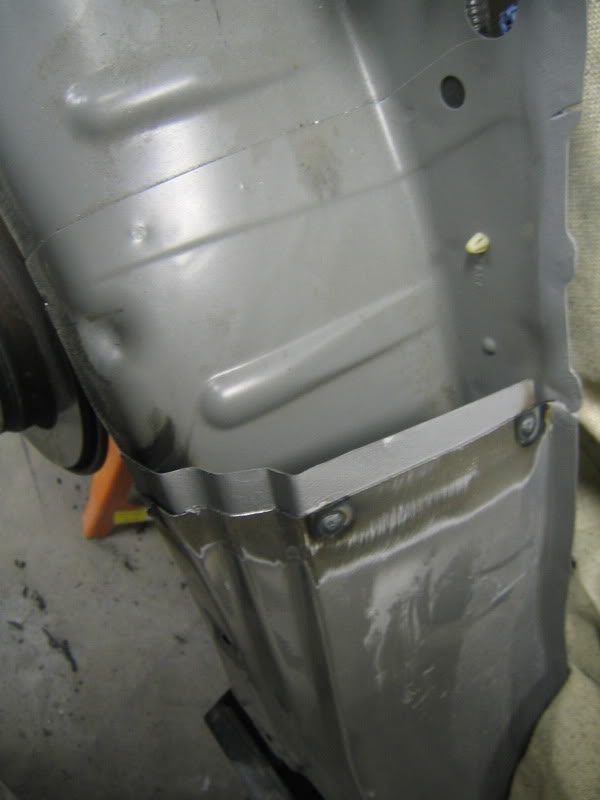
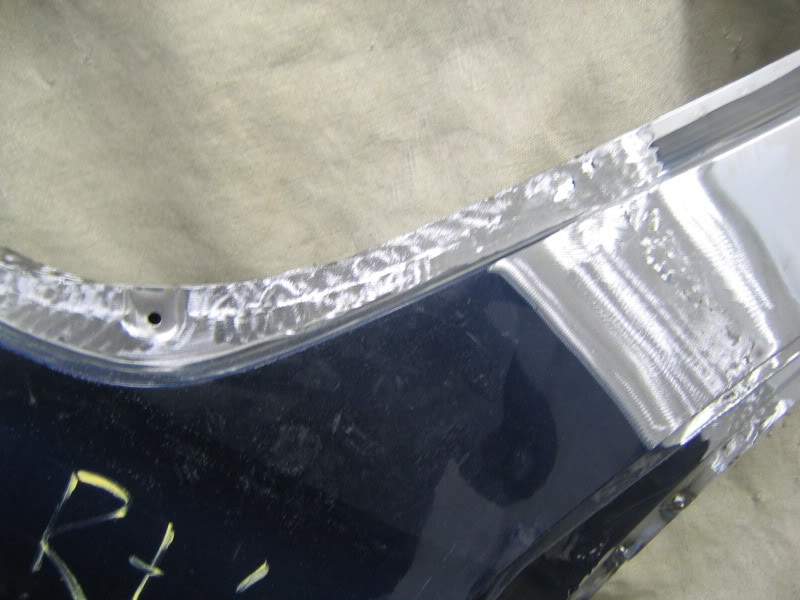
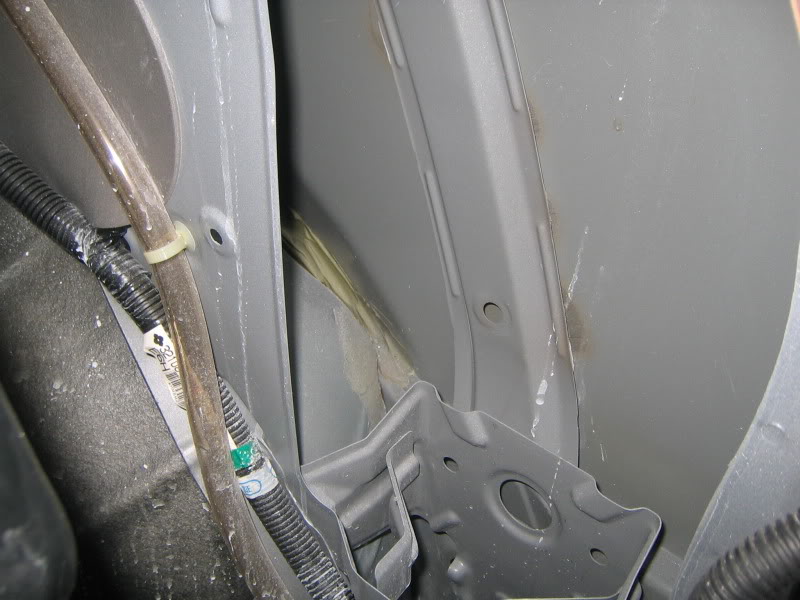
the outer wheel house curled in from the hit. it will need to be pulled re shaped with a hammer and dolly before the new quarter goes on.
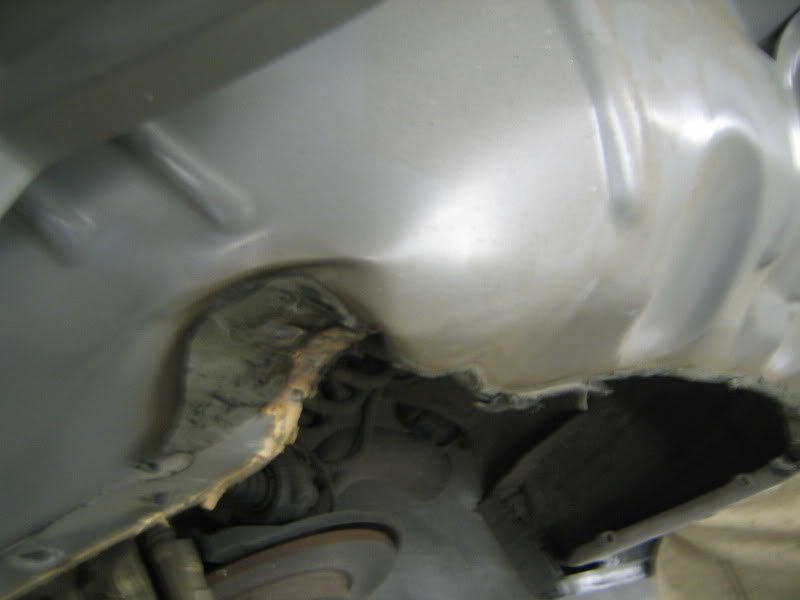
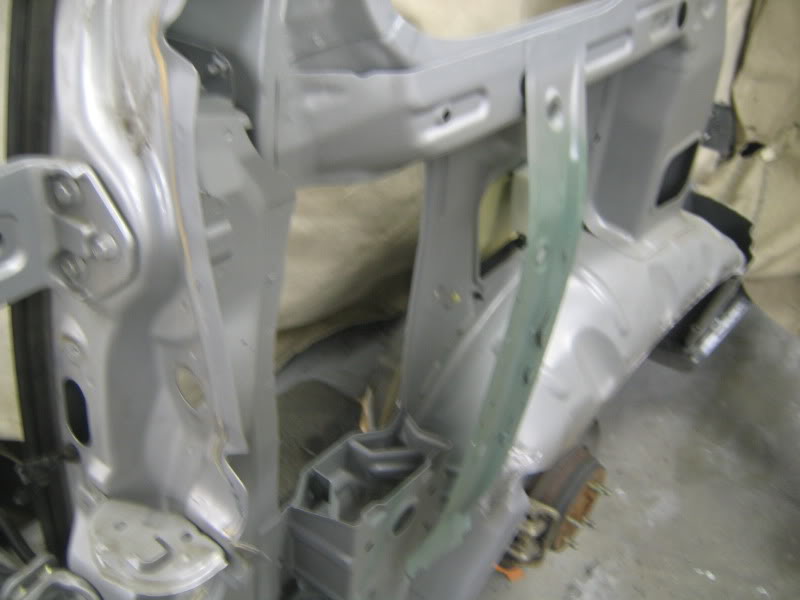
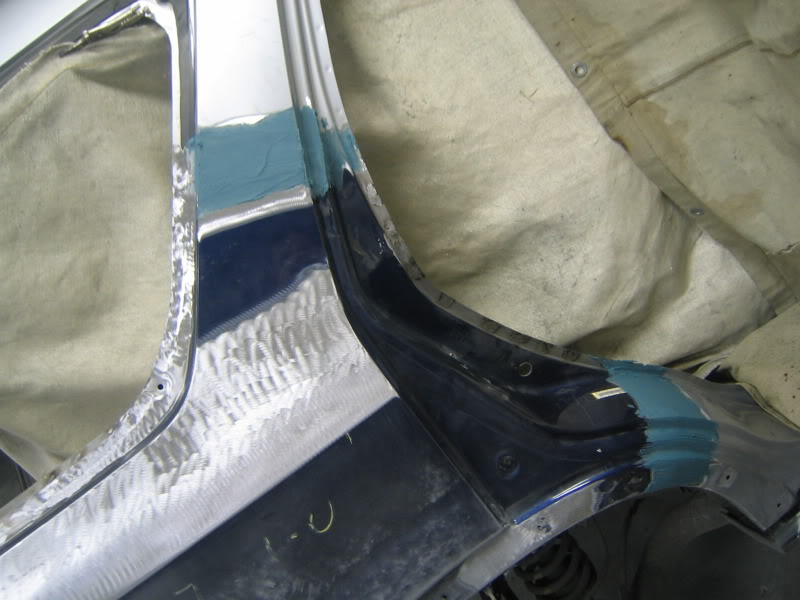
this is small reinforcement piece that is bonded behind the quarter with a non structural foam. it will be cleaned and a new bead of foam will be applied before the quarter goes on.

when you are using a used quarter panel (lkq quarter panel) you need to drill the spot welds out cleanly and use a small chisel get the panel free. it won't take much to break it loose so be careful.
i always use weld though primer on the back side of the flange after i clean the part.
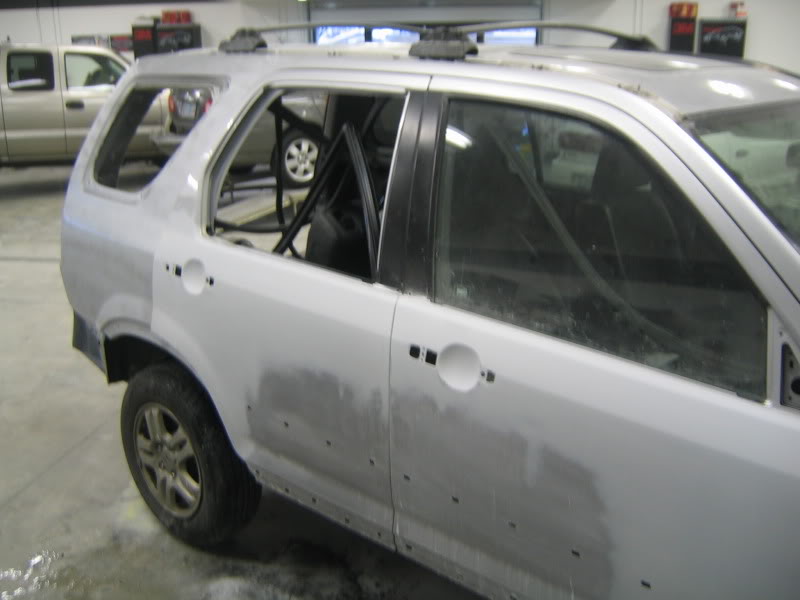
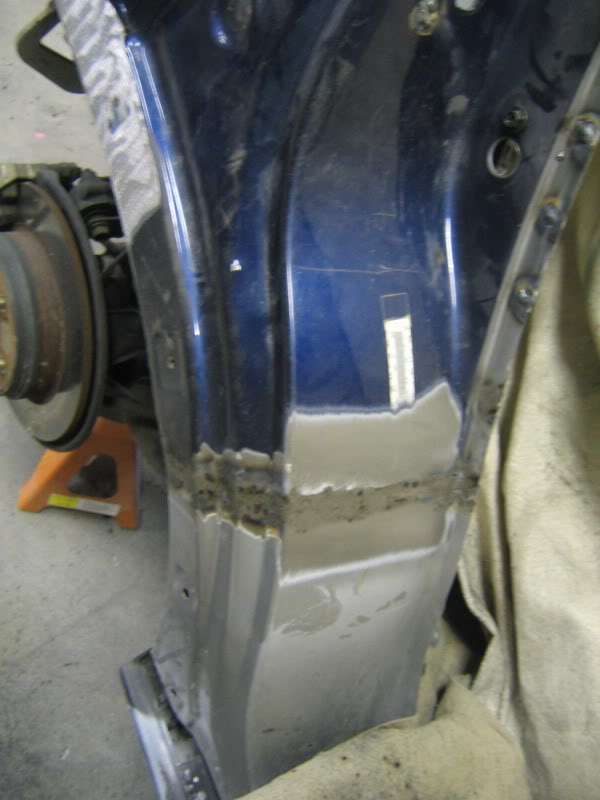
with the old quarter out of the way i lay the lkq quarter in it's place. line it up were it needs to be. observe the surrounding panels and so on. with the lkq panel overlapping the splice sections, make your cut.
the piece in my hand will be my sleeve. (it's used as a backing plate when you weld the new quarter on)
clean the burrs on the metal, remove the paint on the outside of the sleeve, apply weld through primer to the sleeve, about a 1/4 inch or less above the cut line use a hole punch or a drill so you can weld the sleeve in place but don't damage the panel.
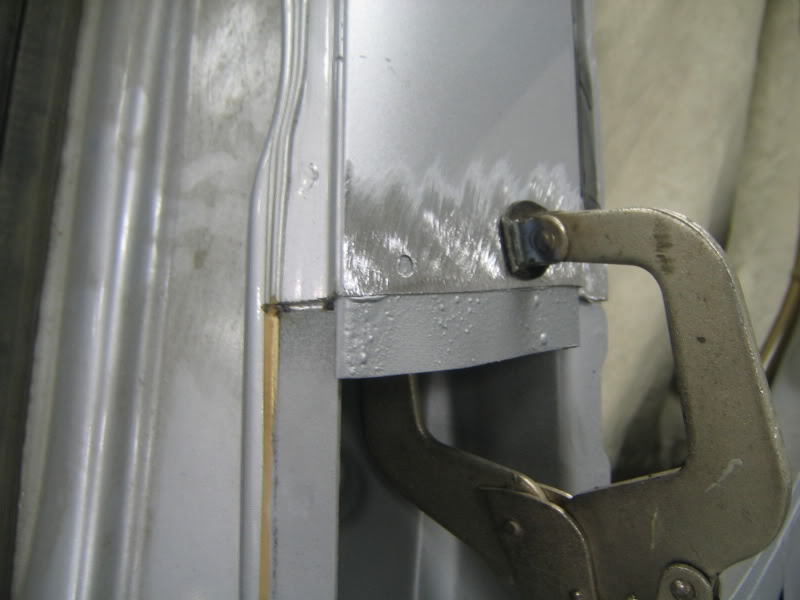
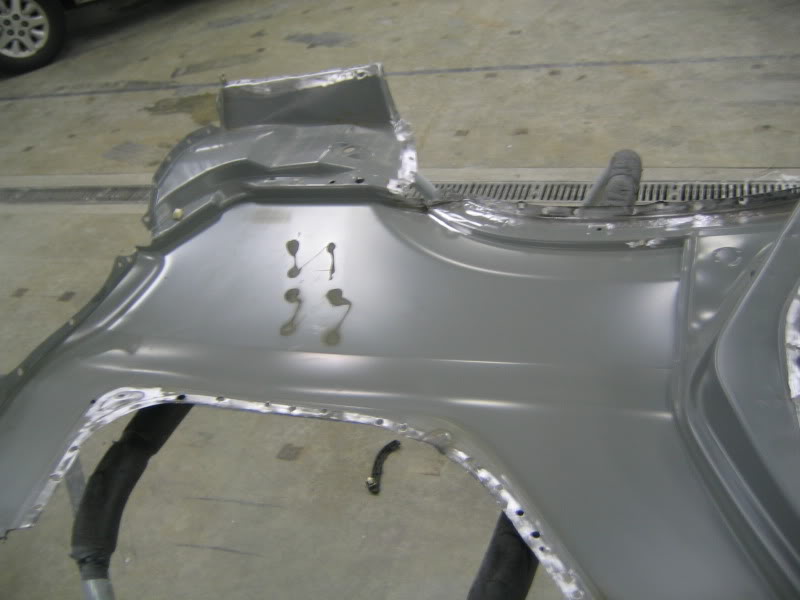
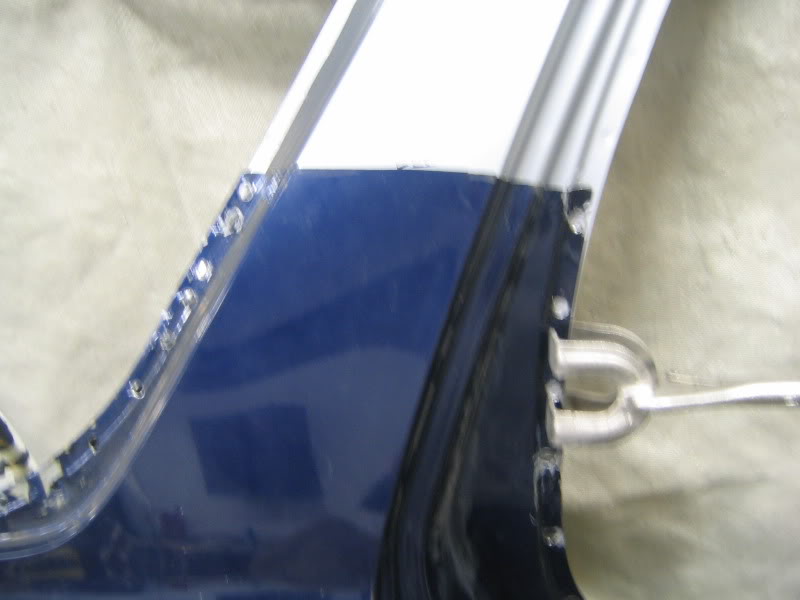
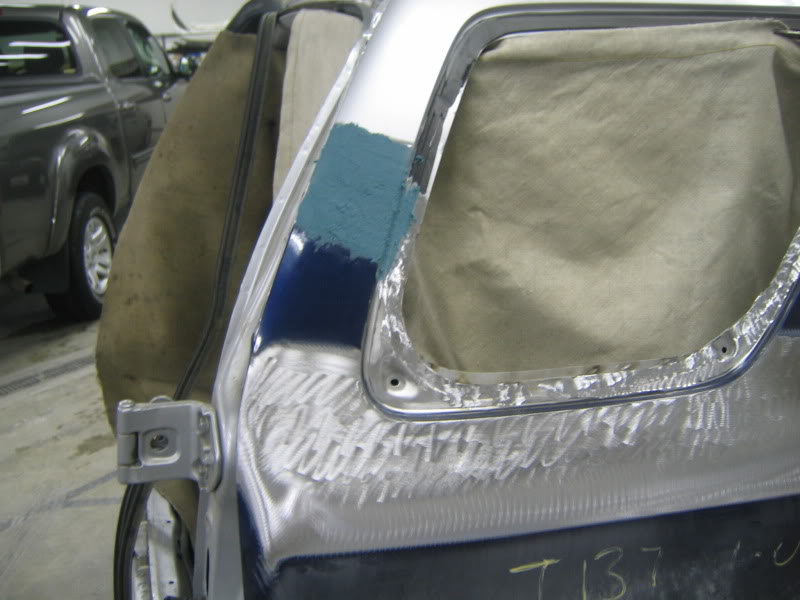
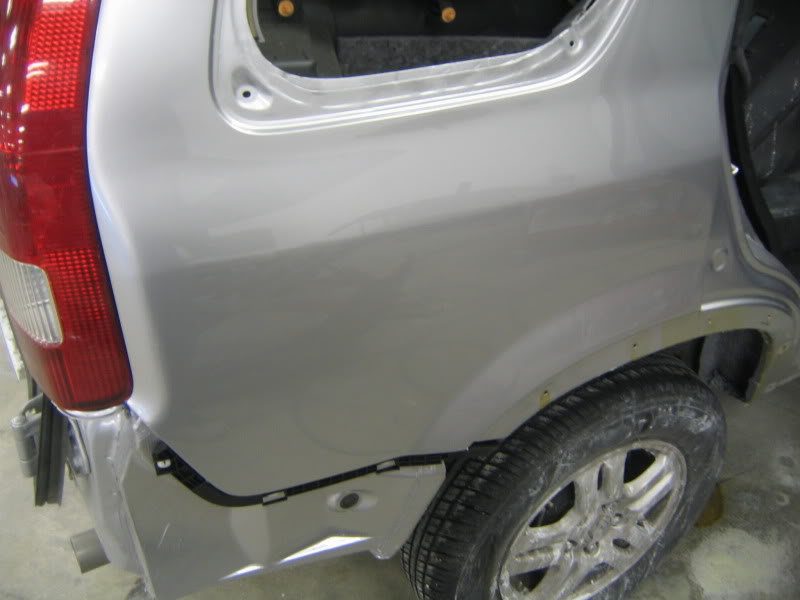
the wheel house is straightened out and all welding area's have been coated with weld through primer but before a single weld is made i will test fit the tailight bumper and check the gap and bodylines with the door. the bead of foam was also applied for the brace that runs behind the quarter
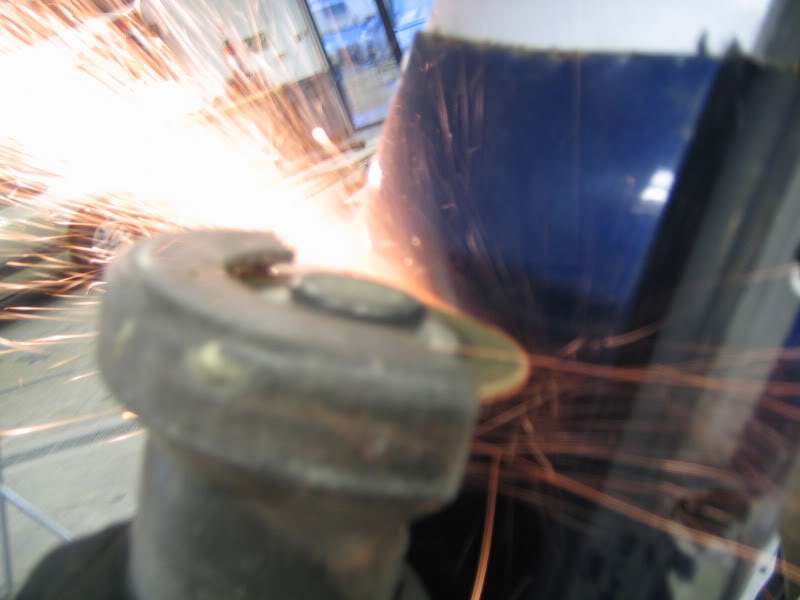
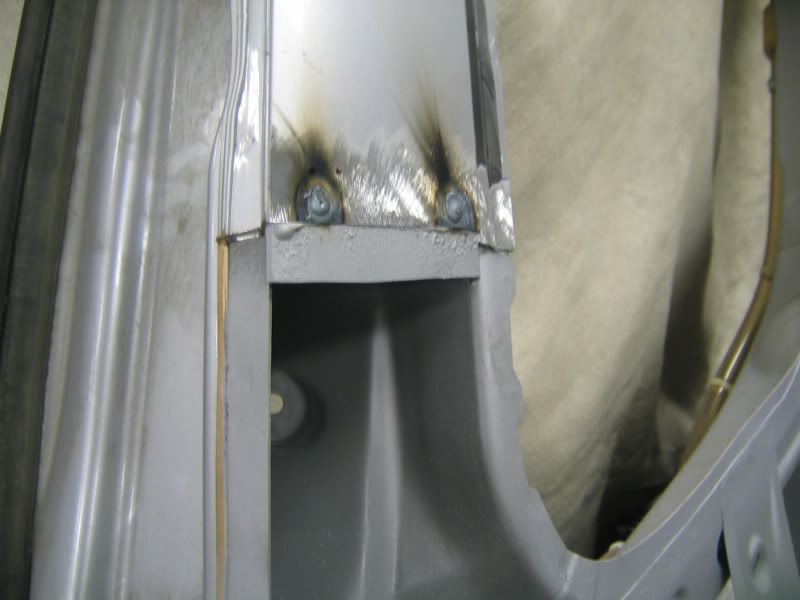
everything looked good so in the wheel house of the quarter panel i layed down a thick bead of metal bond and i started welding where i needed.

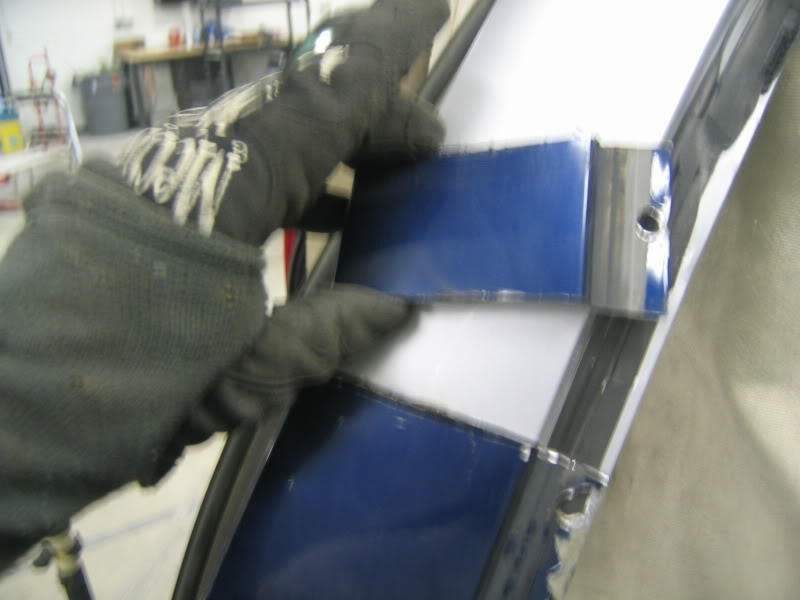
some duraglass on the welded sections, followed by some minor body work, prime then paint.
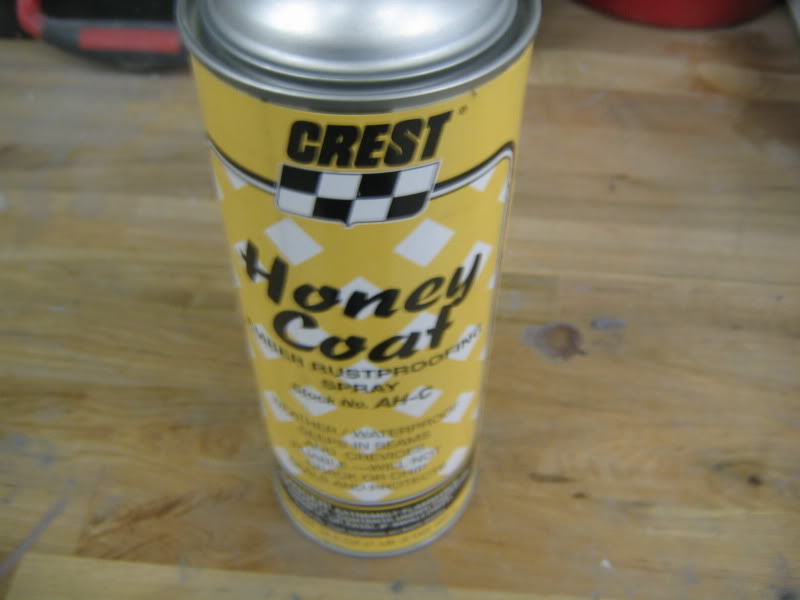
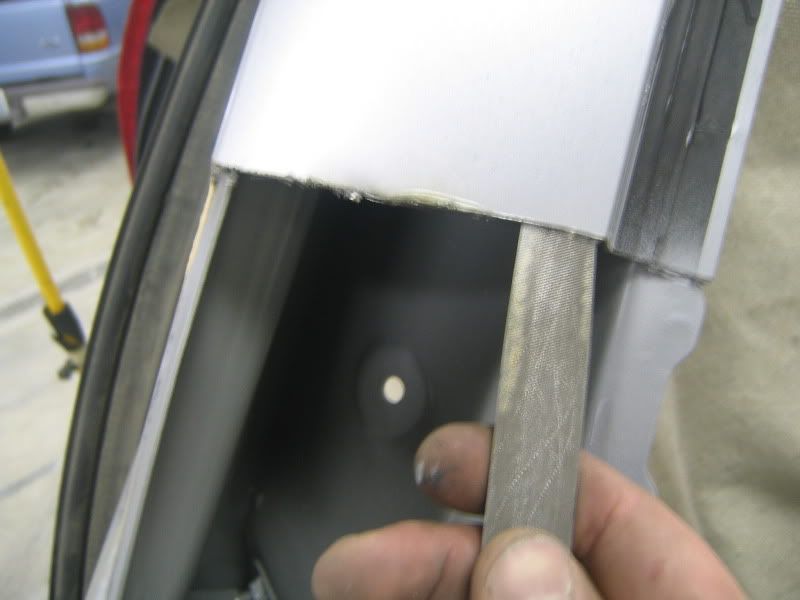
use body wax in as many area's you can reach when your done with paint. do not use before paint, do not use before welding , it's flammable. put a good layer in this area especially
hope this helps some of you guys out. i skimmed through a lot like seam sealing, tools and so on but i hope it's some good basic info that ht members can make use of.
you will need to take the tire off and load the suspension. uni-body design is strong but it's a rule of thumb so the car sits even. cover everything with welding blankets and remove interior that's in danger or in the way.
this quarter took a good amount of pressure. the door opens and shuts fine but the door gap is badly distorted.
the quarter panel i'm getting will be coming from a wrecking yard. it's in good shape.
the outer wheel house curled in from the hit. it will need to be pulled re shaped with a hammer and dolly before the new quarter goes on.
this is small reinforcement piece that is bonded behind the quarter with a non structural foam. it will be cleaned and a new bead of foam will be applied before the quarter goes on.
when you are using a used quarter panel (lkq quarter panel) you need to drill the spot welds out cleanly and use a small chisel get the panel free. it won't take much to break it loose so be careful.
i always use weld though primer on the back side of the flange after i clean the part.
with the old quarter out of the way i lay the lkq quarter in it's place. line it up were it needs to be. observe the surrounding panels and so on. with the lkq panel overlapping the splice sections, make your cut.
the piece in my hand will be my sleeve. (it's used as a backing plate when you weld the new quarter on)
clean the burrs on the metal, remove the paint on the outside of the sleeve, apply weld through primer to the sleeve, about a 1/4 inch or less above the cut line use a hole punch or a drill so you can weld the sleeve in place but don't damage the panel.
the wheel house is straightened out and all welding area's have been coated with weld through primer but before a single weld is made i will test fit the tailight bumper and check the gap and bodylines with the door. the bead of foam was also applied for the brace that runs behind the quarter
everything looked good so in the wheel house of the quarter panel i layed down a thick bead of metal bond and i started welding where i needed.
some duraglass on the welded sections, followed by some minor body work, prime then paint.
use body wax in as many area's you can reach when your done with paint. do not use before paint, do not use before welding , it's flammable. put a good layer in this area especially
hope this helps some of you guys out. i skimmed through a lot like seam sealing, tools and so on but i hope it's some good basic info that ht members can make use of.
Last edited by jasoncrashtech; Nov 23, 2011 at 03:01 PM.
Honda-Tech Member
iTrader: (1)
Joined: Feb 2010
Posts: 1,852
Likes: 1
From: latitude 39.6 longitude 78.9
I had to replace the pass. 1/4 on my integra cause it bought it wrecked for cheap and a friend gave me the 1/4 off an auction car he bought for the swap. After having to drill out the spot welds on both 1/4's I was like damn. It was a lot of work to do it right but worth it in the end I guess. Panel adhesive and seam sealer are your friends for sure.
Great job man.
Great job man.


Trending Topics

Thread Starter
Honda-Tech Member
Joined: Feb 2007
Posts: 1,155
Likes: 0
From: spokane
 .
.
Thread Starter
Honda-Tech Member
Joined: Feb 2007
Posts: 1,155
Likes: 0
From: spokane
but yes on sail panels and rockers you mig weld them in and grind the extra metal off
Honda-Tech Member
Joined: Aug 2005
Posts: 2,182
Likes: 0
From: SD Thief KiLLER, ca, thief killer
what do you think when body shops use braising rod to do the same thing? doesn't this create way too much heat vs the mig? with the mig you can do a tac weld move over an inch let it cool then keep doing it over and over, to keep warping down... also I've noticed that the braising weld wasn't nearly as strong..
Thread Starter
Honda-Tech Member
Joined: Feb 2007
Posts: 1,155
Likes: 0
From: spokane
what do you think when body shops use braising rod to do the same thing? doesn't this create way too much heat vs the mig? with the mig you can do a tac weld move over an inch let it cool then keep doing it over and over, to keep warping down... also I've noticed that the braising weld wasn't nearly as strong..
it doesn't make sense to use the material thought. my opinion is simple and basic, get the panel in the right spot, make good welds, protect against corrosion as much as possible, and put everything back together properly so the customer is confident in there car again.
shops might have a different opinion and business practice then me though.


Honda-Tech Member
Joined: Jun 2012
Posts: 57
Likes: 0
I gather the original post here originally contained photos. Now, no photos. Without them, the value of this discussion is greatly diminished. What happened to the photos? Can they be restored?
Thread Starter
Honda-Tech Member
Joined: Feb 2007
Posts: 1,155
Likes: 0
From: spokane
Honda-Tech Member
Joined: Jun 2012
Posts: 57
Likes: 0
Edit: I found out that the problem with photobucket affected many web surfers, not only those using Opera but those using the Chrome browser and perhaps Firefox. Since first posting this message, the problem has resolved for me. Apparently, photobucket has made a fix; they were getting many complaints on their user forum.
Last edited by dderolph; Feb 13, 2013 at 01:12 PM. Reason: new information

Thread
Thread Starter
Forum
Replies
Last Post
c 2
Acura RSX DC5 & Honda Civic EP3
5
Apr 29, 2007 07:52 AM
msgboardking
Honda Civic / Del Sol (1992 - 2000)
4
Jan 2, 2007 09:11 AM