

diy custom headlights WRITE-UP

Thread Starter
Honda-Tech Member
Joined: Oct 2005
Posts: 1,424
Likes: 1
From: Waukesha, WI, USA
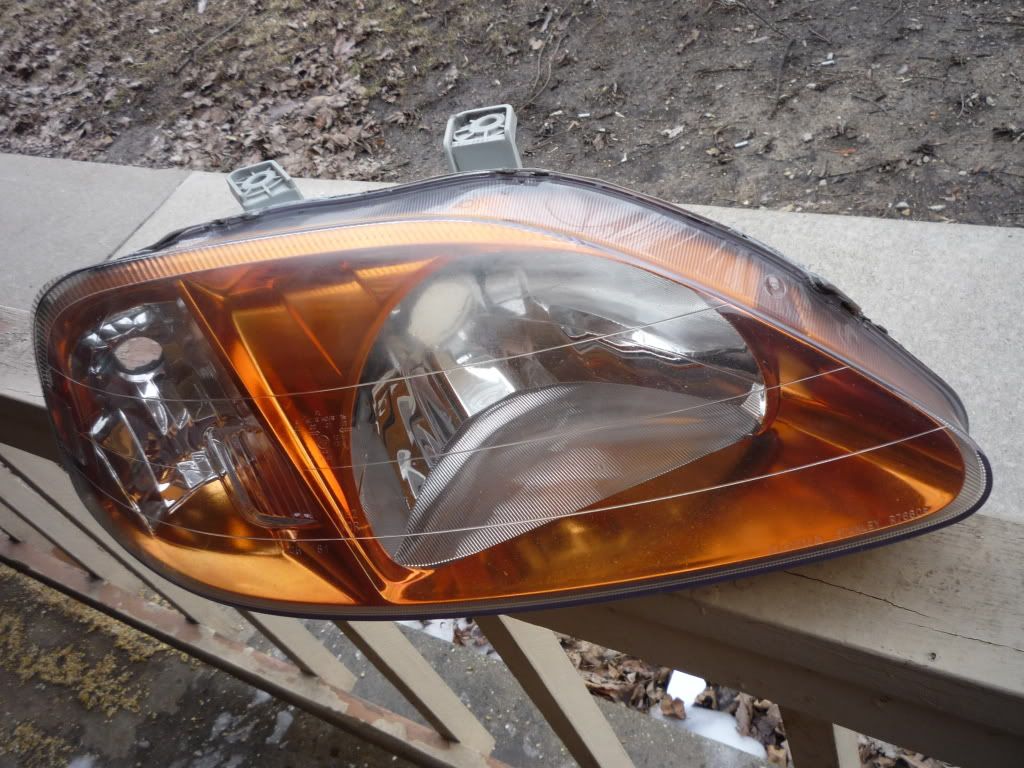
Hey guys! here is a write-up on diy custom headlights. I know honda-tech has tons of already written topics,but I wanted to make mines more specifics and optional. (this write-up is for 96-00 civic, but other vehicle can use this procedure)I know tons of people are always wondering where to get those bronze/gold headlight. Depo and tyc use to make them, but they stop producing them. Here's a quick and easy way to make your own. You can choose any color, gold, blue, yellow, gunmetal etc. If your looking for the anodized look. You can buy it in a spray can @ your local auto store....autozone, advance auto, napa etc. Krylon xmetal or dupli metalcast, I used metalcast because I seen it used more often. ATTENTION!!!!! You must have chrome housing to get the anodized look.You can also take apart the headlight and have a body shop paint them. I choose not to go that far because it is a diy setup.
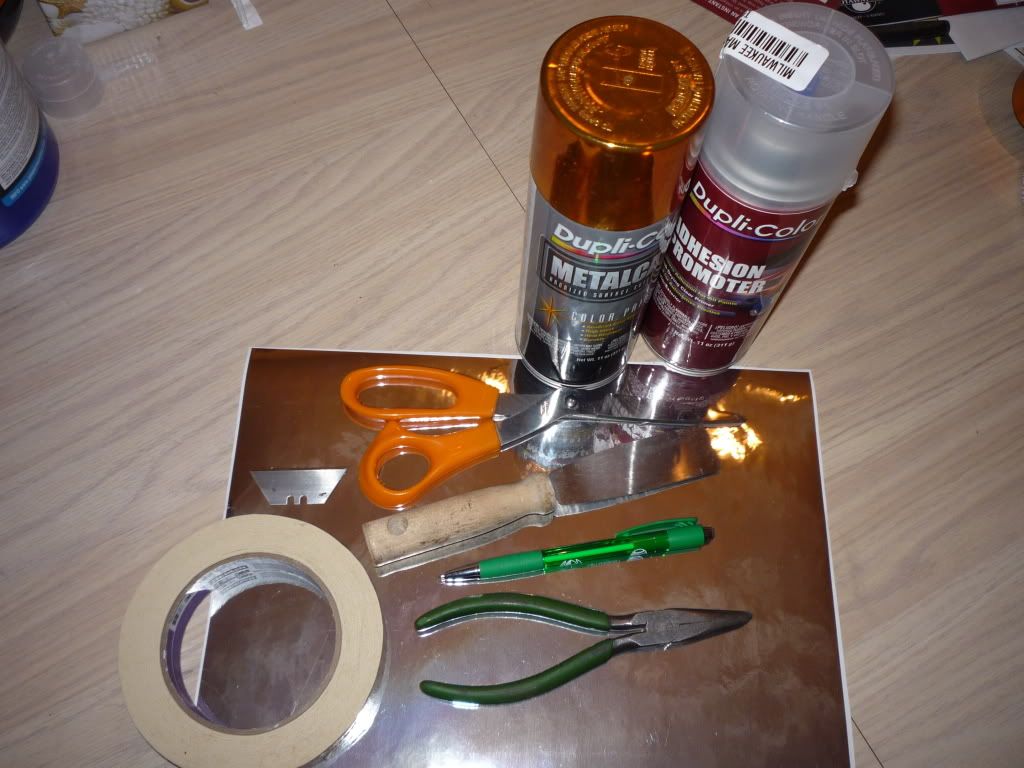
Here is all the tools and material you will need:
.Paint
.primer or adhesion promoter(optional, does help paint from fish eyes and drips)
.paint scraper
.needle nose
.flat-head screw driver
.tape
.scissor
.razor blade
.oven...lol
.baking tray
.chrome vinyl
.micro fiber cloth (soft on the housing, try using anything else and you will scratch it)
.Preheat oven to 325 degrees
.remove all plastic pieces from back of the headlights (the bolts you see on the back of the headlight can stay on)
.Place headlights on tray and pop in oven for approx 2 mins

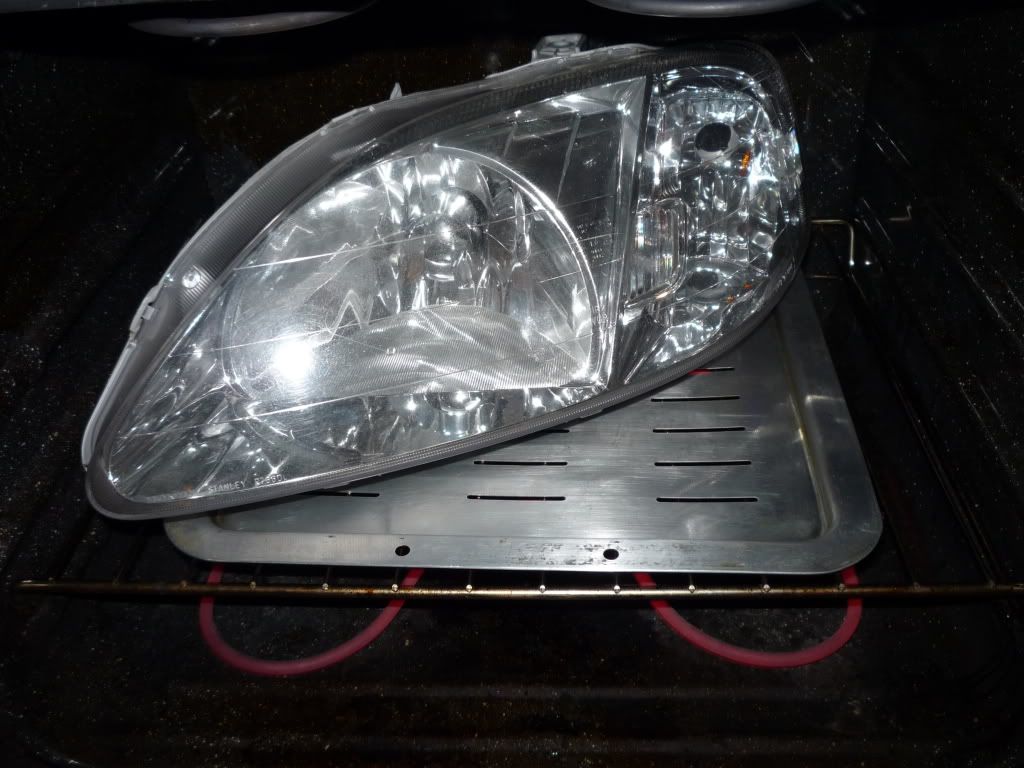
.After 2 mins take the headlight out w/ tray (Do not leave tray in often with it oven on)
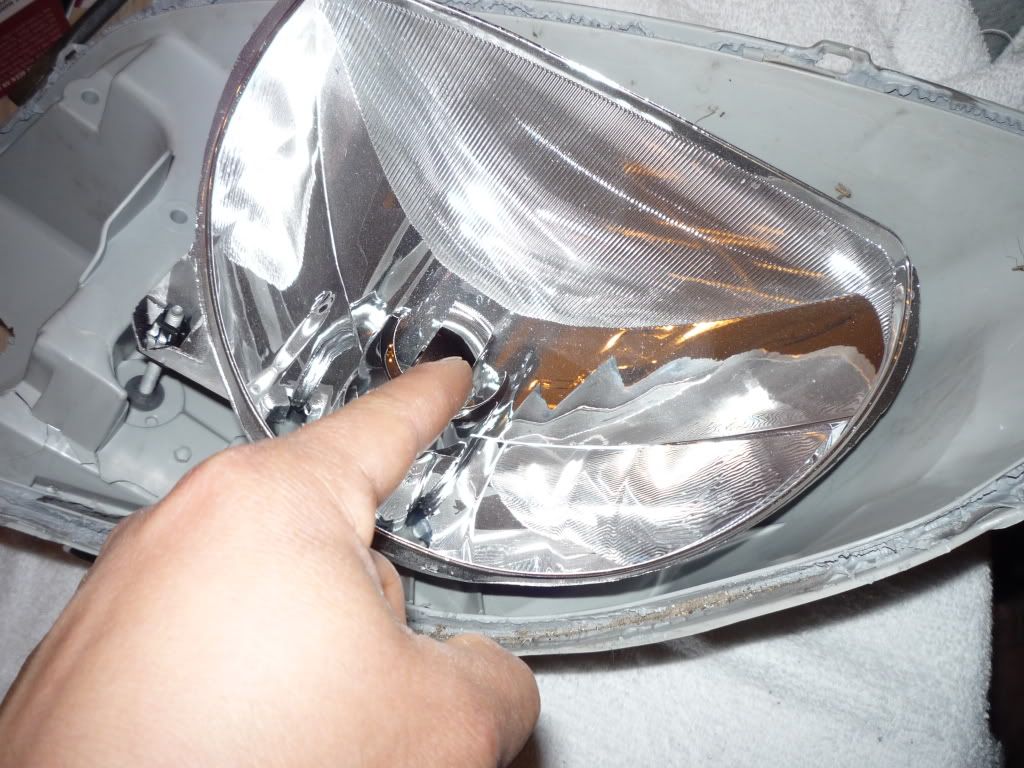
.use flat head to unclip the clip that are all around the headlights
.once that is done used paint scraper to pry headlight open
TIPS: to be honest, this was my first time doing this. When I took the headlight out from oven. I didn't even use none of tools. If you heat up the headlight properly, take rip apart with ease. Start from the corner of the headlight. Use all your muscle, but be careful not to break anything. The faster you split the two, the easier.
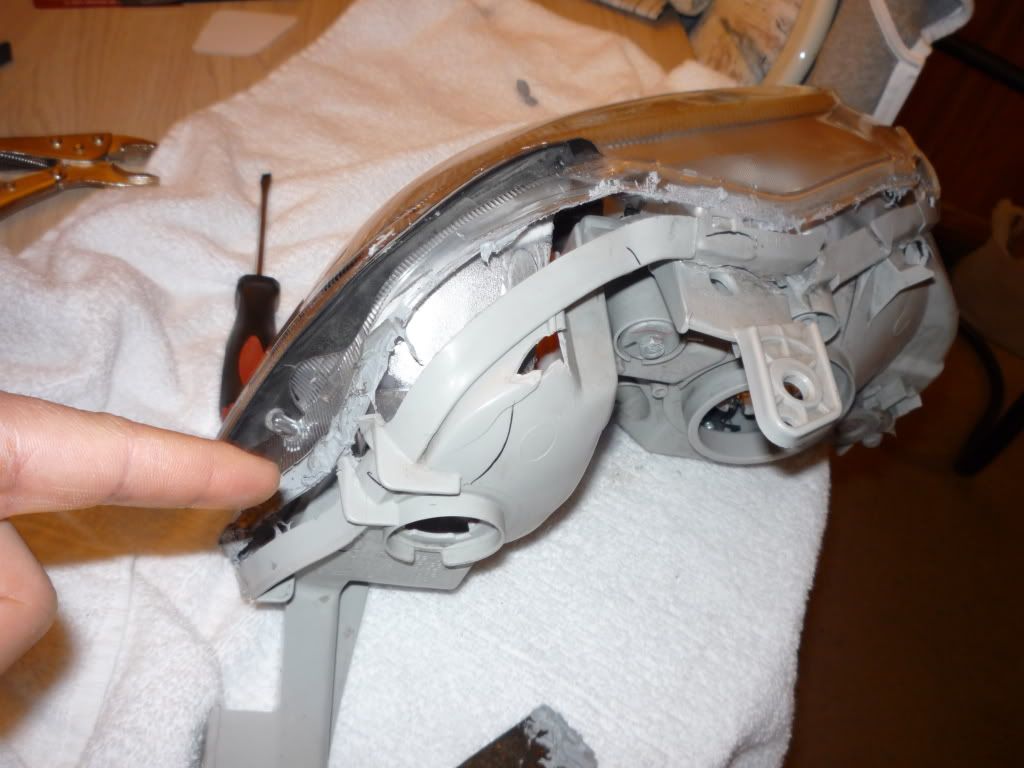
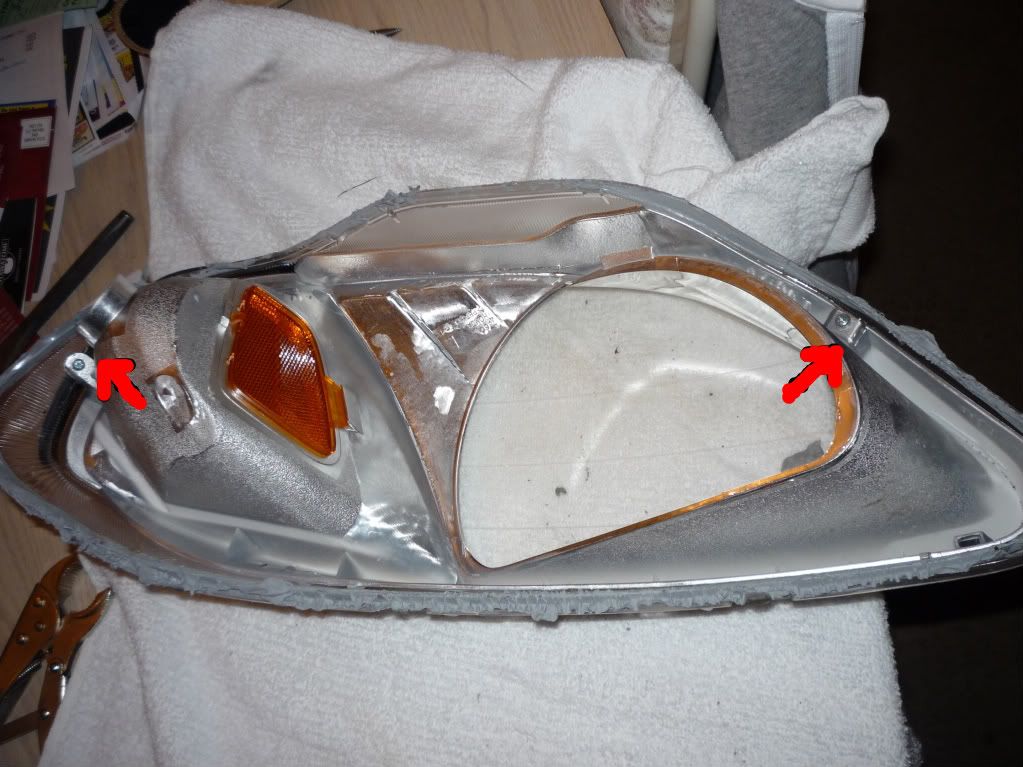
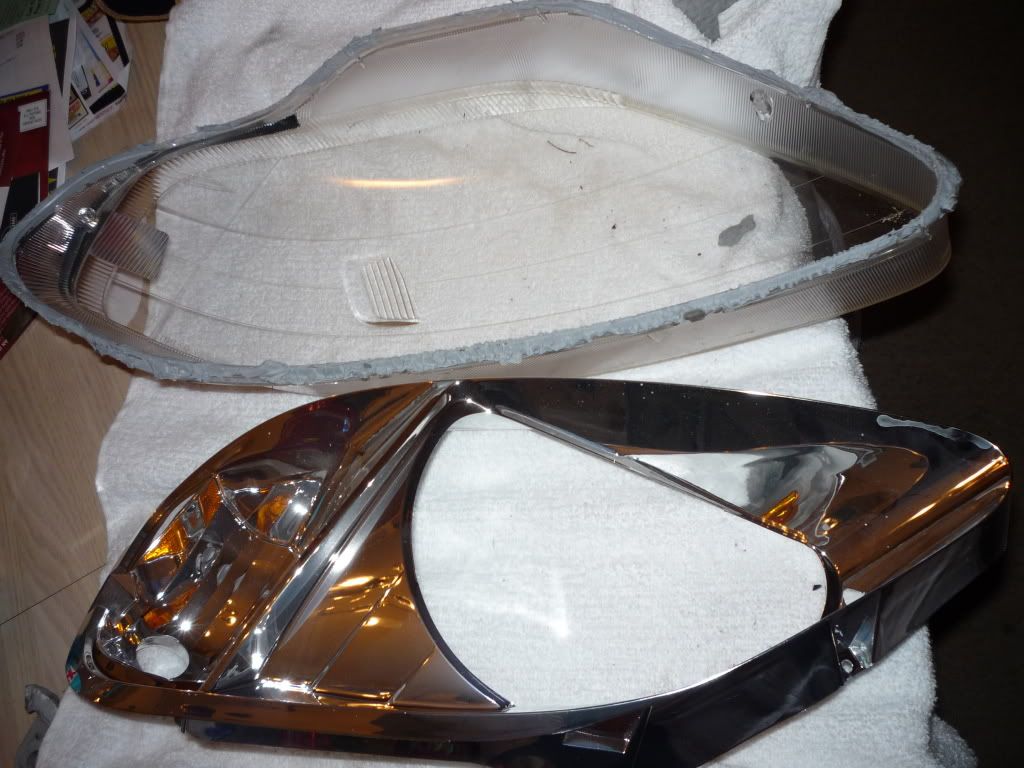
.Once you have the two apart, there are two screws that separate the housing from the headlight cover
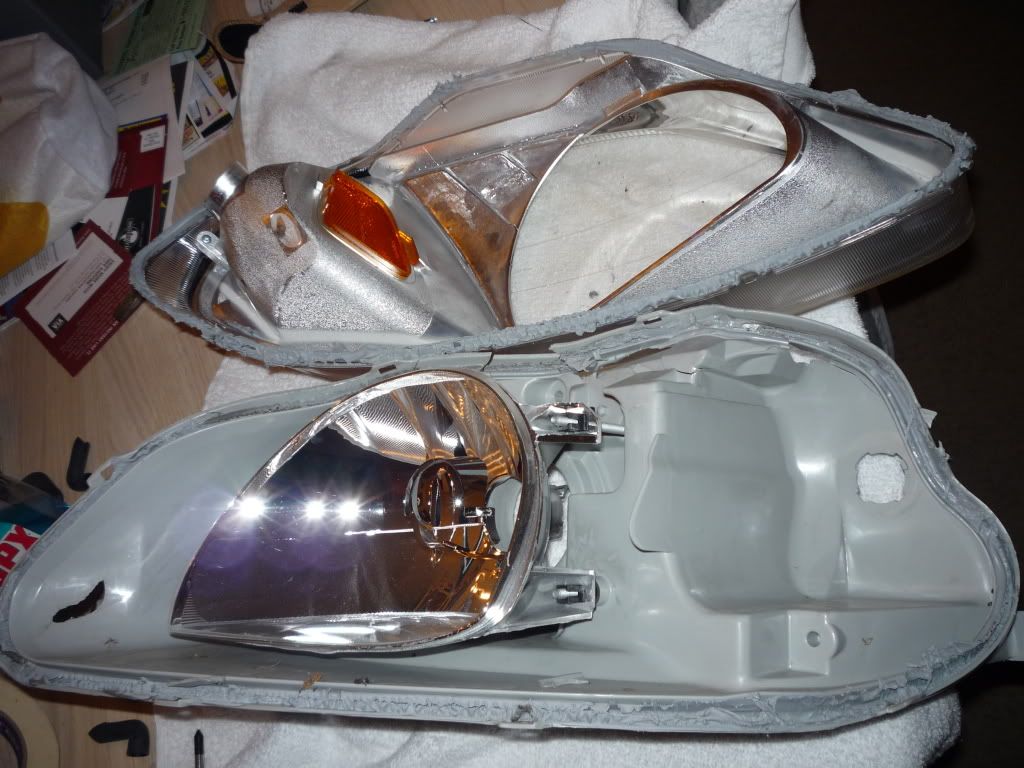
.make sure not to touch the silicone to much, it will give you the oem seal look once back together
.oem ctr headlight come with no headlight reflector and also chrome signal reflector.
.you have the headlight apart why not get rid of the amber crap and reflectors.
.Once everything is apart (headlight reflector, signal reflector etc)
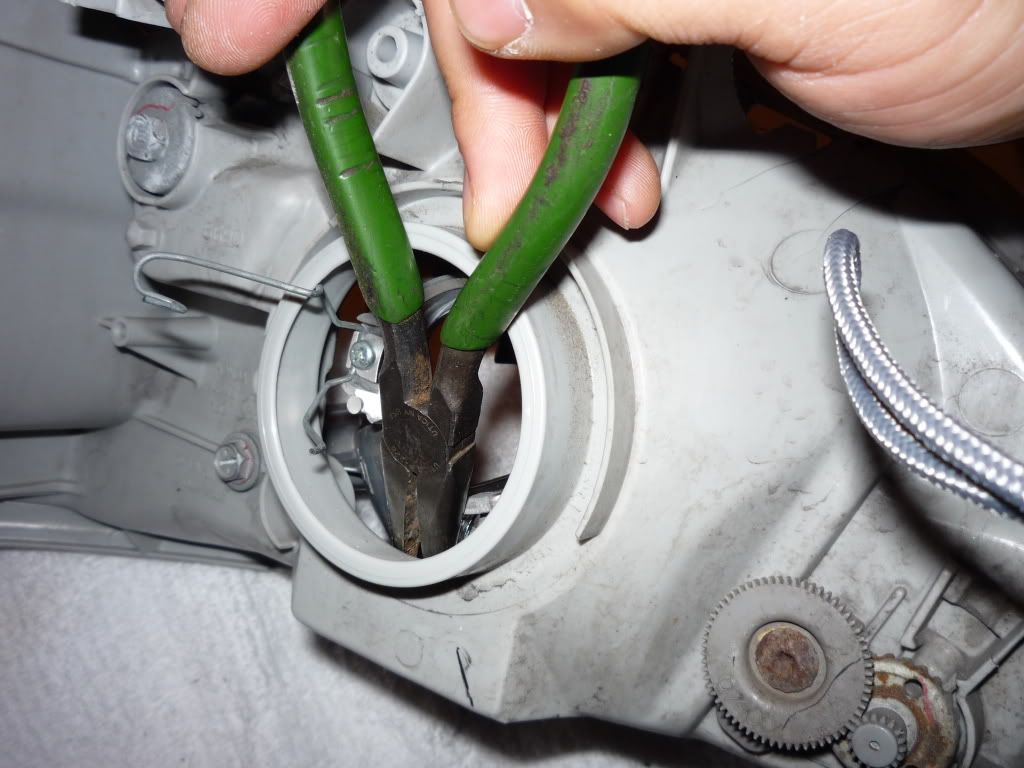
.There is a clip that hold the reflector (its is super fragile, be careful)
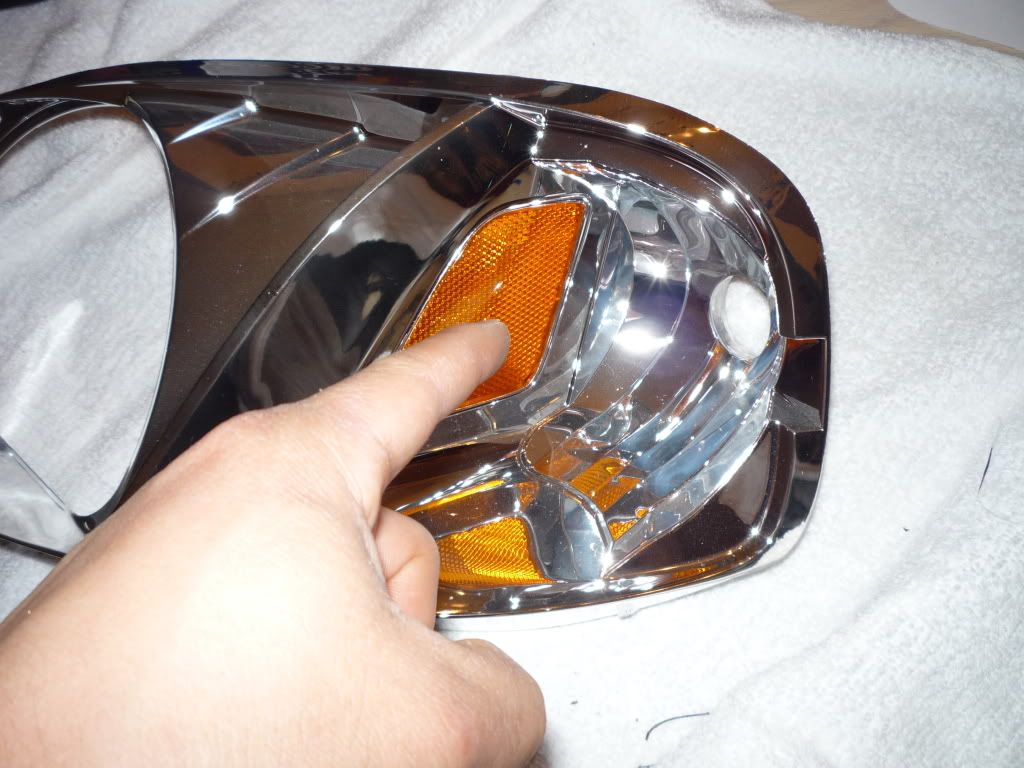
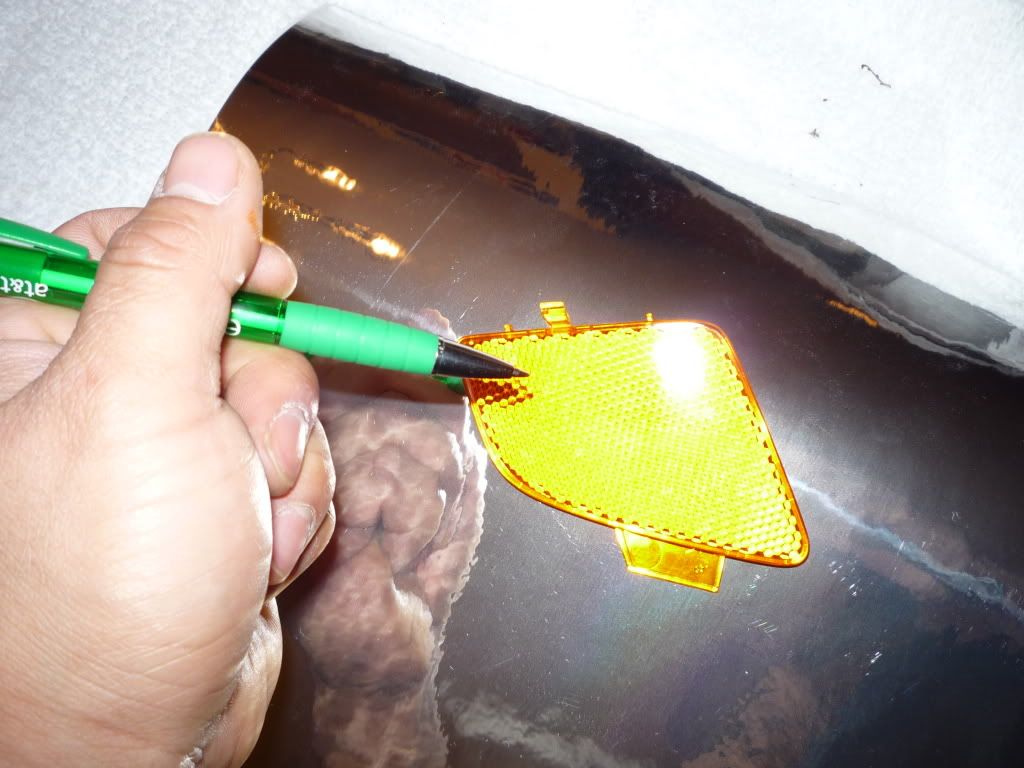
.I used chrome style vinyl to cover the amber reflector
.simply trace, cut, paste...well not paste, but you know what I mean.
(I would recommend buying from ebay...its like 5 bucks shipped. I bought mines from
a local sign shop, got raped. $24.00 for a sheet of vinyl. I could of bought a roll on ebay and started my own shop lol. F**K YOU SIGNS BY TOMORROW on lincoln avenue WI.
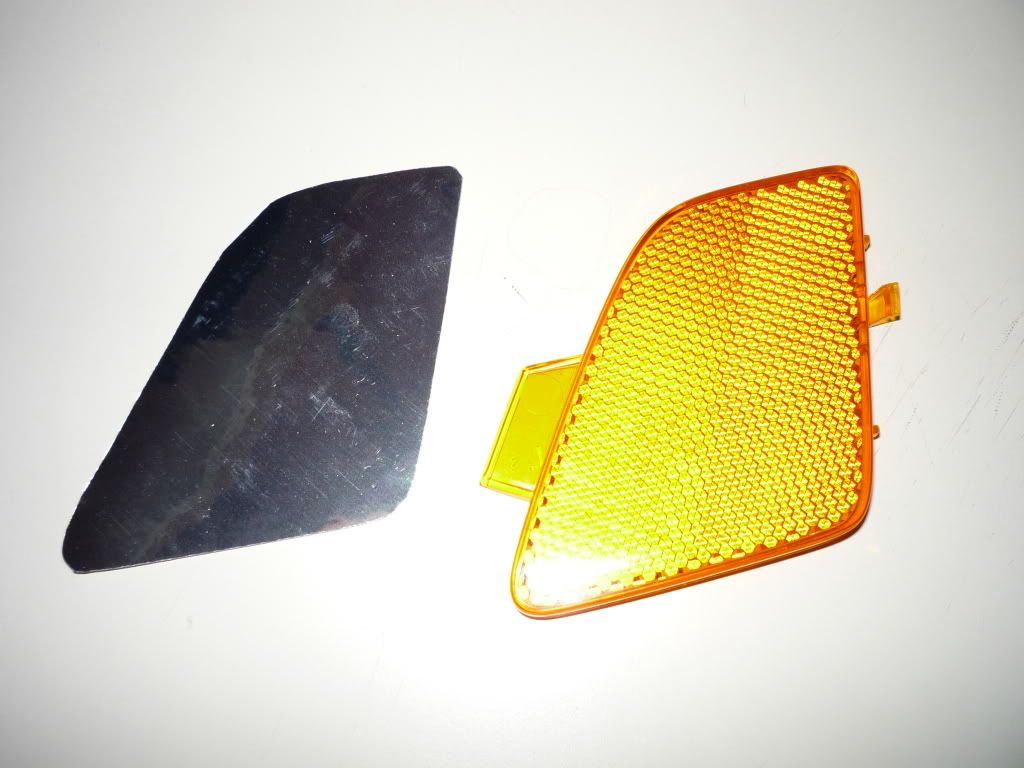
.here is the headlight guard/reflector
I used a needle nose to unscrew the screw side ways. Very time consuming, but very clean
look. (there is a easy way, but you have to drill through the plastic. To make a hole for the the screw driver to access.
.Use the micro fiber cloth to clean the finger prints and dirt off
.spray a light coat of adhesion (not rocket science let adhesion dry before spraying paint)
.If you are spraying in the cold, preheat the oven @ 100-125 degrees and pop housing in oven for faster drying time. You can also do the same procedure before spraying. I live in Wisconsin and it is never warm and no! not everyone has a warm garage. I can always do it in the living room if I want to poison all my pets lol
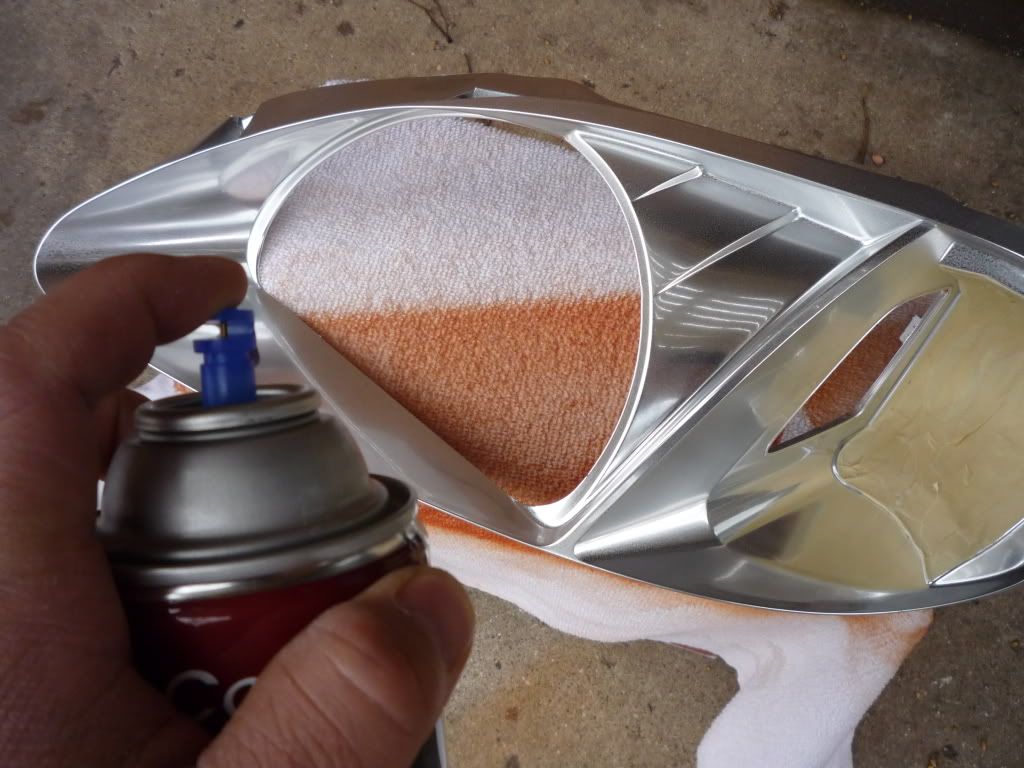
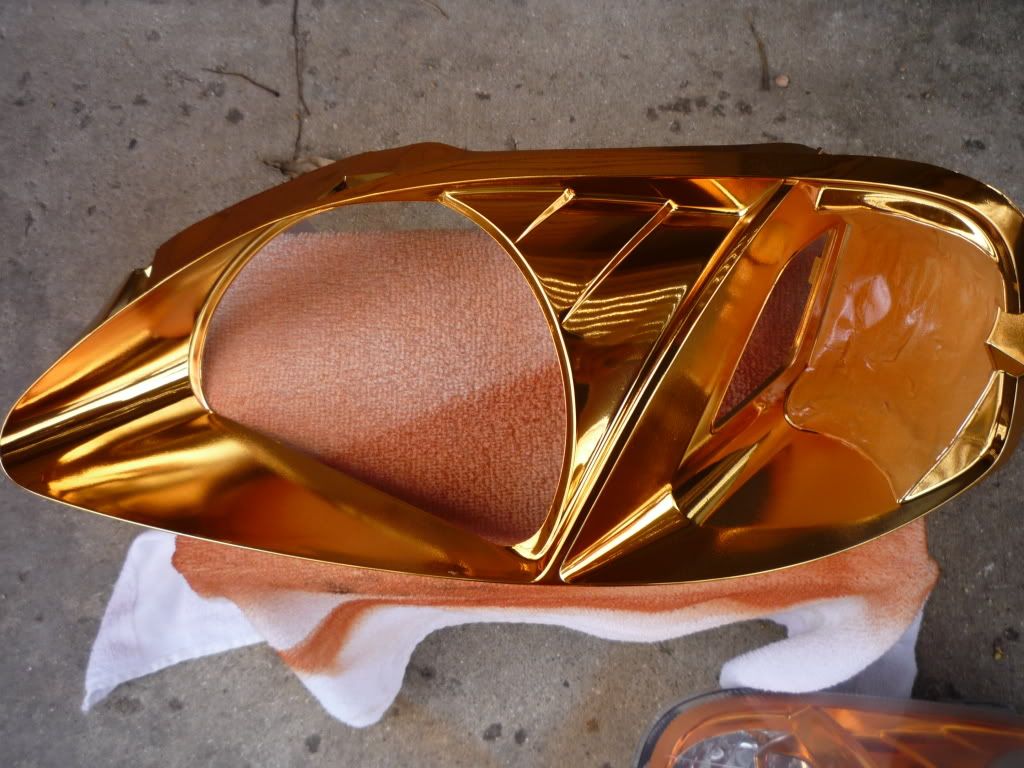
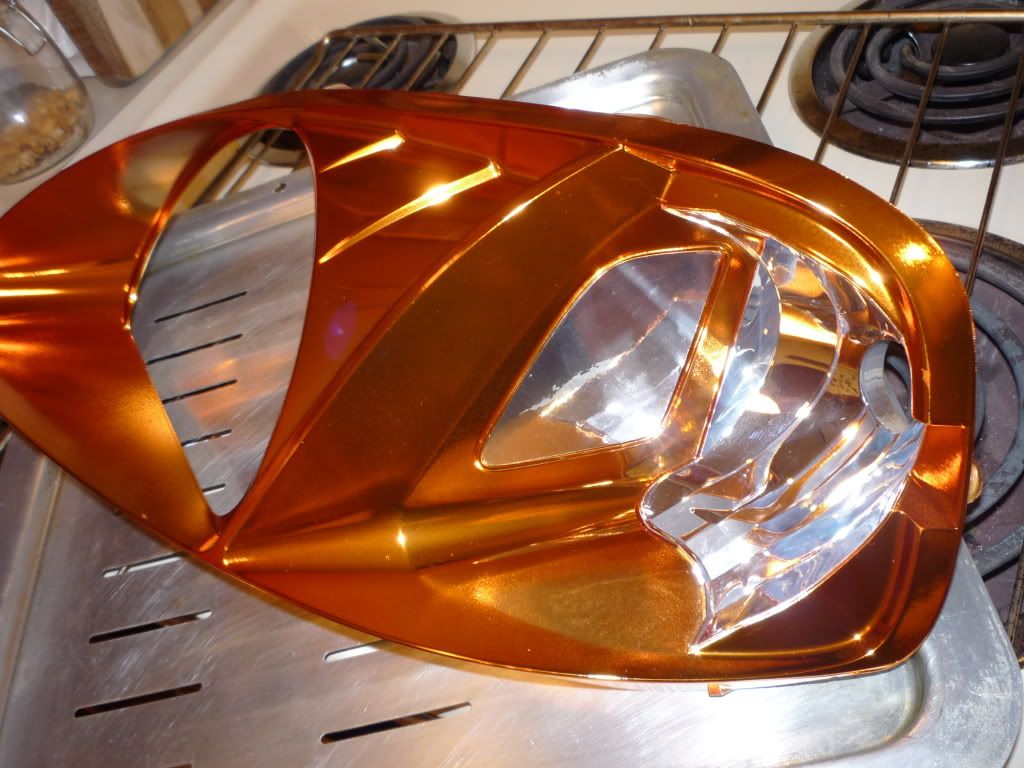
.Back in the oven to bake then another coat will be laid (notice corner of headlights were taped up and left alone. Check out the BLING reflector Just a cleaner look, a lot of people paint the entire housing. I prefer this look, plus you risk grips because its so narrow.
(make sure the headlight is print-free and dirt free before putting them together)
.Once everything is painted, you do the same procedure putting the headlight back together as taking them apart
. a run through preheat oven @ 325
.pop both pieces in oven for approx 2 mins
.When headlight are out of oven immediately put them together
.find a flat surface and press against the headlight to get a good seal (hold them down for 1-2 mins)
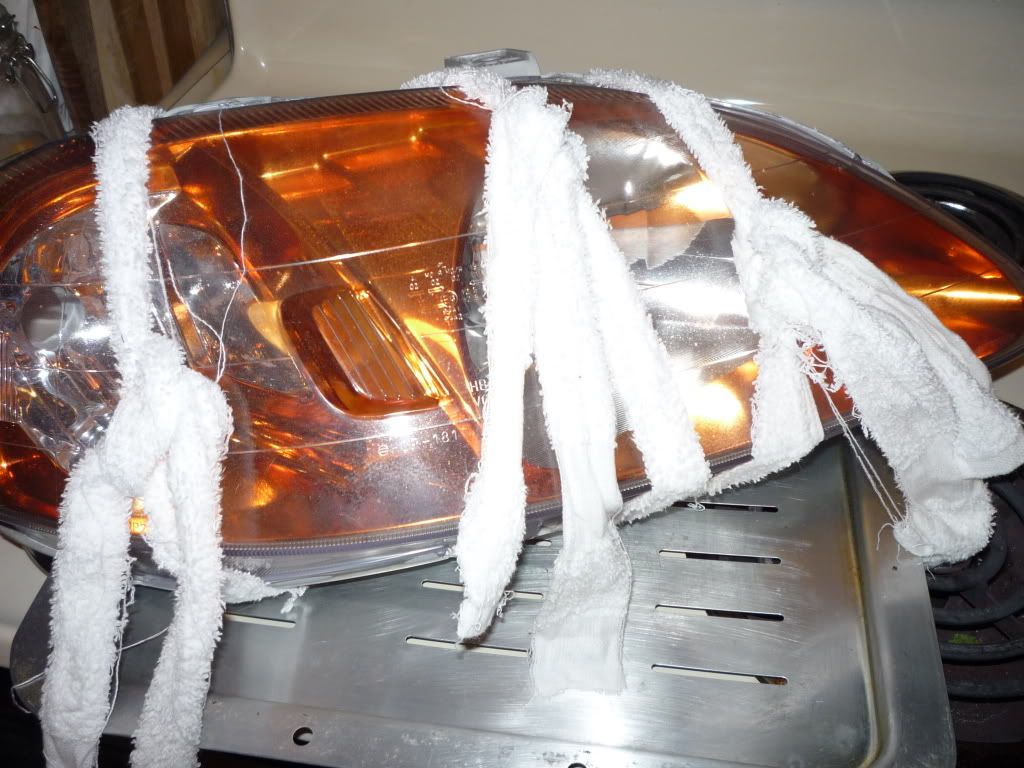
.I used 3 strips of cut towel to hold them together until dry (make sure towel is damp, they tie better)
.resealing the headlights with extra silicone or glue may be done, but if the oem silicone isn't moved to much it should seal up like before.(your choice, do it right the first time)
.after headlight is tied up, find a cold spot to let dry (outside, refrigerator etc.....not the freezer will cause headlight to fog up)
.let dry as long as your little heart desire lol.
.back in oven for silicone to heat up....remember 2 mins only!!!!

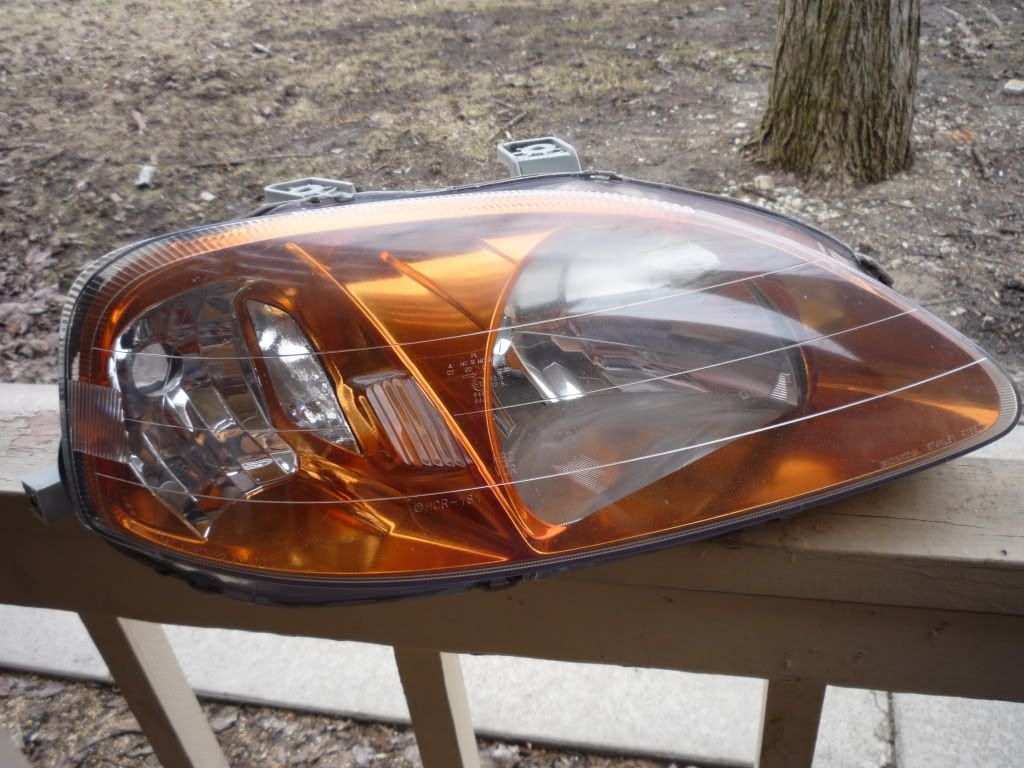
.after holding headlights down together, time them up. Your headlight should look something
like this.
.Ahhh and finally your done!!!!! Sorry guys about the long write-up. I just wanted to be really specific for those who don't do well with diy projects. I use Metalcast COPPER, forgot to mention. Titanium/smoke metalcast is available for that ctr look. The color is way cleaner the first coat. You get a bronze/gold finish. It was my first time doing this so I sprayed a second and it got this dark lol. Take your time and the headlight turn out like crisp. I know my lens need a fresh buffing. Good luck guys....Hopefully I didn't forget anytime else. PM me if you have detail questions. DO NOT BURN YOUR HOUSE DOWN!!!!! I REPEAT DO NOT BURN YOU HOUSE DOWN.
Here is all the tools and material you will need:
.Paint
.primer or adhesion promoter(optional, does help paint from fish eyes and drips)
.paint scraper
.needle nose
.flat-head screw driver
.tape
.scissor
.razor blade
.oven...lol
.baking tray
.chrome vinyl
.micro fiber cloth (soft on the housing, try using anything else and you will scratch it)
.Preheat oven to 325 degrees
.remove all plastic pieces from back of the headlights (the bolts you see on the back of the headlight can stay on)
.Place headlights on tray and pop in oven for approx 2 mins
.After 2 mins take the headlight out w/ tray (Do not leave tray in often with it oven on)
.use flat head to unclip the clip that are all around the headlights
.once that is done used paint scraper to pry headlight open
TIPS: to be honest, this was my first time doing this. When I took the headlight out from oven. I didn't even use none of tools. If you heat up the headlight properly, take rip apart with ease. Start from the corner of the headlight. Use all your muscle, but be careful not to break anything. The faster you split the two, the easier.
.Once you have the two apart, there are two screws that separate the housing from the headlight cover
.make sure not to touch the silicone to much, it will give you the oem seal look once back together
.oem ctr headlight come with no headlight reflector and also chrome signal reflector.
.you have the headlight apart why not get rid of the amber crap and reflectors.
.Once everything is apart (headlight reflector, signal reflector etc)
.There is a clip that hold the reflector (its is super fragile, be careful)
.I used chrome style vinyl to cover the amber reflector
.simply trace, cut, paste...well not paste, but you know what I mean.
(I would recommend buying from ebay...its like 5 bucks shipped. I bought mines from
a local sign shop, got raped. $24.00 for a sheet of vinyl. I could of bought a roll on ebay and started my own shop lol. F**K YOU SIGNS BY TOMORROW on lincoln avenue WI.
.here is the headlight guard/reflector
I used a needle nose to unscrew the screw side ways. Very time consuming, but very clean
look. (there is a easy way, but you have to drill through the plastic. To make a hole for the the screw driver to access.
.Use the micro fiber cloth to clean the finger prints and dirt off
.spray a light coat of adhesion (not rocket science let adhesion dry before spraying paint)
.If you are spraying in the cold, preheat the oven @ 100-125 degrees and pop housing in oven for faster drying time. You can also do the same procedure before spraying. I live in Wisconsin and it is never warm and no! not everyone has a warm garage. I can always do it in the living room if I want to poison all my pets lol
.Back in the oven to bake then another coat will be laid (notice corner of headlights were taped up and left alone. Check out the BLING reflector Just a cleaner look, a lot of people paint the entire housing. I prefer this look, plus you risk grips because its so narrow.
(make sure the headlight is print-free and dirt free before putting them together)
.Once everything is painted, you do the same procedure putting the headlight back together as taking them apart
. a run through preheat oven @ 325
.pop both pieces in oven for approx 2 mins
.When headlight are out of oven immediately put them together
.find a flat surface and press against the headlight to get a good seal (hold them down for 1-2 mins)
.I used 3 strips of cut towel to hold them together until dry (make sure towel is damp, they tie better)
.resealing the headlights with extra silicone or glue may be done, but if the oem silicone isn't moved to much it should seal up like before.(your choice, do it right the first time)
.after headlight is tied up, find a cold spot to let dry (outside, refrigerator etc.....not the freezer will cause headlight to fog up)
.let dry as long as your little heart desire lol.
.back in oven for silicone to heat up....remember 2 mins only!!!!
.after holding headlights down together, time them up. Your headlight should look something
like this.
.Ahhh and finally your done!!!!! Sorry guys about the long write-up. I just wanted to be really specific for those who don't do well with diy projects. I use Metalcast COPPER, forgot to mention. Titanium/smoke metalcast is available for that ctr look. The color is way cleaner the first coat. You get a bronze/gold finish. It was my first time doing this so I sprayed a second and it got this dark lol. Take your time and the headlight turn out like crisp. I know my lens need a fresh buffing. Good luck guys....Hopefully I didn't forget anytime else. PM me if you have detail questions. DO NOT BURN YOUR HOUSE DOWN!!!!! I REPEAT DO NOT BURN YOU HOUSE DOWN.
Thread Starter
Honda-Tech Member
Joined: Oct 2005
Posts: 1,424
Likes: 1
From: Waukesha, WI, USA
The adhesion promoter is pretty much a clear primer. Ideal for plastic, fiberglass, auto trim and bumpers. Dupli Metalcast came out with a primer and clear just for the metalcast line up. Our city is crap, and same goes for our auto parts stores. I searched every where no parts store had it. I used to work in a body shop so I knew the promoter would work. You can just spray the headlight with just the paint and that would work. I didn't want to risk chipping or dripping so I went the primer route.
Thread Starter
Honda-Tech Member
Joined: Oct 2005
Posts: 1,424
Likes: 1
From: Waukesha, WI, USA
Trending Topics
Good stuff! You might want to add that you should preheat the oven and then TURN IT OFF before putting the housing in. Otherwise they will probably melt.

Thread
Thread Starter
Forum
Replies
Last Post