
bakertime's DC4 paint/body thread. Vogue Silver>>Jade Green
 07-23-2009, 07:52 PM
#1
Honda-Tech Member
Thread Starter
iTrader: (1)
Join Date: Jan 2007
Location: Doylestown, PA
Posts: 1,122
Likes: 0
Received 0 Likes
on
0 Posts
So here goes my first attempt at any body or paint work ever. I've spent over a year reading and researching, and think that I've collected the tools and most of the know-how to finally tackle this project. I'll try to keep this thread updated with the progress and the ups and downs so that others can learn from my mistakes! A huge thanks to everyone that has made build/paint threads so that I can learn along the way!
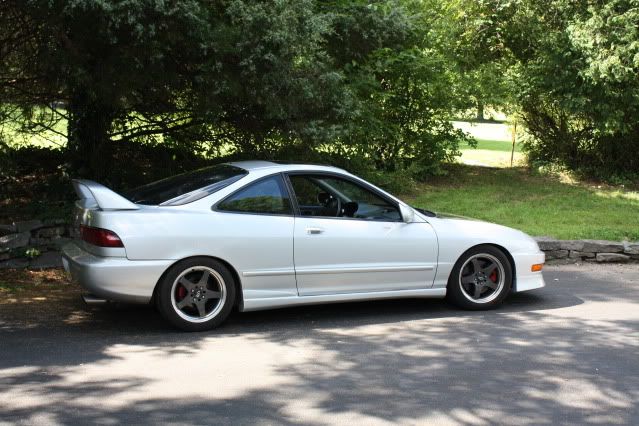
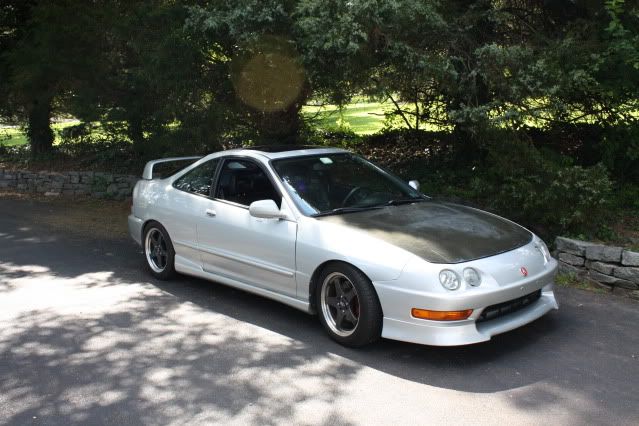
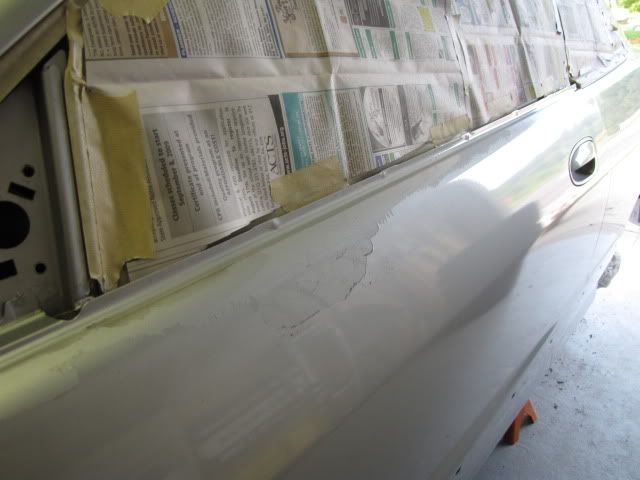
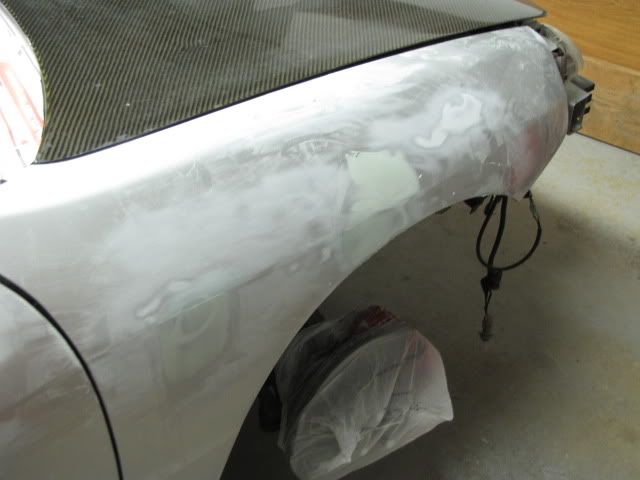
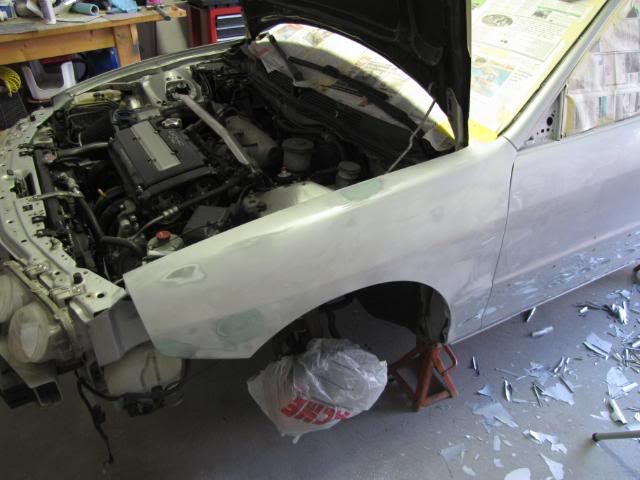
The car is Vogue Silver Metallic stock, and has a lot of issues from repaints and poor prep work when the car was owned by previous owners. I'll be doing the outside and jambs (No bay, silver looks fine) in Jade Green Metallic (from 05-06 Acura RSX), and putting on a brand new Seibon CF Hood. I've got 2-3 weeks planned so that I can do this project slowly and take the time to do everything to the best of my ability!
To cover some of the questions that always get asked:
Compressor: Harbor Freight/ Central Pneumatic 21 gallon, 3hp. (Not optimal, but it keeps up with my gun just barely)
Spray Guns:
Base/Clear: Astro Pneumatic Evo 4014, 1.4mm tip
Primer: Astro Pneumatic Evo 4018, 1.8mm tip
Misc:
Paint: PPG Shopline
Fillers: Evercoat Rage, Evercoat Metal Glaze
So here's the car and some of the imperfections I'm out to fix along with minor dents and dings all over:
What the heck is this tan stuff under the paint?! Is this the coating from the factory?
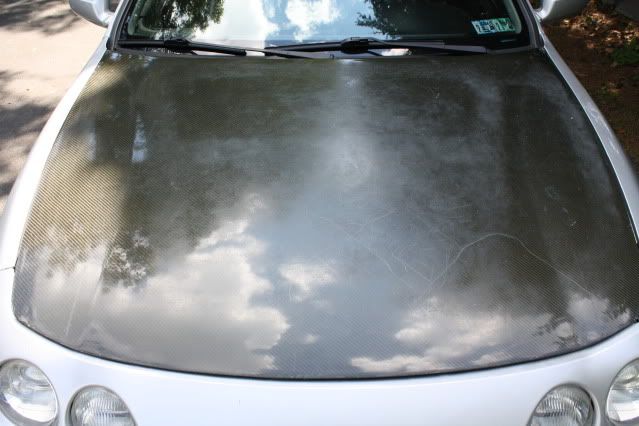
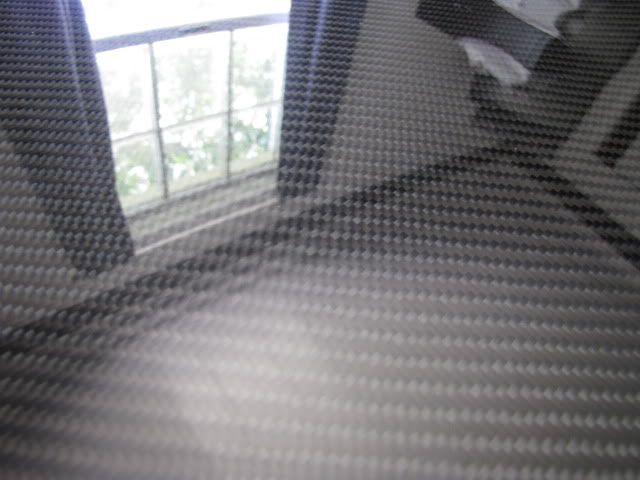
Hardcore CF Neglect...not just fading but cracks on the top and bottom.

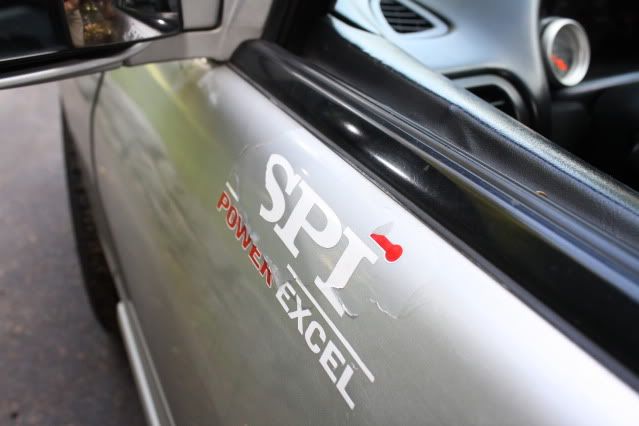
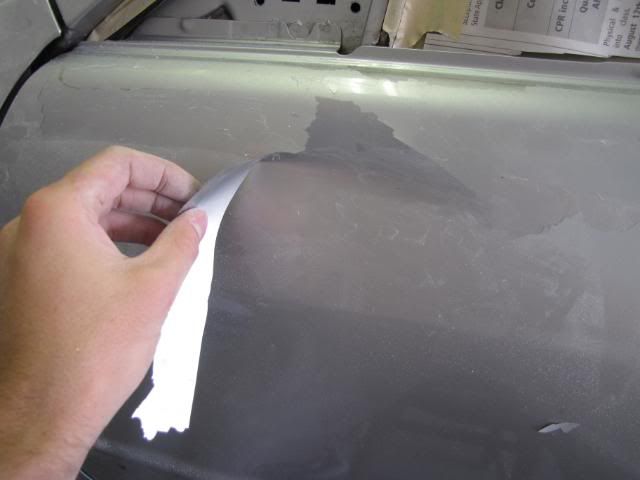
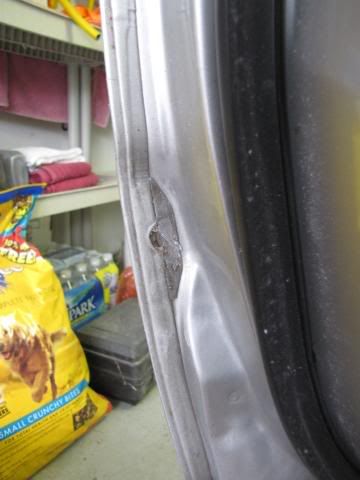
Ricey stickers that I've been afraid to peel off due to a peeling paintjob that was sprayed over un-scuffed paint on the driver's door. Maaco? Probably.
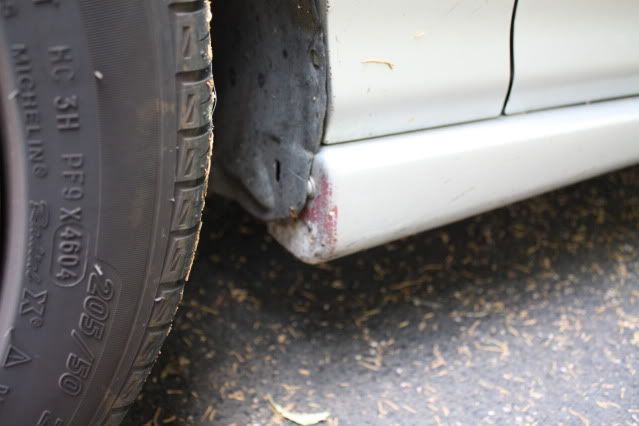
Poor prep on the sideskirts...doesn't even look like there was primer before the silver was sprayed.
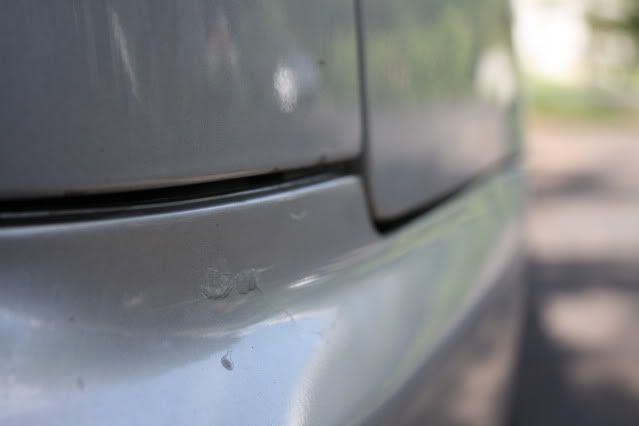
Peeling paint on the rear bumper
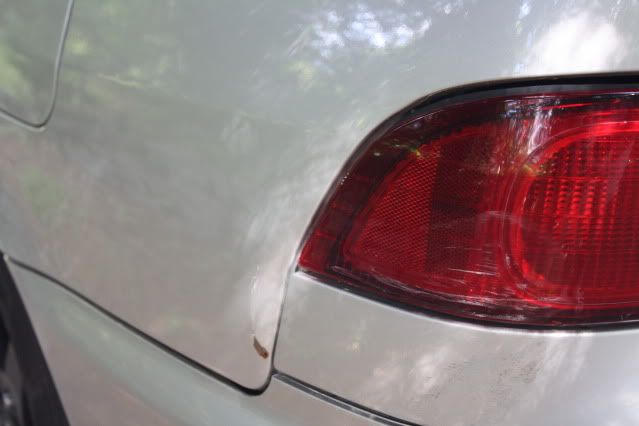
Driveway fender bender...hope I can fix this one.
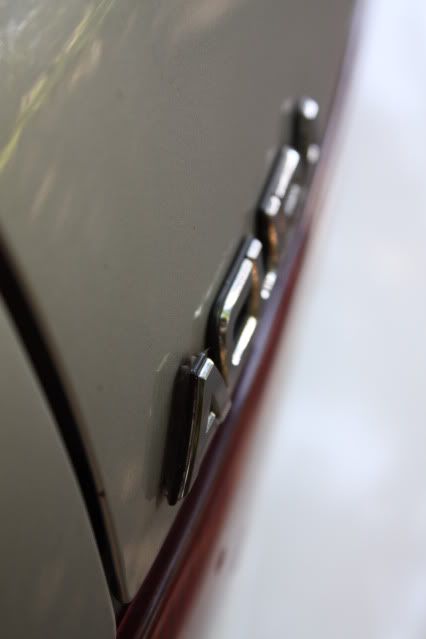
Epoxied on "A"
And so it begins!
The car is Vogue Silver Metallic stock, and has a lot of issues from repaints and poor prep work when the car was owned by previous owners. I'll be doing the outside and jambs (No bay, silver looks fine) in Jade Green Metallic (from 05-06 Acura RSX), and putting on a brand new Seibon CF Hood. I've got 2-3 weeks planned so that I can do this project slowly and take the time to do everything to the best of my ability!
To cover some of the questions that always get asked:
Compressor: Harbor Freight/ Central Pneumatic 21 gallon, 3hp. (Not optimal, but it keeps up with my gun just barely)
Spray Guns:
Base/Clear: Astro Pneumatic Evo 4014, 1.4mm tip
Primer: Astro Pneumatic Evo 4018, 1.8mm tip
Misc:
Paint: PPG Shopline
Fillers: Evercoat Rage, Evercoat Metal Glaze
So here's the car and some of the imperfections I'm out to fix along with minor dents and dings all over:
What the heck is this tan stuff under the paint?! Is this the coating from the factory?
Hardcore CF Neglect...not just fading but cracks on the top and bottom.
Ricey stickers that I've been afraid to peel off due to a peeling paintjob that was sprayed over un-scuffed paint on the driver's door. Maaco? Probably.
Poor prep on the sideskirts...doesn't even look like there was primer before the silver was sprayed.
Peeling paint on the rear bumper
Driveway fender bender...hope I can fix this one.
Epoxied on "A"
And so it begins!
Last edited by bakertime; 09-29-2009 at 06:06 PM.
 07-23-2009, 08:10 PM
#2
Honda-Tech Member
Thread Starter
iTrader: (1)
Join Date: Jan 2007
Location: Doylestown, PA
Posts: 1,122
Likes: 0
Received 0 Likes
on
0 Posts
New CF:
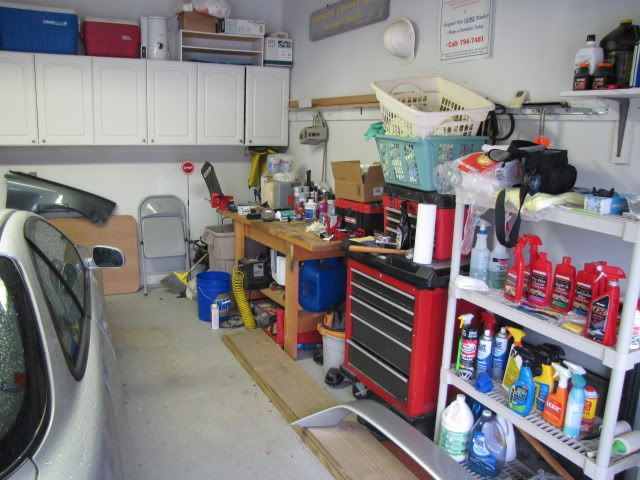
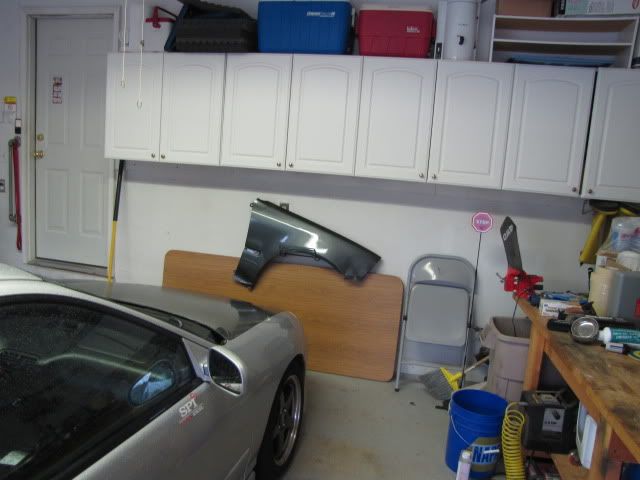
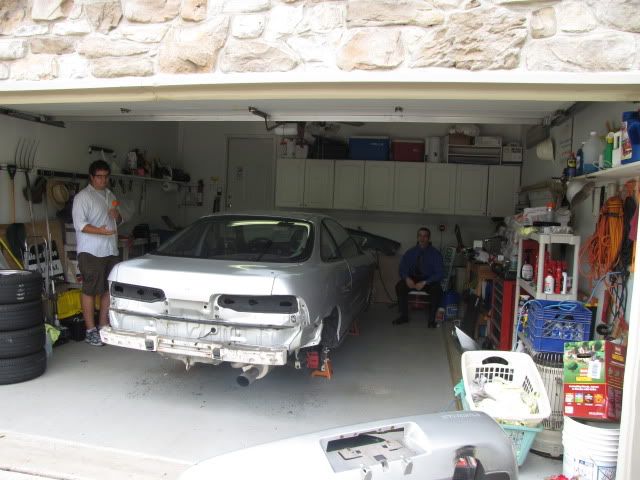
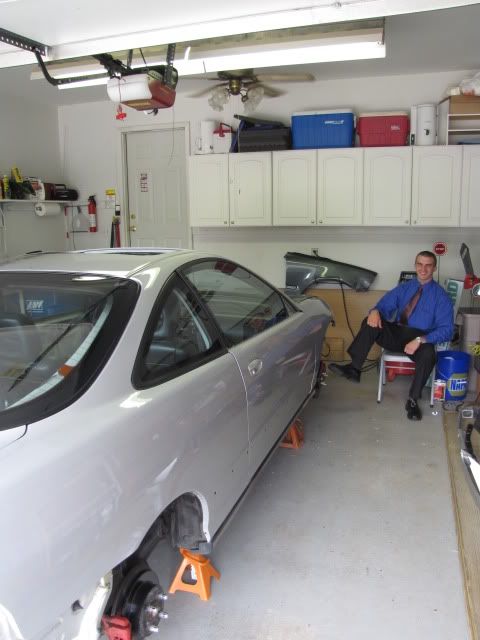
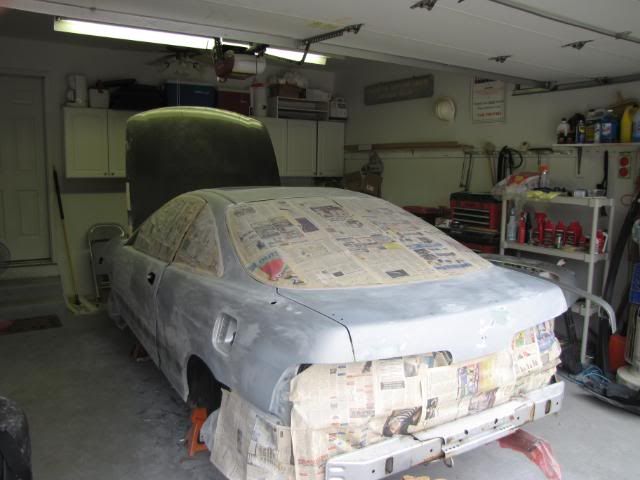
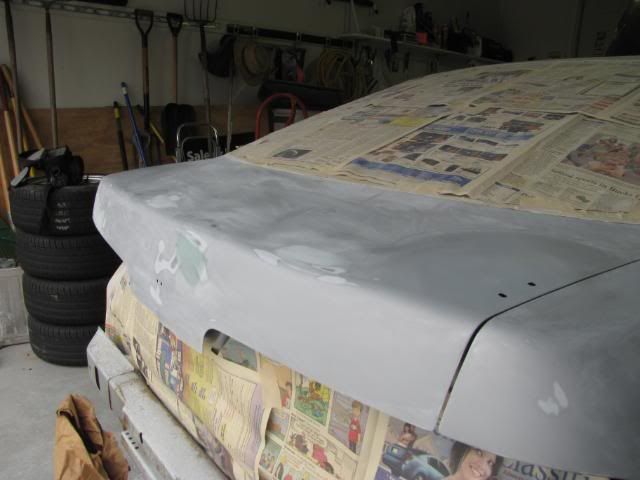
Before starting, and the workspace:

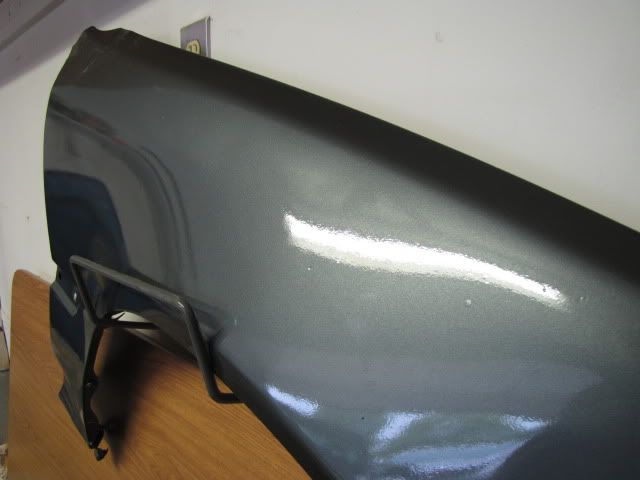
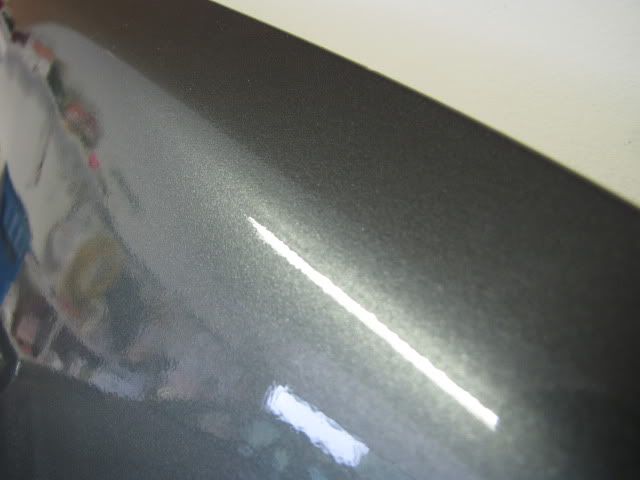
Eyes on the prize:
Lots of orange peel from aerosol clear coat
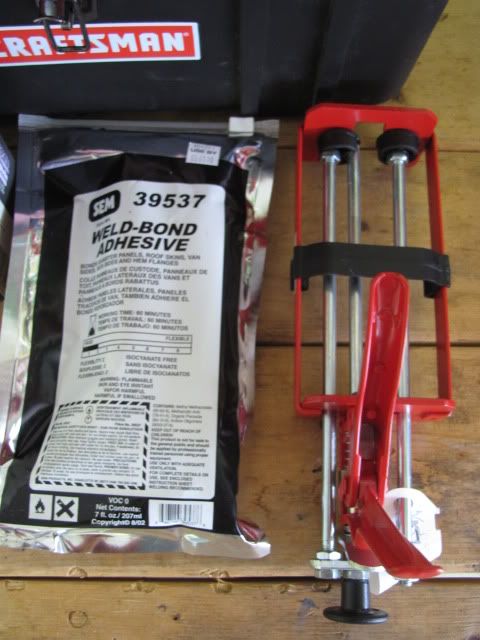
For filling molding holes:
My compressor:

Disassembly has taken 2 and a half days before finally getting to body filler...I went all out on taking things apart to avoid as many tape lines as I can.
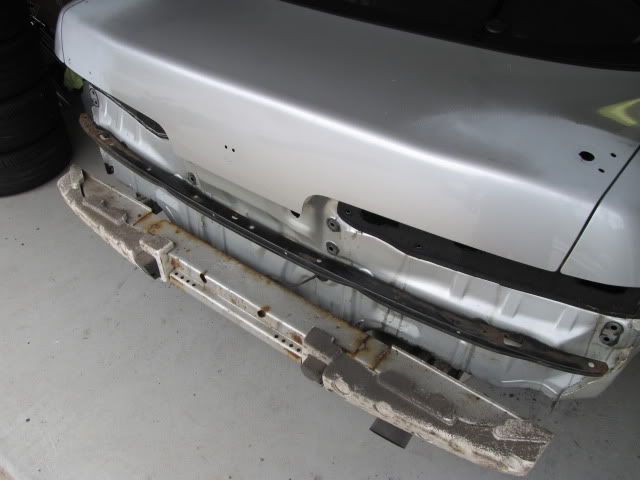
Rusty bumper, but not too bad for 13 years in PA. Don't mind the primer on the spoiler holes...that was a welding attempt.
My friends come dressed to work:
Masking tape peeled off some more paint...awesome. Can't wait to sand this and see what's underneath.
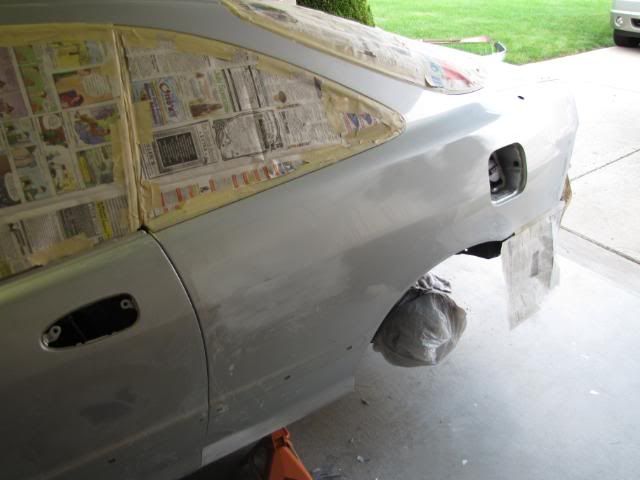
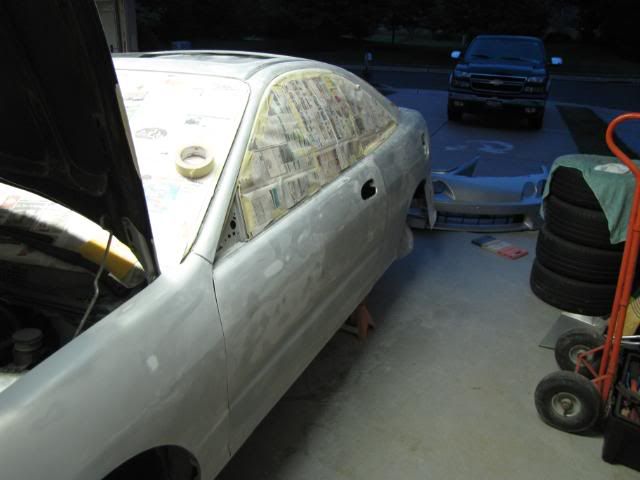
Masked to protect the glass while sanding...and to practice getting the tape where I want it. probably the first of 3 or 4 tapings.
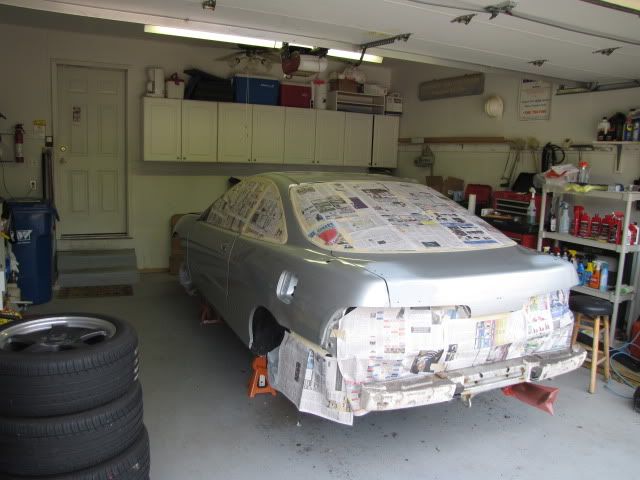
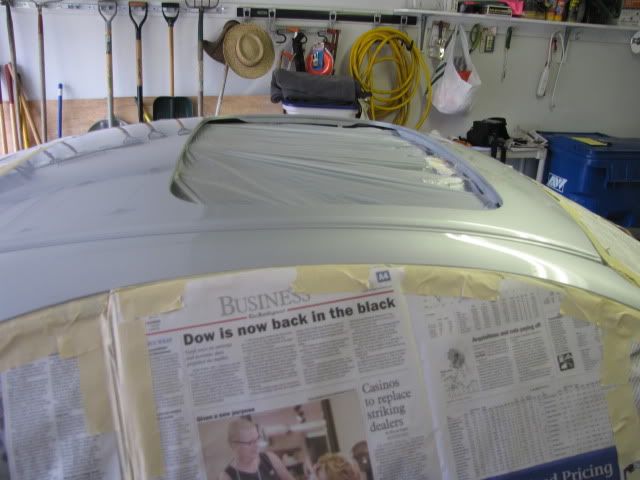
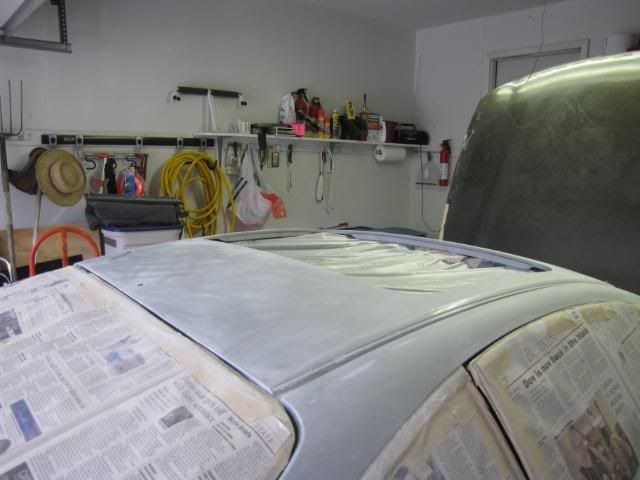
Sunroof is out and plastic installed to keep the dust out.
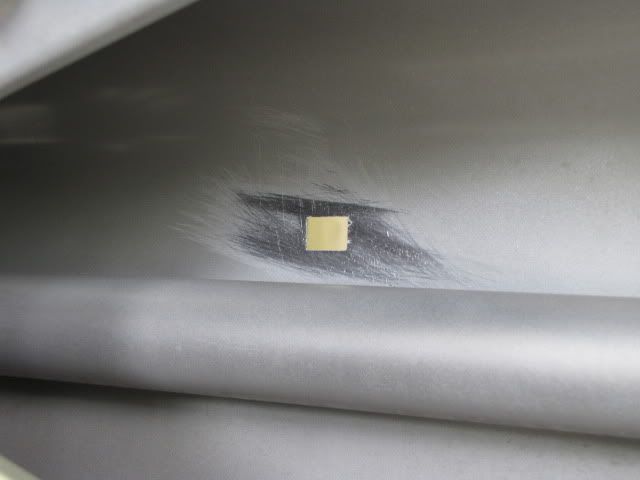
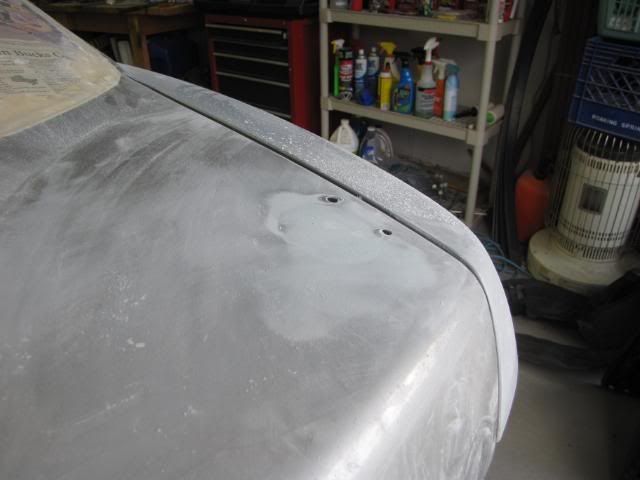
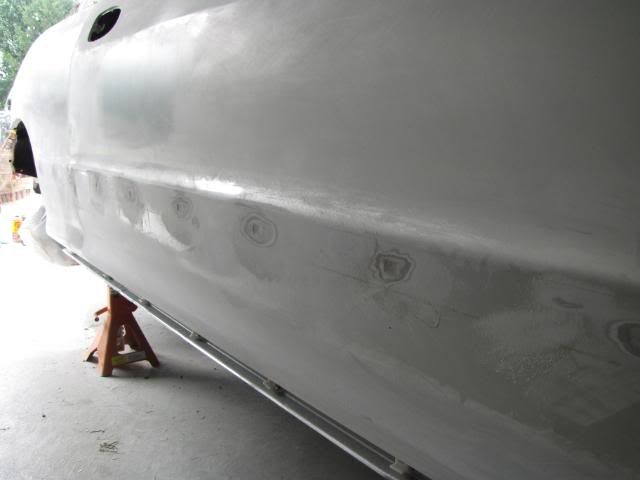
Started marking dents (circles) and waves in the paint (squiggles):

Scuffed the back of the door molding holes. I'm using SEM Weld-Bond and squares of sheet metal to patch these up.
Finally some progress...the dents on the body line are giving me a challenge, but I'm getting better
Calling it a night after putting another coat on the passenger side. End of day 3.
3 days later, I wish I had a little more done, but no major hiccups have come up yet, so I'll take it. Updates soon!
Before starting, and the workspace:
Eyes on the prize:
Lots of orange peel from aerosol clear coat
For filling molding holes:
My compressor:
Disassembly has taken 2 and a half days before finally getting to body filler...I went all out on taking things apart to avoid as many tape lines as I can.
Rusty bumper, but not too bad for 13 years in PA. Don't mind the primer on the spoiler holes...that was a welding attempt.
My friends come dressed to work:
Masking tape peeled off some more paint...awesome. Can't wait to sand this and see what's underneath.
Masked to protect the glass while sanding...and to practice getting the tape where I want it. probably the first of 3 or 4 tapings.
Sunroof is out and plastic installed to keep the dust out.
Started marking dents (circles) and waves in the paint (squiggles):
Scuffed the back of the door molding holes. I'm using SEM Weld-Bond and squares of sheet metal to patch these up.
Finally some progress...the dents on the body line are giving me a challenge, but I'm getting better
Calling it a night after putting another coat on the passenger side. End of day 3.
3 days later, I wish I had a little more done, but no major hiccups have come up yet, so I'll take it. Updates soon!
Last edited by bakertime; 07-23-2009 at 08:29 PM.
 07-23-2009, 09:01 PM
#4
Honda-Tech Member
iTrader: (1)
Join Date: Feb 2008
Posts: 1,466
Likes: 0
Received 0 Likes
on
0 Posts
PDR would've saved a lot of material which = money
but of course it requires skill and the right tools... but keep up the good work
but of course it requires skill and the right tools... but keep up the good work
07-24-2009, 04:49 AM
#5
Honda-Tech Member
Thread Starter
iTrader: (1)
Join Date: Jan 2007
Location: Doylestown, PA
Posts: 1,122
Likes: 0
Received 0 Likes
on
0 Posts
Thanks guys! Paintless would have worked for the small dents, but when you look at how many pieces needed a repaint, it was worth it: Front bumper, Lip, Side skirts, Mirrors, Driver Door, Rear Bumper, Rear Driver QP. That and I'm picky  , and tired of showing people my car and having the first thing they see the dents and a faded CF hood.
, and tired of showing people my car and having the first thing they see the dents and a faded CF hood.
07-24-2009, 09:46 AM
#7
Honda-Tech Member
Join Date: Jun 2003
Location: JACKSONVILLE, FL, USA
Posts: 497
Likes: 0
Received 0 Likes
on
0 Posts
wow great work so far, im in the process of restoring a 96 gsr w/ jdm nose that desperately need some TLC lookwise. good luck and subscribing!
Trending Topics
07-25-2009, 11:25 AM
#10
Honda-Tech Member
You may have given it some thought but don't you think spraying over that silver that was already flaking off everywhere is a bad idea? It's obvious the car hadn't been prepped properly before it was sprayed with that silver. That being said if you paint over the silver you'll probably have your new paint cracking, chipping or peeling. Just a thought, I'm not an expert and have never done any work I'm just worried about something like that happening to me so I figured I'd mention it. Great work so far though man, I'm excited to see the end result.
Edit: I just realized that the silver is the stock paint but I'm still worried about that flaking silver with you tossing new paint on top of it.
Edit: I just realized that the silver is the stock paint but I'm still worried about that flaking silver with you tossing new paint on top of it.
07-25-2009, 01:33 PM
#11
Honda-Tech Member
Thread Starter
iTrader: (1)
Join Date: Jan 2007
Location: Doylestown, PA
Posts: 1,122
Likes: 0
Received 0 Likes
on
0 Posts
Yeah, I'll definitely be handling that flaking paint...I haven't made it around to that side of the car yet, but my plan is to try to sand off the whole top layer of paint to get it down to the OEM topcoat or primer. But you're completely right; If that wasn't taken care of it would definitely repeat the problem down the the road.
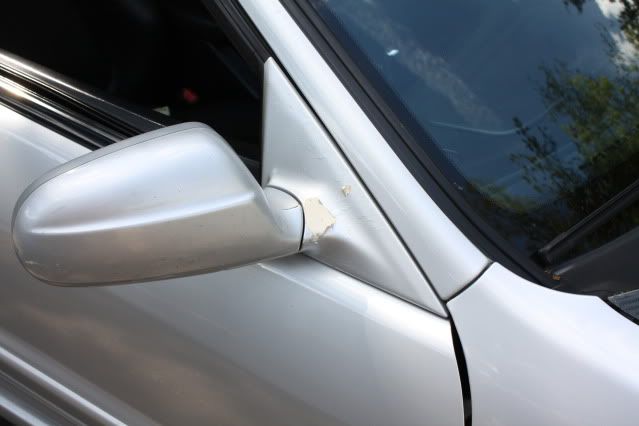
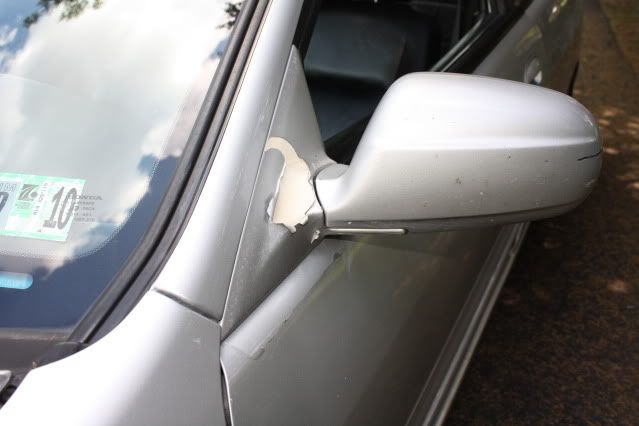
What I'm still trying to figure out is the coating on the mirrors. I peeled off the paint on one of the mirrors to see what it was, and it is like a sort of rough tan coating...almost like the surface of masking tape, only there aren't any seams. I guess It just needs a good priming and it should be OK. It was never primed last time, so it just didn't stick. They're OEM mirrors, so I was kind of expecting black plastic underneath.
As for the new CF hood, I won't be clearing the new one, because it looks incredible as is...I just can't bring myself to hit that with sandpaper. If it fades down the road, I'll take care of it then. I take pretty good car of my car as far as keeping it clean and waxed, so I'm hopeful that it will last for a while.
Thanks for the comments so far! I've almost got the scuffing/filler work done on the passenger side, so more pictures tomorrow or Monday.
07-25-2009, 02:22 PM
#12
Honda-Tech Member

Join Date: Jun 2009
Posts: 10
Likes: 0
Received 0 Likes
on
0 Posts
I am thinking about doing a similar project what is that you bought for the molding holes and how does it work? Thanks man and keep up the good work
07-27-2009, 07:54 PM
#14
Honda-Tech Member
Thread Starter
iTrader: (1)
Join Date: Jan 2007
Location: Doylestown, PA
Posts: 1,122
Likes: 0
Received 0 Likes
on
0 Posts
I got some more work done Friday/ Today and am almost done with the filler work on the body!
Here are some pictures...
I was working on the passenger side Friday when I looked outside...
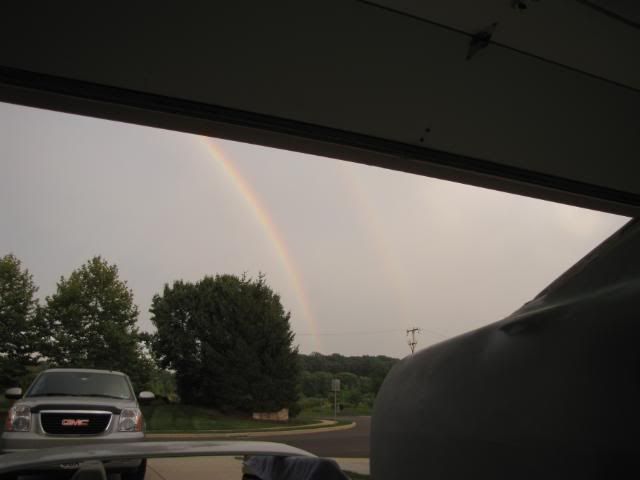
Double rainbow:

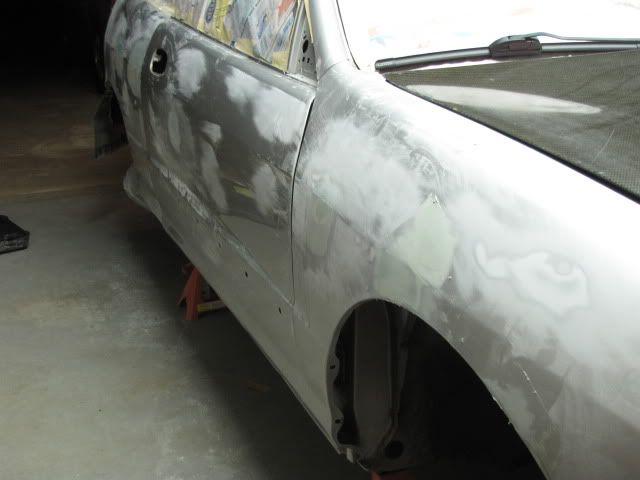
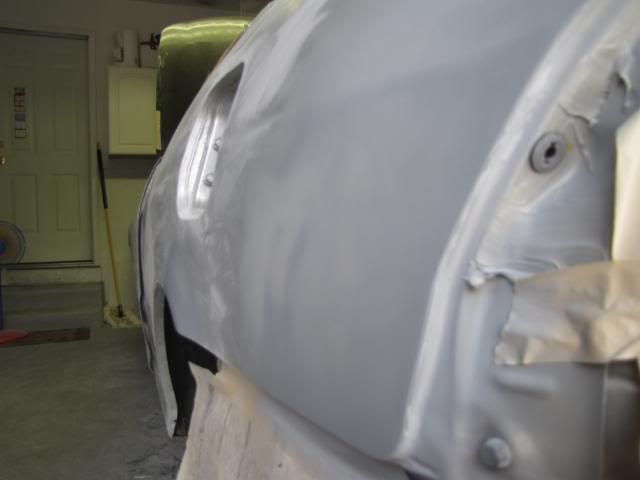
Finally got the tough spots on the body line all done on the pass. side:
Time to deal with this driver door....I started peeling and it just kept going. So i started using a window scraper with a razor blade. It was way worse than I thought.
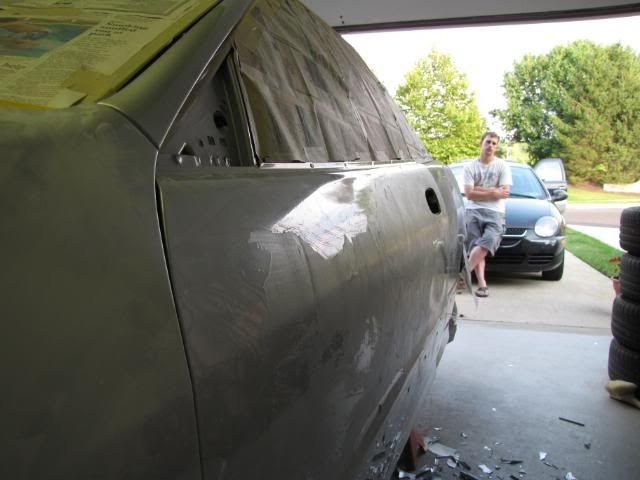
Uggggh...top half is mostly scraped, but lots of sanding to do:
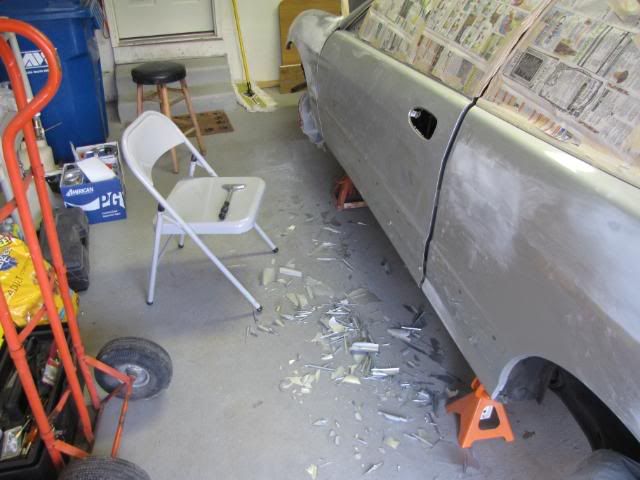
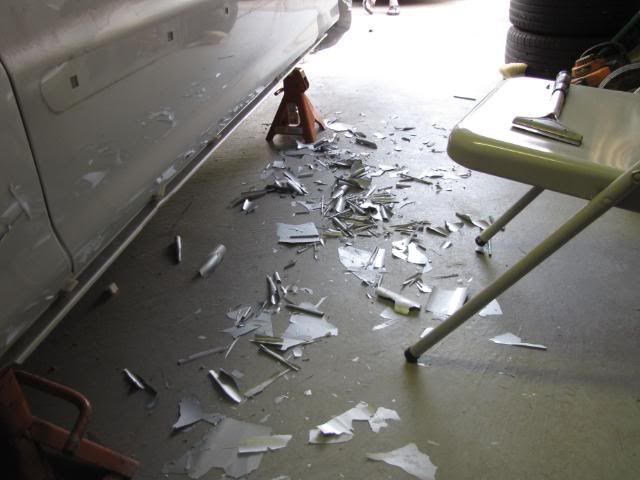
The shiny parts weren't scuffed at all, the other parts had another layer under the paint that doesn't want to scrape off. I'll have to sand it all.
When I got tired of scraping I went back and forth between that and filler work. I spent some time with a hammer and dolly getting that damage by the taillight fixed, and another spot on the fender. I found some high spots at the end of the day that I'll work on tomorrow.
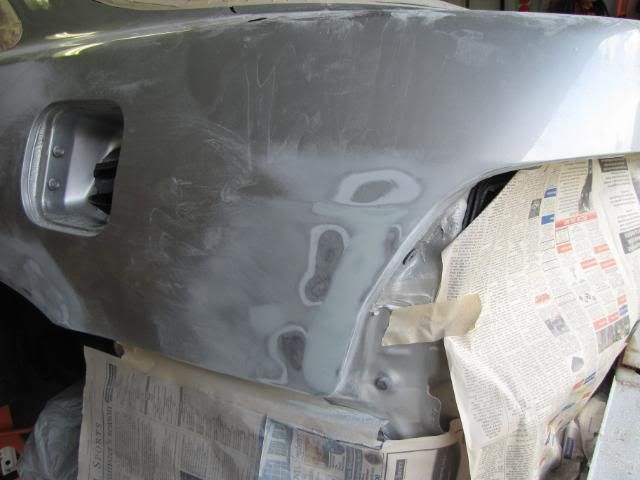
Driver's fender needed some hammer work and had 3 pretty significant dents.
Had a little ding behind the drivers door on the body line...still need another coat or two on this one:
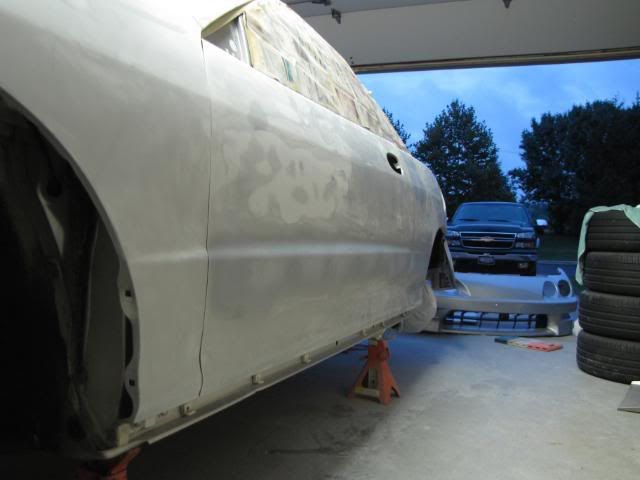
You can see the high spots where the bare metal is. It's getting there...
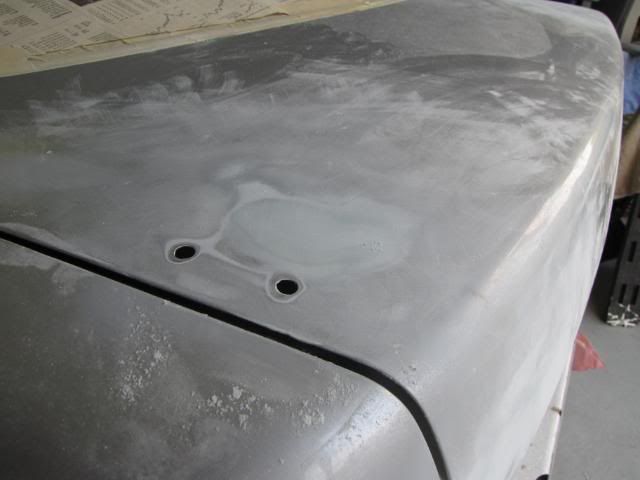
Extra spoiler holes just about finished:
"Acura" emblem gone:
Thanks for the encouragement...keep watching!
07-29-2009, 07:44 PM
#16
Honda-Tech Member
Thread Starter
iTrader: (1)
Join Date: Jan 2007
Location: Doylestown, PA
Posts: 1,122
Likes: 0
Received 0 Likes
on
0 Posts
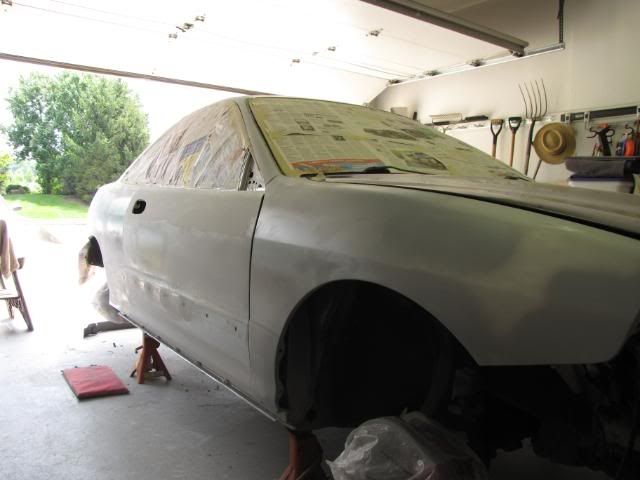
Got a lot done over the past two days! I'm basically done filler work, excluding glazing putty, unless I have a surprise. The whole car is scuffed on the major surfaces, but the edges and jambs still have to be done. I've almost got the spoiler done, and just finished scuffing the rear filler piece today also.
Onto the pictures...
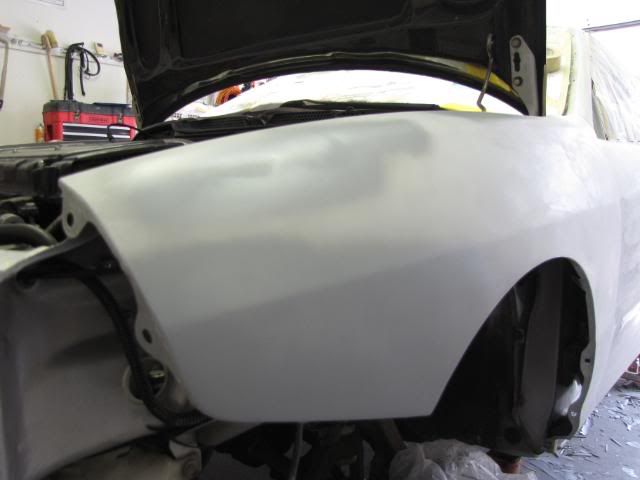
Scuffed!
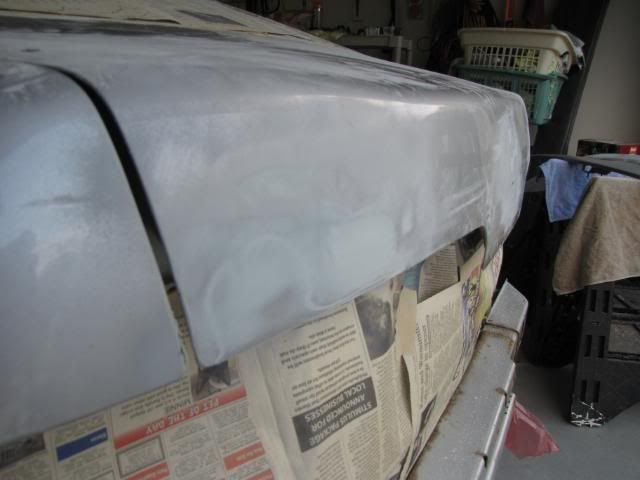
Fixed dents (tough to see because the primer makes it look uneven):
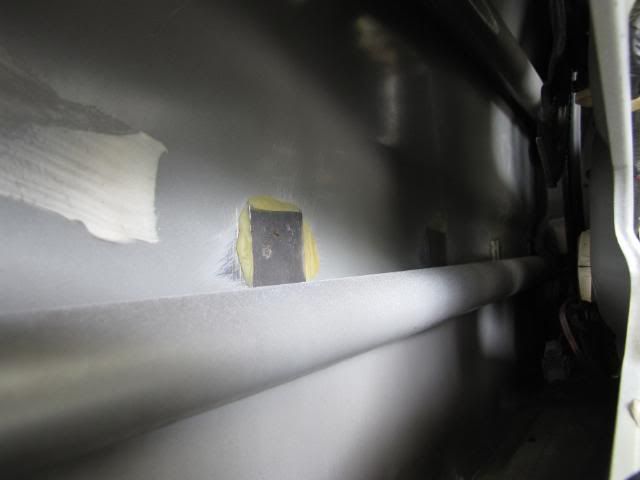
I finished the side moldings today, so I collected some pictures of how I did it. I was recommended this method by PandaHatch, so I trust that it will hold up. However, I'm not a pro so use at your own risk! You'll need 1 package of SEM Weld-Bond, PN# 39357 (~$30) and an SEM Dual-Mix gun (~$50), 36 or 40 grit sandpaper and a whole lot of creativity and patience. The sheet metal I used was 22 gauge.
First, cut some squares to cover the holes. For the rear hole on the doors, you need to cut a shape that fits properly (see pictures). Scuff the pieces with 36-40 grit paper on one side until it is entirely scratched. Then scuff the back of each whole on the door/QP. It's tough to do this on a few, so you have to get creative. You MUST get down to bare metal or the glue won't hold up. To be honest, this part really sucks...I ended up using a dremel with a wide stone to get to the back of a few REAL difficult ones...then I use a mirror to inspect. Don't get lazy here or you'll regret it. I also filed the paint off on the inside edge of the hole.
Then you need to create a low spot around each hole with a body hammer or a ball peen to featheredge the filler. Once you're done with that, put glue on the piece, and push on to the hole. Have someone wipe the glue flush on the outside with a spreader. Do this on un-scuffed paint, because it is easy to get the residue off once it dries. Again, for the difficult holes you need to get creative. I used a stick with some tape to hold it until it set a bit.
Pictures are after setting overnight:
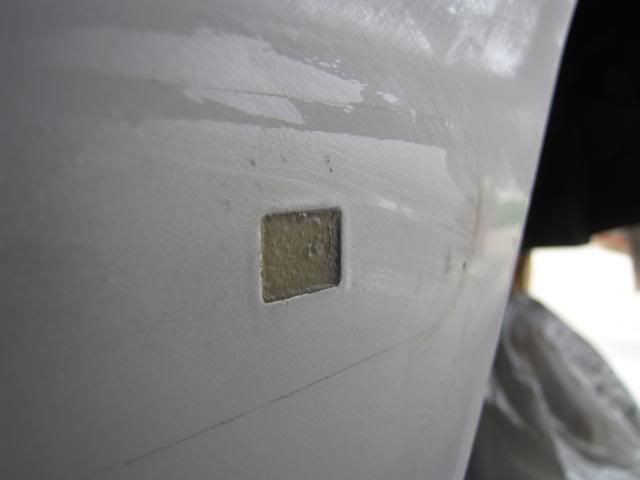
Let set overnight and then clean off residue on paint before prepping for filler as usual.
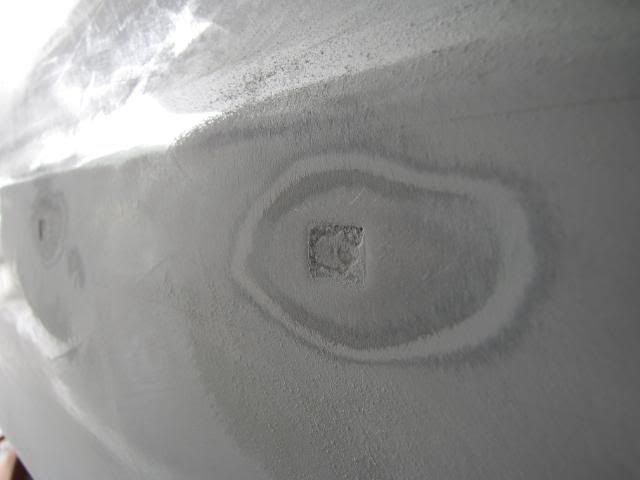

After a few coats of filler and lots of sanding, I cleaned it off and primed it with some etching primer to protect the bare metal and filler until it gets real primer. I'm really happy with the results...well worth the time! (Again, it looks uneven in the pics due to the primer, but it's actually nice and smooth)
Starting on the bumpers tomorrow!
Onto the pictures...
Scuffed!
Fixed dents (tough to see because the primer makes it look uneven):
I finished the side moldings today, so I collected some pictures of how I did it. I was recommended this method by PandaHatch, so I trust that it will hold up. However, I'm not a pro so use at your own risk! You'll need 1 package of SEM Weld-Bond, PN# 39357 (~$30) and an SEM Dual-Mix gun (~$50), 36 or 40 grit sandpaper and a whole lot of creativity and patience. The sheet metal I used was 22 gauge.
First, cut some squares to cover the holes. For the rear hole on the doors, you need to cut a shape that fits properly (see pictures). Scuff the pieces with 36-40 grit paper on one side until it is entirely scratched. Then scuff the back of each whole on the door/QP. It's tough to do this on a few, so you have to get creative. You MUST get down to bare metal or the glue won't hold up. To be honest, this part really sucks...I ended up using a dremel with a wide stone to get to the back of a few REAL difficult ones...then I use a mirror to inspect. Don't get lazy here or you'll regret it. I also filed the paint off on the inside edge of the hole.
Then you need to create a low spot around each hole with a body hammer or a ball peen to featheredge the filler. Once you're done with that, put glue on the piece, and push on to the hole. Have someone wipe the glue flush on the outside with a spreader. Do this on un-scuffed paint, because it is easy to get the residue off once it dries. Again, for the difficult holes you need to get creative. I used a stick with some tape to hold it until it set a bit.
Pictures are after setting overnight:
Let set overnight and then clean off residue on paint before prepping for filler as usual.
After a few coats of filler and lots of sanding, I cleaned it off and primed it with some etching primer to protect the bare metal and filler until it gets real primer. I'm really happy with the results...well worth the time! (Again, it looks uneven in the pics due to the primer, but it's actually nice and smooth)
Starting on the bumpers tomorrow!
Last edited by bakertime; 10-18-2009 at 10:01 AM.
07-30-2009, 08:43 AM
#18
Honda-Tech Member
Join Date: Nov 2002
Location: jacksonville, florida, u.s
Posts: 985
Likes: 0
Received 0 Likes
on
0 Posts
looks good...just make sure for those door molding holes you spread filler the whole way down...dont want any waves on the doors...
 08-01-2009, 10:35 PM
#21
Honda-Tech Member
Join Date: Jun 2008
Location: Eureka, CA, USA
Posts: 615
Likes: 0
Received 0 Likes
on
0 Posts
Great job so far. Thanks for posting in my thread also.
Have always wanted to use the panel bonding adhesive method to close up some holes and whatnot. Seems like a great way to do it.
One quick tip, if you use the painters masking paper, it's a lot easier to tape up things, and it's tougher then newspaper. Also, it won't let liquid through, like paint etc. I'm guessing it was all you had though. It's all good.
Did you decide on what color you're going to paint it?
Edit: Just re-read the title, sounds good.
Last edited by Eyger; 08-02-2009 at 12:47 PM.
08-03-2009, 07:28 PM
#22
Honda-Tech Member
Thread Starter
iTrader: (1)
Join Date: Jan 2007
Location: Doylestown, PA
Posts: 1,122
Likes: 0
Received 0 Likes
on
0 Posts
Thanks guys...updates will be coming sometime in the next few days. I was really beat after today and didn't feel like taking more pictures. I got the doors and hatch off and all the jambs scuffed today. I just have to double check that everything is scuffed, and mask again before I start priming. I was going to start spraying tonight, but everything took longer than expected (haha, as usual with this project).
Question for you guys: After I spray the primer, I'm planning on sanding the panels with 400/600 with the help of a guide coat, but what is the procedure for getting jambs and tight areas ready for paint? Can they just be scuffed like the OEM topcoat, or do they need to be sanded with both grits also? I used red Scotchbrite pads to scuff the factory finish very successfully, and would very much prefer that over sandpaper for the jambs.
Thanks man, your thread is an inspiration, so I'll be continuing to follow along! I knew it was a lot of work, but I can appreciate it much more now.
I have high hopes for the durability on the panel boding adhesive, since lots of others have had good luck with it. I wouldn't want to have to get that stuff off though, that's for sure. If it ever fails, I'm taking it to a shop, haha.
I was really close to ordering a roll of masking paper, but I actually ended up with some 12ft wide plastic (comes in a 3ft roll, and folds out)that clings to things nicely on one side. I'm going to re-mask with that stuff to make sure it doesn't bleed! Not to mention it's a nice size for covering the garage and floor also. I went with the newspaper first time around since it's free and it was basically a practice run!
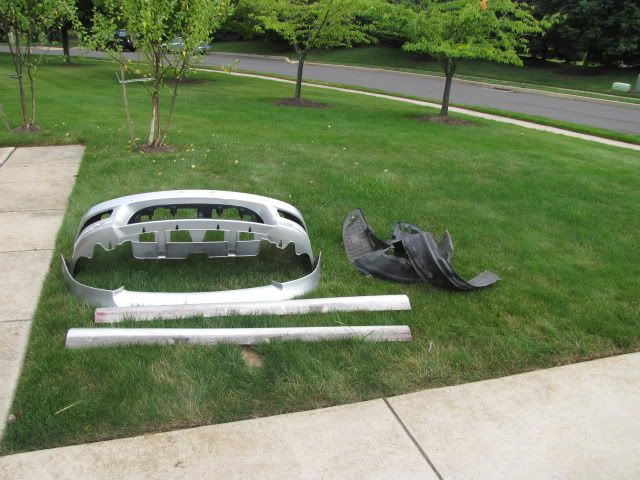
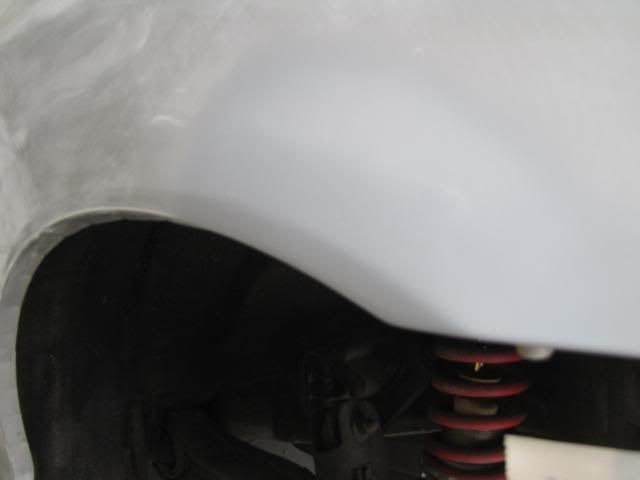
Yeah, the color is off an RSX, it's the one on the fender in the pictures towards the top. Should look awesome with the CF hood and charcoal wheels. I cannot WAIT to spray color!
How's your project coming along?
Question for you guys: After I spray the primer, I'm planning on sanding the panels with 400/600 with the help of a guide coat, but what is the procedure for getting jambs and tight areas ready for paint? Can they just be scuffed like the OEM topcoat, or do they need to be sanded with both grits also? I used red Scotchbrite pads to scuff the factory finish very successfully, and would very much prefer that over sandpaper for the jambs.
Great job so far. Thanks for posting in my thread also.
Have always wanted to use the panel bonding adhesive method to close up some holes and whatnot. Seems like a great way to do it.
One quick tip, if you use the painters masking paper, it's a lot easier to tape up things, and it's tougher then newspaper. Also, it won't let liquid through, like paint etc. I'm guessing it was all you had though. It's all good.
Did you decide on what color you're going to paint it?
Edit: Just re-read the title, sounds good.
Have always wanted to use the panel bonding adhesive method to close up some holes and whatnot. Seems like a great way to do it.
One quick tip, if you use the painters masking paper, it's a lot easier to tape up things, and it's tougher then newspaper. Also, it won't let liquid through, like paint etc. I'm guessing it was all you had though. It's all good.
Did you decide on what color you're going to paint it?
Edit: Just re-read the title, sounds good.
I have high hopes for the durability on the panel boding adhesive, since lots of others have had good luck with it. I wouldn't want to have to get that stuff off though, that's for sure. If it ever fails, I'm taking it to a shop, haha.
I was really close to ordering a roll of masking paper, but I actually ended up with some 12ft wide plastic (comes in a 3ft roll, and folds out)that clings to things nicely on one side. I'm going to re-mask with that stuff to make sure it doesn't bleed! Not to mention it's a nice size for covering the garage and floor also. I went with the newspaper first time around since it's free and it was basically a practice run!
Yeah, the color is off an RSX, it's the one on the fender in the pictures towards the top. Should look awesome with the CF hood and charcoal wheels. I cannot WAIT to spray color!
How's your project coming along?
08-03-2009, 09:21 PM
#23
Honda-Tech Member
Join Date: Jun 2008
Location: Eureka, CA, USA
Posts: 615
Likes: 0
Received 0 Likes
on
0 Posts
^Awesome, I can't wait to see it too. I think I've seen an RSX on tunerzine that had that color, and I think it's pretty dope.
Good thing you got the plastic sheeting, it'll help out a lot to keep over spray off the walls an junk. Tip: use a stapler to staple the plastic to the walls and stuff. (that is, if you don't care about putting staples in the walls. The holes are tiny, when you pull them out.
My project it crawling at a snails pace, I keep running out of money. I'm about to get a set of wheels off this guy in the marketplace, after I get that, then I'm going to sand some more. I just need more supplies really. I'm having a hard time getting the drivers side of the front bumper, the part closest to the wheel, the right shape. It kinda bulges out. I showed it to the guy that's going to paint my car. And he kinda laughed, saying that I'm being too perfectionist about it. I'm like "Damn dude, I want this to be seriously perfect."
08-03-2009, 11:58 PM
#24
Honda-Tech Member
Join Date: Jul 2008
Location: Glendale, AZ, US
Posts: 43
Likes: 0
Received 0 Likes
on
0 Posts
Looks like great work. I like reading first timer threads, learning what worked best and such.
Thanks for posting.
Thanks for posting.