
DIY: EG jdm side marker install (in a hour!)
 07-26-2008, 01:19 PM
#1
Honda-Tech Member
Thread Starter
Ok, i've seen only one write-up but its template didnt print for me. So im going to do a write up on this and show you how i did it and it took less than a hour.
You'll need a dremel, reinforced cutting wheel for dremel (bought at wal-mart), masking tape, paper and a pen. Here we go.
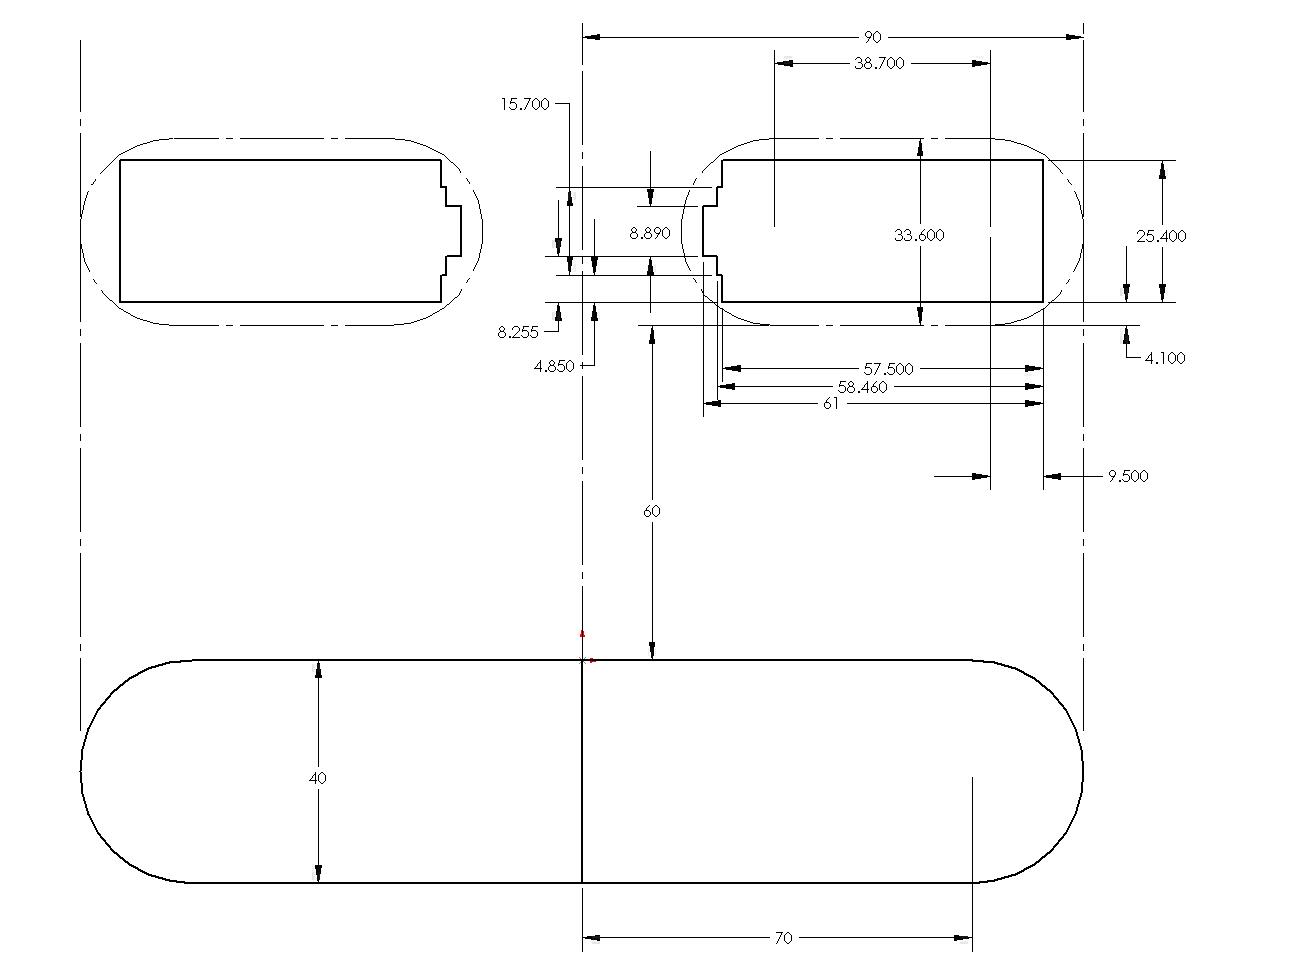
The template can be found in this DIY http://web.archive.org/web/201012161...sidemarker.htm , but the that your supposed to print wouldnt print for me, so i used the measured drawing beside it and made my template and went this route.
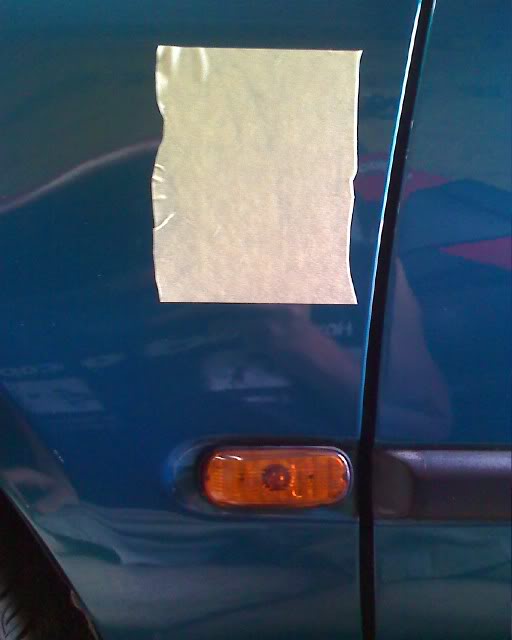
This is where masking tape comes in, you will trace your template on this and cut it out. You can see the old trailer markers from autozone (from previous owner) for side markers, lol.
Lay it up there and trace it, when you do the placement jdm side marker are 6cm. above the top of the molding and flush with the farthest side of the trim below it. You can also look in the DIY i got the template from for placement info.
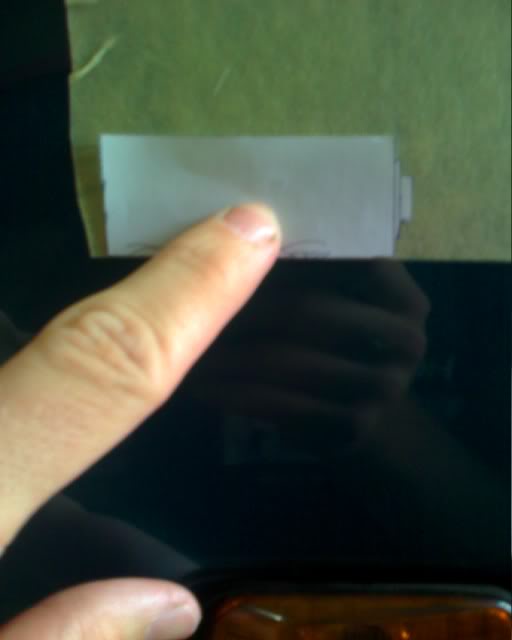
traced

Heres what these dremel wheel look like, it was like 5 of them in for $4.xx i think
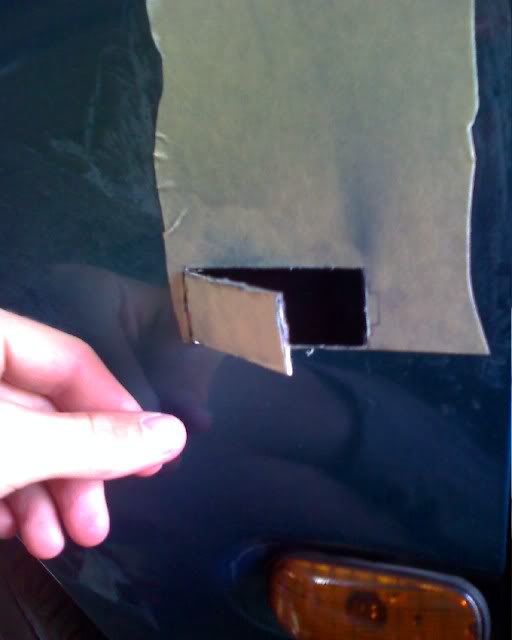
I went about this by cutting the main "rectangle" out first then proceeded to notch the side of it
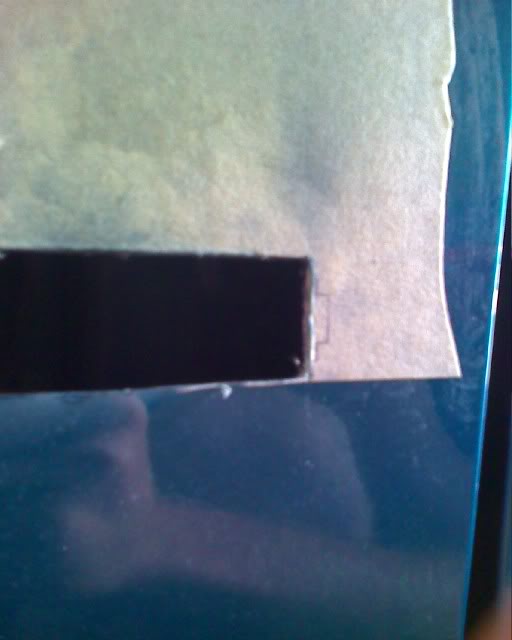
Theres the notches thats left
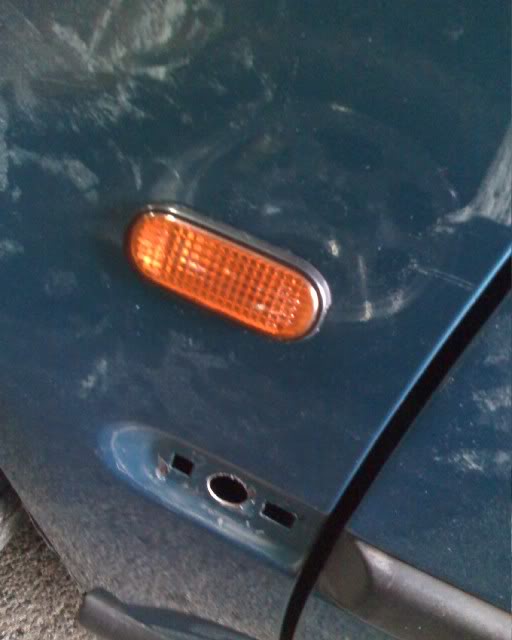
All done and wired. If it doesnt slide in right just trim with the wheel some.
Have fun,
You'll need a dremel, reinforced cutting wheel for dremel (bought at wal-mart), masking tape, paper and a pen. Here we go.
The template can be found in this DIY http://web.archive.org/web/201012161...sidemarker.htm , but the that your supposed to print wouldnt print for me, so i used the measured drawing beside it and made my template and went this route.
This is where masking tape comes in, you will trace your template on this and cut it out. You can see the old trailer markers from autozone (from previous owner) for side markers, lol.
Lay it up there and trace it, when you do the placement jdm side marker are 6cm. above the top of the molding and flush with the farthest side of the trim below it. You can also look in the DIY i got the template from for placement info.
traced
Heres what these dremel wheel look like, it was like 5 of them in for $4.xx i think
I went about this by cutting the main "rectangle" out first then proceeded to notch the side of it
Theres the notches thats left
All done and wired. If it doesnt slide in right just trim with the wheel some.
Have fun,
Last edited by It Wasn't Me; 03-23-2013 at 05:13 PM. Reason: new link
 07-26-2008, 03:37 PM
#4
Honda-Tech Member
Thread Starter
Im putting the trim pieces back in there, lol. For the wiring: black = ground, and you can use the other wire for park or turn signal (as used in japan). On one light it has 2 wires the same color just twist them together and use as one.
07-30-2008, 12:28 PM
#5
Honda-Tech Member
nice, I was looking for this, found it a hella long time ago (the template) and then well 3 computers later I have none of my favorites/files/pictures I did back then... 
08-04-2008, 08:56 PM
#7
Honda-Tech Member
Join Date: Jul 2008
Location: regina, sk, canada
Posts: 345
Likes: 0
Received 0 Likes
on
0 Posts
nice write up the print out seems to match match perfectly the side markers.... ill try to post some pics of the process... im kinda scare of that dremell thing.... im at -50 skill points with that thing, it shouldn't be that bad... thanks again
Trending Topics
 08-07-2008, 11:15 AM
#9
Honda-Tech Member
iTrader: (1)
Join Date: Jan 2002
Location: Nowhere and Everywhere
Posts: 29,530
Likes: 0
Received 52 Likes
on
46 Posts
I don't think that diagram will print to scale. I drew a new diagram at work and made a PDF of it that prints on 8.5 x 11 landscape, but I can't upload it to Photobucket. 
09-06-2008, 03:30 PM
#10
Member
Join Date: Dec 2005
Location: NY, USA
Posts: 1,137
Likes: 0
Received 0 Likes
on
0 Posts
Sorry, for bringing this back up from the dead.. well actually not too dead, i mean i've seen worse here on ht...
<TABLE WIDTH="90%" CELLSPACING=0 CELLPADDING=0 ALIGN=CENTER><TR><TD>Quote, originally posted by PatrickGSR94 »</TD></TR><TR><TD CLASS="quote">I don't think that diagram will print to scale. I drew a new diagram at work and made a PDF of it that prints on 8.5 x 11 landscape, but I can't upload it to Photobucket.</TD></TR></TABLE>
you can upload it to rapidshare, mediafire, yousendit, etc...
if mediafire accepts pdfs, then upload it on mediafire... no annoying wait time to dl it.
<TABLE WIDTH="90%" CELLSPACING=0 CELLPADDING=0 ALIGN=CENTER><TR><TD>Quote, originally posted by PatrickGSR94 »</TD></TR><TR><TD CLASS="quote">I don't think that diagram will print to scale. I drew a new diagram at work and made a PDF of it that prints on 8.5 x 11 landscape, but I can't upload it to Photobucket.
</TD></TR></TABLE>you can upload it to rapidshare, mediafire, yousendit, etc...
if mediafire accepts pdfs, then upload it on mediafire... no annoying wait time to dl it.
09-10-2008, 11:33 PM
#11
Junior Member
Join Date: Jul 2008
Location: huntington park, ca, us
Posts: 45
Likes: 0
Received 0 Likes
on
0 Posts
hey nice write up man wish i had the templates when i did this to my car... ima total noob and got my depo imitation sidemarkers in there perfectall by myslef just took sum b****.. took me about acouple hours though... took my time with it,,.. had to borrow all my tool.. well.. my boyy did the wiring for me he tapped into my corners right by the harness for the bulb and they turn on whne i turn on my corners but when i put my blinkers they dont blink in unison.. is this suppose to happen.??? i got an ej1 if it helpsss??????
 02-11-2009, 01:08 PM
#14
Honda-Tech Member
Join Date: Jan 2009
Location: sunnyside, wa
Posts: 163
Likes: 0
Received 0 Likes
on
0 Posts
 02-11-2009, 02:53 PM
#15
Honda-Tech Member
iTrader: (1)
Join Date: Jan 2002
Location: Nowhere and Everywhere
Posts: 29,530
Likes: 0
Received 52 Likes
on
46 Posts
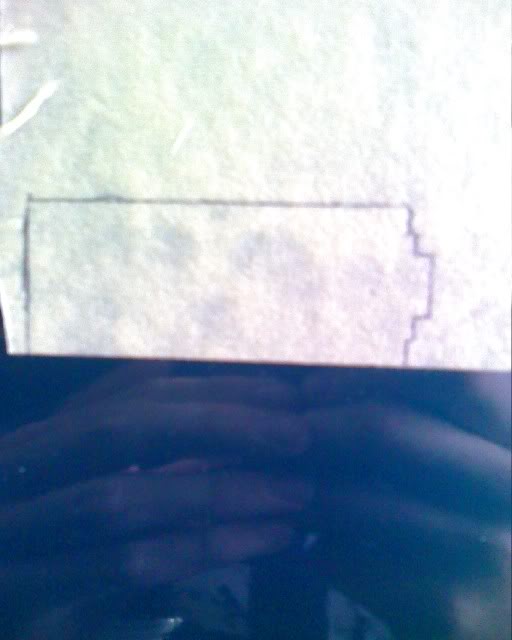
Measurements are in millimeters, and yes the oval shape at the bottom is supposed to be the piece of molding (or maybe the recess) on the fender. Check that 40mm measurement to verify what it is.
02-11-2009, 03:20 PM
#16
Join Date: Jan 2008
Location: kekaha, hi, 96752
Posts: 6
Likes: 0
Received 0 Likes
on
0 Posts
hey i got a question. I dont you cut out the main square first but the notches that were left, you had to cut those out to right? im sry im thinking about cutting my own to and im scared lol. and how many mms are the marker and the side molding appart?? from the square cut out that is. thanks
nathan
nathan
02-11-2009, 03:55 PM
#17
Honda-Tech Member
iTrader: (1)
Join Date: Jan 2002
Location: Nowhere and Everywhere
Posts: 29,530
Likes: 0
Received 52 Likes
on
46 Posts
hey i got a question. I dont you cut out the main square first but the notches that were left, you had to cut those out to right? im sry im thinking about cutting my own to and im scared lol. and how many mms are the marker and the side molding appart?? from the square cut out that is. thanks
nathan
nathan
Yes you have to cut the little notches, otherwise the OEM sidemarker housing won't fit in there (the little clip won't make it past the metal).
02-11-2009, 07:39 PM
#18
Honda-Tech Member
Join Date: Jan 2009
Location: sunnyside, wa
Posts: 163
Likes: 0
Received 0 Likes
on
0 Posts
02-13-2009, 03:38 PM
#19
Join Date: Jan 2008
Location: kekaha, hi, 96752
Posts: 6
Likes: 0
Received 0 Likes
on
0 Posts
nathan
02-14-2009, 06:25 AM
#20
Honda-Tech Member
iTrader: (1)
Join Date: Jan 2002
Location: Nowhere and Everywhere
Posts: 29,530
Likes: 0
Received 52 Likes
on
46 Posts
The rectangular hole w/ the notches drawn w/ the solid black line represents the hole itself. The dashed oval represents the outer shape of the sidemarker lens.
05-05-2009, 09:31 PM
#23
Honda-Tech Member
Thread Starter
its been a while since i've been on, thanks for all the comments guys! I usually just do a straight rectangle then notch out the notch on the end. Dont be scared guys, you can do it just use the diagram, and youll be straight!
05-17-2009, 07:49 AM
#24
Honda-Tech Member

Join Date: Aug 2008
Location: St Lin Laurentides, QC, Canada
Posts: 27
Likes: 0
Received 0 Likes
on
0 Posts