

need help on changing my coolant

Thread Starter
Honda-Tech Member
Joined: Mar 2004
Posts: 622
Likes: 0
From: Chi Town, United States
Hey guys I'm still new to the prelude forum I came from the integra side and when we need to know to do the "how to's" we went to team-integra.net to get pic by pic instructions on how to do things.
I need to know if there is something similar to team-integra.net for Preludes cause I need to do a coolant change.
Thanks!!!
I need to know if there is something similar to team-integra.net for Preludes cause I need to do a coolant change.
Thanks!!!
Member
Joined: May 2004
Posts: 1,420
Likes: 0
shouldn't it be kinda the same as with all cars?
i mean you get under, unplug the drainage bolt on the bottom of the radiator. wait till it all comes out. maybe run some water thru just for fun and then add more coolant/distilled water mix and bleed the system.
i mean you get under, unplug the drainage bolt on the bottom of the radiator. wait till it all comes out. maybe run some water thru just for fun and then add more coolant/distilled water mix and bleed the system.
Thread Starter
Honda-Tech Member
Joined: Mar 2004
Posts: 622
Likes: 0
From: Chi Town, United States
i want to know if there is a step by step write up with pictures for my car, i can get it for the integra's. me and my cousin will be doing the coolant change on his teg so i need to know if it is similar to the b-series engins cause i want to do it the same time as he does it
Member
Joined: May 2004
Posts: 1,420
Likes: 0
yeah there is a step by step. its in the helms but it takes like 2 steps and honestly an oil change is about the same difficutly.
if you really need that in-depth of a writeup i suggest you physically buy a helms are just ask someone to do it.
if you really need that in-depth of a writeup i suggest you physically buy a helms are just ask someone to do it.
Member
Joined: May 2004
Posts: 1,420
Likes: 0
<TABLE WIDTH="90%" CELLSPACING=0 CELLPADDING=0 ALIGN=CENTER><TR><TD>Quote, originally posted by hu »</TD></TR><TR><TD CLASS="quote">Is there any type of drain plug on the engine itself??</TD></TR></TABLE>
yeah but its a pain to get to and is unneccessary for a simple coolant job.
yeah but its a pain to get to and is unneccessary for a simple coolant job.
Honda-Tech Member
Joined: May 2006
Posts: 1,989
Likes: 0
From: upstate NY
you drain the coolant from the radiator by the little valve on the bottom of the radiator, that is only a partial flush if you drain that out. there is also a bolt on the back of the block near the oil filter and that can be a bitch to get off. if you drian through both of those, thats a complete drain.
Trending Topics
Thread Starter
Honda-Tech Member
Joined: Mar 2004
Posts: 622
Likes: 0
From: Chi Town, United States
is a partial flush good enough every 30k miles or do i need to do a full. i have a 01 Lude with 56k miles on it. let me know if a partial flush is good enough. Oh yea how many qts is required for a full flush?

Junior Member
Joined: Jun 2006
Posts: 251
Likes: 0
From: Beavercreek, OH
can someone explain the bleeding process. I have done it a couple times recently but I am not sure i am really doing it the best way... also a little explanation could probably help a lot of people on here out
Member
Joined: May 2004
Posts: 1,420
Likes: 0
well there is a ghetto way to do it and a real way.
ghetto way: just fill your radiator up, make sure to squeeze all those radiator hoses to make sure they fill up somewhat.
then leave the rad cap off and start the car. this will normally cycle everything thru and get most of the air out.
the real way: in the helms which i don't have my hardcopy next to me. which i suggest you all buy and then you could do anything
Member
Joined: Jul 2005
Posts: 4,410
Likes: 1
<TABLE WIDTH="90%" CELLSPACING=0 CELLPADDING=0 ALIGN=CENTER><TR><TD>Quote, originally posted by petern101 »</TD></TR><TR><TD CLASS="quote">
yeah but its a pain to get to and is unneccessary for a simple coolant job.
</TD></TR></TABLE>
Its near the oil filter? How much of a pita is it? Reason why...Honda switched from the green coolant which my old stock radiator had. I put in a new Koyo and got some new coolant from the Dealership. It is blue. I do not want to mix the fluids.
So if anybody can be more specific as to the location of the drain on the block, it would be really appreciated.
Thread Starter
Honda-Tech Member
Joined: Mar 2004
Posts: 622
Likes: 0
From: Chi Town, United States
wow didn't know this many people needed to know how to do a coolant change, good thing i brought it up.
Can someone answer my last question
<TABLE WIDTH="90%" CELLSPACING=0 CELLPADDING=0 ALIGN=CENTER><TR><TD>Quote, originally posted by shhh151 »</TD></TR><TR><TD CLASS="quote">is a partial flush good enough every 30k miles or do i need to do a full. i have a 01 Lude with 56k miles on it. let me know if a partial flush is good enough. Oh yea how many qts is required for a full flush?</TD></TR></TABLE>
Member
Joined: Jul 2005
Posts: 4,410
Likes: 1
<TABLE WIDTH="90%" CELLSPACING=0 CELLPADDING=0 ALIGN=CENTER><TR><TD>Quote, originally posted by shhh151 »</TD></TR><TR><TD CLASS="quote">wow didn't know this many people needed to know how to do a coolant change, good thing i brought it up.
Can someone answer my last question
</TD></TR></TABLE>
In most cases a coolant change is easy. Since Honda now uses a blue color coolant and they recommend that you dont mix the old green and blue, it would be nice to drain the rest of the coolant from the block.
Can someone answer my last question
</TD></TR></TABLE>
In most cases a coolant change is easy. Since Honda now uses a blue color coolant and they recommend that you dont mix the old green and blue, it would be nice to drain the rest of the coolant from the block.
Member
Joined: Jul 2005
Posts: 4,410
Likes: 1
Is it from the Dealership? I went and got new coolant 2 weeks ago. They advised me that they no longer use the green colored coolant. They said the new coolant has a blue hue to it. They said it only needs to be changed every 60k miles.
Junior Member
Joined: Feb 2004
Posts: 648
Likes: 0
From: Murfreesboro, TN, USA
this strange...why not just go to autozone and get coolant? it is pretty much water...this isnt that hard of a thing to do. I am hoping you all drive ""new" cars and are pretty new into the car thing.
Jack the thing up, pull the plug on the bottom of the radiator and drain everything...if you want, crank the motor and let the rest of the fluid cycle thru the block...you can even fill water in while doing it to flush all the older fluid out. Once it looks that all water is coming out of the plug in the bottom of the radiator, turn the motor off. should take about 30 seconds or so. then put the plug in, put the car back on the ground and fill up with fluid...once full, crank the car without the radiator cap. you will see bubbles come out of the top of the radiator. This is cycling the air out. Wait for the thermostat to open. thru out all of this, keep putting fluid in if it needs it...you dont want the radiator to suck in air, so keep it at the top of the radiator..then your done....
as far as i know...there arent any special instructions for any car
Honda-Tech Member
Joined: May 2006
Posts: 1,989
Likes: 0
From: upstate NY
a partial is nice and easy to do, but the reason most people dont do it at home is because it is very messy. well at least the way ive done it. the drain for the block is to the left of the oil filter and right behind the PS rack. sorry i dont have a pic. if you only drain from the radiator that is only about half the coolant. i go with honda coolant because it has anti-corrosion additives in it. to bleed it, just loosen the coolant bleeding nut right near the thermostat after you've filled the radiator and resevoir as much as possible. loosen it up and keep filling the radiator until the fluid runs w/ no bubbles. tighten the nut while coolant is still flowing. put caps back on. now start the car let it run like 5 secs. shut it down. fill the radiator and resevoir if low. keep checking the level for the next day or so to make sure there is no problems. sorry i dont have the pics, but PM me if you are really in a bind and ill climb under the car and take some. hope i was some help. i figure on an open deck block, keeping the coolant clean can make anice difference. as far as the color of fluids, i always wanted to mix some honda with some autozone **** in a clear glass and see what happens when they settle out. I think a full flush will take just under 2 gallons. a partial flush right around 1 gallon.
Junior Member
Joined: Jun 2006
Posts: 251
Likes: 0
From: Beavercreek, OH
<TABLE WIDTH="90%" CELLSPACING=0 CELLPADDING=0 ALIGN=CENTER><TR><TD>Quote, originally posted by jdmlude_dude »</TD></TR><TR><TD CLASS="quote">this strange...why not just go to autozone and get coolant? it is pretty much water...this isnt that hard of a thing to do. I am hoping you all drive ""new" cars and are pretty new into the car thing.
Jack the thing up, pull the plug on the bottom of the radiator and drain everything...if you want, crank the motor and let the rest of the fluid cycle thru the block...you can even fill water in while doing it to flush all the older fluid out. Once it looks that all water is coming out of the plug in the bottom of the radiator, turn the motor off. should take about 30 seconds or so. then put the plug in, put the car back on the ground and fill up with fluid...once full, crank the car without the radiator cap. you will see bubbles come out of the top of the radiator. This is cycling the air out. Wait for the thermostat to open. thru out all of this, keep putting fluid in if it needs it...you dont want the radiator to suck in air, so keep it at the top of the radiator..then your done....
as far as i know...there arent any special instructions for any car </TD></TR></TABLE>
ghetto way ^^ i.e. the way i have been doing it
<TABLE WIDTH="90%" CELLSPACING=0 CELLPADDING=0 ALIGN=CENTER><TR><TD>Quote, originally posted by bluedlude »</TD></TR><TR><TD CLASS="quote">a partial is nice and easy to do, but the reason most people dont do it at home is because it is very messy. well at least the way ive done it. the drain for the block is to the left of the oil filter and right behind the PS rack. sorry i dont have a pic. if you only drain from the radiator that is only about half the coolant. i go with honda coolant because it has anti-corrosion additives in it. to bleed it, just loosen the coolant bleeding nut right near the thermostat after you've filled the radiator and resevoir as much as possible. loosen it up and keep filling the radiator until the fluid runs w/ no bubbles. tighten the nut while coolant is still flowing. put caps back on. now start the car let it run like 5 secs. shut it down. fill the radiator and resevoir if low. keep checking the level for the next day or so to make sure there is no problems. sorry i dont have the pics, but PM me if you are really in a bind and ill climb under the car and take some. hope i was some help. i figure on an open deck block, keeping the coolant clean can make anice difference. as far as the color of fluids, i always wanted to mix some honda with some autozone **** in a clear glass and see what happens when they settle out. I think a full flush will take just under 2 gallons. a partial flush right around 1 gallon.</TD></TR></TABLE>
the right way... 
Jack the thing up, pull the plug on the bottom of the radiator and drain everything...if you want, crank the motor and let the rest of the fluid cycle thru the block...you can even fill water in while doing it to flush all the older fluid out. Once it looks that all water is coming out of the plug in the bottom of the radiator, turn the motor off. should take about 30 seconds or so. then put the plug in, put the car back on the ground and fill up with fluid...once full, crank the car without the radiator cap. you will see bubbles come out of the top of the radiator. This is cycling the air out. Wait for the thermostat to open. thru out all of this, keep putting fluid in if it needs it...you dont want the radiator to suck in air, so keep it at the top of the radiator..then your done....
as far as i know...there arent any special instructions for any car </TD></TR></TABLE>
ghetto way ^^ i.e. the way i have been doing it
<TABLE WIDTH="90%" CELLSPACING=0 CELLPADDING=0 ALIGN=CENTER><TR><TD>Quote, originally posted by bluedlude »</TD></TR><TR><TD CLASS="quote">a partial is nice and easy to do, but the reason most people dont do it at home is because it is very messy. well at least the way ive done it. the drain for the block is to the left of the oil filter and right behind the PS rack. sorry i dont have a pic. if you only drain from the radiator that is only about half the coolant. i go with honda coolant because it has anti-corrosion additives in it. to bleed it, just loosen the coolant bleeding nut right near the thermostat after you've filled the radiator and resevoir as much as possible. loosen it up and keep filling the radiator until the fluid runs w/ no bubbles. tighten the nut while coolant is still flowing. put caps back on. now start the car let it run like 5 secs. shut it down. fill the radiator and resevoir if low. keep checking the level for the next day or so to make sure there is no problems. sorry i dont have the pics, but PM me if you are really in a bind and ill climb under the car and take some. hope i was some help. i figure on an open deck block, keeping the coolant clean can make anice difference. as far as the color of fluids, i always wanted to mix some honda with some autozone **** in a clear glass and see what happens when they settle out. I think a full flush will take just under 2 gallons. a partial flush right around 1 gallon.</TD></TR></TABLE>
the right way...
Joined: Jun 2003
Posts: 136
Likes: 0
From: belmont, CA, USA
I did this about a month ago, these are the instructions per Helm's for those who want to do it exactly the way the manual says in an easy copy and past format. There are also some additional notes made from my experience with it.
1. Set the heater temperature lever or control dial to maximum heat.
2. When the radiator is cool, remove the radiator cap. Loosen the drain plug, and drain the coolant.
My notes: the drain plug is in the center of the bottom of the radiator, turn plastic plug counter-clockwise to loosen.
3. Remove the drain bolt from the rear side of the cylinder block to drain the block (except with ATTS).
My notes: drain bolt is located a few inches directly to the left of the oil filter as viewed from beneath the vehicle.
4. Apply liquid gasket to the drain bolt threads, then reinstall the bolt with a new washer and tighten it securely.
My notes: drain bolt torque is 61 lb.ft.
5. tighten the radiator drain plug securely.
6. Remove, drain and reinstall the reservoir. Fill the tank halfway to the MAX mark with water, then up to the MAX mark with antifreeze.
My notes: The white plastic refill reservoir just pulls out with some effort. The Genuine Honda coolant I purchased is pre-mixed, so you don't add any water. I filled it up prior to reinstalling it.
7. Mix the recommended antifreeze with an equal amount of water in a clean container.
My notes: Again, the fluid I purchased was pre-mixed, so you DON'T ADD WATER.
NOTE: Always use Genuine Honda Antifreese/Coolant. Using a non-Honda coolant can result in corrosion, causing the cooling system to malfunction or fail.
NOTE: For best corrosion protection, the coolant concentration must be maintained year-round at 50% minimum. Coolant concentrations less than 50% may not provide sufficient protection against corrosion or freezing.
NOTE: Coolant concentrations greater than 60% will impair cooling efficiency and are not recommended.
CAUTION: Do not mix different brands of antifreeze/coolant. Do not use additional rust inhibitors or anti-rust products; they may not be compatible with the genuine coolant.
8. Loosen the air bleed bolt in the thermostat housing, then fill the radiator to the bottom of the filler neck with the coolant mixture. Tighten the bleed bolt as soon as coolant starts to run out in a steady stream without bubbles.
My notes: thermostat housing is located aft and slightly beneath the distributor. The bleed bolt looks like a half-inch long bolt sticking directly up and has a bleed hole in the center of it. I attached a small clear tube to the bleed bolt to prevent any coolant from touching other parts and let it drip into the drain bucket. Loosen counterclockwise about two turns. Torque to 7 lb.ft.
9. With the radiator cap off, start the engine and let it run until warmed up (the radiator fan comes on at least twice). Then, if necessary, add more coolant mix to bring the level back up to the bottom of the filler neck.
My notes: place some shop rags around the radiator cap hole to prevent ethylene-glycol from dripping onto other car components. You should see little bubbles popping at the surface now and then.
10. Put the radiator cap on tightly, then run the engine again and check for leaks.
Some last things to note:
I tested the used coolant with a fluid hydrometer and it's freezing point was still an indicated -55 degrees Fahrenheit. Honda Genuine coolant is worth $10 to me.
I measured the cooling system with a laser gun, and the oem thermostat opened up at 174 degrees fahrenheit.
I pressure-tested the oem radiator cap at 15 psi and it stayed exactly at 15 psi.
Coolant changes for normal conditions is recommended at 45k, 75k, and 105k miles.
Capacities:
M/T Base: 3.5 qt for coolant change, 7.3 for coolant overhaul
Type SH: 3.4 qt for coolant change, 7.2 for coolant overhaul
A/T: 3.4 qt for coolant change, 7.2 for coolant overhaul
And regarding using the coolant they have at Autozone or Kragen, Honda fluid isn't that much more expensive and it's worth it to stick with the same fluid that's been running through hoses and pipes and journals since the car first started. No-name fluids may have the same ingredients, but it's not going to have the exact same chemistry as the original fluid that your car is already accustomed to. Now, if your built motor started with some aftermarket fluid, I'd stick with that. But since Hondas start off with honda fluid, I stick with it, like so:
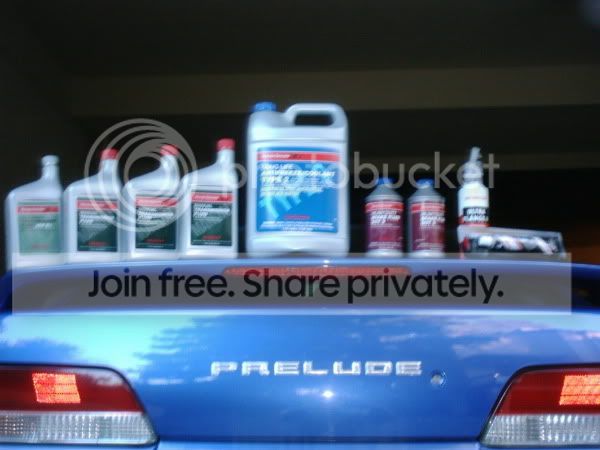
Member
Joined: Jul 2005
Posts: 4,410
Likes: 1
Have any of you used or heard of Evans coolant? Darton recommends it with their sleeves.
http://www.dartonsleeves.com/Honda%20Manual.pdf see page 13
http://www.evanscooling.com/html/npgPls.htm
http://www.dartonsleeves.com/Honda%20Manual.pdf see page 13
http://www.evanscooling.com/html/npgPls.htm