When you click on links to various merchants on this site and make a purchase, this can result in this site earning a commission. Affiliate programs and affiliations include, but are not limited to, the eBay Partner Network.
All are good companies that make stuff for your car.
Thanks a ton for all of the info - I'm looking into some of those companies now, gonna shop around for new parts
Originally Posted by alex zolotarev
dope
Thanks!
On to today's updates:
My wheel came today! Decided to install it and the hub.
First time opening up the hub, look like they have some Japanese instructions printed on it. (There are also lots of name brands splattered all over the outside - Nardi, Momo, etc)
Popped it out of the box, things are going downhill quickly. When I pulled it out, it was so light I wasn't even sure if it was metal...
Oh boy. This thing looks like its been used or sitting on some factory floor for the past ten years, christ.
I suppose the hub is garbage, but at least the wheel looks great! Quality feels similar to that of an NRG/etc wheel, definitely not too bad for the $50 I paid.
In the car, ready to install
Honda badge comes off..
...and the ratchet goes in! I forgot these cars don't have airbags, so I was surprised that the wheel was this easy to remove. (Bolt is a 19mm for those playing along at home)
The old wheel was... crusty.
So I guess it matches the crusty new hub! (For those worrying: Don't worry, the hub is coming off soon. I'm ordering a Works Bell hub, and the car isn't currently being driven)
There's a small tab of metal coming up from the steering column. The metal ring from the Chinese-ium hub touches it, and a wire runs from the Chinese-ium metal ring to the plug for the horn button.
Wheel is on! And god damn it looks nice. I'm definitely happy with the quality of the wheel. Hub? Not so much...
Today's tl;dr:
- Don't buy Chinese hubs, they'll come looking like ****
- Chinese wheels are built fairly nice, probably because its hard to **** up a wheel
- One of the first steps to managing personal finance is to build an emergency fund. For most people, 3 to 6 months of expenses is good. A larger emergency fund (e.g., 9 to 12 months) may be warranted if your income is variable or uncertain. A smaller emergency fund of $1,000 or 1 month of expenses is temporarily acceptable while paying off credit card debt or other debts with interest rates above 10%.
Highest priorities:
- Remove brake booster
- Replace master cylinder
- Passenger side drum brake
- Add brake fluid (Use the liter of DOT4 I bought)
- Buy a new Works Bell hub (This is down on the list since I won't be driving the car until the brakes are done)
- Use dry ice technique to remove interior sound deadening!
- Battery relocation kit
- New intake
Re: $250 '90 Hatch Build! (AKA: College Kid Budget Build)
Originally Posted by 2x0
Coke Zero FTW!!!
Nice lookin wheel, too. I'm glad I know how easy these are to swap now in case I ever want to upgrade mine
Hell yeah haha, and thanks! They're super easy to swap, I didn't expect it at all.
Originally Posted by sumdewd
Is an auto to manual swap planned in the future? I used to have an auto DX with the D15b2 and these cars are total dogs with it.
DEFINITELY. I can't stand the auto in this car, I've been looking around for a manual transmission setup that I can swap. I found a four-speed at a junk yard near me recently, with the total setup (cluster, pedals, etc) totaling to around $300. I'm hoping to do it sometime soon, but at the moment I've got some bills to pay for so I can't really drop $300 Hopefully it will happen this winter, before the track days start up in April!
Re: $250 '90 Hatch Build! (AKA: College Kid Budget Build)
For the amount of work you'd do, I'd stay away from the 4 speed. It's almost as bad. A friend of mine had one and it couldn't go anywhere.. Even worse if you had a passenger or two. And since the car will see track use, you're better off trying for the Si 5 speed. I've been pretty happy with a 5 speed DX trans with my SOHC ZC, though. It would still be a good idea to get the rest of the parts from the junkyard. They all match up with some exceptions to the clutch/flywheel with the correct year.
Re: $250 '90 Hatch Build! (AKA: College Kid Budget Build)
Originally Posted by sumdewd
For the amount of work you'd do, I'd stay away from the 4 speed. It's almost as bad. A friend of mine had one and it couldn't go anywhere.. Even worse if you had a passenger or two. And since the car will see track use, you're better off trying for the Si 5 speed. I've been pretty happy with a 5 speed DX trans with my SOHC ZC, though. It would still be a good idea to get the rest of the parts from the junkyard. They all match up with some exceptions to the clutch/flywheel with the correct year.
Ahh okay, I'll have to keep an eye out for one! I'm probably going to swing by the junkyard in the next week or two to start picking up the other parts. I'm hoping to swap the trans sometime this winter to have it ready-to-run in April, when track days start up
New updates!
Decided to finally do something about the incorrectly-installed silencer on the exhaust. The silencer is supposed to screw in with the long tube on the inside of the exhaust to maintain an aftermarket look while restricting airflow/noise, at least from what I've seen before online .This one was screwed in the other way around and thus stuck out almost five inches from the rear bumper, so I decided it had to go.
A bit of work with a grinder (the screws were completely rusted and stripped) and a few hits of encouragement from the trusty hammer and it was out! Only took ten or fifteen minutes.
The car looks much better (at least in my opinion) with this thing off. (Also you can see my horrible rusted rear bumper mounts in this shot, hopefully I can get those taken care of soon)
Bumper back on! (bumper fitment is currently a bit wonky because of two added quick-releases to keep it from resting on the exhaust and rattling. I'm gonna switch out the rubber bands with zip ties to get a bit more length and hopefully get it to sit flat)
And a close-up shot of the "refreshed" exhaust tip, now without a silencer!
Next, I decided I wanted to swap out the spark plugs. After all, its one of the easiest jobs you can do on these engines! Ran up to AutoZone, grabbed some Nickel spark plugs (Didn't want to cheap out and get copper, but also didn't want to spend $50 on a set of Iridium ones...)
Popped out the tube, and uh-oh... That's all engine oil.
Definitely not what I was planning on seeing. After some Googling, it seems like this could be one of a number of blown gaskets, seals, etc. I'm going to do some more research and hopefully get it fixed pretty soon. Decided to postpone on the spark plug install for now!
Besides that, I had some confusion with a vacuum line, but I made a separate thread for that. Just curious about a mysterious line, you never know what some things are if the old owner has totally hacked them up
Today's tl;dr:
- Don't install exhaust silencers backwards
- Oil in your spark plugs is bad
- Ask smart people online if the previous owner of your car hacked a bunch of stuff up!
Highest priorities:
- Get oil out of spark plugs!
- Brake booster delete kit
- Replace master cylinder
- Passenger side drum brake
- Add brake fluid (Use the liter of DOT4 I bought)
- Buy a new Works Bell hub (This is down on the list since I won't be driving the car until the brakes are done)
- Use dry ice technique to remove interior sound deadening!
- Battery relocation kit
- New intake
Re: $250 '90 Hatch Build! (AKA: College Kid Budget Build)
Oof! Rotten luck with the oily spark plug wire. Hope it's easy to find the source once you pop the valve cover off. At least you shouldn't have to worry about that plug being seized into the head
Maybe I missed it, but why are you planning a brake booster delete? What's the advantage and is it worth it?
Re: $250 '90 Hatch Build! (AKA: College Kid Budget Build)
Coming along nicely. The dry ice on the floorboards trick for removing the sound deadening is one of the most fun projects you can do on these cars. Good luck with the seals.
Re: $250 '90 Hatch Build! (AKA: College Kid Budget Build)
Your oil in the spark plug tube is probably dried up old valve cover gaskets around the plugs. Replacing this with a new one (Use some honda bond around the cam) will give you an excuse to paint that nasty valve cover
Re: $250 '90 Hatch Build! (AKA: College Kid Budget Build)
There are also lower spark plug tube seals sandwiched between the rocker arm assembly and the head. Those are kind of a pain in the *** if you're not already doing a timing belt. My lower tube seal set has been sitting on a shelf for such a time. And as a bonus, if you wait too long they'll ruin the spark plug wires! Woooo
Re: $250 '90 Hatch Build! (AKA: College Kid Budget Build)
Wow, I'm back! Can't believe it, I went on a one month hiatus where I stopped working on the car. I got a bit discouraged by the valve cover/spark plug gasket job, but just a few days ago I pulled it all apart.
I bought the gasket kit from Autozone that didn't have the lower spark plug tube gaskets, thinking I could just run to my local Ace Hardware and pick up some o-rings (this is what I was told by someone on an EF Civic Facebook group). Low and behold, you need a special o-ring that you can only get from Honda, so that plan went out the door. I discovered that after pulling the entire engine apart, so lets get some pics of that!
Engine before the job, looking nice and gross. I bought some high-temp grill paint to paint my valve cover matte black after I get all of these gaskets replaced, along with some Aircraft Remover to clean up some of the corrosion and oil that's on it right now. Hopefully it comes out looking nice!
Got the valve cover off without any problems, now I'm staring at the rocker arm assembly! You can see the puddles of oil where the upper spark plug tube gaskets are supposed to be and where it was dripping into the actual tube, so those are obviously no good. Glad I have replacements!
Here's what the underside of the valve cover looked like. Not sure if this is good or bad, but I'm planning on cleaning it before I paint the top of it nonetheless.
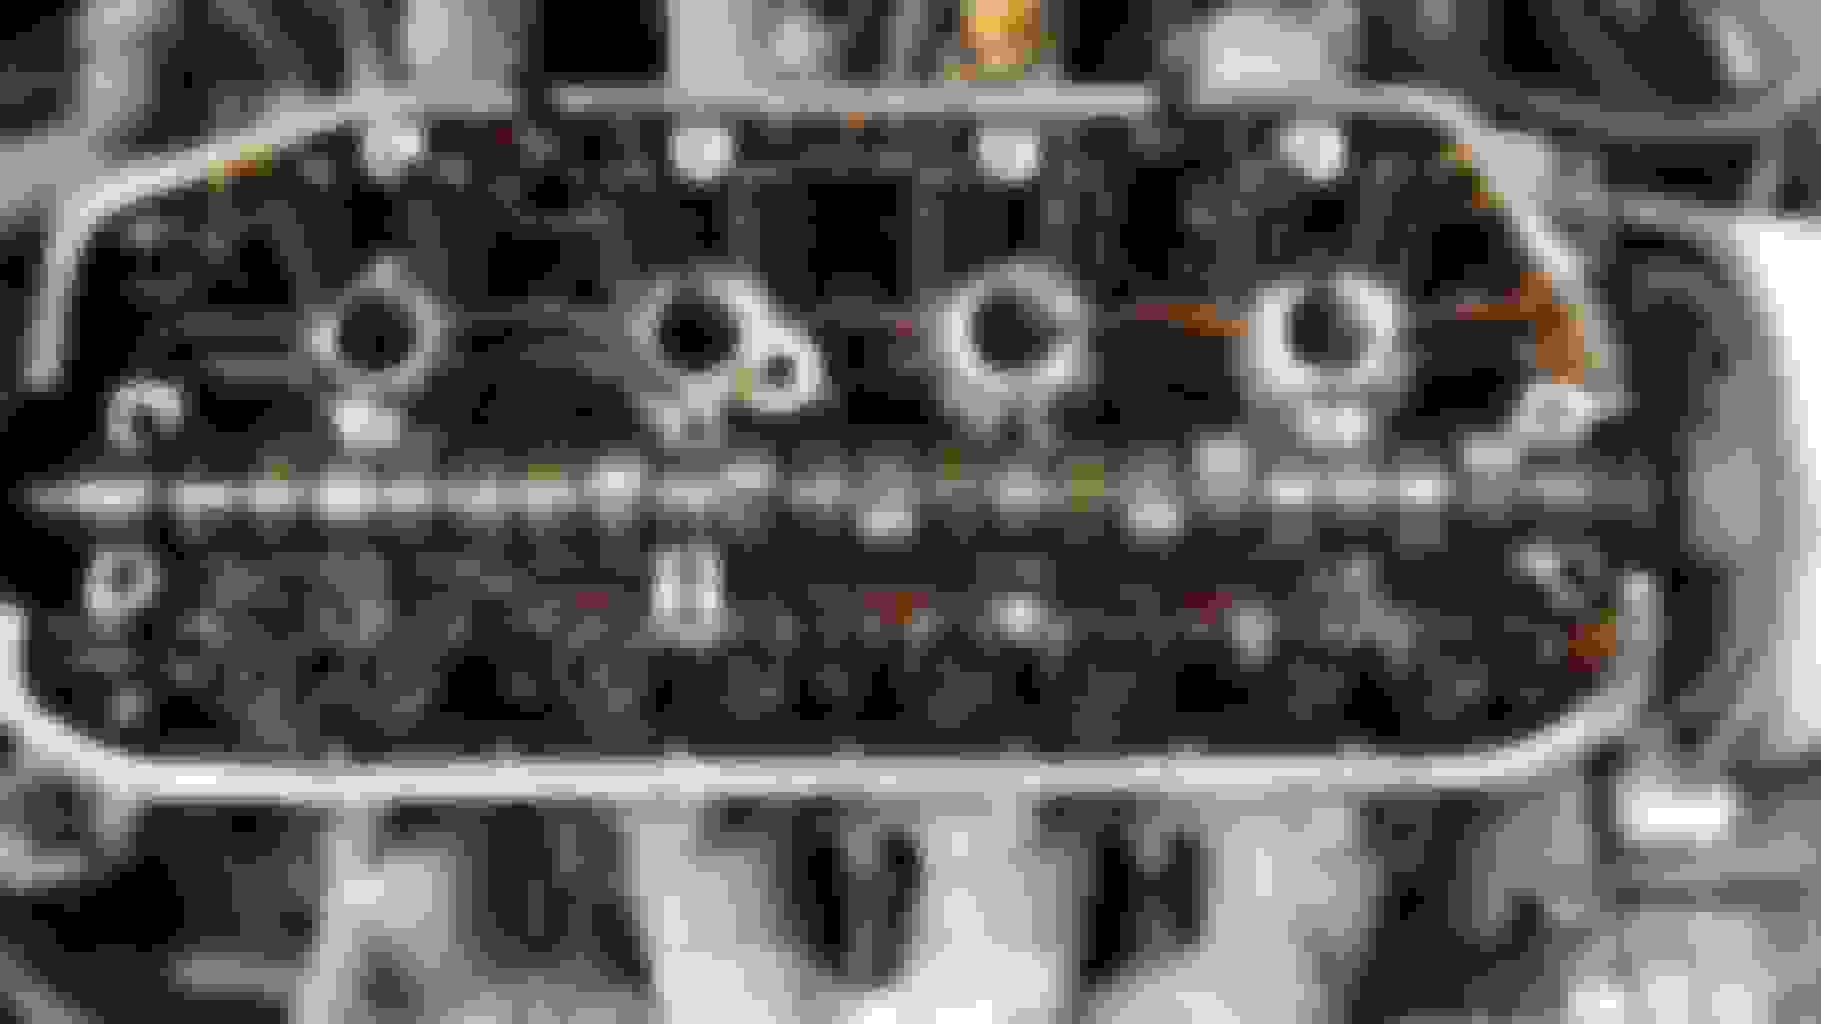
Followed some YouTube instructions and took the bolts out in the proper 1 through 16 pattern and managed to take the rocker arm assembly off all in one piece! Again everything went extremely well, and you can see that there's oil where the lower spark plug tube gaskets are supposed to go, meaning they were leaking as well. Here's where things got interesting...
I was told that all of the lower spark plug tube gaskets were just circular o-rings, so I could replace them all from my local Ace Hardware and it would be a done deal. Come to find out that the second one in is a specialty gasket only available through a Honda dealer! For anyone else attempting this (spark plug tube gasket replacement on a D15B2 engine) the part numbers I had to order were 91301-PJ7-000 and 91302-PJ7-003.
Unfortunately this meant ordering from a Honda dealer! Everywhere I looked online had flat-rate shipping, meaning I was going to pay $13 to ship my $5 o-rings. I didn't want to do that so instead I ordered an entire new Valve Cover Gasket Kit from RockAuto that included the lower spark plug tube seals for a grand total of $16 (including shipping!) Hopefully I can re-sell my unused kit that didn't include the lower seals, since I already opened it so AutoZone probably wont take it back.
And that leads us to now! I'm still waiting on the new valve cover gasket kit, RockAuto has been taking forever in shipping. Hopefully I'll be able to get the parts soon, put the engine back together, and have a happily running Civic!
Today's tl;dr:
- RockAuto ships slowly
- I procrastinate too much and need to work on my car more
- I should re-grind my cam for more horsepower???? (lol maybe not yet, I have way more important stuff to do)
Highest priorities:
- Get oil out of spark plugs!
- Passenger side drum brake (plus caliper paint to stop rust)
- Use dry ice technique to remove interior sound deadening!
- Brake booster delete kit
- Replace master cylinder
- Buy a new Works Bell hub (This is down on the list since I won't be driving the car until the brakes are done)
- Battery relocation kit
- New intake
Re: $250 '90 Hatch Build! (AKA: College Kid Budget Build)
Originally Posted by 2x0
Nice update, fun stuff
Once you get the new gaskets in and put everything back together, should go ahead and check the valve lash while ur in there!
Yeah definitely! I highly doubt the previous owners did it with how they left the rest of the vehicle, so the poor engine could probably use it.
More updates today! Pulled out the passenger seat and started to pull out the front carpet. Current plan is to sell the passenger seat to help me afford a nice driver-side bucket seat. Once that's bought I can worry about getting a passenger bucket
Seat came out super easy. Anyone know what that plug is for? It wasn't hooked up to anything...
The passenger seat out of the vehicle. Definitely going to try selling it, it's in great shape!
I noticed this while pulling things apart. (Ignore the dirt and dust, this car is GRIMEY. I haven't gotten a chance to clean it out yet, I probably should) Anyone know why there's a square hole cut into the side of this? I'm guessing its something the previous owner did either on purpose or accident, but I can't think of any reason to ghetto-cut a hole there...
Moved over to the driver's side, about to pop off the trim that runs along the bottom of the door sill to start removing the carpet, when I noticed this latch is completely smashed... (passenger side was perfect)
When I went to pull it out, one of the bolts instantly snapped. This thing was 70% rust!
Anyone know where I can pick up a new one of these, or know if they're required? This one is definitely toast.
While working on the driver's side, I figured I'd ask about this door hinge too! Anyone know if these are replaceable/fixable? This one is wiggling around and makes a loud CRACK noise when you open the door wide.
I saw a thread about replacing "sagging" door hinges, but I wasn't sure about these/the fact that it wiggles and moves where it shouldn't...
That about does it for today! Got a bit of interior stuff done, still waiting on the spark plug tube gaskets from RockAuto. Now I'm off to the gym for some personal weight reduction!
Today's tl;dr:
- 27 year old cars are rusty and break bolts
- Who needs passengers? Weight reduction!
- If something can break on this Civic, it probably will.
Highest priorities:
- Get oil out of spark plugs!
- Passenger side drum brake (plus caliper paint to stop rust)
- Use dry ice technique to remove interior sound deadening!
- Brake booster delete kit
- Replace master cylinder
- Buy a new Works Bell hub (This is down on the list since I won't be driving the car until the brakes are done)
- Battery relocation kit
- New intake
Re: $250 '90 Hatch Build! (AKA: College Kid Budget Build)
Anyone know why there's a square hole cut into the side of this? I'm guessing its something the previous owner did either on purpose or accident, but I can't think of any reason to ghetto-cut a hole there...
Looks like they had it cut out for a switch of some sort.... maybe the connector under the seat is related? They could've had some sweet neon under-seat lighting or something at one time
Re: $250 '90 Hatch Build! (AKA: College Kid Budget Build)
That center hinge you have a picture of - no clue if that can be replaced. But when I got my hatch my door was popping and creaking like hell and the door would sag so hard it wouldn’t close. I replaced the other 2 door hinges and spent some time getting it all to line up and I eliminated the noise and issues. They were pretty cheap to go pull them at a junk yard
Re: $250 '90 Hatch Build! (AKA: College Kid Budget Build)
Originally Posted by 2x0
Looks like they had it cut out for a switch of some sort.... maybe the connector under the seat is related? They could've had some sweet neon under-seat lighting or something at one time
Wouldn't surprise me haha
Originally Posted by tooters bmx
That center hinge you have a picture of - no clue if that can be replaced. But when I got my hatch my door was popping and creaking like hell and the door would sag so hard it wouldn�t close. I replaced the other 2 door hinges and spent some time getting it all to line up and I eliminated the noise and issues. They were pretty cheap to go pull them at a junk yard
Ah okay, I'll probably look into that pretty soon! Thanks for the info
On to today's update!
My package from RockAuto came in, so I decided to hop right into things and start replacing the lower spark plug tube gaskets.
First things first, I cleaned off all of the "edge" surfaces that were covered in oil or grime. Looks a lot better!
Popped all of the new gaskets in! They all fit great, it was nice finally having them back in after such a long wait with RockAuto's shipping. I also tried to clean all of the oil off of the surface and channel where the gasket goes.
This thing is still an eyesore, but at this point it was almost pitch black out so I decided to retire for the night. I'm planning on degreasing/cleaning, sanding, and washing tomorrow, and then hopefully painting it on Friday. If I didn't mention it previously, I bought some high-temp matte black BBQ Grill paint to use. (I was advised that most engine paint is just more expensive and re-labeled grill paint, and that the valve cover usually doesn't get insanely hot anyways)
I ended up dabbing a majority of the oil out of the spark plug tubes using torn up rags and the tip of my screw driver to soak it all up. I also properly installed and torqued down the entire rocker arm assembly (following the correct bolt pattern, giving each bolt 16 ft/lbs of torque) and temporarily popped the valve cover back on, stuffing the holes with rags. Got my to-do list written down on my handy dandy piece of cardboard (I used it for keeping track of the rocker arm assembly bolts) and closed everything up for the night.
Hopefully I can finish up this repair job tomorrow or Friday, unfortunately things are taking longer because of the painting! Hopefully the finished product will look nice though, I'm excited to have a nicer looking valve cover.
Today's tl;dr:
-Woot! New gaskets!
- Woot, gonna paint my valve cover
- It gets dark too early in the winter
Highest priorities: - Clean and paint valve cover
- New spark plug wires to compliment new spark plugs
- Passenger side drum brake (plus caliper paint to stop rust)
- Use dry ice technique to remove interior sound deadening!
- Brake booster delete kit
- Replace master cylinder
- Buy a new Works Bell hub (This is down on the list since I won't be driving the car until the brakes are done)
- Battery relocation kit
- New intake
Re: $250 '90 Hatch Build! (AKA: College Kid Budget Build)
Thanks for the support guys! Got a lot more stuff done today.
This is how the day started. It was time to clean, sand, and wash the valve cover. This thing had an insane amount of caked on grease, oil, and corrosion. Cleaning it was no small feat!
Here we are after attacking it with brake clean, a nylon bristle brush, and blue rags for almost an hour. Looking 100x better! I cleaned it up a bit more and decided to move onto the top.
Jeeeesus. This was going to take some hardcore cleaning and sanding if I ever wanted to get it looking nice. Lets see what I can do!
Another 45 minutes to an hour later, here it was! All done by hand with 320 grit sandpaper. It could probably look better if I took even more time sanding it, but for the matte black paint that was going over it, I figured this would be fine.
This was where I retired for the night. It was getting late and I had things to do in the morning! Which brings us to today's photos...
First, the sanded valve cover in the light! It could use some cleaning up, but it's 100x better than it looked before sanding. After taking this picture I scrubbed the whole thing down and cleaned it with warm soapy water, but I didn't get any photos of that. Oops!
I've seen differing accounts online - some people say that shoving a piece of paper in each hole is enough, and others swear by taping over each hole individually. I decided to take the extra time and tape over every hole to give it a clean and nice finish.
Taping process complete, it was time to get to painting!
It got dark quickly and I only had time for four or five coats applied fairly quickly after each other, but I'm in love with the result. I used high-temp grill paint (Can take up to 1200 degrees Fahrenheit) since it was cheaper than engine enamel paint, and I'm really satisfied with the result!
Another angle of the valve cover before the tape comes off...
Tape came off, valve cover is looking great! Time to throw it on the car and see how it looks.
The new paintjob on the valve cover completely transforms the look of the engine bay.
While I still have a long ways to go before the car is exactly how I want it, this is a huge step in the right direction!
On top of that, I can say this is definitely the best $6 mod I've ever done to a car. I still need to actually do all of the valve adjustments and change out the spark plugs, it was too late to get into all of that tonight. But everything is coming along great so far!
Now I just need to MPFI swap it to get that ugly DPFI intake manifold off of there... I think finishing up the brakes and whatnot is going to come first though!
Today's tl;dr:
- I painted the valve cover
- It looks amazing
- I need to MPFI swap my car if I ever want my engine bay to be truly clean
- Rear brakes are next on the to-do list!
Highest priorities: - New spark plug wires to compliment new spark plugs
- Passenger side drum brake (plus caliper paint to stop rust)
- Use dry ice technique to remove interior sound deadening!
- Brake booster delete kit
- Replace master cylinder
- Buy a new Works Bell hub (This is down on the list since I won't be driving the car until the brakes are done)
- Battery relocation kit
- New intake
Re: $250 '90 Hatch Build! (AKA: College Kid Budget Build)
Originally Posted by 2x0
Nice job on that valve cover!
For next time, a wire wheel is your friend
Keep up the good work
Very true! I realized that about half way through, but by that point I was committed to sanding. Thanks for the encouragement too!
Now then, today's update!
The car has been sitting for far too long. I've been dealing with college finals these past two weeks so almost nothing has been done to the car. On top of that, it snowed almost a foot on the last day of finals week, so my car was completely buried! I dug it out and got to work on the valve adjustment.
The uncovered yet snowy Civic! Ready to be worked on!
Painted valve cover is still looking good, and my cardboard + towel appears to have been keeping the elements out of the spark plug holes (plus the hood has been closed this whole time)
I've never done a valve lash adjustment before, so I was a huge noob going into this! This was another part of the reason the car hadn't been worked on in a while - I was super intimidated at this job!
Various forum posts all told me different things, but I finally figured it out. I should've consulted the Hayne's manual I bought first! It didn't have the actual specs (those are apparently on a hood sticker which has long since peeled off of my car) but it had the exact process needed to adjust the lash. I'll post it here in case anyone else is wondering:
Pull the wheel off to get access to the crank pulley. The D15B2 rotates counterclockwise, which was news to me. (I haven't found a conclusive answer on what happens if the engine is rotated the incorrect direction, but I've heard people say various gears can skip teeth and things like that. Probably not the end of the world, but better not to) Piston 1 has to be set at TDC (Top Dead Center) by rotating counter-clockwise until the word "UP" appears at the top of the cam gear (the gear with the timing belt on it, to the right of the valve/rocker arm assembly) with the two markings (there are two dash markings on either side of the cam gear) pointing to the left and right, horizontal. From there you can adjust piston #1's valves. Another quarter turn so the markings are facing straight up and down vertically and you're at TDC for piston #3. Adjust piston #3's valves, another quarter turn so the markings are facing horizontal again (but the word "UP" is at the bottom) and you can adjust piston #4's valves. Finally, a quarter turn so that the markings are vertical again, and you can adjust piston #2's valves. I used 0.07 in. for the intake-side valve lash and 0.09 in. for the exhaust-side valve lash.
And with that, you're done!
With the hardest job out of the way, I decided to start "buttoning up" the engine and putting everything back together. First item on that list: new spark plugs!
Spark plugs were the reason I did this entire job - I discovered all of the seals were bad when I originally went to change them and found the tubes filled with oil!
Since the old spark plug wires were crusty and gross, I decided to pick up a new set of those too. Unfortunately I couldn't find any Duralast Gold wires in stock near me, only the regular Duralast ones. $35 later and I was plugging away!
Aaaand as always, I was working into the night. I couldn't get a good picture of the finished up engine bay, but everything went back together nicely! The car fired right up (after coaxing the battery a little) and I let it warm up for a while.
While I had the hood open (and now that it was really winter time) I decided to double check the coolant as well. Ran what was currently in the system through a tester, and it showed it was mostly antifreeze which was a good sign. The last thing I wanted to find out was that the previous owner dumped this thing full of water and it froze. I decided to fill her up with some nice new Peak antifreeze (some of the stuff that doesn't freeze until -84F) and let it warm up and kick in the thermostat to get the system running.
I think it was the longest I've had the car running at one time so far, around 20-30 minutes. I also found out the heat blows just fine, which is awesome. Made a to-do list of stuff I wanted to do to the car over the next few months before summer time hits, I'm excited to have a nice clean Civic by the time track season rolls around!
Today's tl;dr:
- Finished valve adjustment, which wasn't as hard as I thought it would be!
- Got engine back together!
- Car is running!
- Heat even blows! Woo!
- Coolant topped off and looking good!
- Made an insanely long to-do list!
Here's my new to-do list:
(This isn't in any specific order)
Paint cold air intake with black grill paint (The shiny chrome looks horrible)
Relocate battery to trunk
Strip out front carpet
Get a new air filter
Maybe an HKS mushroom one? I've always liked the look of them haha
Replace passenger side rear tire
Currently has a slow leak - I picked up a new tire, just need to get it mounted
Get interior dome light working (Possible blown fuse as radio didn't work, nor does cigarette plug)
Tape off radio harness wires to prevent possible shorting
Replace passenger-side drum brake
Paint both sides with silver caliper paint!
Replace front brake pads
Need to clean up the calipers as well, possibly paint?
Remove interior sound deadening material
Dry ice technique is currently the plan
Brake booster delete kit
This may not be required - I was going to do this because I thought my booster/master was bad, but I'm now thinking it could be a bad slave cylinder in one of the rear drums that's leaking brake fluid! I'm going to replace them both and see if that solves the problem. If it does, I can remove this from my list.
Works Bell hub
This is down on the list since I won't be driving the car until the brakes are done
Install lowering springs
I bought some Neuspeed Race springs forever ago back when I first replaced the headlight! Just gotta install them
This could possibly require new shocks too. Hopefully not, because shocks are expensive!
Manual swap!
I almost bought a $200 '90 Si that had the 5-speed manual in it! The entire car would've been cheaper than buying a swap! The car had some suspension and wheel bearing issues but none of those would've mattered. I'm super mad, because I could've also gotten the MPFI swap from it, not to mention the gauge cluster, pedals, etc. The only thing that stopped me was my parents saying they would kick me out of the house if I bought it :'( c'est la vie
Get new corner lights, or fix current ones
I'm divided. Part of me wants to get amber corner lights and paint white stripes on them because I think it would look cool, and the other part of me wants to just run clear corner lights and call it a day. We'll see what happens!
I'm also tempted to repair my own lights instead of buying them. I've heard its not very hard! Lots of people build custom clear tail lights and whatnot.
Replace power steering belt
With the help of my dad, I was able to cut off the previously-stripped power steering pump adjustment bolt!
This means I can replace the belt and get power steering working at any time!
Re: $250 '90 Hatch Build! (AKA: College Kid Budget Build)
Nice updates! Glad to see the valve adjustment went smoothly once you got into it. It's one of those jobs that is never fun to do, but is almost worth knowing that it's done It's something I also need to do.
Re: $250 '90 Hatch Build! (AKA: College Kid Budget Build)
Originally Posted by 2x0
Hey we need some more build updates in the EF forum!
Thanks for the inspiration to post! I've been totally forgetting to update this thread.
So, stepping all the way back to late December...
Threw on a new power steering belt and was able to fix up the seized bolt that wouldn't let me move the power steering pump! Thanks to my dad for helping with this one.
Here's a picture of the repaired/freed-up bolt. Works great now! Just have to loosen the nut to adjust it.
Later in the month, I couldn't stand just waiting around in the snow. I was getting restless! I had a flat tire for the entire winter up until this point and it was annoying me (I made the poor decision of buying a Craigslist tire which turned out to have a leak )
Took off the wheel and ran to the junk yard and got a new tire (yeah yeah I know, junkyard tire to replace craigslist tire? But don't worry - I made sure this one holds air hahaha) and had it mounted, now everything is good!
Gonna try to separate time gaps into different posts so I don't have one post that spans 100 pictures haha. I wasn't super active in fixing the Civic over the past 4 months, but I've definitely made a lot of progress!

 10-13-2017, 06:36 AM


 Hopefully it will happen this winter, before the track days start up in April!


 Rotten luck with the oily spark plug wire. Hope it's easy to find the source once you pop the valve cover off. At least you shouldn't have to worry about that plug being seized into the head


 )
)


