
Muckman’s Integra High Compression Super Build
 09-08-2012, 08:24 AM
#101
I had to move the short block upstairs and back to the garage before it got too heavy to lift.
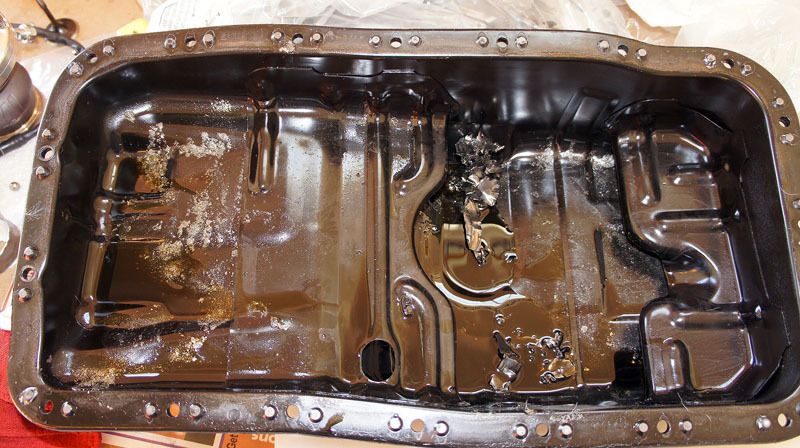
I spent 2 hours cleaning out my oil pan from the last spun bearing. When you think the pan is completely clean, it’s not.
There’s always metal particles hiding in the corners after a spun bearing. The best way is just a lot of soap and water then repeat 50 times.
Replaced the rear main seal
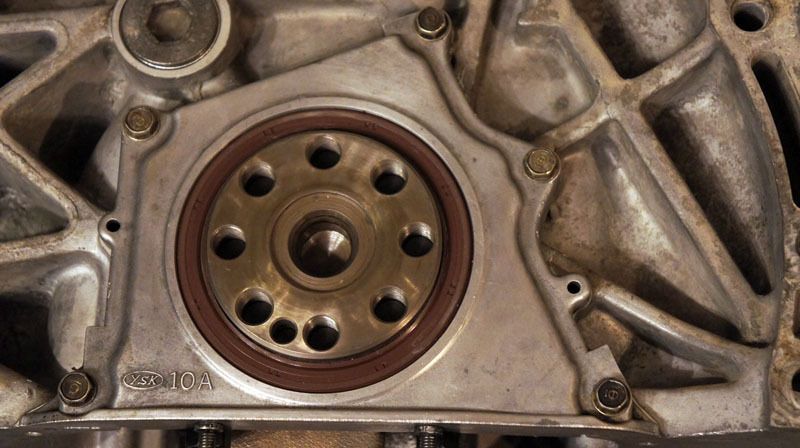
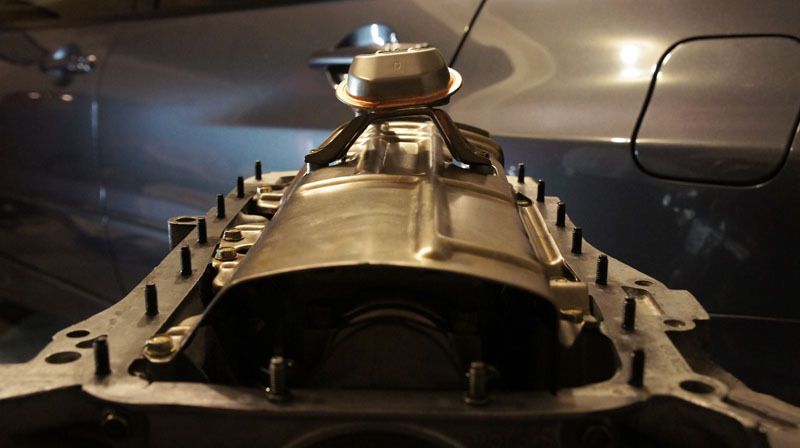
Got the oil pump installed. I bought a modified OEM oil pump massaged by Endyn.
Bought a new oil pick up too.
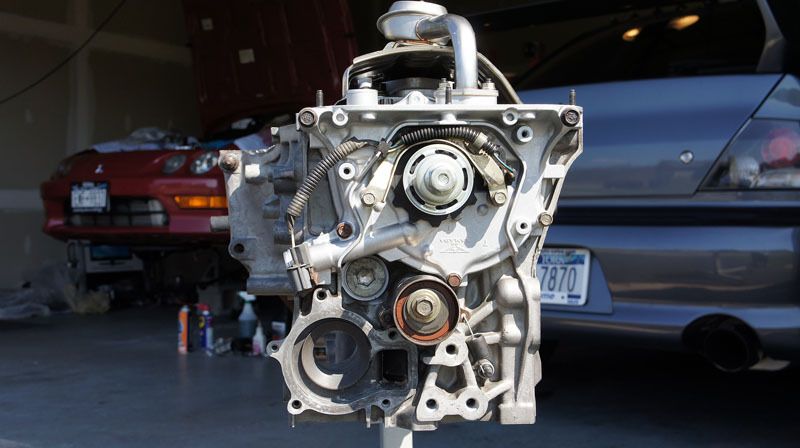
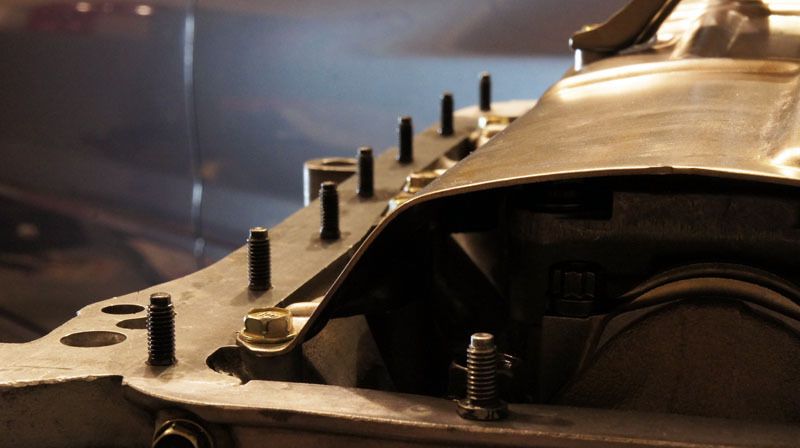
Replaced all the oil pan bolts with new OEM studs. Why? BecauseCrazy
Experimenting with background lighting and aperture.
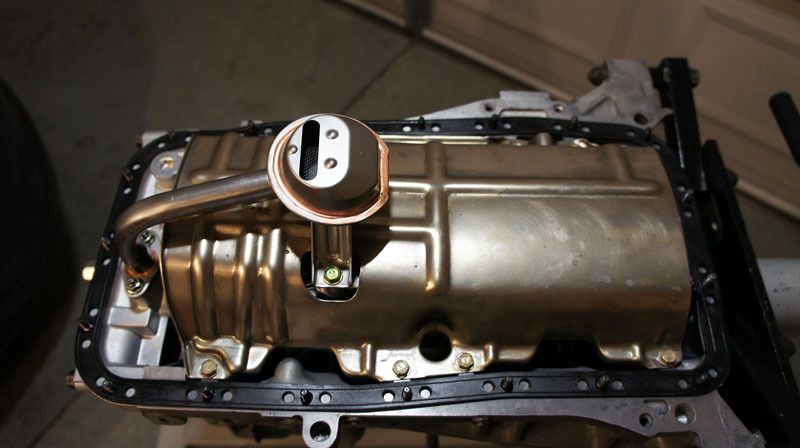
New oil pan gasket installed.
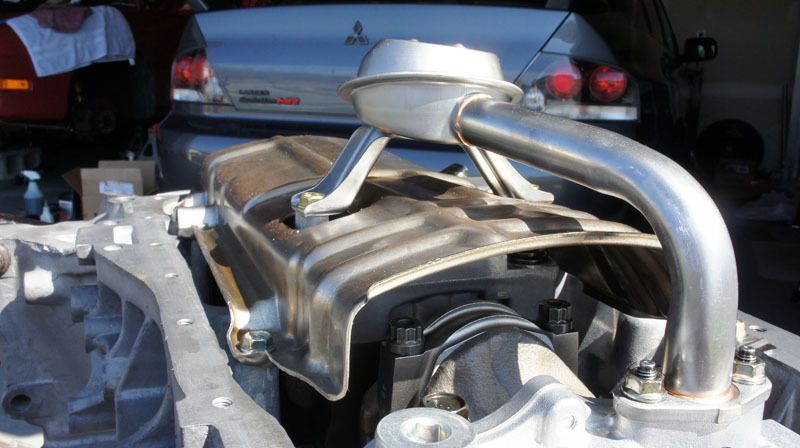
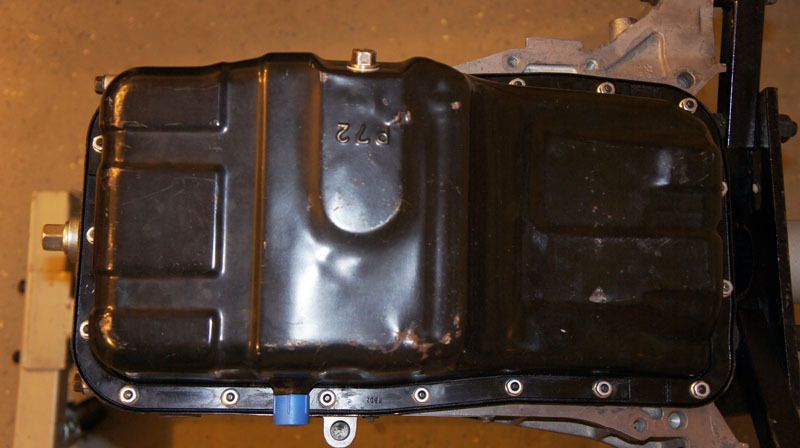
Clean oil pan installed.
I spent 2 hours cleaning out my oil pan from the last spun bearing. When you think the pan is completely clean, it’s not.
There’s always metal particles hiding in the corners after a spun bearing. The best way is just a lot of soap and water then repeat 50 times.
Replaced the rear main seal
Got the oil pump installed. I bought a modified OEM oil pump massaged by Endyn.
Bought a new oil pick up too.
Replaced all the oil pan bolts with new OEM studs. Why? BecauseCrazy
Experimenting with background lighting and aperture.
New oil pan gasket installed.
Clean oil pan installed.
 09-08-2012, 08:41 AM
#102
Honda-Tech Member
HEY !!! You stole the sump studs idea from ME !!  j/k
j/k
I've had fun cleaning sumps out myself so I know how much of a pain it can be. After I've give it a good clean down I normally just feel around with my fingers and try and get the remaining particles by sticking them to my fingers. Its a pain because even if it looks spotless there's always something there... It takes for ever...
j/kI've had fun cleaning sumps out myself so I know how much of a pain it can be. After I've give it a good clean down I normally just feel around with my fingers and try and get the remaining particles by sticking them to my fingers. Its a pain because even if it looks spotless there's always something there... It takes for ever...
09-08-2012, 09:01 AM
#103
Honda-Tech Member
Join Date: Mar 2004
Location: NY
Posts: 976
Likes: 0
Received 0 Likes
on
0 Posts
One quick question, do you reuse the thrust bearings or replace them when you replace everything else?
Also, I just want to say I really appreciate you sharing with this build. It gives people who don't have engine building experience wealth of info on how to start.
Also, I just want to say I really appreciate you sharing with this build. It gives people who don't have engine building experience wealth of info on how to start.
09-08-2012, 09:03 AM
#104
-No need for "LS/VTEC" kits and all that nonsense. Especially if running a MOCAL oil cooler system
- Stick with the same VTEC gasket, and no mix-matching parts, easier to get replacements.
I used the LS Crank in my GS-R NA build and love it. But unlike Muckman, I just removed the squirters w/ an LS/VTEC squirter block kit instead of shaving the bolts for the counter-weights.. (NICE IDEA, BTW!!)
I'm going to be experimenting with Project B16 with a few parts, for a light road race build using a GTX2867R and GSC cams. I'll put up a parts list and ask your opinions.
 09-08-2012, 12:01 PM
#107
Theres no need to mix bolts and studs anyways.
You COULD because thrust bearings dont see alot of wear. But when you buy an ACL main bearing kit it comes with a new thrust bearing.
Thats the theory. Think of like a thermal blanket that will shield the piston from some of the heat. However I dont adjust the p2w because of it. Dont expect it to solve any permanent tuning issues because it wont. I just use it for an extra safety buffer.
Thats the theory. Think of like a thermal blanket that will shield the piston from some of the heat. However I dont adjust the p2w because of it. Dont expect it to solve any permanent tuning issues because it wont. I just use it for an extra safety buffer.
09-10-2012, 09:10 AM
#109
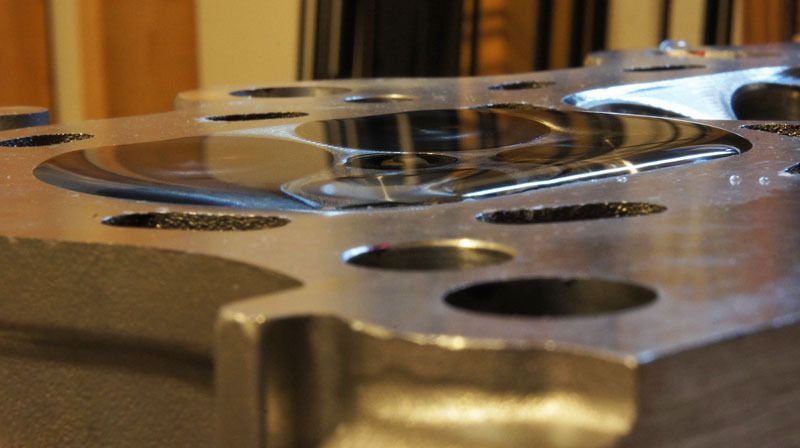
I needed to measure the volume of the head chamber to get an accurate compression ratio. The concept is simple – pour a measured amount of liquid into the head chamber until it’s filled up. At first I tried to use water but the surface tension created headaches. The water wouldn’t fill in around the top of the valves unless I overfilled the chamber. So I tried using rubbing alcohol and it filled in nicely around the valves.
This is with water showing the surface tension problem. Water would not fill in around the valves.
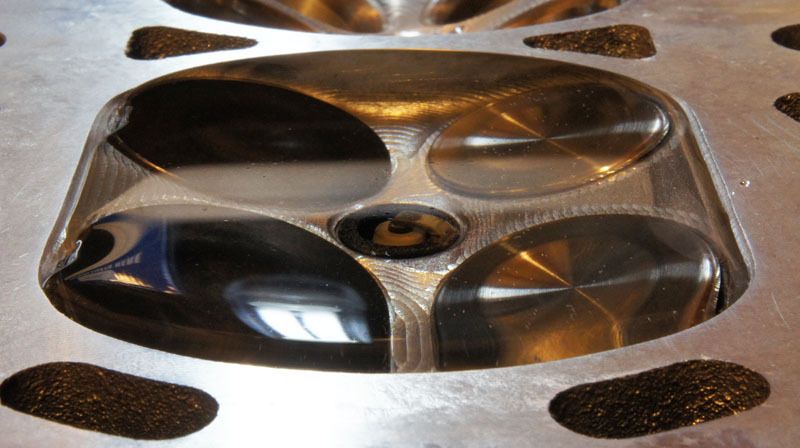
I could only get the area above the valves to fill in when I overfilled the chamber. This was about 48cc. This is the WRONG way to measure.
I used a 10cc syringe to inject the alcohol and a plate of plexi.
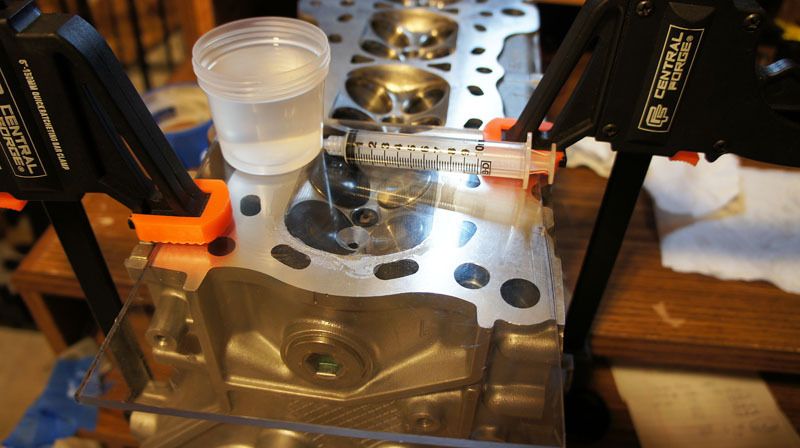
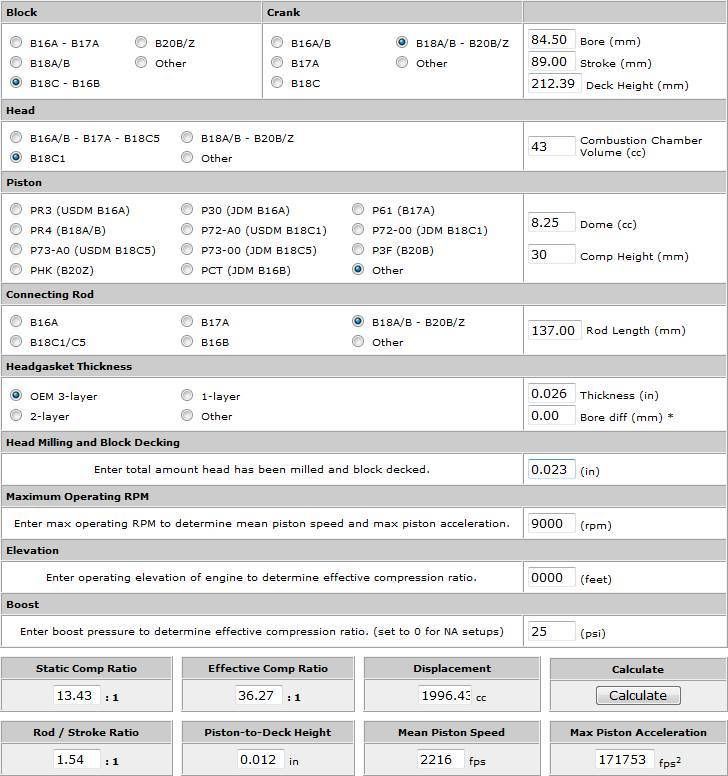
Final volume is 43cc!
This should give me about 13.43:1 compression ratio. Although Im not certain sure how much my block has been decked. Its been milled at least 4 times. I am estimating based on piston to deck height.
This is with water showing the surface tension problem. Water would not fill in around the valves.
I could only get the area above the valves to fill in when I overfilled the chamber. This was about 48cc. This is the WRONG way to measure.
I used a 10cc syringe to inject the alcohol and a plate of plexi.
Final volume is 43cc!
This should give me about 13.43:1 compression ratio. Although Im not certain sure how much my block has been decked. Its been milled at least 4 times. I am estimating based on piston to deck height.
09-10-2012, 04:40 PM
#112
Who is Mr Robot?
iTrader: (2)
Join Date: Jul 2004
Location: ATL - Where the Pimps and Players dwell
Posts: 21,474
Likes: 0
Received 10 Likes
on
10 Posts
next time if you want to use water to cc a head, put a few drops of dish soap in it... breaks the surface tension without fail.
we had the same problem as you did on our ls7 heads.
we had the same problem as you did on our ls7 heads.
 09-10-2012, 05:53 PM
#114
Honda-Tech Member
subscribe! nice built. i have a similar setup like urs. waiting on money to take it to the dyno tune. 12:5:1 81.5
 09-10-2012, 08:34 PM
#117
Checking v2v
*I originally picked the Skunk2 Tuner1 cam for this build but later changed my mind to the new GSC T1 cam. I took the "opportunity" to double my work effort here and check v2v with both cams in case I changed my mind again.
Anytime you are running an aftermarket cam or oversized valves or both especially you want to check valve to valve clearance. This is typically done at 0 valve lash because as your engine heats up the valve lash will decrease so you test with a worst case scenario – 0. Since it’s hard to measure zero clearance usually dial indicators are used to measure the height of the valve as you adjust the valve lash. You would tighten the valve lash just before you see valve movement on the dial.
Like this:
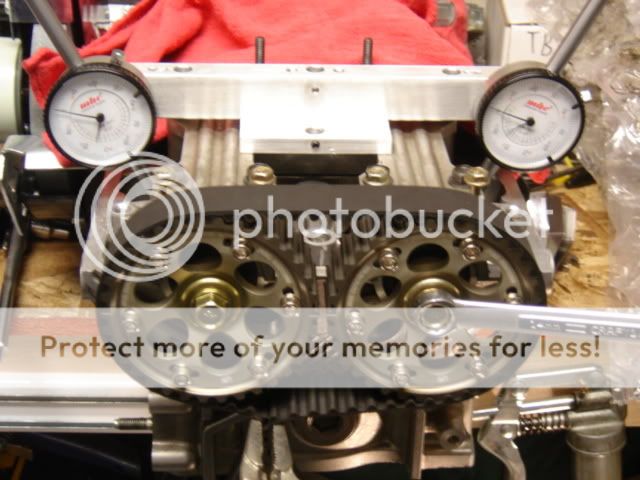
I don’t have a $300 dial indicator kit like that so I use the close’enuff method. I tighten the lash until I feel it hit the cam then back off a tiny amount. You want to avoid having negative lash where the valve is always being pushed down a tiny bit because the amount of lash will affect the v2v clearance.
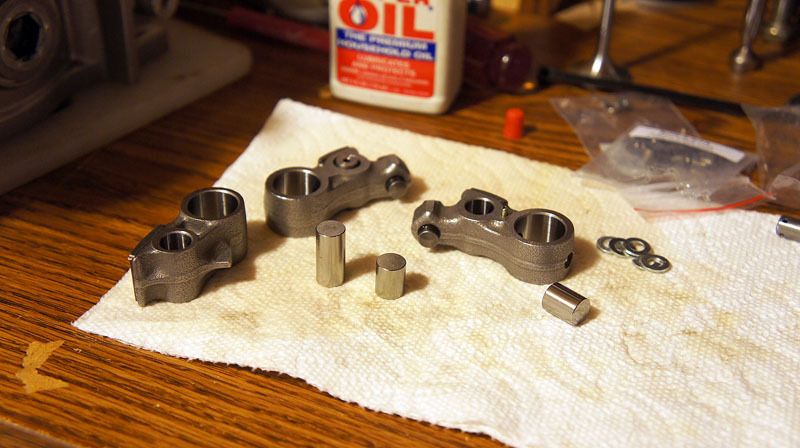
Next you need to lock your VTEC rockers because you want to measure the big lobe. There are a couple ways to do this. You can use pressurized air through a service port to pneumatically slide the VTEC pins in place. The system is very leaky which means you need to keep your compressor on constantly. The alternative method is to lock the rocker in place by extending the pins with a BB or small washers.
I used a stack of M4 washers to space out the pins locking the VTEC rocker.
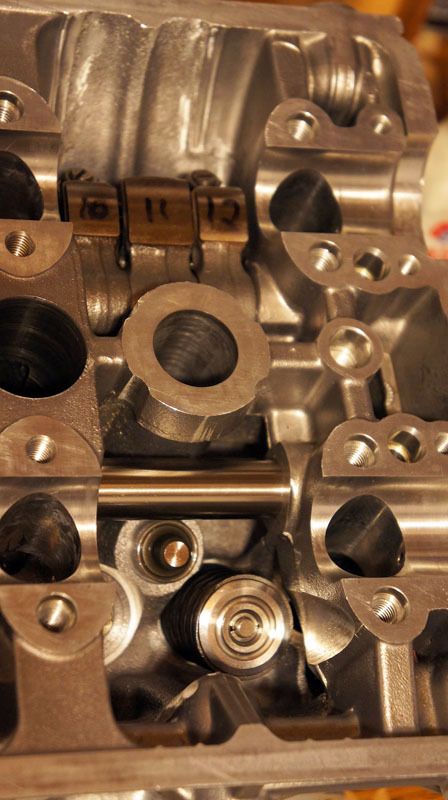
I set it up so only rockers were active in #1 cyl. I used the OEM exhaust valve springs as they are the softest making the cams easier to turn over. Spring pressure is not helpful here, the softer the better.
New cam and cam gears installed
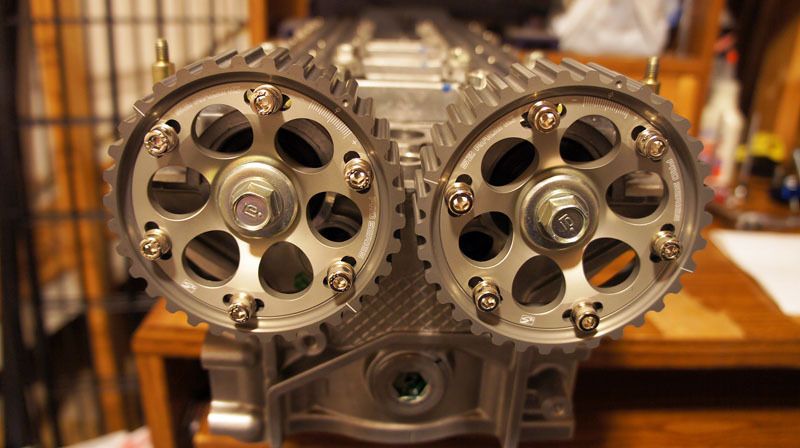
Wrapped an old tbelt around the cam gears and held it tight with vise grips.
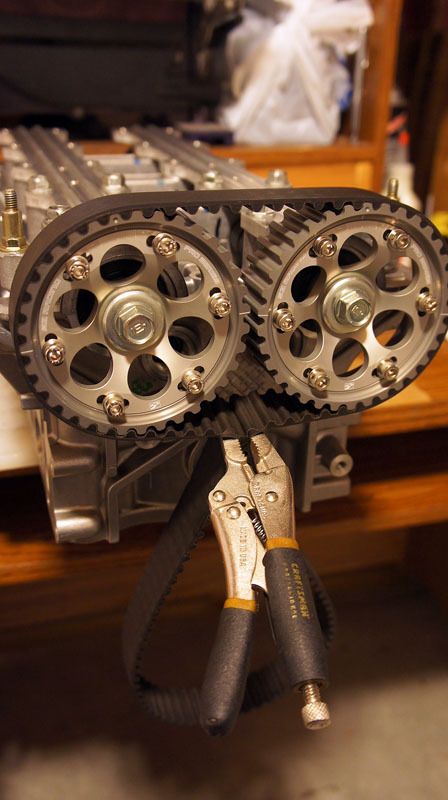
Then I set the lash to as close to 0 as I can by hand. I only have 1 valve for each cam installed so the right rocker is idle.
Once the head is setup now is the tedious part. You rotate the cams over until the valves are at their closest point (BDC) measure with a feeler gauge and record it, back off to TDC, adjust one cam gear and retest. Pretty soon you will see a trend develop on the chart where the cam spacing is safe. The “safe” v2v clearance is ~.030”.
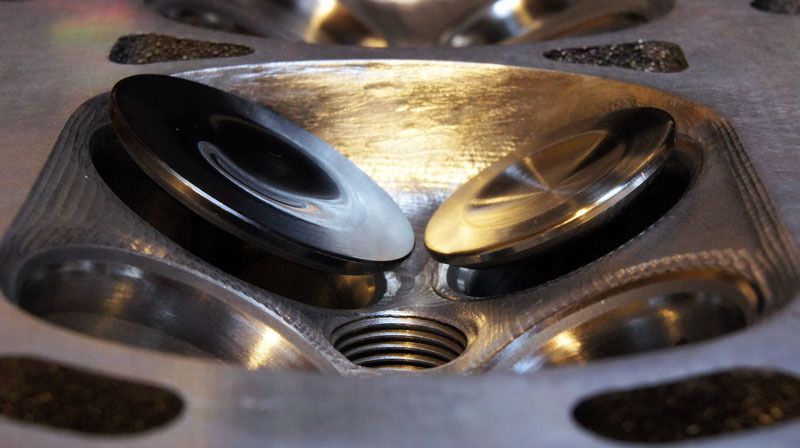
Here are the valves at their closest points with cams set to 0/0. .029” Close enough!
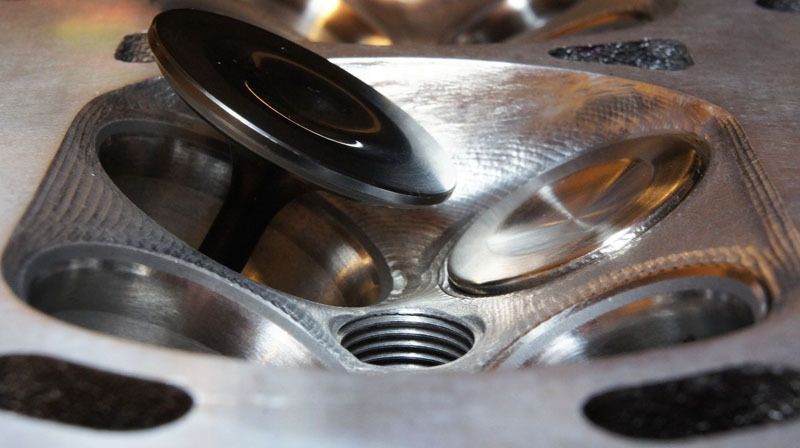
The new GSC cam has tons of lift.
Here are the final v2v charts for both cams. Green is the safe zone. Yellow is danger zone. The red is valve contact and catastrophic engine failure.
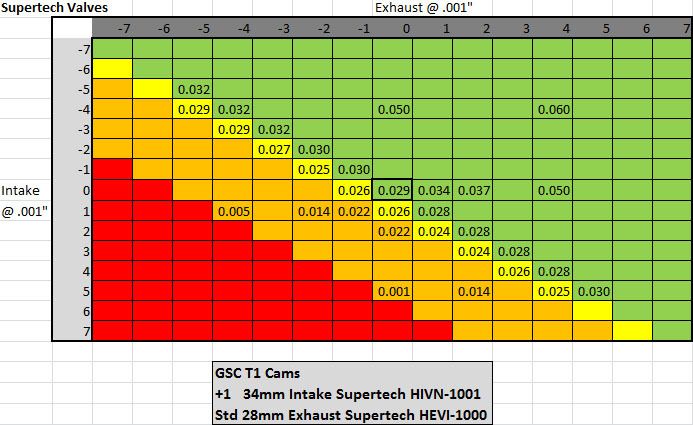
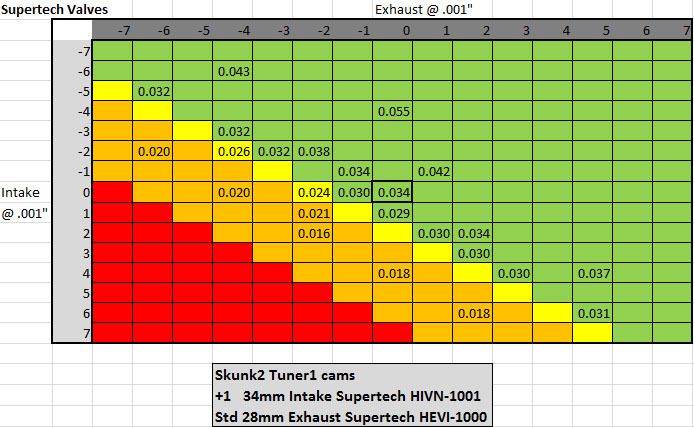
**My Dart head has a +1mm oversized intake valve making the v2v clearances tighter than a standard valve head. This forces me to seperate my cam gears further apart. If you are running either of these cams you can use my charts as a "worst case" clearance guide.
*I originally picked the Skunk2 Tuner1 cam for this build but later changed my mind to the new GSC T1 cam. I took the "opportunity" to double my work effort here and check v2v with both cams in case I changed my mind again.
Anytime you are running an aftermarket cam or oversized valves or both especially you want to check valve to valve clearance. This is typically done at 0 valve lash because as your engine heats up the valve lash will decrease so you test with a worst case scenario – 0. Since it’s hard to measure zero clearance usually dial indicators are used to measure the height of the valve as you adjust the valve lash. You would tighten the valve lash just before you see valve movement on the dial.
Like this:
I don’t have a $300 dial indicator kit like that so I use the close’enuff method. I tighten the lash until I feel it hit the cam then back off a tiny amount. You want to avoid having negative lash where the valve is always being pushed down a tiny bit because the amount of lash will affect the v2v clearance.
Next you need to lock your VTEC rockers because you want to measure the big lobe. There are a couple ways to do this. You can use pressurized air through a service port to pneumatically slide the VTEC pins in place. The system is very leaky which means you need to keep your compressor on constantly. The alternative method is to lock the rocker in place by extending the pins with a BB or small washers.
I used a stack of M4 washers to space out the pins locking the VTEC rocker.
I set it up so only rockers were active in #1 cyl. I used the OEM exhaust valve springs as they are the softest making the cams easier to turn over. Spring pressure is not helpful here, the softer the better.
New cam and cam gears installed
Wrapped an old tbelt around the cam gears and held it tight with vise grips.
Then I set the lash to as close to 0 as I can by hand. I only have 1 valve for each cam installed so the right rocker is idle.
Once the head is setup now is the tedious part. You rotate the cams over until the valves are at their closest point (BDC) measure with a feeler gauge and record it, back off to TDC, adjust one cam gear and retest. Pretty soon you will see a trend develop on the chart where the cam spacing is safe. The “safe” v2v clearance is ~.030”.
Here are the valves at their closest points with cams set to 0/0. .029” Close enough!
The new GSC cam has tons of lift.
Here are the final v2v charts for both cams. Green is the safe zone. Yellow is danger zone. The red is valve contact and catastrophic engine failure.
**My Dart head has a +1mm oversized intake valve making the v2v clearances tighter than a standard valve head. This forces me to seperate my cam gears further apart. If you are running either of these cams you can use my charts as a "worst case" clearance guide.
09-10-2012, 08:42 PM
#118
Who is Mr Robot?
iTrader: (2)
Join Date: Jul 2004
Location: ATL - Where the Pimps and Players dwell
Posts: 21,474
Likes: 0
Received 10 Likes
on
10 Posts
thats a ridiculous amount of lift lol.
i can't imagine doing this without a degree wheel and dial indicator but you made it work
i can't imagine doing this without a degree wheel and dial indicator but you made it work
 09-10-2012, 10:07 PM
#121
Who is Mr Robot?
iTrader: (2)
Join Date: Jul 2004
Location: ATL - Where the Pimps and Players dwell
Posts: 21,474
Likes: 0
Received 10 Likes
on
10 Posts
makes me wonder how putting bad putting my Tomei 280's (.492" lift) in my sr20 is gonna suck lol
09-11-2012, 04:30 AM
#123
Muck, you may want to consider ditching those S2 Pro series cam gears. The dainty little fasteners will strip really easily, especially when the engine is hot. I had one strip out on the dyno and had to throw a GE cam gear in for my intake cam. I went ahead and bought another GE cam gear just because I was that impressed with them. They are much more substantial and they come with ARP fasteners 
Just looking out for you!
Just looking out for you!
09-11-2012, 06:26 AM
#125
Not super tight at all. I use a stubby ratchet, holding the head of the ratchet and not the handle. Definitely not over-bearing. I just snug it up to where it will not back out. My tuner even had one of bolts on my S2 gears strip out. Rob (Total Performance Racing) said it was a common thing to see those cam gears strip, thats why he only stocks Golden Eagle cam gears.
On the S2 gear, you can see that barely any of the threads of the cap screws go into the cam gear when they are installed.
On the S2 gear, you can see that barely any of the threads of the cap screws go into the cam gear when they are installed.