
RoRo's RHD EG6 - Canadian Build
 02-16-2014, 04:39 PM
#1
Honda-Tech Member
Thread Starter
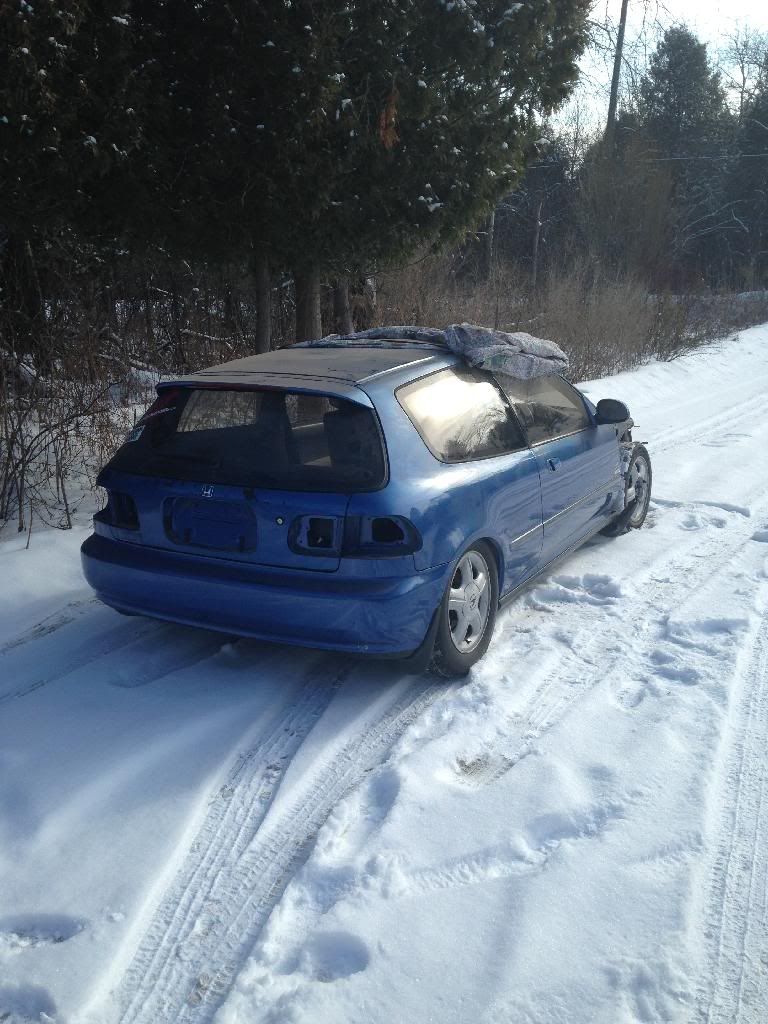
Hey all, My names Ronan, im 24, originally from England but ive lived in canada for almost 10 years now, been heavily into Hondas for 4 years owning several chassis (still do) and finally picked up a 1991 Honda civic RHD SiR hatch ive been lurking Honda-Tech for a while now and though i might as well post my build thread of my new car
so i sold my First honda, 1994 DX hatchback for $1600, the same night i stumbled upon the RHD forsale on my local forum for $1400 (minus engine)
a couple friends and i took a 4 hour road trip up north from where i am to get it the next night
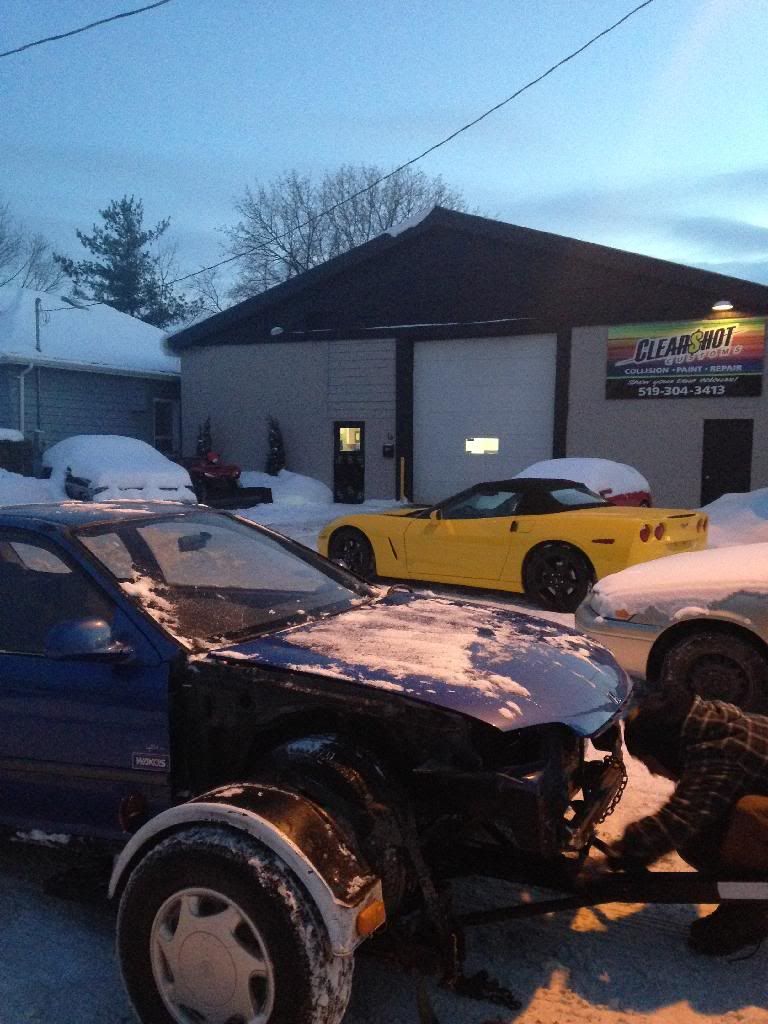
September 14th 2013
the day i picked her up :D


Here's more pics
Carbon fiber fog covers are forsale, headlights and corners are already sold

Cream coloured door panel inserts

Spoiler is forsale


Powder folding mirrors, traction control system!!!

Map light

Random windshield sticker

Door sticker


September 16th 2013
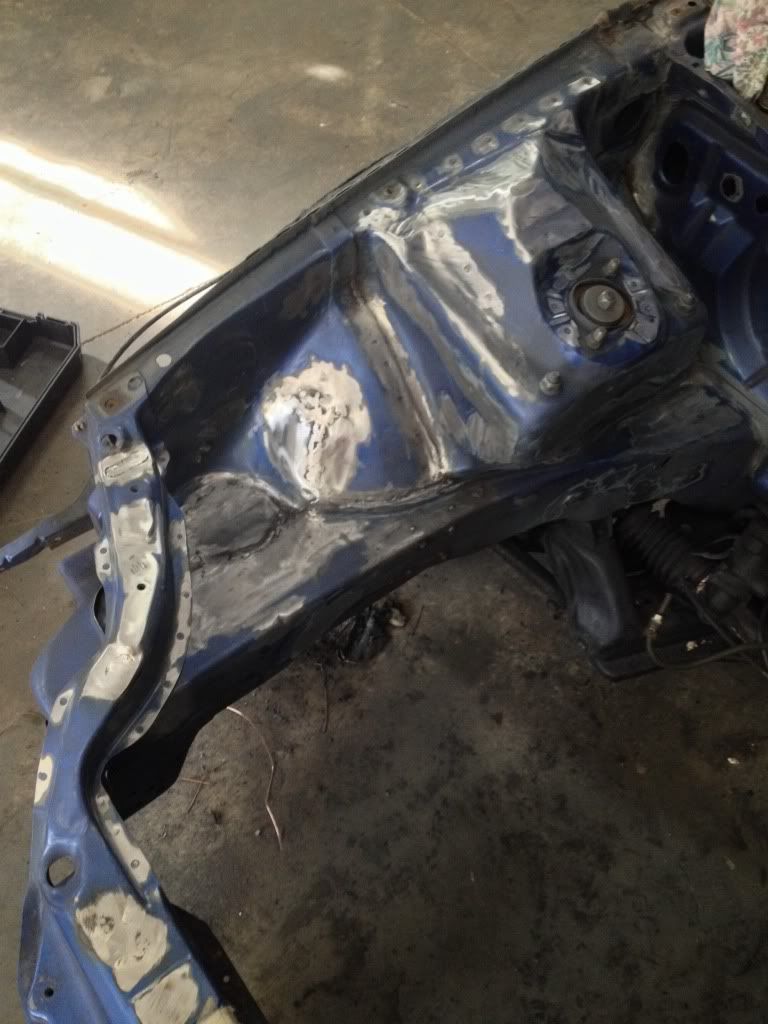
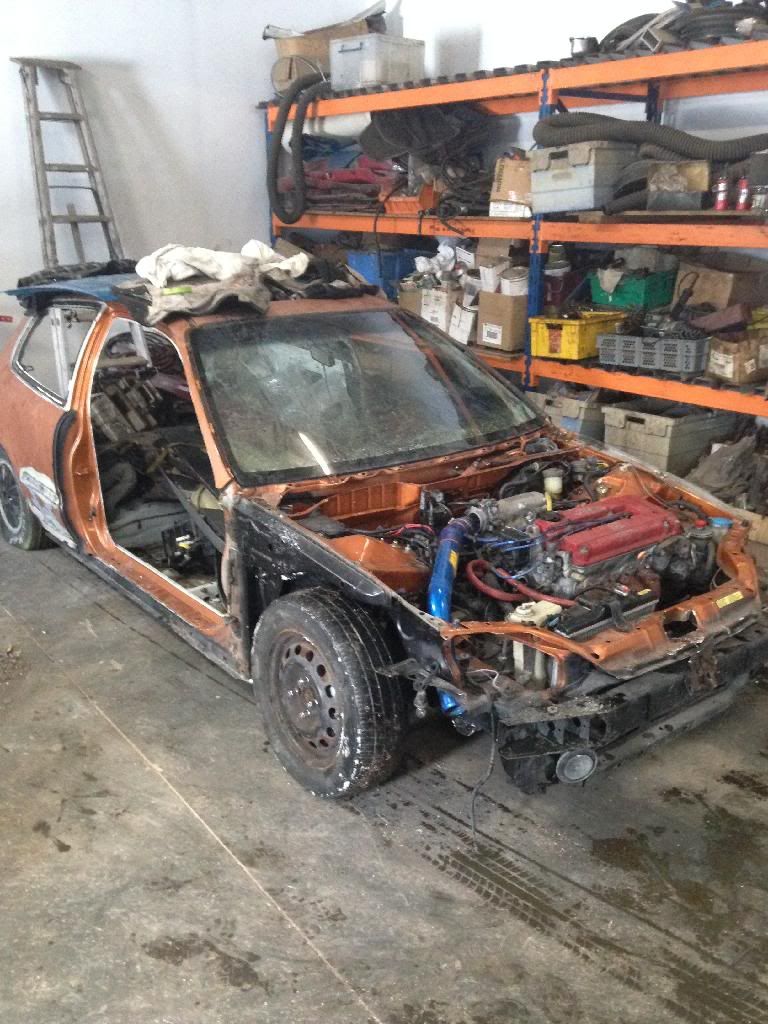
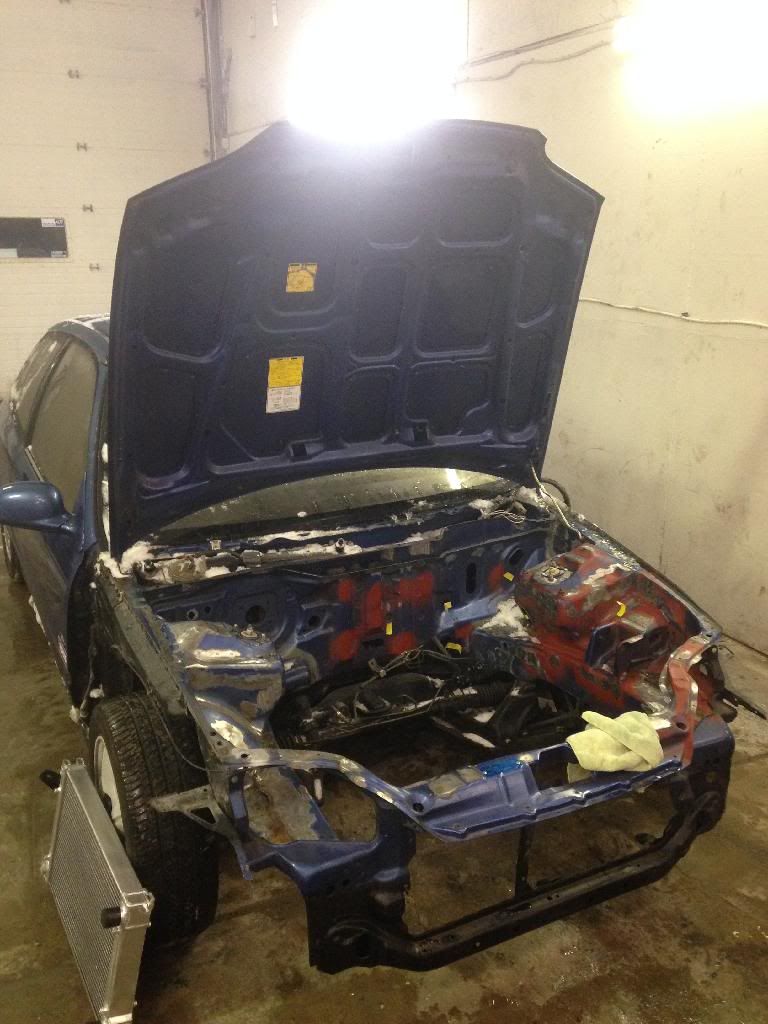
started stripping down the front end, I want to get the engine bay painted first and get the motor swap done before the rest gets painted
this shell had a k20 in it so I realized today it didnt have a "driver side" mount

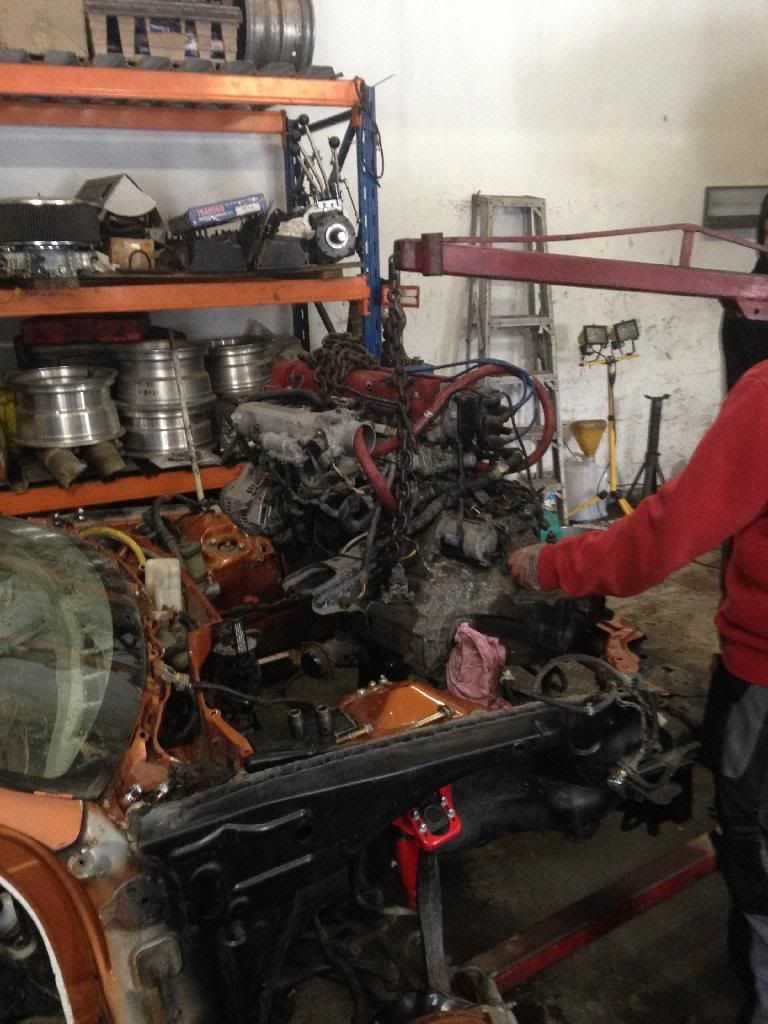
So I walked 3ft with a cutting disk in hand to my parts car (lol at my dad backing up my crv into the bushes)

And this was the "carnage"

Then I drilled out all the spot welds and separated the 2 pieces

I can see the dimples in the chassis rail as to where this mount should be, I'm going to get the body shop guys to weld it in

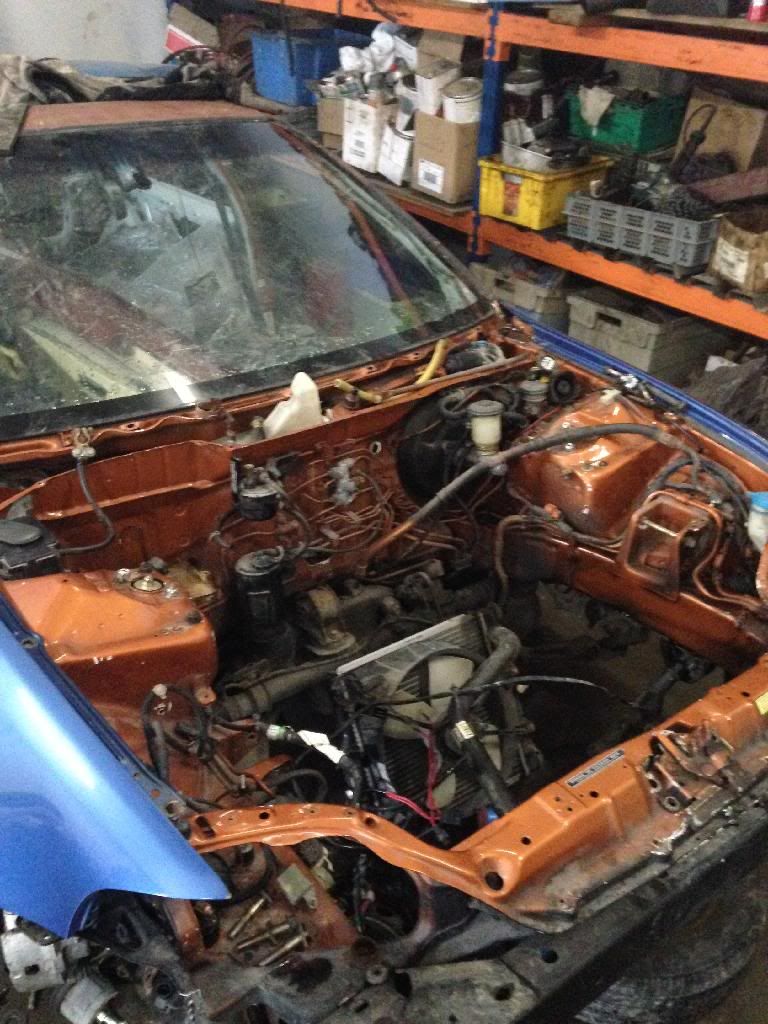
Undid all these lines and everything off the fire wall

And this is the point where I went home, I haven't even wiped / degreased or cleaned anything, there shouldn't be much of that to do at all, it's been well taken care of

and my parts car shall be gone tomorrow, no need of it now! Bye bye


September 17th 2013
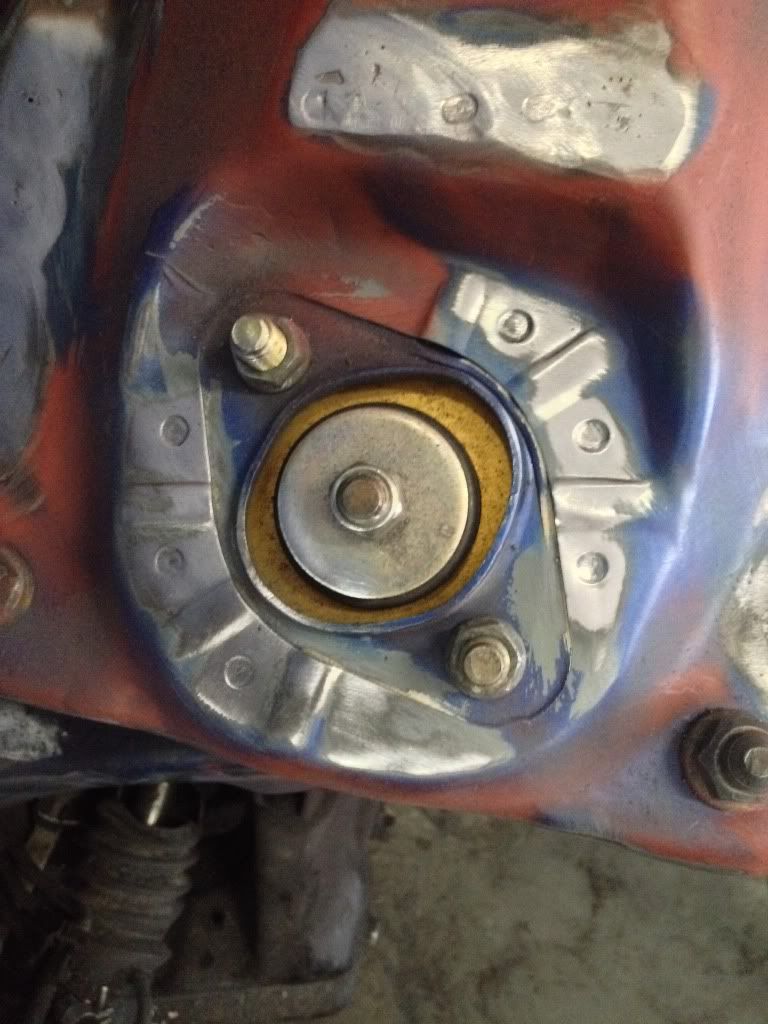
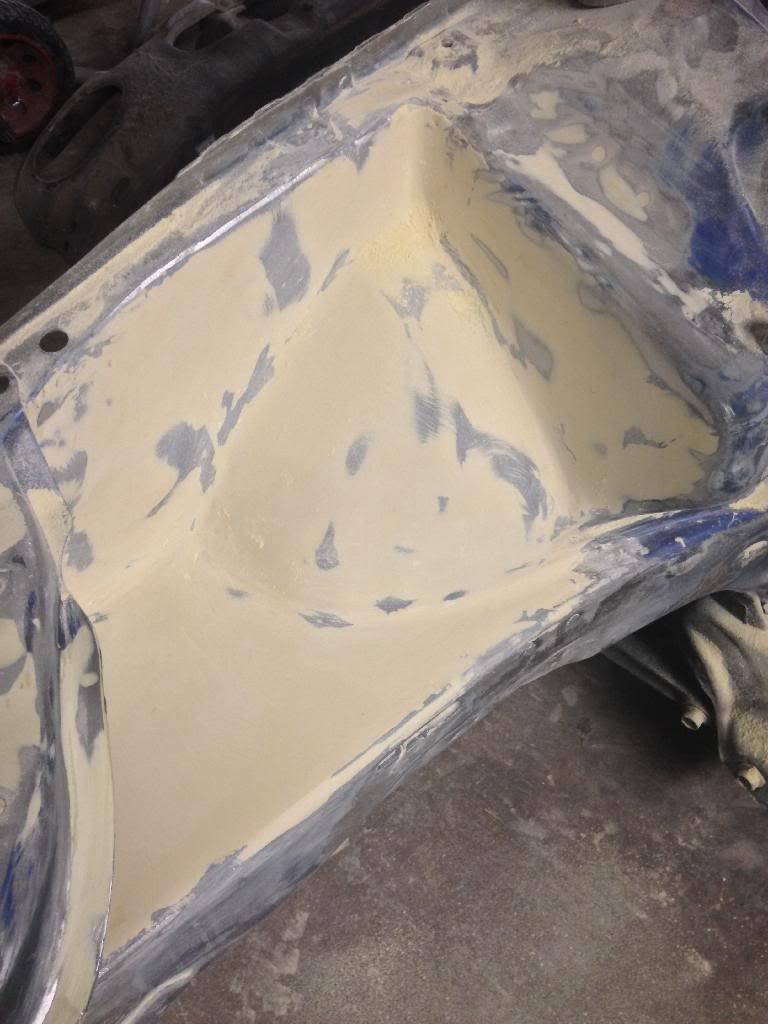
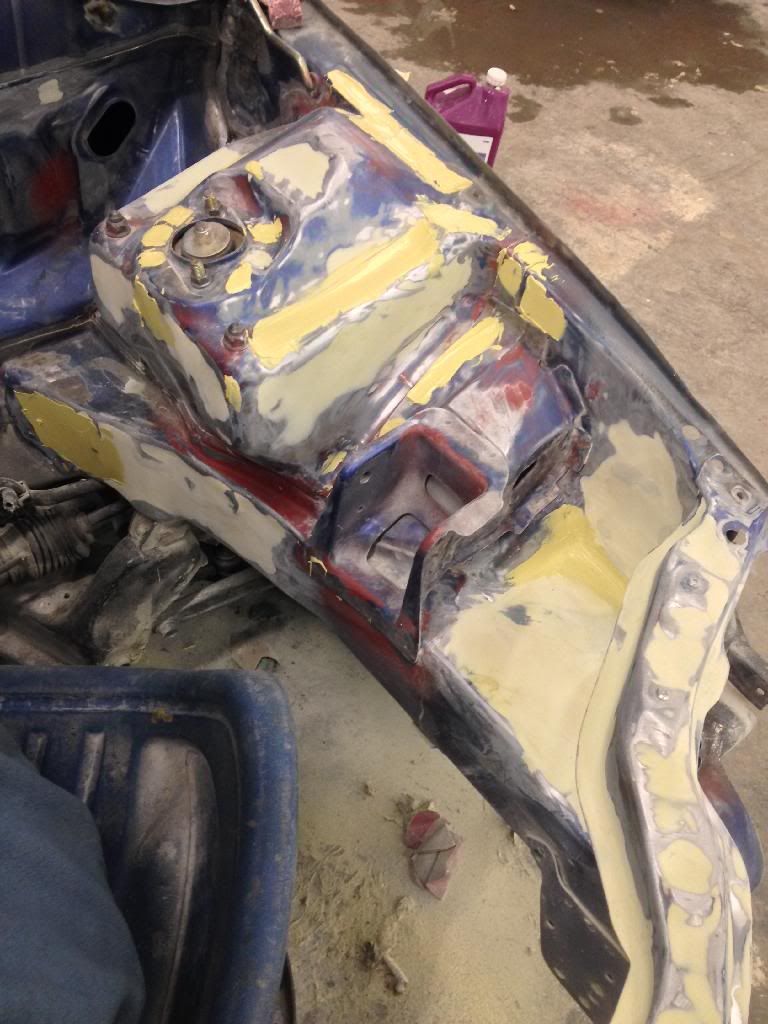
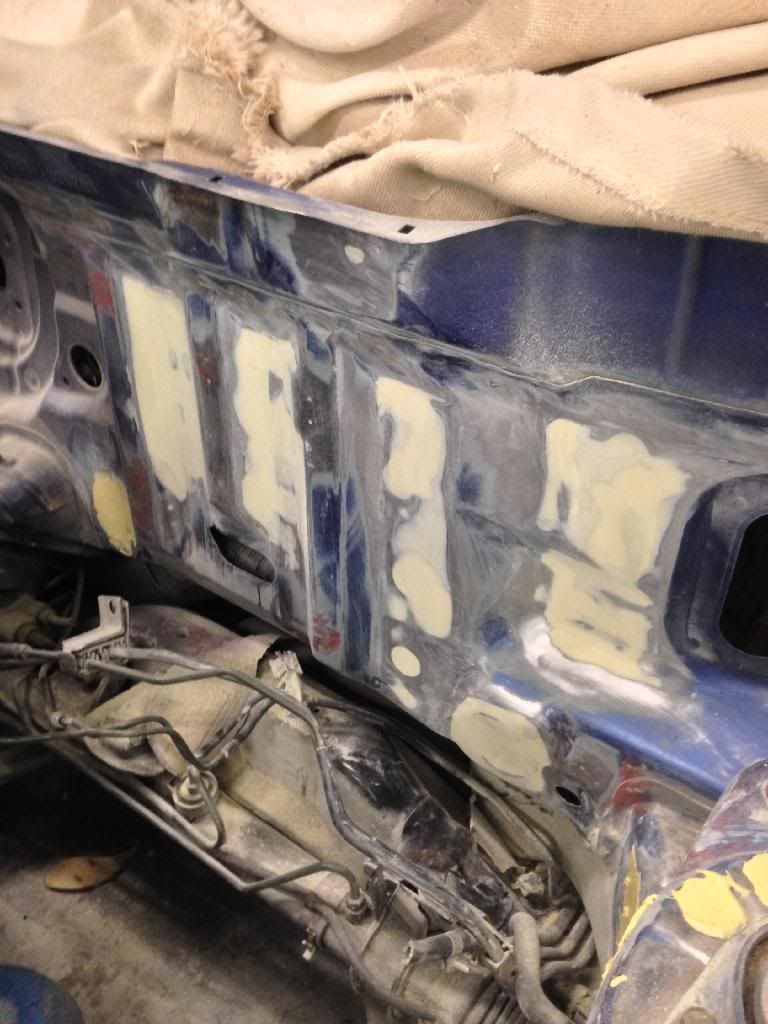
started removing all the factory seam sealer


I took a wire wheel on a drill to all the left over seam sealer in the bay

took 80 grit sand paper and sanded the joints for a clean surface
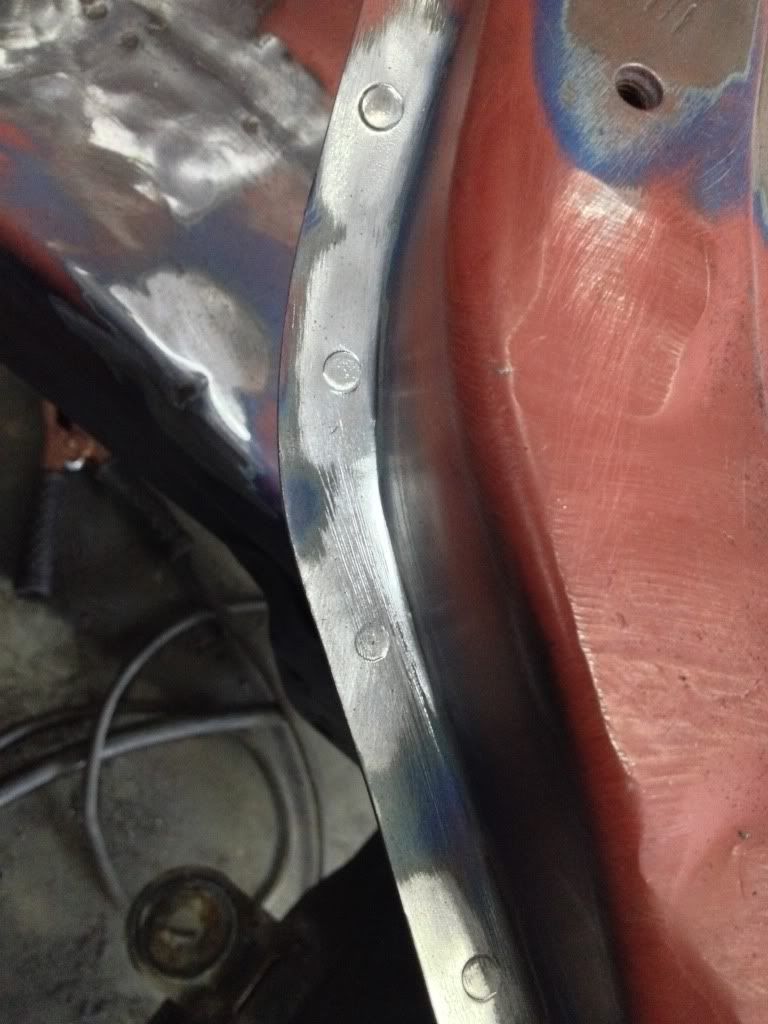
Busted out my welder and started

Just started on the corner, it's not the prettiest but of course it wouldn't be, welding splatter and burnt paint, just trying to set the welder right
But I've got it all ground down flat and it looks fine!

unfortunately as we got to the right side we ran out of welding gas, we (and by we I mean my cousin colin) managed to do all the holes on the left side shock tower, the dreams rail and along the whole rad support, tomorrow I'll be getting some more gas


September 24th 2013
basically finishing off all the welding and grinding, after work got a new bottle of gas and I finished off the right side and then ground everything with the big 6" Grinding disk , hard to reach spots I'll use the 2" disks on a little grinder


October 2nd 2013
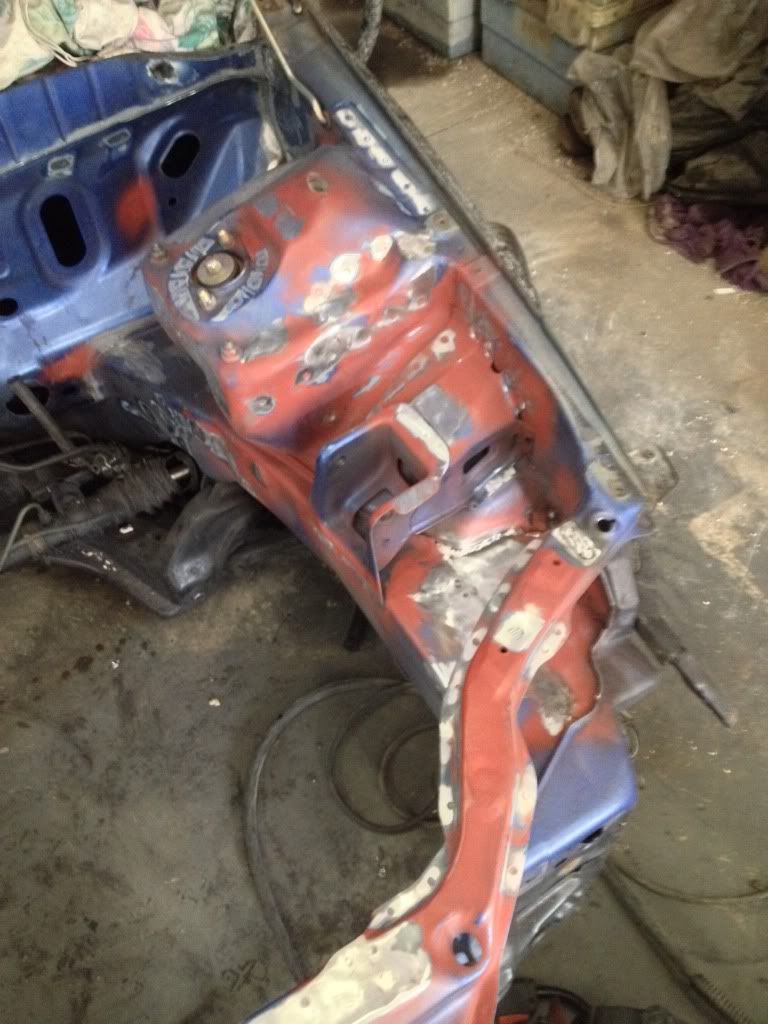
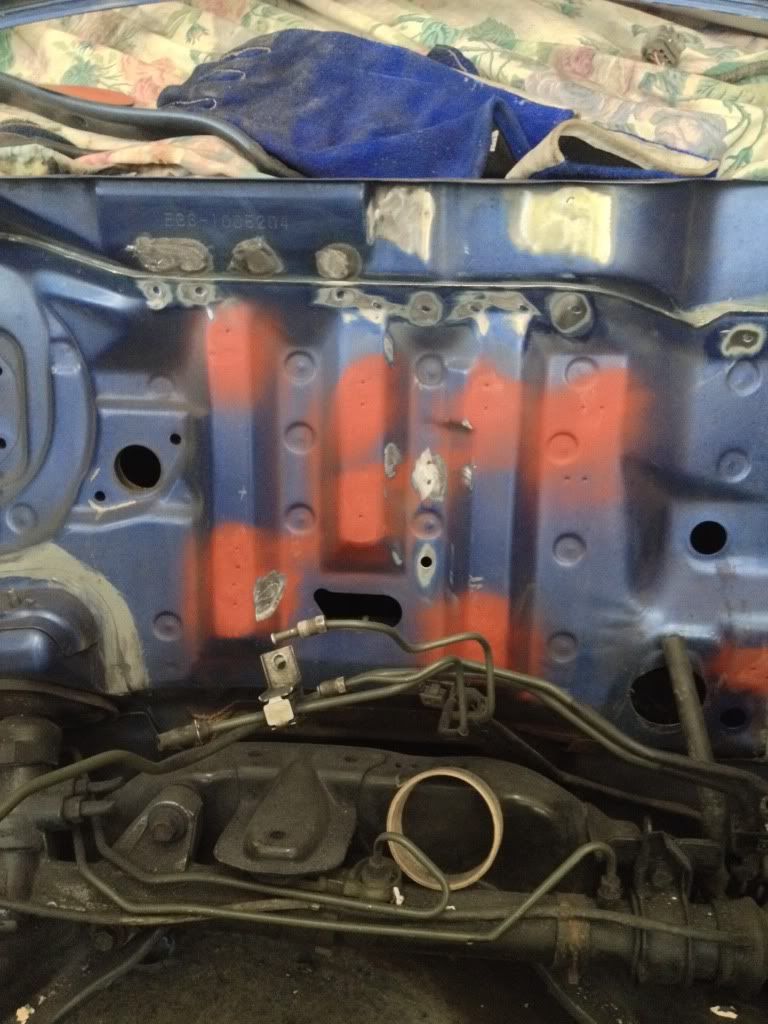
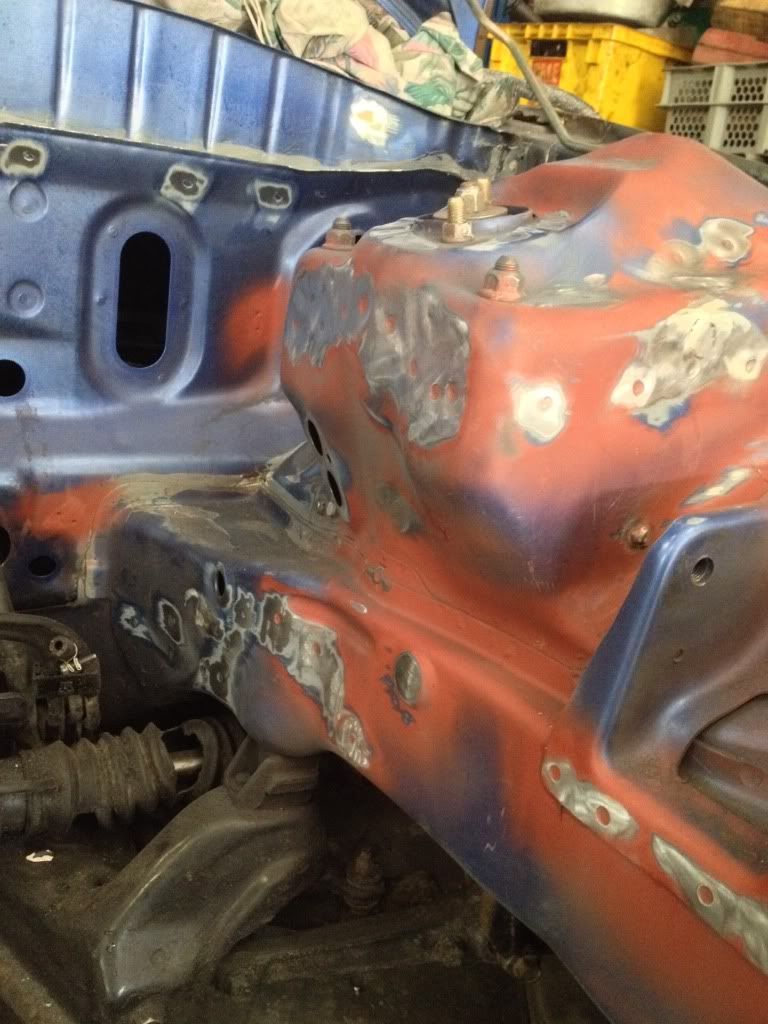
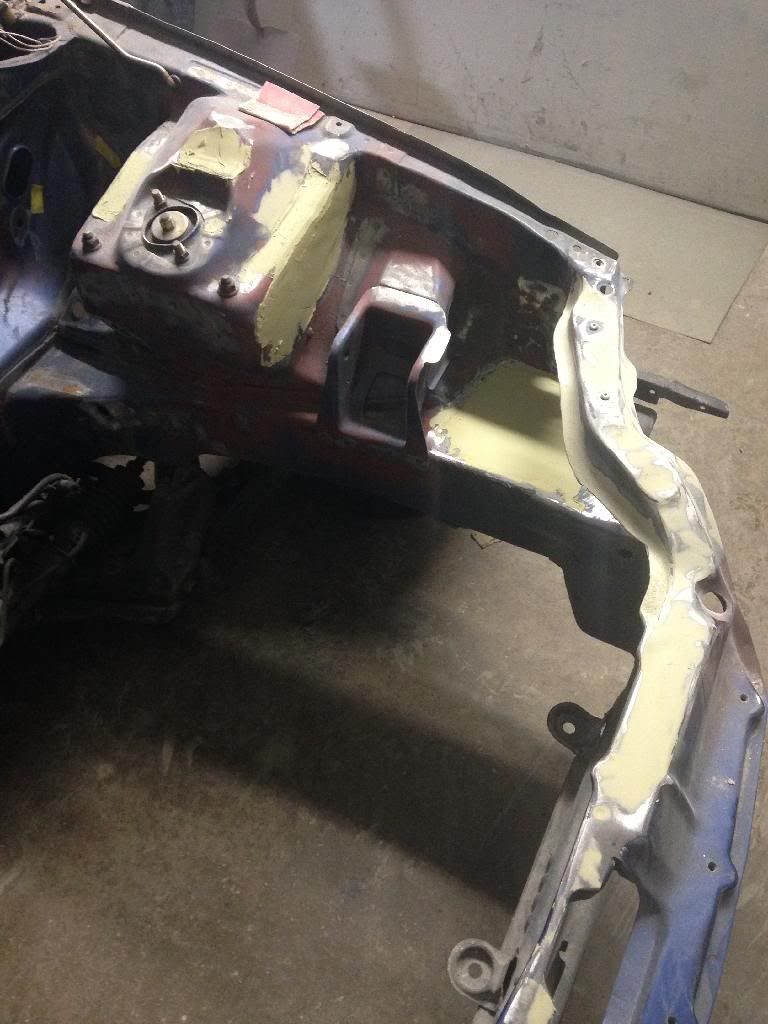
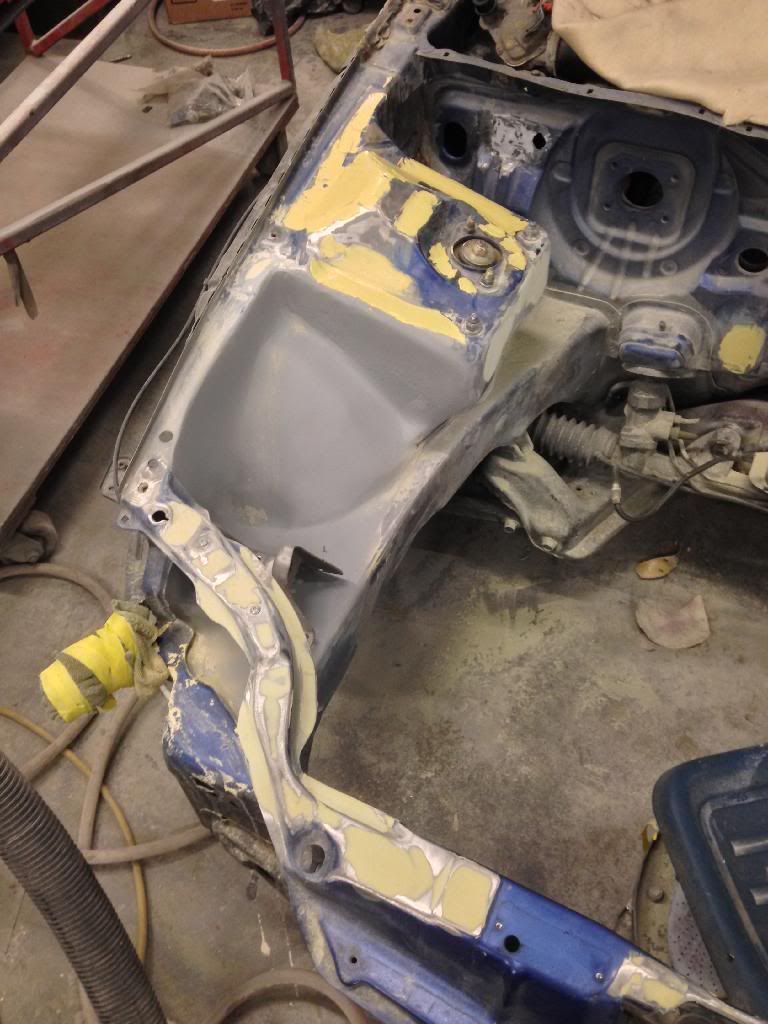
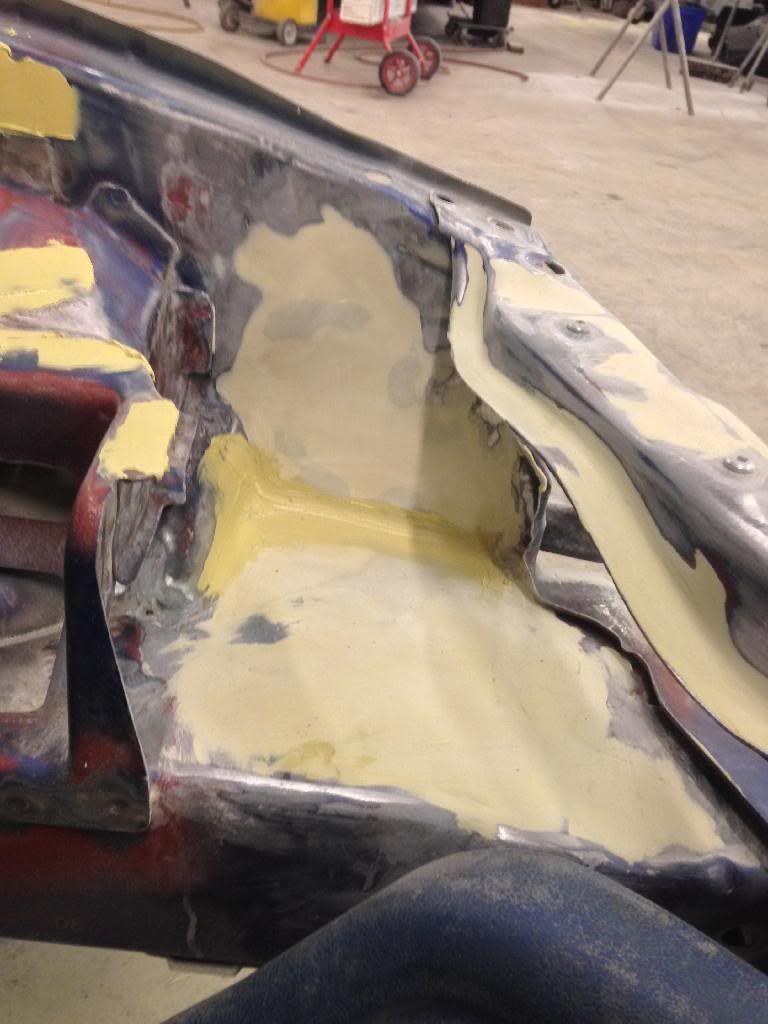
a friend convinced me to do a brake line tuck, I finished cleaning out the spot welds on the right side and half the rad support and then took the studs off the fire wall


finished all the welding besides 6 larger holes that require plates to be made,
I took off the wiper cowl so I can re route the wiper motor wire and to weld the holes on the fire wall, the red primer is just there to stop the bare metal from rusting since the car stays out side

Finished cleaning out the seam sealer with a fine pick, and this is the only rust I've seen on the car 0_o


October 7th 2013
Picked up a few parts
Eg6 window visors
Eg6 grey rhd console
Eg6 spare tire


so i sold my First honda, 1994 DX hatchback for $1600, the same night i stumbled upon the RHD forsale on my local forum for $1400 (minus engine)
a couple friends and i took a 4 hour road trip up north from where i am to get it the next night
September 14th 2013
the day i picked her up :D
Here's more pics
Carbon fiber fog covers are forsale, headlights and corners are already sold
Cream coloured door panel inserts
Spoiler is forsale
Powder folding mirrors, traction control system!!!
Map light
Random windshield sticker
Door sticker
September 16th 2013
started stripping down the front end, I want to get the engine bay painted first and get the motor swap done before the rest gets painted
this shell had a k20 in it so I realized today it didnt have a "driver side" mount
So I walked 3ft with a cutting disk in hand to my parts car (lol at my dad backing up my crv into the bushes)
And this was the "carnage"
Then I drilled out all the spot welds and separated the 2 pieces
I can see the dimples in the chassis rail as to where this mount should be, I'm going to get the body shop guys to weld it in
Undid all these lines and everything off the fire wall
And this is the point where I went home, I haven't even wiped / degreased or cleaned anything, there shouldn't be much of that to do at all, it's been well taken care of
and my parts car shall be gone tomorrow, no need of it now! Bye bye
September 17th 2013
started removing all the factory seam sealer
I took a wire wheel on a drill to all the left over seam sealer in the bay
took 80 grit sand paper and sanded the joints for a clean surface
Busted out my welder and started
Just started on the corner, it's not the prettiest but of course it wouldn't be, welding splatter and burnt paint, just trying to set the welder right
But I've got it all ground down flat and it looks fine!
unfortunately as we got to the right side we ran out of welding gas, we (and by we I mean my cousin colin) managed to do all the holes on the left side shock tower, the dreams rail and along the whole rad support, tomorrow I'll be getting some more gas
September 24th 2013
basically finishing off all the welding and grinding, after work got a new bottle of gas and I finished off the right side and then ground everything with the big 6" Grinding disk , hard to reach spots I'll use the 2" disks on a little grinder
October 2nd 2013
a friend convinced me to do a brake line tuck, I finished cleaning out the spot welds on the right side and half the rad support and then took the studs off the fire wall
finished all the welding besides 6 larger holes that require plates to be made,
I took off the wiper cowl so I can re route the wiper motor wire and to weld the holes on the fire wall, the red primer is just there to stop the bare metal from rusting since the car stays out side
Finished cleaning out the seam sealer with a fine pick, and this is the only rust I've seen on the car 0_o
October 7th 2013
Picked up a few parts
Eg6 window visors
Eg6 grey rhd console
Eg6 spare tire
 02-16-2014, 05:08 PM
#2
Honda-Tech Member
Thread Starter
October 8th 2013
decided to delete the air intake hole and just run a shorter pipe instead of a full ram under the bumper


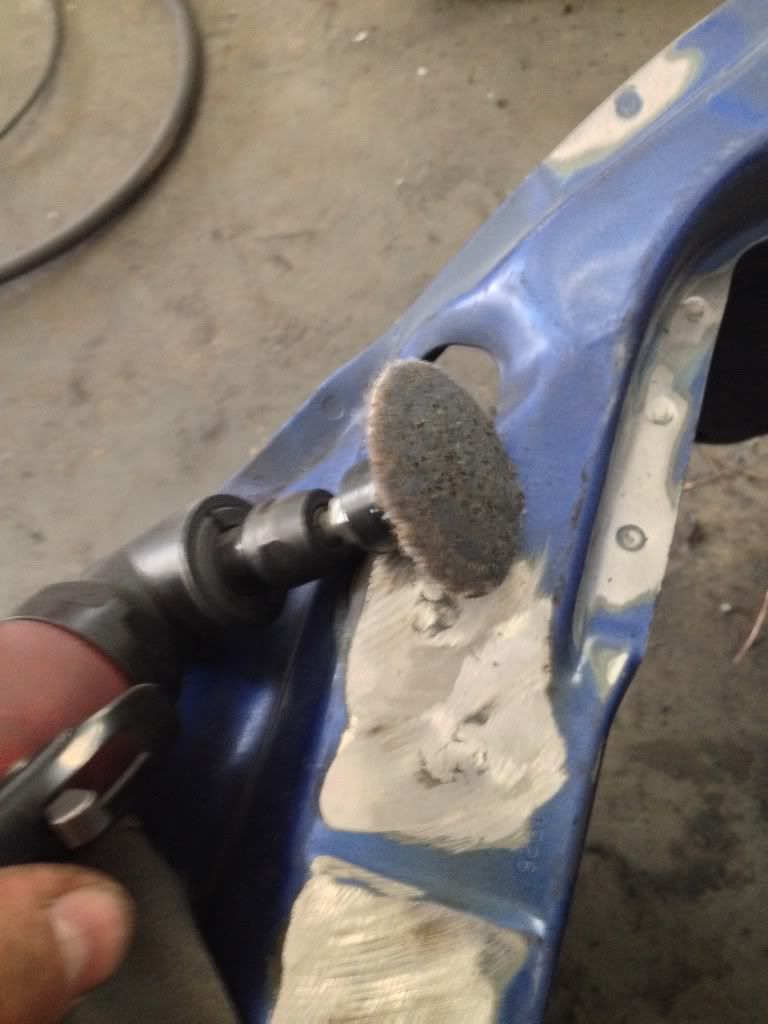
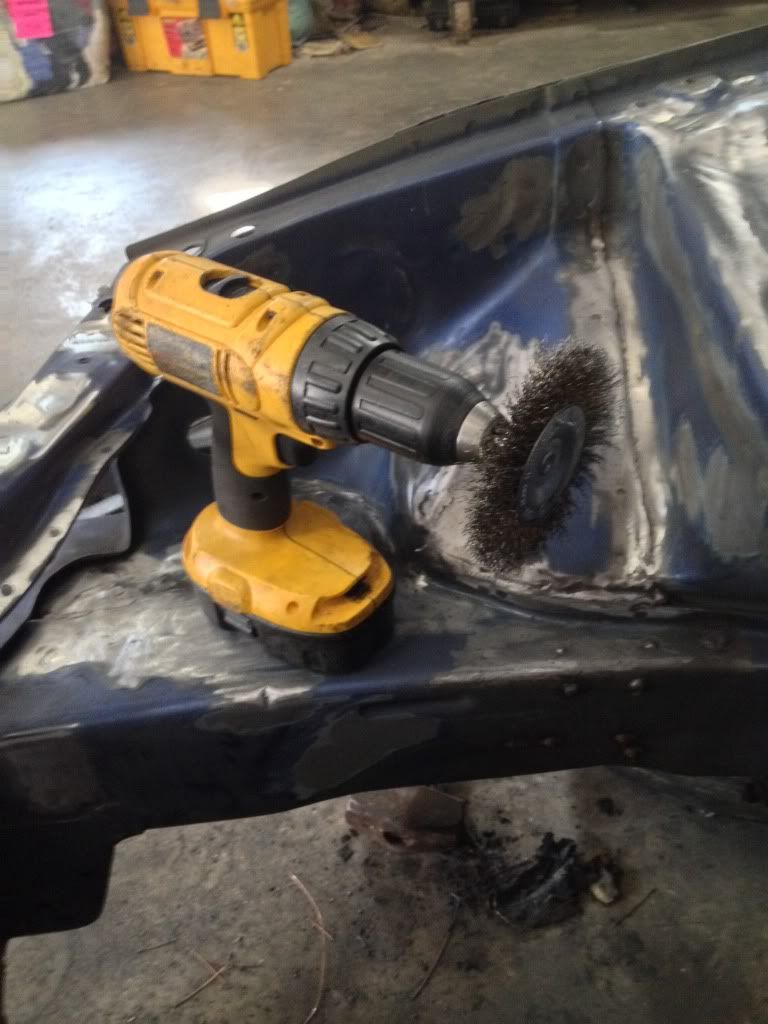
did a bit of grinding on some welds and all the spot welds for the body work portion
And the 2 tools I used to clean the spot welds
just a few more things to weld up on the fire wall
December 4th 2013
had a big long break working on the car due to the cold here in Canada, really puts you out of the mood for working on your car (especially body work) so i started ordering a lot of parts!
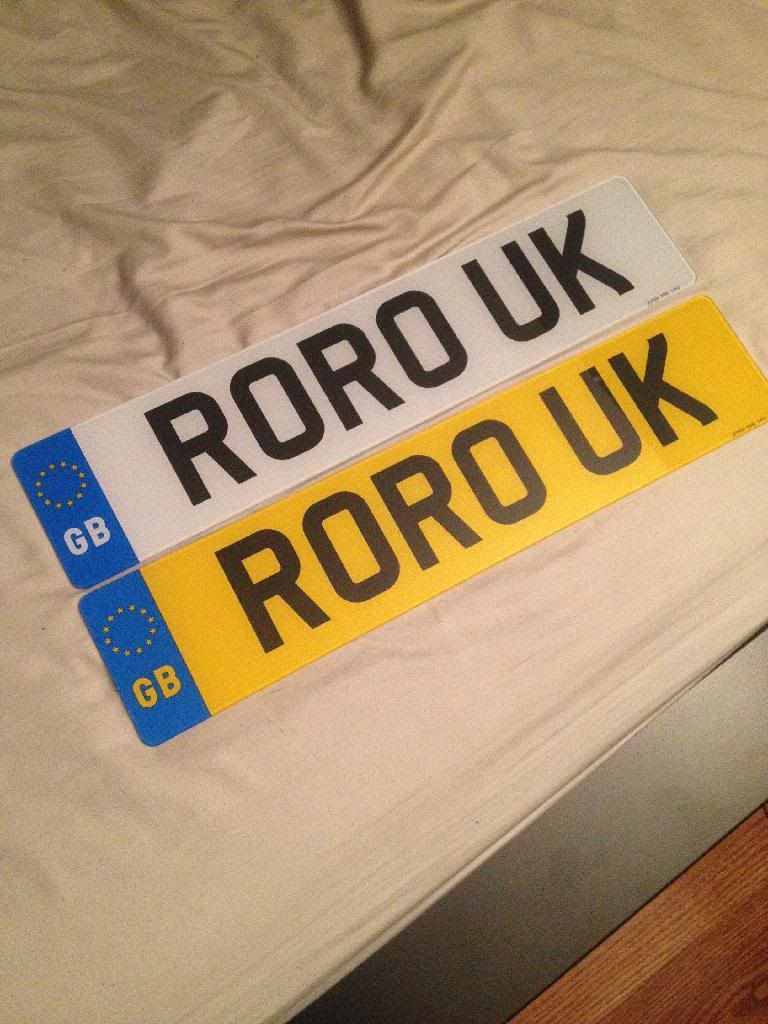
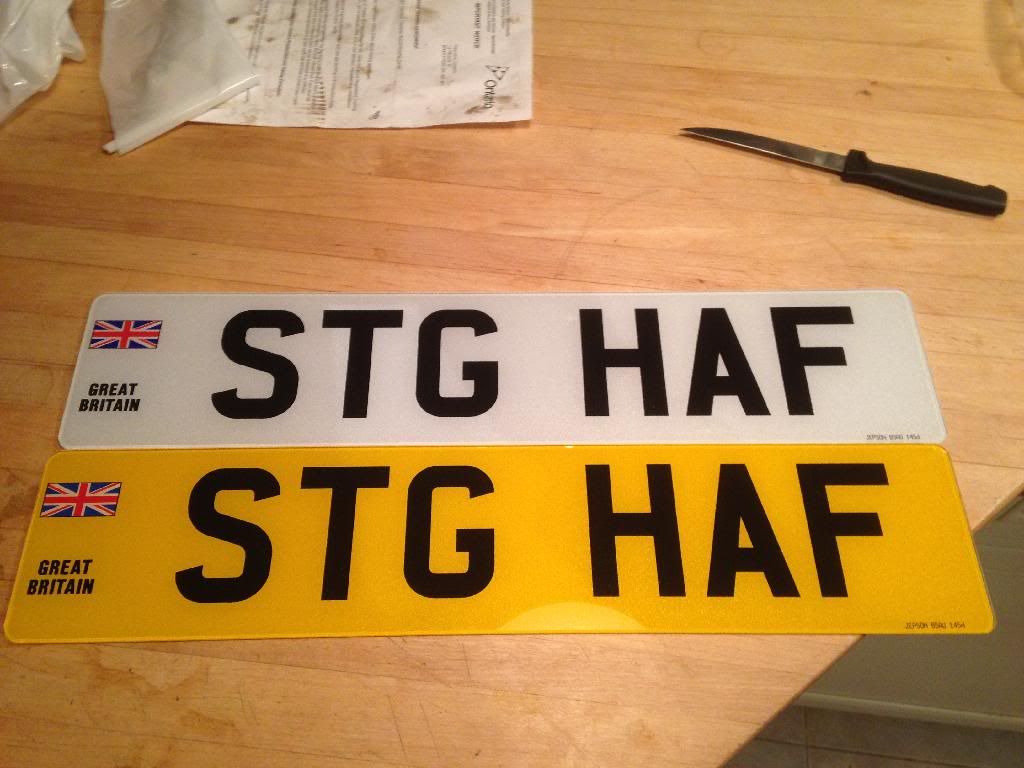
luckily being from England i have a lot of hooks ups and friends down there so i got some custom UK plates made and sent over
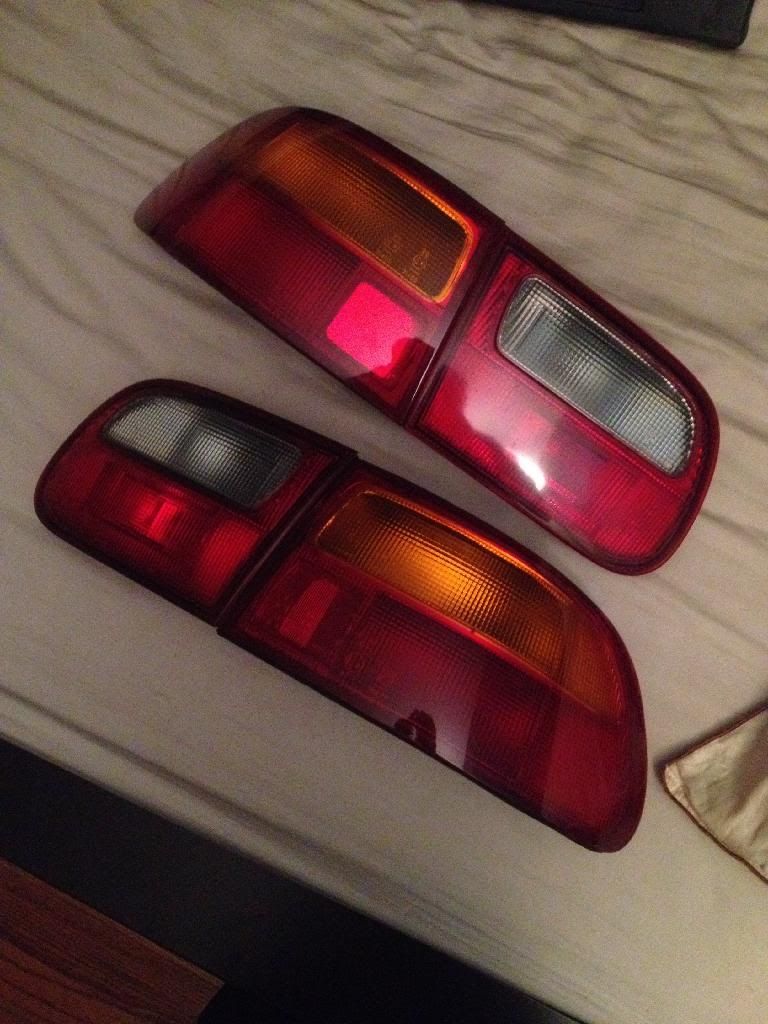
a couple days later my UKDM spec tail lights came in
they are flawless, came with mint gaskets, all the screws, all bulbs and wiring and the lenses look like glass
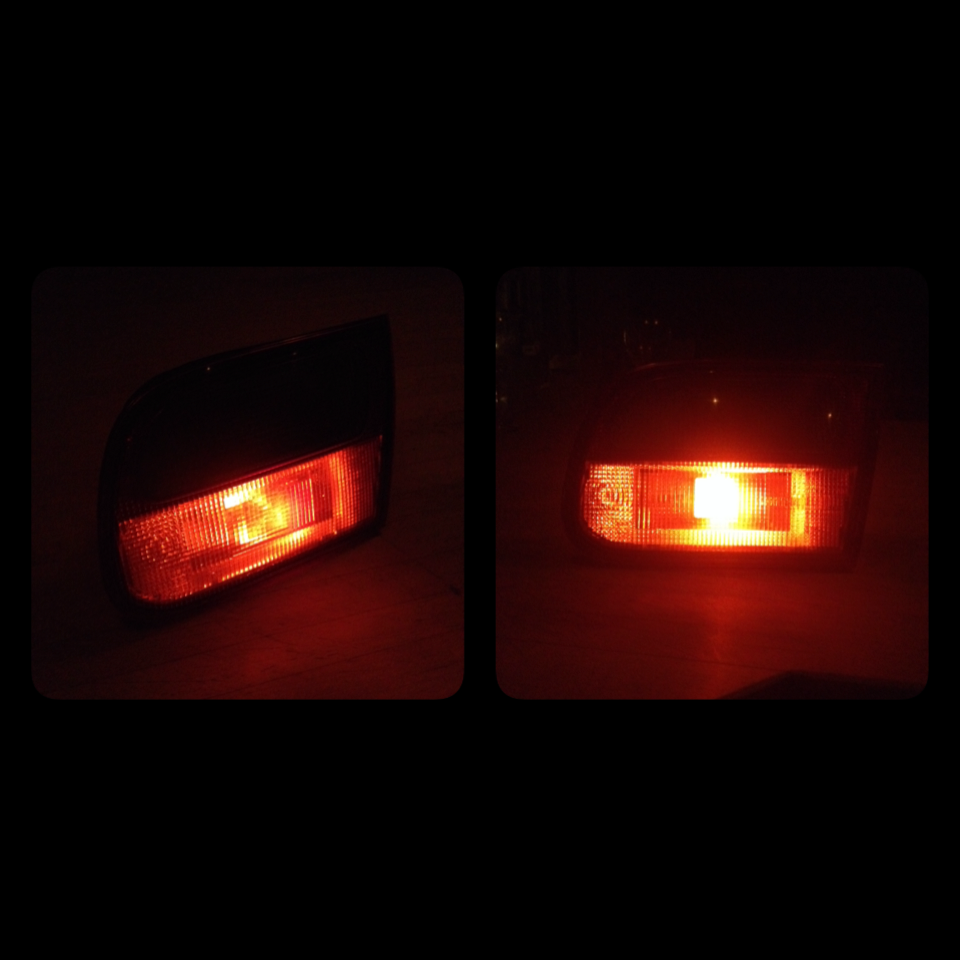
I tried out the rear fog with a flash light :D
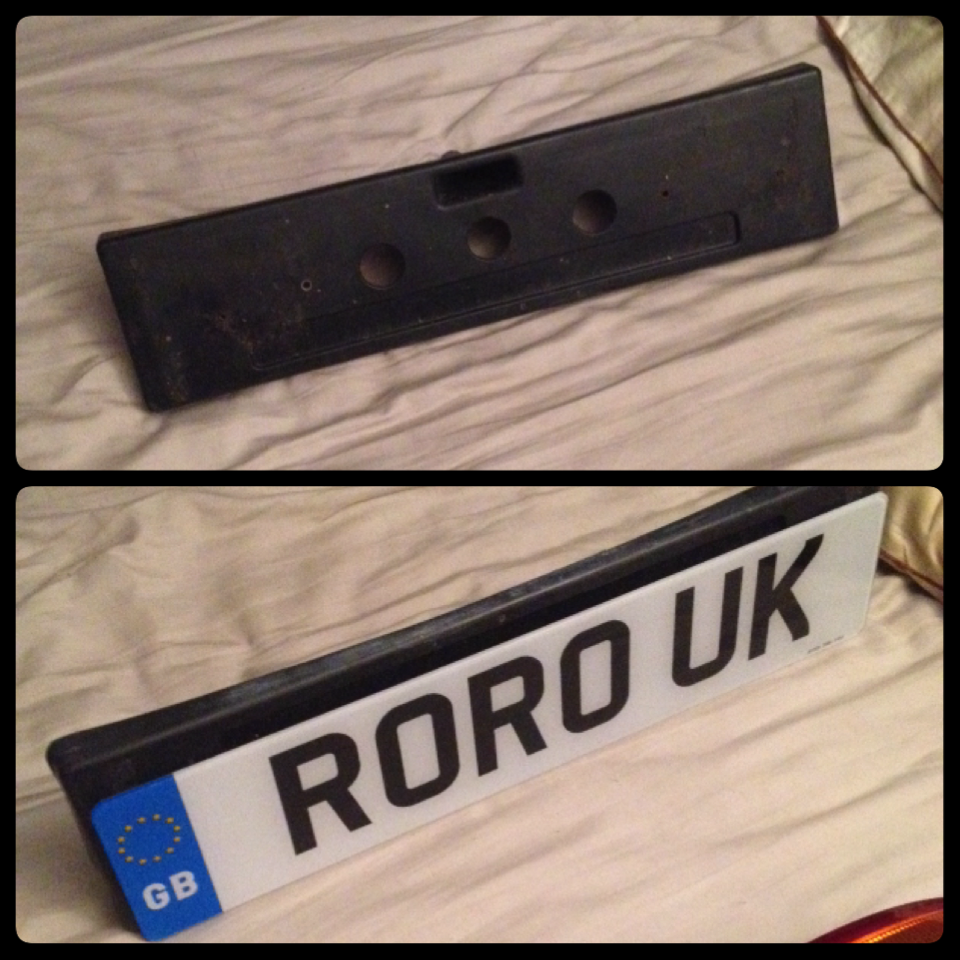
and my front plate holder came aswell !!
January 18th 2014
another long break due to Christmas etc, just spent most of the time sourcing parts/selling parts and saving up
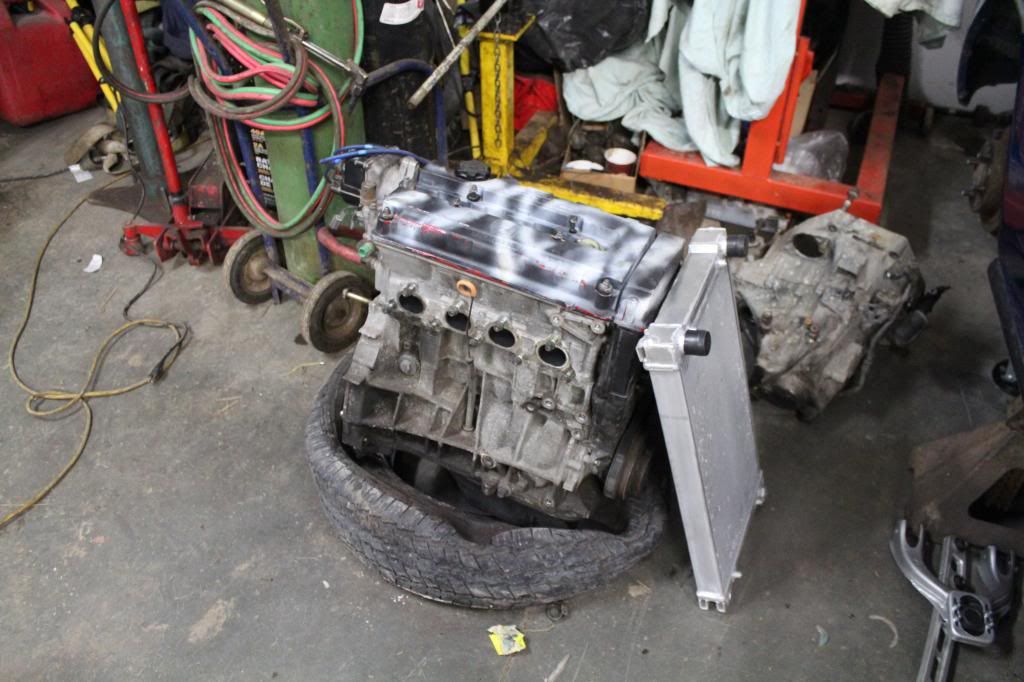
then my plan changed, i already bought an engine and transmission off a friend of mine to clean up and put into the EG6, but i didnt have a good feeling about using it, so i decided to pull the drive train out of my other "project" car since i know the history of it all
January 21st 2014
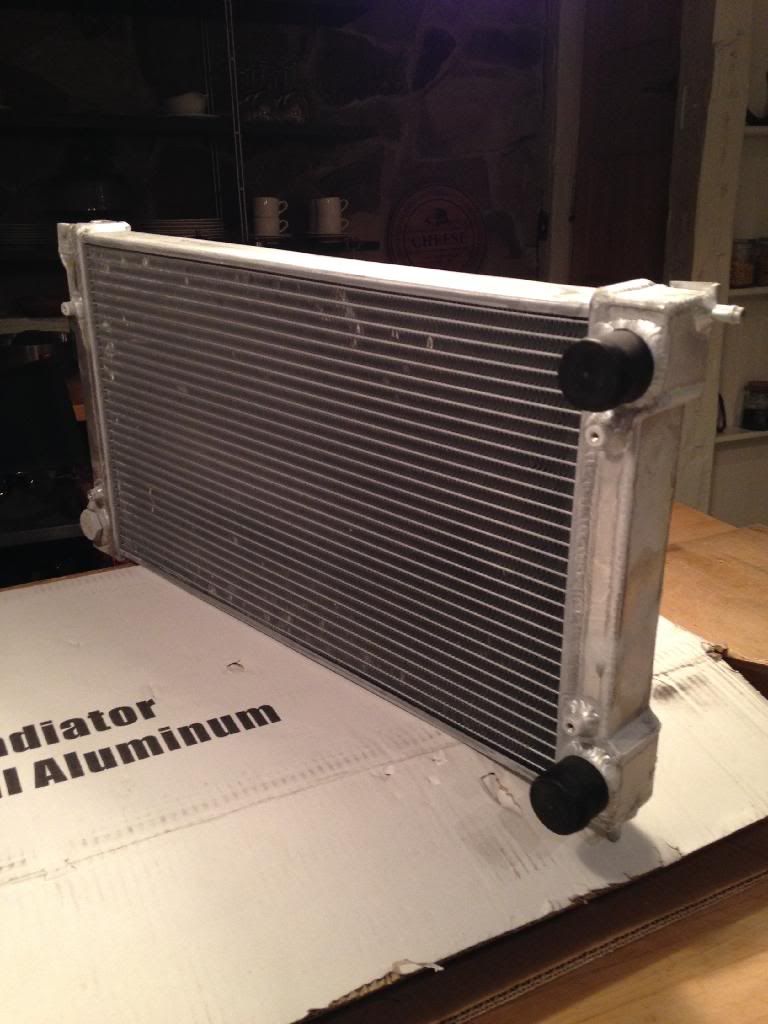
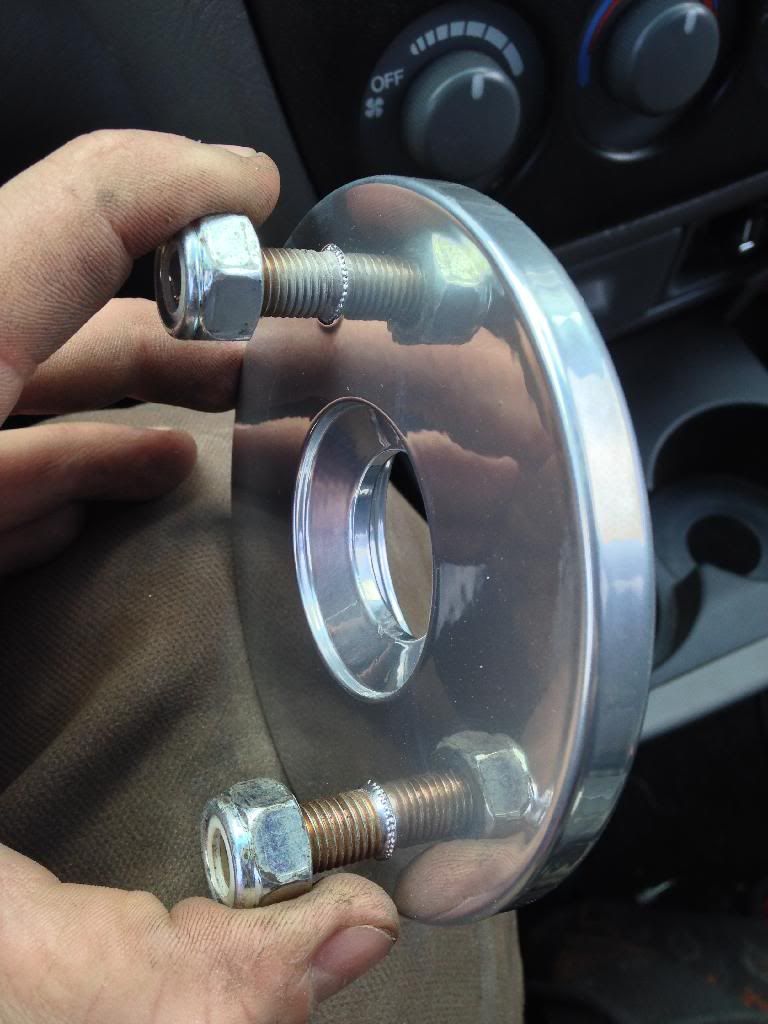
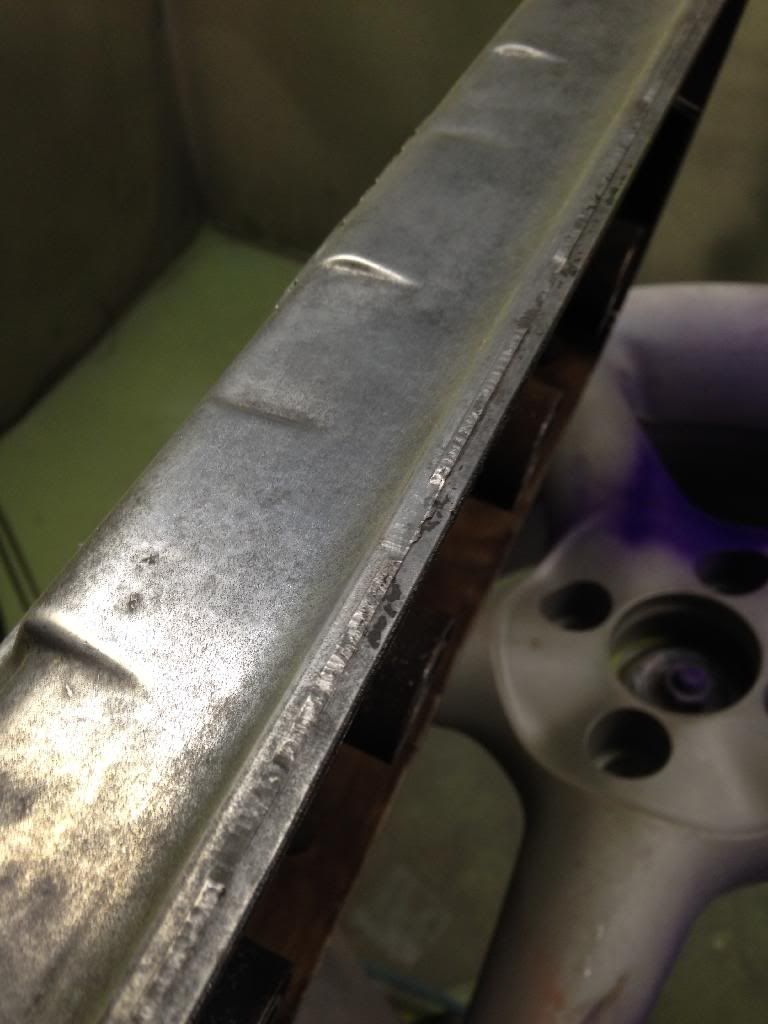
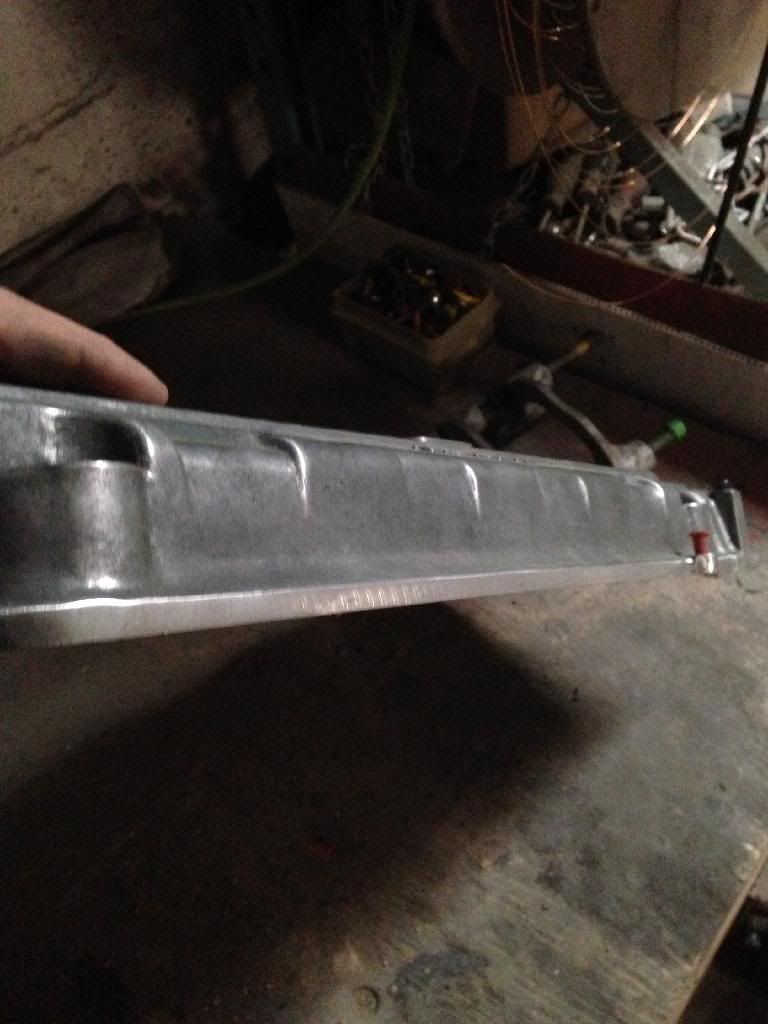
my tucked rad came in, im going to polish the outsides to bling, dont like how dull it looks
February 2nd 2014
over the next 2 weeks tons of parts came rolling in!
OEM VTi decals from the Uk

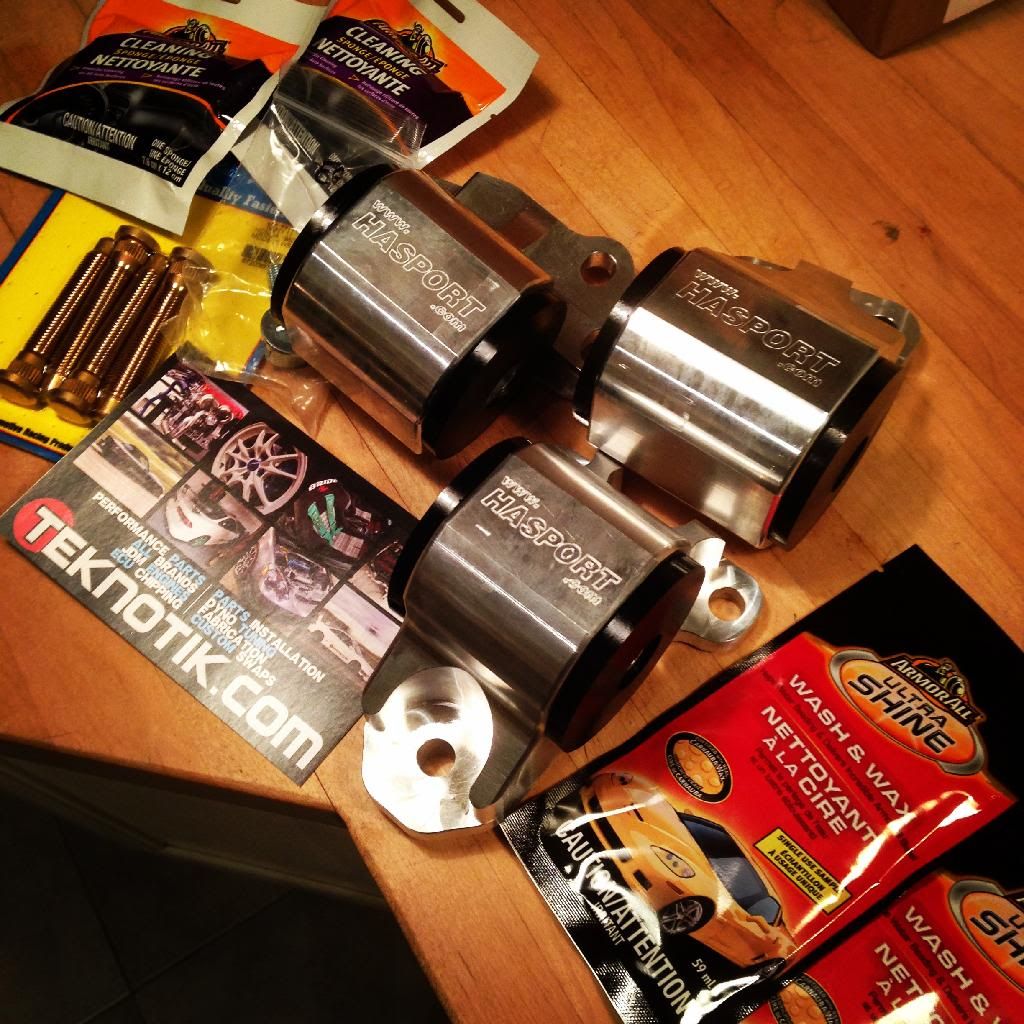
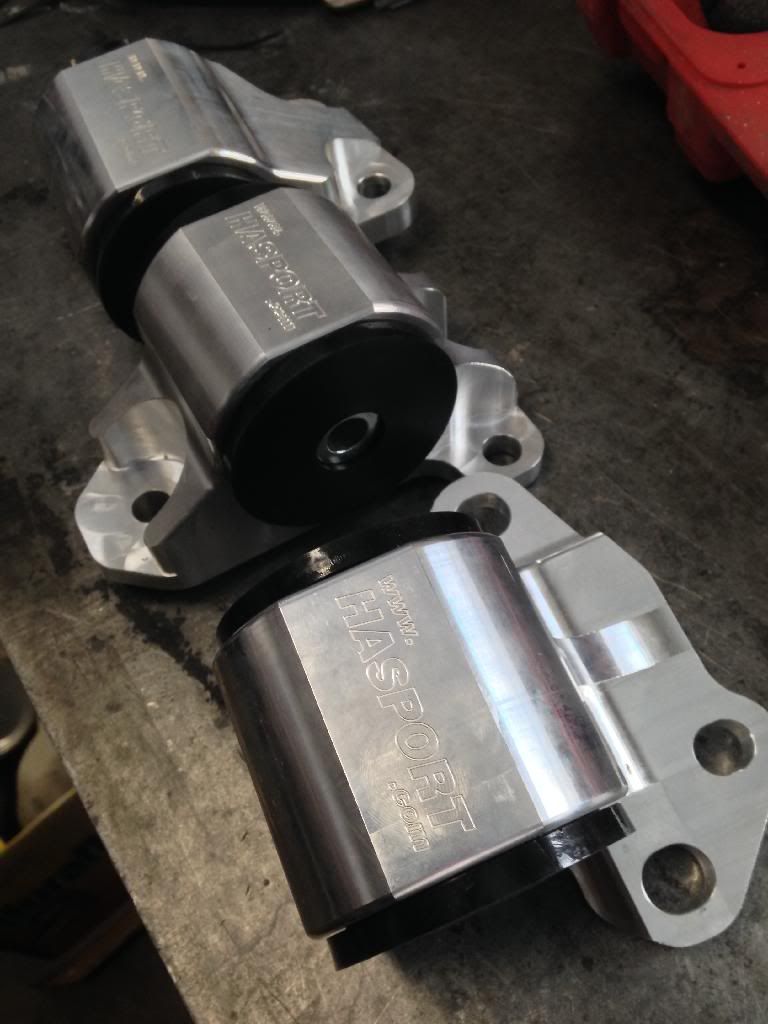
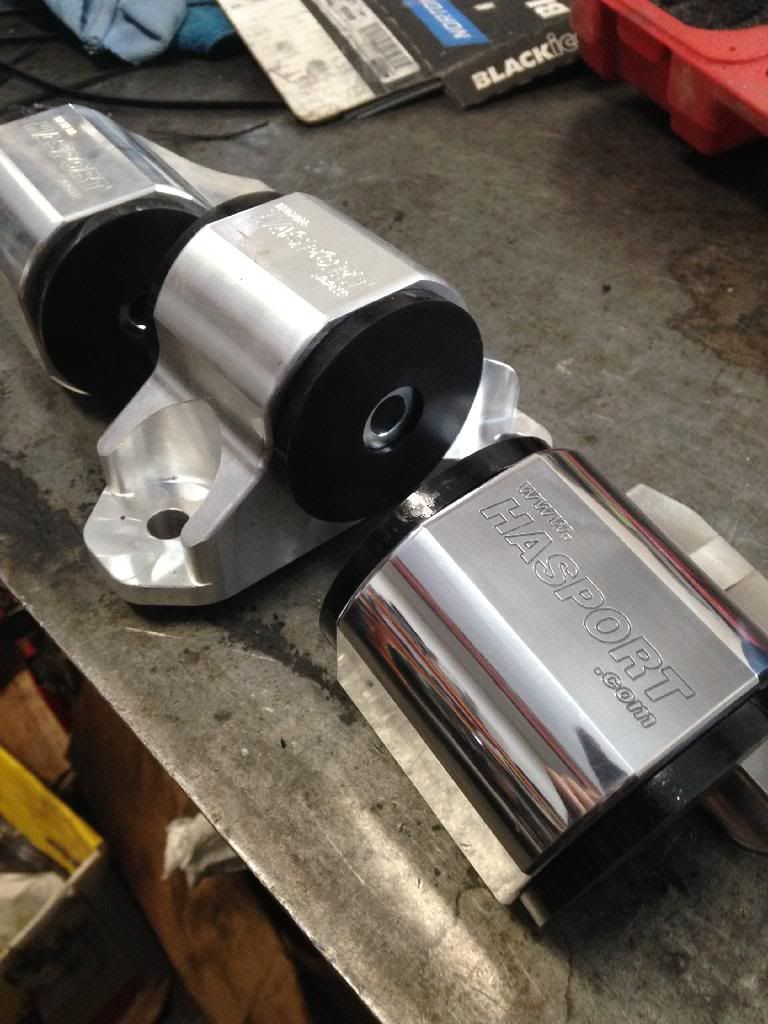
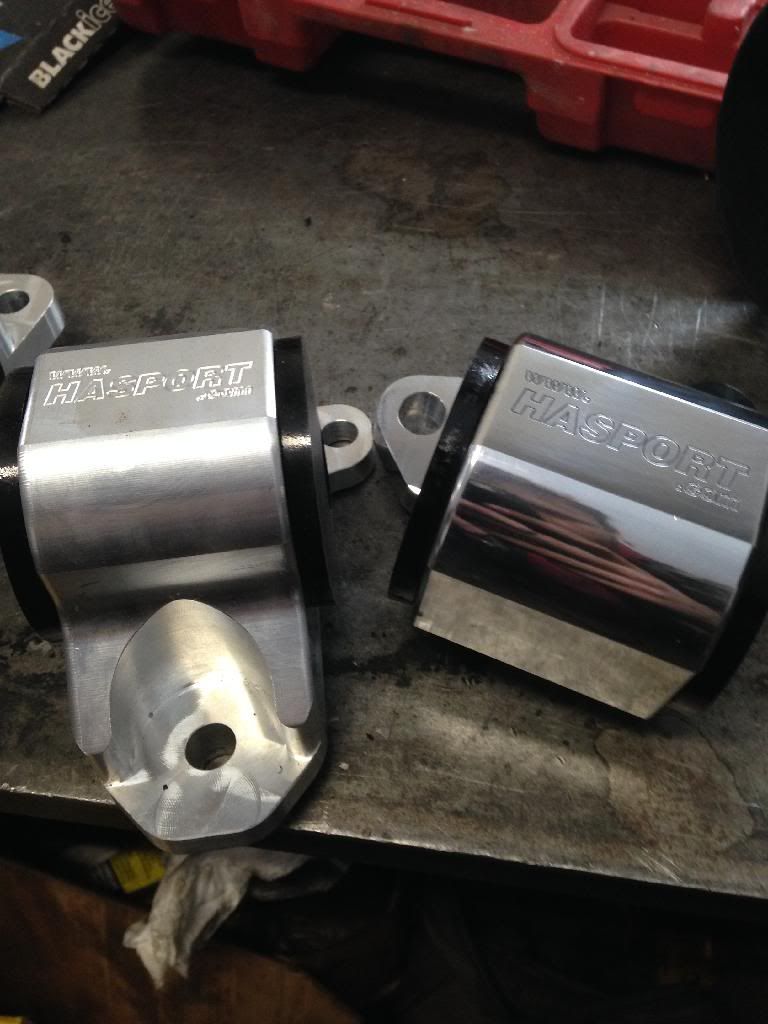
Hasport mounts :D (arp studs are for my crv)
and got another set of uk plates with my car club on them
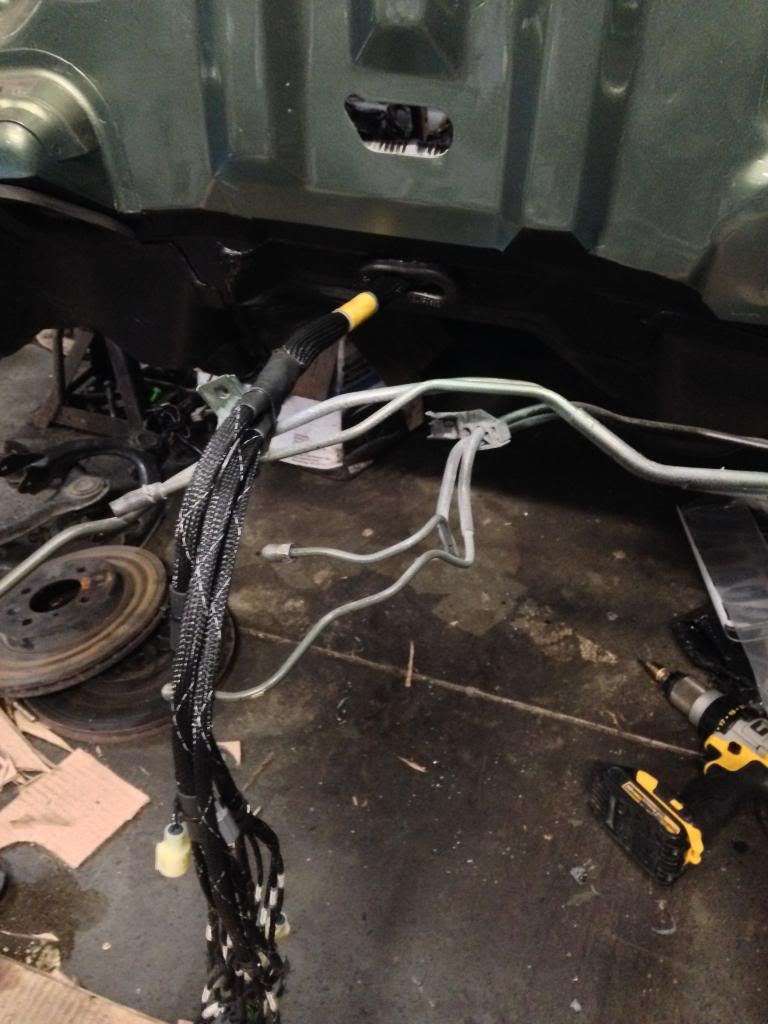
and my Ry wire harness
[URL=http://s846.photobucket.com/user/ronan_hs/media/Mobile%20Uploads/F884C117-E256-4CF3-A8E8-52F2EF6A6278_zpsg3b4k5uc.jpg.html]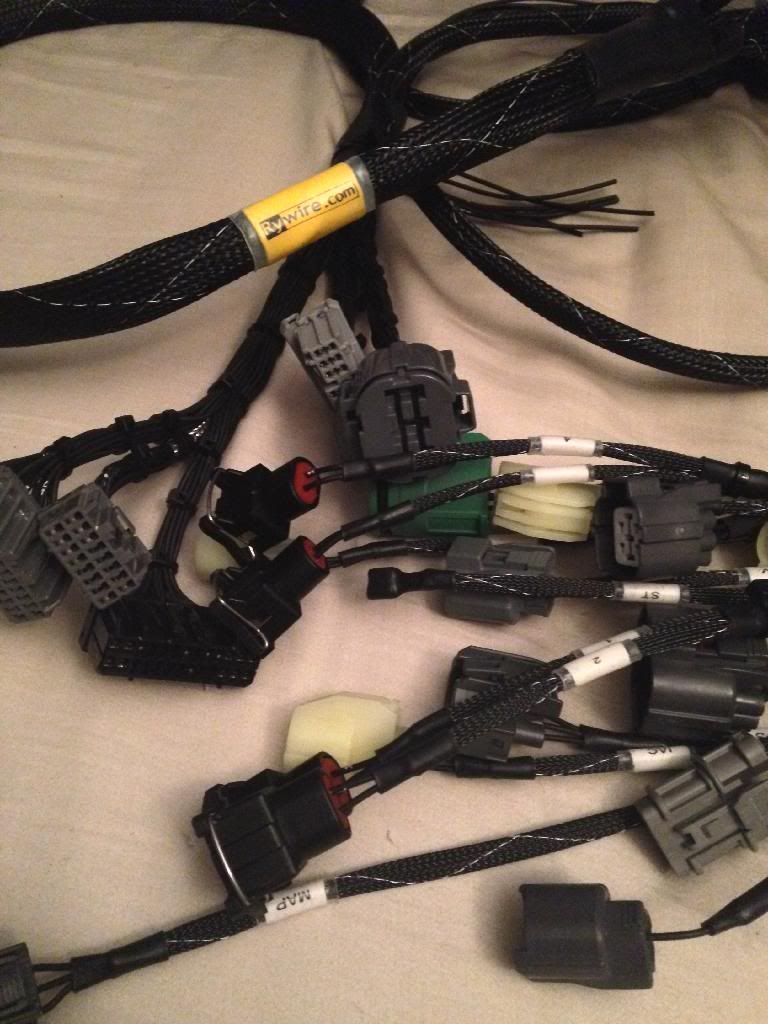
February 10th 2014
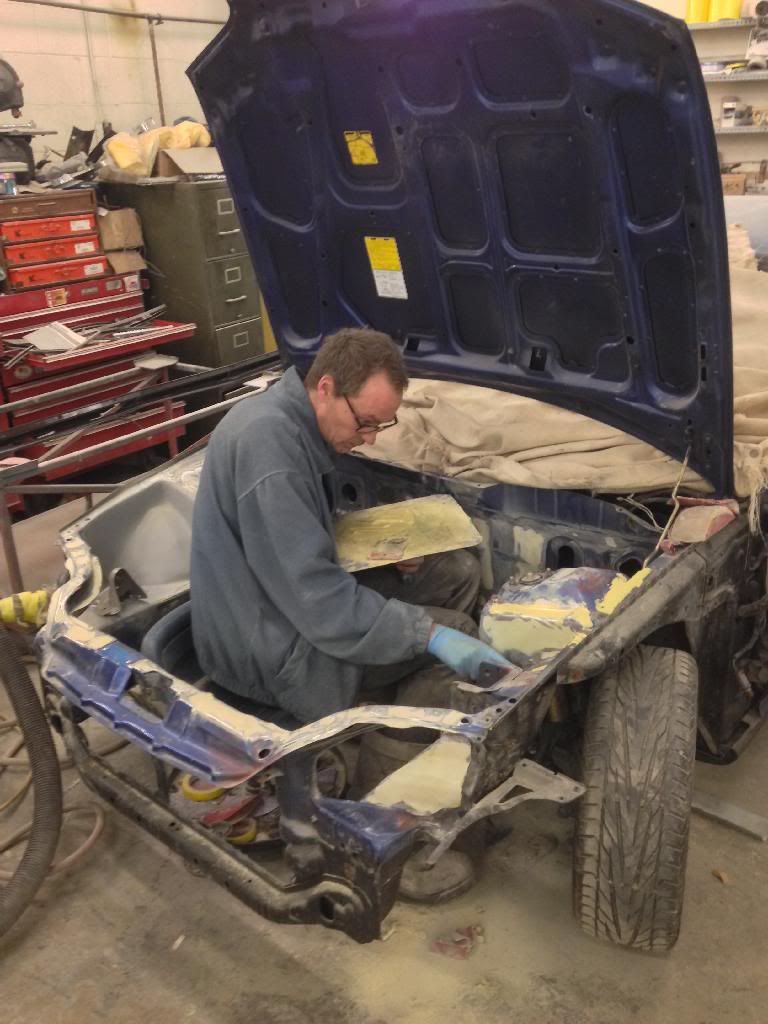
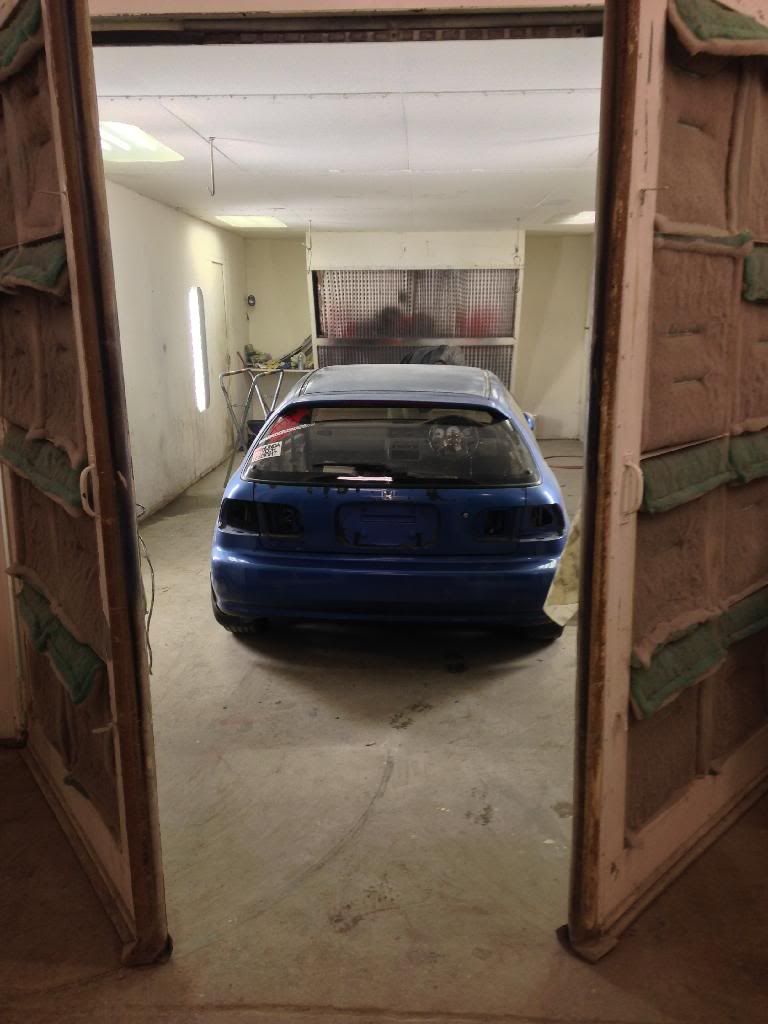
and then took a little road trip !!! i sent my car off the my body shop guys to have the bay finished and painted, just a few fire wall holes needed to be welded up and i just want the thing done ready to have the engine dropped in, my shop is too cold to do it myself although i am fully capable of doing so (auto body apprentice)
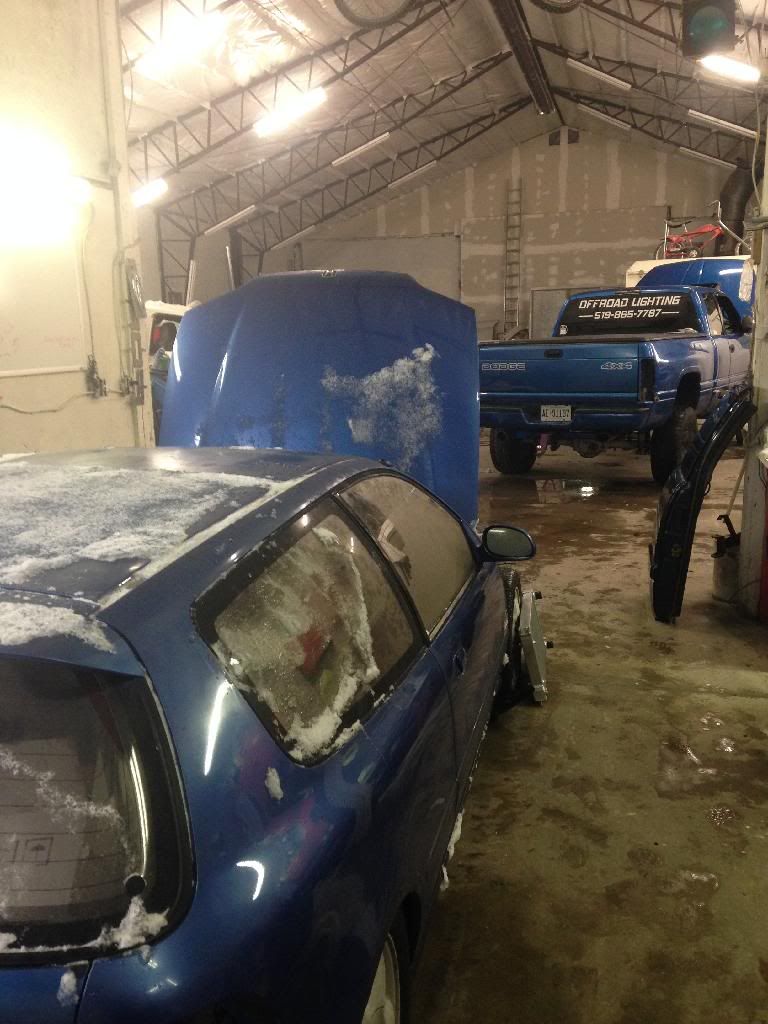
February 16th 2014
Decided to make moves today
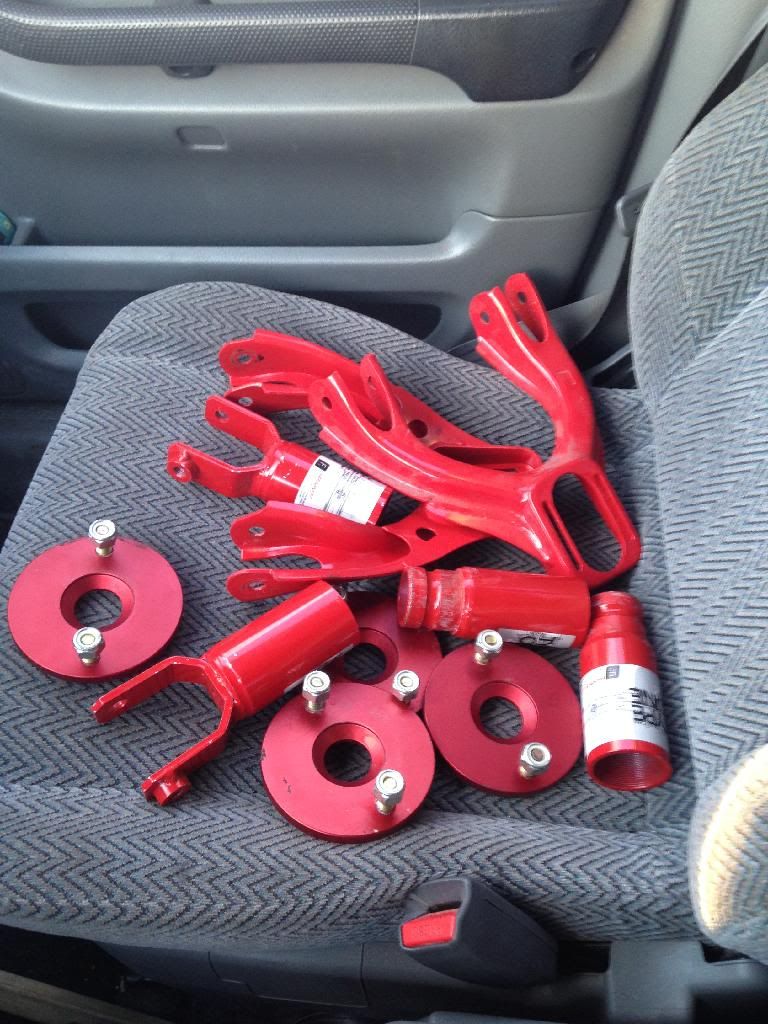
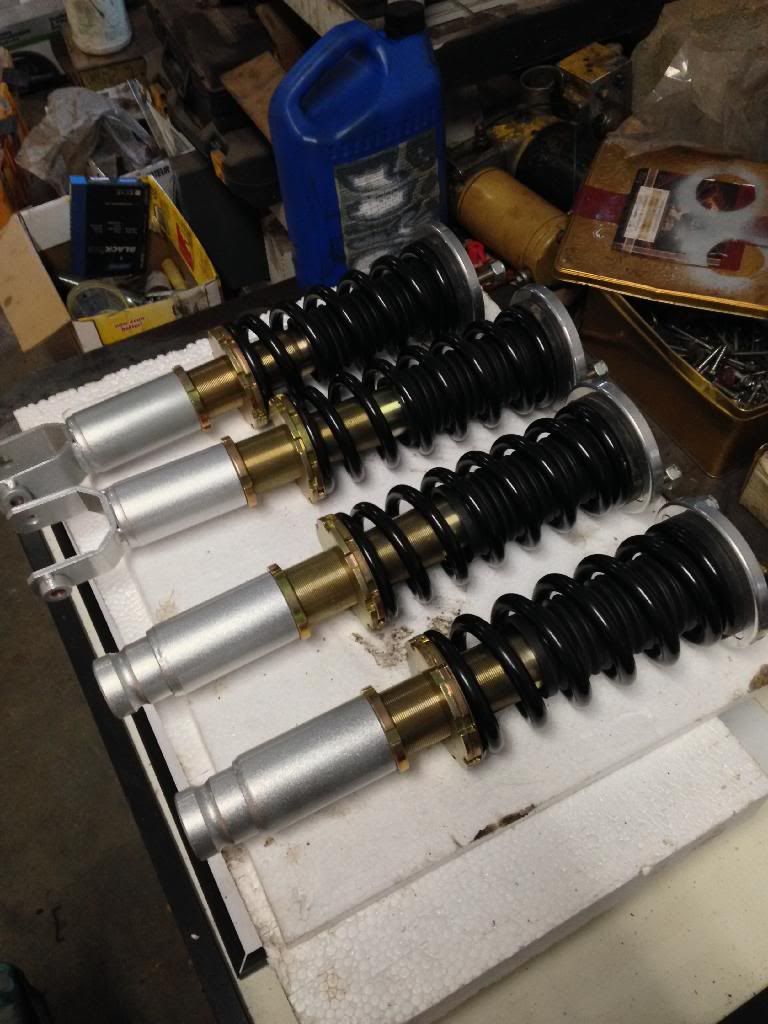
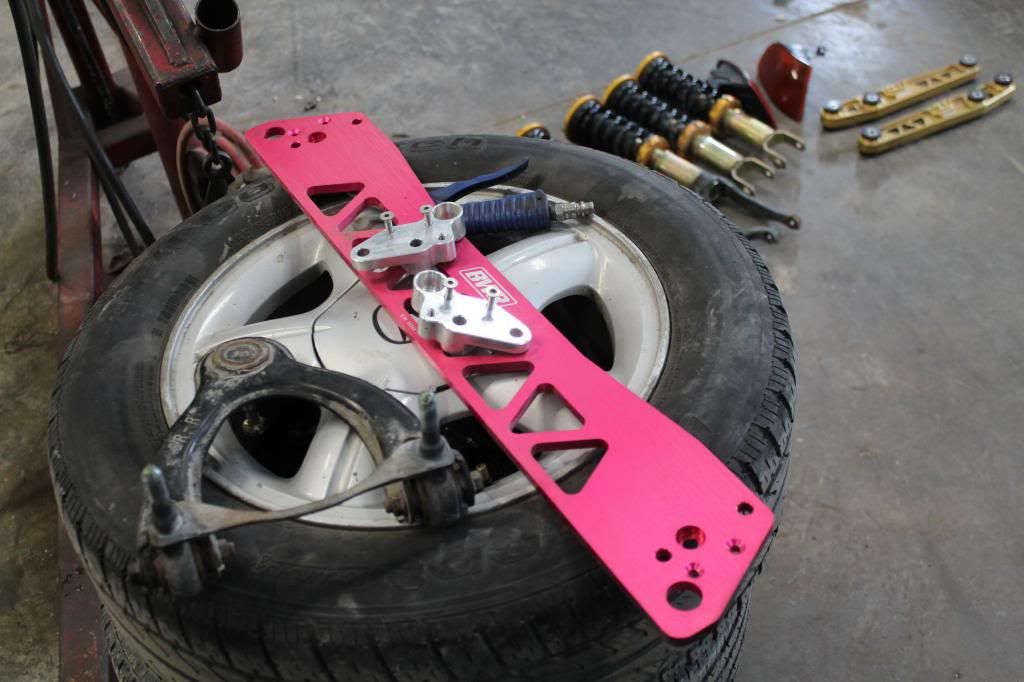
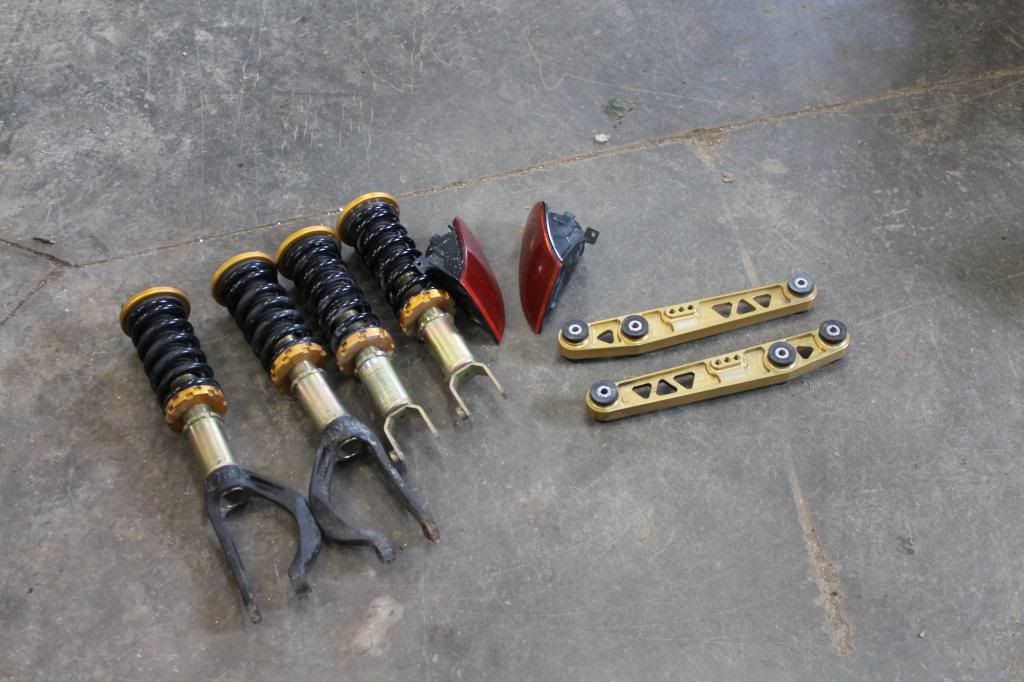
I bought a bunch of new suspension stuff which ended up on my other project car (posted above) last year so today I took it all off, form and function type 1coils, bwr front and rear camber kit, megan toe arms and black works racing LCA's which is all going on this eg6.
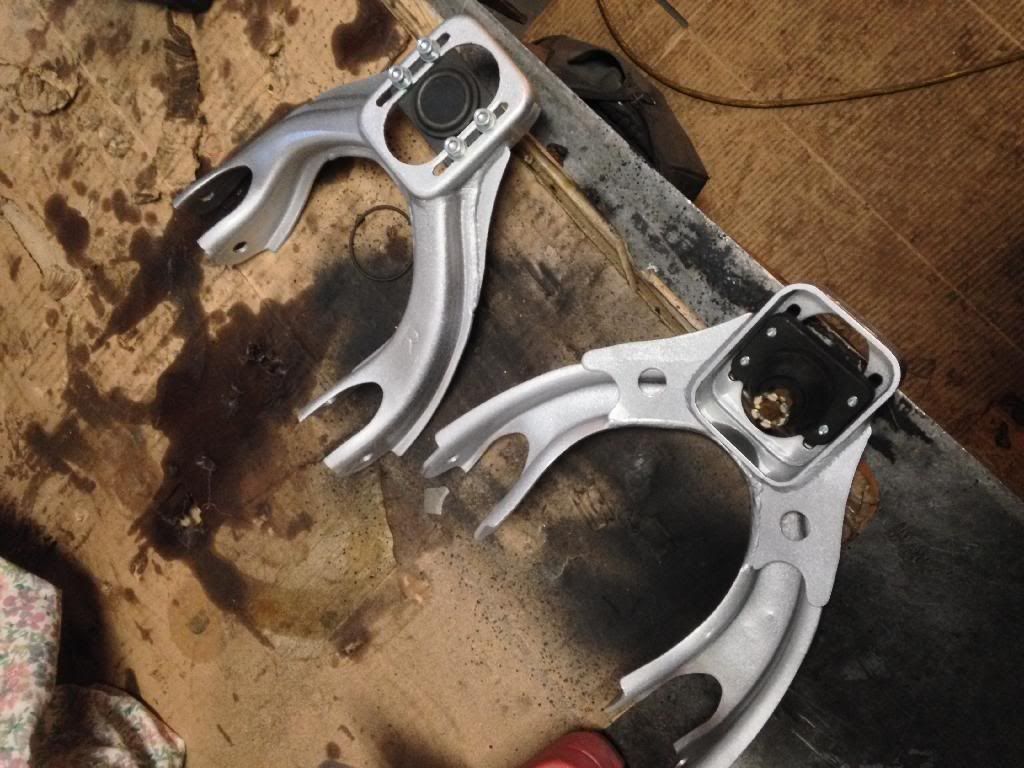
I disassembled the lower half, took off the top hats and the BWR upper control arms to get powder coated, red just doesn't fit the theme of what I'm going for.
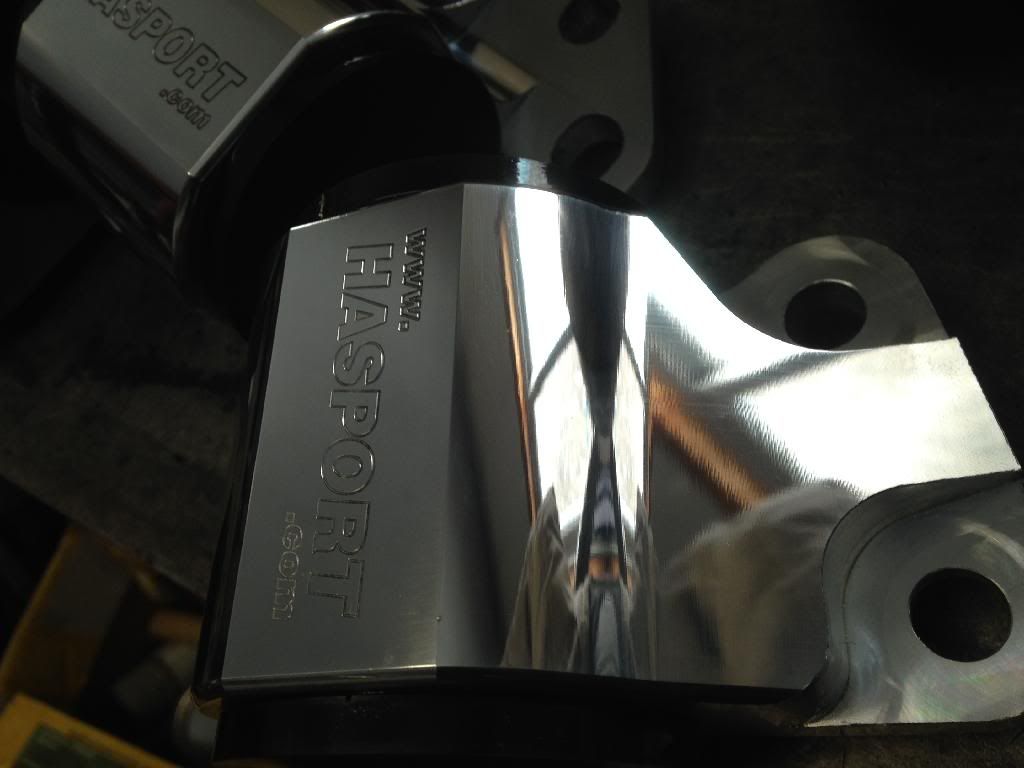
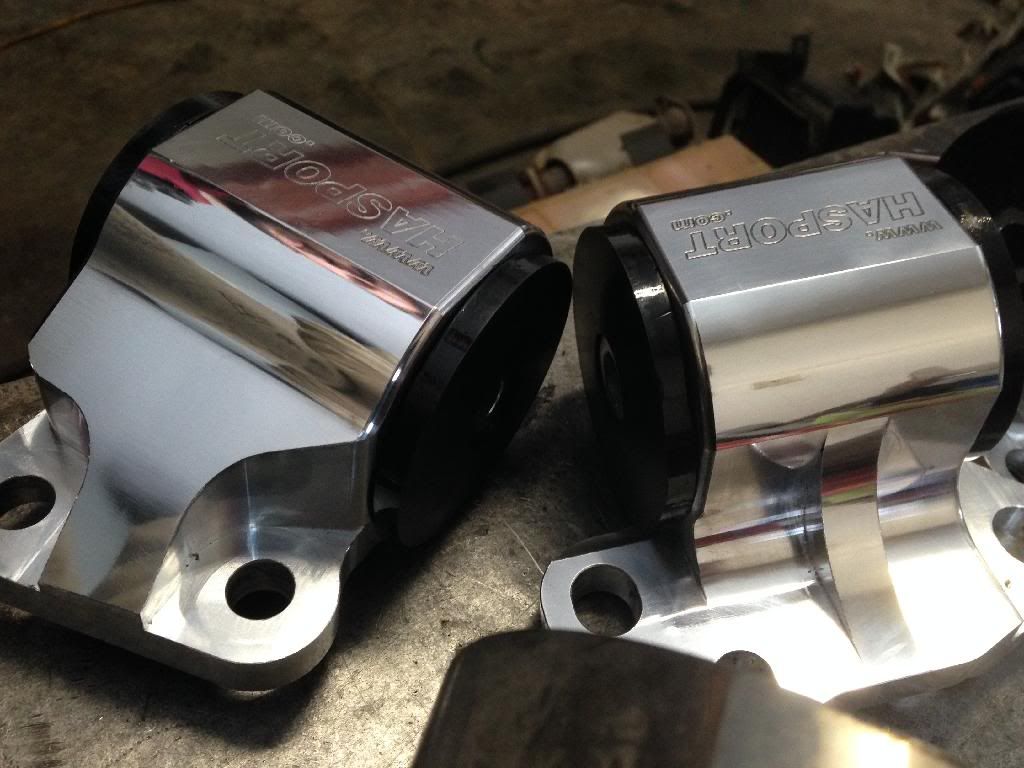
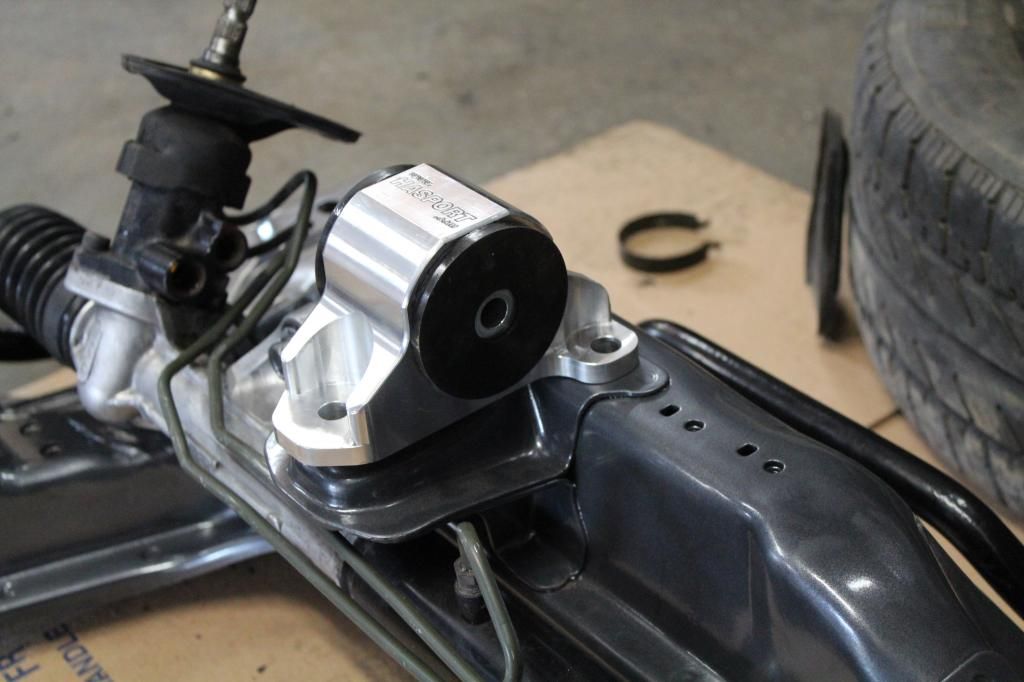
Next I polished my hasport mounts
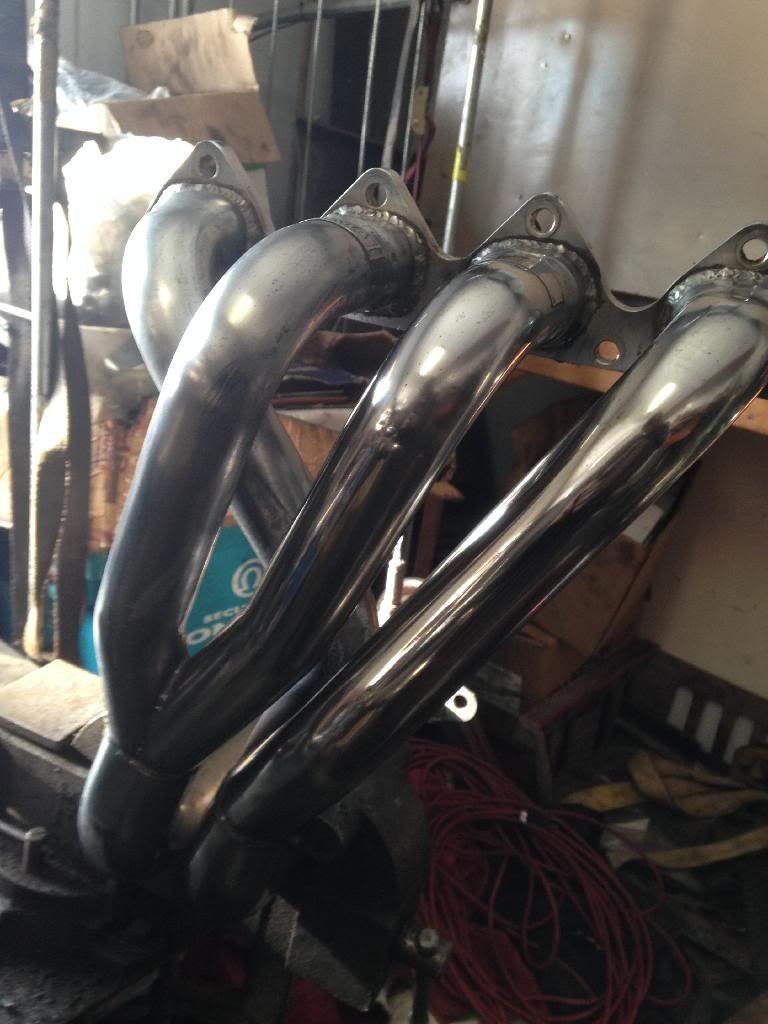
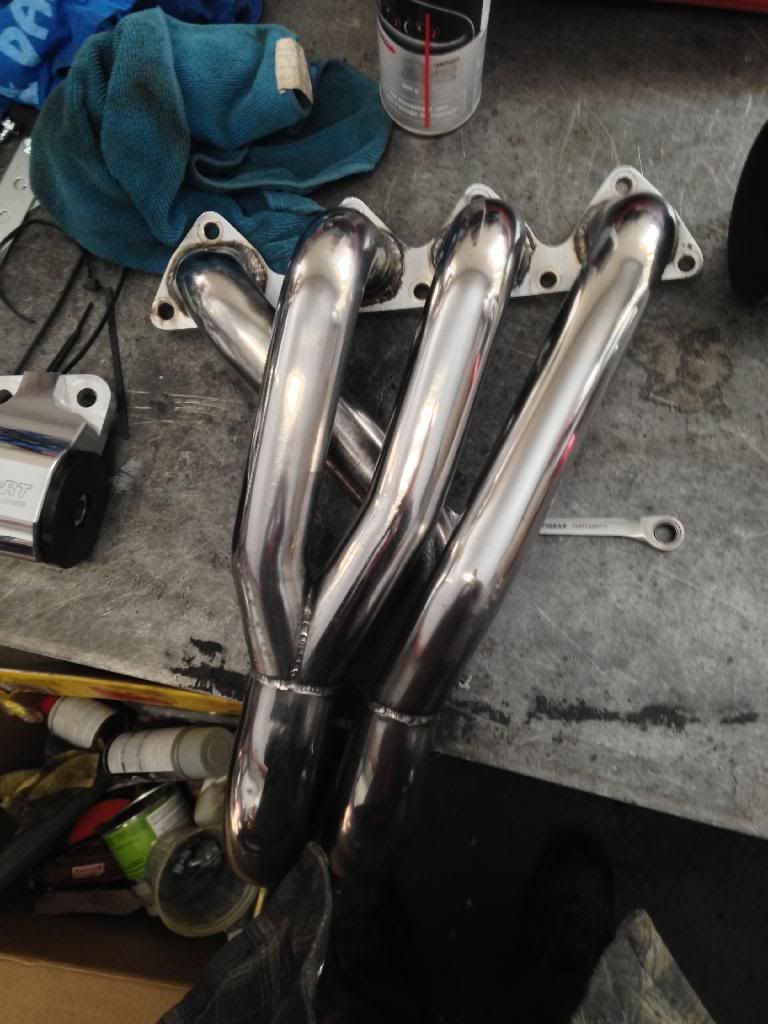
then I sanded and polished my header again it started to get tarnished, it's still not as nice as I would like it to be but i like the style of the header
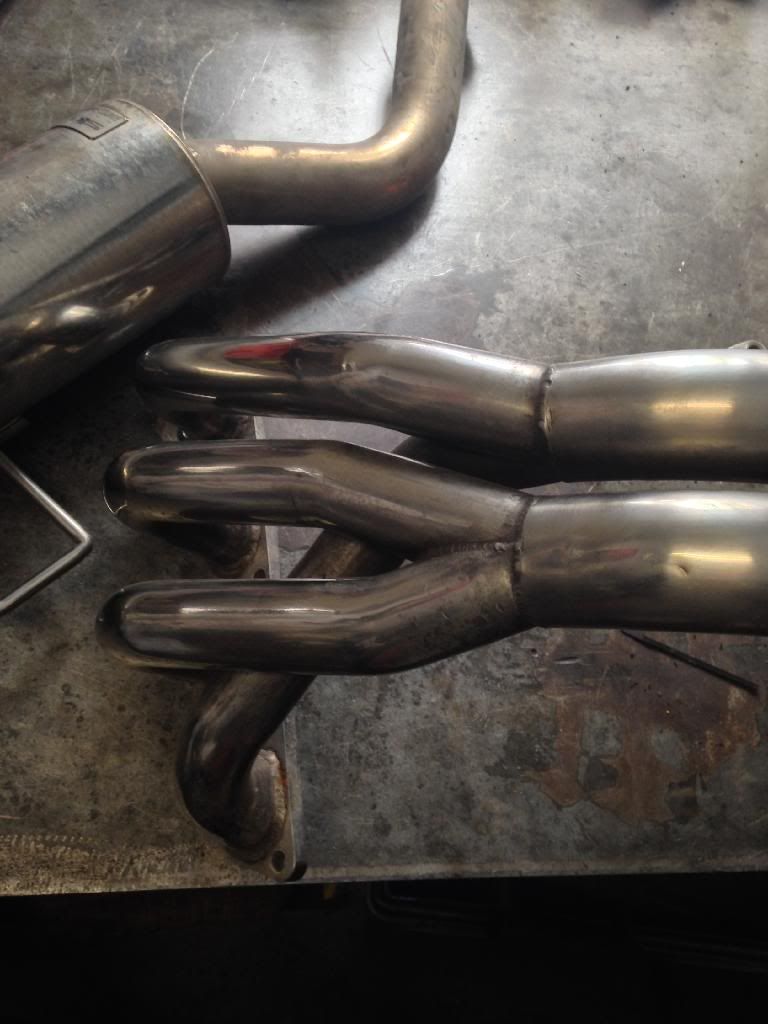
then gave a quick polish to my skunk 2 mega power (I believe it is) muffler
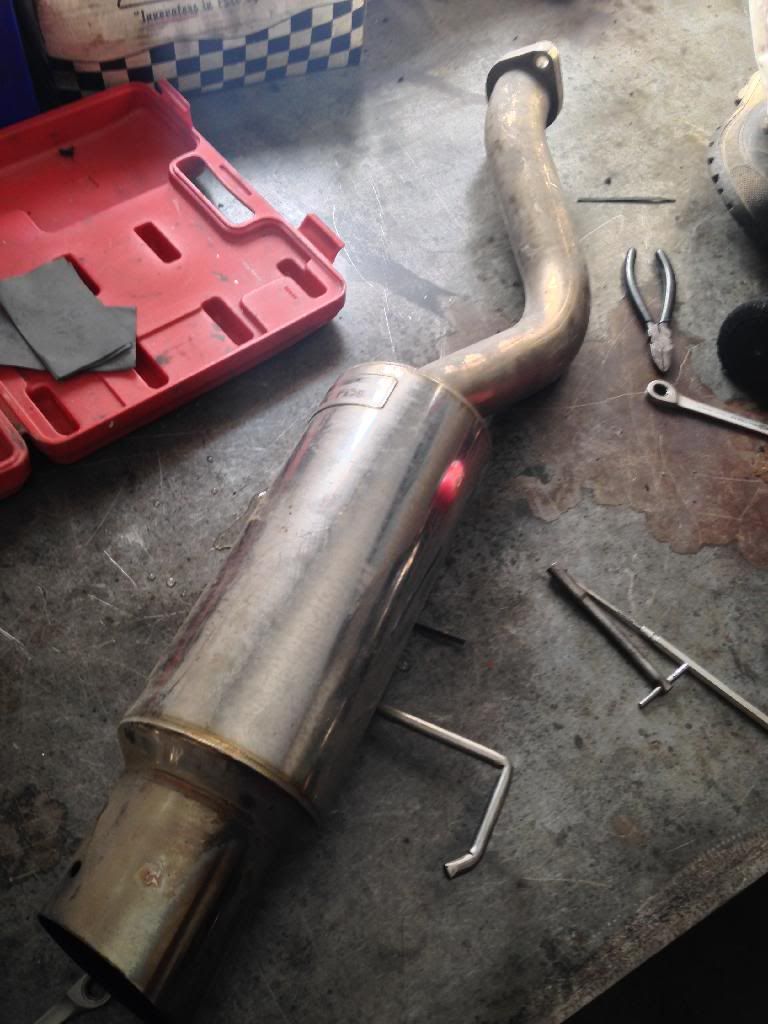
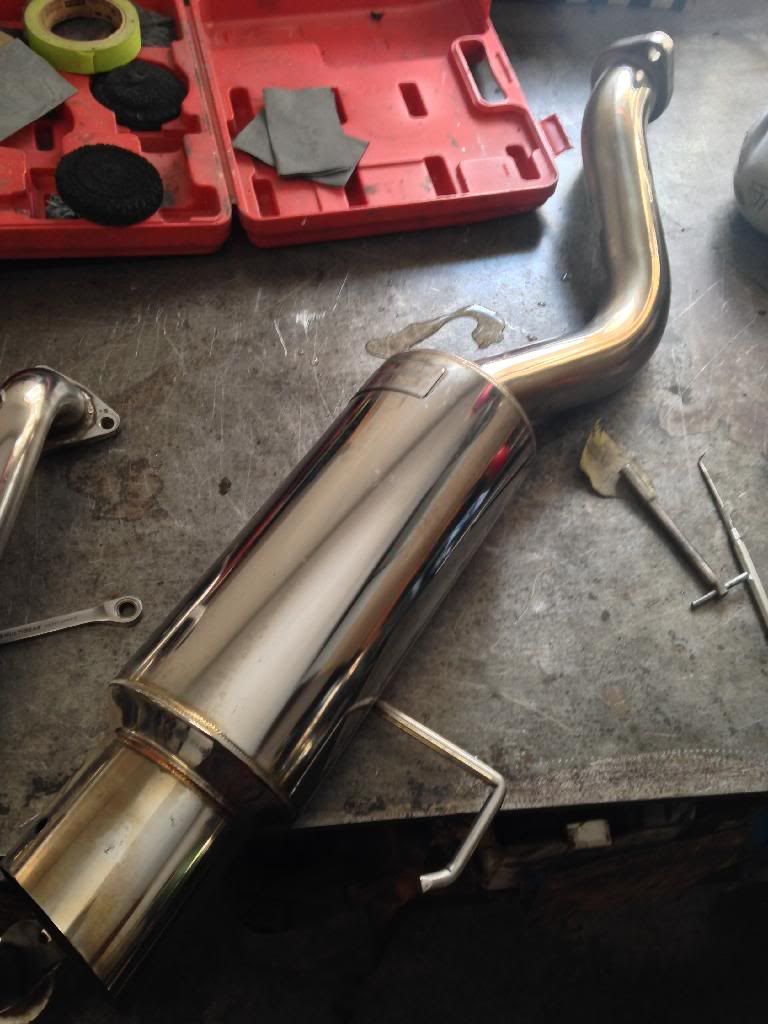
going to do the rest of the exhaust tomorrow then pay attention to tearing the motor down
decided to delete the air intake hole and just run a shorter pipe instead of a full ram under the bumper
did a bit of grinding on some welds and all the spot welds for the body work portion
And the 2 tools I used to clean the spot welds
just a few more things to weld up on the fire wall
December 4th 2013
had a big long break working on the car due to the cold here in Canada, really puts you out of the mood for working on your car (especially body work) so i started ordering a lot of parts!
luckily being from England i have a lot of hooks ups and friends down there so i got some custom UK plates made and sent over

a couple days later my UKDM spec tail lights came in
they are flawless, came with mint gaskets, all the screws, all bulbs and wiring and the lenses look like glass

I tried out the rear fog with a flash light :D

and my front plate holder came aswell !!

January 18th 2014
another long break due to Christmas etc, just spent most of the time sourcing parts/selling parts and saving up
then my plan changed, i already bought an engine and transmission off a friend of mine to clean up and put into the EG6, but i didnt have a good feeling about using it, so i decided to pull the drive train out of my other "project" car since i know the history of it all


January 21st 2014
my tucked rad came in, im going to polish the outsides to bling, dont like how dull it looks

February 2nd 2014
over the next 2 weeks tons of parts came rolling in!
OEM VTi decals from the Uk

Hasport mounts :D (arp studs are for my crv)

and got another set of uk plates with my car club on them

and my Ry wire harness
[URL=http://s846.photobucket.com/user/ronan_hs/media/Mobile%20Uploads/F884C117-E256-4CF3-A8E8-52F2EF6A6278_zpsg3b4k5uc.jpg.html]
February 10th 2014
and then took a little road trip !!! i sent my car off the my body shop guys to have the bay finished and painted, just a few fire wall holes needed to be welded up and i just want the thing done ready to have the engine dropped in, my shop is too cold to do it myself although i am fully capable of doing so (auto body apprentice)


February 16th 2014
Decided to make moves today
I bought a bunch of new suspension stuff which ended up on my other project car (posted above) last year so today I took it all off, form and function type 1coils, bwr front and rear camber kit, megan toe arms and black works racing LCA's which is all going on this eg6.
I disassembled the lower half, took off the top hats and the BWR upper control arms to get powder coated, red just doesn't fit the theme of what I'm going for.

Next I polished my hasport mounts


then I sanded and polished my header again it started to get tarnished, it's still not as nice as I would like it to be but i like the style of the header


then gave a quick polish to my skunk 2 mega power (I believe it is) muffler


going to do the rest of the exhaust tomorrow then pay attention to tearing the motor down
 02-17-2014, 12:40 PM
#4
Honda-Tech Member
Thread Starter
February 17th 2014
just ordered some NRG polished hood dampers, always been a huge fan of these since i got into hondas, finally went ahead and got some
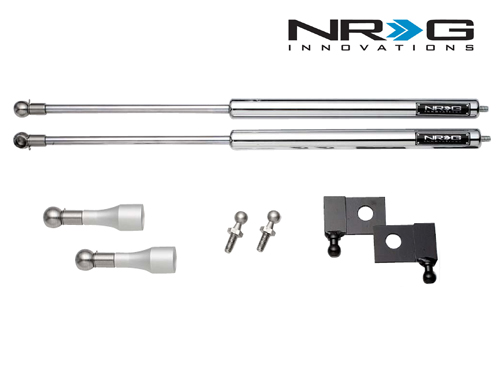
just ordered some NRG polished hood dampers, always been a huge fan of these since i got into hondas, finally went ahead and got some
02-19-2014, 12:56 PM
#6
Honda-Tech Member
Thread Starter
^ my build is on JDMRides dude , EH, post more of your hatch! i love that thing
February 19th 2014
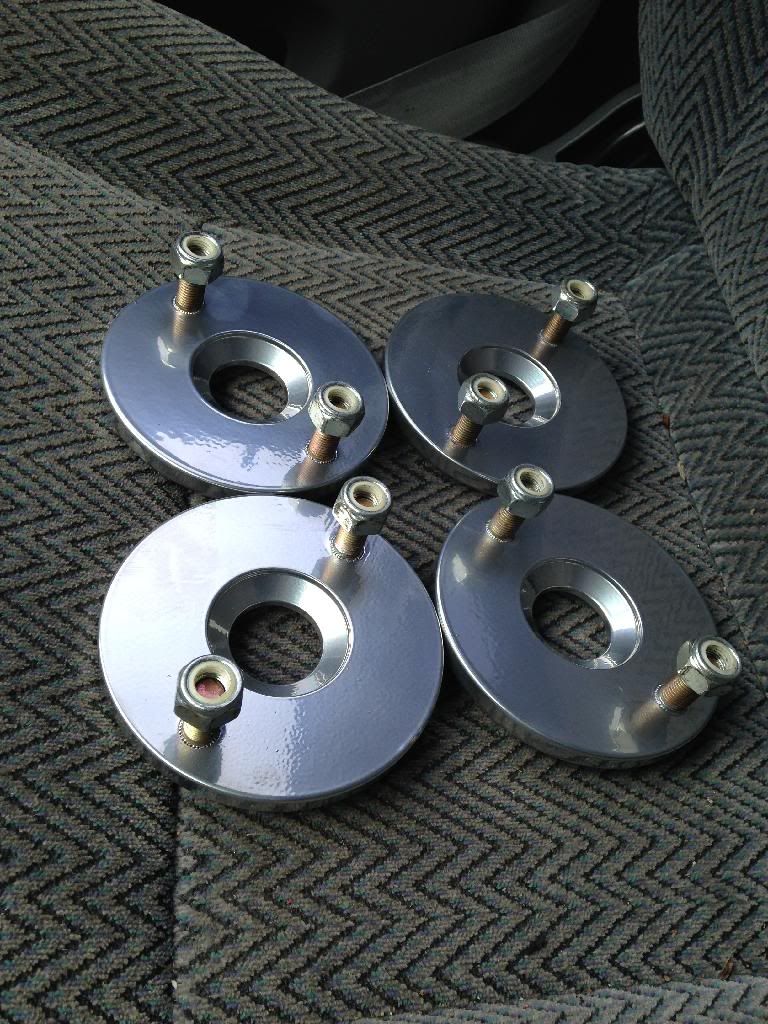
just a little update, I powder coated my top hats chrome today, even though you barely see them through the shock towers just knowing they are red and that tiny bit showing would bug the hell out of me, doesn't look as chrome in the pictures as it does in person, but now I can think of a few other things I will chrome powder coat in the bay :D
February 19th 2014
just a little update, I powder coated my top hats chrome today, even though you barely see them through the shock towers just knowing they are red and that tiny bit showing would bug the hell out of me, doesn't look as chrome in the pictures as it does in person, but now I can think of a few other things I will chrome powder coat in the bay :D


Trending Topics
02-23-2014, 04:38 PM
#8
Honda-Tech Member
Thread Starter
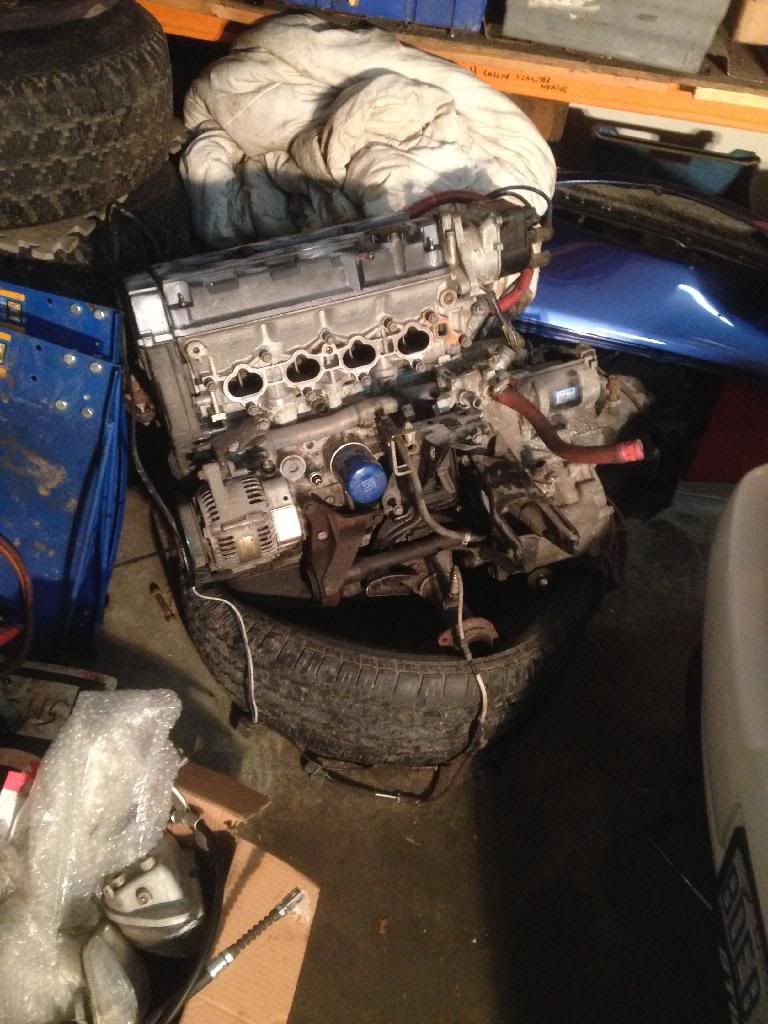
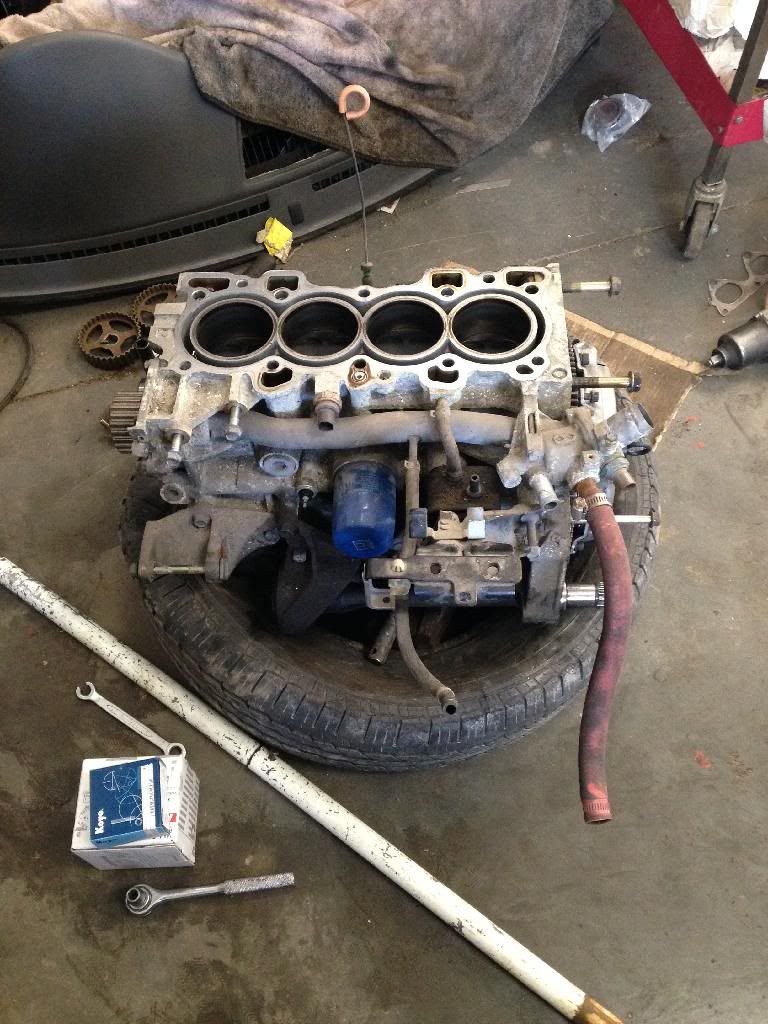
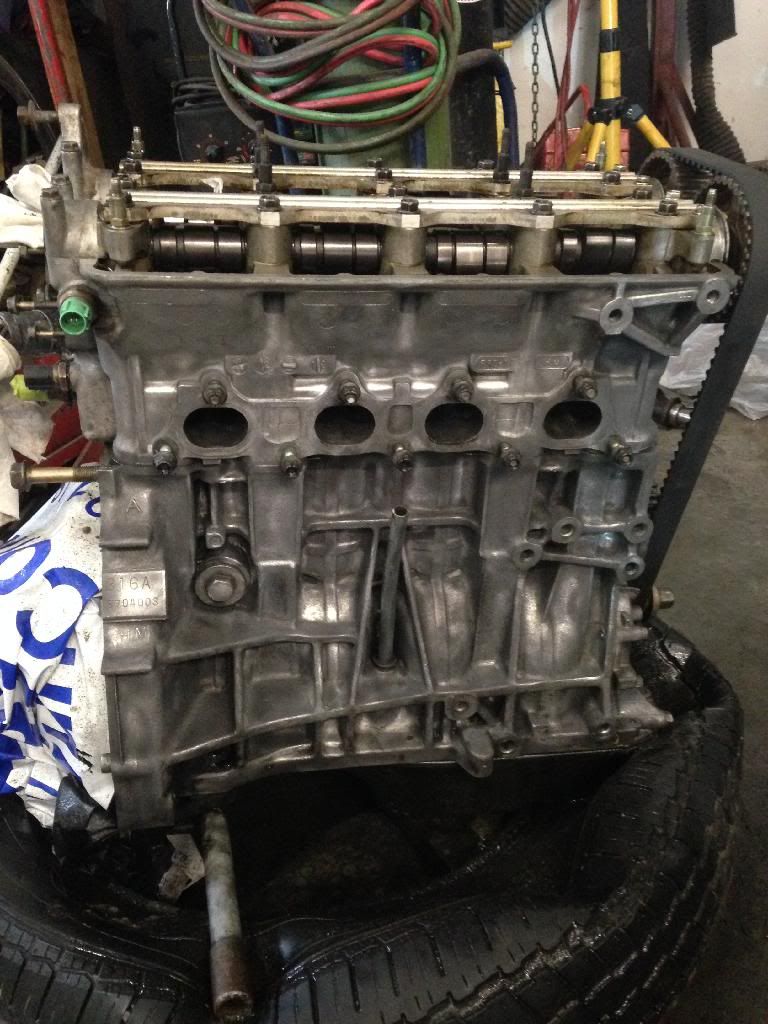
February 22nd 2014
started stripping my engine apart tonight
intake manifold was the first thing off
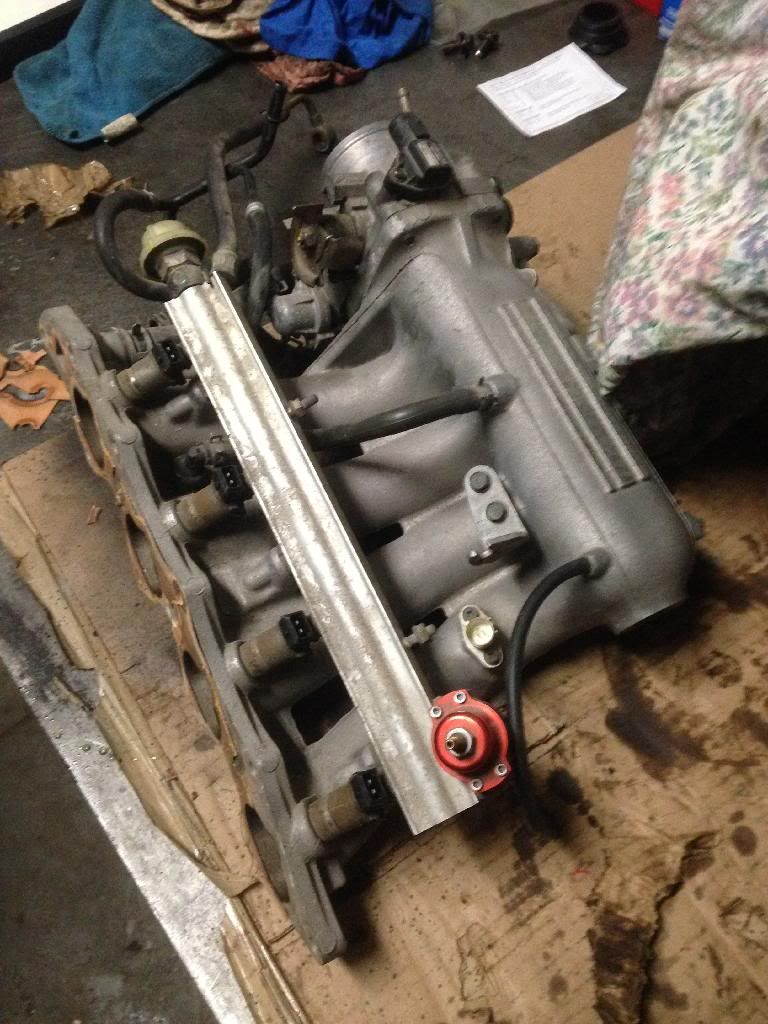
Took apart the fuel rail to polish
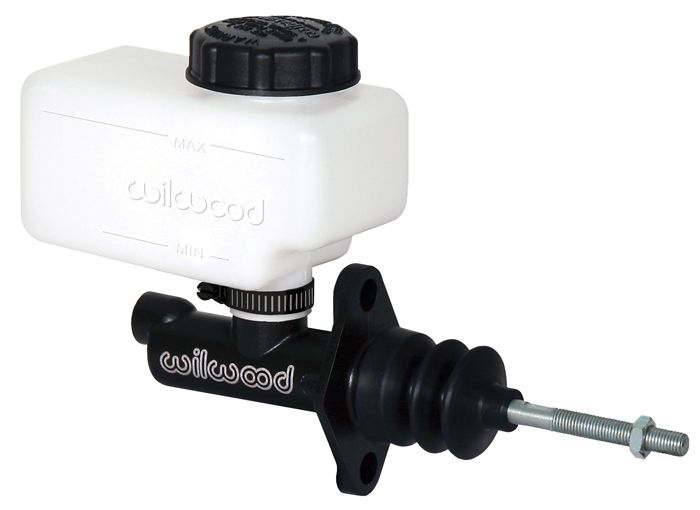
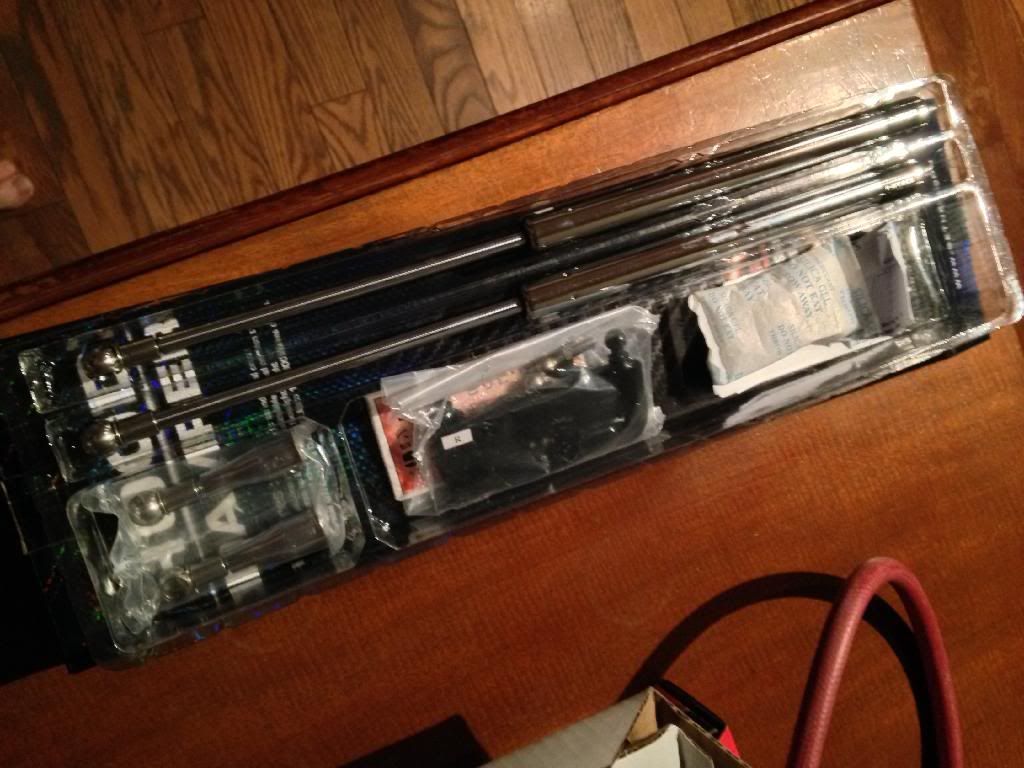
also ordered the willwood universal 7/8th master cylinder, the pot is 10oz so a little large so I'm going to order a 7oz, I'm going to have a friend make me an adapter plate at his machine shop
im just waiting to see how big it is in person and may just order the same one for the clutch and get a 4oz pot for that, i want everything to match so a S2k one just wont do lol
started stripping my engine apart tonight
intake manifold was the first thing off


Took apart the fuel rail to polish


also ordered the willwood universal 7/8th master cylinder, the pot is 10oz so a little large so I'm going to order a 7oz, I'm going to have a friend make me an adapter plate at his machine shop
im just waiting to see how big it is in person and may just order the same one for the clutch and get a 4oz pot for that, i want everything to match so a S2k one just wont do lol
 02-24-2014, 12:19 PM
#9
Honda-Tech Member
Thread Starter
February 24th 2014
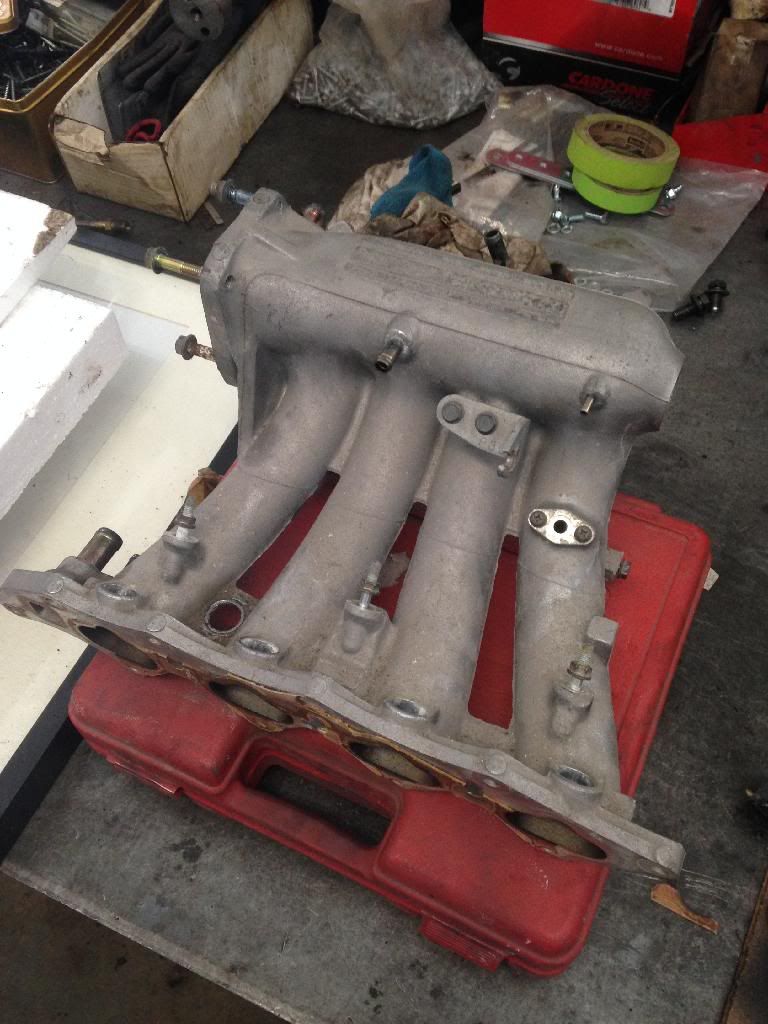
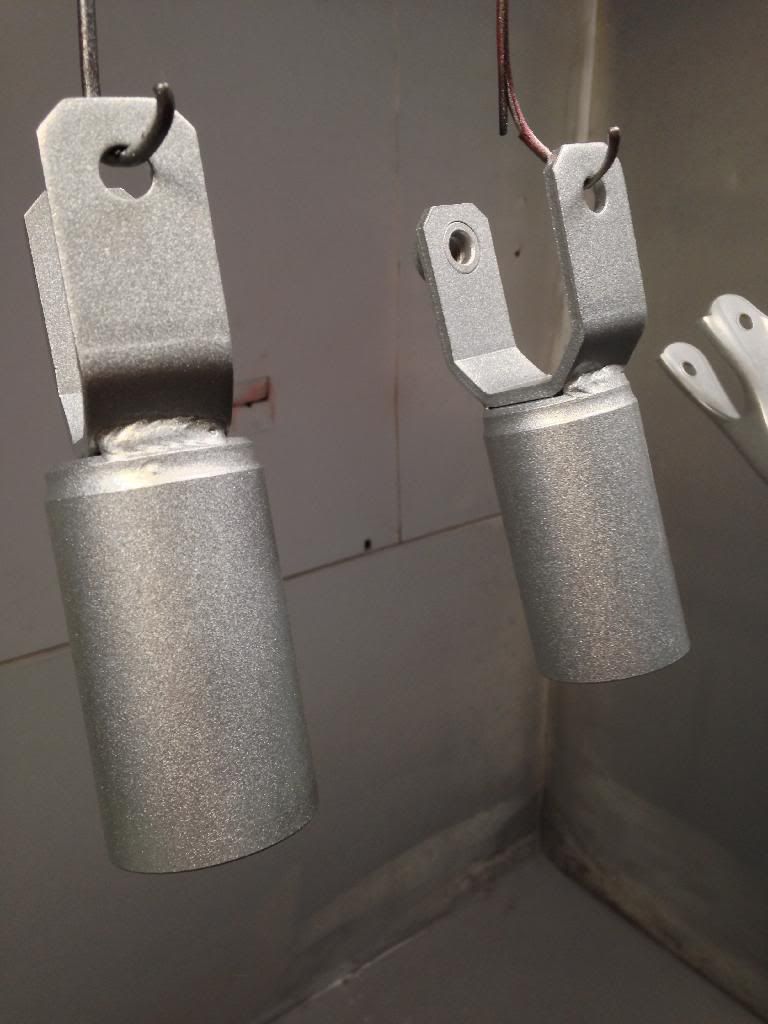
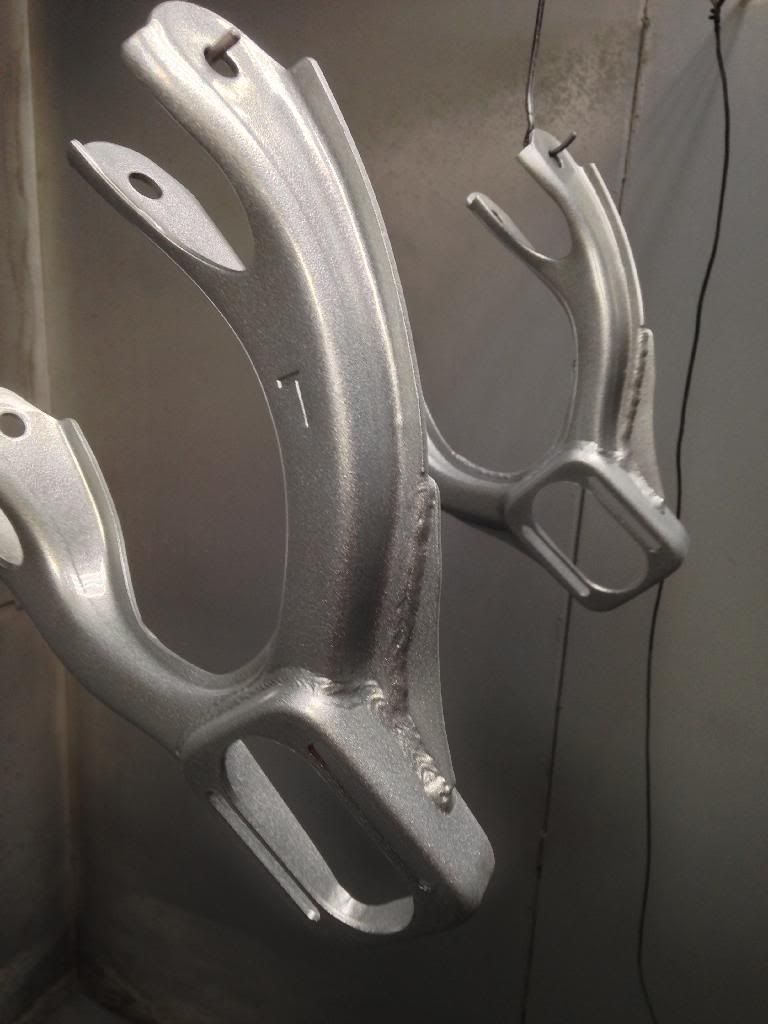
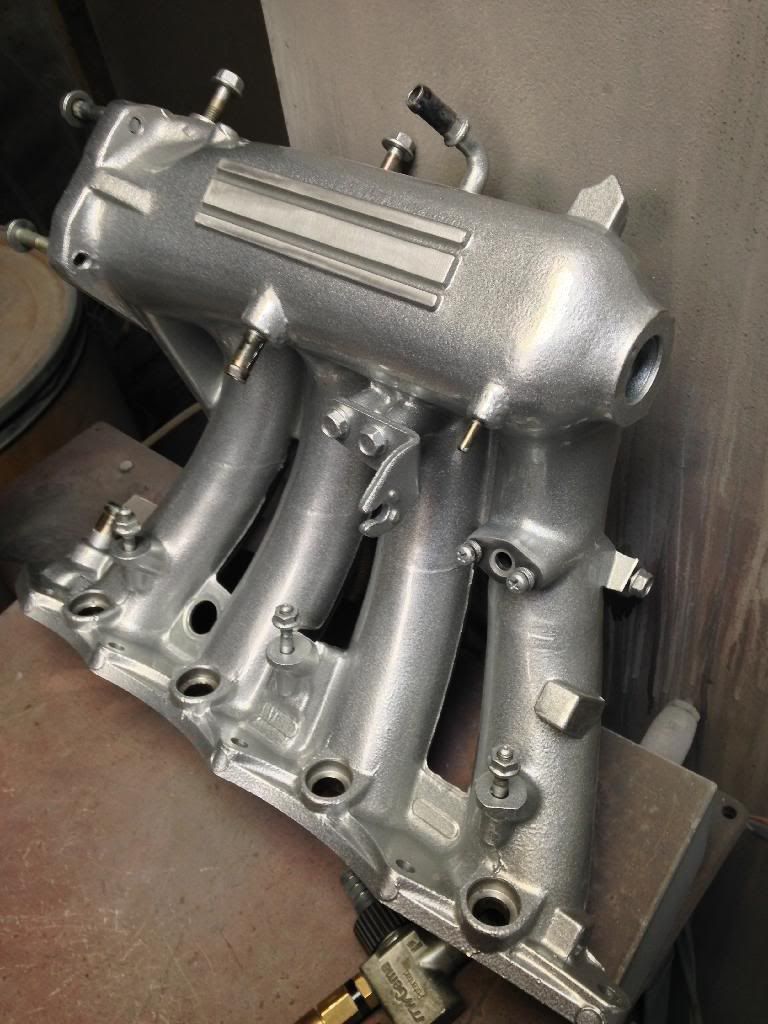
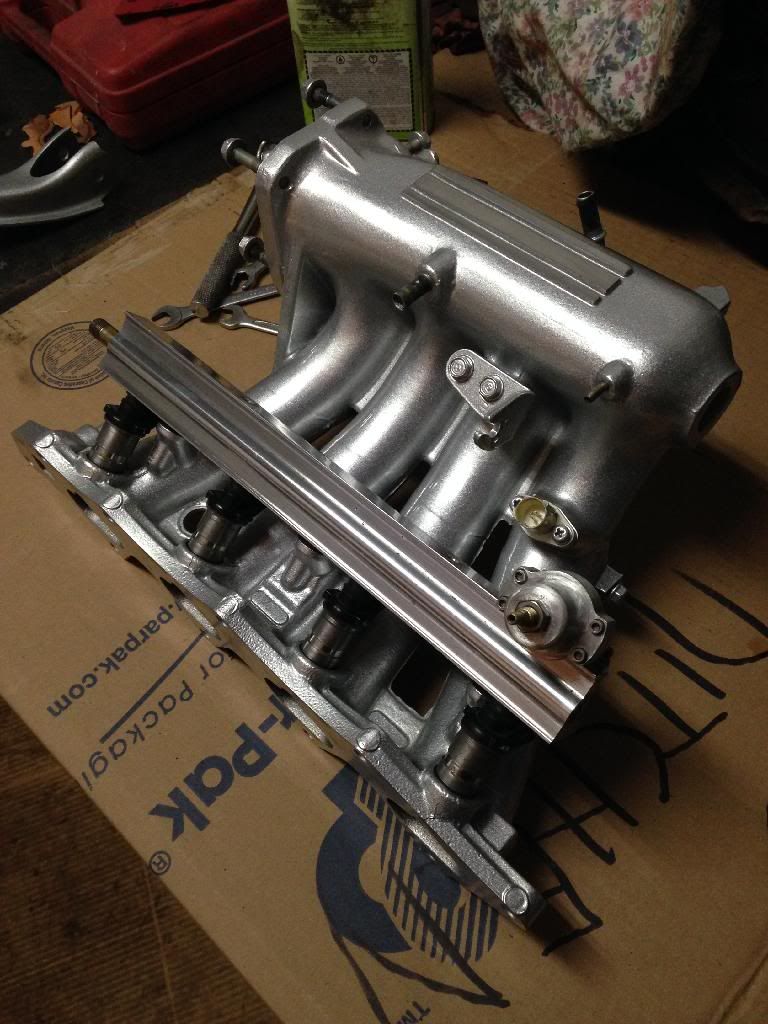
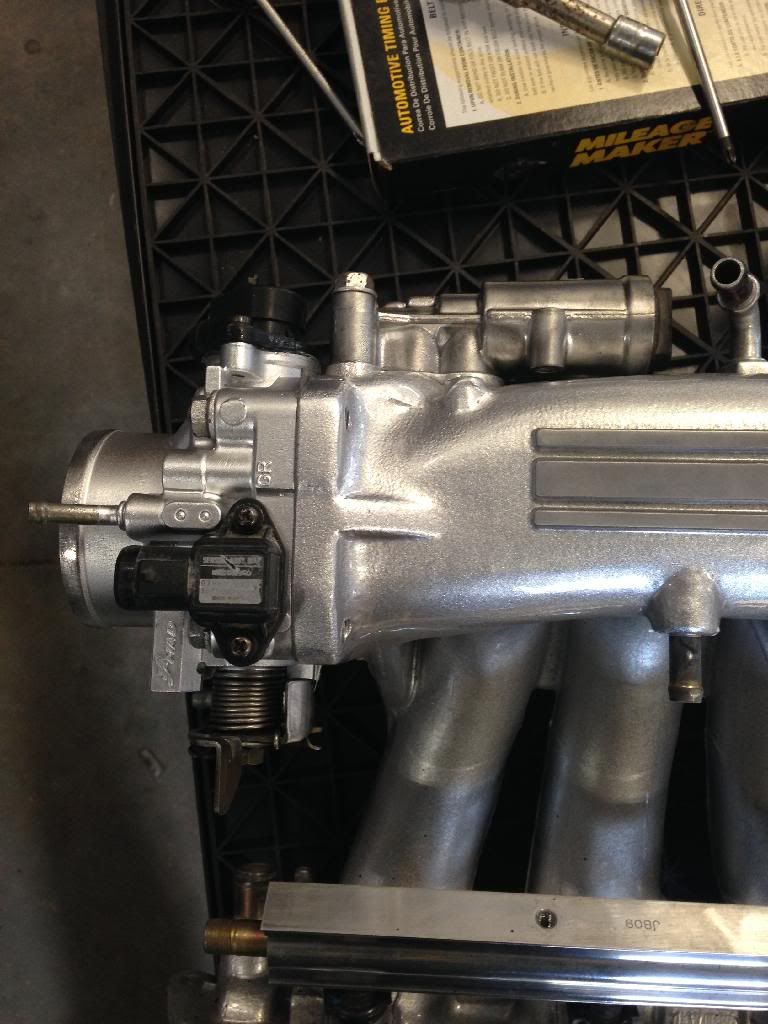
today was a good day, got all my suspension stuff powder coated and my intake manifold
All Done in sparkle silver with clear coat, 10 internet points for ever ever can spot what I did to the intake manifold
today was a good day, got all my suspension stuff powder coated and my intake manifold
All Done in sparkle silver with clear coat, 10 internet points for ever ever can spot what I did to the intake manifold


 02-24-2014, 04:32 PM
#11
Honda-Tech Member
Thread Starter
nice one !! ^ a guy on my UK forum got it right away as well, nobody on my local forum got it yet, but someone brought to my attention that i still have the line for the vacuum to the brake booster which i am deleting so i will need to shave that off and tap a bolt into there or something to get rid of it
did some stuff at the shop tonight too
first was go to bolts plus and get stainless washers for my top hat bushings, had to get rid of the gold

Then put the coils back together
Then put the control arms back together
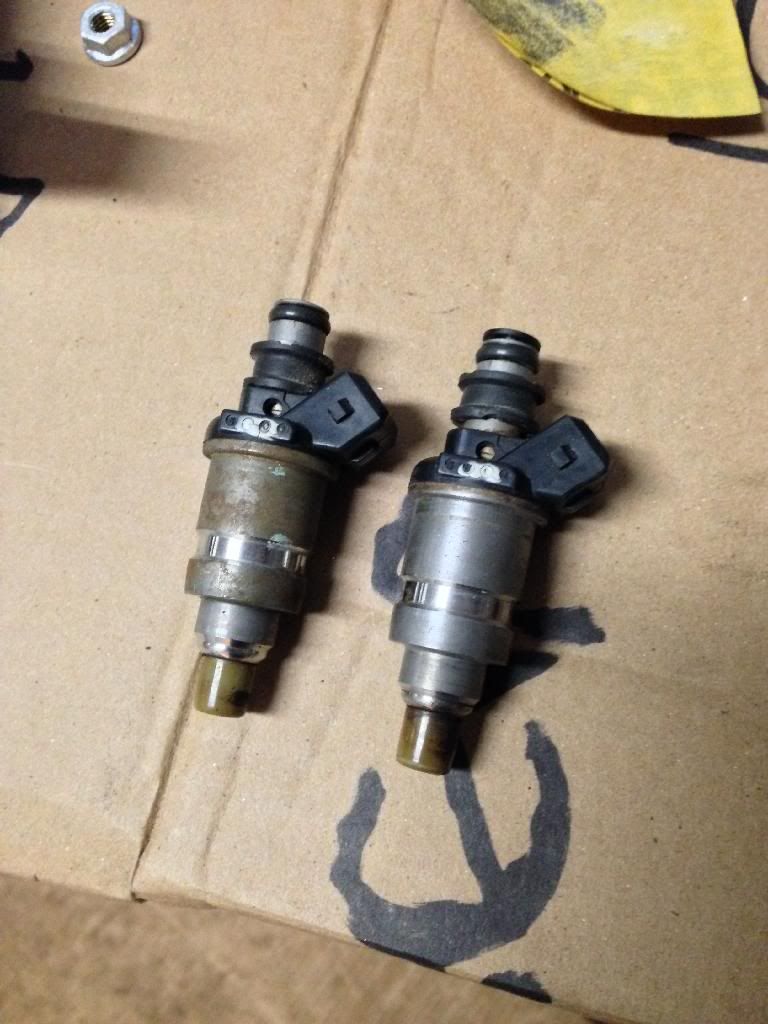
cleaned the rust off the injectors
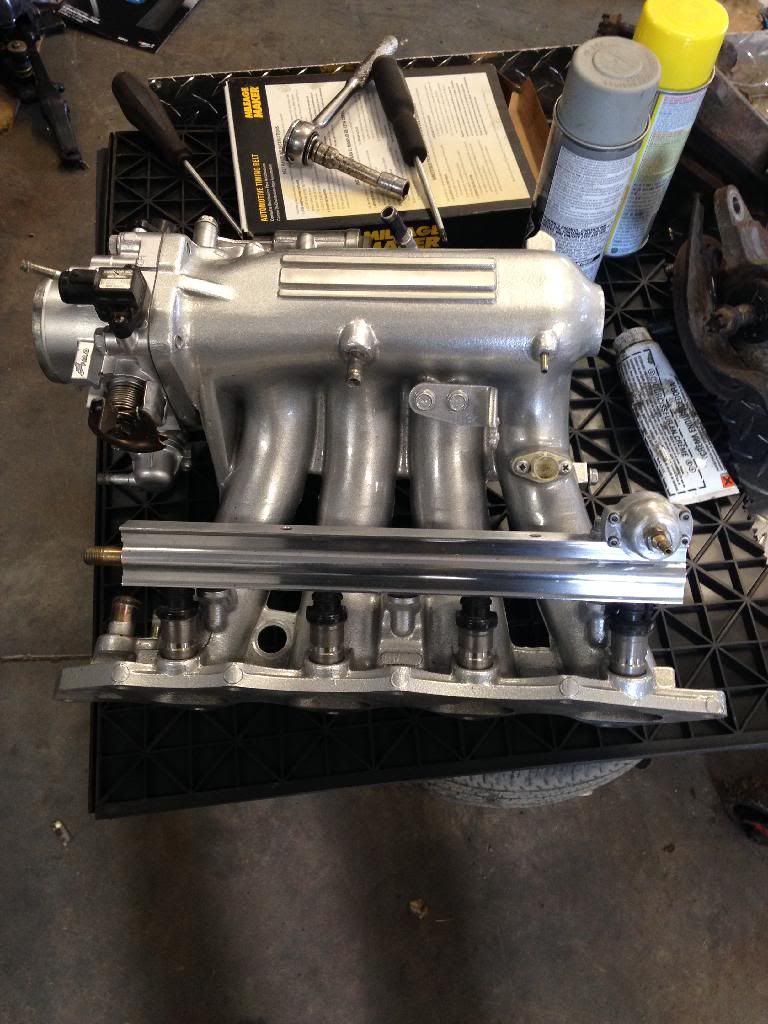
Then started assembling the manifold
did some stuff at the shop tonight too
first was go to bolts plus and get stainless washers for my top hat bushings, had to get rid of the gold


Then put the coils back together

Then put the control arms back together

cleaned the rust off the injectors

Then started assembling the manifold
 02-25-2014, 12:00 PM
#12
Honda-Tech Member
Thread Starter
February 25th 2014
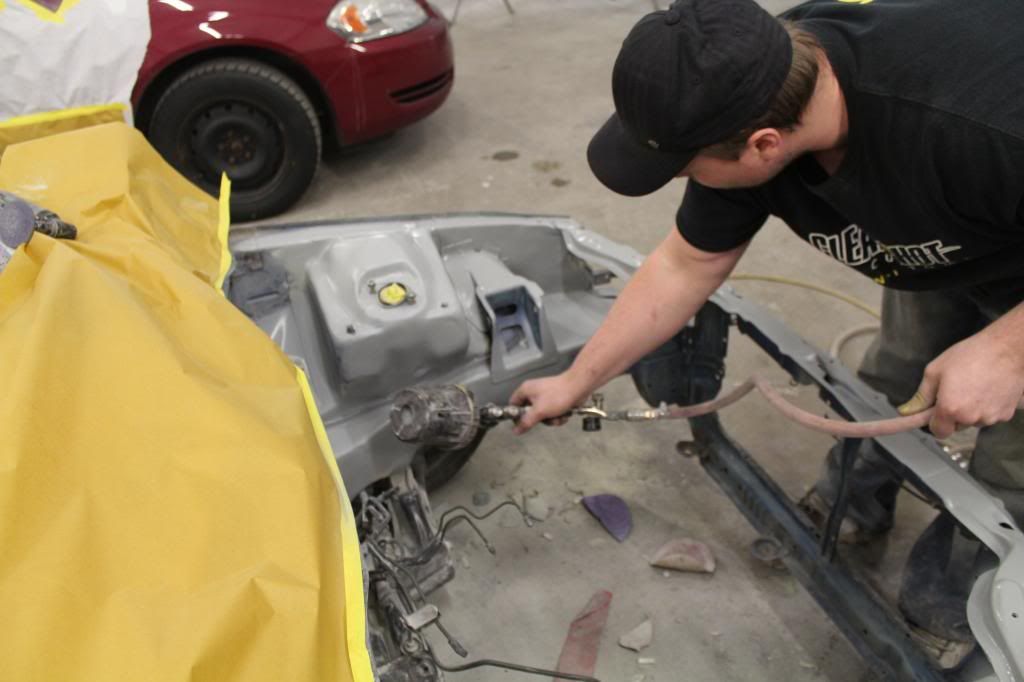
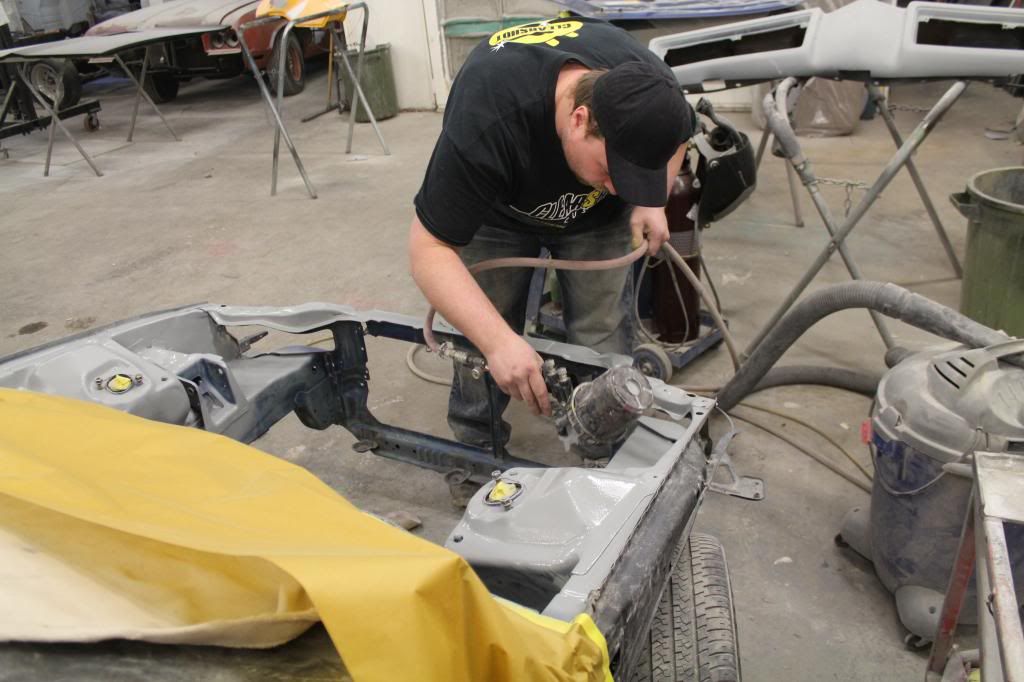
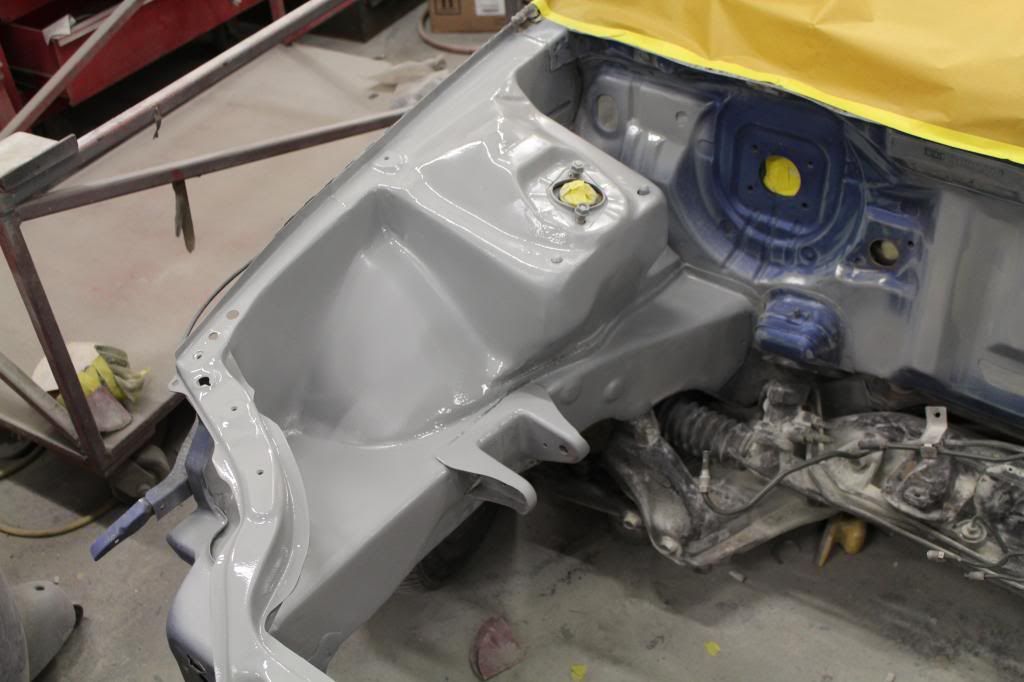
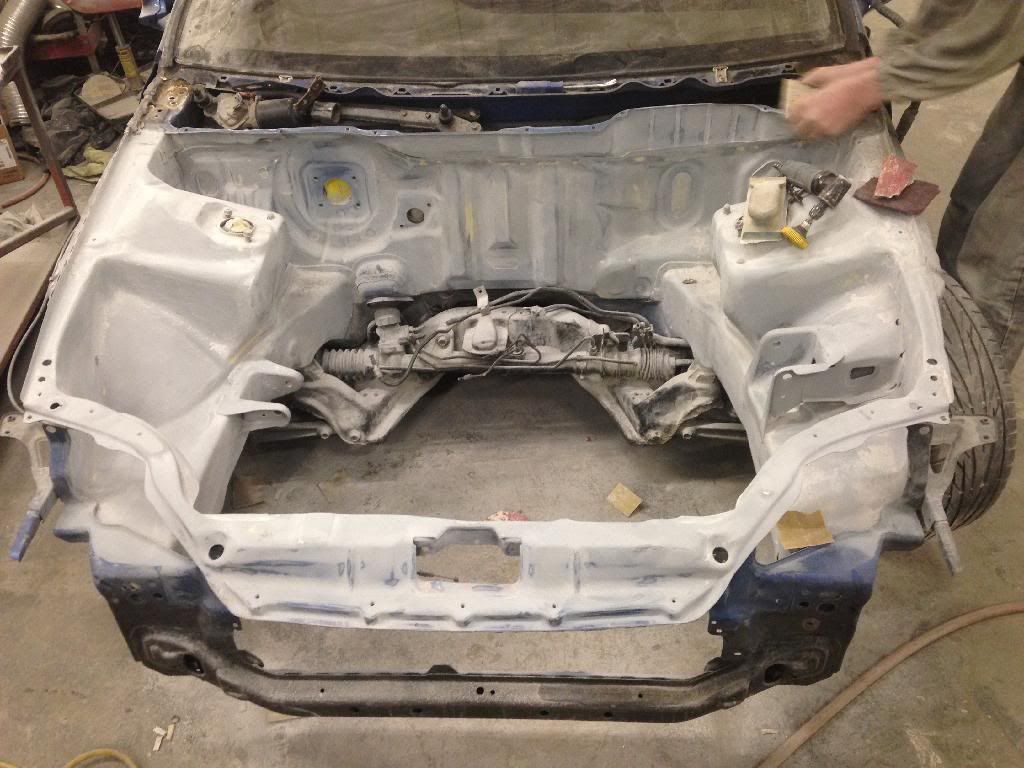
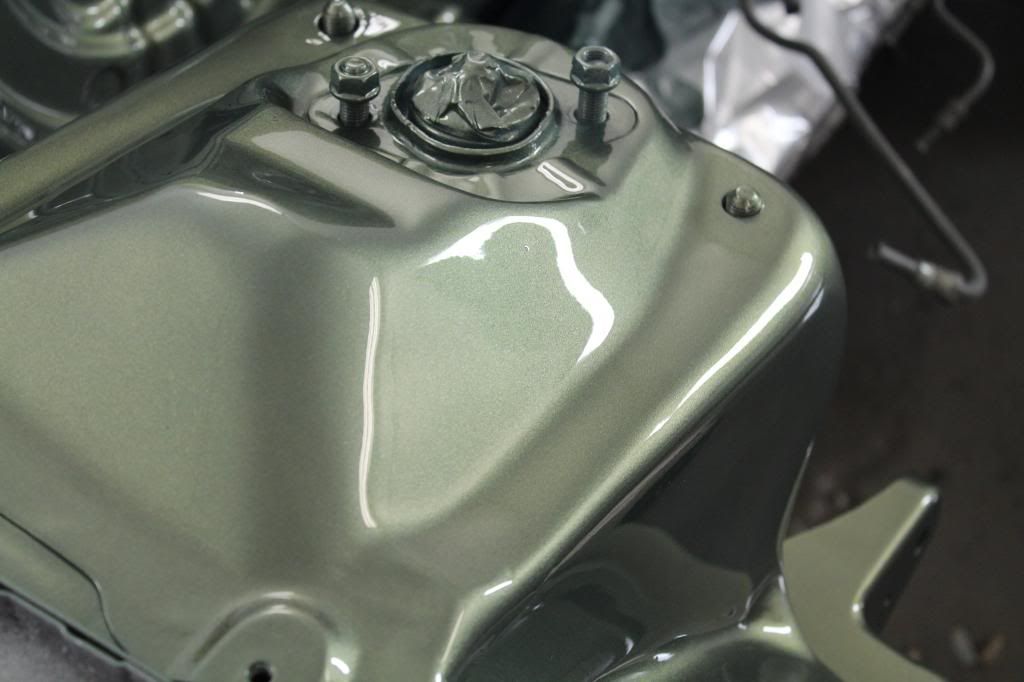
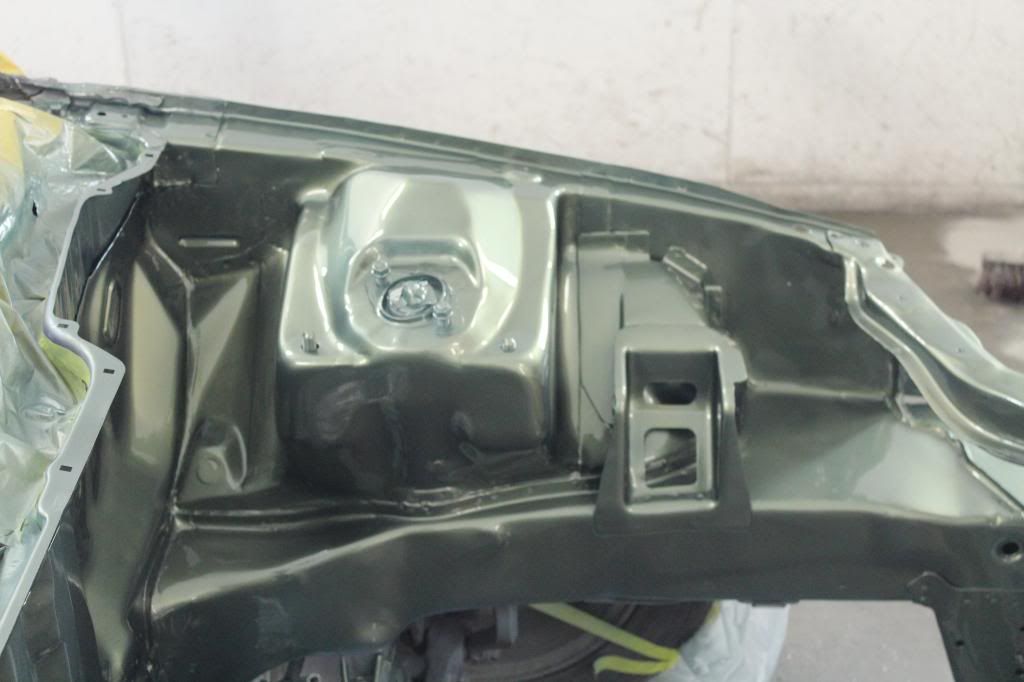
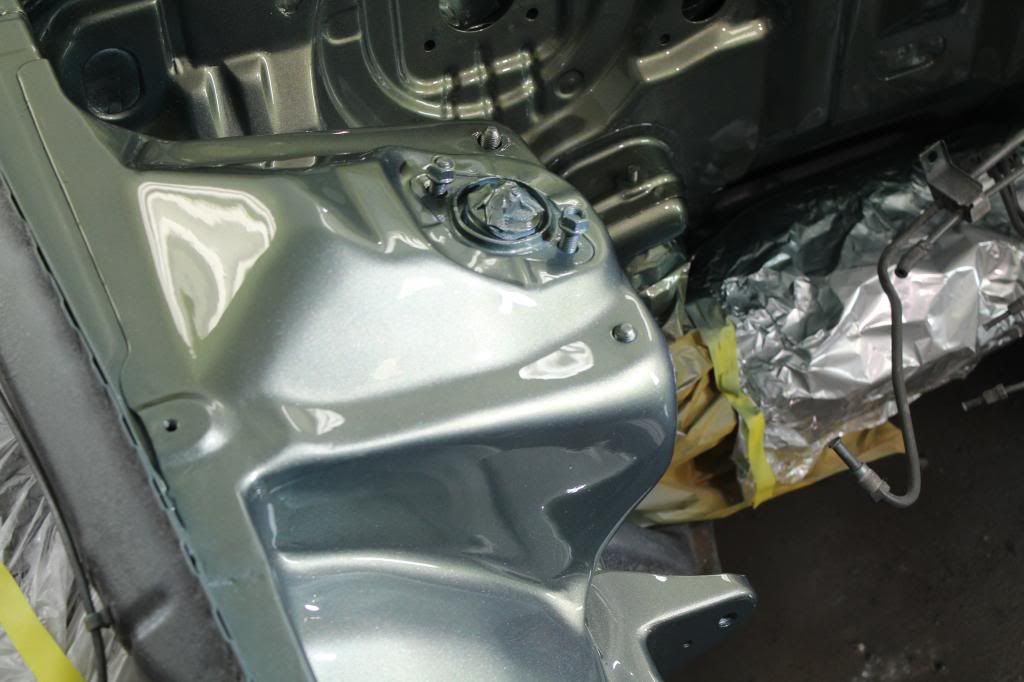
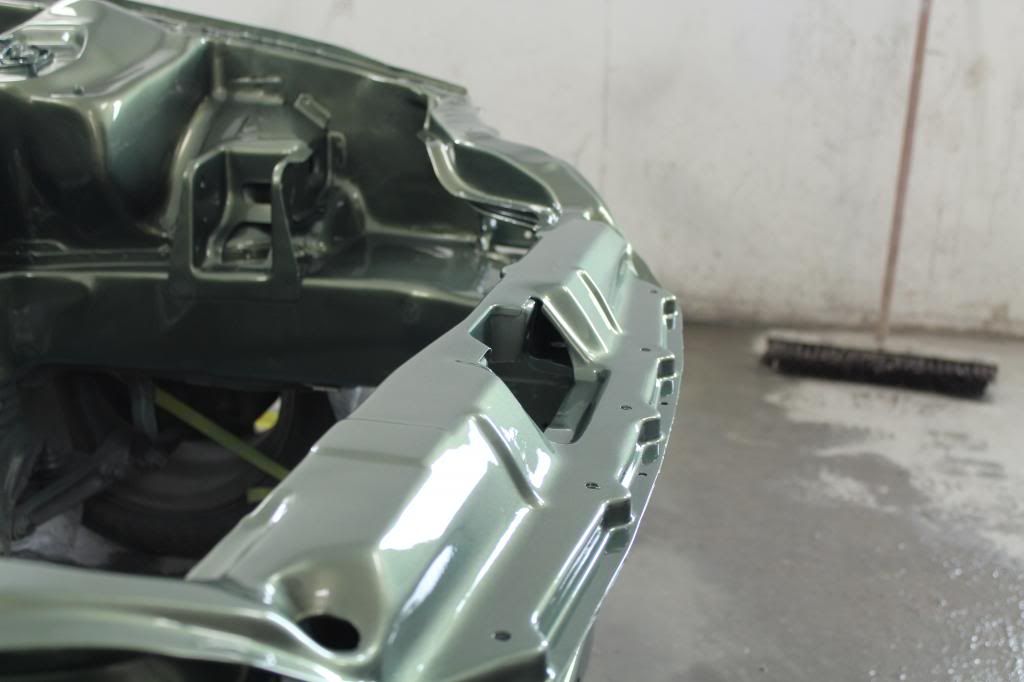
and today is a good day too, took a drive out to the body shop and they have started on my engine bay :D
fully aware that the mount still needs to be welded in just waiting on me to get them the measurements
and today is a good day too, took a drive out to the body shop and they have started on my engine bay :D
fully aware that the mount still needs to be welded in just waiting on me to get them the measurements

 02-26-2014, 05:22 PM
#13
Honda-Tech Member
Thread Starter
February 26th 2014
woooop new parts are always an awesome thing to come home to
NRG hood dampers
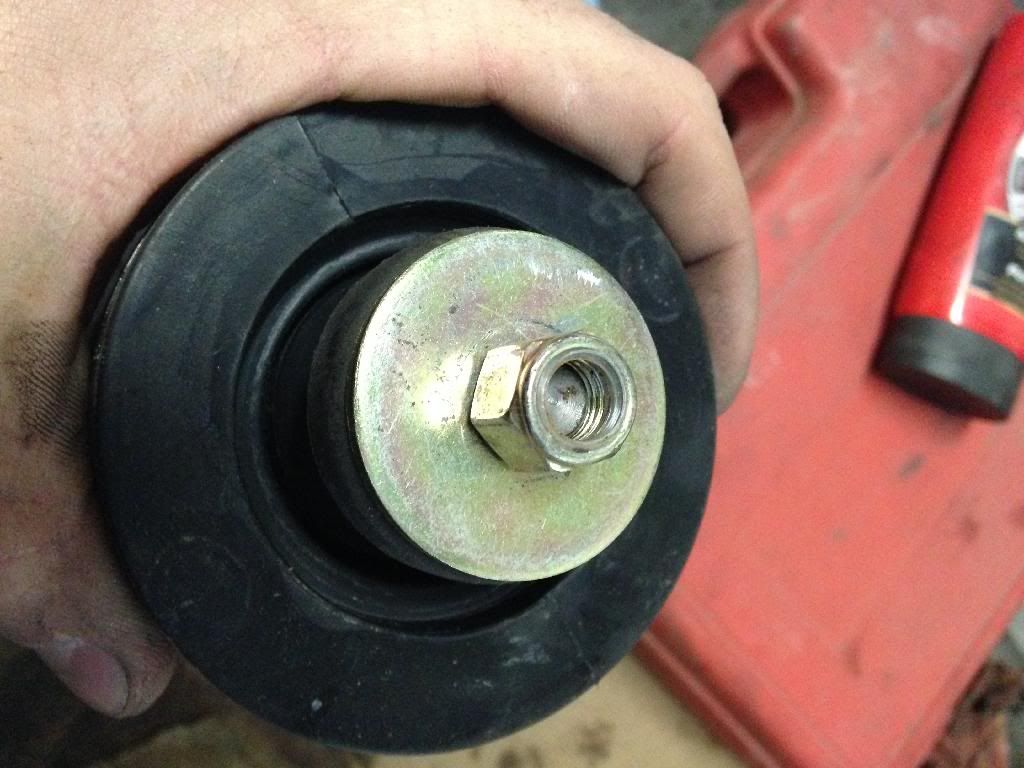
And my brake master which is an awesome **** up !
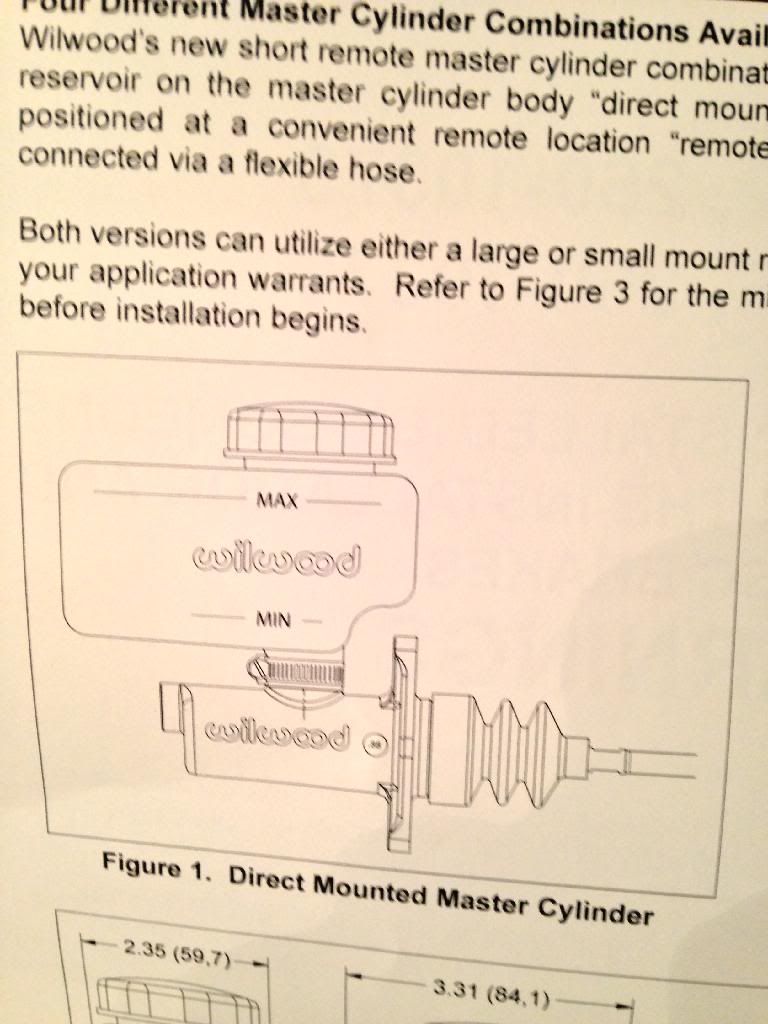
like the picture a few posts back I ordered just this with full intentions of getting a 7oz pot ontop
What they actually sent
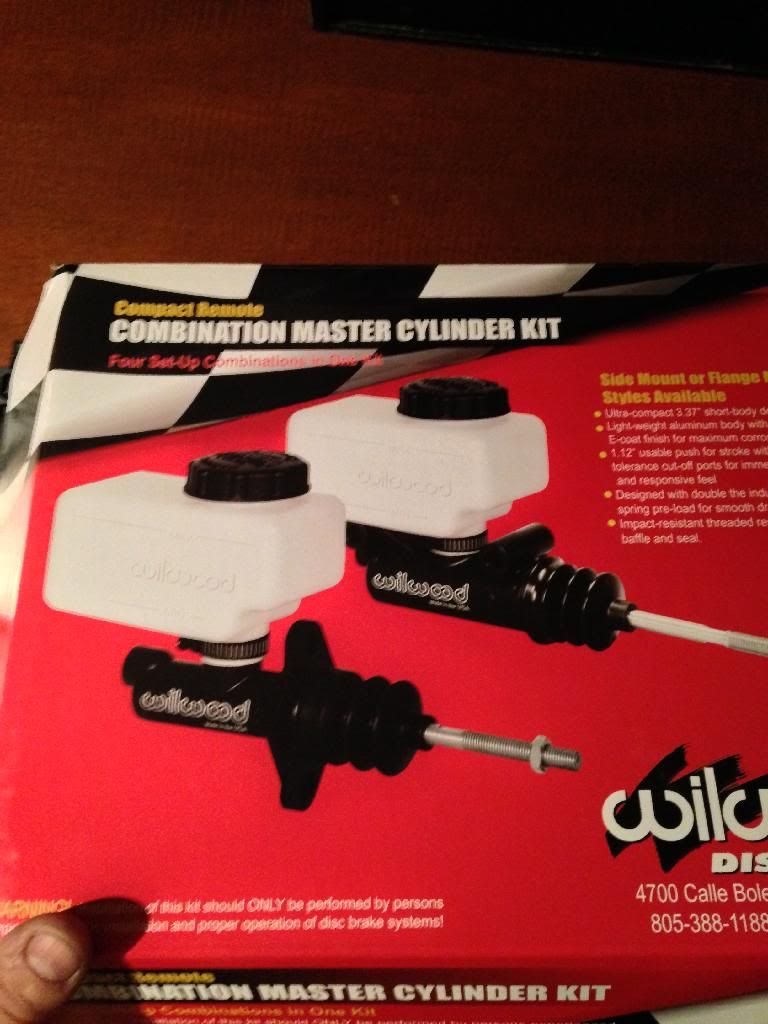

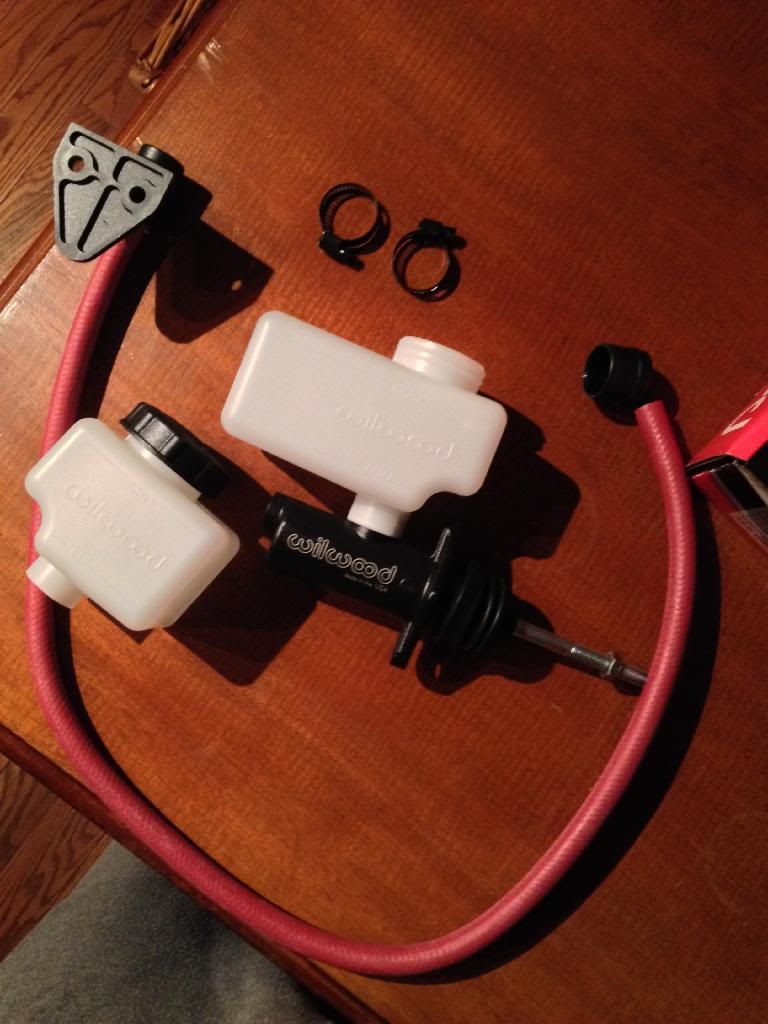

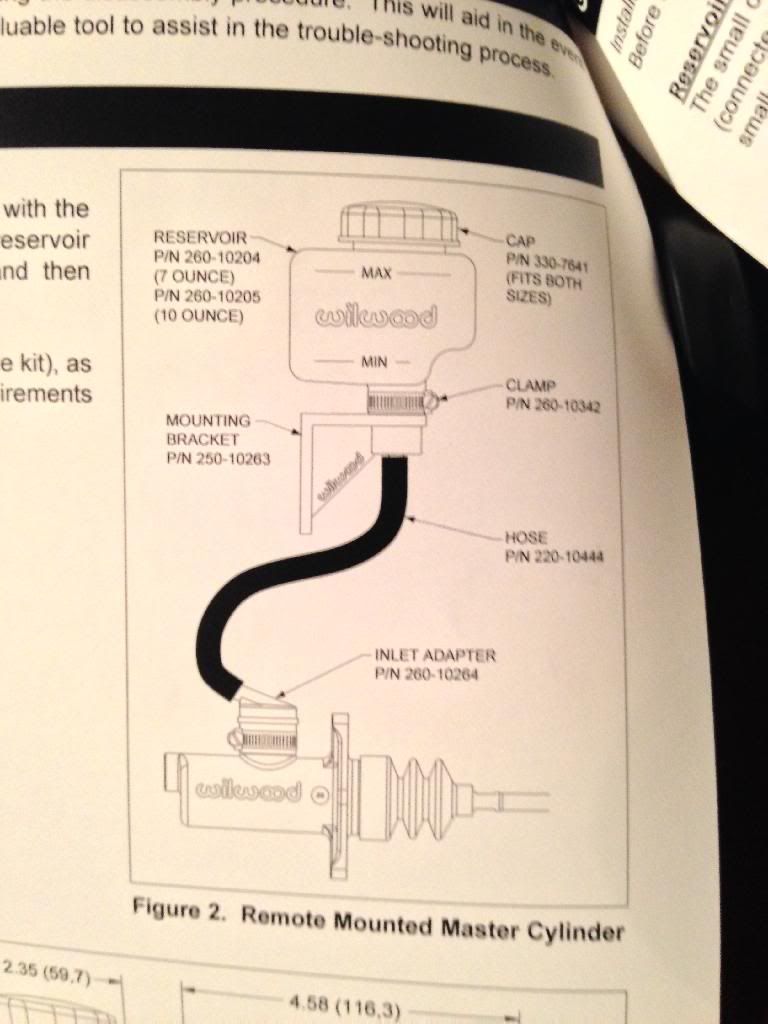
So 1 master cylinder but 2 pots and a relocate kit! Super awesome so now I get my smaller pot and didn't have to pay!
woooop new parts are always an awesome thing to come home to
NRG hood dampers

And my brake master which is an awesome **** up !
like the picture a few posts back I ordered just this with full intentions of getting a 7oz pot ontop
What they actually sent


So 1 master cylinder but 2 pots and a relocate kit! Super awesome so now I get my smaller pot and didn't have to pay!
03-25-2014, 03:54 PM
#14
Honda-Tech Member
Thread Starter
UPDATE!
my photobucket has been down for a month due to over posting lol
so these updates will be over the past month until todays date, lots of pictures :D and i finally decided to use the DSLR instead of an iphone, im pointing and shooting so some pictures are out of focus
March 25th 2014
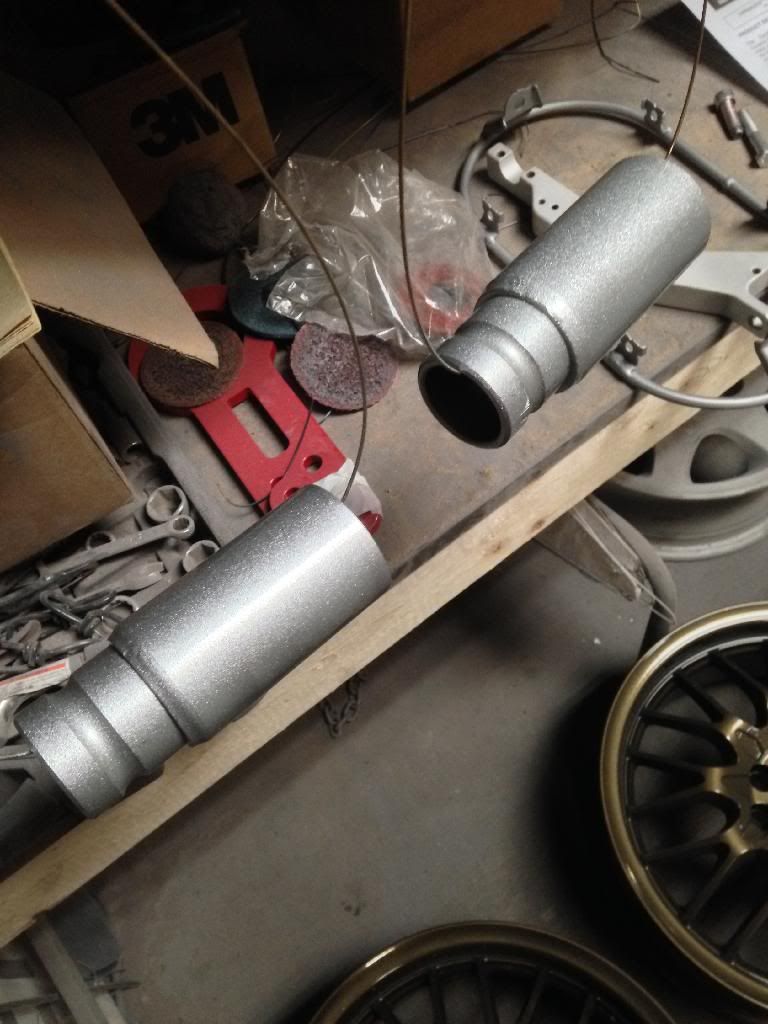
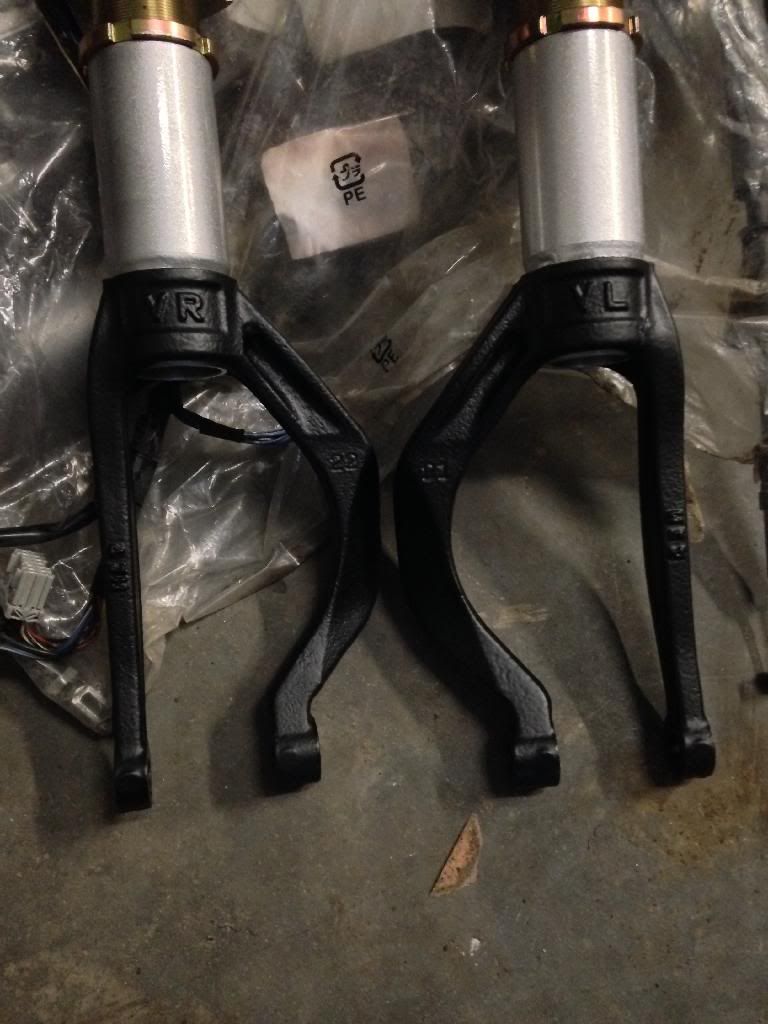
i finished up all the suspension by powder coating the front forks
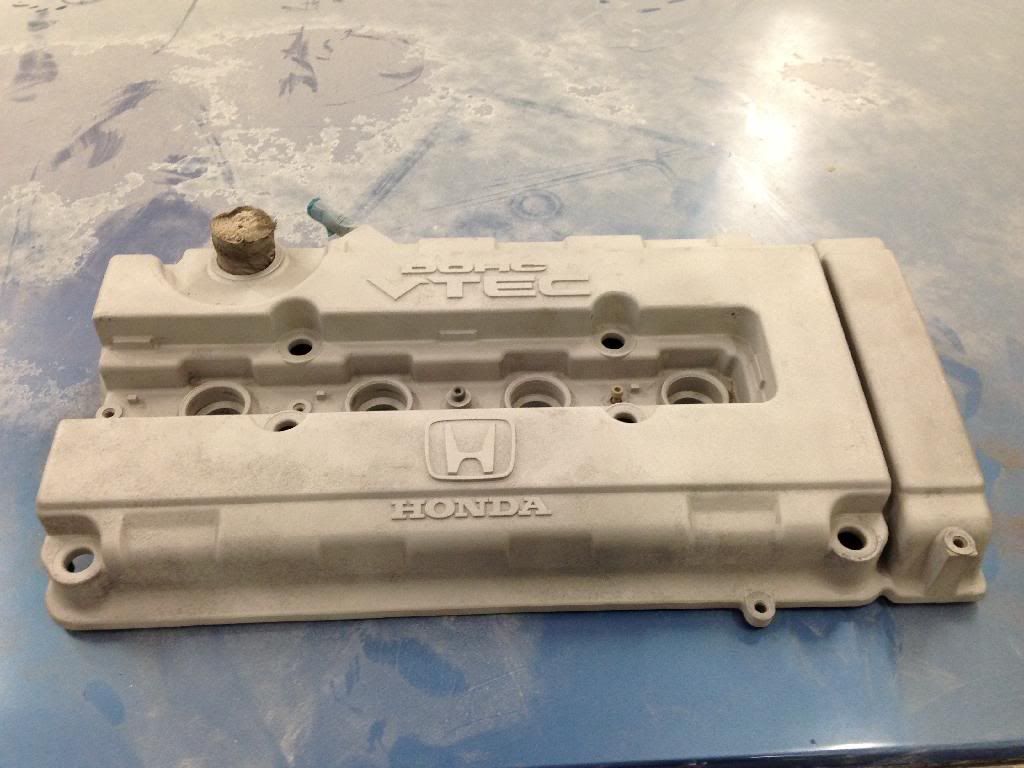
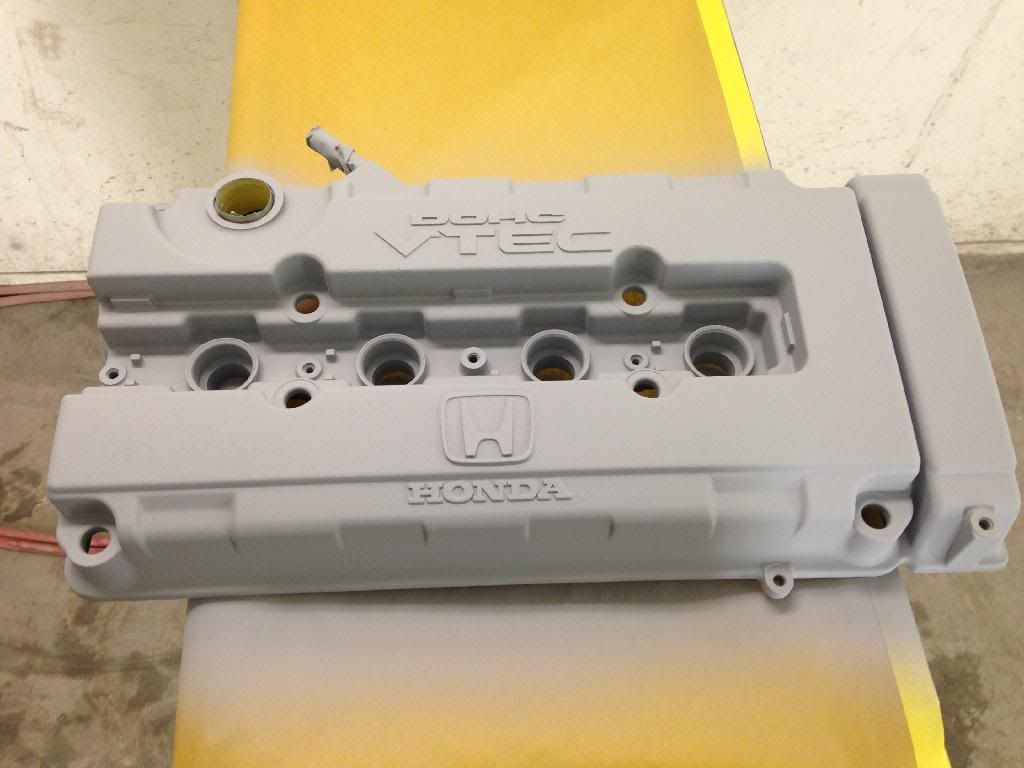
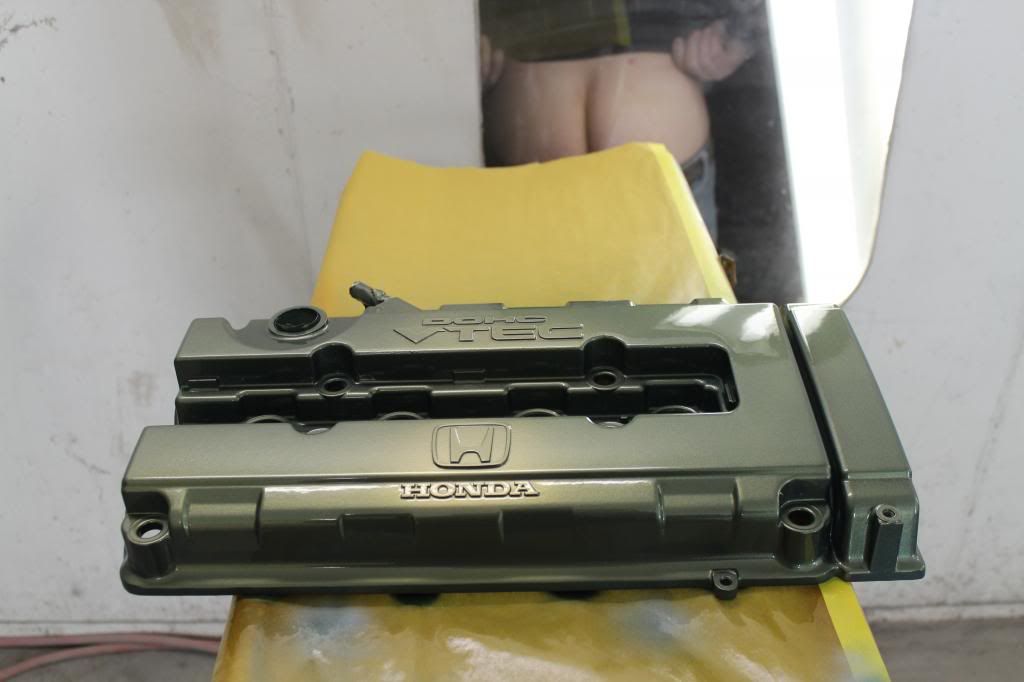
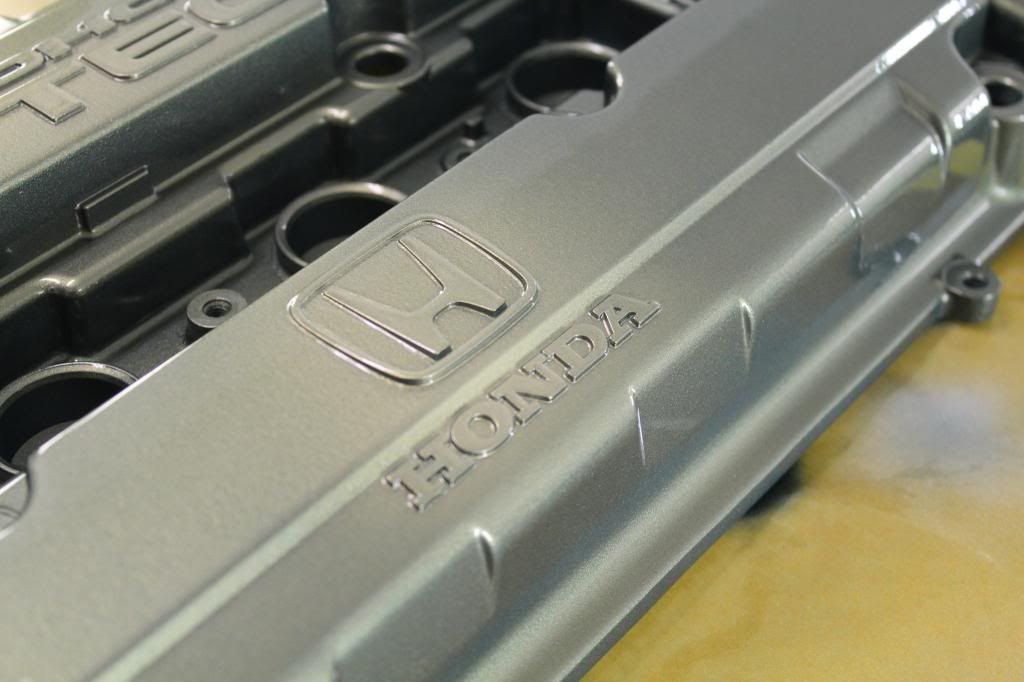
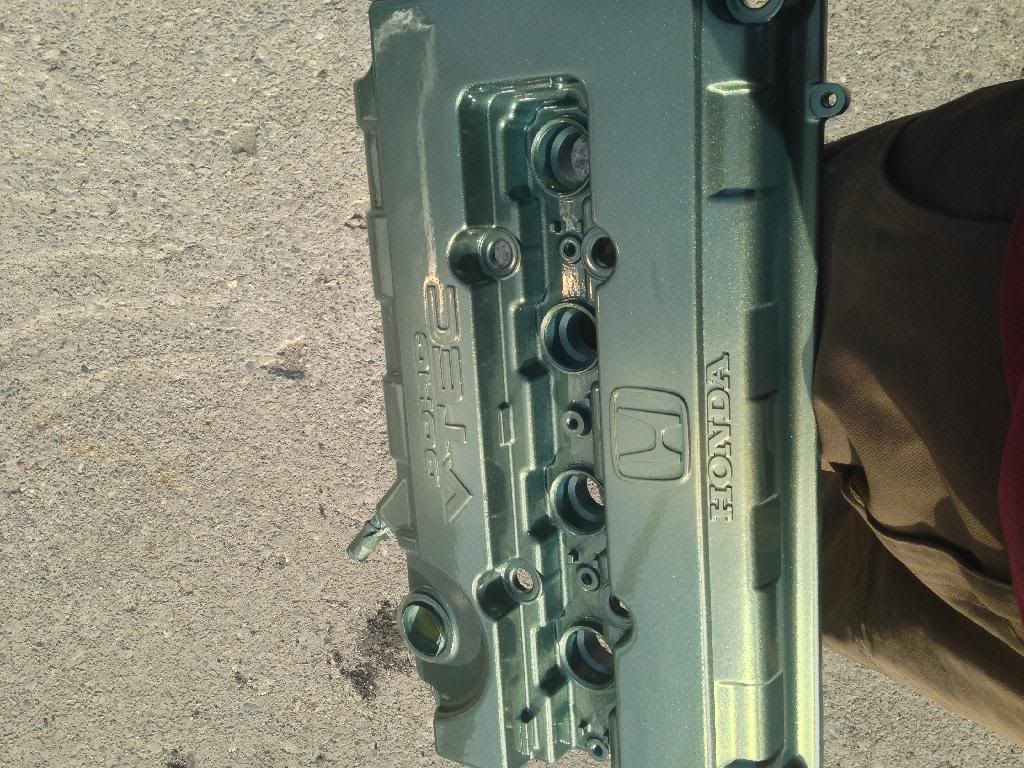
i picked up a b16 valve cover, it had already been stripped and the letters hadnt been shaved (which i was looking for)
i want to modify any little thing i can for a more sleek OEM look so off with the casting marks!
and then media blasted it
Then they had made some serious head way since the last visit a few days prior to this
and then i went there the next night and walked in on this !
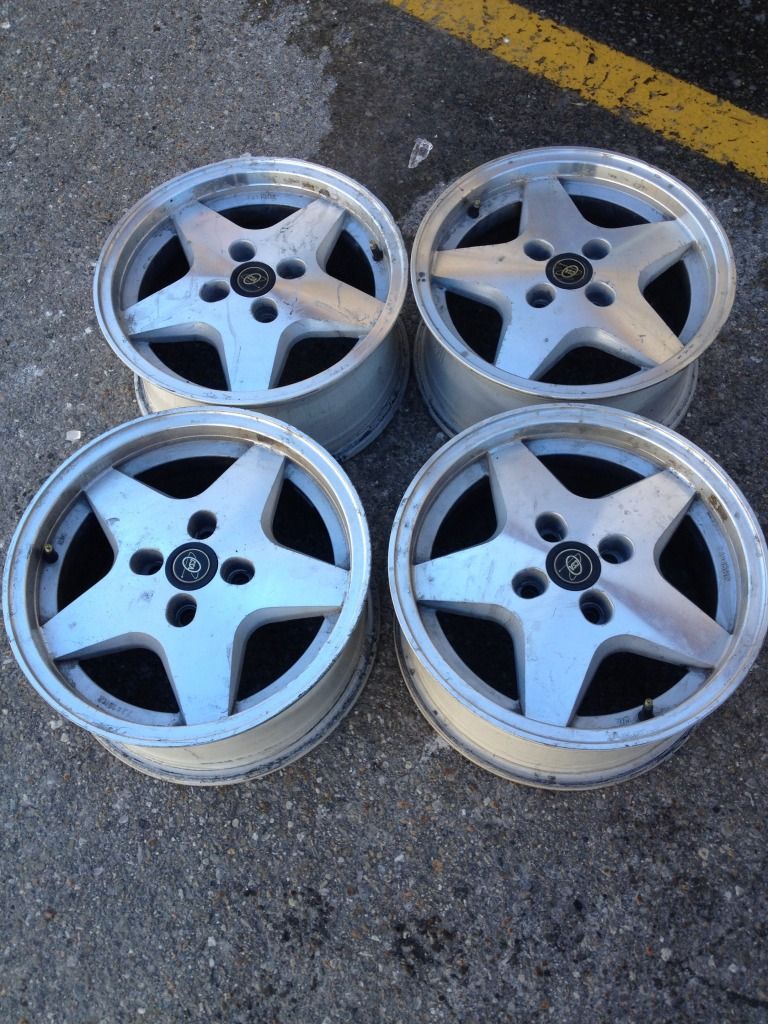
found these locally for $100 so i picked them up the same night, i just need something 15" to mount my new tires onto so these will do, im probably going to re coat them flat black or silver/greyish
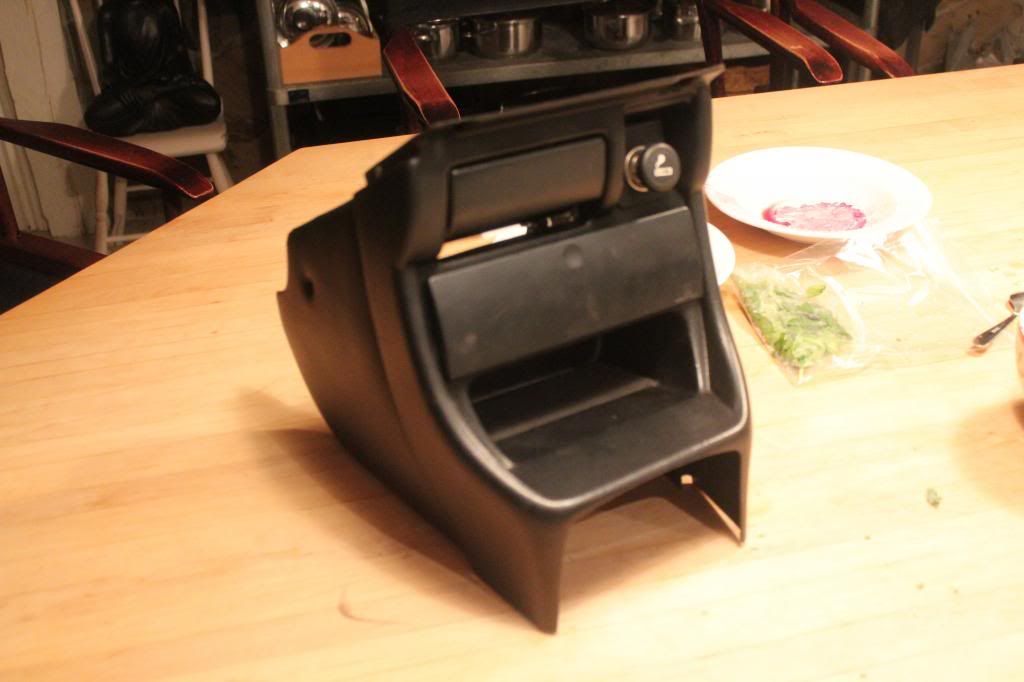
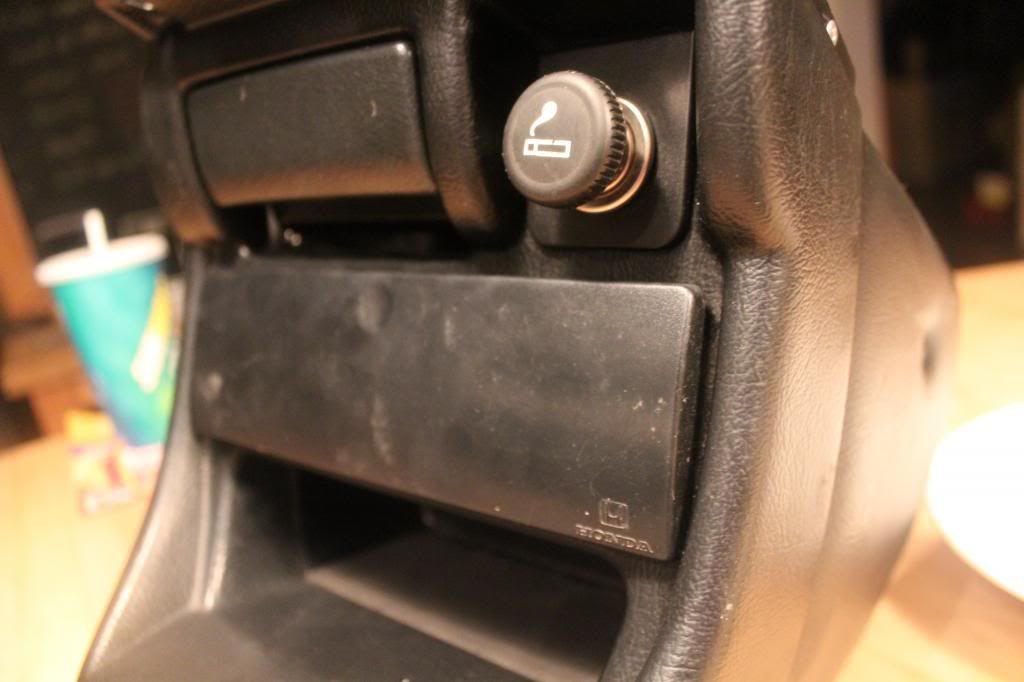
i finally convinced a friend to sell me his console, luckily hes doing a part out and sold me this ,RHD EDM console and little coin holder for the arm rest, i have been after the EDM console for some time now. unfortunately in black when my interior is grey, but thats no big deal.
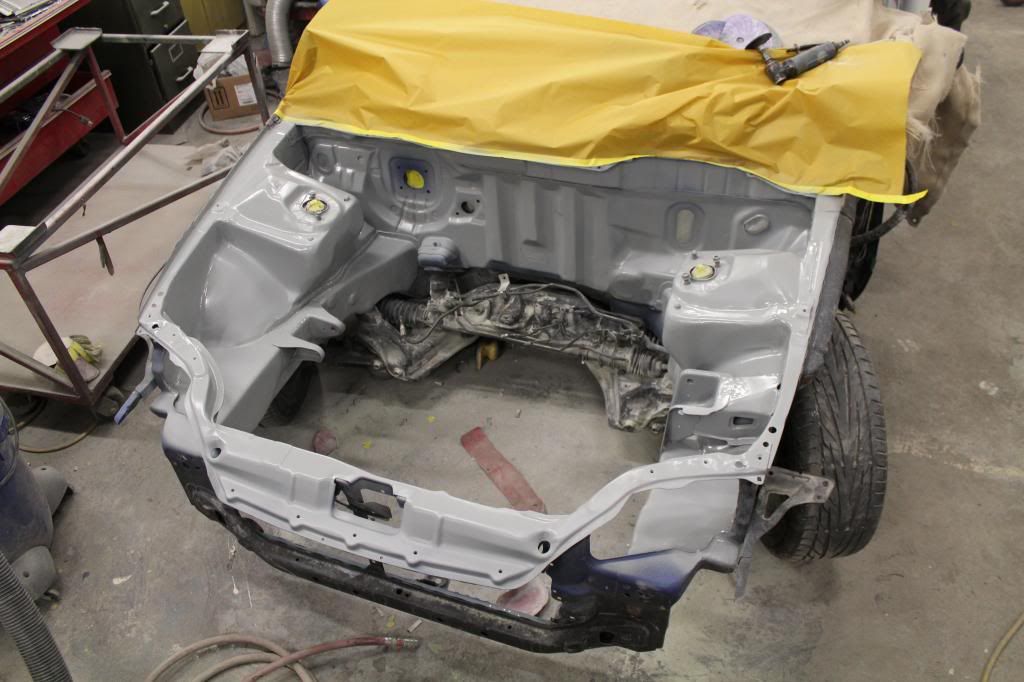
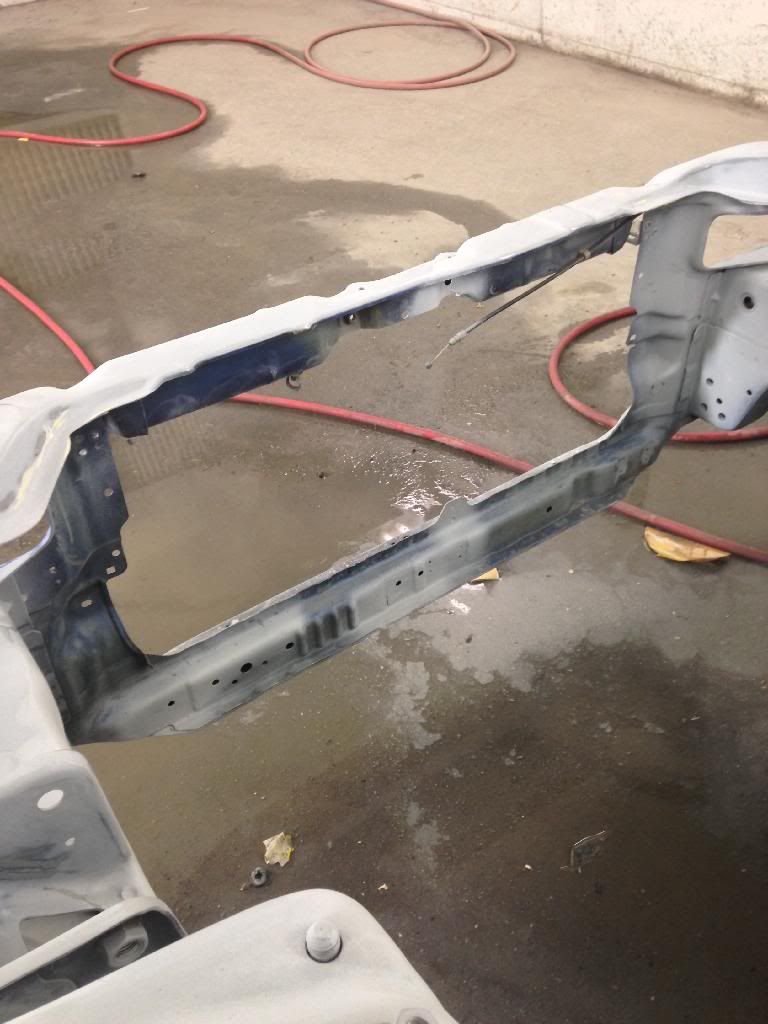
a few days later i visited the car, to my amazement they were pushing it into the paint booth! 1 guy had blocked out the whole bay himself in 1 day o_0!!
i had the center piece cut out and the old factory rad supports so my tucked rad can fit in there and i'll make some custom mounts
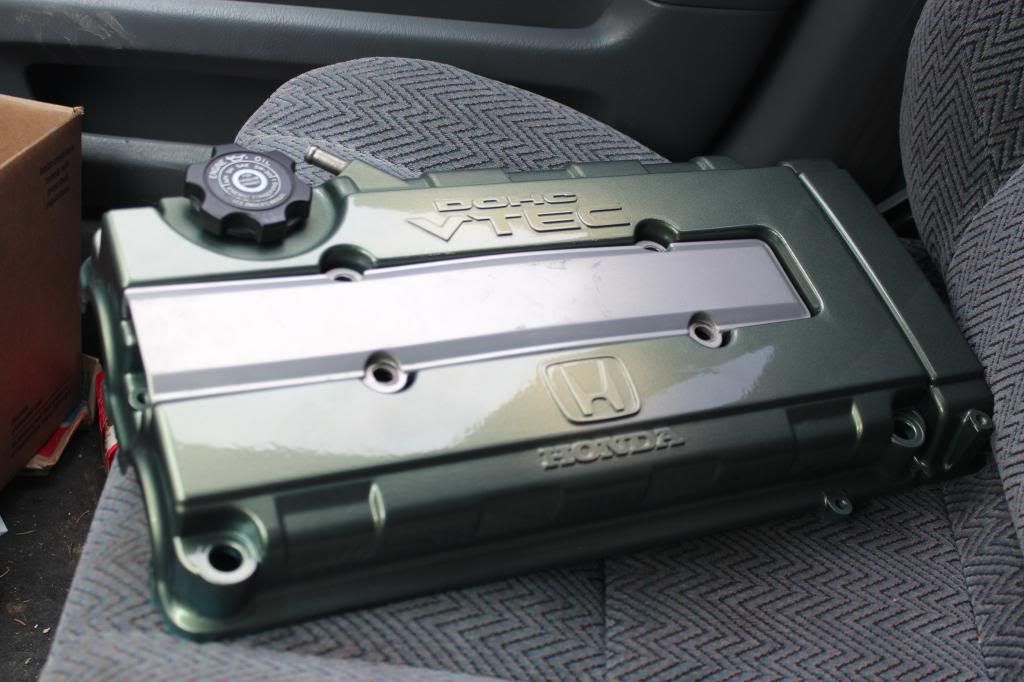
my valve cover in primer ready for sanding
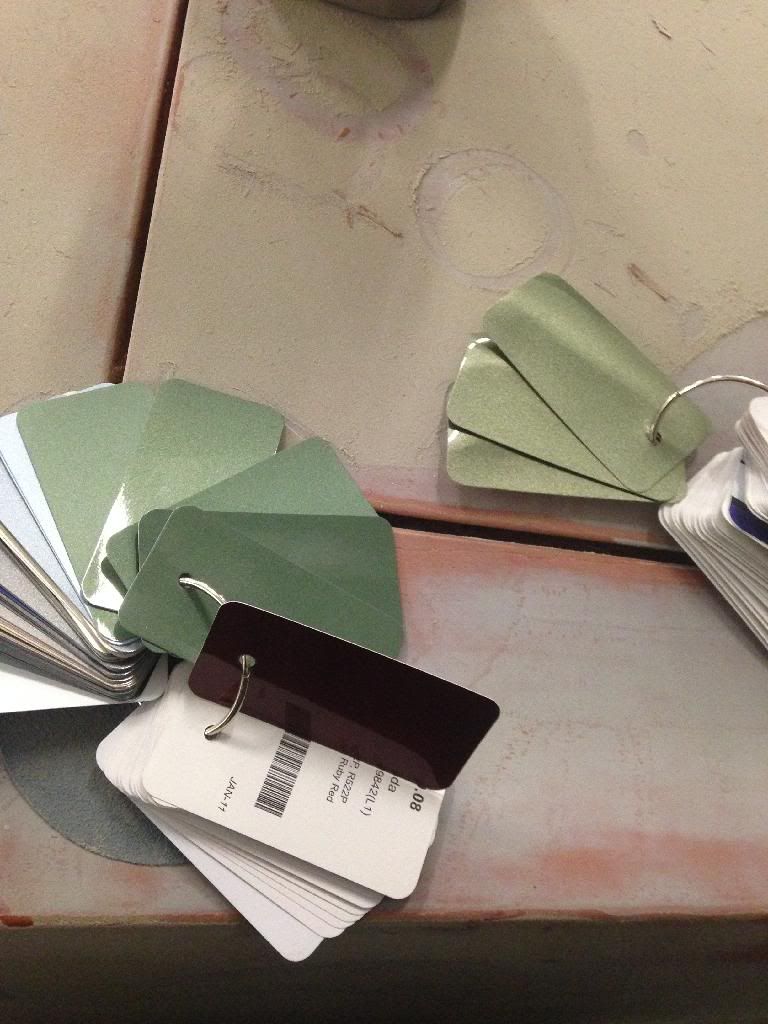
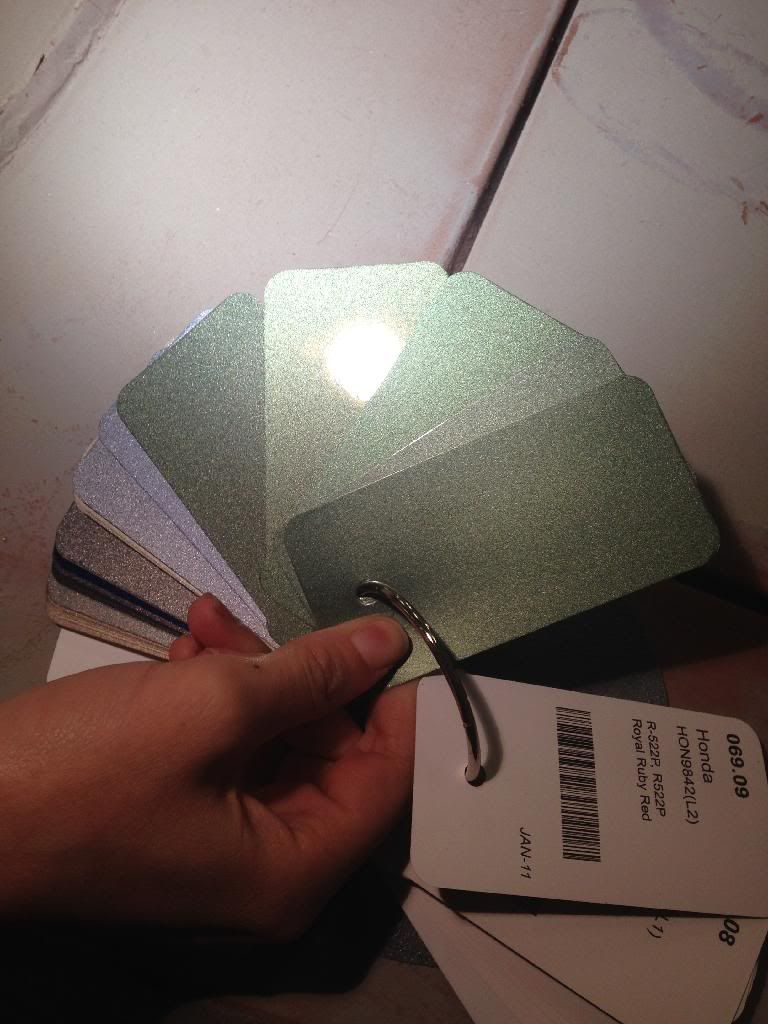
then we pulled out a few colour chips to get our main colour to customize like a ricer
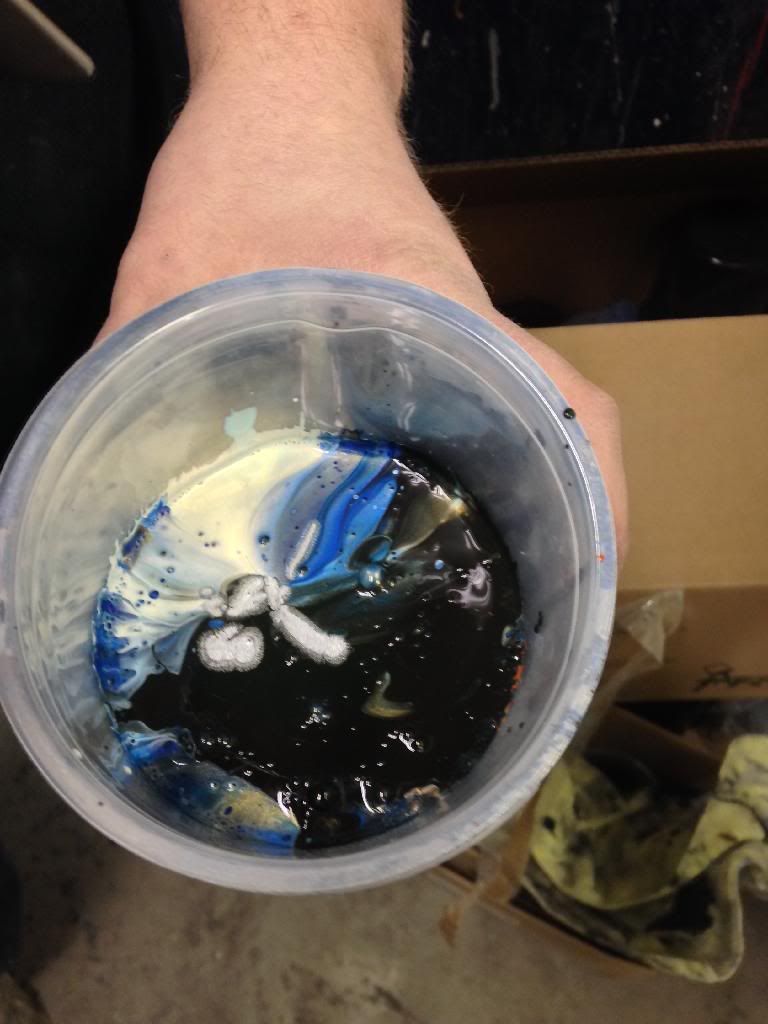
and here is the colour all in the pot together...
AND BAAAAM SHES DONE!!! :D
once again pictures cannot do a colour justice, it flips and flops gold/green/silver/blueish depending on the light because its a tri coat, i couldnt be happier, there is a few things that i want to change already, one of those "ahh **** it i wont bother with that" and then now when its all done im like "**** i should have done that" but maybe when i spray the exterior next year i will shave a few little things again on the bay and they can spray the whole thing at once

this was the picture i got sent that morning when the base was laid down, i really need to get better at pointing and shooting in focus *face palm*
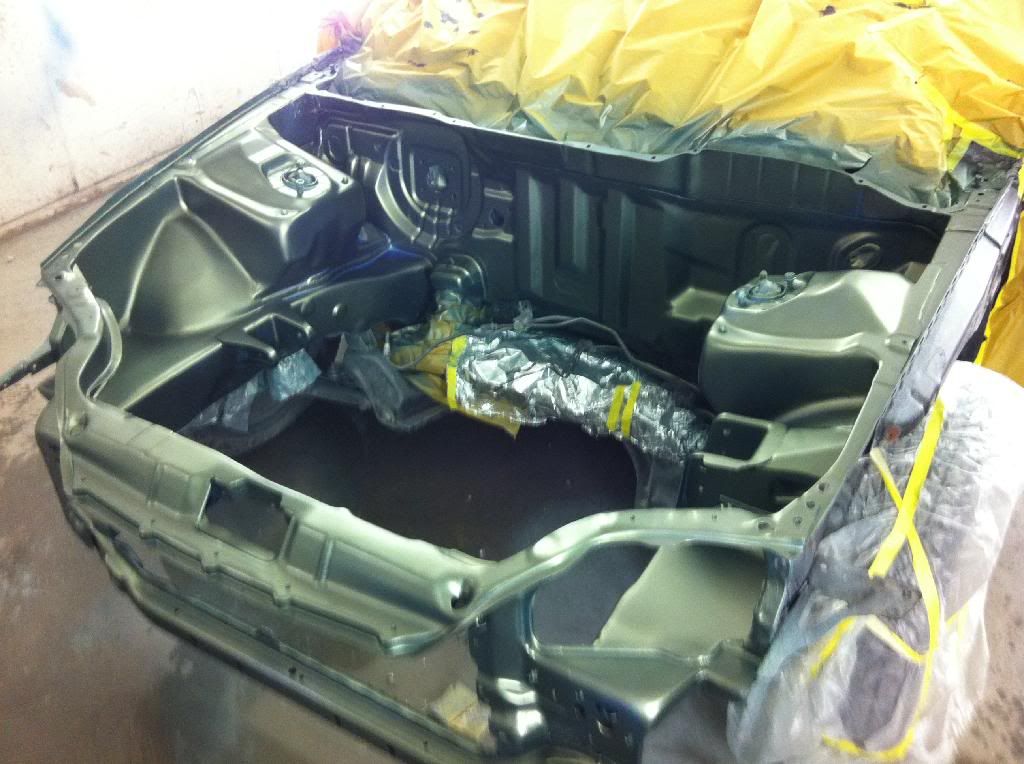
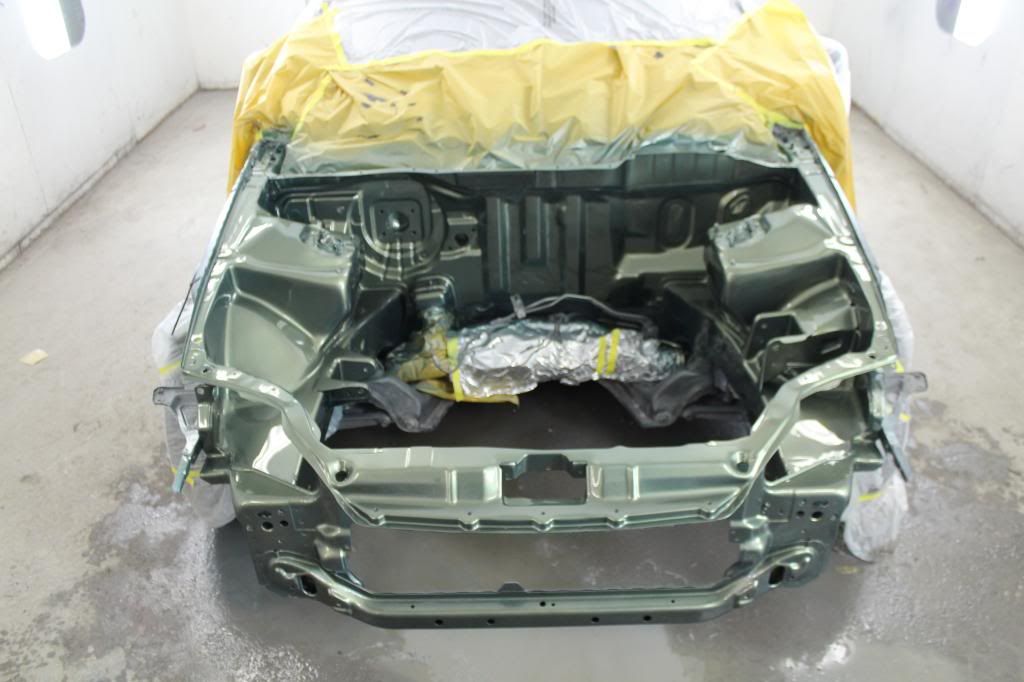

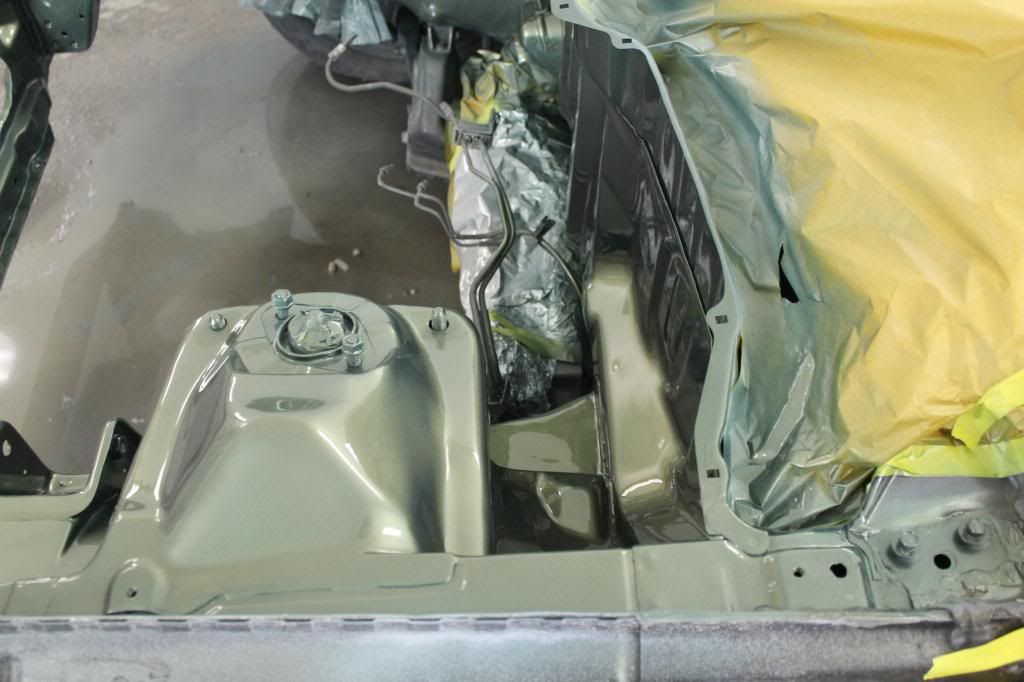
the day after it was painted i went to go pick it up and seeing the colour in the sun was amazing
this is the valve cover out in the sun, it flips and flops so much, i am truly blown away by it

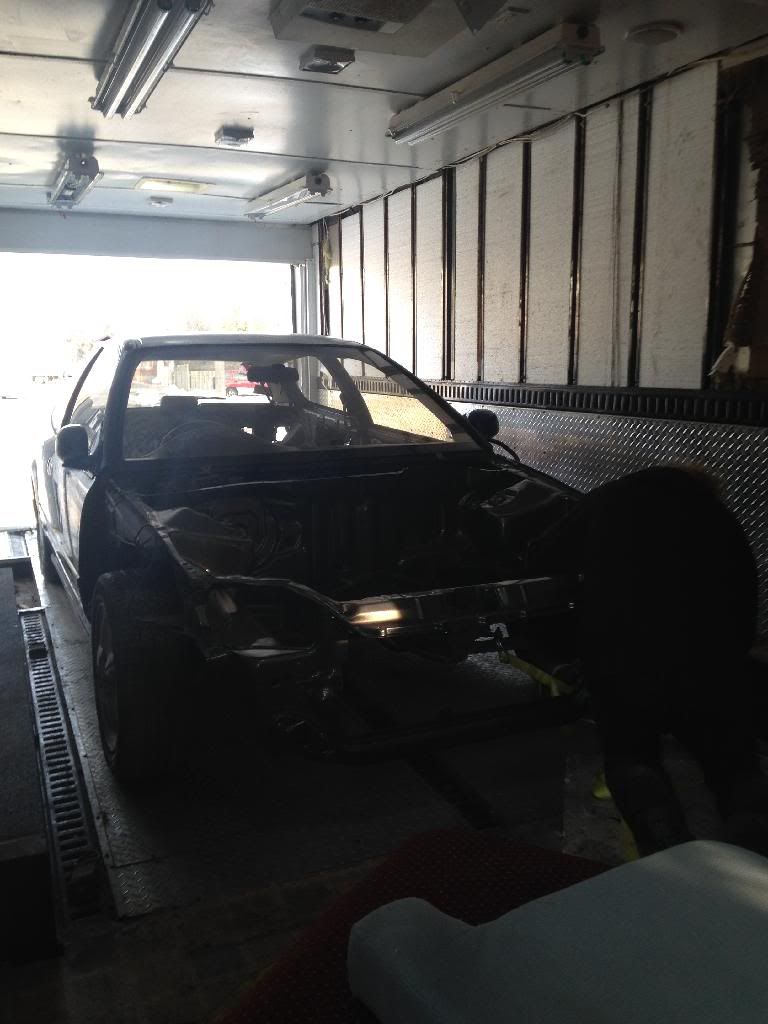
strapping the car down in the trailer
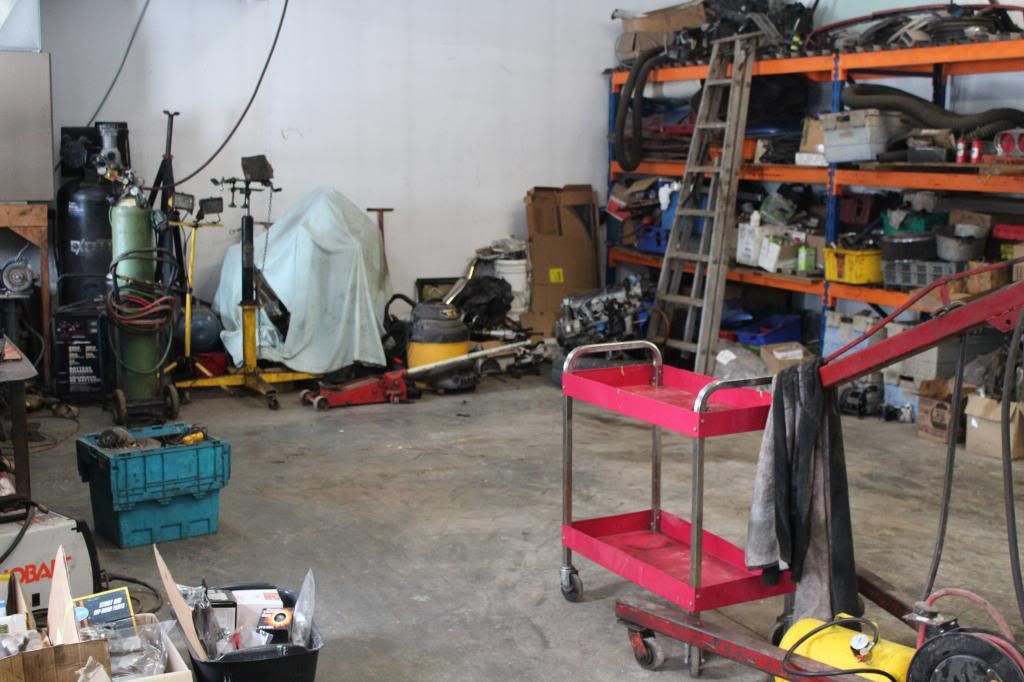
and todays challenge, clean up the shop to make room for the car and work space,
we just bought a new trailer and ripped the living quaters out of the front due to water damage and it all got piled up in the back of the shop
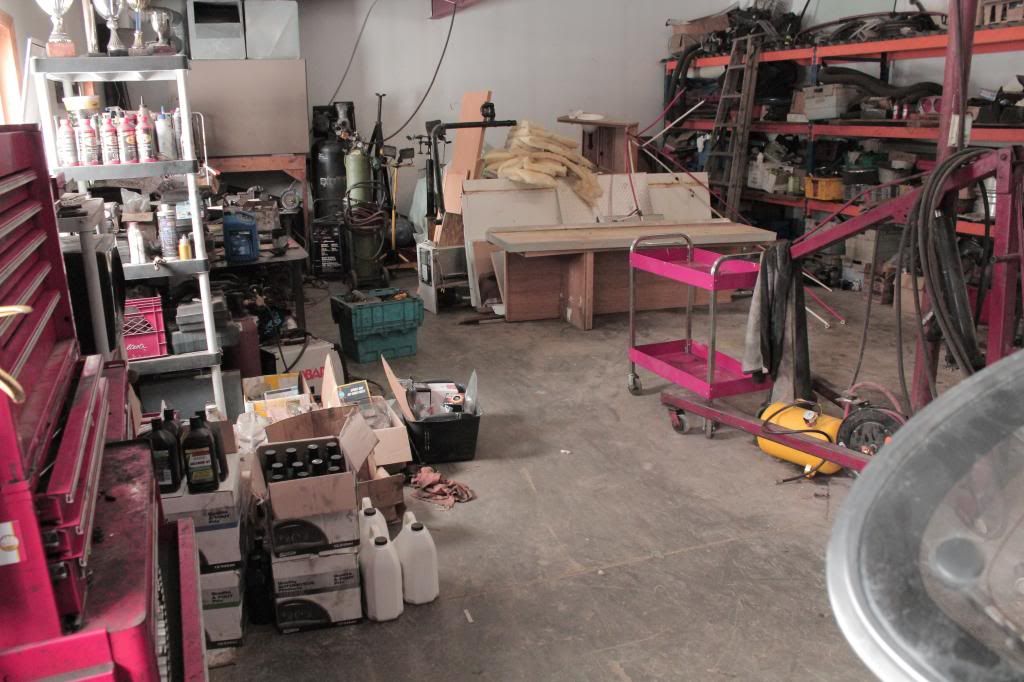
then move all my parts from behind that
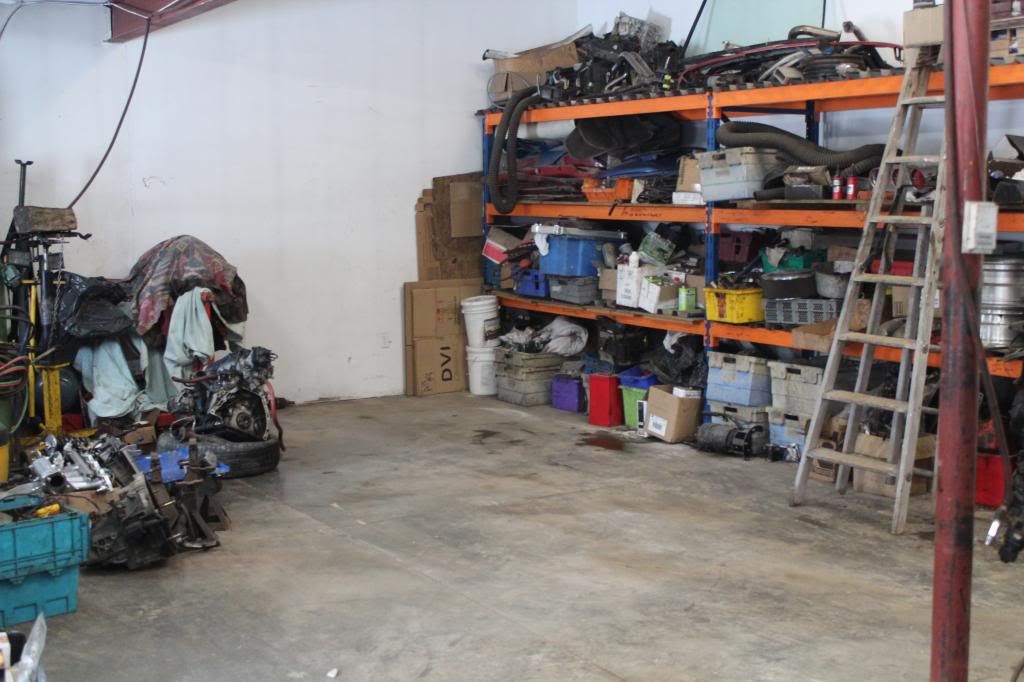
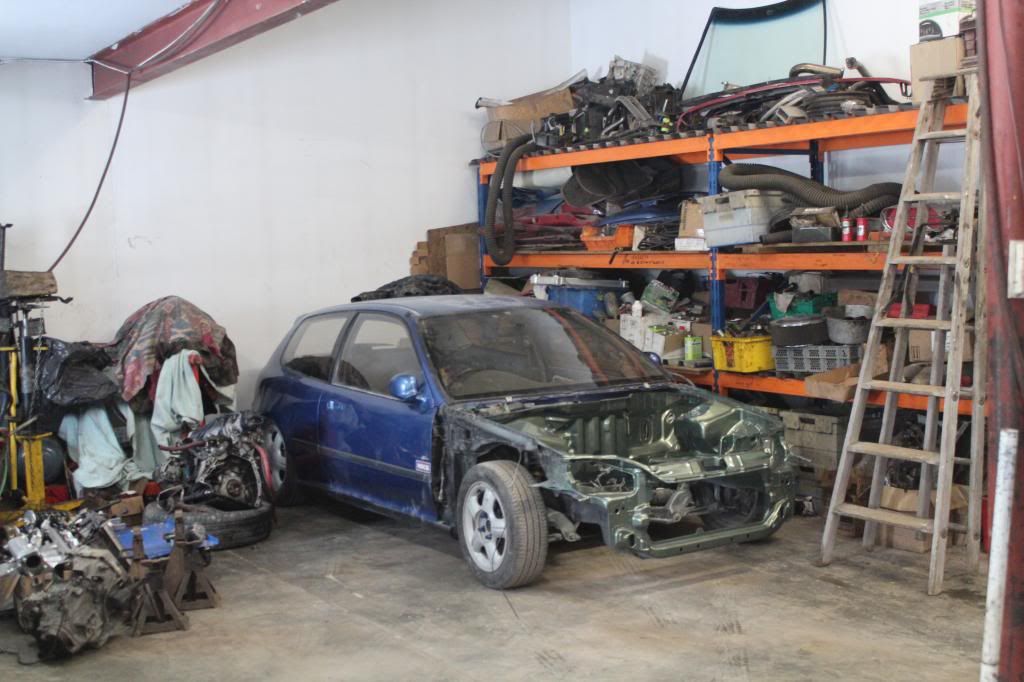
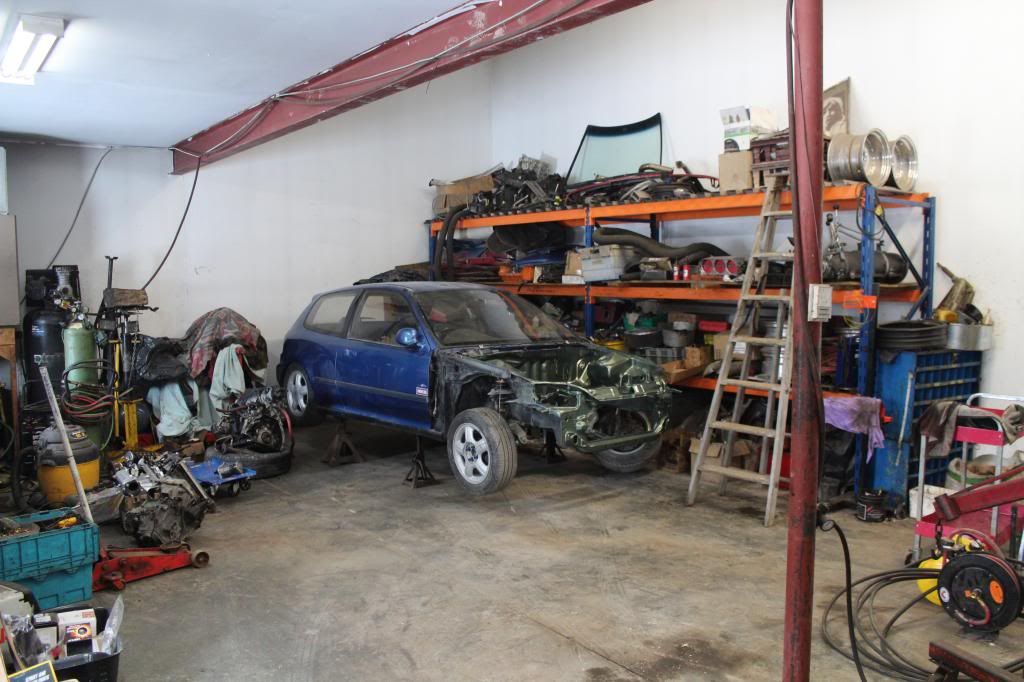
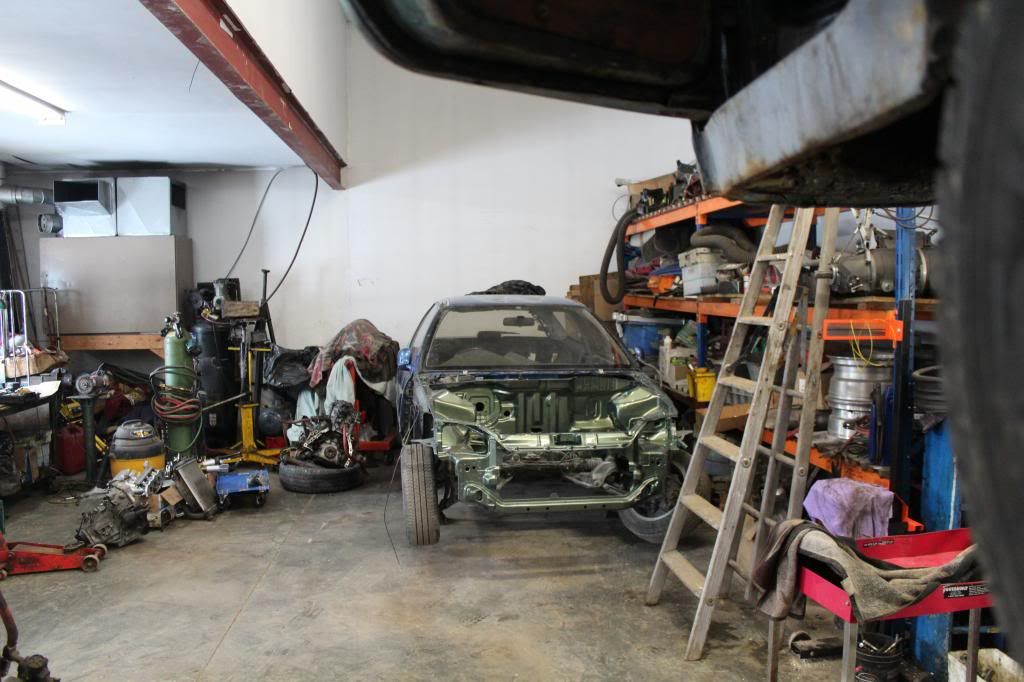
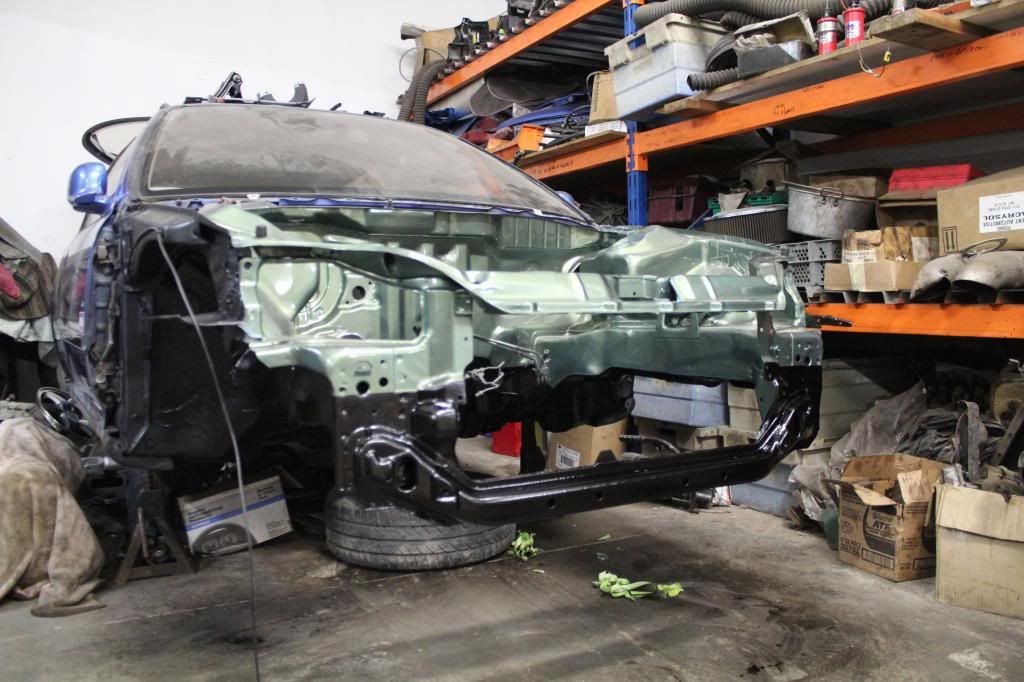
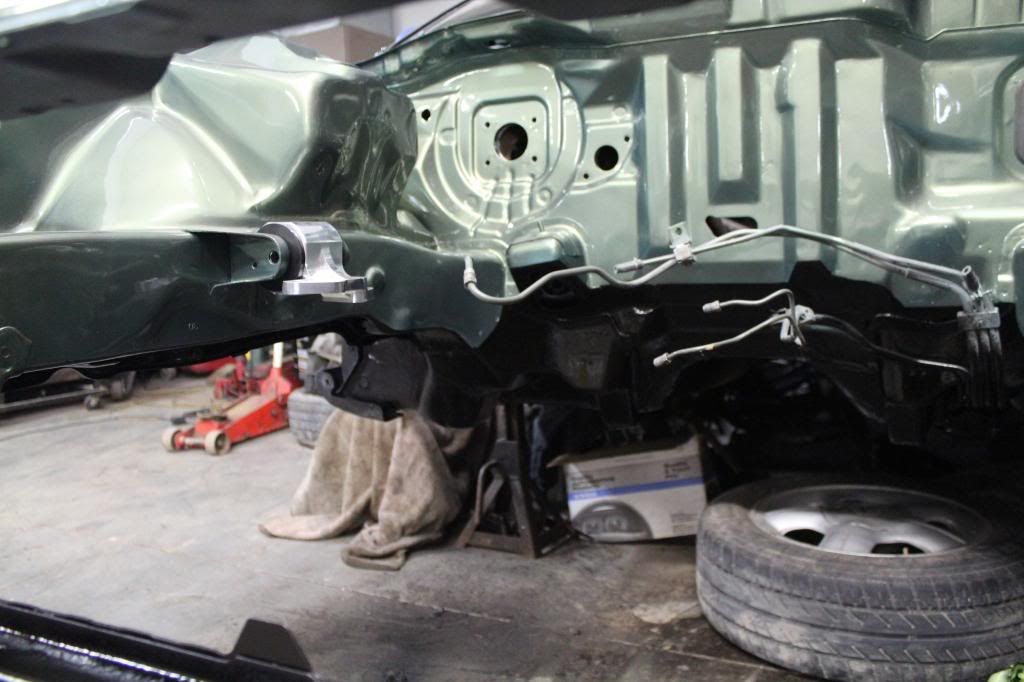
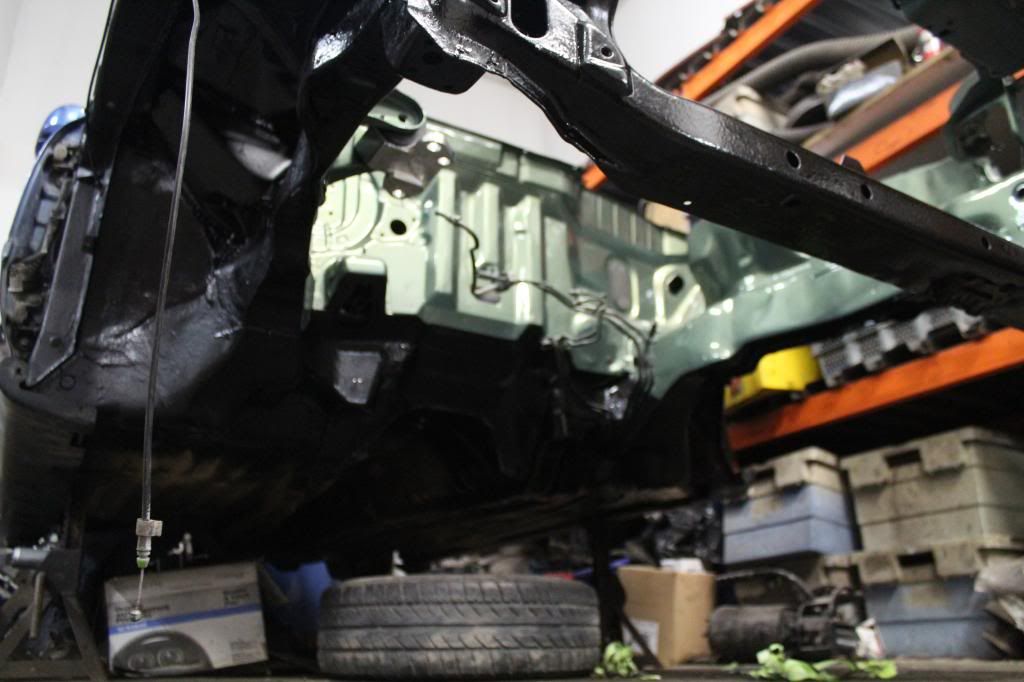
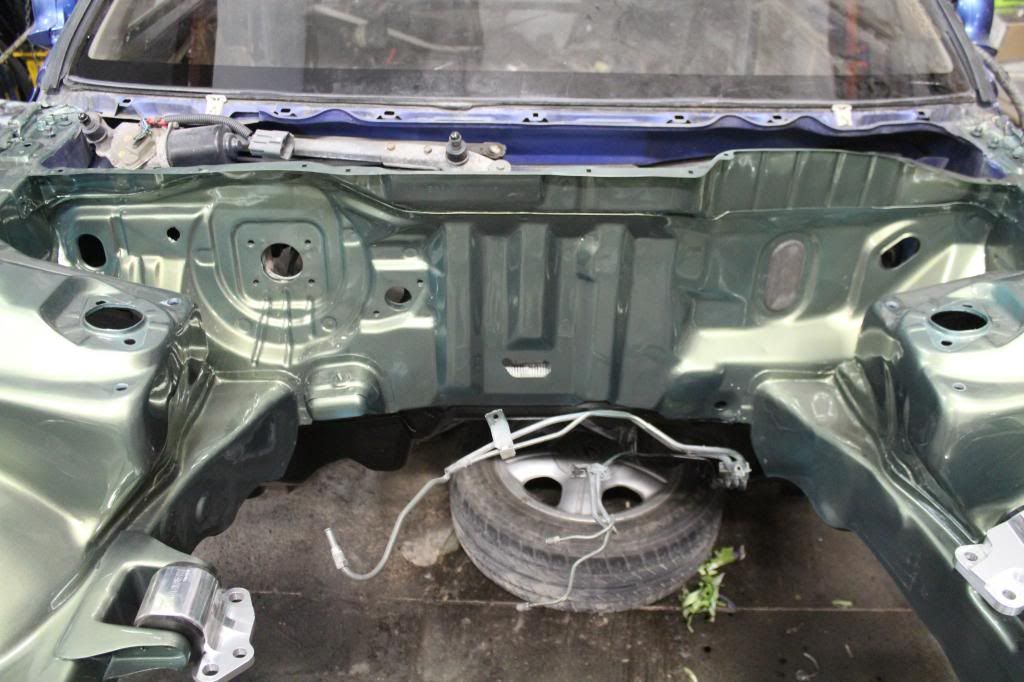
then started removing all the front end
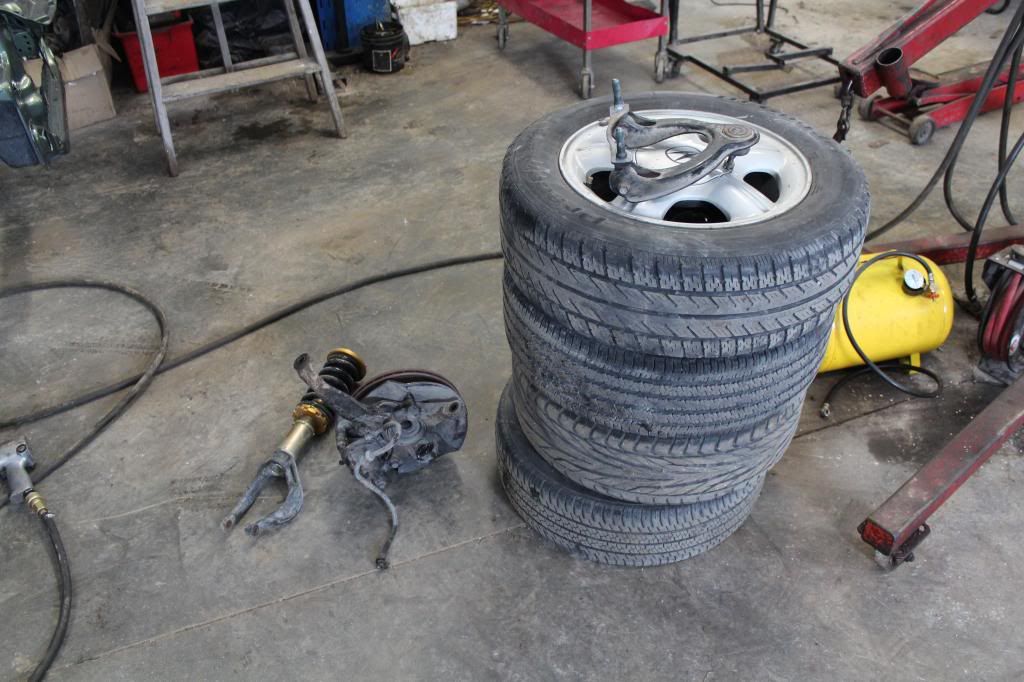
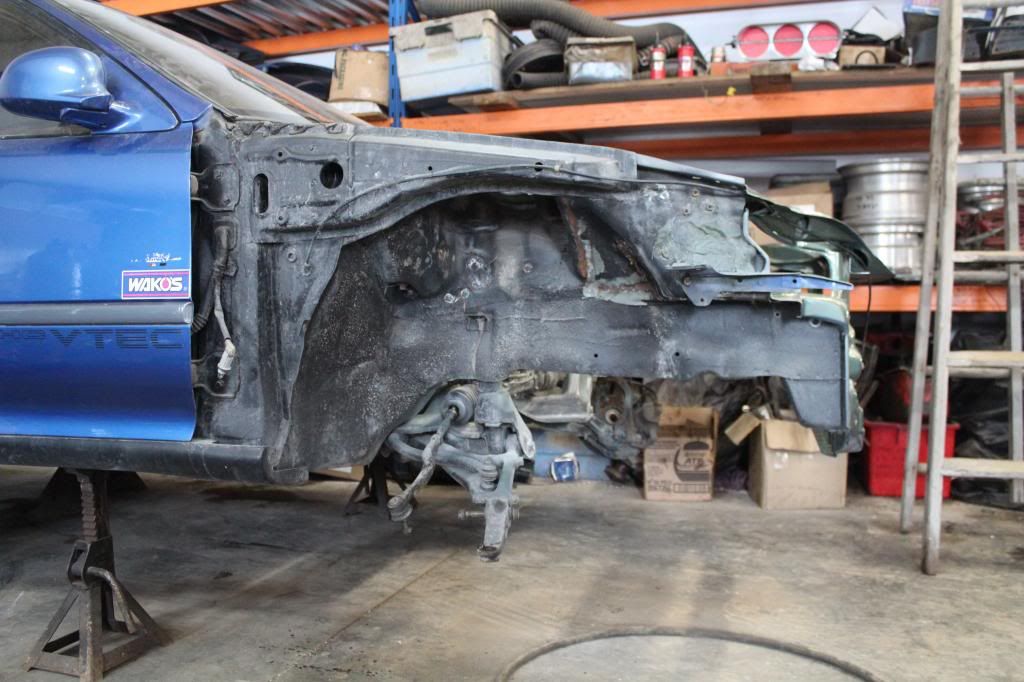
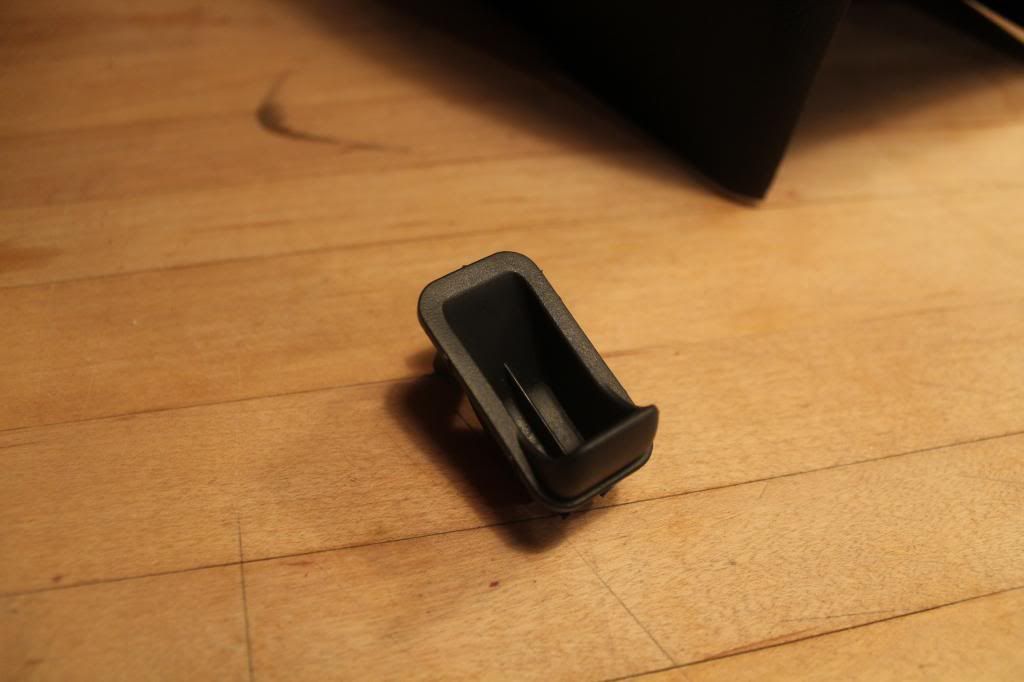
im guessing this car used to come with ABS !!
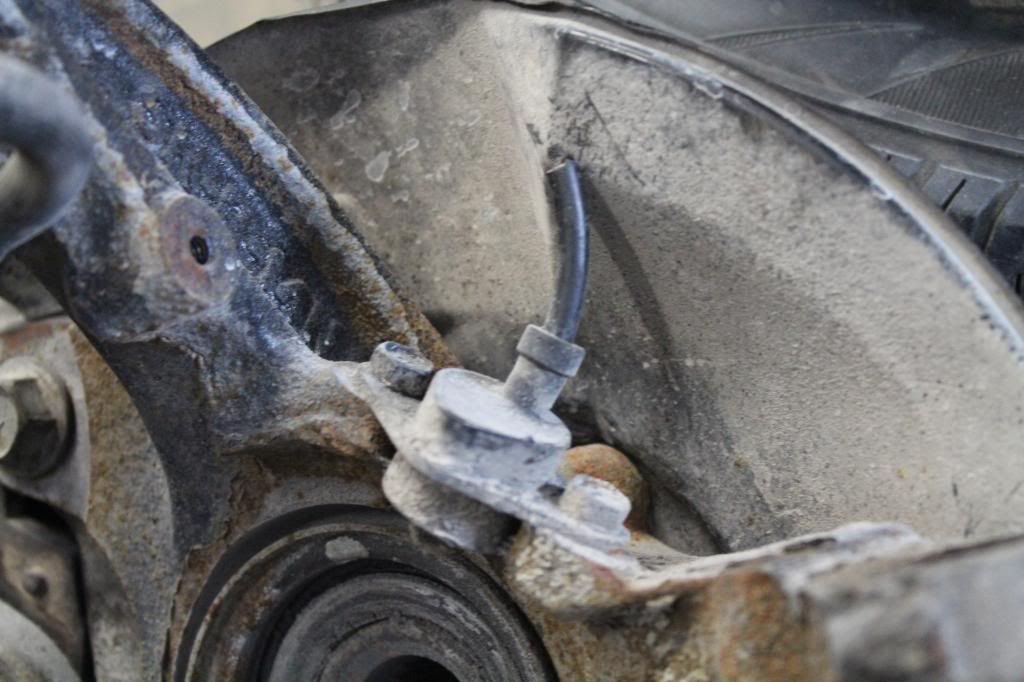
took the rear end goodies out, everything is like brand new, and all forsale (except the brace is called for)

i didnt want to remove the rear trailing arms myself without putting a bit of heat to all the bolts, the last thing i want to do is snap or round off any bolts
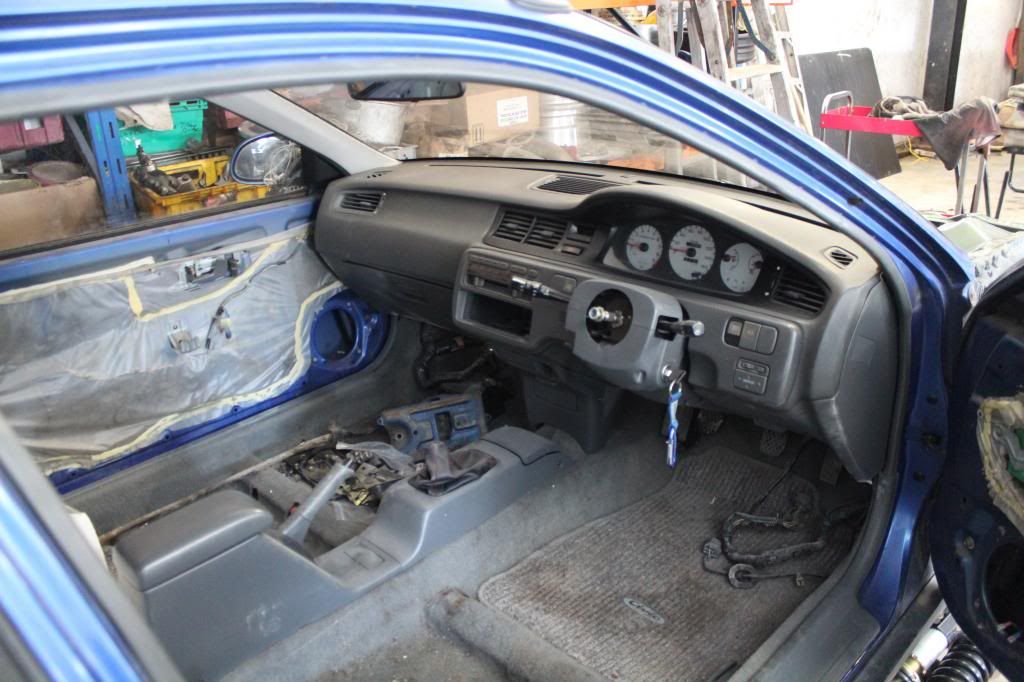
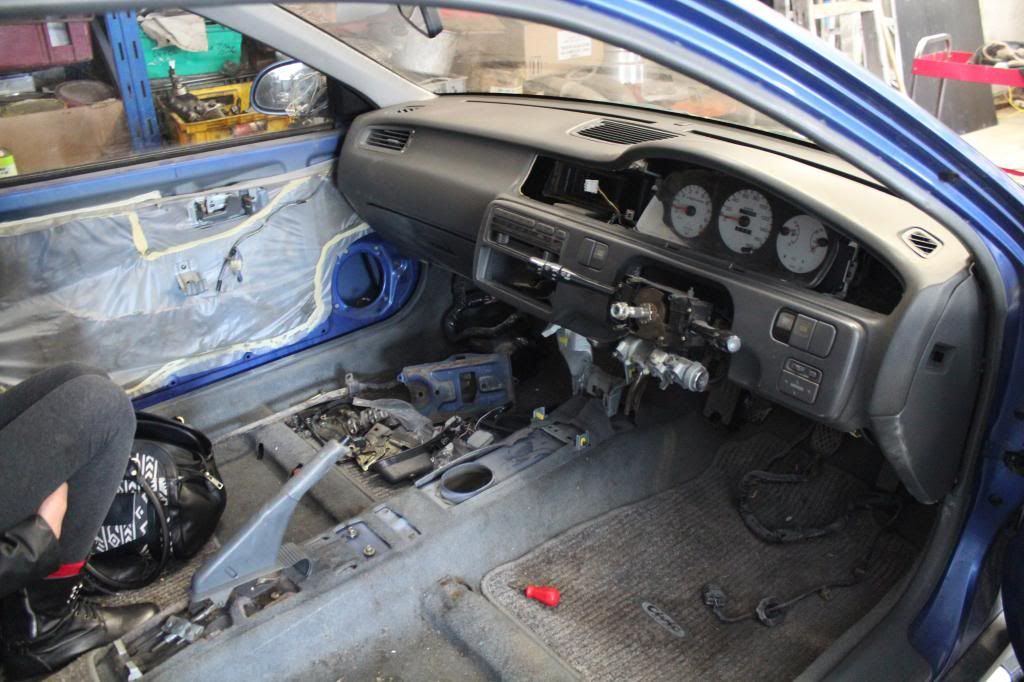
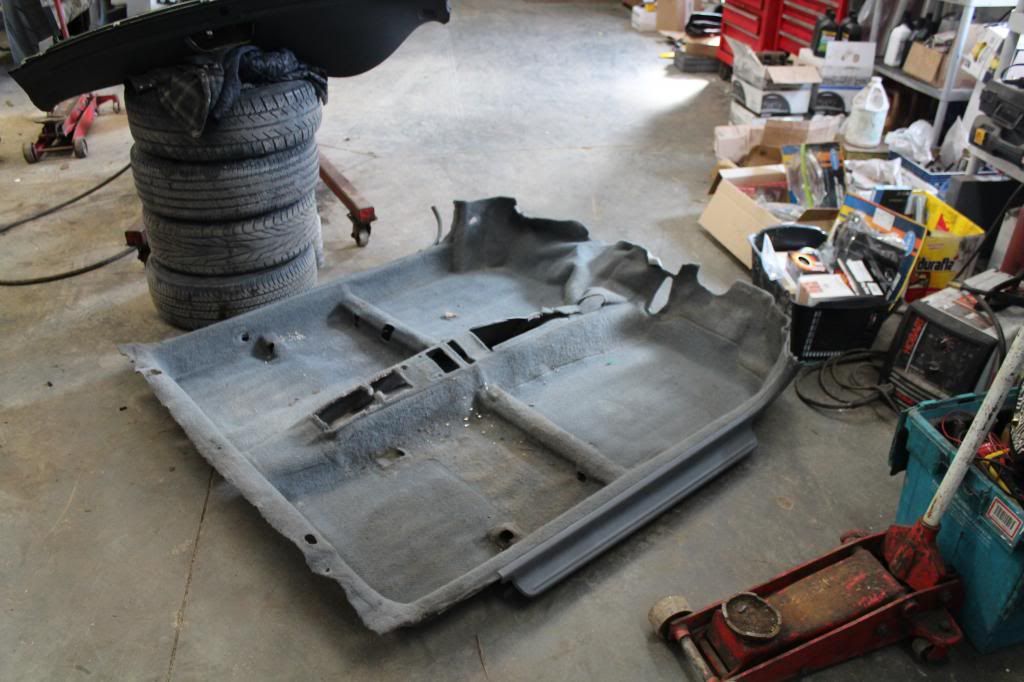
i thought this would take a hell of a lot longer then it actually did, im so used to EG's that i know every tool needed, what comes out where, etc so this was a breeze, pulling the dash and the carpet. i was dreading the dash incase i broke any clips or vents etc but i did it all without any issues,
the reason for pulling the dash was more then just for the brake tuck, the previous owner removed the heater core and blower motor, which in turn makes the "auto climate control" useless which i want to function properly,
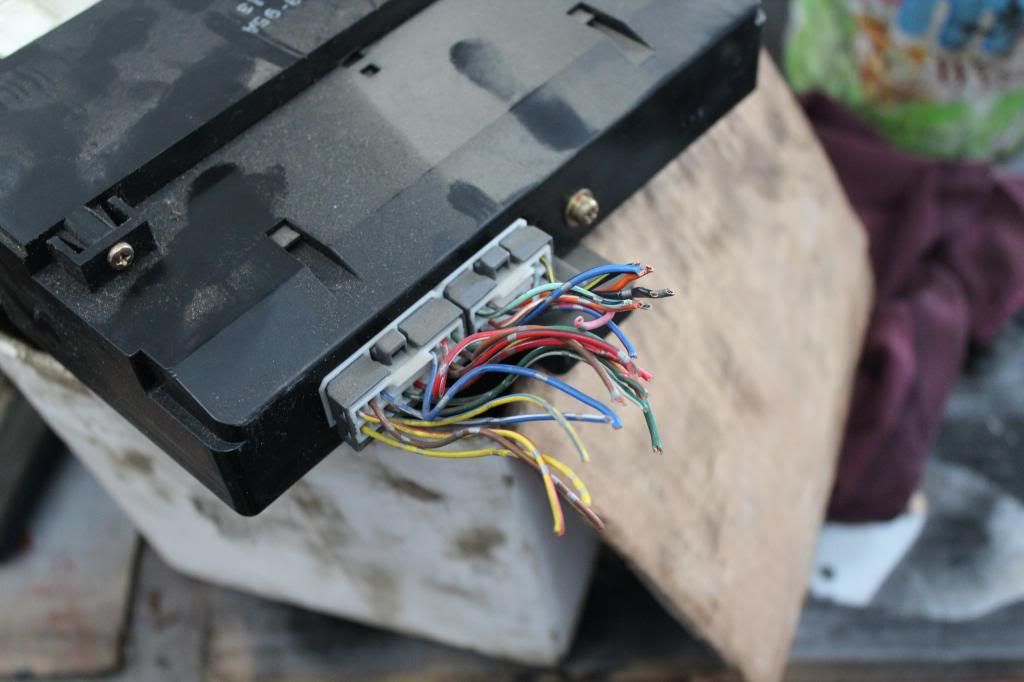
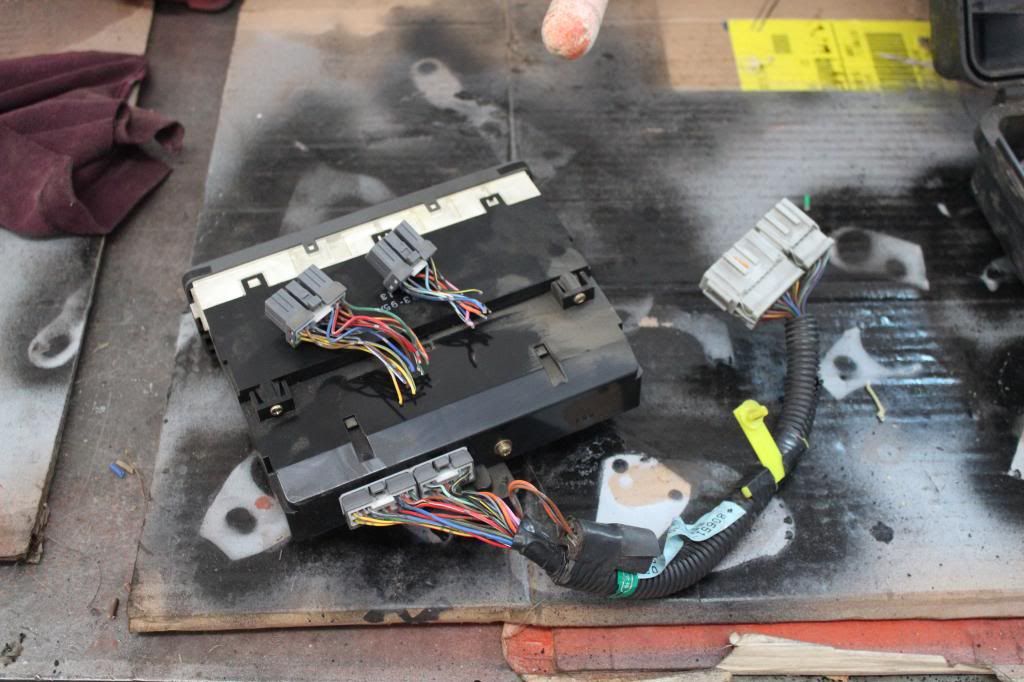
i also need to wire up several things like the rear fog light, speakers, deck, front fogs, ry wire harness, Ecu, fuse box and all that other jazz, so basically its a good thing i removed it lol
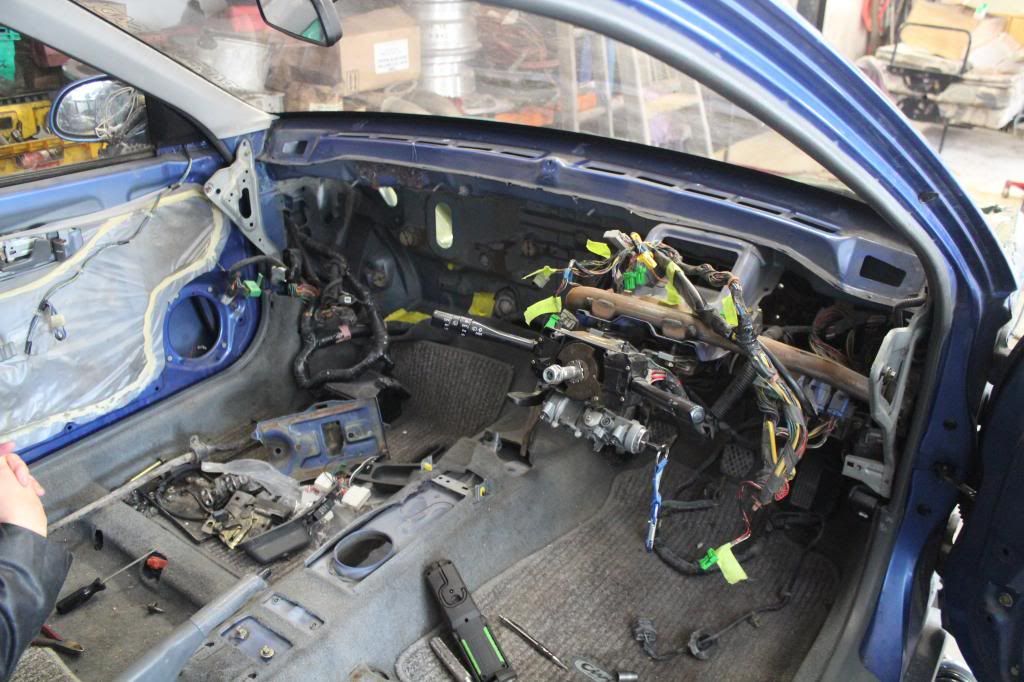
after i pulled the dash found this going to the climate control, the whole harness cut, Luckily for me 3 years ago i bought an EG^ climate control with harness, with the sensors from a friend so all this isnt so much of a worry for me :D
so i was on it again tonight, i want to make it a habit to go to the shop for a few hours a night, im having the time of my life for the simple reason every single bolt comes out without an issue, nothing is rusted or corroded :D
first was to go to my storage unit and track down my wiring harness for the auto climate control, the one in the barn had the tiniest scratch on the face so i'll just keep that as a spare incase this one craps out
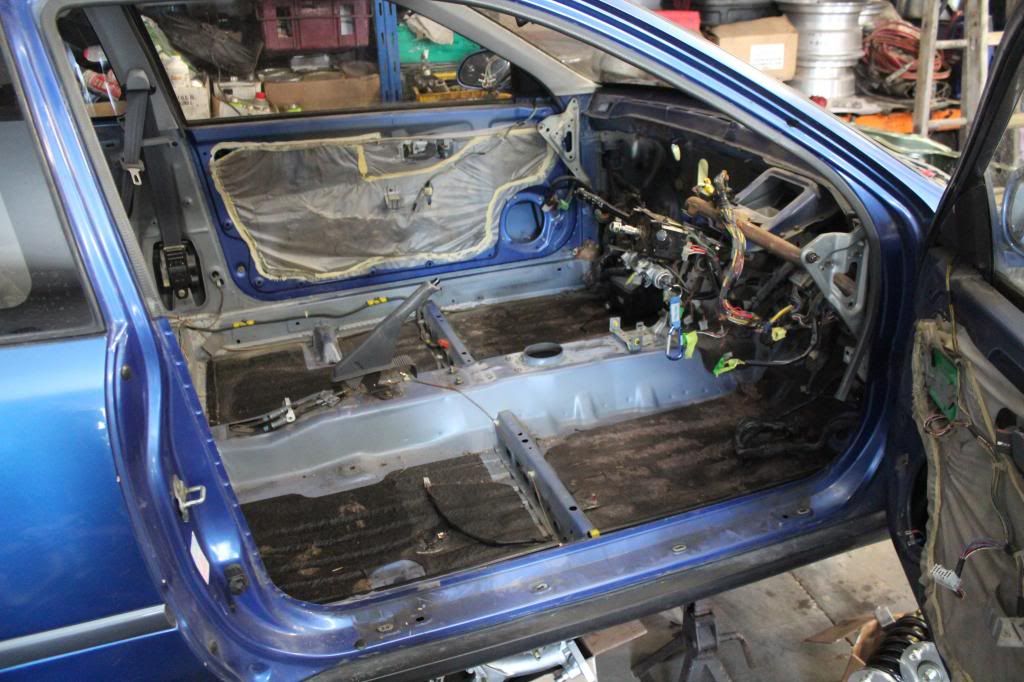
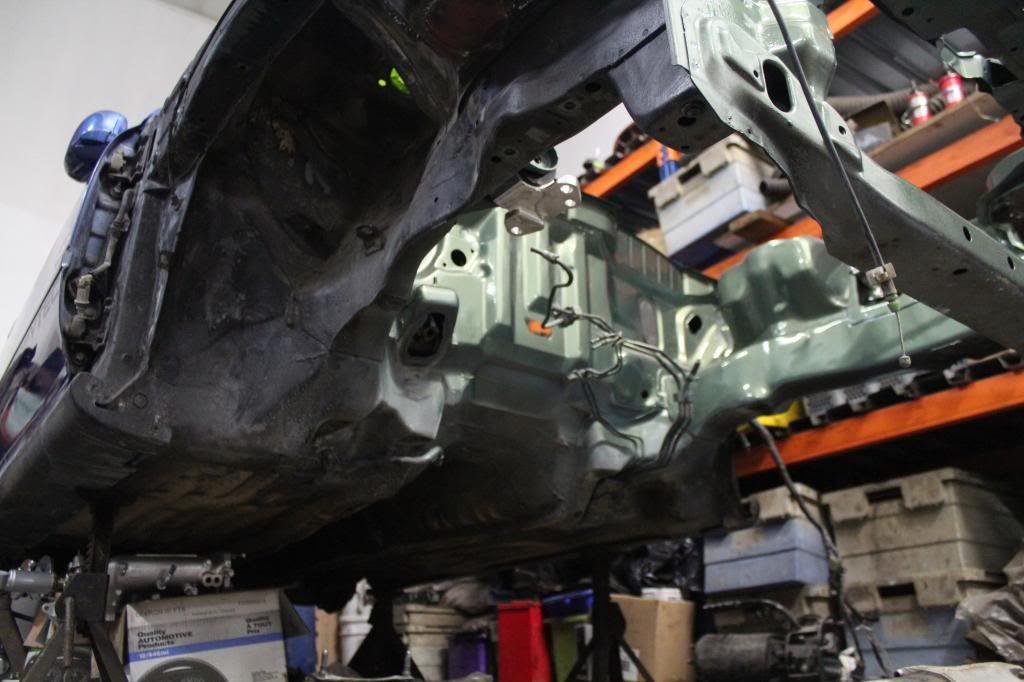
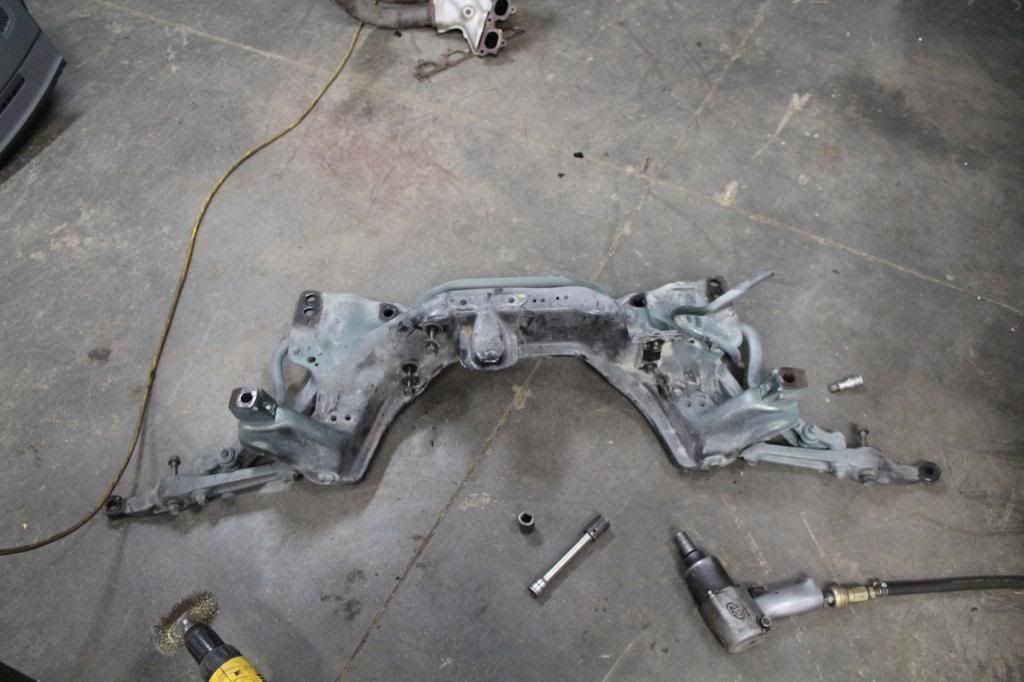
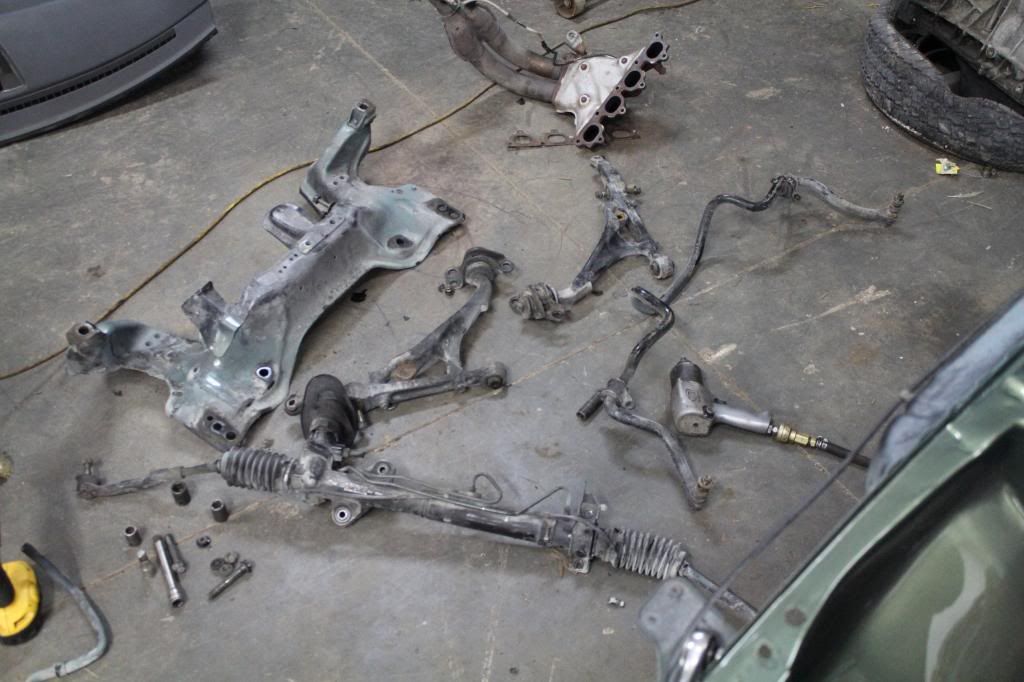
next job was to pull the sub frame out, that was easy enough too
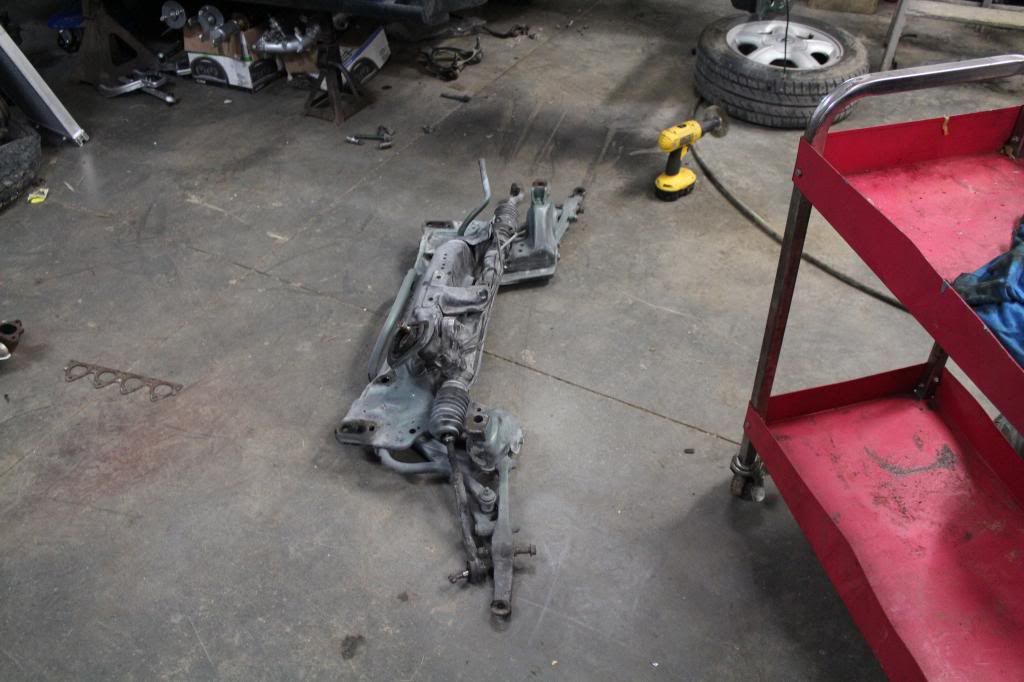

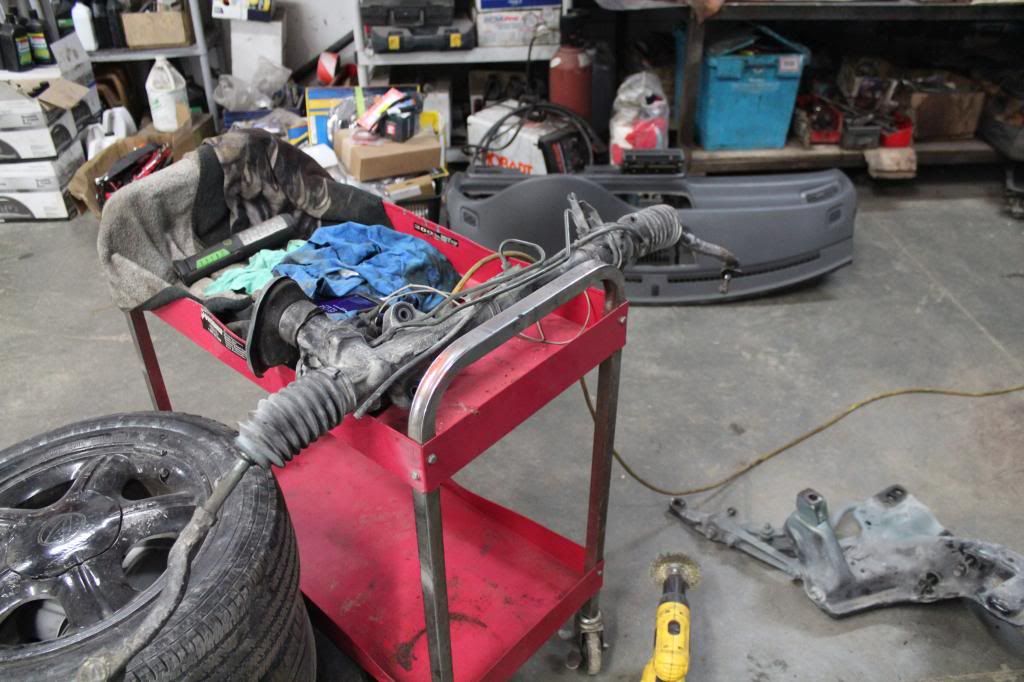
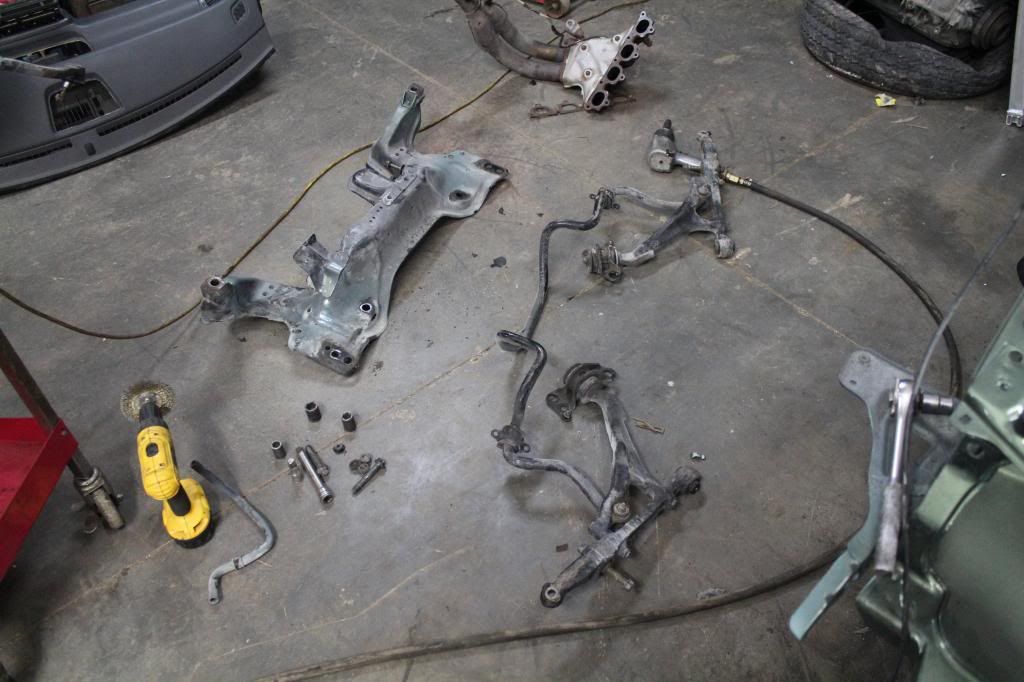
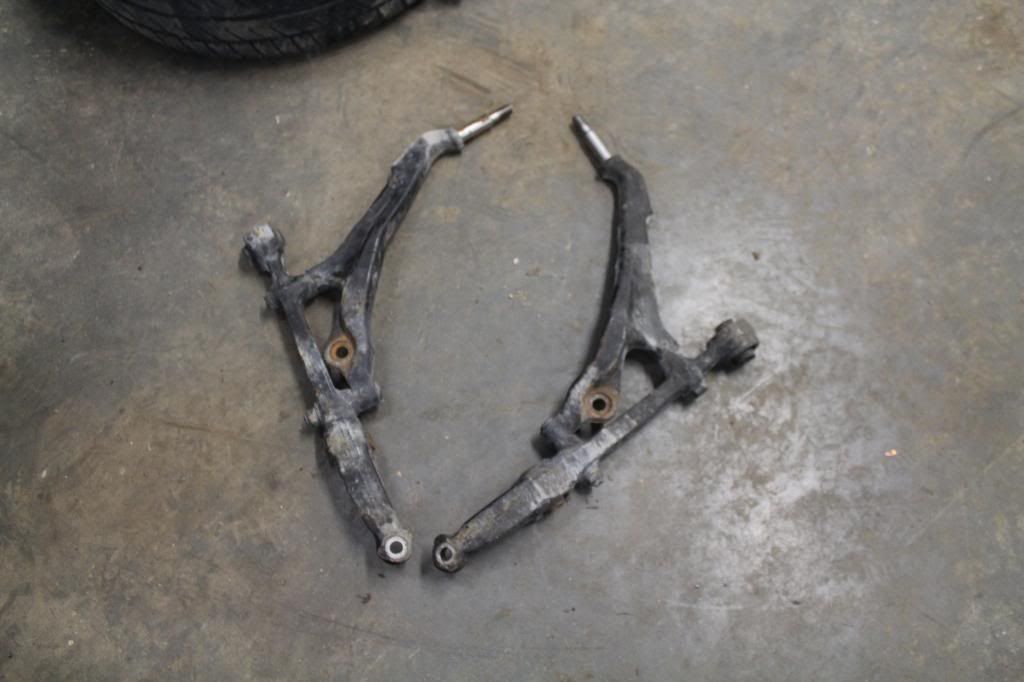
then off comes the steering rack, control arms and sway bar,
took the header off my engine and sold that tonight
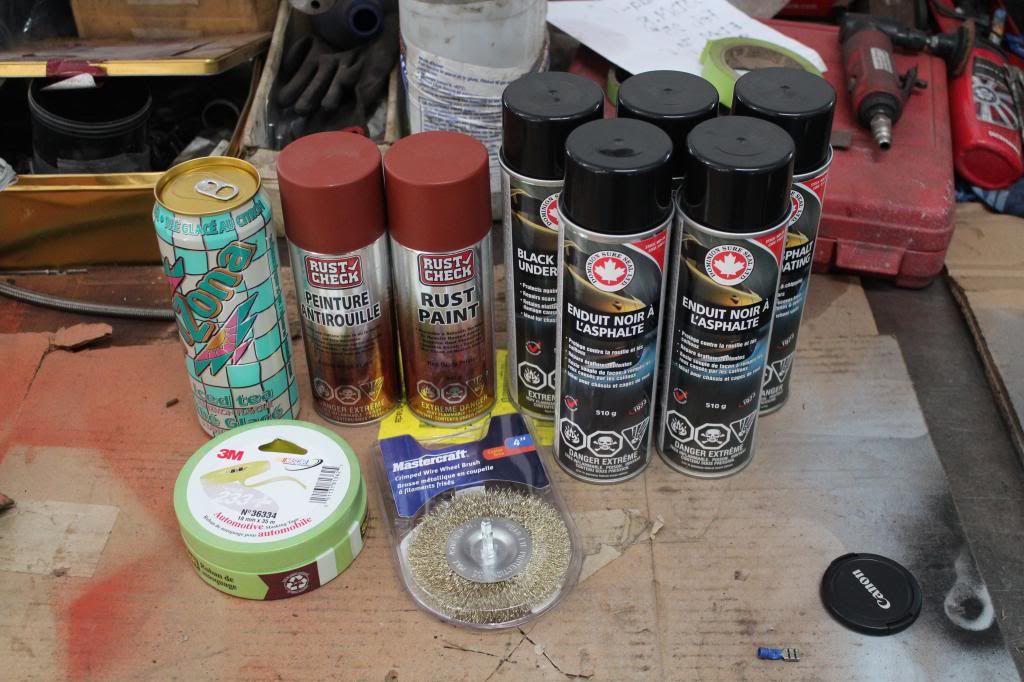
and bought a bunch of stuff to do the under body / wheel wells , espcially the front end while the sub frame is out
so that is where im up to! next step is tape off the whole bay and leave the underside of the chassis rails exposed and the under side of the fire wall, and coat it all in rocker guard, aswell as blasting and coating the sub frame and everything that goes along with it to get the front end all in and buttoned up,
my photobucket has been down for a month due to over posting lol
so these updates will be over the past month until todays date, lots of pictures :D and i finally decided to use the DSLR instead of an iphone, im pointing and shooting so some pictures are out of focus
March 25th 2014
i finished up all the suspension by powder coating the front forks

i picked up a b16 valve cover, it had already been stripped and the letters hadnt been shaved (which i was looking for)
i want to modify any little thing i can for a more sleek OEM look so off with the casting marks!


and then media blasted it

Then they had made some serious head way since the last visit a few days prior to this


and then i went there the next night and walked in on this !


found these locally for $100 so i picked them up the same night, i just need something 15" to mount my new tires onto so these will do, im probably going to re coat them flat black or silver/greyish

i finally convinced a friend to sell me his console, luckily hes doing a part out and sold me this ,RHD EDM console and little coin holder for the arm rest, i have been after the EDM console for some time now. unfortunately in black when my interior is grey, but thats no big deal.


a few days later i visited the car, to my amazement they were pushing it into the paint booth! 1 guy had blocked out the whole bay himself in 1 day o_0!!


i had the center piece cut out and the old factory rad supports so my tucked rad can fit in there and i'll make some custom mounts

my valve cover in primer ready for sanding

then we pulled out a few colour chips to get our main colour to customize like a ricer


and here is the colour all in the pot together...

AND BAAAAM SHES DONE!!! :D
once again pictures cannot do a colour justice, it flips and flops gold/green/silver/blueish depending on the light because its a tri coat, i couldnt be happier, there is a few things that i want to change already, one of those "ahh **** it i wont bother with that" and then now when its all done im like "**** i should have done that" but maybe when i spray the exterior next year i will shave a few little things again on the bay and they can spray the whole thing at once


this was the picture i got sent that morning when the base was laid down, i really need to get better at pointing and shooting in focus *face palm*


the day after it was painted i went to go pick it up and seeing the colour in the sun was amazing
this is the valve cover out in the sun, it flips and flops so much, i am truly blown away by it


strapping the car down in the trailer

and todays challenge, clean up the shop to make room for the car and work space,
we just bought a new trailer and ripped the living quaters out of the front due to water damage and it all got piled up in the back of the shop

then move all my parts from behind that


then started removing all the front end


im guessing this car used to come with ABS !!

took the rear end goodies out, everything is like brand new, and all forsale (except the brace is called for)


i didnt want to remove the rear trailing arms myself without putting a bit of heat to all the bolts, the last thing i want to do is snap or round off any bolts
i thought this would take a hell of a lot longer then it actually did, im so used to EG's that i know every tool needed, what comes out where, etc so this was a breeze, pulling the dash and the carpet. i was dreading the dash incase i broke any clips or vents etc but i did it all without any issues,
the reason for pulling the dash was more then just for the brake tuck, the previous owner removed the heater core and blower motor, which in turn makes the "auto climate control" useless which i want to function properly,
i also need to wire up several things like the rear fog light, speakers, deck, front fogs, ry wire harness, Ecu, fuse box and all that other jazz, so basically its a good thing i removed it lol


after i pulled the dash found this going to the climate control, the whole harness cut, Luckily for me 3 years ago i bought an EG^ climate control with harness, with the sensors from a friend so all this isnt so much of a worry for me :D

so i was on it again tonight, i want to make it a habit to go to the shop for a few hours a night, im having the time of my life for the simple reason every single bolt comes out without an issue, nothing is rusted or corroded :D
first was to go to my storage unit and track down my wiring harness for the auto climate control, the one in the barn had the tiniest scratch on the face so i'll just keep that as a spare incase this one craps out

next job was to pull the sub frame out, that was easy enough too


then off comes the steering rack, control arms and sway bar,


took the header off my engine and sold that tonight

and bought a bunch of stuff to do the under body / wheel wells , espcially the front end while the sub frame is out

so that is where im up to! next step is tape off the whole bay and leave the underside of the chassis rails exposed and the under side of the fire wall, and coat it all in rocker guard, aswell as blasting and coating the sub frame and everything that goes along with it to get the front end all in and buttoned up,
03-28-2014, 03:05 PM
#15
Honda-Tech Member
Thread Starter
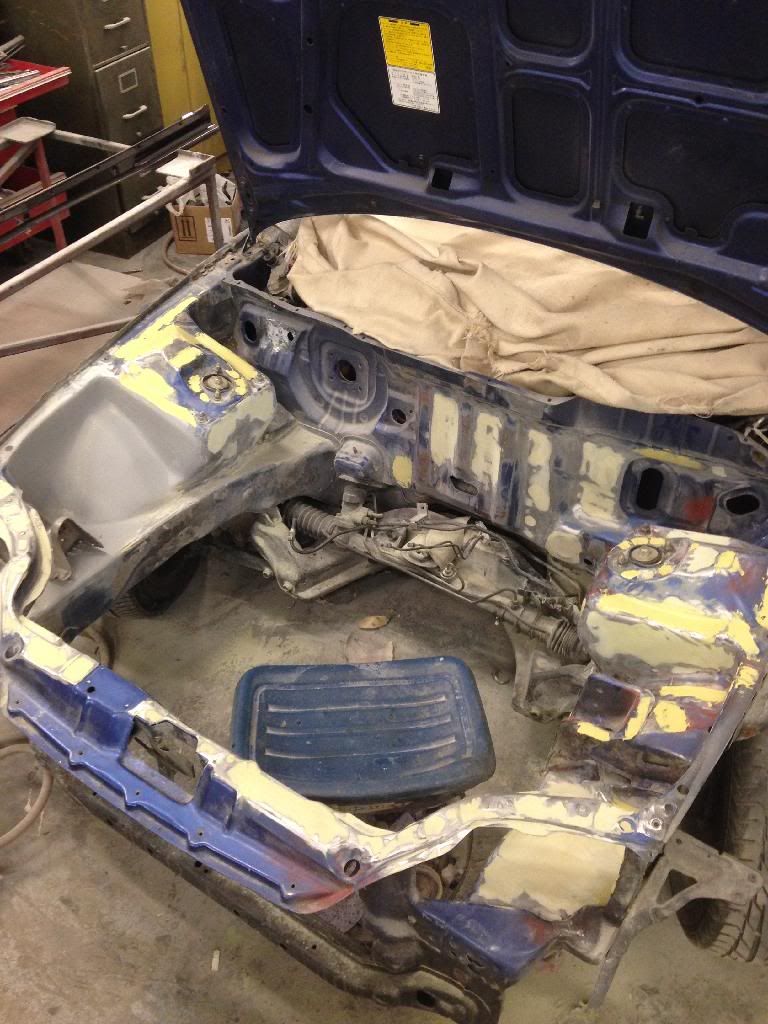
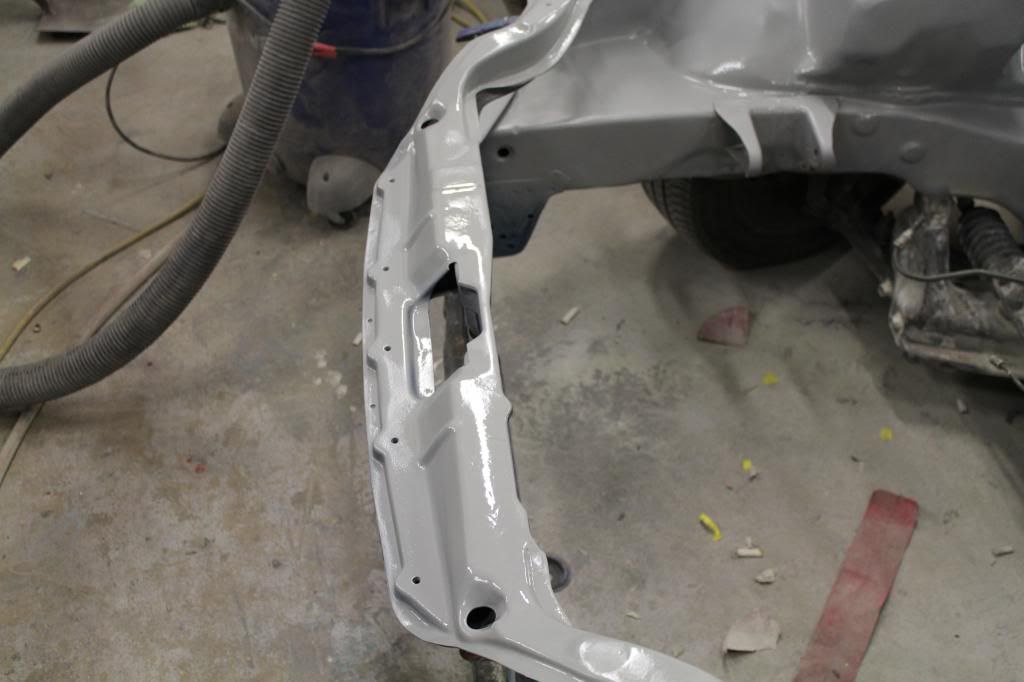
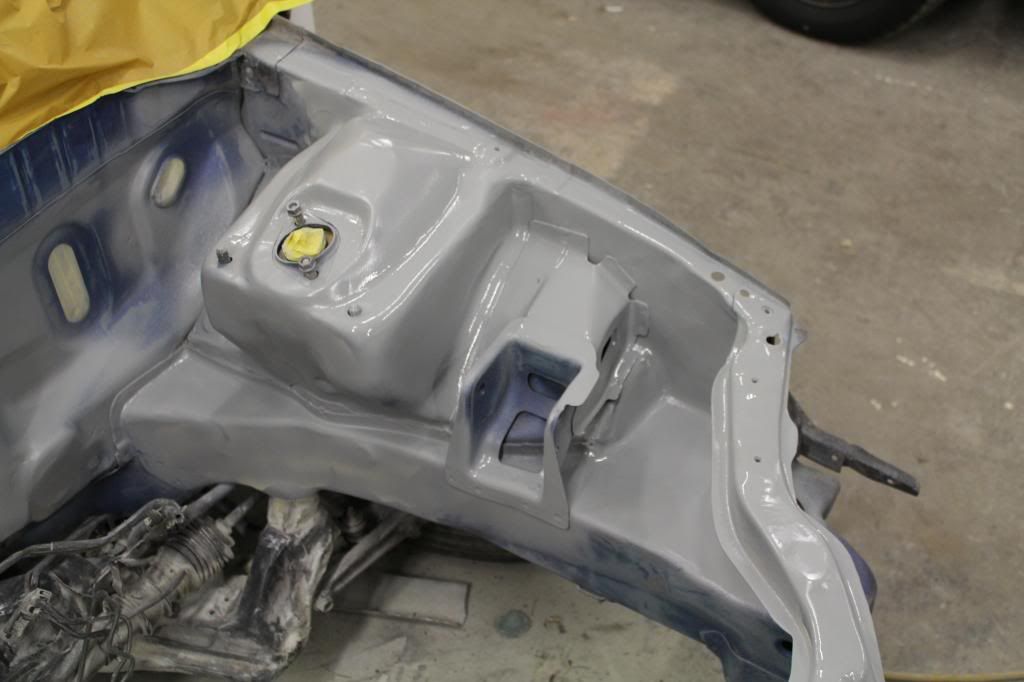
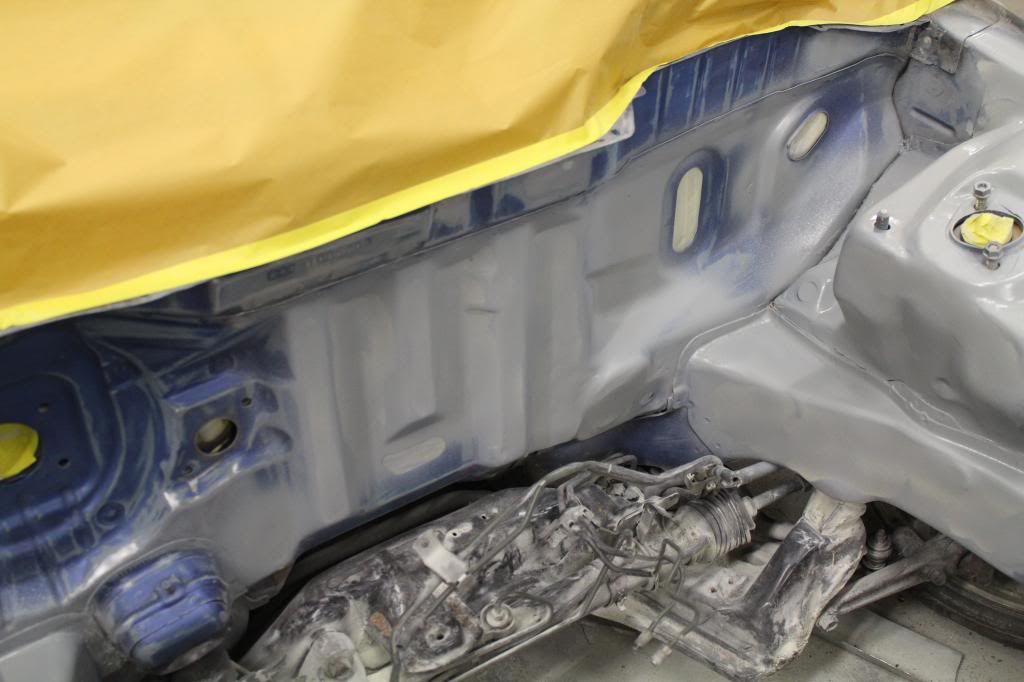
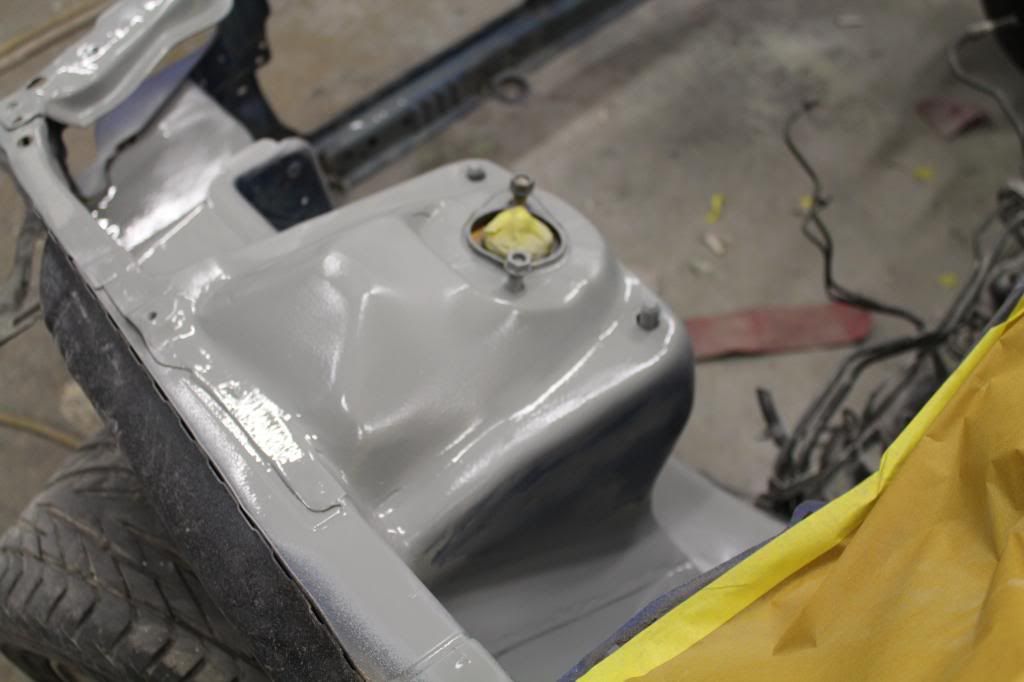
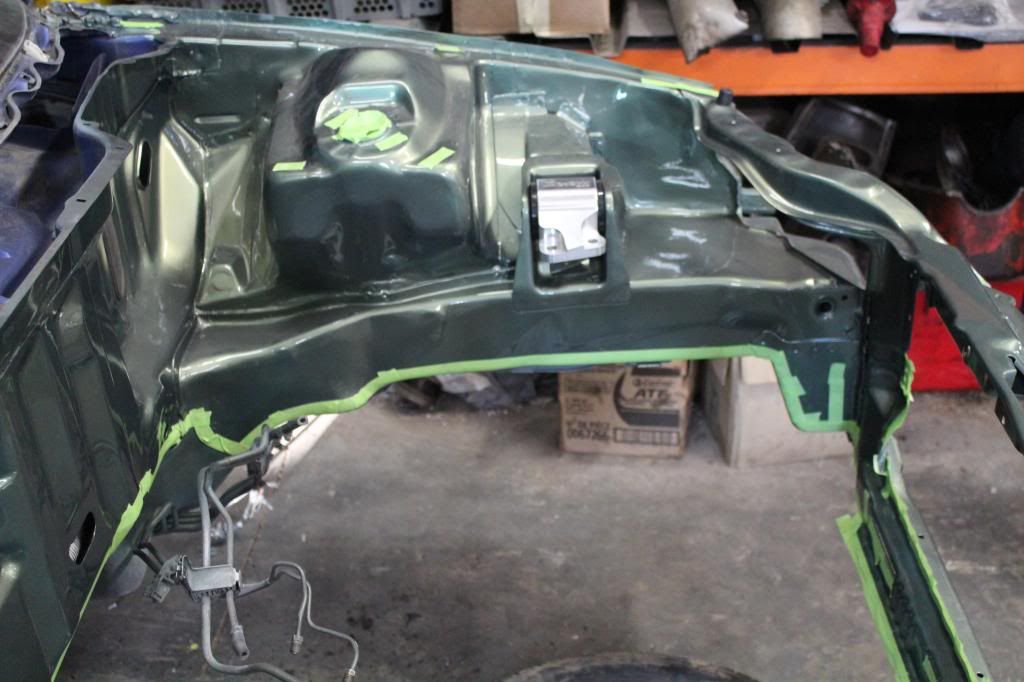
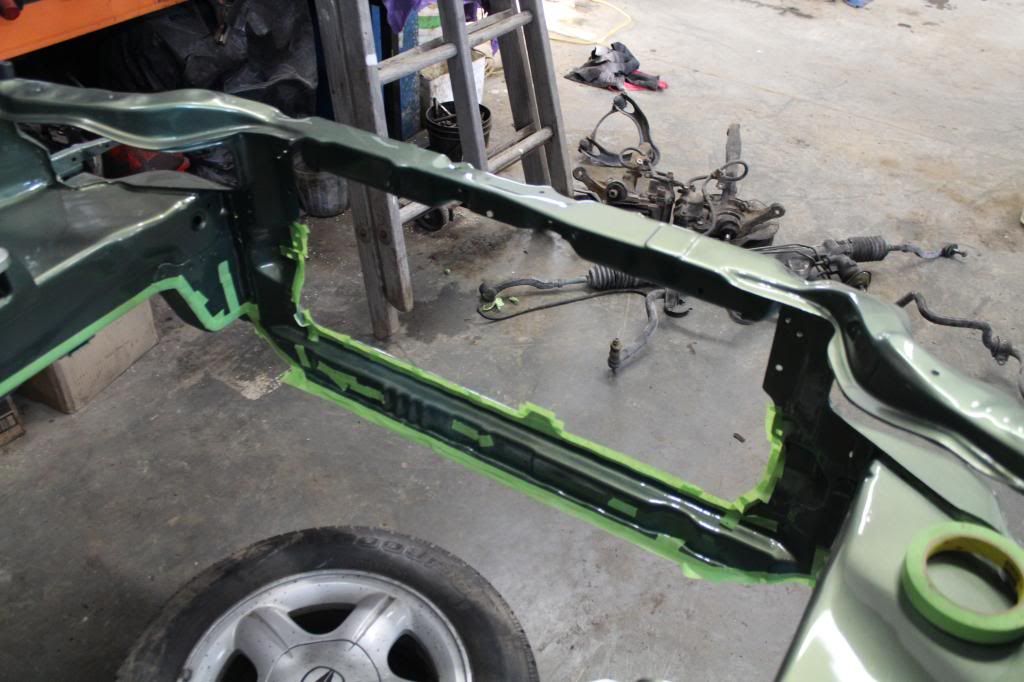
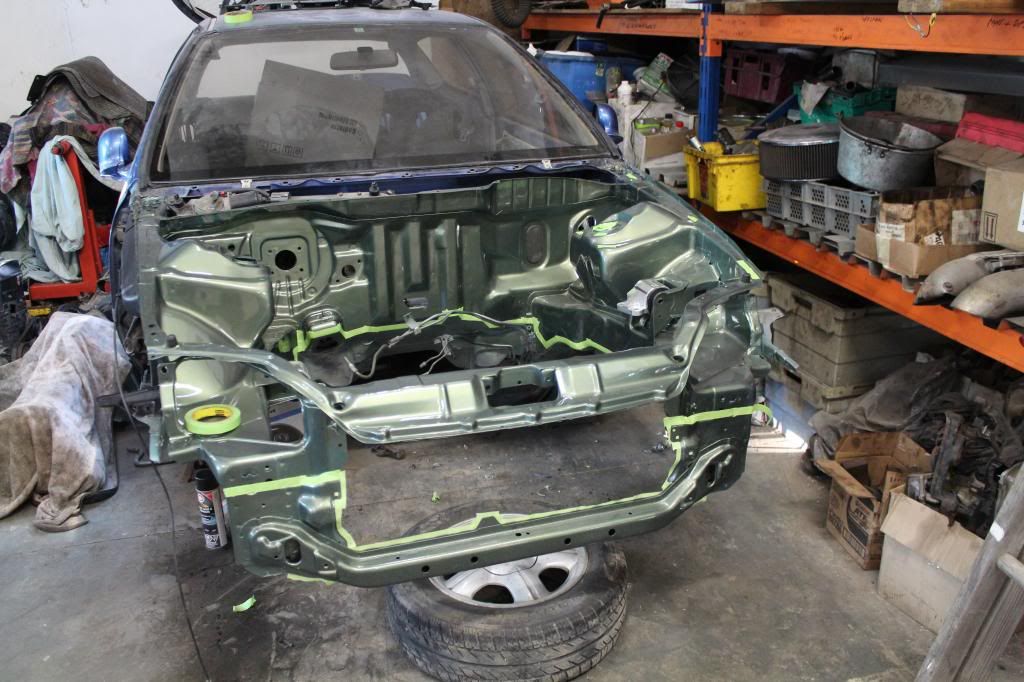
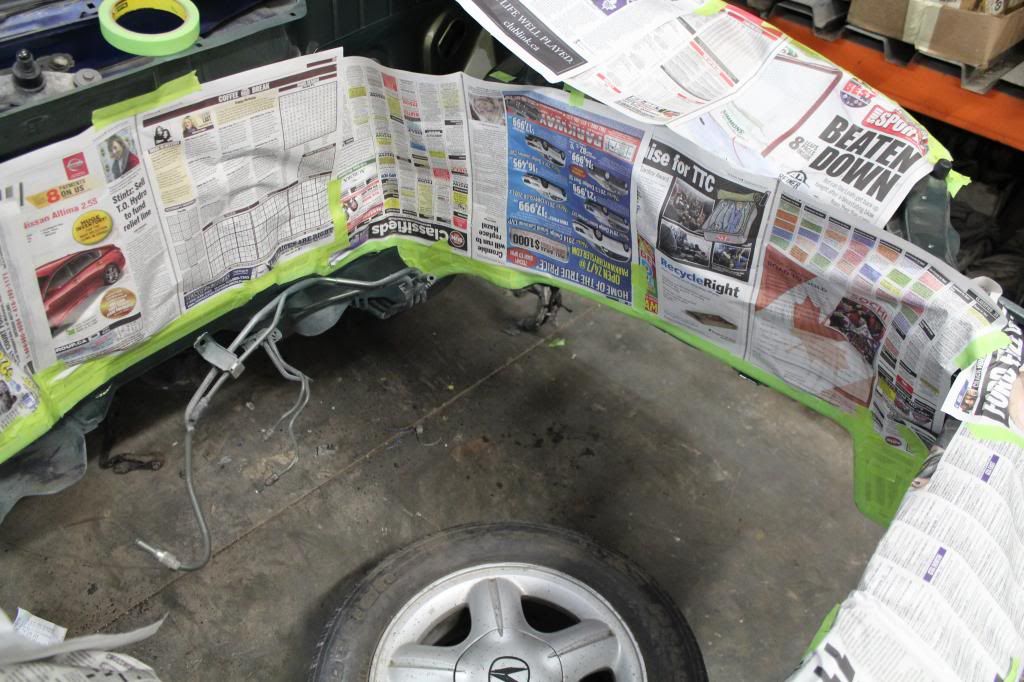
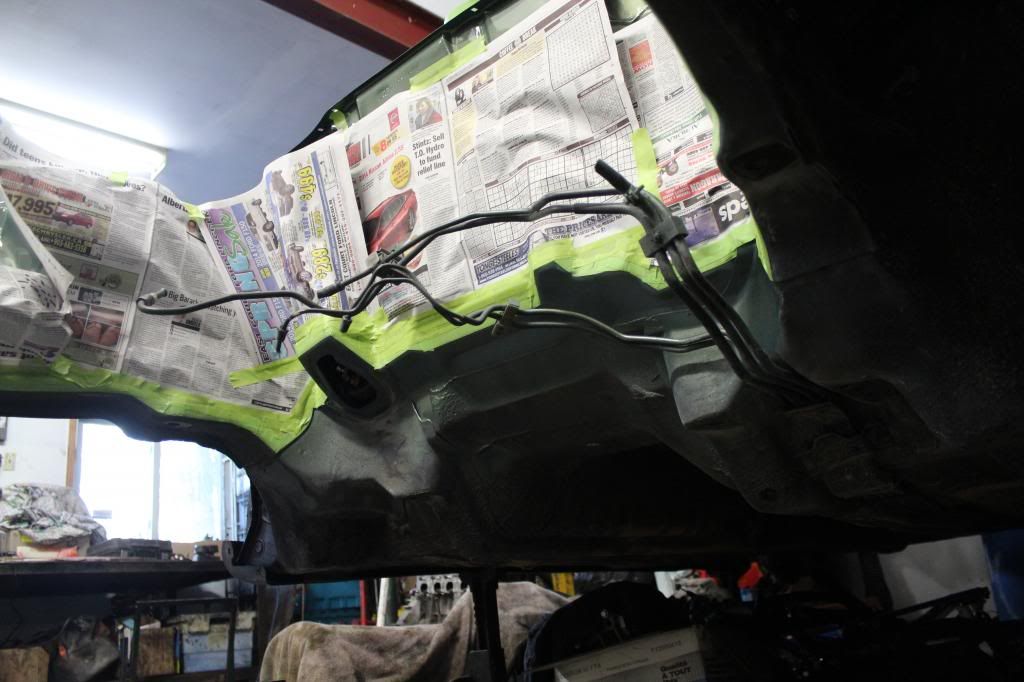
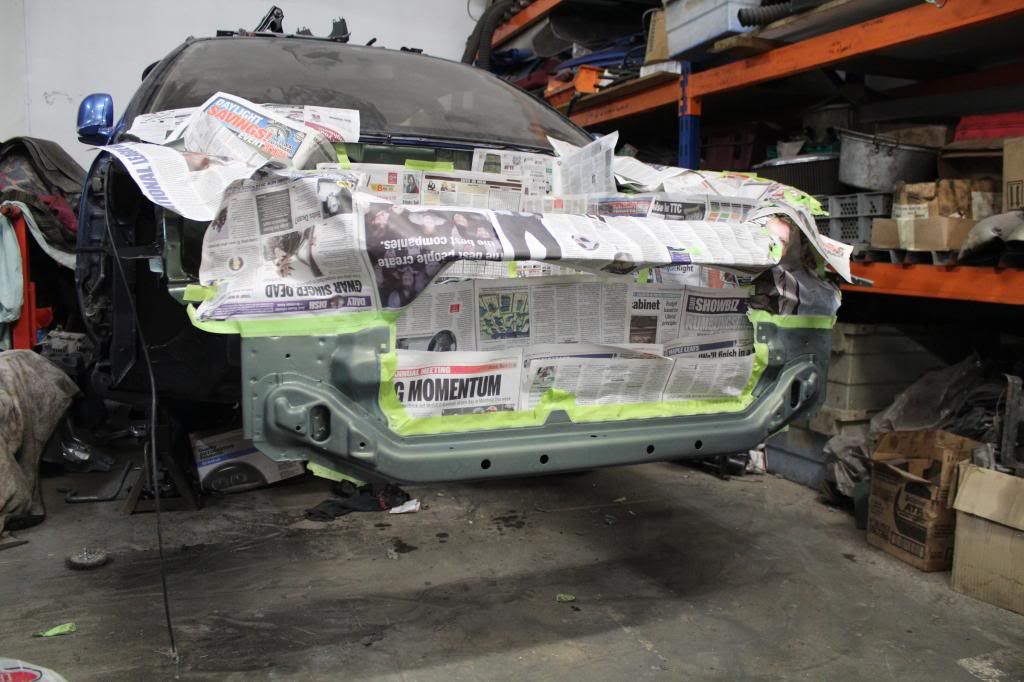
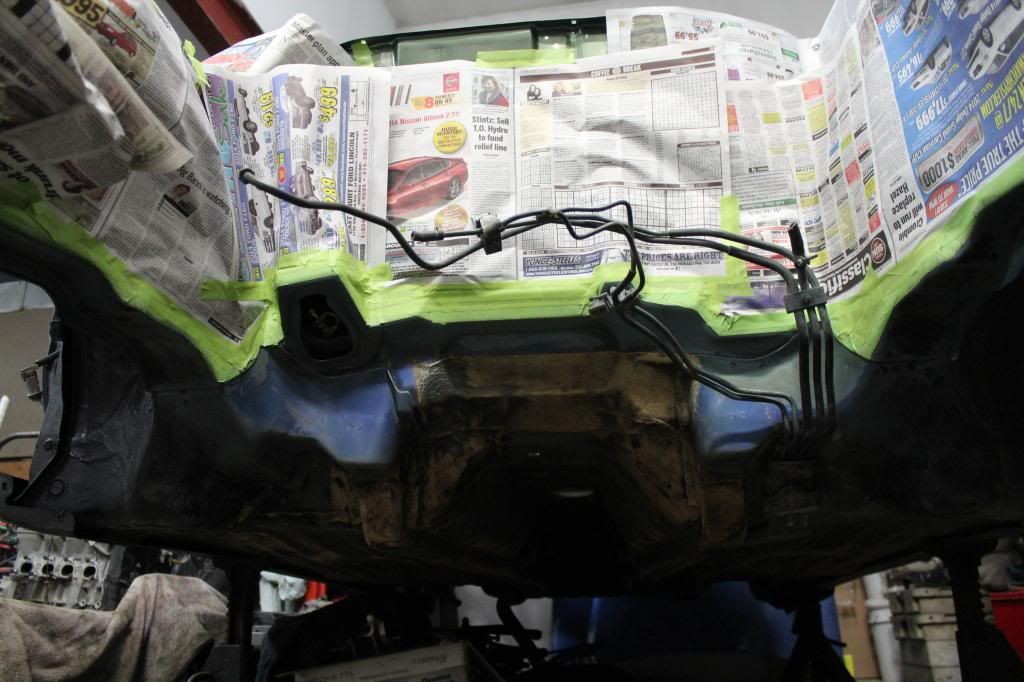
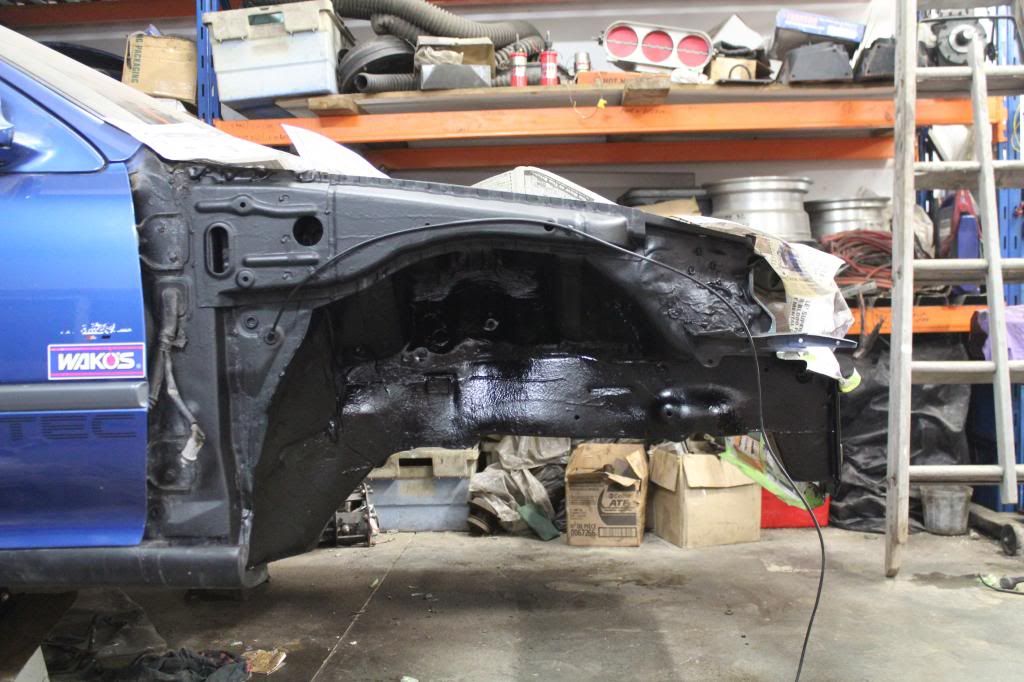
so lastnight i got around to cleaning and painting the lower fire wall, underside of the frame rails, the under side of the rad support, the front of the rad support and the front wheel wells.
the process of doing this was quite easy but laying on a broken crawler and using a shitty flash light was the only hard part lol
step 1. mask off all the edges where your paint is going to go
step 2. mask of any holes that over spray can get through (bolt holes, top hats etc)
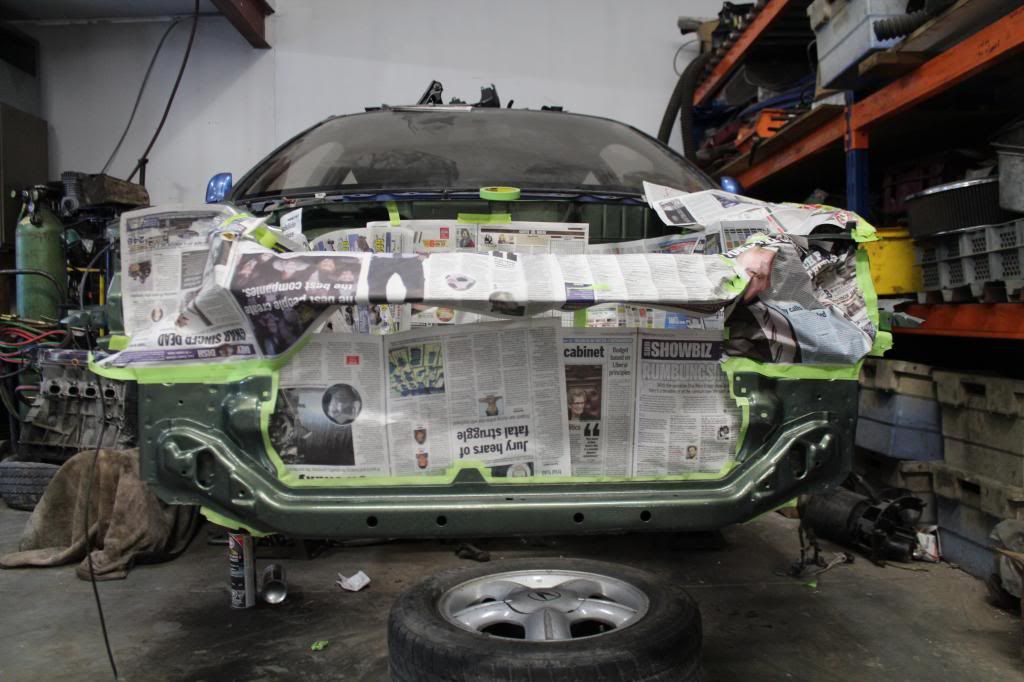
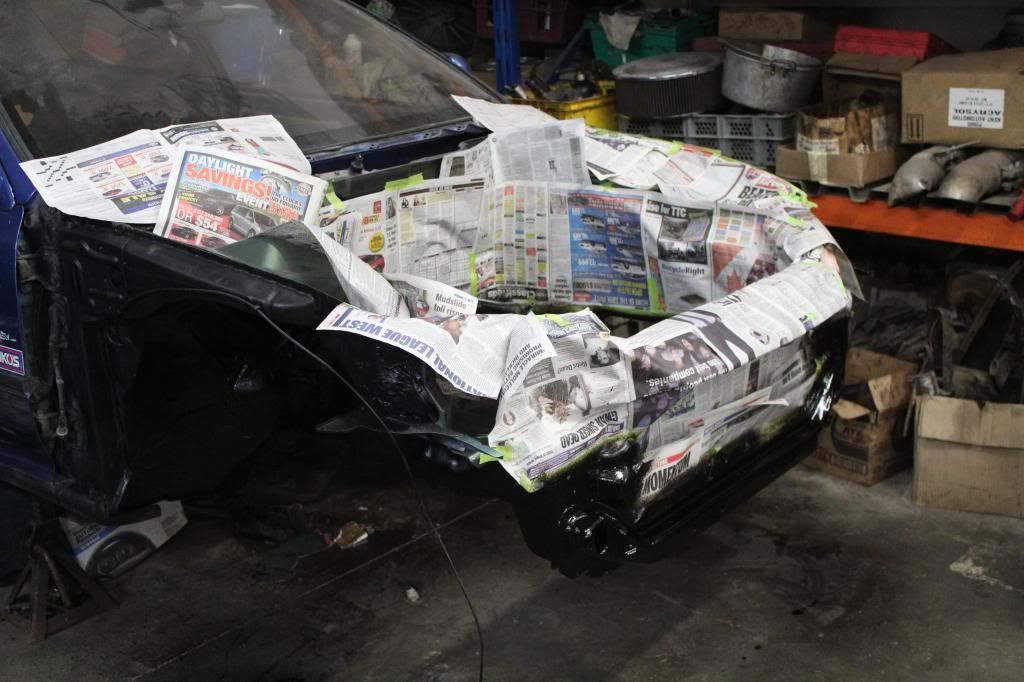
step 3. using paper (i used a bunch of news paper) cover and tape off all the areas you do not want painted
step 4. using a drill with an assortment of wire wheels / cone attachments clean off the areas you are going to paint, luckily for me there was little to no grease and oil, just lots of dirt from the road and old rocker guard so this was easy, keep in mind staying away from the tape edges so you dont rip through the tape and scratch the good paint.
step 5. using a scratch pad scuff up the areas you didnt get with the wire wheel
step 6. using a blow gun blow off all the areas you are going to paint
step 7. pour some acrosol prep cleaner (wax and grease remover) onto a rag and wire down all areas you are going to paint
step 8. any bare metal areas were coated with tremclad rust proof primer first before the rocker guard, of course once a few coats are applied and dry it was then scuffed up with a scratch pad to ensure the rocker guard had something to bite to.
step 9. double check all the tape is sticking and no bleed through can happen
step 10. shake the can well, wear eye protection and gloves and get spraying
NOTE: after seeing the pictures almost all loading out of focus my little brother told me the issue is the lense is out of focus, so when i see the picture im about to take is in focus, it actually is not. FML.
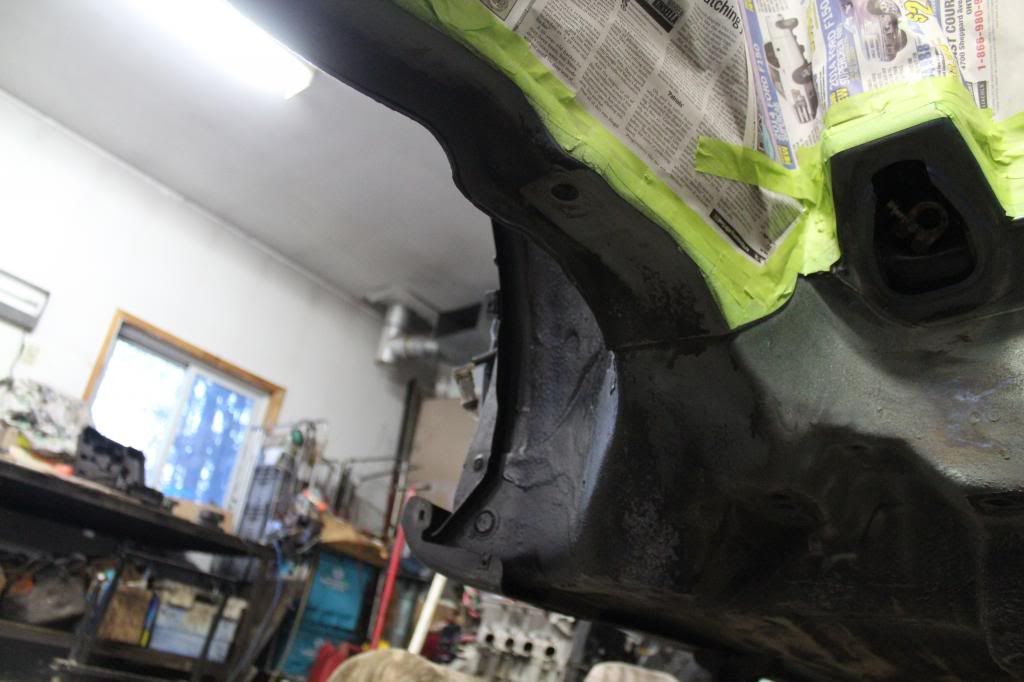
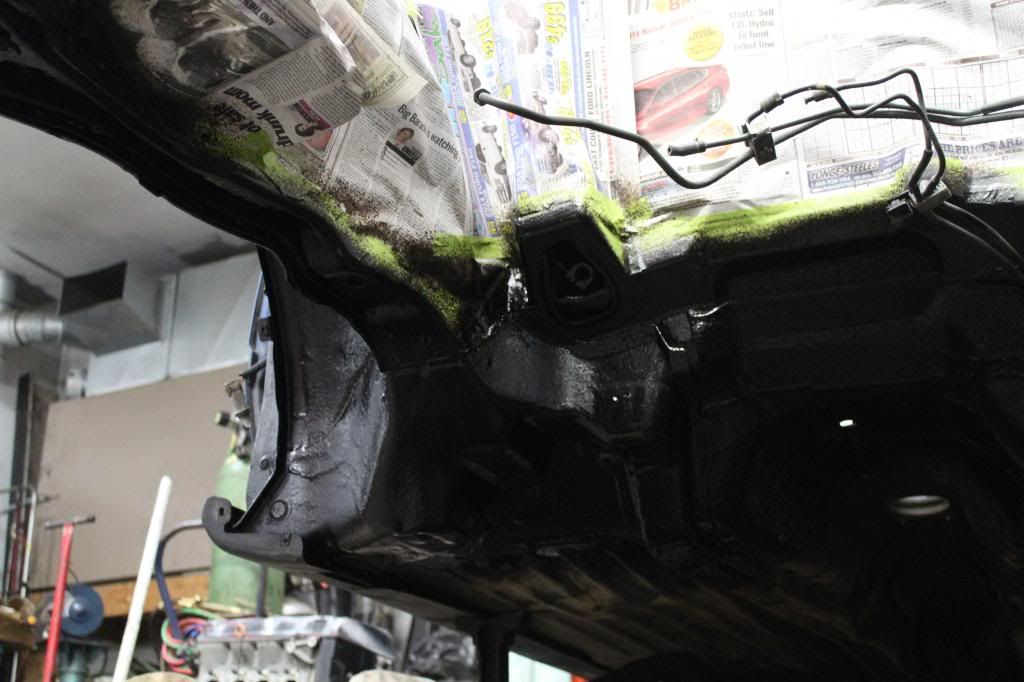
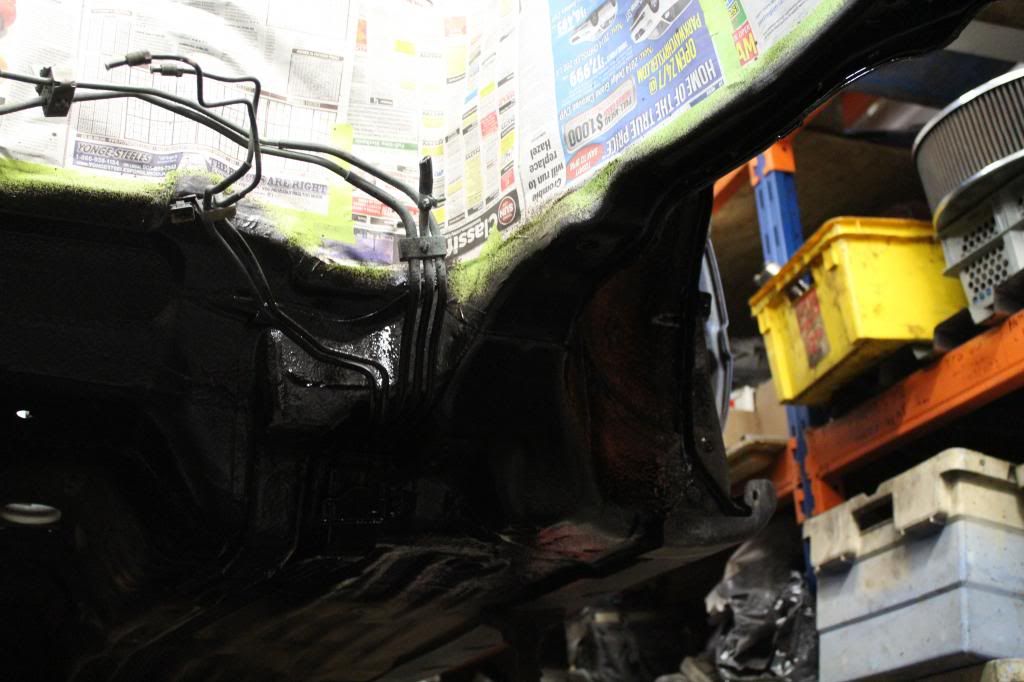
:D so that is all done and now dry so i can now focus on the brake tuck, and getting the wiring sorted.
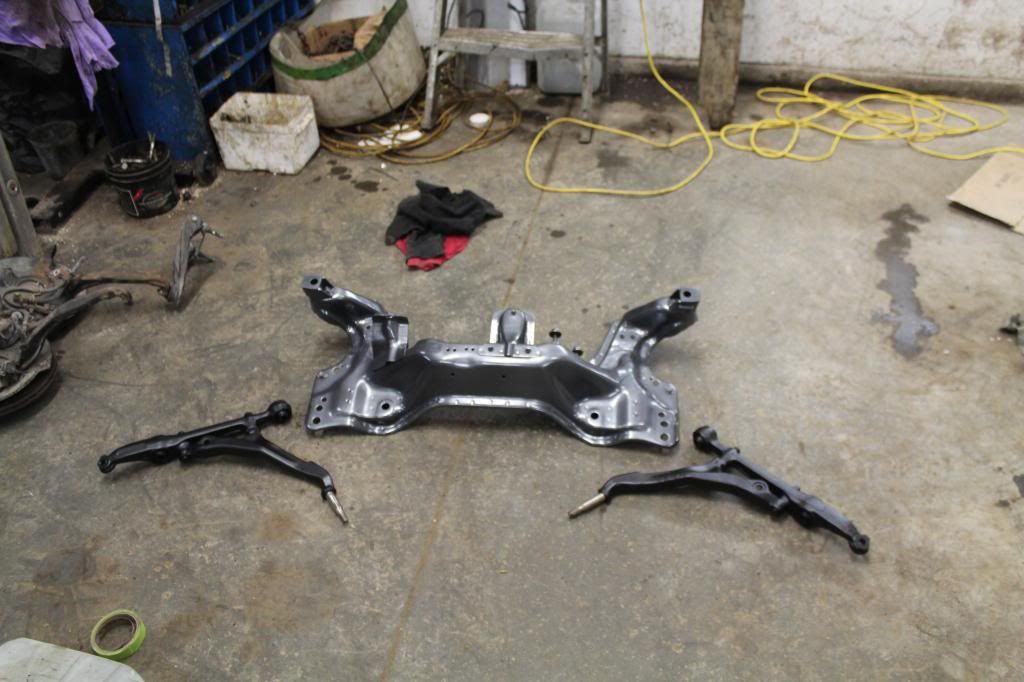
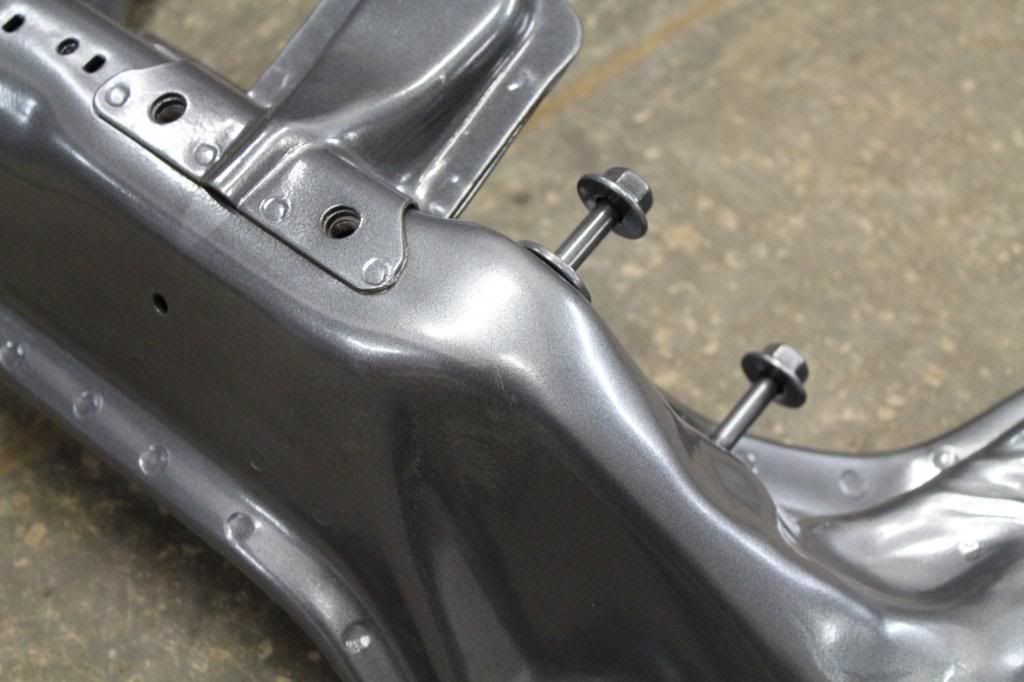
i also got my front lower control arms and sub frame powder coated, i just need to clean up the steering rack and sway bar (new end links are needed too) and i can put all that back in too.
the process of doing this was quite easy but laying on a broken crawler and using a shitty flash light was the only hard part lol
step 1. mask off all the edges where your paint is going to go
step 2. mask of any holes that over spray can get through (bolt holes, top hats etc)
step 3. using paper (i used a bunch of news paper) cover and tape off all the areas you do not want painted
step 4. using a drill with an assortment of wire wheels / cone attachments clean off the areas you are going to paint, luckily for me there was little to no grease and oil, just lots of dirt from the road and old rocker guard so this was easy, keep in mind staying away from the tape edges so you dont rip through the tape and scratch the good paint.
step 5. using a scratch pad scuff up the areas you didnt get with the wire wheel
step 6. using a blow gun blow off all the areas you are going to paint
step 7. pour some acrosol prep cleaner (wax and grease remover) onto a rag and wire down all areas you are going to paint
step 8. any bare metal areas were coated with tremclad rust proof primer first before the rocker guard, of course once a few coats are applied and dry it was then scuffed up with a scratch pad to ensure the rocker guard had something to bite to.
step 9. double check all the tape is sticking and no bleed through can happen
step 10. shake the can well, wear eye protection and gloves and get spraying
NOTE: after seeing the pictures almost all loading out of focus my little brother told me the issue is the lense is out of focus, so when i see the picture im about to take is in focus, it actually is not. FML.


:D so that is all done and now dry so i can now focus on the brake tuck, and getting the wiring sorted.
i also got my front lower control arms and sub frame powder coated, i just need to clean up the steering rack and sway bar (new end links are needed too) and i can put all that back in too.

 03-28-2014, 06:50 PM
#16
Honda-Tech Member
Looking awesome! keep it up.
Bay is soooo smooth. Nice work!
Color is sweet as well. Will be checking in on progress.
Bay is soooo smooth. Nice work!
Color is sweet as well. Will be checking in on progress.
04-01-2014, 04:17 PM
#20
Honda-Tech Member
Thread Starter
wooop woooooooop!!!!
parts parts parts parts and more parts came today! now i can finally start cracking on a lot of stuff
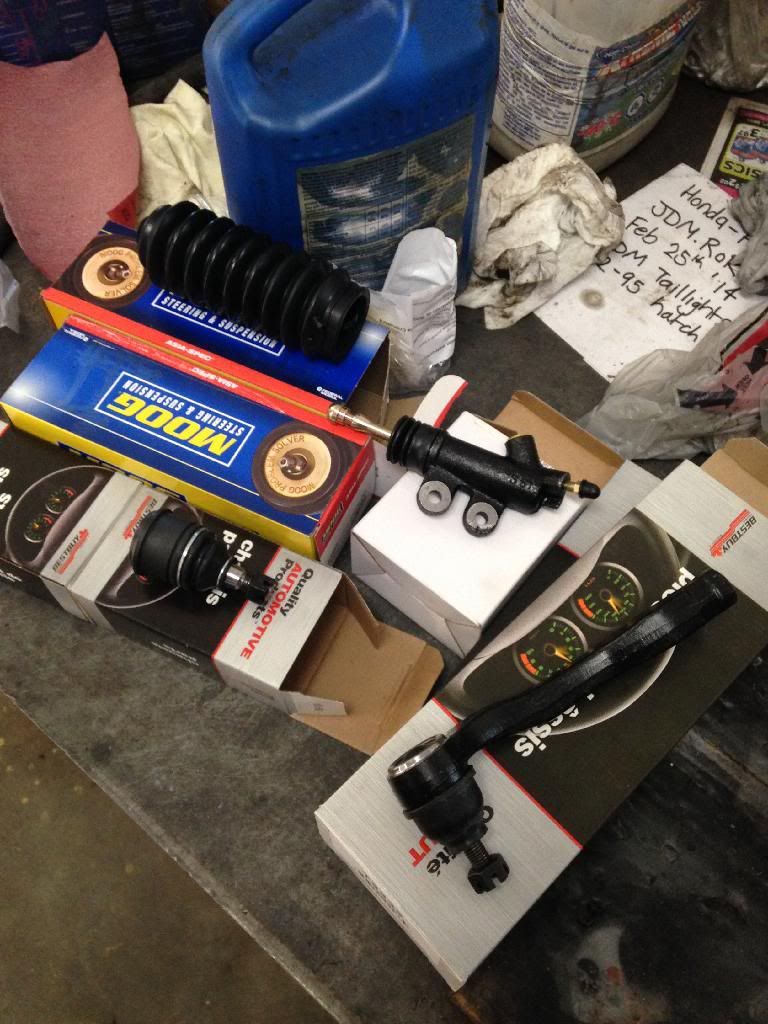
Steering rack bellows both left and right (one was ripped but didnt see much sense replacing just 1)
both outer tie rods
both lower ball joints
clutch slave cylinder
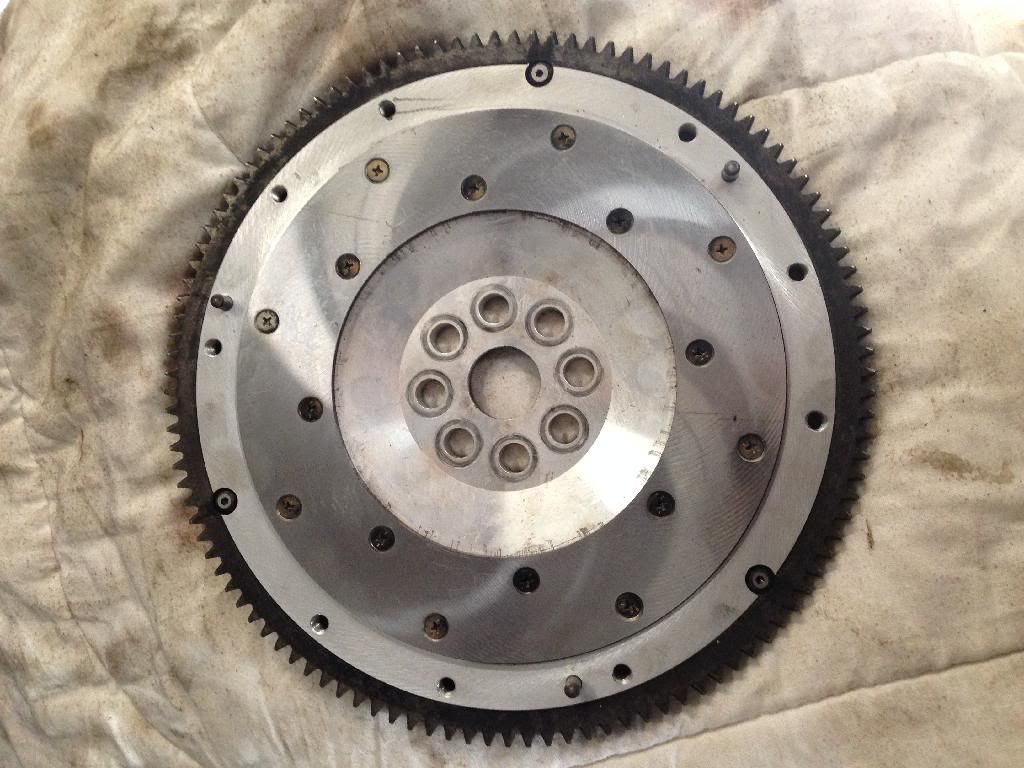
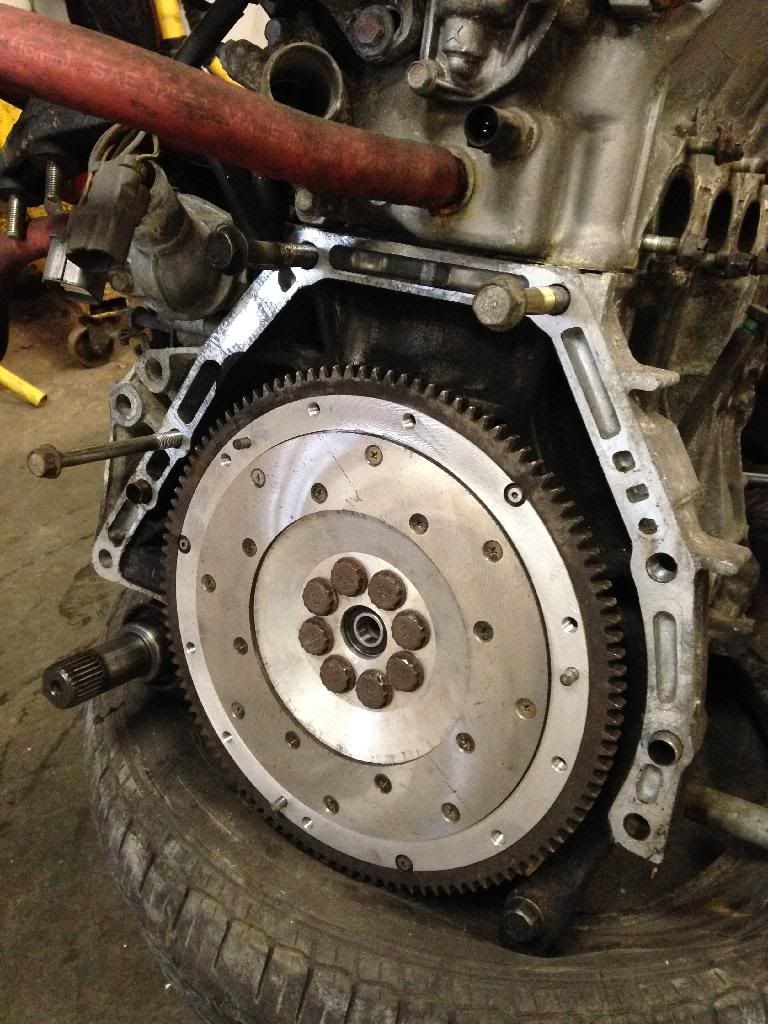
my fly wheels came back from being machined
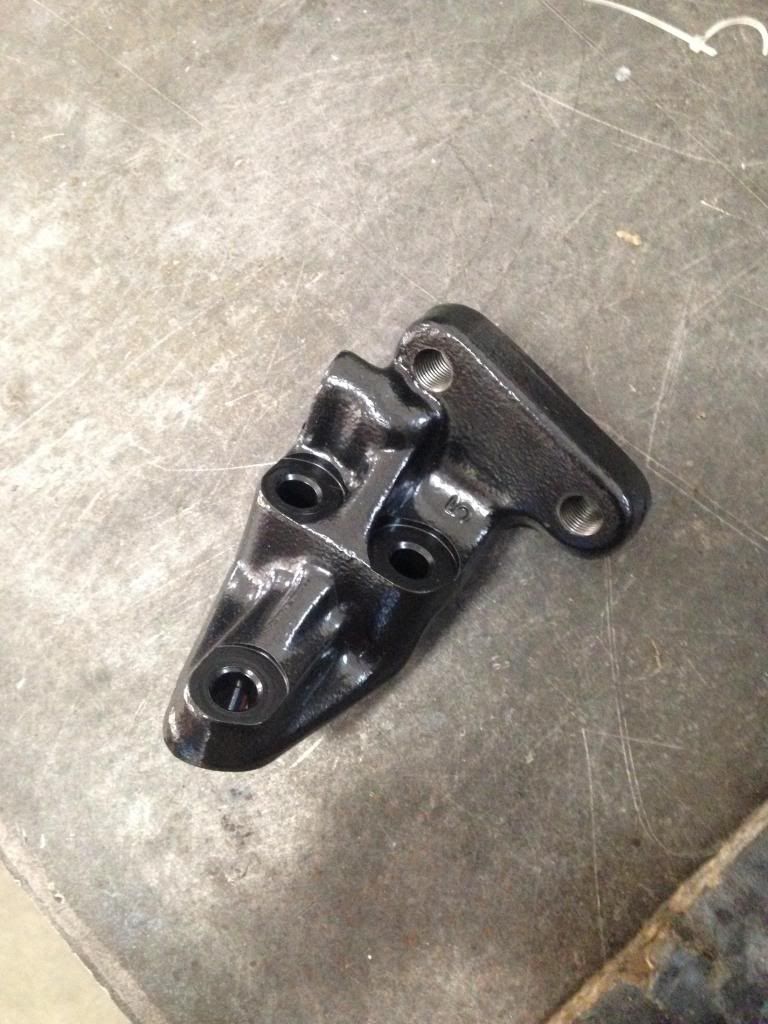
a new post mount (which my friend had to buy me because i had to give mine to his so he could get his engine in)
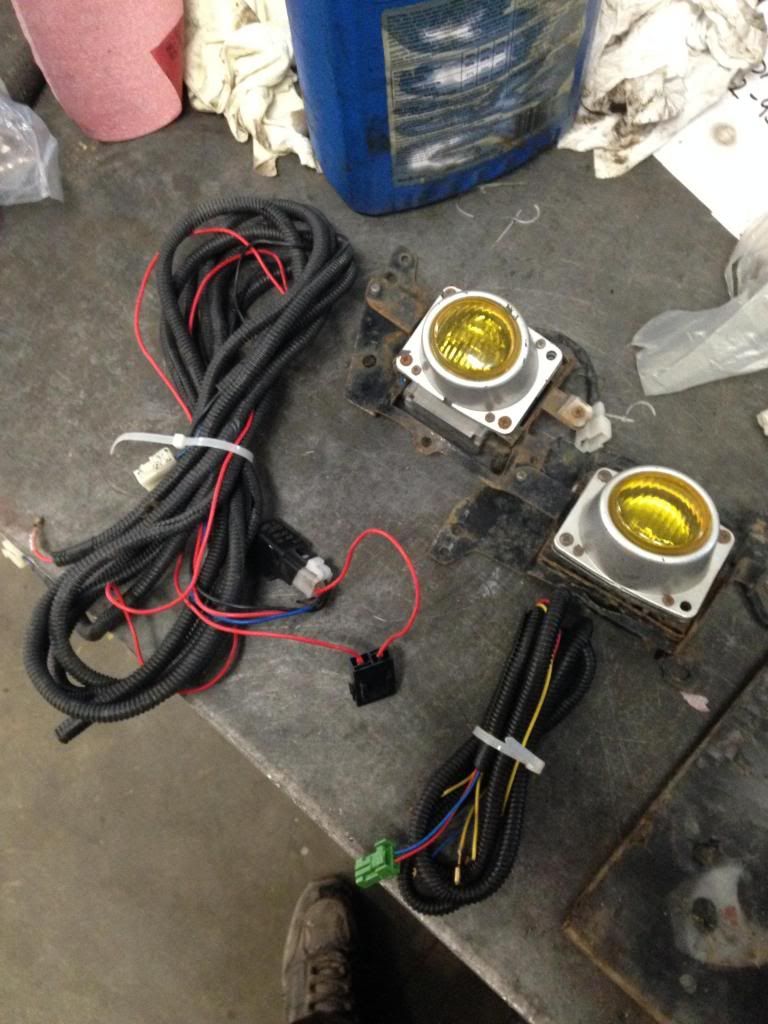
lastnight i bought a fog light kit, when i got my car it came with the fog lights but the wiring was half there and completely fucked up so i needed this just for the wiring
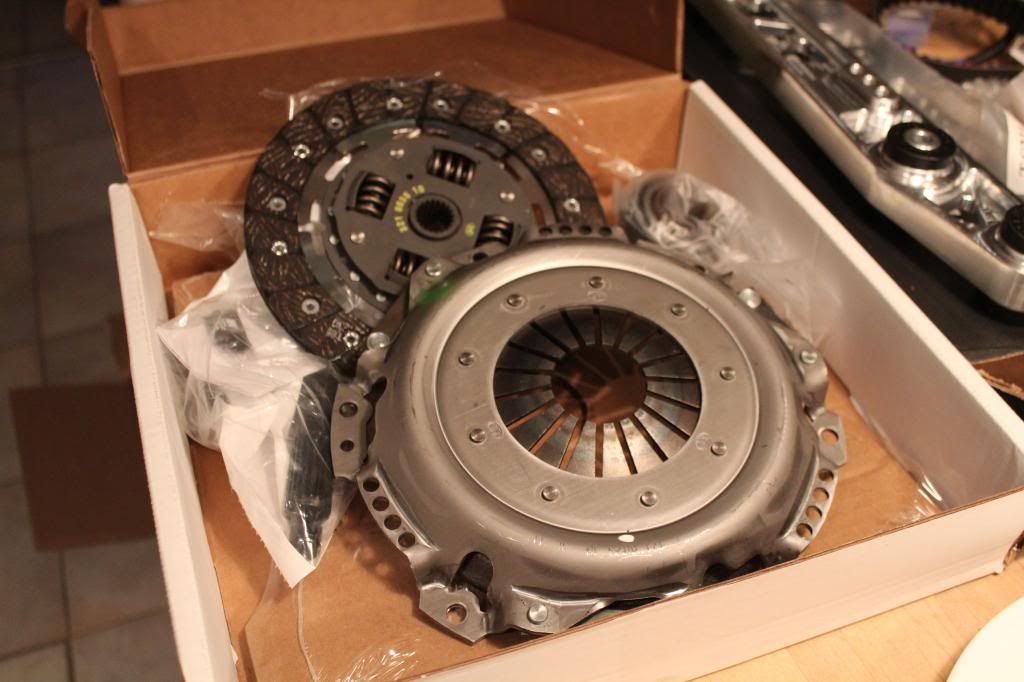
complete clutch kit
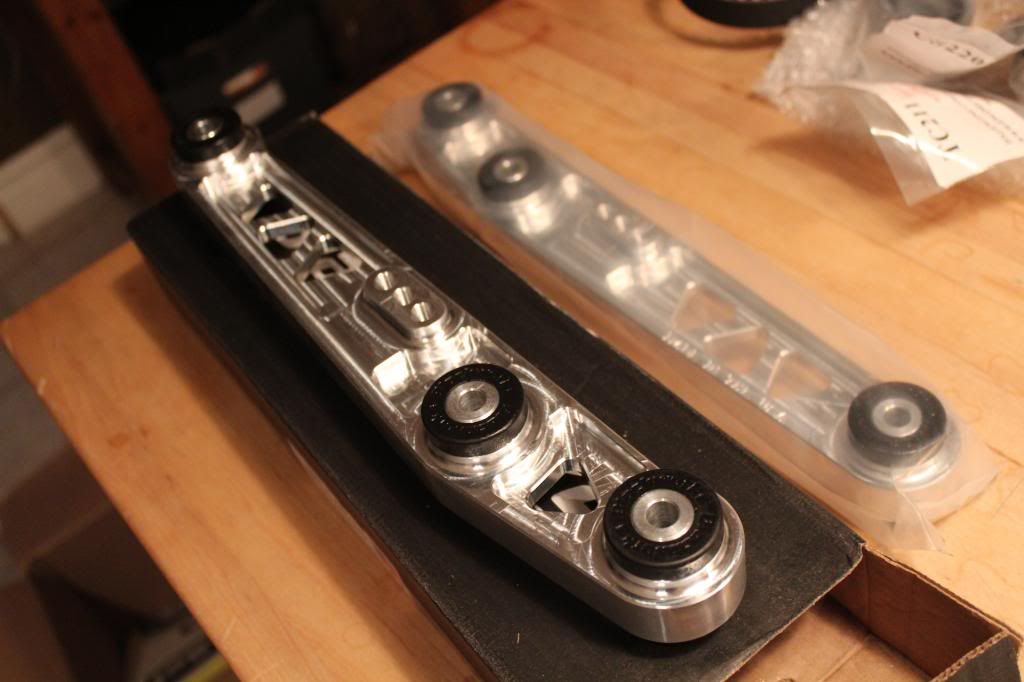
BWR polished LCA's
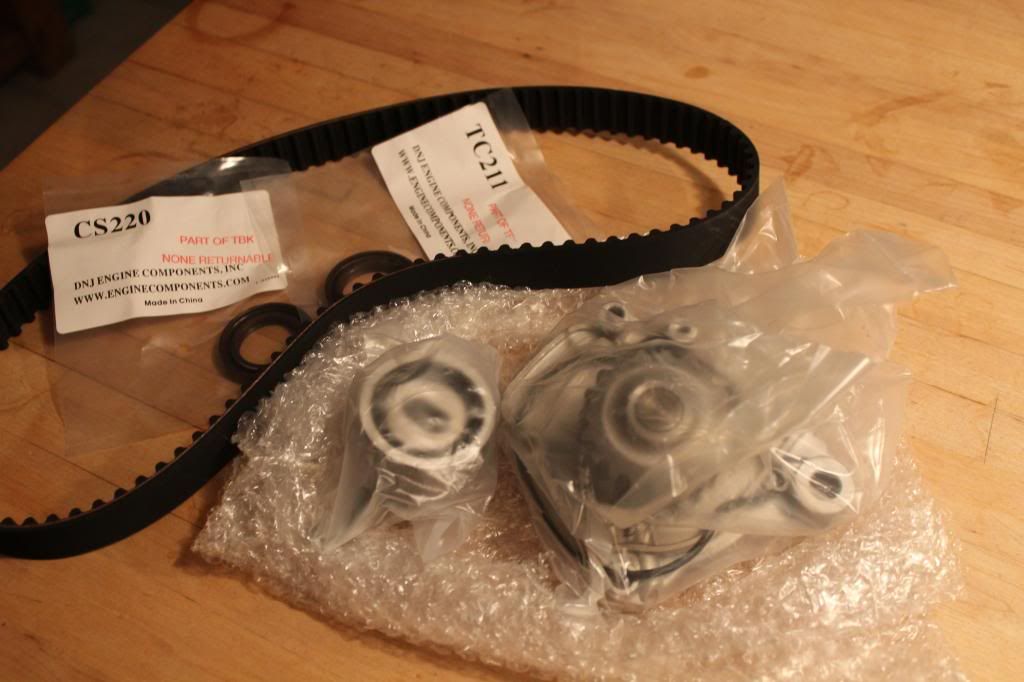
timing belt and water pump kit
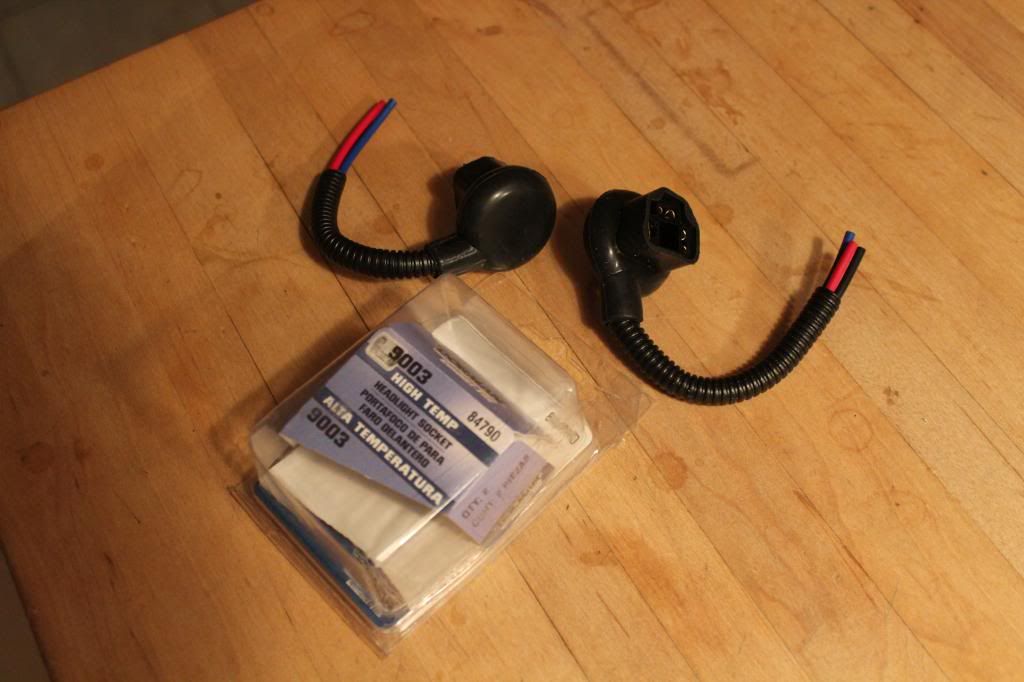
new headlight sockets (mine are all bare and have been hacked into before
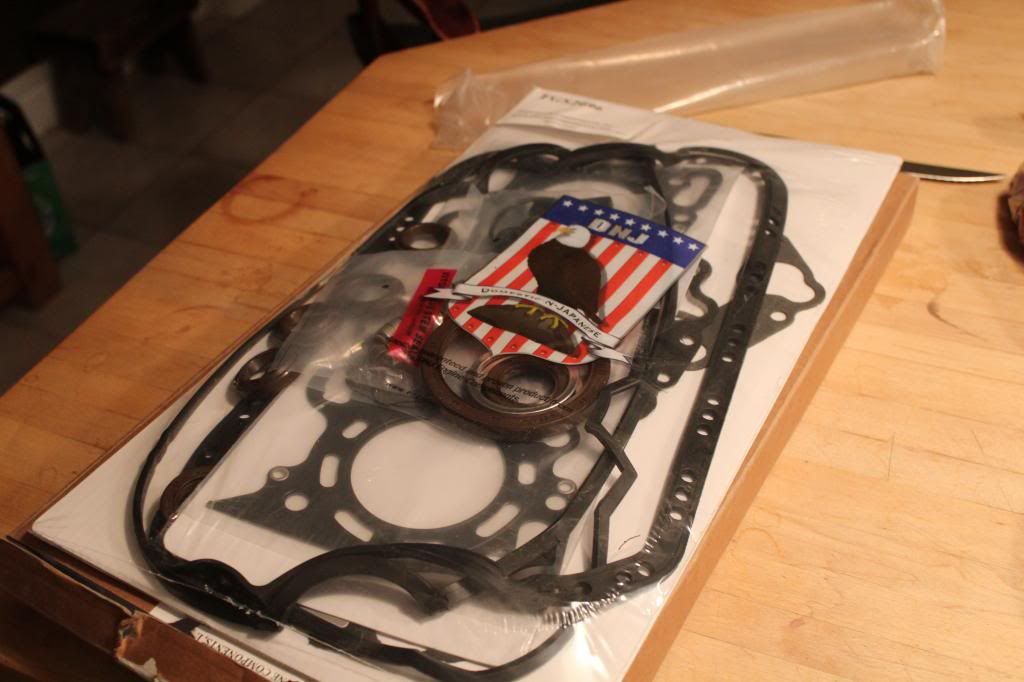
complete engine gasket kit
parts parts parts parts and more parts came today! now i can finally start cracking on a lot of stuff
Steering rack bellows both left and right (one was ripped but didnt see much sense replacing just 1)
both outer tie rods
both lower ball joints
clutch slave cylinder

my fly wheels came back from being machined

a new post mount (which my friend had to buy me because i had to give mine to his so he could get his engine in)

lastnight i bought a fog light kit, when i got my car it came with the fog lights but the wiring was half there and completely fucked up so i needed this just for the wiring

complete clutch kit

BWR polished LCA's

timing belt and water pump kit

new headlight sockets (mine are all bare and have been hacked into before

complete engine gasket kit
 04-06-2014, 08:15 AM
#21
Honda-Tech Member
Thread Starter
UPDATE APRIL 4th 2014
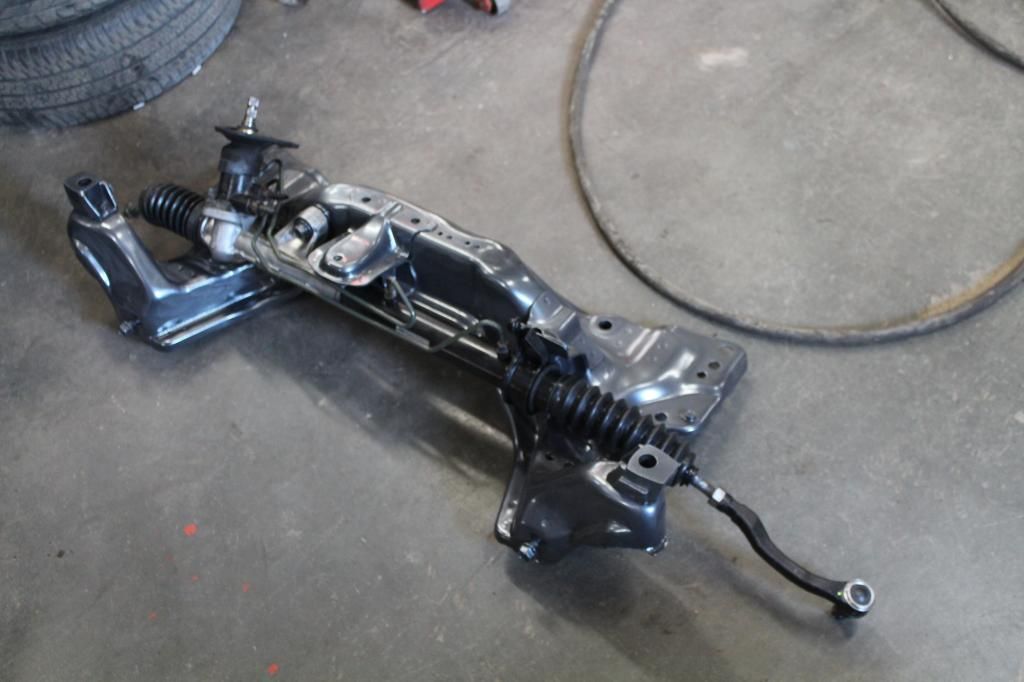
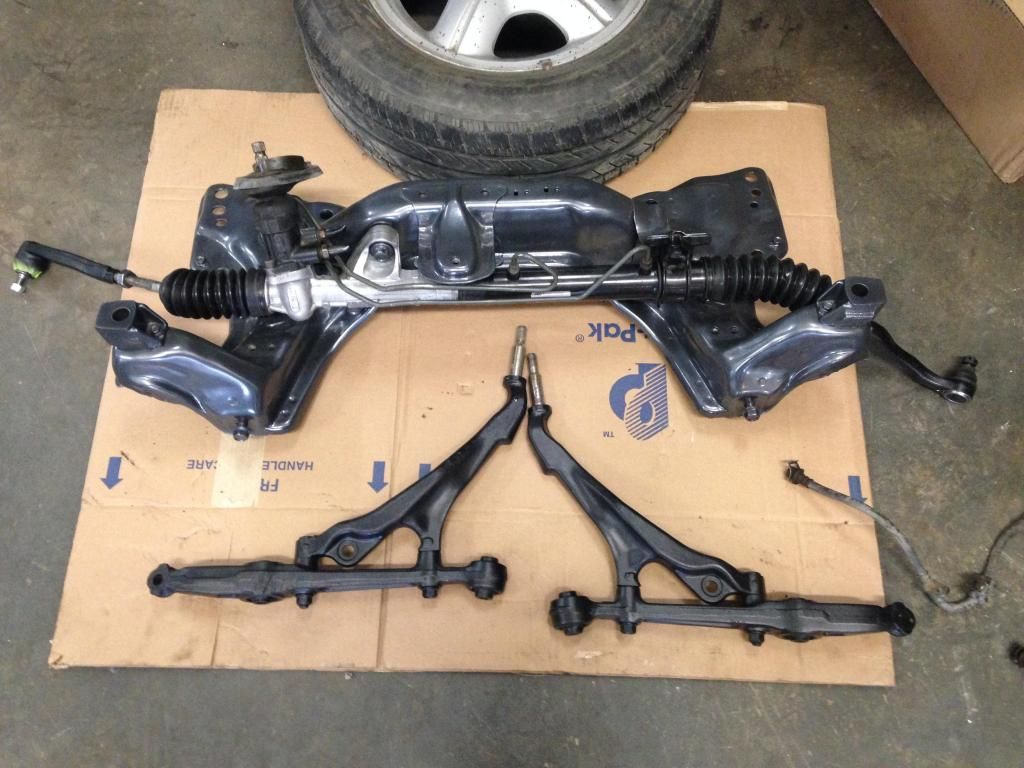
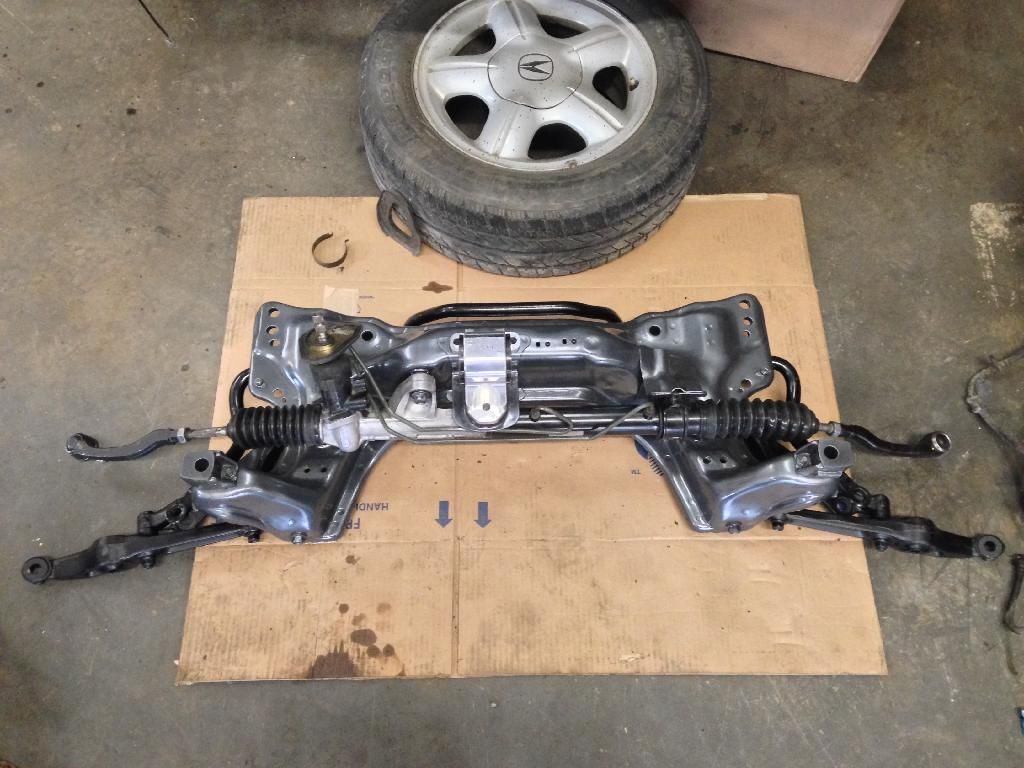
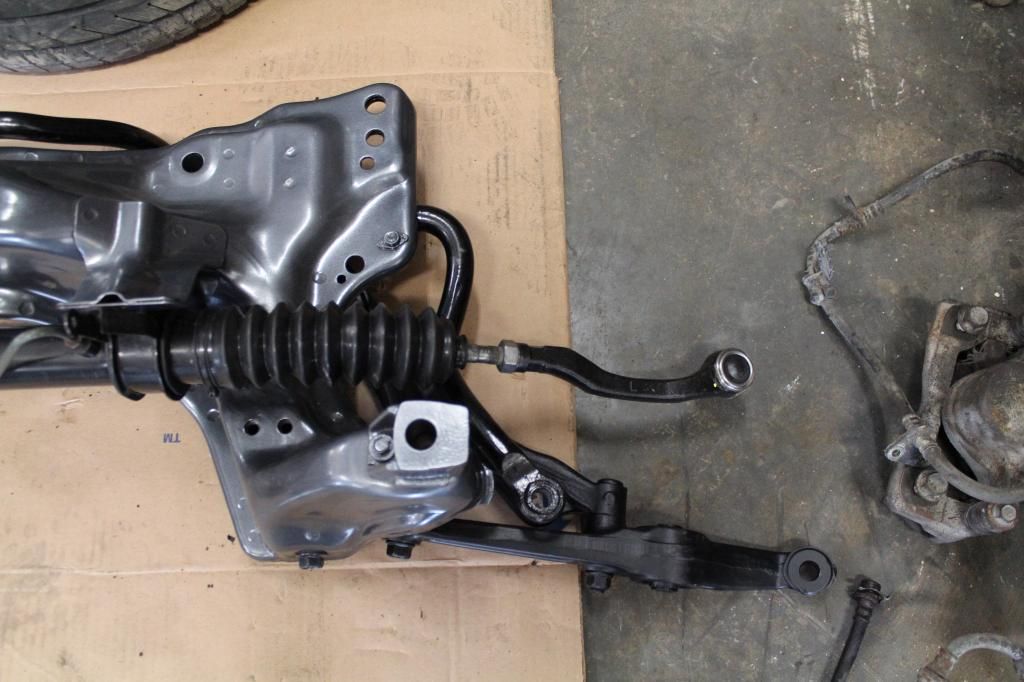
over the past couple of days ive done some assembly and cleaning of the steering rack / sub frame
first was to clean up the steering rack and replace the outer tie rods and boots. cleaning was a breeze with the good ol' wire wheel on the brush and some degreaser and rags for the other stuff
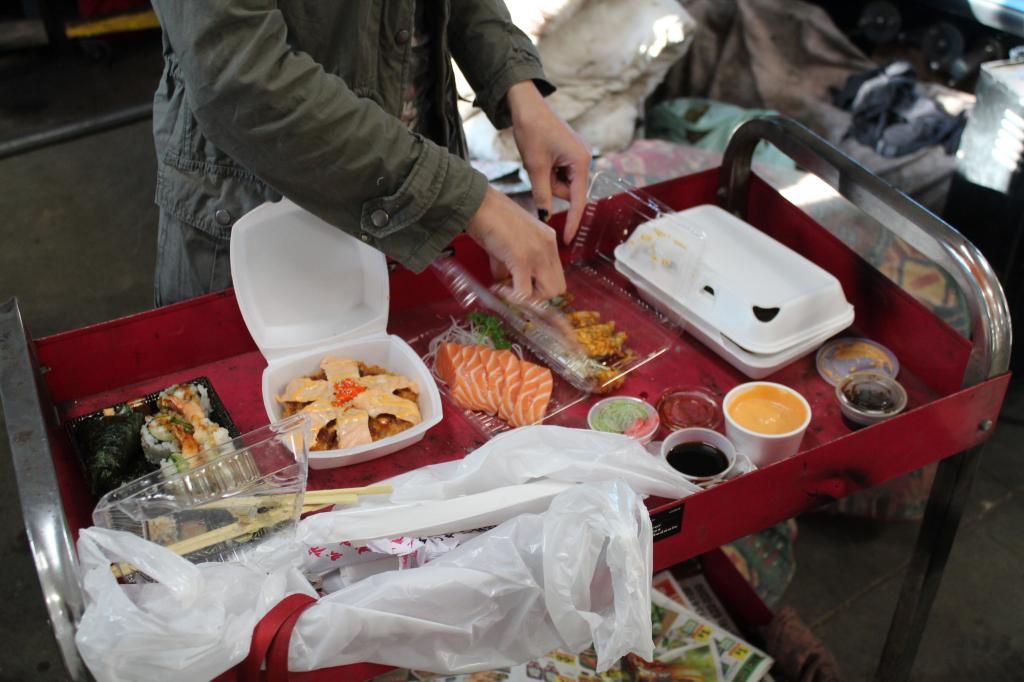
then in the middle of doing that the girl came and brought me sushi
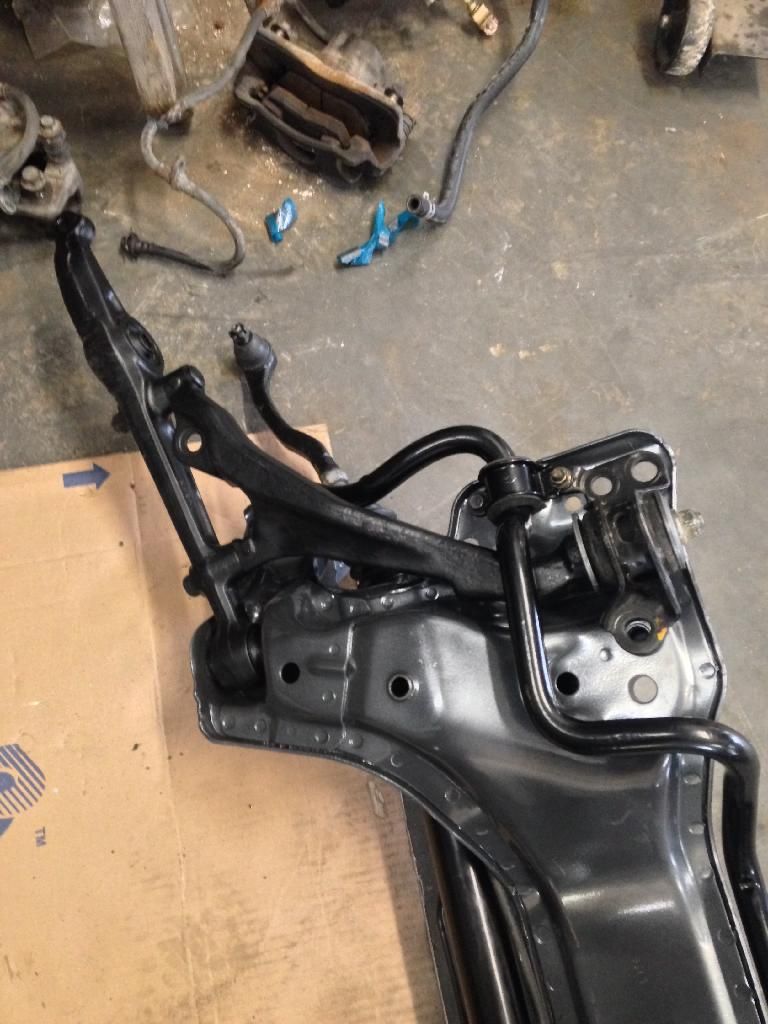
then i put the sway bar and LCA's on, im just waiting on my sway bar links and the loop/fittings for the power steering delete
over the past couple of days ive done some assembly and cleaning of the steering rack / sub frame
first was to clean up the steering rack and replace the outer tie rods and boots. cleaning was a breeze with the good ol' wire wheel on the brush and some degreaser and rags for the other stuff


then in the middle of doing that the girl came and brought me sushi

then i put the sway bar and LCA's on, im just waiting on my sway bar links and the loop/fittings for the power steering delete


 04-29-2014, 05:23 AM
#24
Honda-Tech Member
Thread Starter
UPDATE:
APRIL 29th 2014
this is over the past 2 weeks, finally got around to installing all my engine "upgrades"
exedy clutch kit
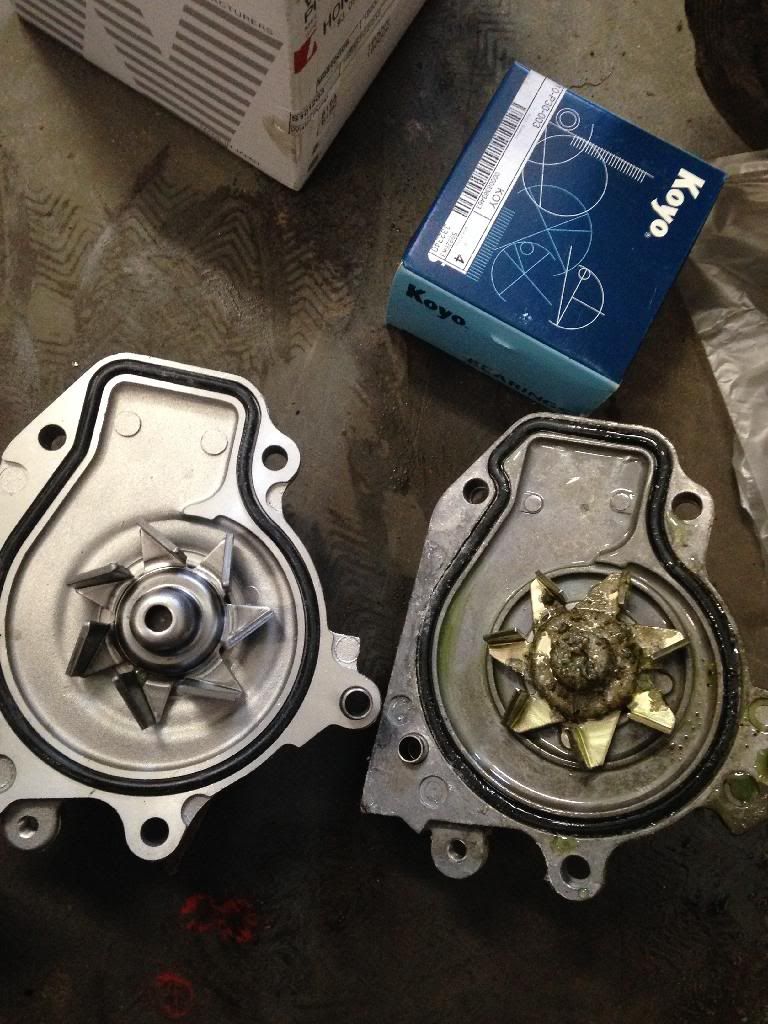
timing belt
Water pump
idler pully
Cam seals
head gasket
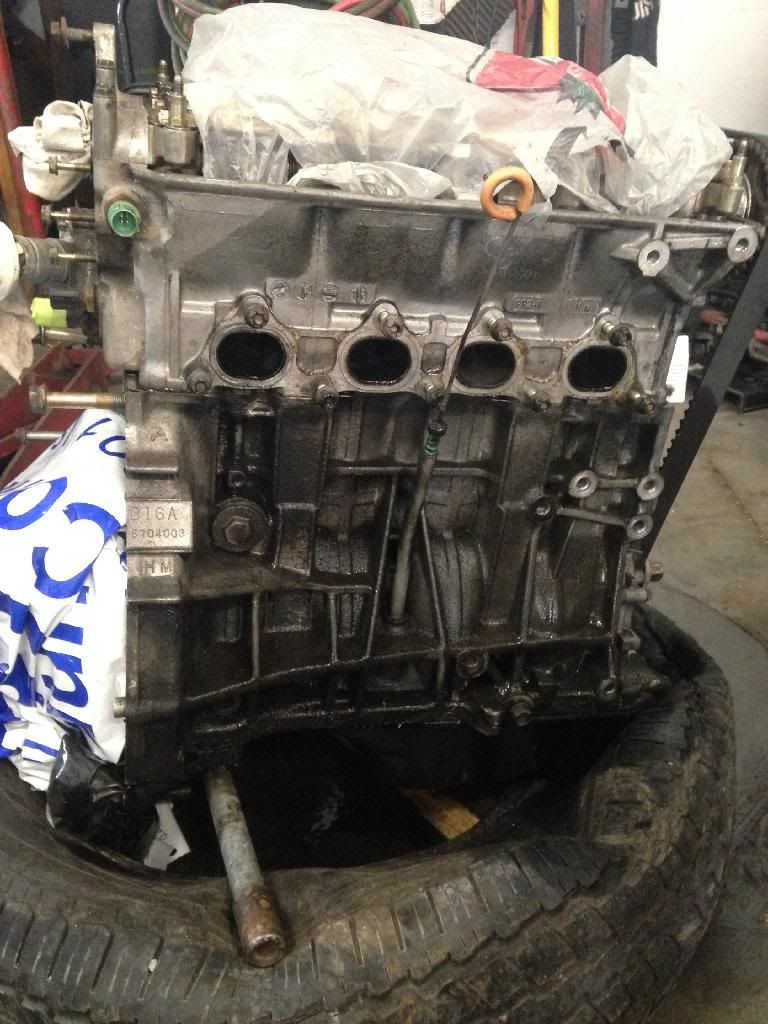
then I stripped the rest of the block down of all brackets etc so I can powder coat those black.
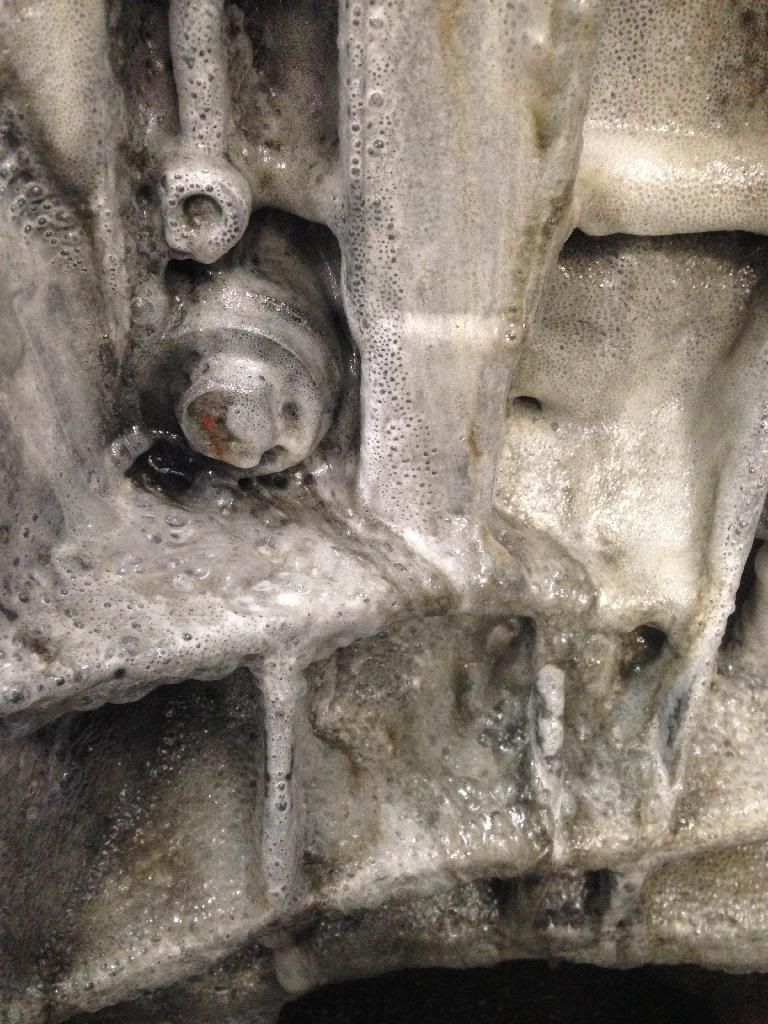
started de greasing the trans and engine block to send out for paint.
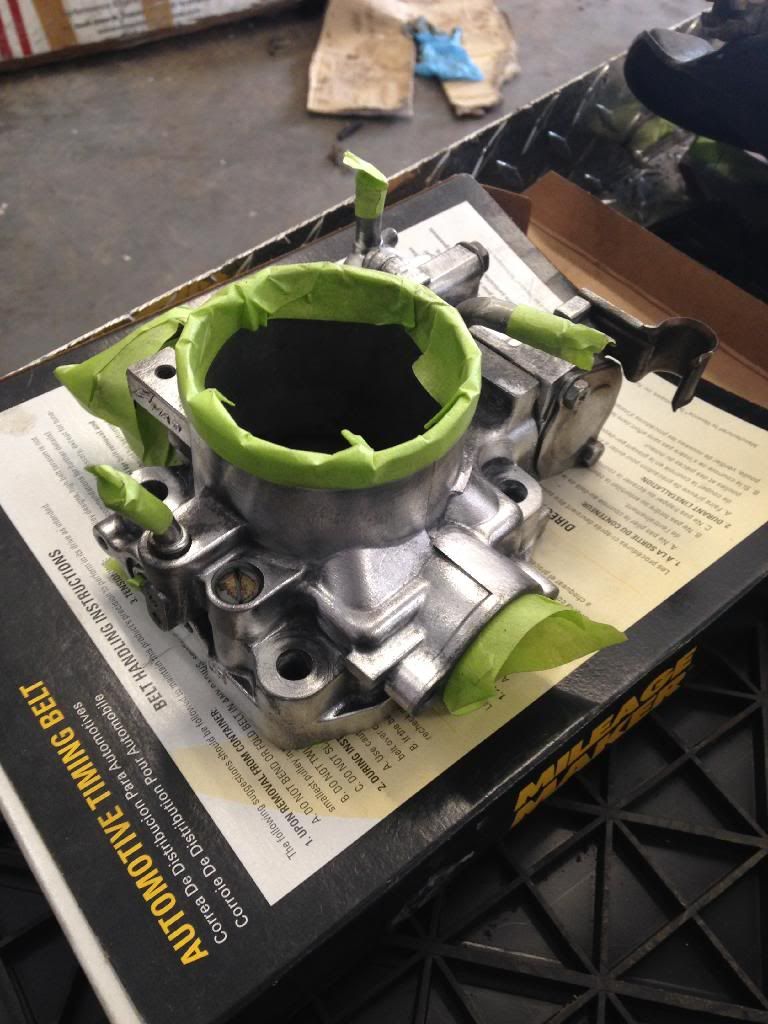
Spent about 3 hours cleaning and prepping my throttle body for paint aswell, cleaned the iacv and installed the 2 with a new gasket of course.
APRIL 29th 2014
this is over the past 2 weeks, finally got around to installing all my engine "upgrades"
exedy clutch kit
timing belt
Water pump
idler pully
Cam seals
head gasket
then I stripped the rest of the block down of all brackets etc so I can powder coat those black.
started de greasing the trans and engine block to send out for paint.
Spent about 3 hours cleaning and prepping my throttle body for paint aswell, cleaned the iacv and installed the 2 with a new gasket of course.


 05-12-2014, 06:15 AM
#25
Honda-Tech Member
Thread Starter
UPDATE MAY 12th 2014
over the past weekend I got some stuff done, especially now the warm weather is here I'm getting more motivated
A few little purchases
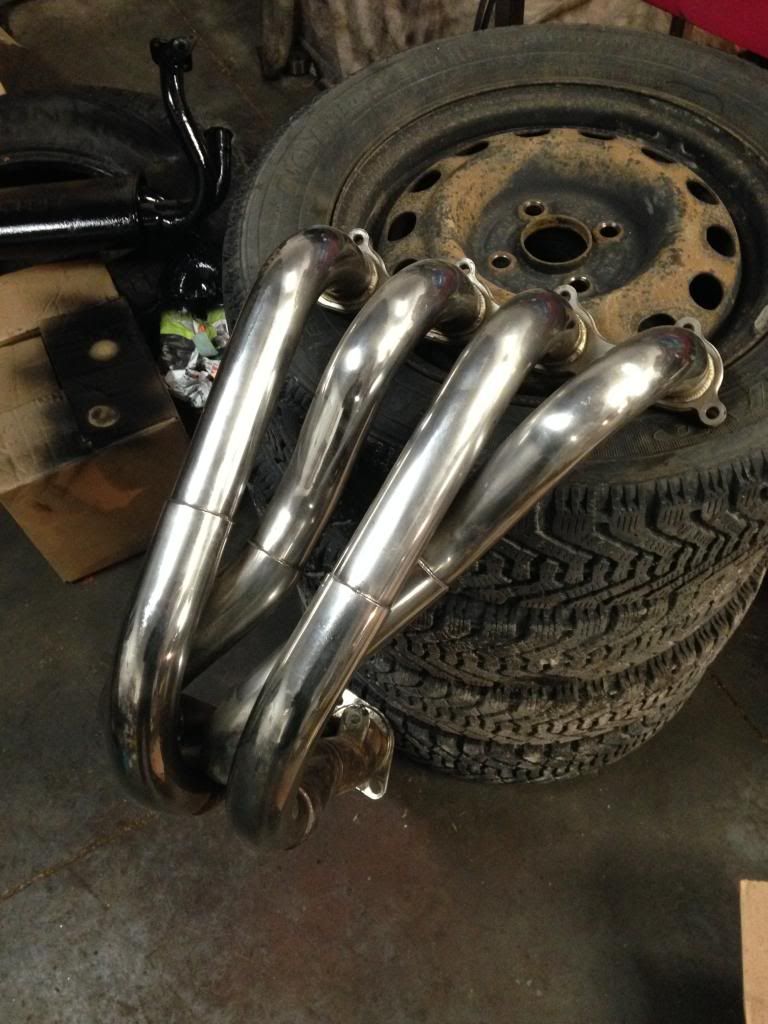
skunk2 header off a friend of mine that I already polished for him when he bought it
now I have the header to go with my full skunk2 exhaust system
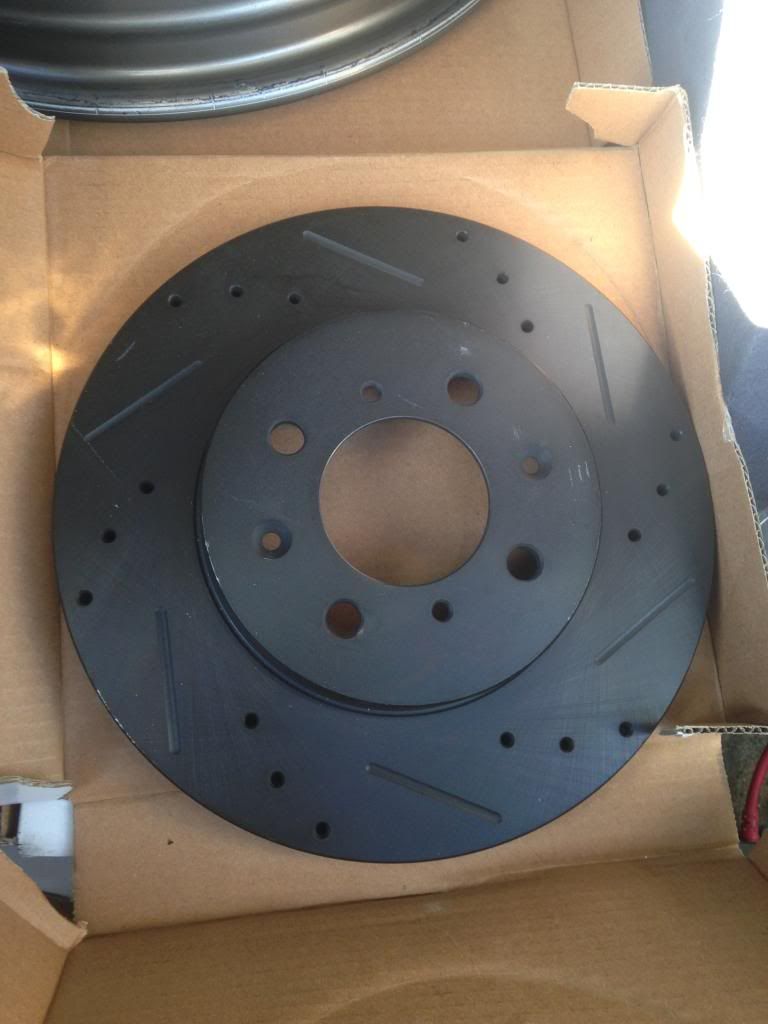
drilled and slottled black ceramic coated rotors
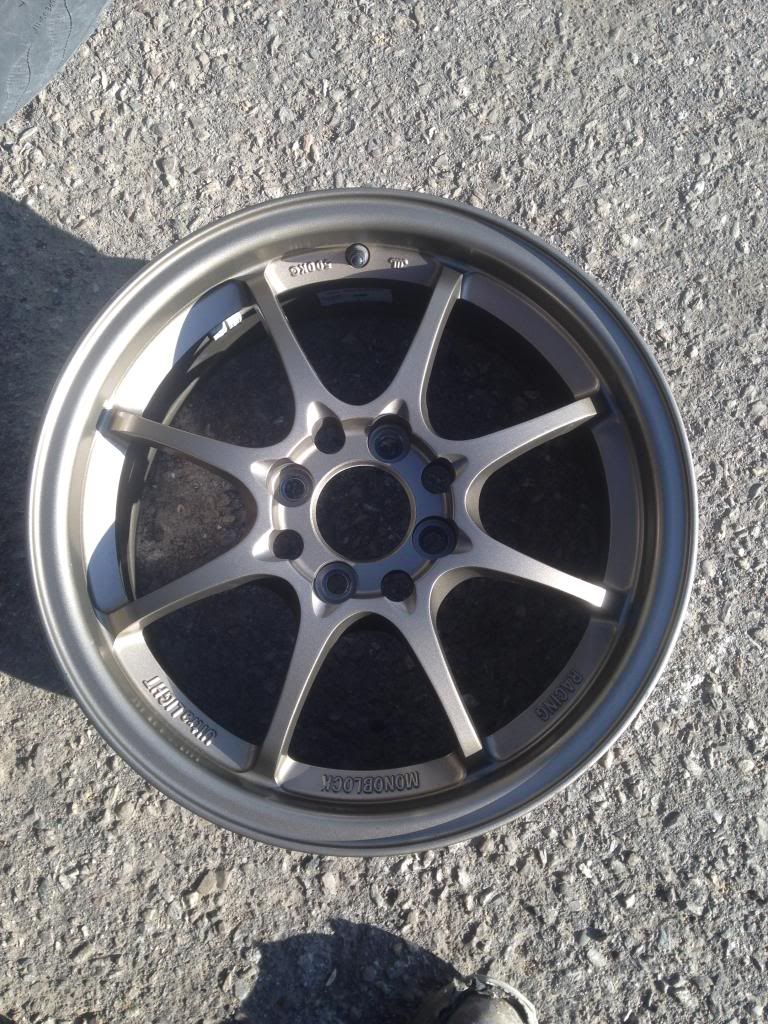
I hate buying replica wheels but for The cheap price I got them for I couldn't say no, I just need some 15" roll around wheels for now anyway
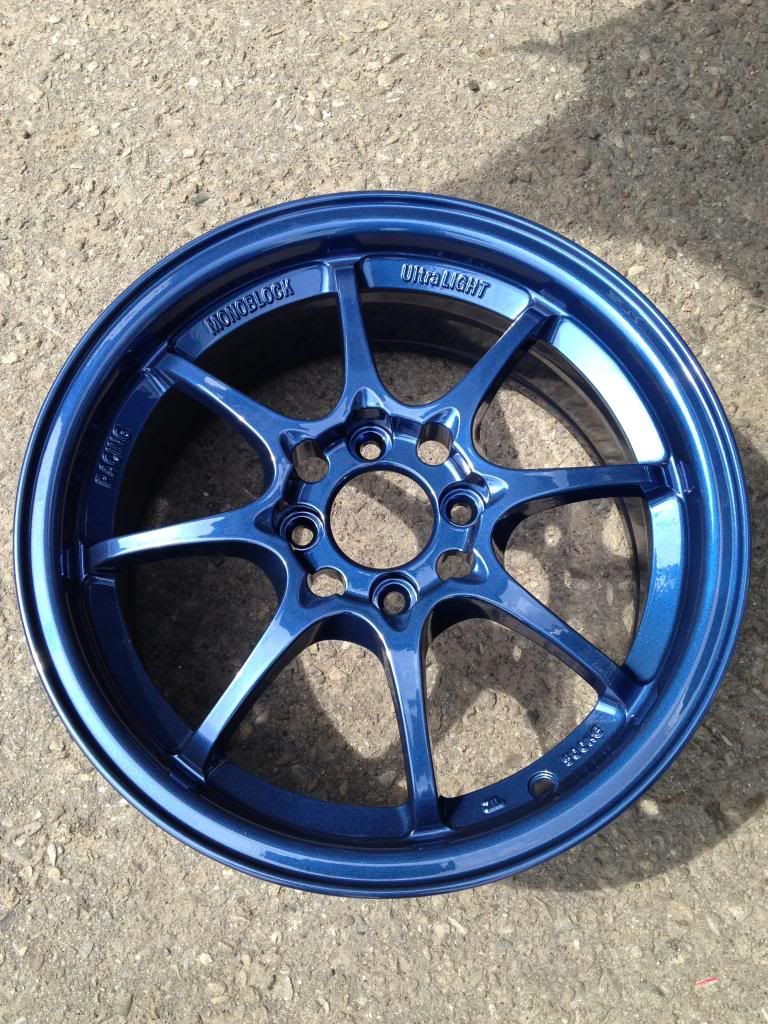
And the next day powder coated them mag blue with custom blue pearl flake added
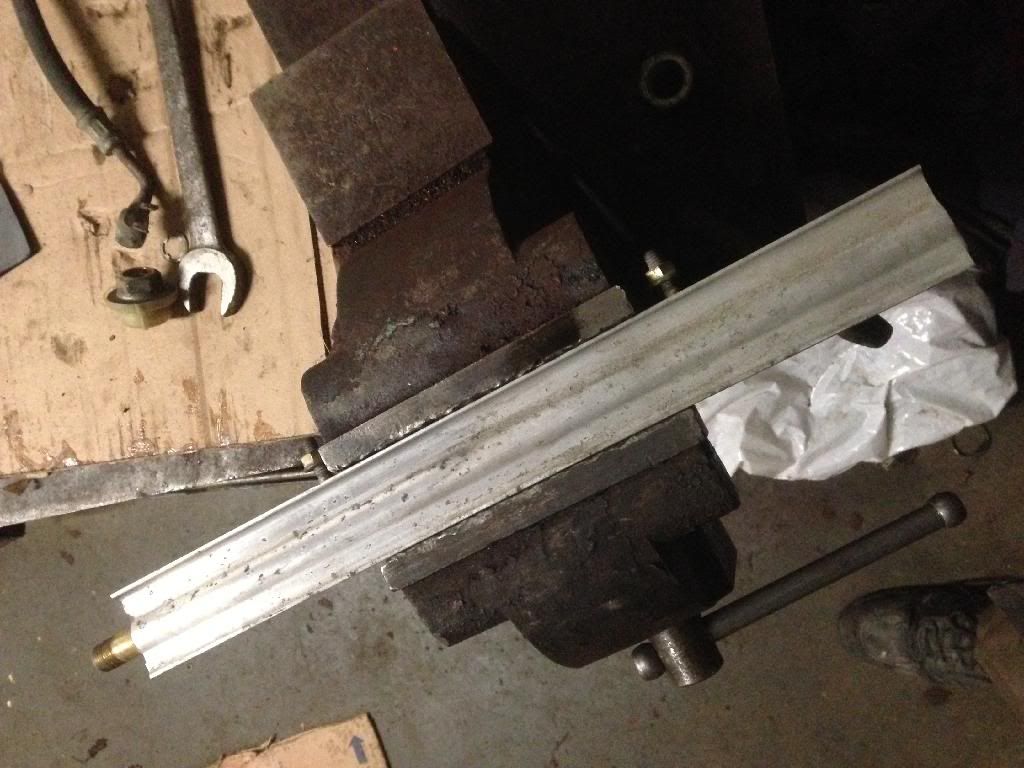
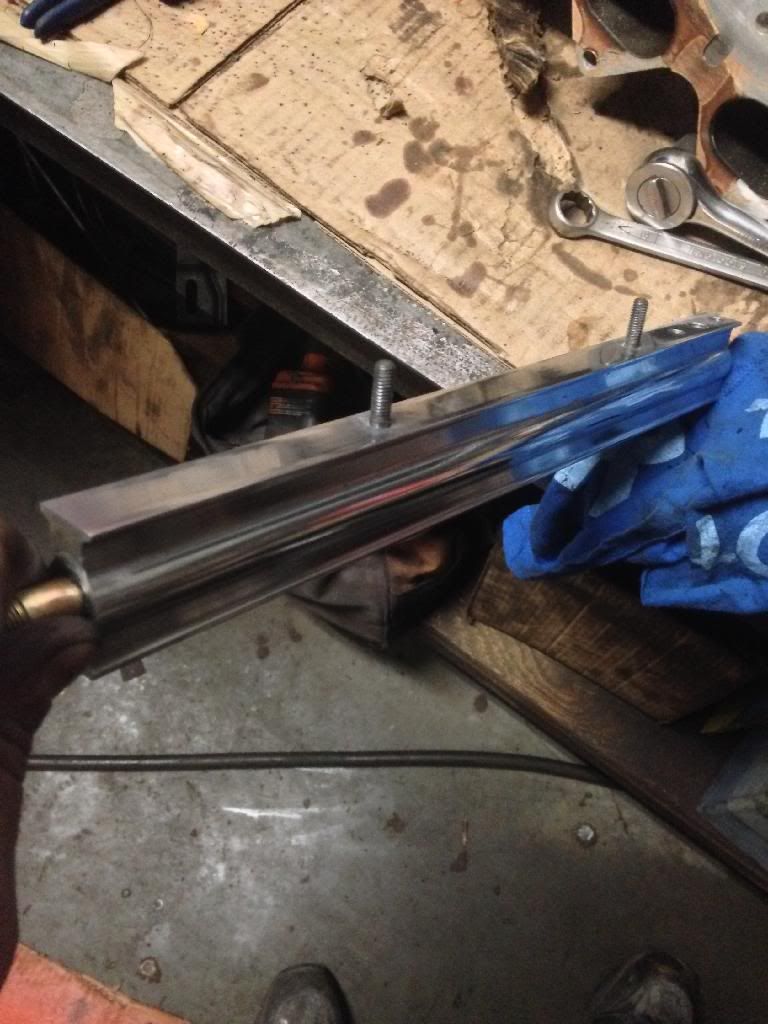
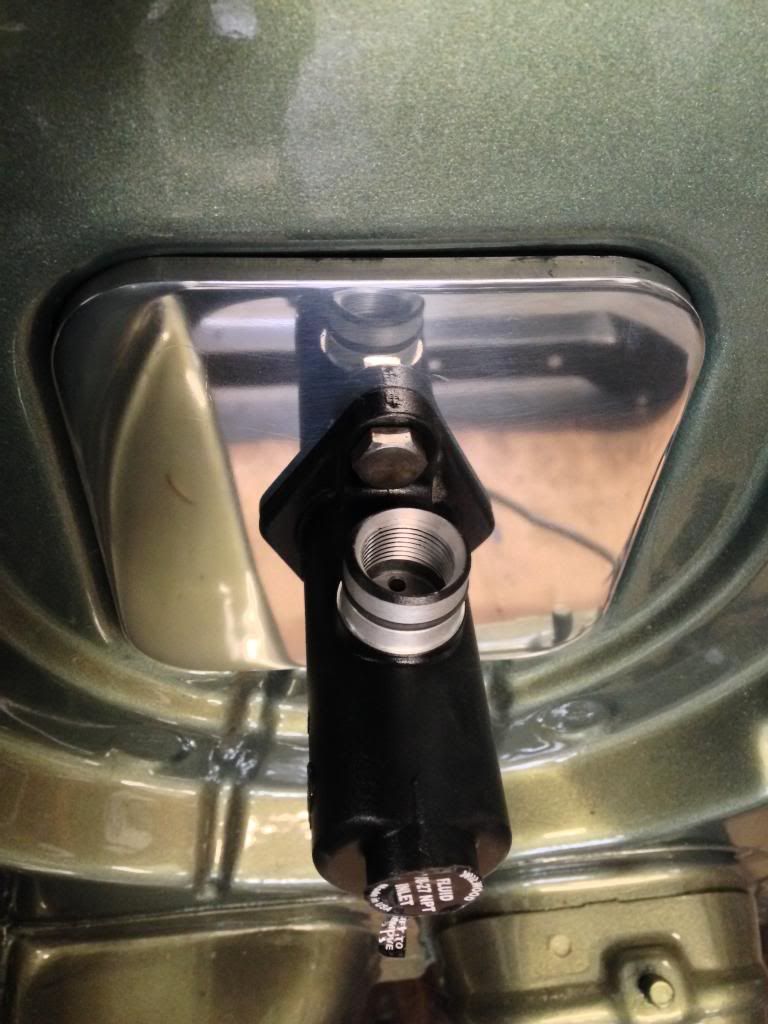
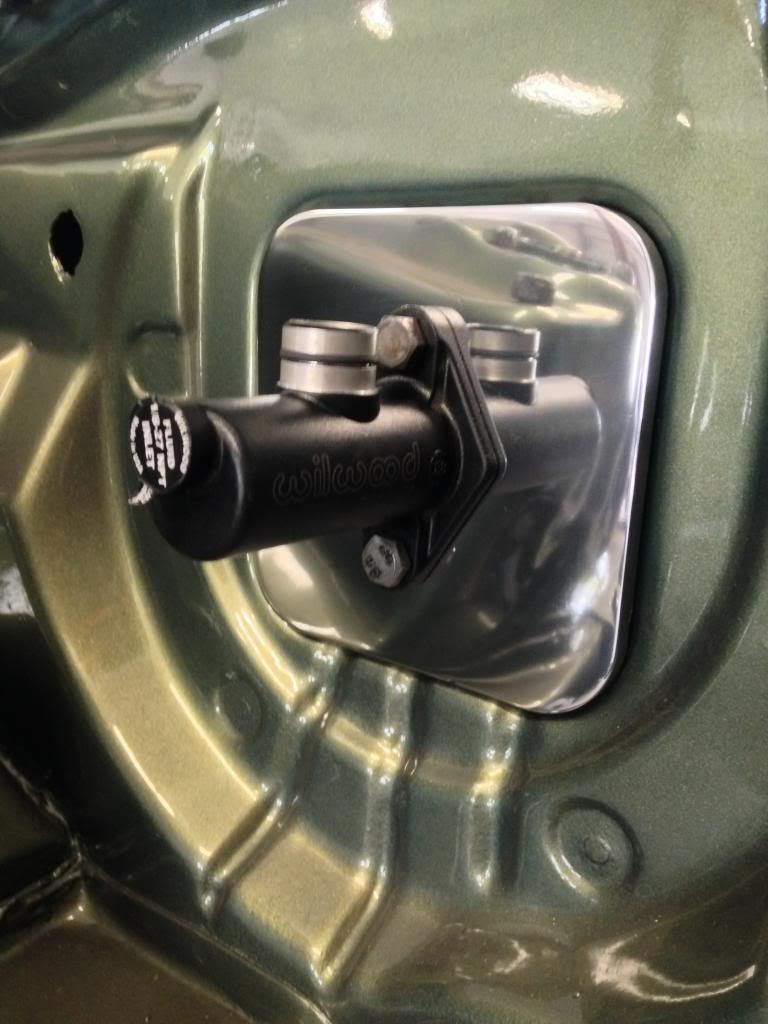
I had my friend make me a custom adapter plate for my willwood brake master cylinder. Drilled and taped from the back I made some studs to go in the back
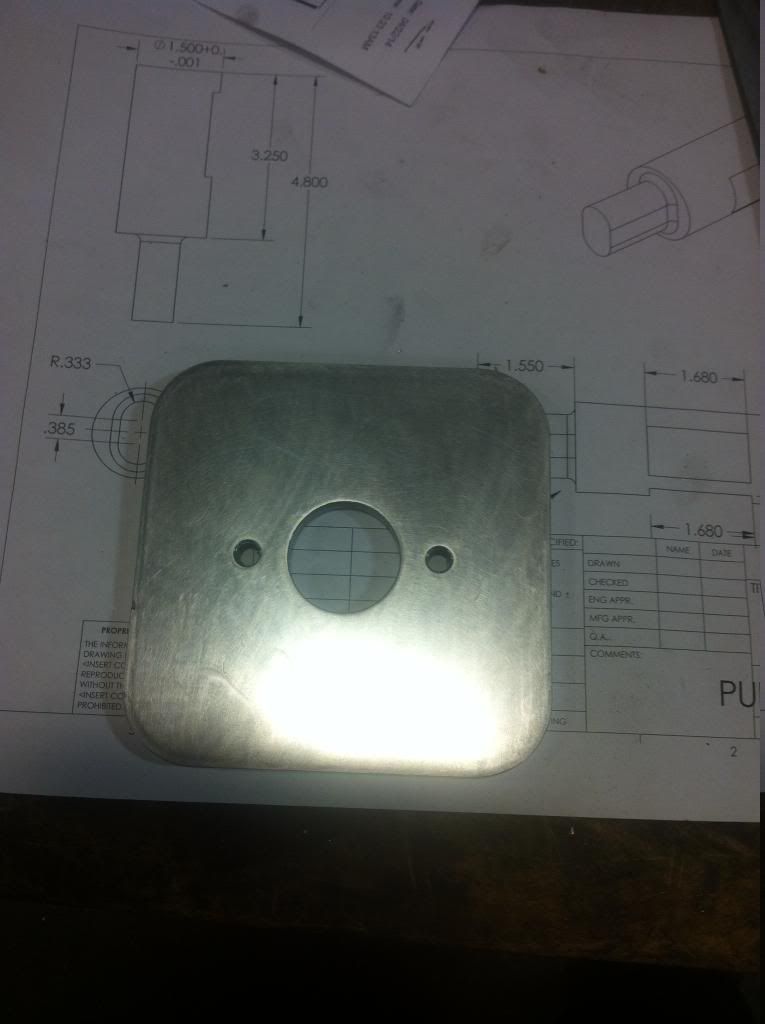
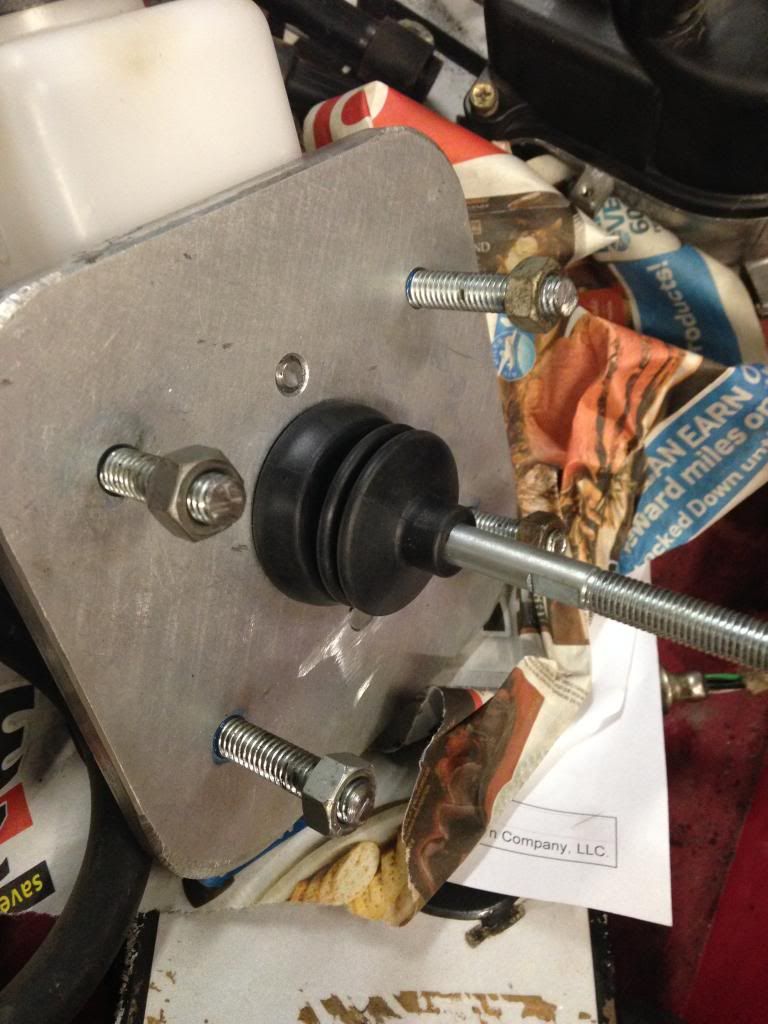
And then polished it up before final install
also made a battery box for the optima yellow top I am getting, all zinc coated before welding it to the frame rail

and lastly installed my ry wire harness with an oem grommet
over the past weekend I got some stuff done, especially now the warm weather is here I'm getting more motivated
A few little purchases
skunk2 header off a friend of mine that I already polished for him when he bought it
now I have the header to go with my full skunk2 exhaust system

drilled and slottled black ceramic coated rotors

I hate buying replica wheels but for The cheap price I got them for I couldn't say no, I just need some 15" roll around wheels for now anyway

And the next day powder coated them mag blue with custom blue pearl flake added

I had my friend make me a custom adapter plate for my willwood brake master cylinder. Drilled and taped from the back I made some studs to go in the back


And then polished it up before final install


also made a battery box for the optima yellow top I am getting, all zinc coated before welding it to the frame rail

and lastly installed my ry wire harness with an oem grommet
