
My JDM EG6 Civic SiR-S Restoration / Build
 10-04-2013, 10:52 AM
#1
Honda-Tech Member
Thread Starter
Join Date: Aug 2008
Location: Baton Rouge, LA, USA
Posts: 357
Likes: 0
Received 0 Likes
on
0 Posts
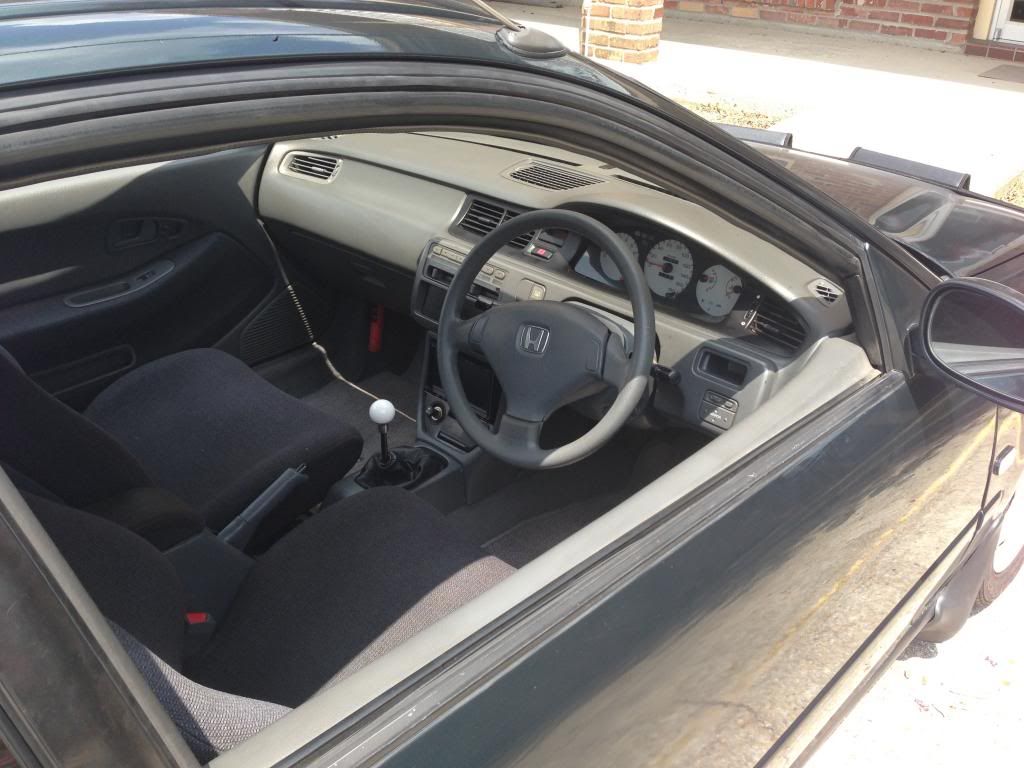
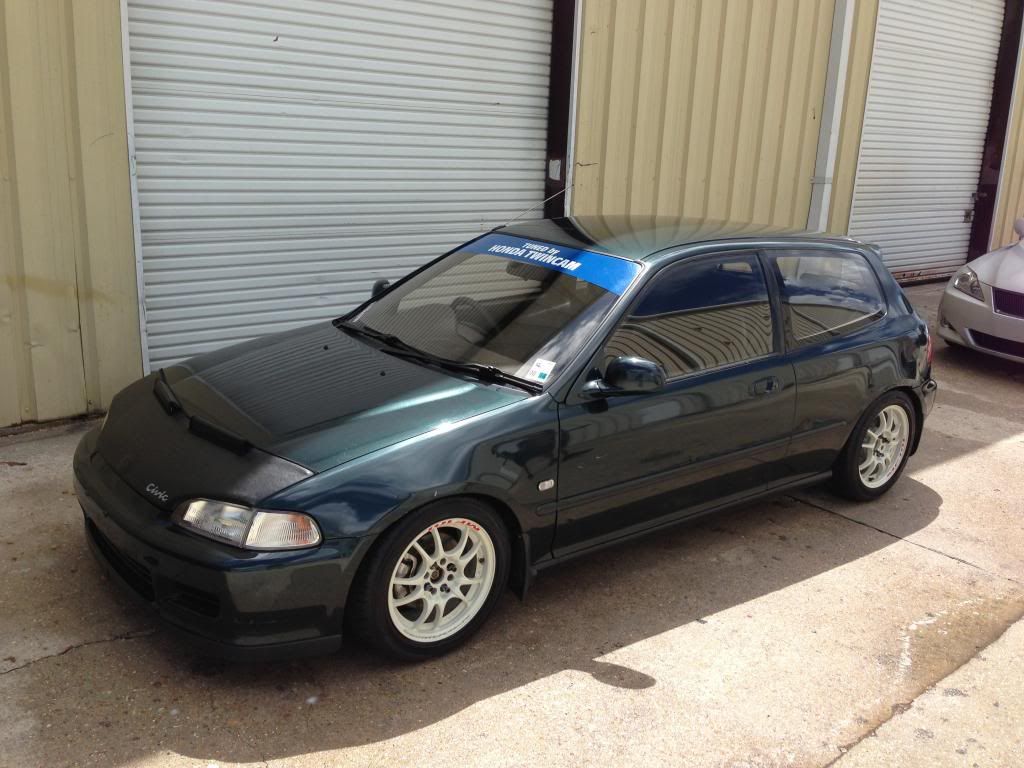
Hey guys, I've been working on a new project and thought I'd make a thread... has been a long time since I've made a build thread. haha. Anyway, I picked this car up from a guy in TN and it definitely has been driven.
I've built a bunch of cars over the last few years and I have always wanted a really nice, stock-ish EG6. Above all I wanted it to be authentic and reliable/comfortable enough to daily drive. Since most cars built now have shaved this and that with huge wheels, ect I want to stay away from that. I will also be keeping the factory B16 power plant which many say I should swap for a K20 but I'd rather not.
This is how I got the car:

Cleaned up:
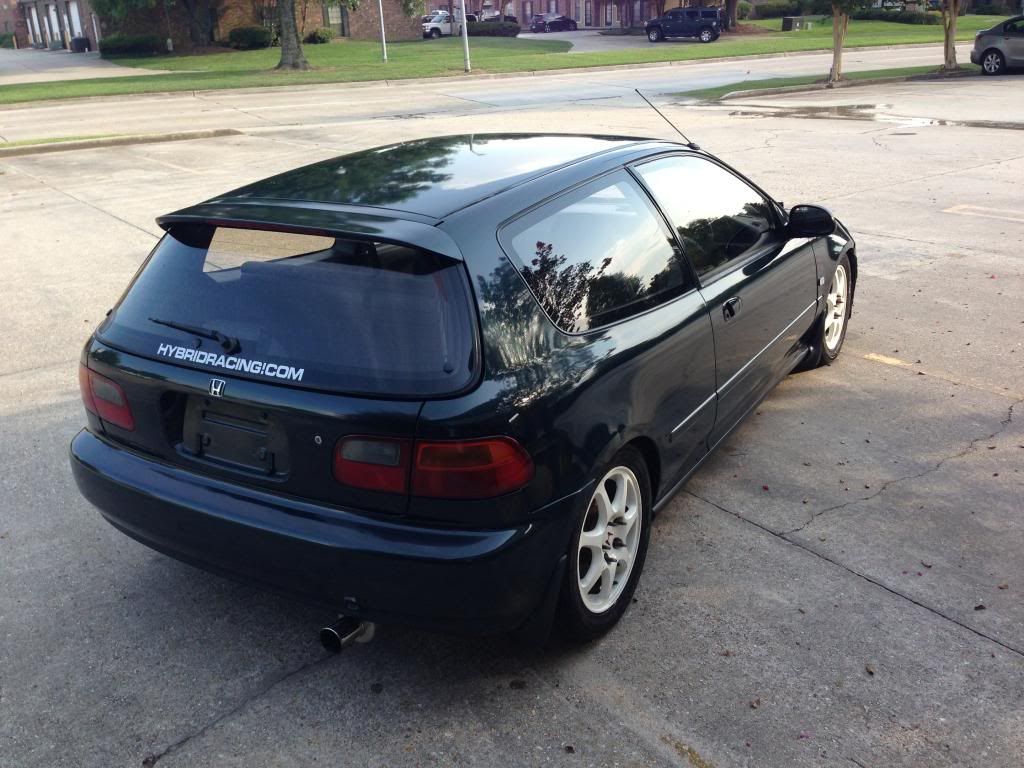
The car is a 1992 Honda Civic SiR-S EG6. I've been digging into the history of the car a bit and it seems to be pretty cool. The car has the factory Lausanne green paint on it, however it appears that it has been painted before... twice in fact. I have decided to change the color... although I do my personal battles about it. I said I wanted to keep it original but the truth is, I just don't like this color.
With that said, I started prepping the car for paint, but before I could do that, I had to change the wheels and brakes..ect.
I don't like 5 lug on EG and because I wanted to keep this as close to a factory type build, I sold the 5 lug and installed the stock 4 bolt suspension back on.
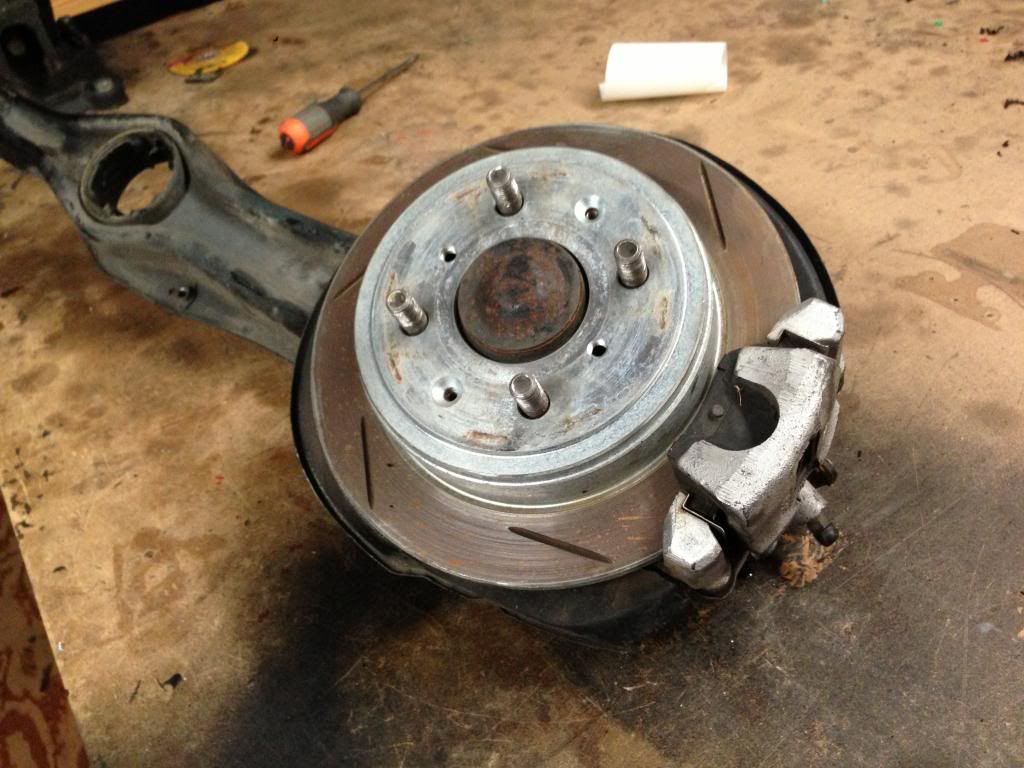
I didn't snap any pictures of the rotors, pads or any of the bushings I used... oh well.
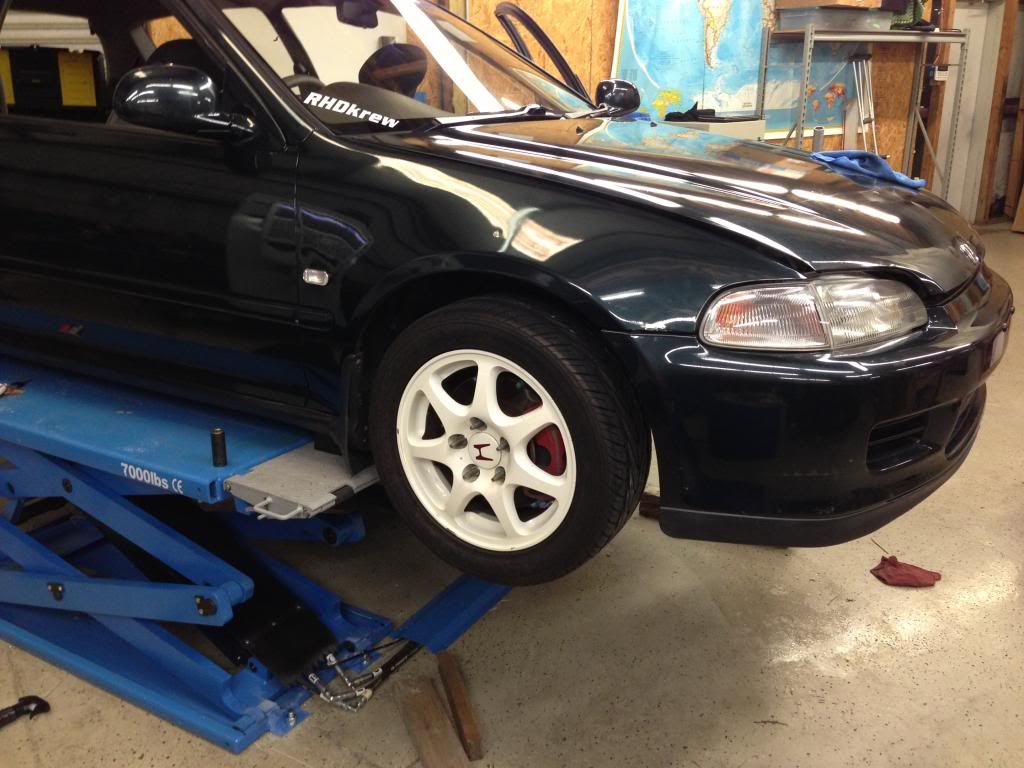
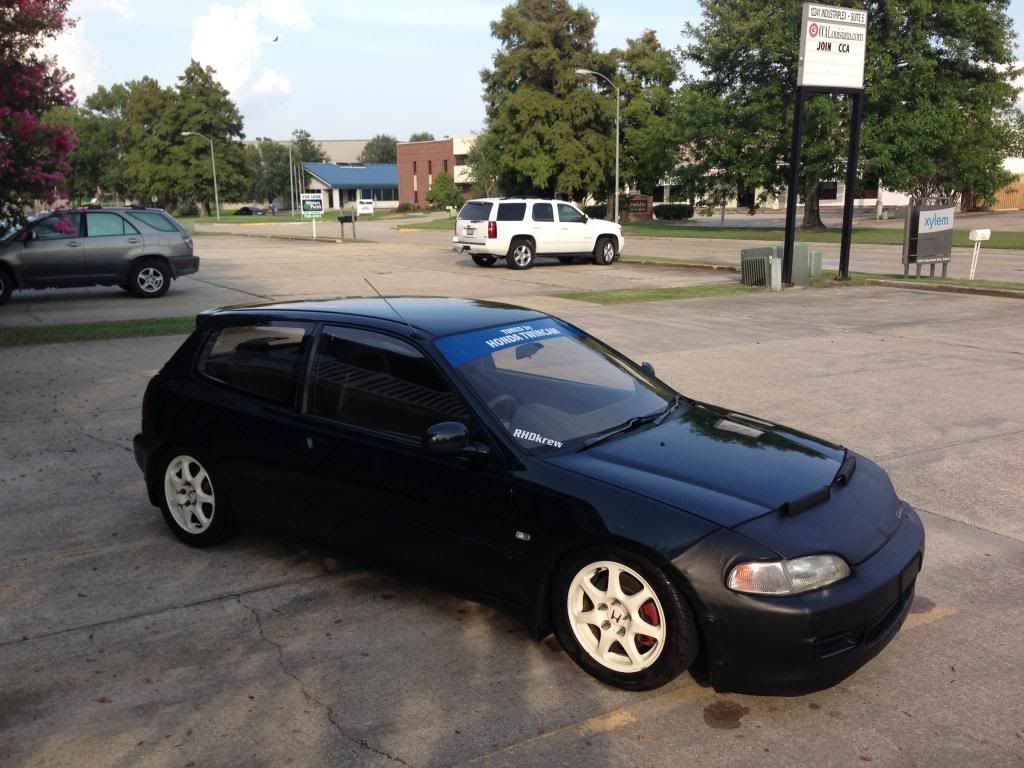
I picked up a set of 15x7 Mugen MF10Ls from a buddy and threw them on with a set of kics lugs.
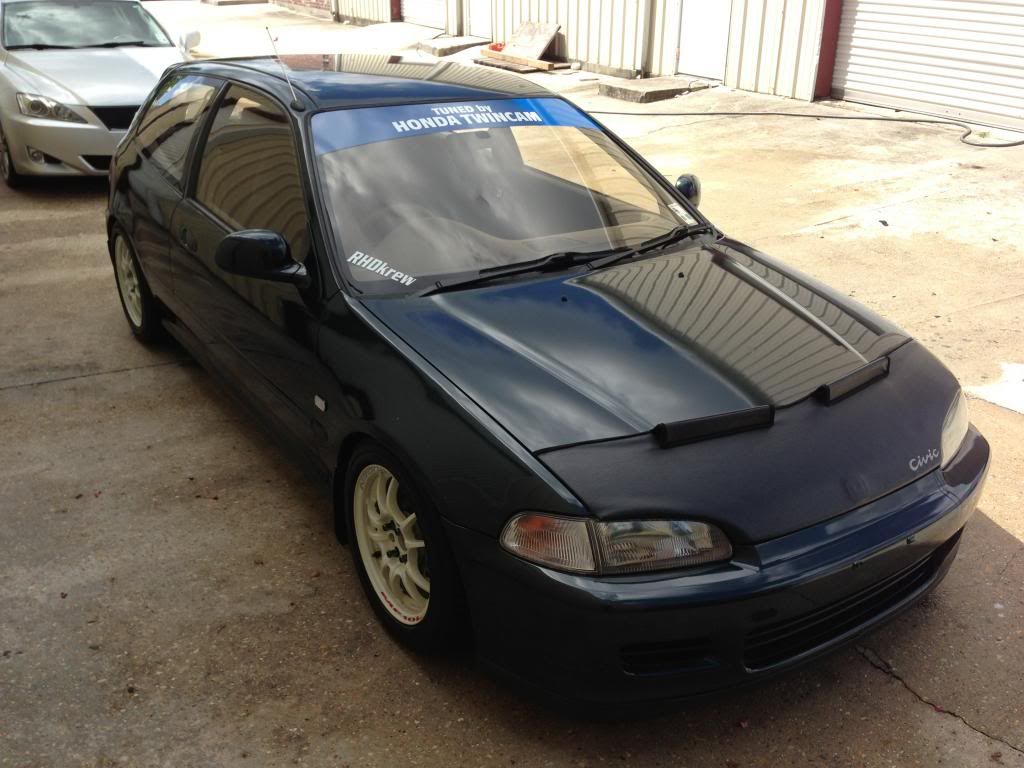
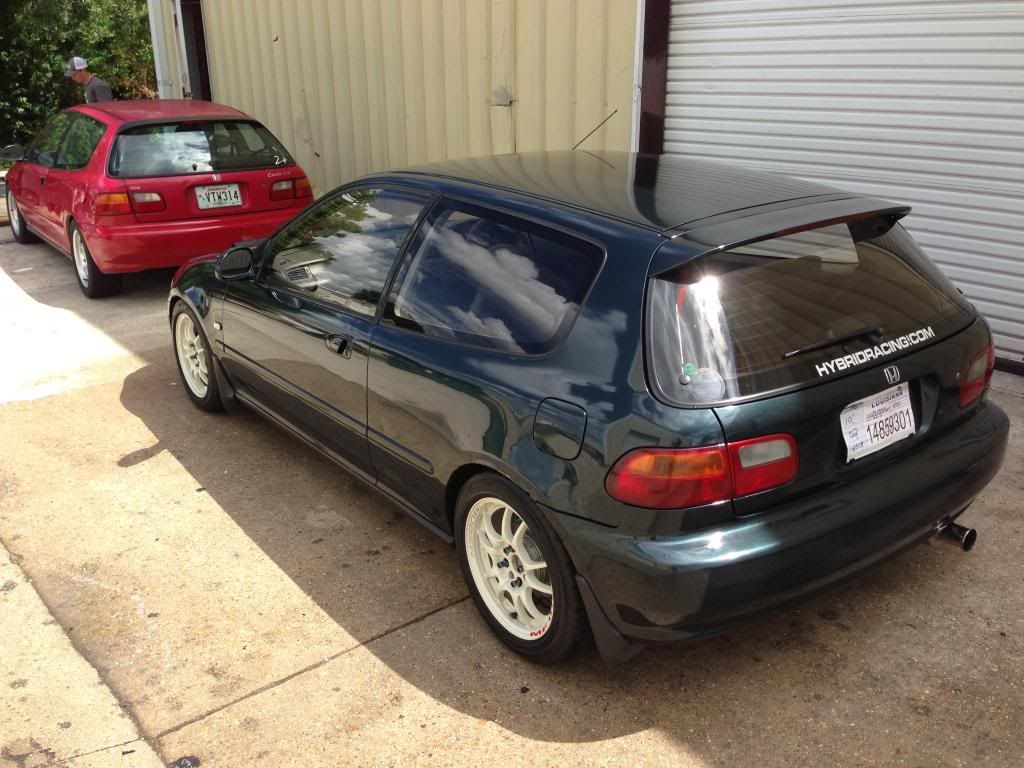
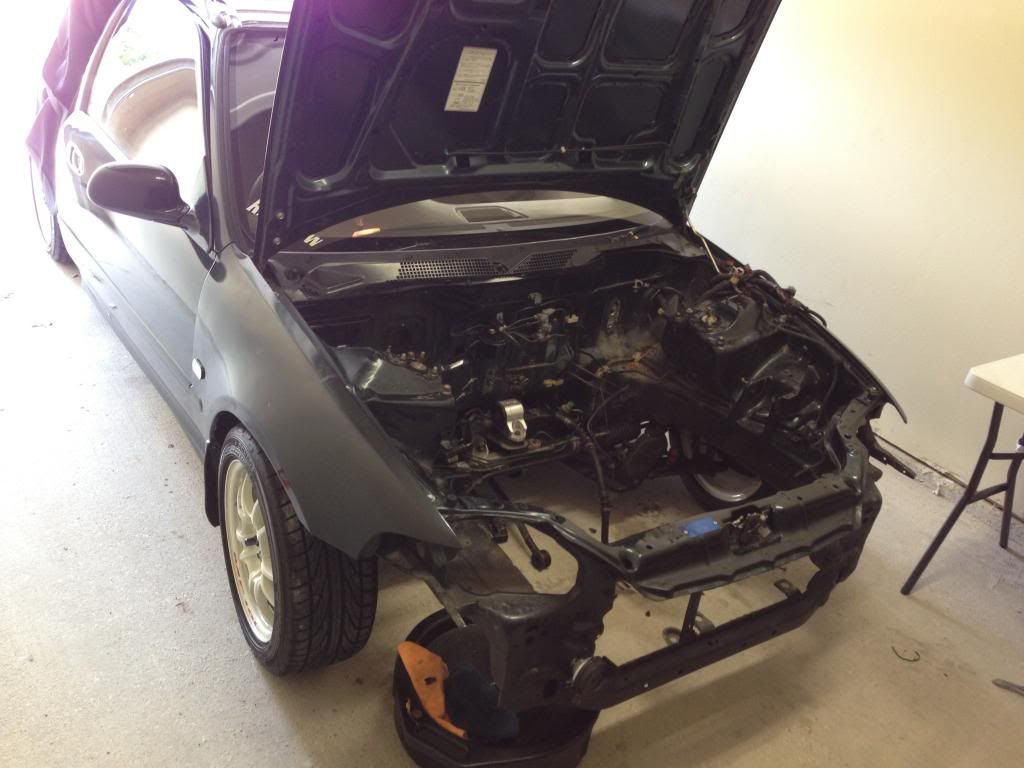
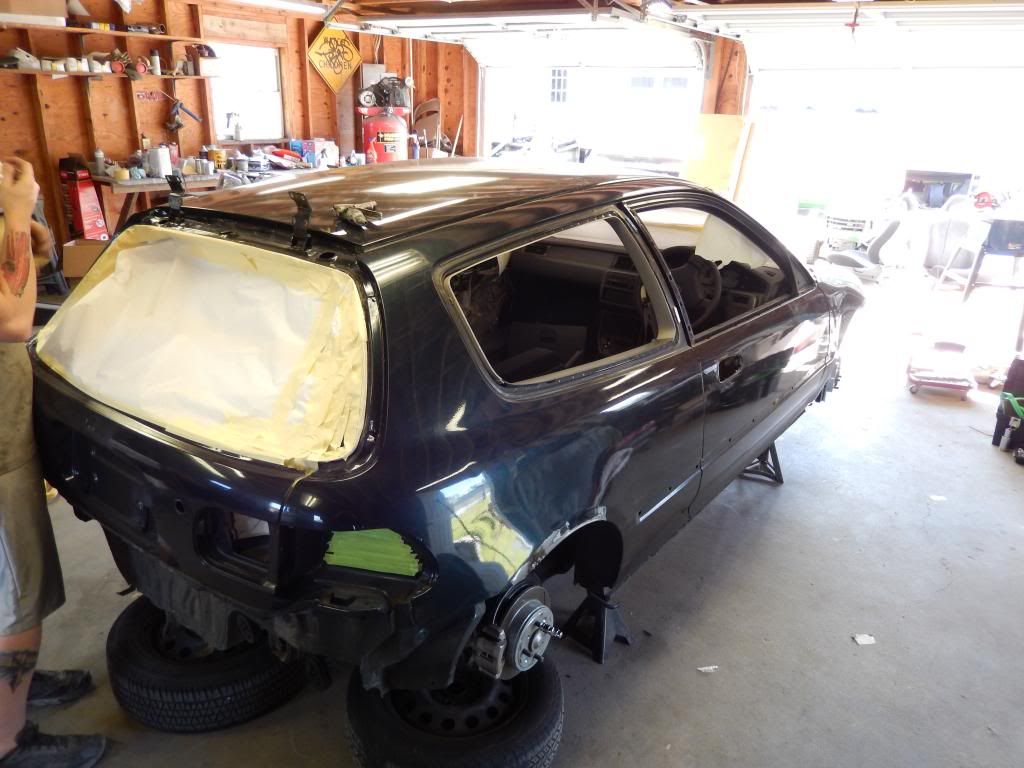
This is how the car looked before the tear down began.

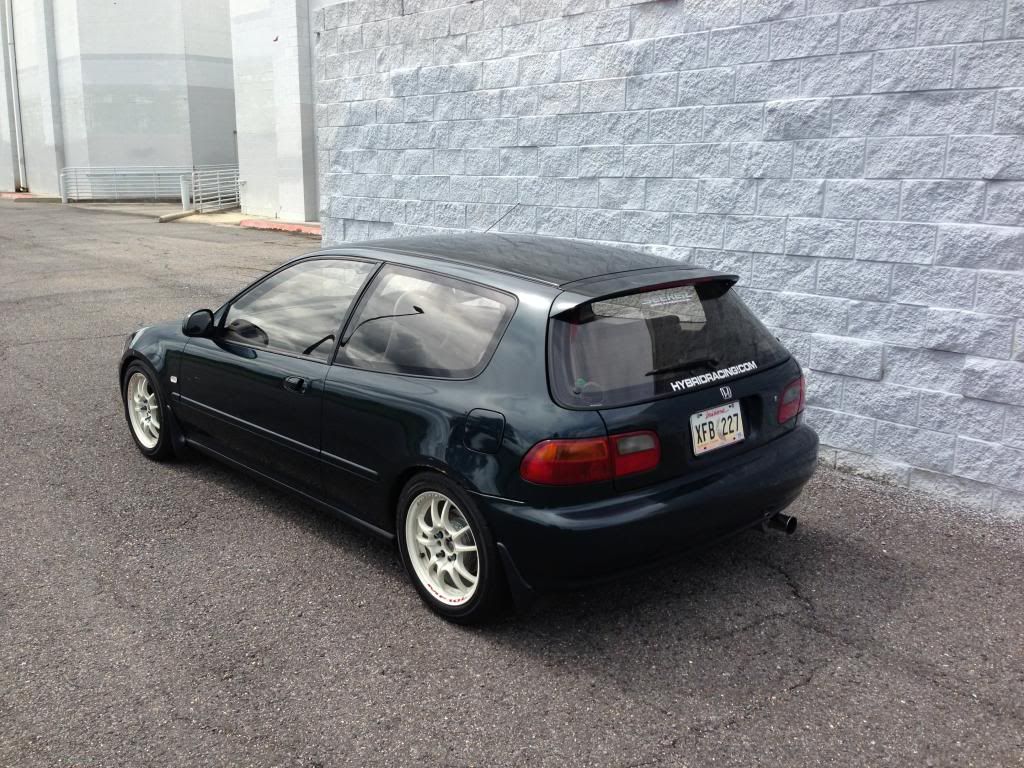
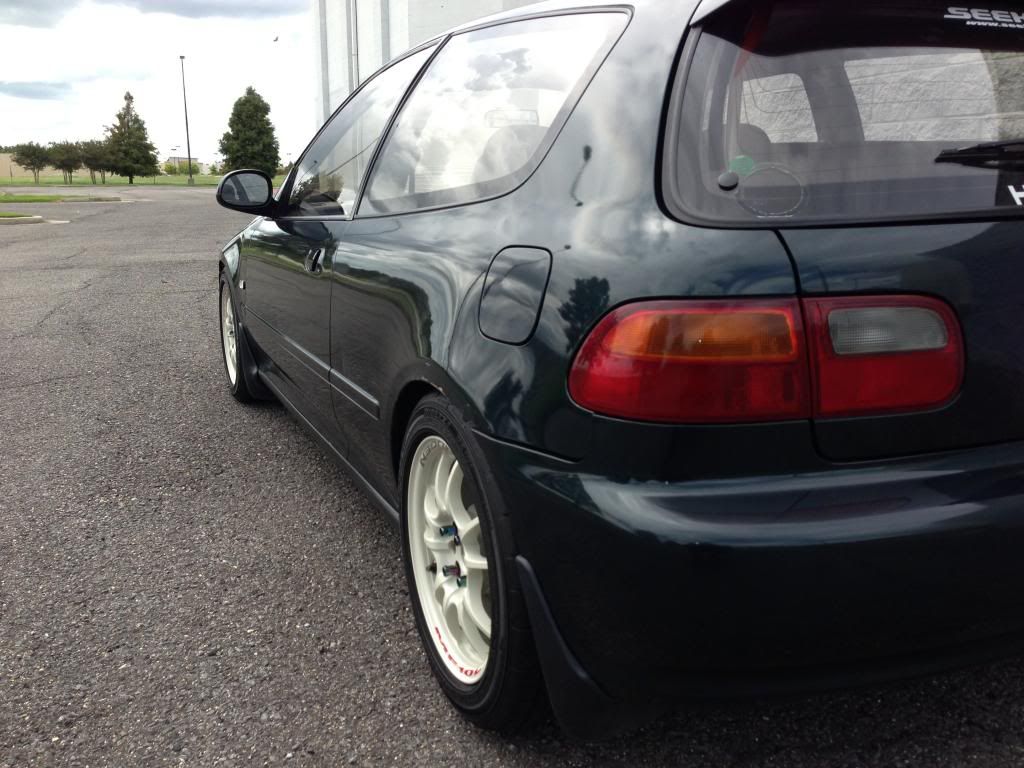
You can see the busted up quarter panel in this picture. One of the previous owners rolled the fenders and pretty much destroyed it. I'm having the whole section redone.
Put it in my garage and then the tear down began!
The car seemed really clean on the surface but as I started pulling it apart it was apparent that the car hadn't really been pulled apart, ever.


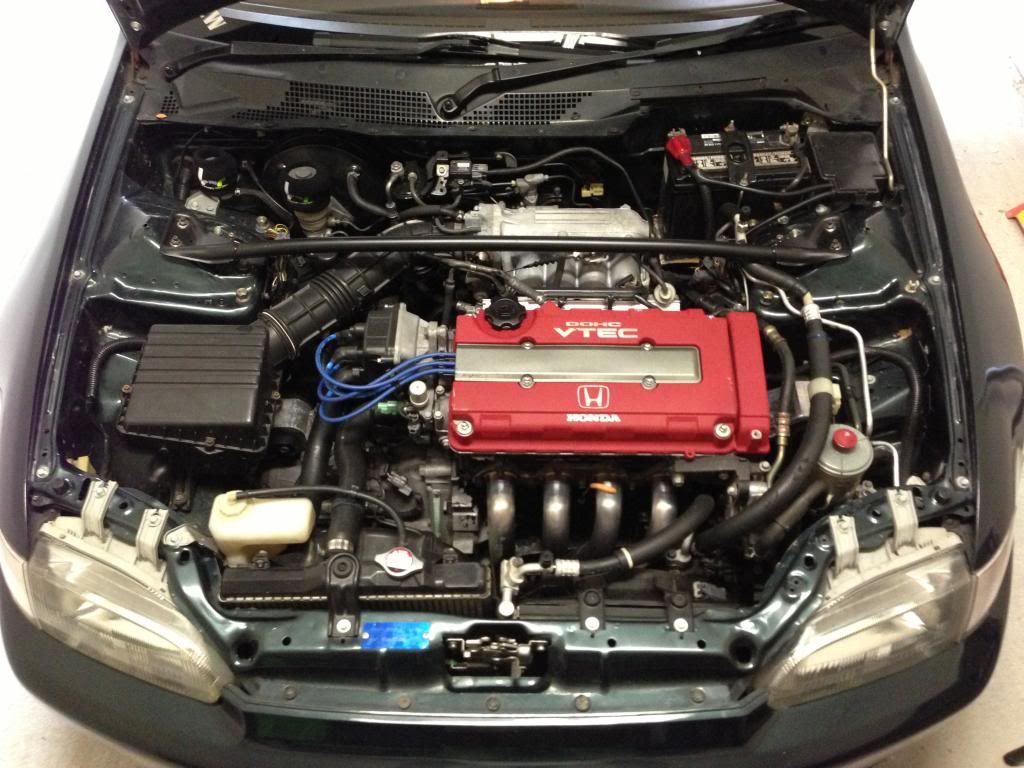
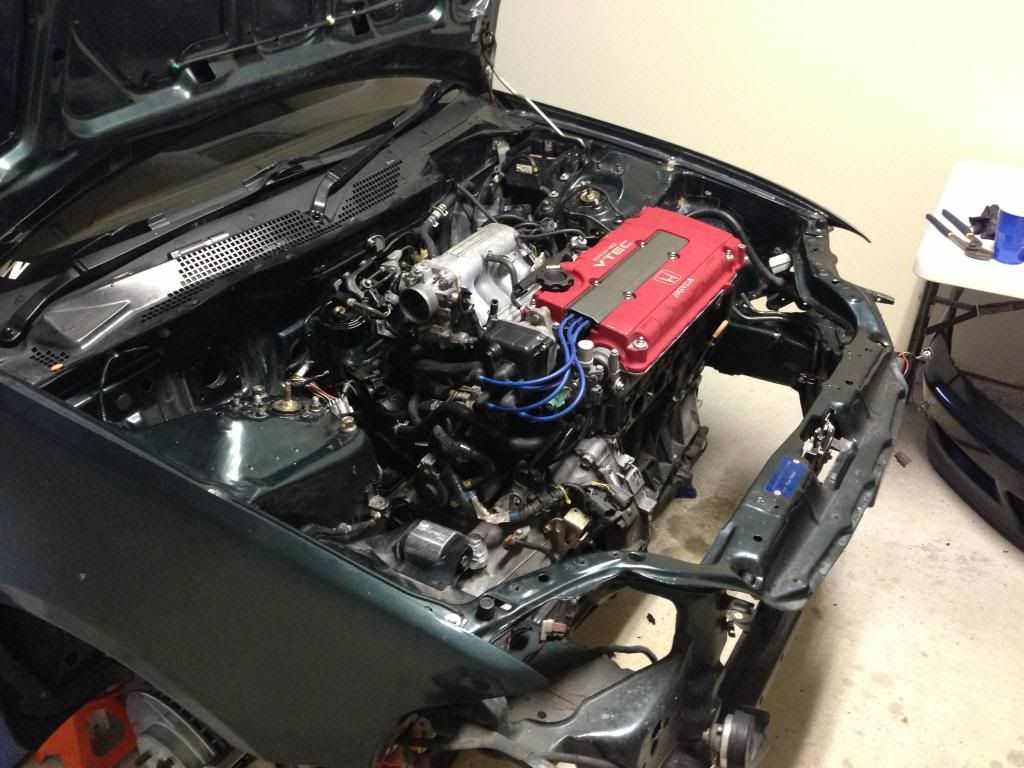
I won't be doing a brake line tuck or anything of the sort, but I am repainting the engine bay and replacing a lot of the worn out parts. Good thing because the brake and clutch master cylinders had been leaking and it was slowly rusting away at the firewall.


Ready to come out...


Almost ready to leave!
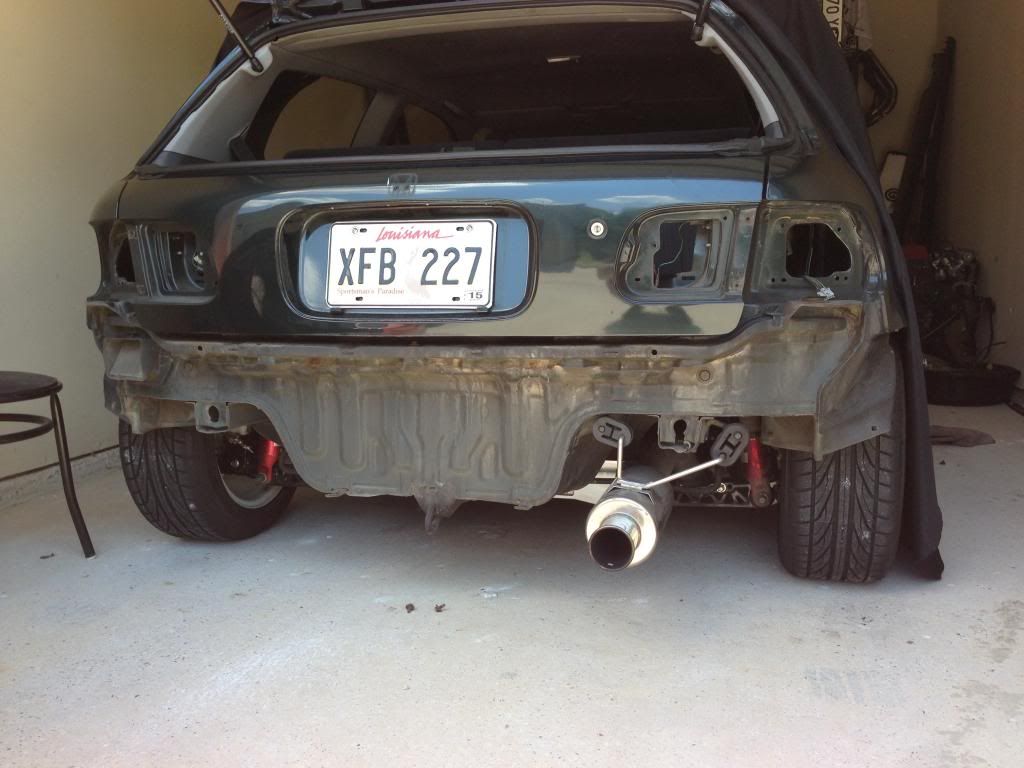
The back bumper of this car was all warped for some reason, so I pulled it off, threw it away and bought a brand new one from Honda.
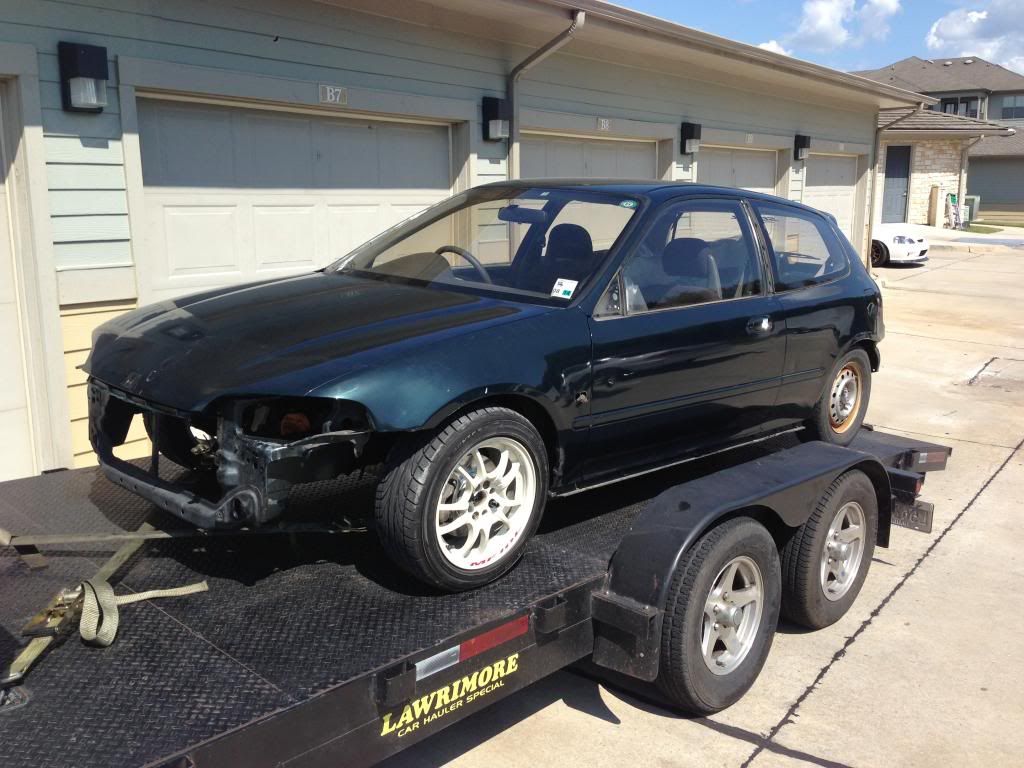
All loaded up and heading to the paint shop!

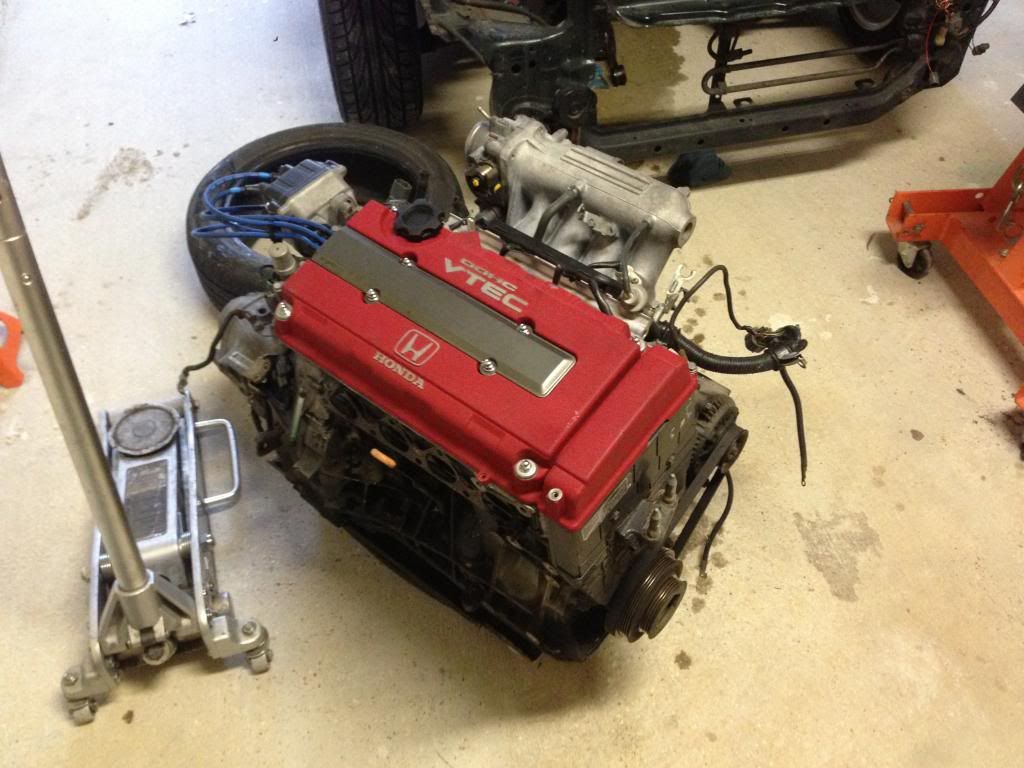
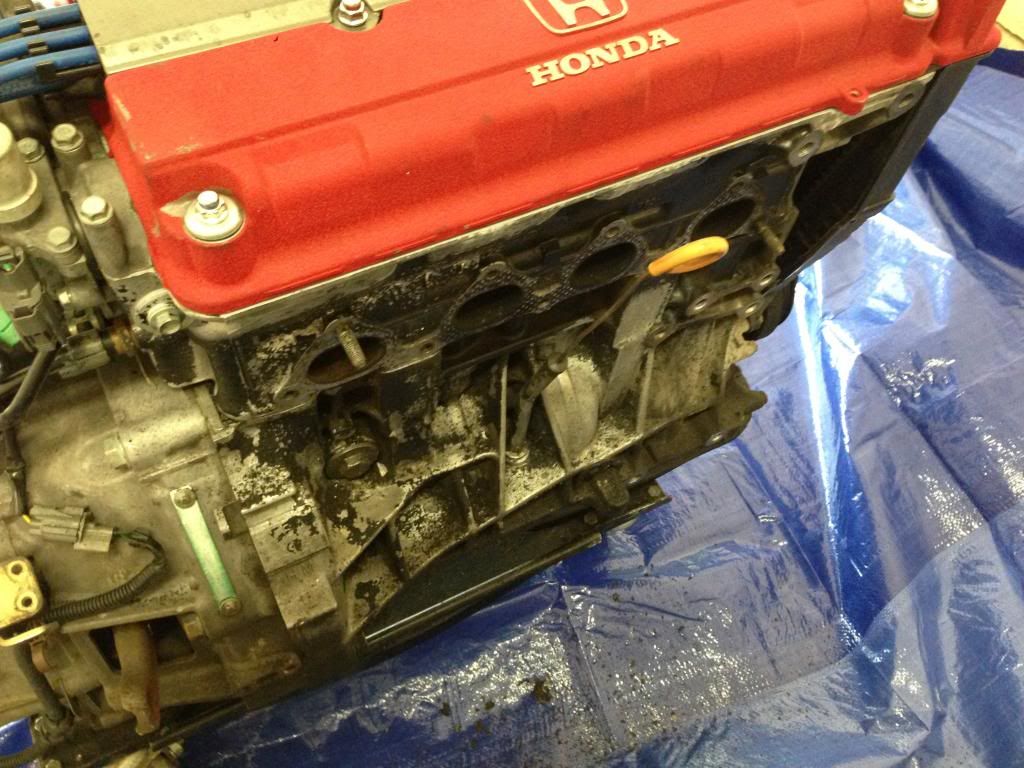
The motor out and getting ready to be cleaned.

I took these pics after it had been blasted with brake cleaner and paint stripper... there were 2 old layers of engine paint.
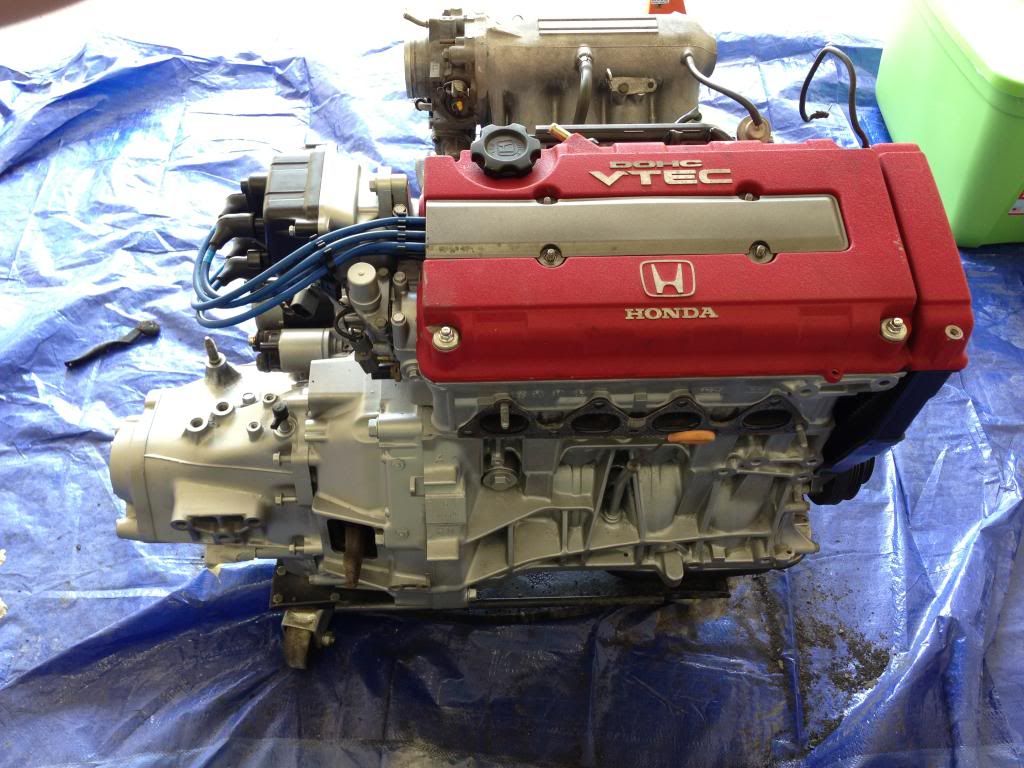
Cleaned, sealed and repainted
Some parts:

EDM Glass headlights, OEM H4H JDM lights are ****.
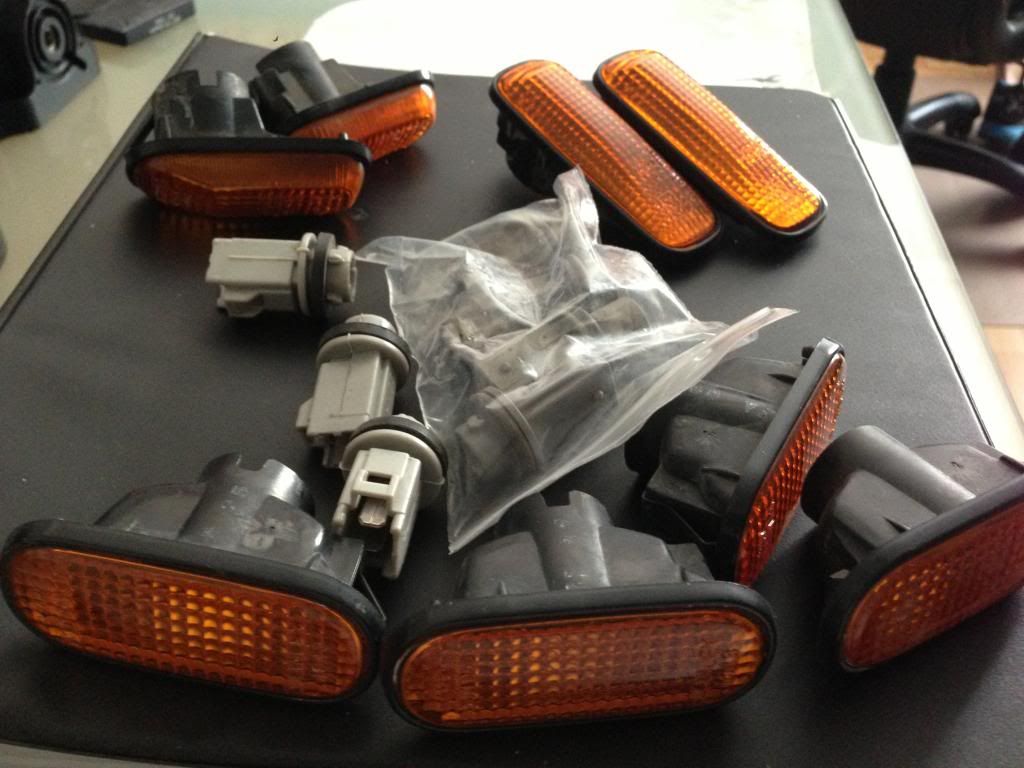
A buddy sent me a ton of side markers, I'll change my clear for amber.

I have always admired this lip and since I now have an EG to put it on, I had to have it! First molding EG6 lip!
Few other misc things:

JDM Civic cargo cover


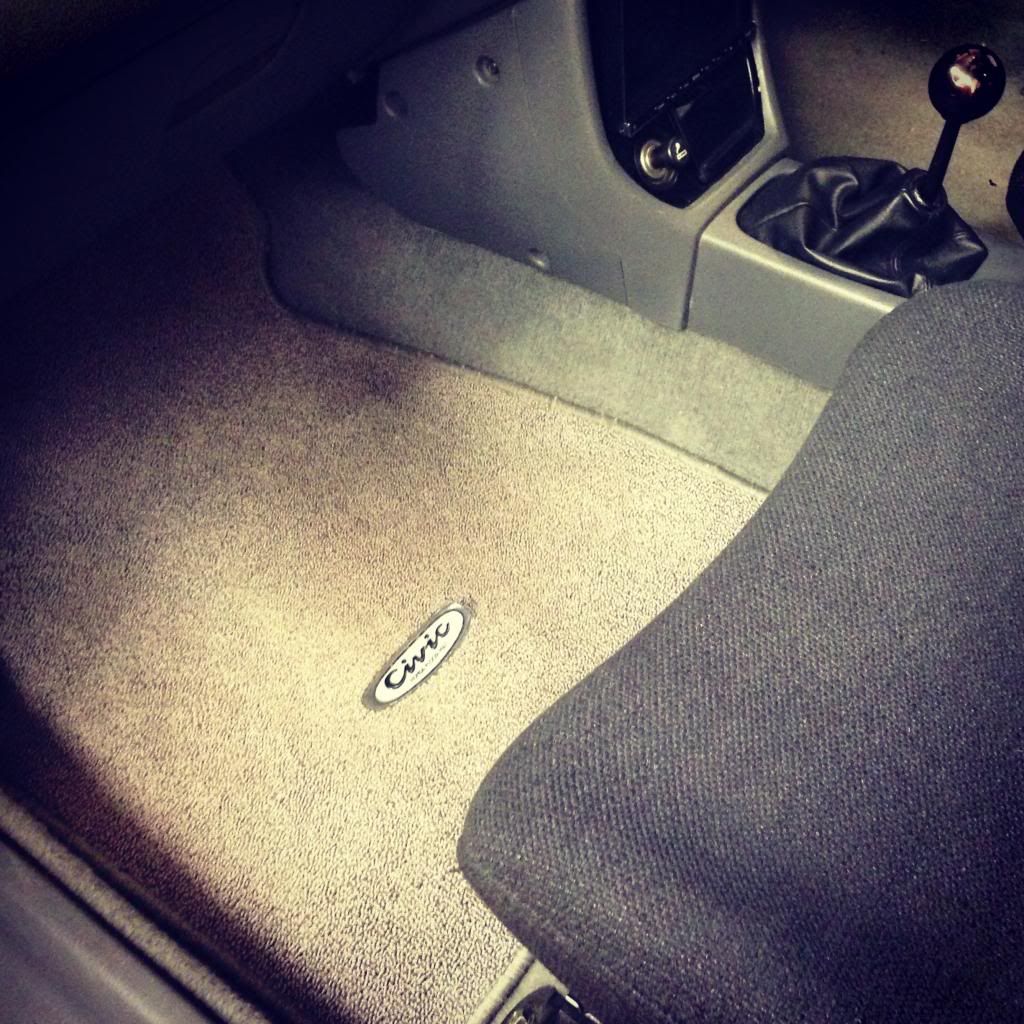
Mint EG6 floor mats
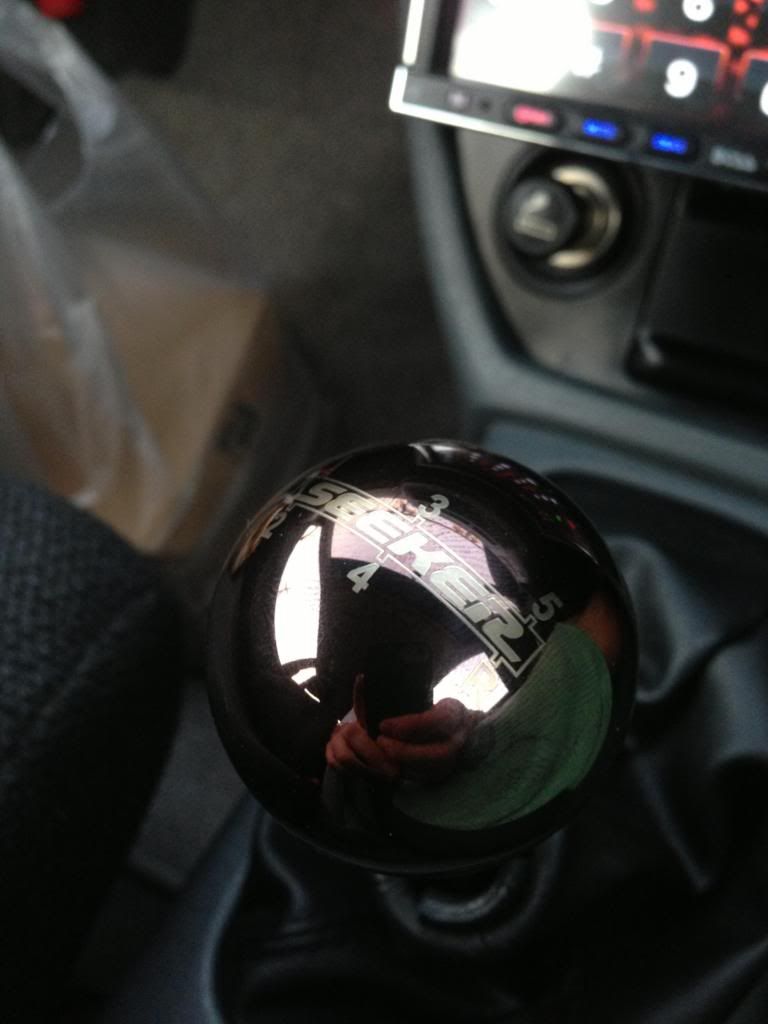
Seeker 5spd shift **** (I also have the oil and rad caps)
I have a lot of other parts for the car as well as I'm replacing all of the exterior plastics and moldings. I am also trying to get a new RHD cowl from a friend in Japan. The engine bay, jams and exterior will all be repainted a different color. I'll have more parts coming in so I'll post them when I can.
Thanks for looking!
I've built a bunch of cars over the last few years and I have always wanted a really nice, stock-ish EG6. Above all I wanted it to be authentic and reliable/comfortable enough to daily drive. Since most cars built now have shaved this and that with huge wheels, ect I want to stay away from that. I will also be keeping the factory B16 power plant which many say I should swap for a K20 but I'd rather not.
This is how I got the car:
Cleaned up:
The car is a 1992 Honda Civic SiR-S EG6. I've been digging into the history of the car a bit and it seems to be pretty cool. The car has the factory Lausanne green paint on it, however it appears that it has been painted before... twice in fact. I have decided to change the color... although I do my personal battles about it. I said I wanted to keep it original but the truth is, I just don't like this color.
With that said, I started prepping the car for paint, but before I could do that, I had to change the wheels and brakes..ect.
I don't like 5 lug on EG and because I wanted to keep this as close to a factory type build, I sold the 5 lug and installed the stock 4 bolt suspension back on.
I didn't snap any pictures of the rotors, pads or any of the bushings I used... oh well.
I picked up a set of 15x7 Mugen MF10Ls from a buddy and threw them on with a set of kics lugs.
This is how the car looked before the tear down began.
You can see the busted up quarter panel in this picture. One of the previous owners rolled the fenders and pretty much destroyed it. I'm having the whole section redone.
Put it in my garage and then the tear down began!
The car seemed really clean on the surface but as I started pulling it apart it was apparent that the car hadn't really been pulled apart, ever.
I won't be doing a brake line tuck or anything of the sort, but I am repainting the engine bay and replacing a lot of the worn out parts. Good thing because the brake and clutch master cylinders had been leaking and it was slowly rusting away at the firewall.
Ready to come out...
Almost ready to leave!
The back bumper of this car was all warped for some reason, so I pulled it off, threw it away and bought a brand new one from Honda.
All loaded up and heading to the paint shop!
The motor out and getting ready to be cleaned.
I took these pics after it had been blasted with brake cleaner and paint stripper... there were 2 old layers of engine paint.
Cleaned, sealed and repainted
Some parts:
EDM Glass headlights, OEM H4H JDM lights are ****.
A buddy sent me a ton of side markers, I'll change my clear for amber.
I have always admired this lip and since I now have an EG to put it on, I had to have it! First molding EG6 lip!
Few other misc things:
JDM Civic cargo cover
Mint EG6 floor mats
Seeker 5spd shift **** (I also have the oil and rad caps)
I have a lot of other parts for the car as well as I'm replacing all of the exterior plastics and moldings. I am also trying to get a new RHD cowl from a friend in Japan. The engine bay, jams and exterior will all be repainted a different color. I'll have more parts coming in so I'll post them when I can.
Thanks for looking!
 10-04-2013, 10:52 AM
#2
Honda-Tech Member
Thread Starter
Join Date: Aug 2008
Location: Baton Rouge, LA, USA
Posts: 357
Likes: 0
Received 0 Likes
on
0 Posts
I really need to get my camera back...

New RHD antenna delete
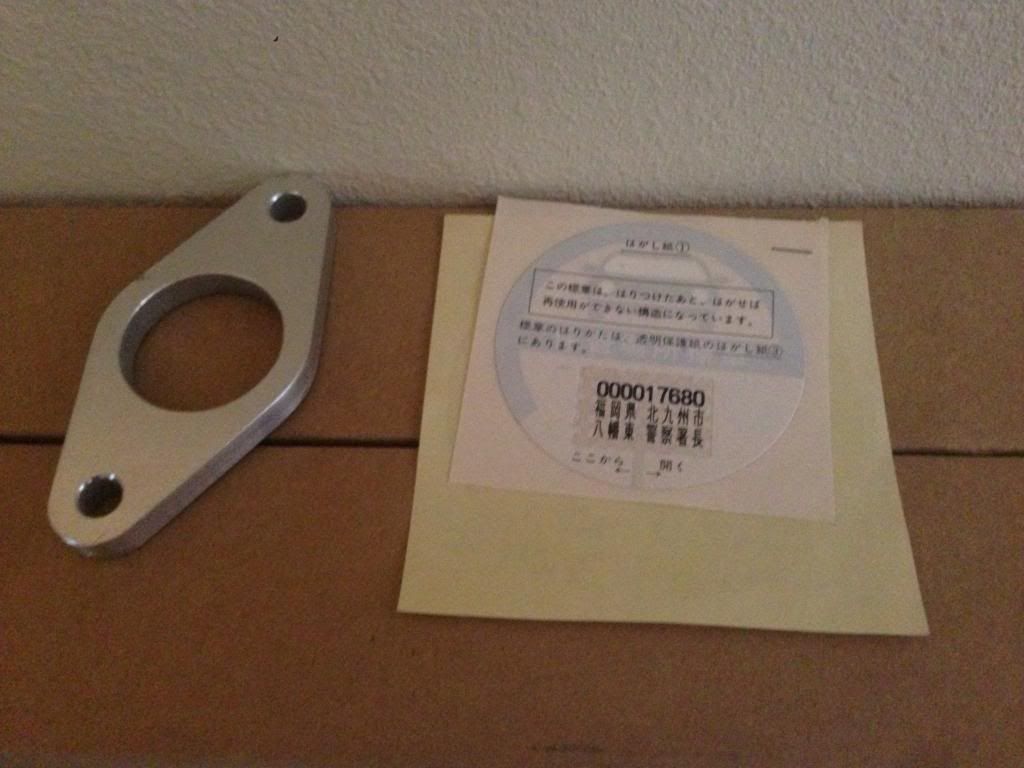
CMC spacer for my s2k kit, and (I know its stupid) but a new parking sticker. The car had one of these one it but the sun has destroyed it, so in the theme of keeping it factory fresh, I got a new one. ;-)
New OEM door sash

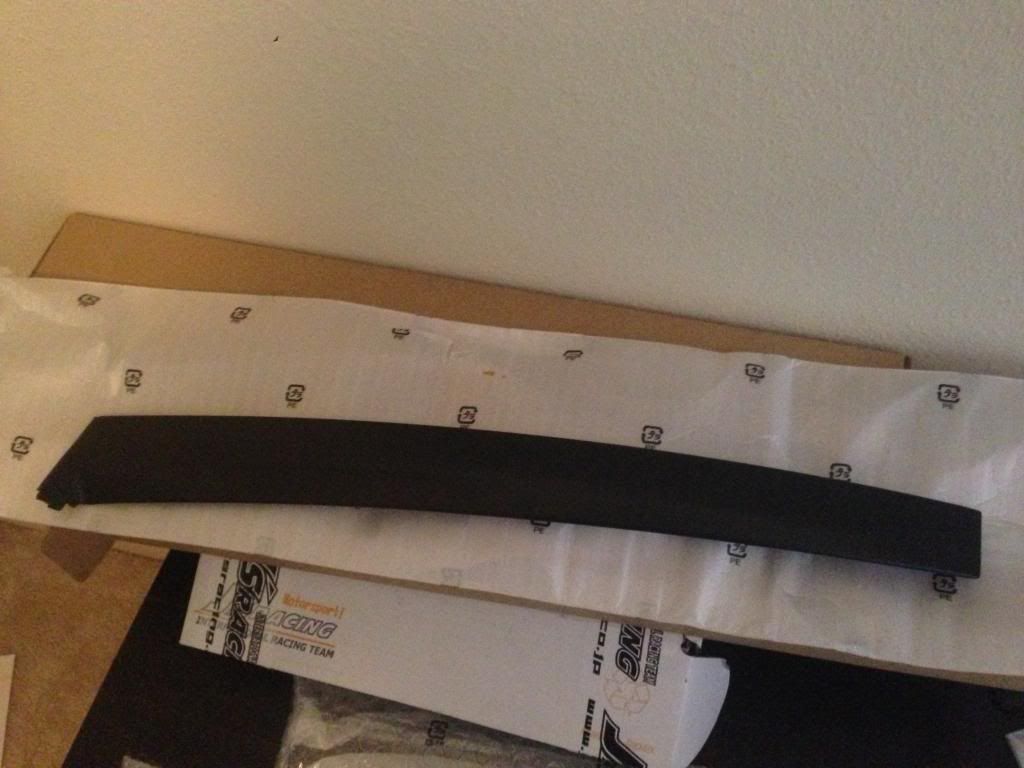
No restoration would be complete without the lower window trim!

My J's racing windshield banner
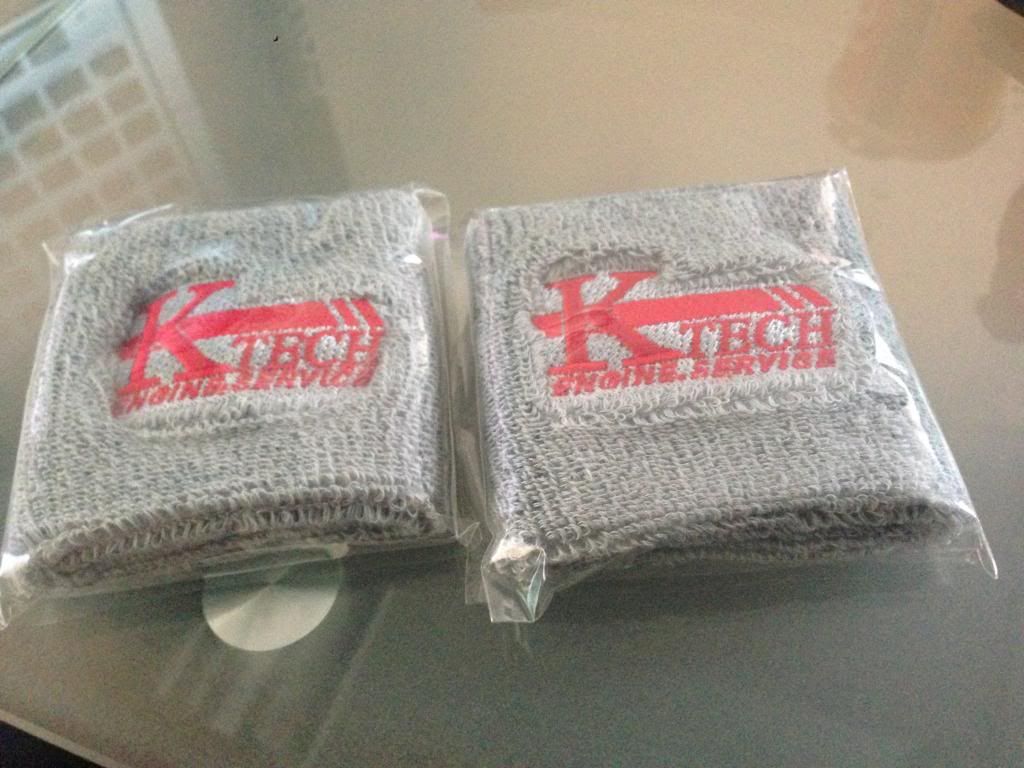
Last year I had the pleasure of visiting Japan and meeting Makato Kawashima, the owner of K-TECH Engine Service and before we left he gave me these really cool reservoir covers. One of the coolest and smartest people I've ever met so I will put these to good use. I have also been thinking about doing a valve cover similar to how he does them when he builds engines.
More coming soon, thanks for looking.
New RHD antenna delete
CMC spacer for my s2k kit, and (I know its stupid) but a new parking sticker. The car had one of these one it but the sun has destroyed it, so in the theme of keeping it factory fresh, I got a new one. ;-)
New OEM door sash
No restoration would be complete without the lower window trim!
My J's racing windshield banner
Last year I had the pleasure of visiting Japan and meeting Makato Kawashima, the owner of K-TECH Engine Service and before we left he gave me these really cool reservoir covers. One of the coolest and smartest people I've ever met so I will put these to good use. I have also been thinking about doing a valve cover similar to how he does them when he builds engines.
More coming soon, thanks for looking.
10-04-2013, 10:56 AM
#3
Honda-Tech Member
Thread Starter
Join Date: Aug 2008
Location: Baton Rouge, LA, USA
Posts: 357
Likes: 0
Received 0 Likes
on
0 Posts
Pretty stoked! Parts showed up this morning!
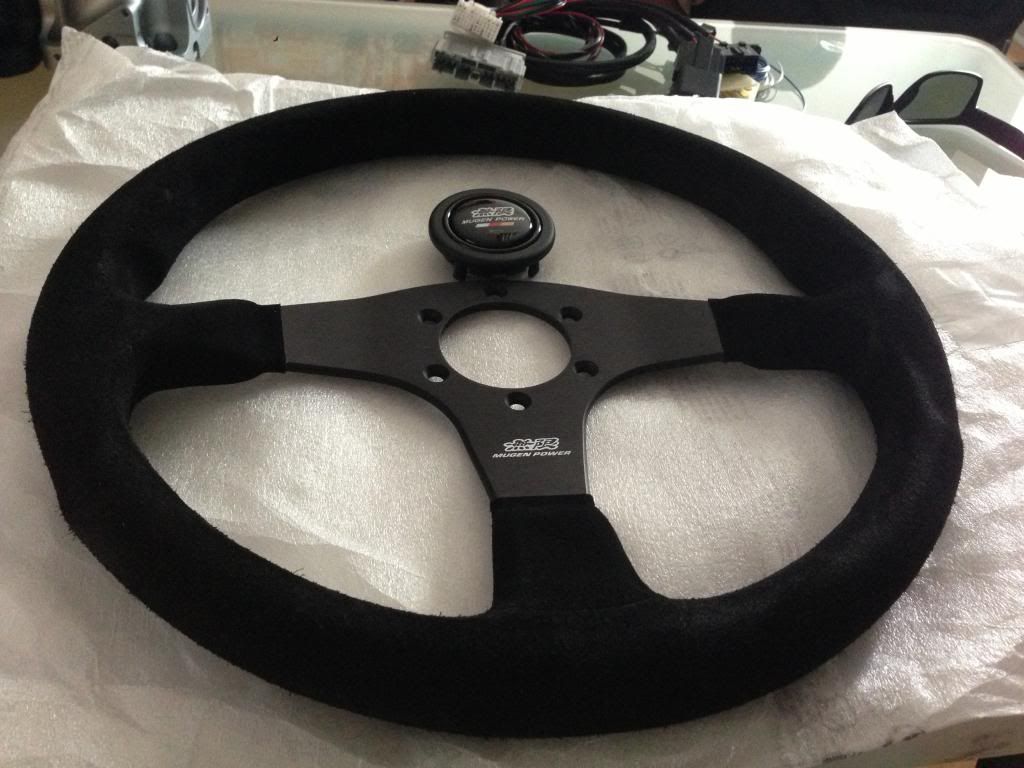
New Mugen Gen III wheel

New oem fender
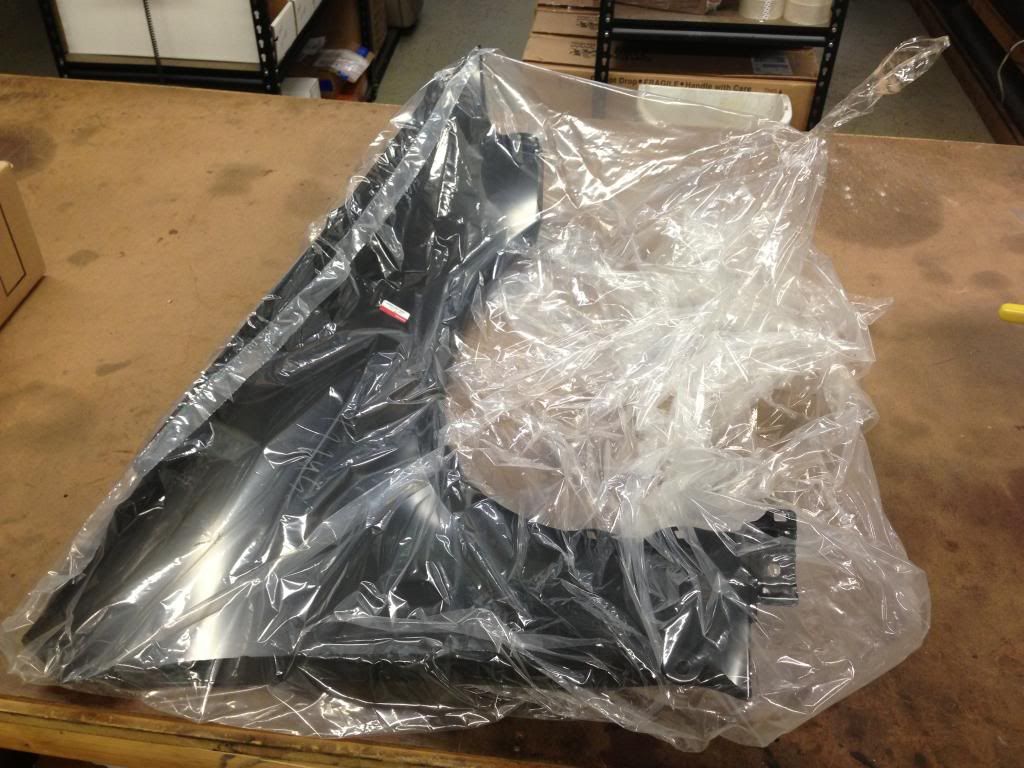
New PS reservoir
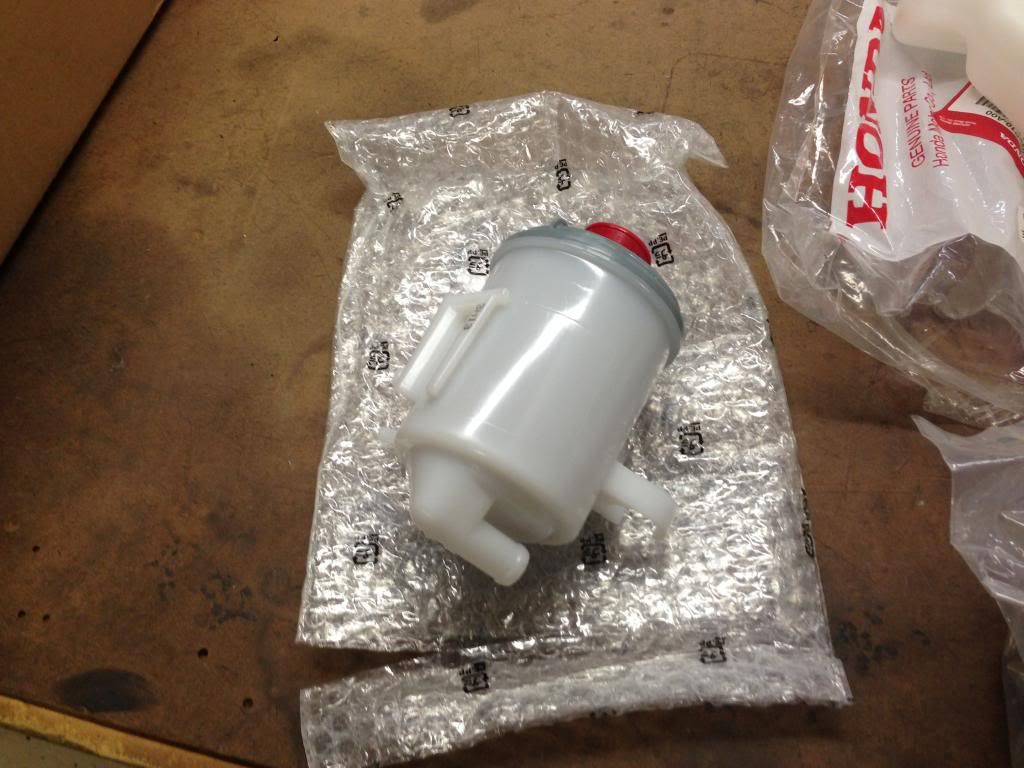
New Overflow tank
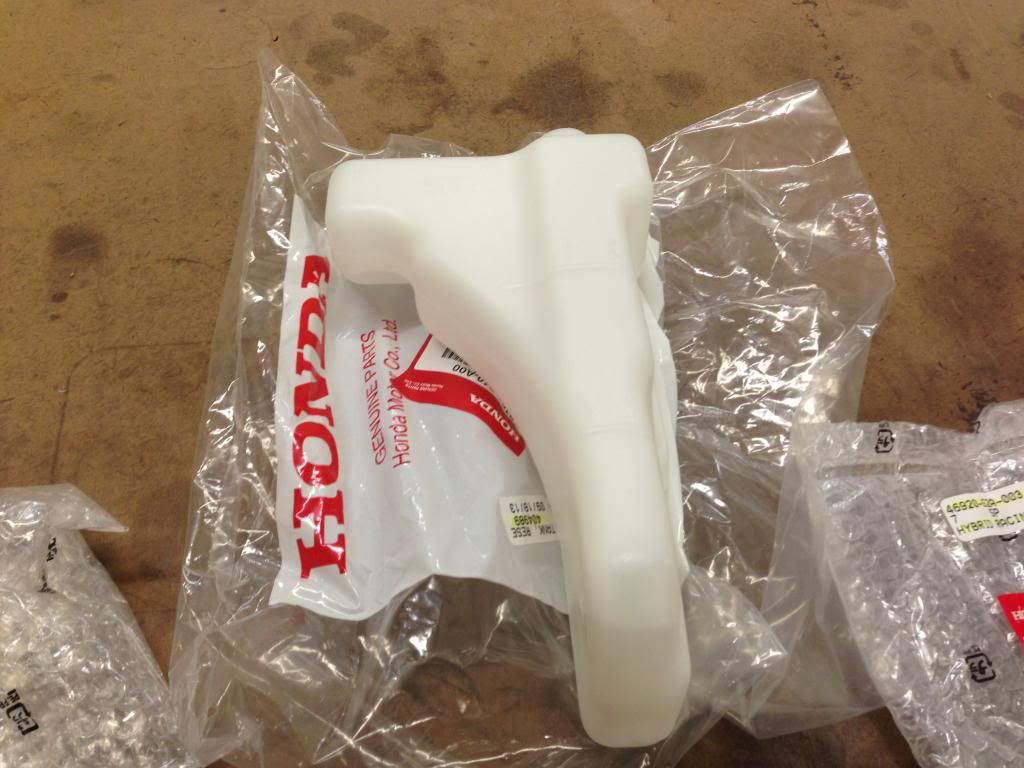
S2k cmc and a few misc hoses that I needed also came in.
New Mugen Gen III wheel
New oem fender
New PS reservoir
New Overflow tank
S2k cmc and a few misc hoses that I needed also came in.
10-04-2013, 10:56 AM
#4
Honda-Tech Member
Thread Starter
Join Date: Aug 2008
Location: Baton Rouge, LA, USA
Posts: 357
Likes: 0
Received 0 Likes
on
0 Posts
More parts showed up today... man... I'm ready to get this damn car back. LOL
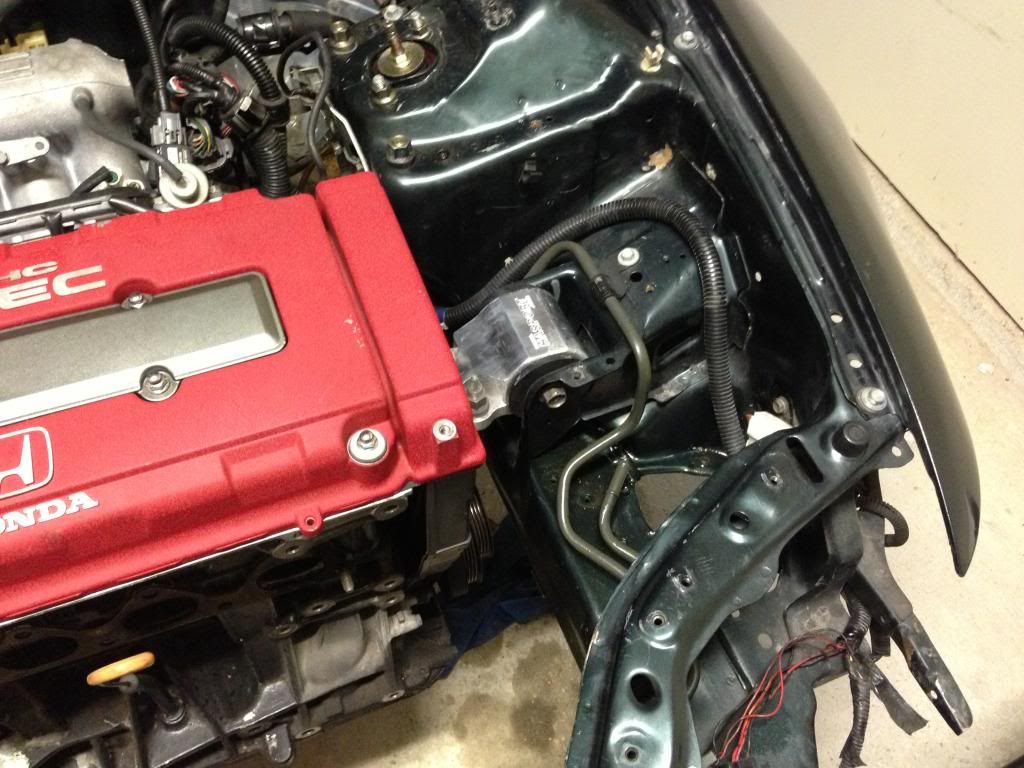
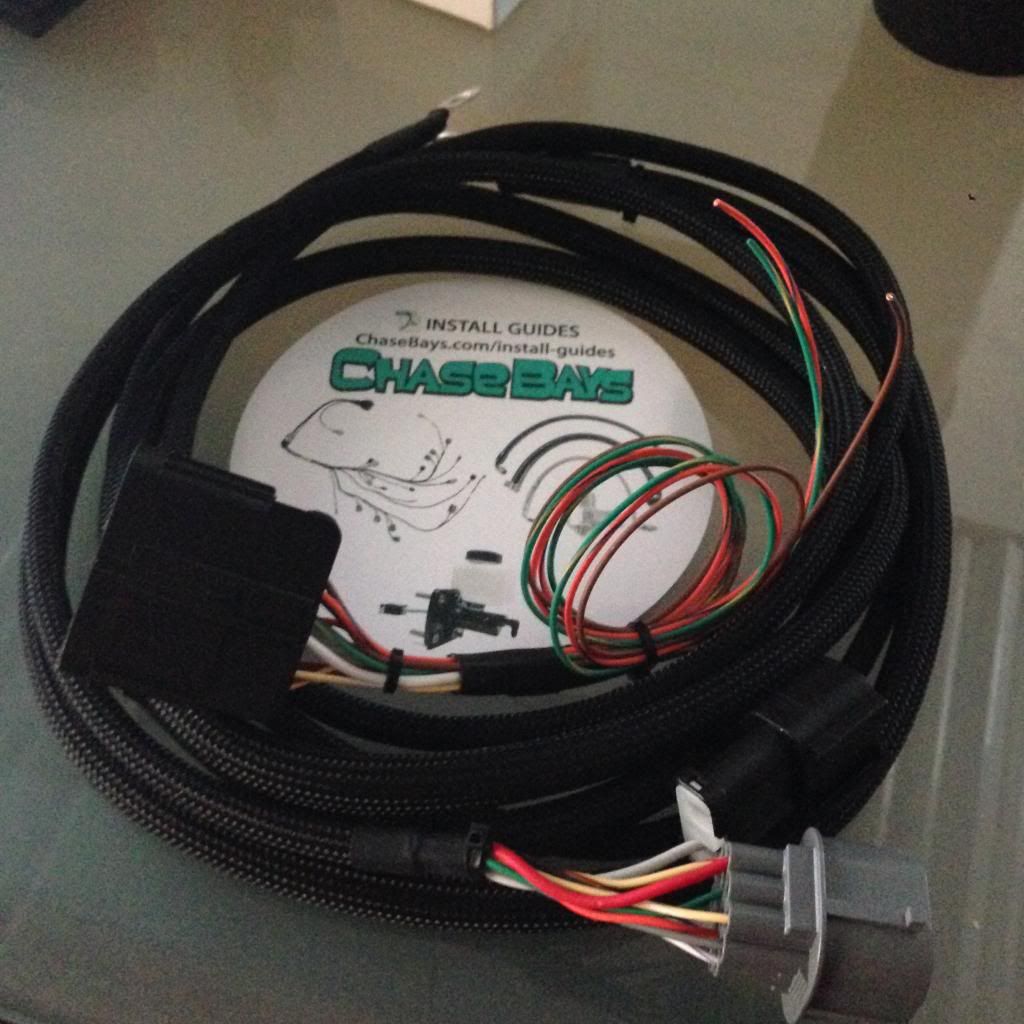
dun dun dunnnnnnnnnnnnnn! ChaseBays CM1 engine harness. I know a lot of people don't care for their stuff but they have always been good to me so I went back again for a B16 harness.
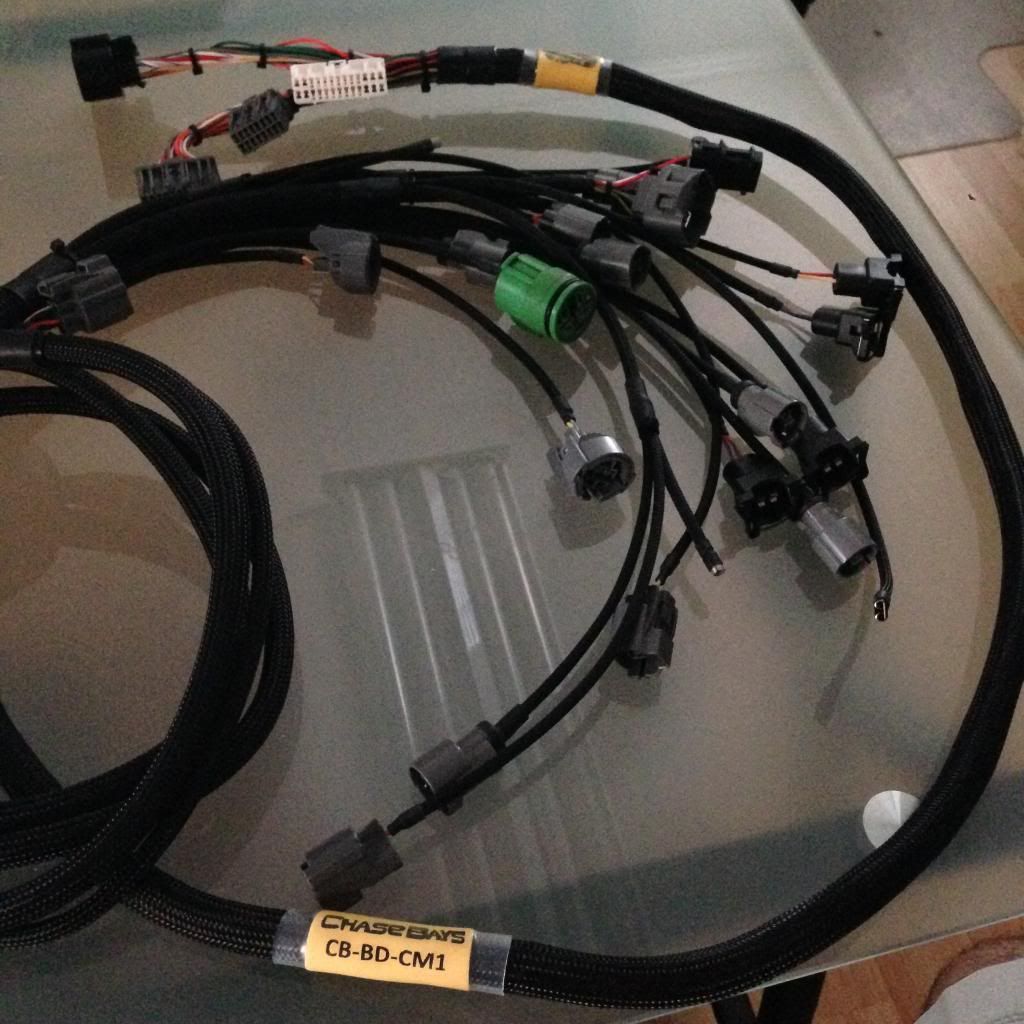
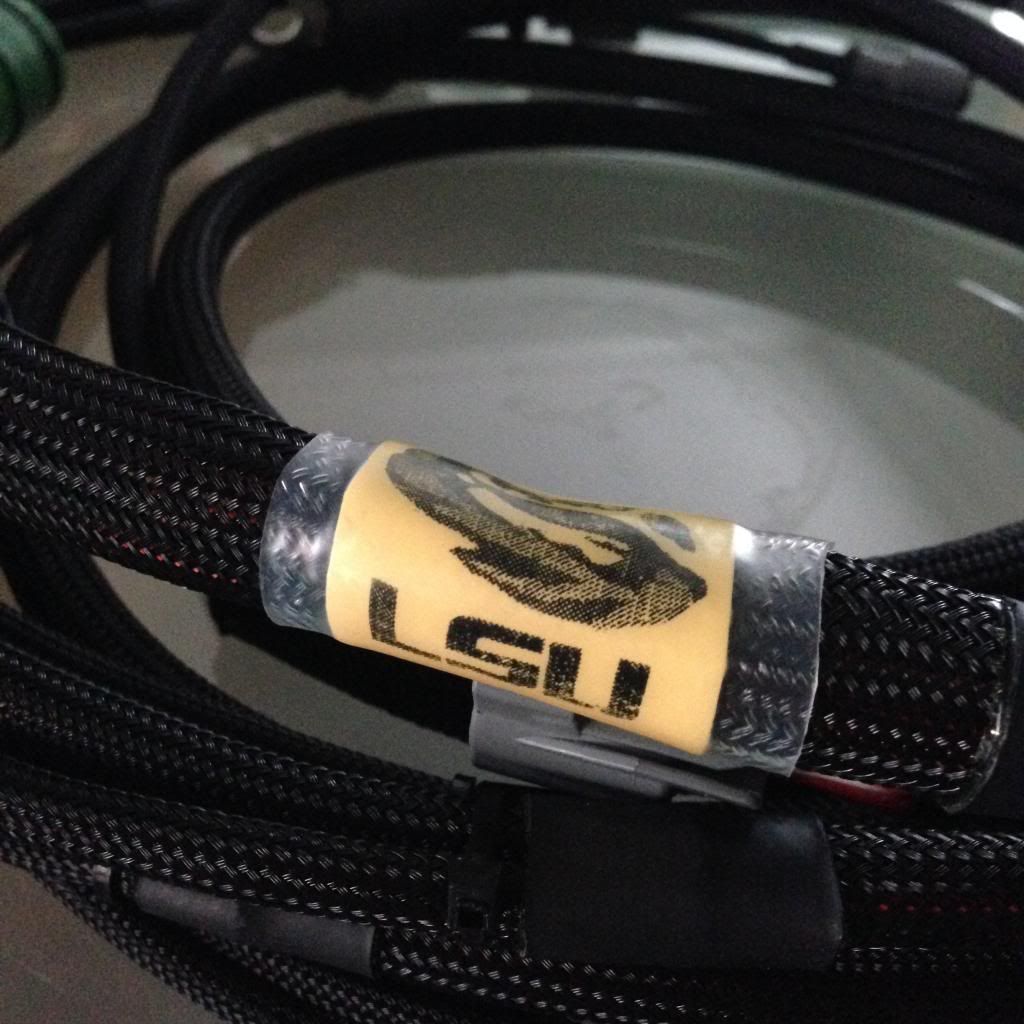
I got this awesome label too! LSU! GEAUX TIGERS!
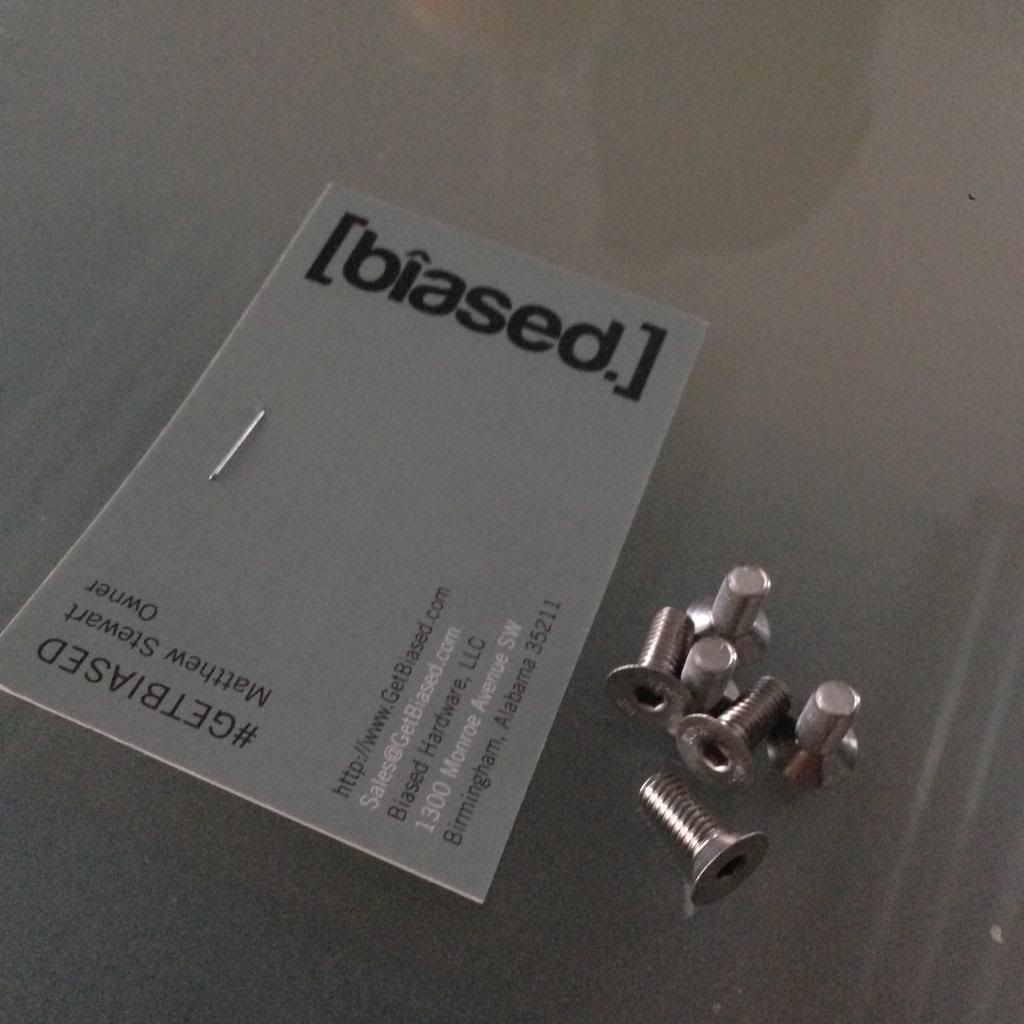
Also got some nice stainless steering wheel screws for my new Mugen wheel. http://www.getbiased.com

I order all new OEM chassis Honda stickers for the EG6, and they are still NOT here! It has been five weeks so far! I hope they show up soon, I'm going to need them!
Thanks for looking!
dun dun dunnnnnnnnnnnnnn! ChaseBays CM1 engine harness. I know a lot of people don't care for their stuff but they have always been good to me so I went back again for a B16 harness.
I got this awesome label too! LSU! GEAUX TIGERS!
Also got some nice stainless steering wheel screws for my new Mugen wheel. http://www.getbiased.com
I order all new OEM chassis Honda stickers for the EG6, and they are still NOT here! It has been five weeks so far! I hope they show up soon, I'm going to need them!
Thanks for looking!
10-04-2013, 10:59 AM
#5
Honda-Tech Member
Thread Starter
Join Date: Aug 2008
Location: Baton Rouge, LA, USA
Posts: 357
Likes: 0
Received 0 Likes
on
0 Posts
Packaged up all of my bolts to have them plated.

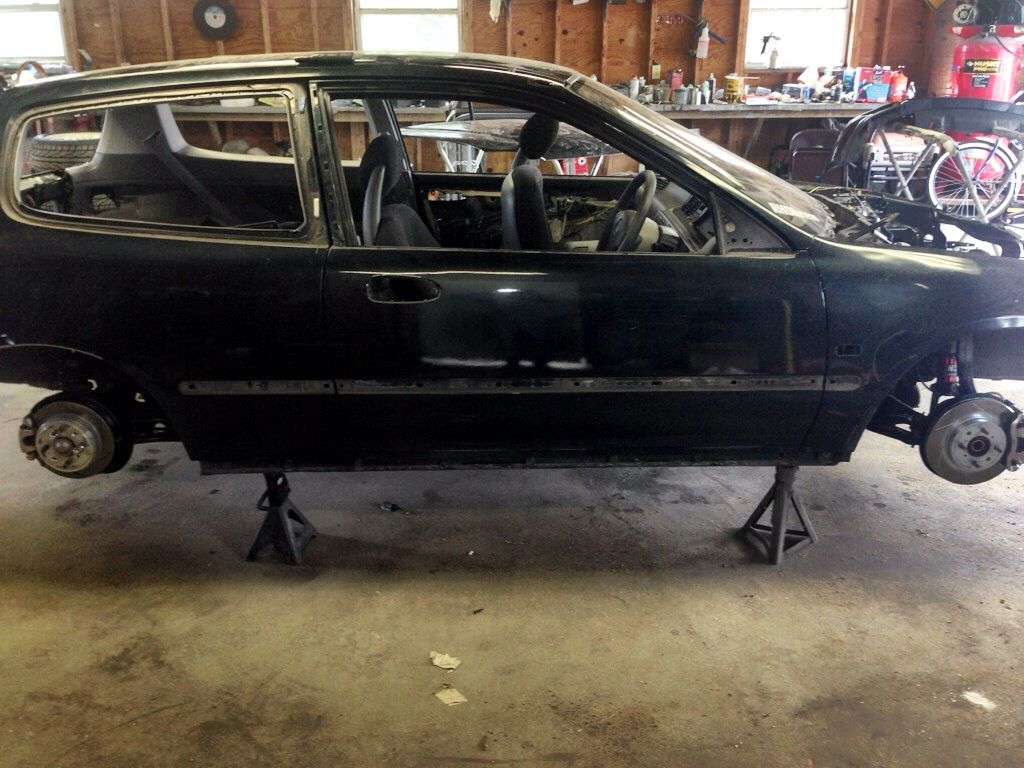
A few pics of the car as it sits in my buddies garage.


I ordered these over a month ago and they finally showed up. OEM replacement stickers from an EG6 in Japan. Once my car is all repainted and fresh, it will have the OEM stickers back in the factory places. No tape lines. No old *** stickers.

A few pics of the car as it sits in my buddies garage.
I ordered these over a month ago and they finally showed up. OEM replacement stickers from an EG6 in Japan. Once my car is all repainted and fresh, it will have the OEM stickers back in the factory places. No tape lines. No old *** stickers.
10-04-2013, 10:59 AM
#6
Honda-Tech Member
Thread Starter
Join Date: Aug 2008
Location: Baton Rouge, LA, USA
Posts: 357
Likes: 0
Received 0 Likes
on
0 Posts
Ok so I have a pretty big update for those that are interested. I spent my entire Saturday working on the EG6, getting ready for the body work. The shop is about an hour and a half away from me so I don't go there often. But with a good 14 hours put in over the weekend the car is getting closer to the paint booth. My buddy has a garage outside of his house that we will do all of the body work and such, then once it's time for the final prime and basecoat, we will transport it to the shop with the booth.


The car had been put on stands and then all of the glass was removed. I found out that the body shop ended up breaking my bronze tinted windshield while attempting to remove the top molding. =( So I ordered a replacement glass from HMO today, thankfully Steve had one in stock.
Furthering the point of how terrible the paint really was on the car... The paint on the spoiler was peeling off. It doesn't look that bad in pictures, but the paint was really not very good.
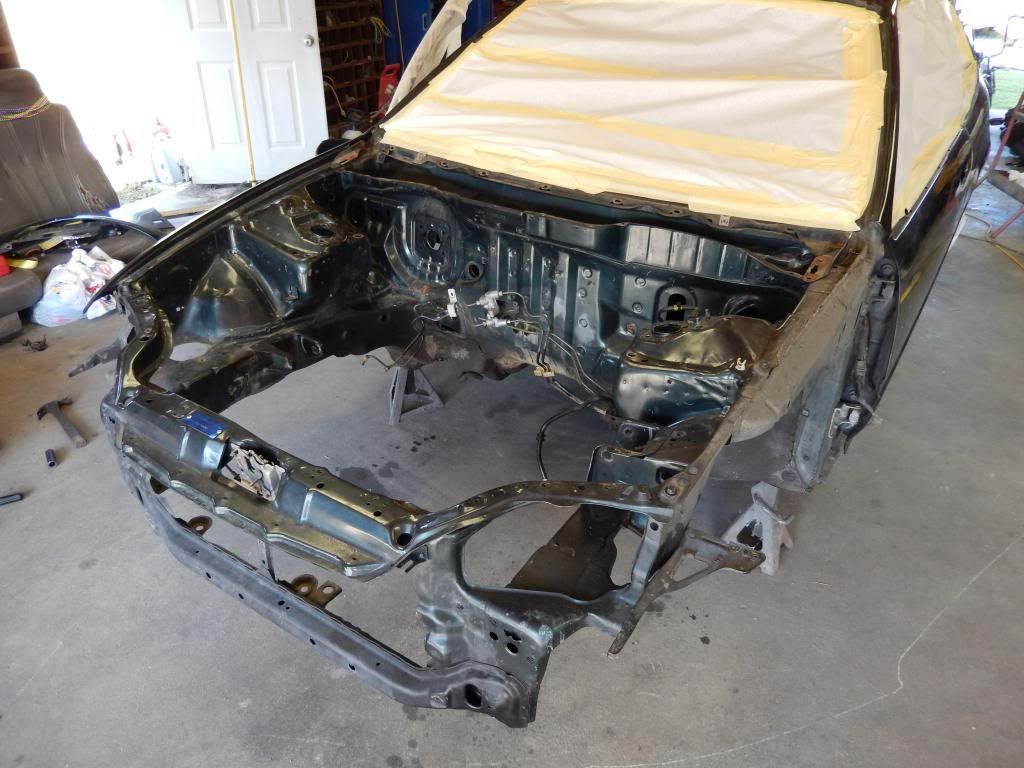
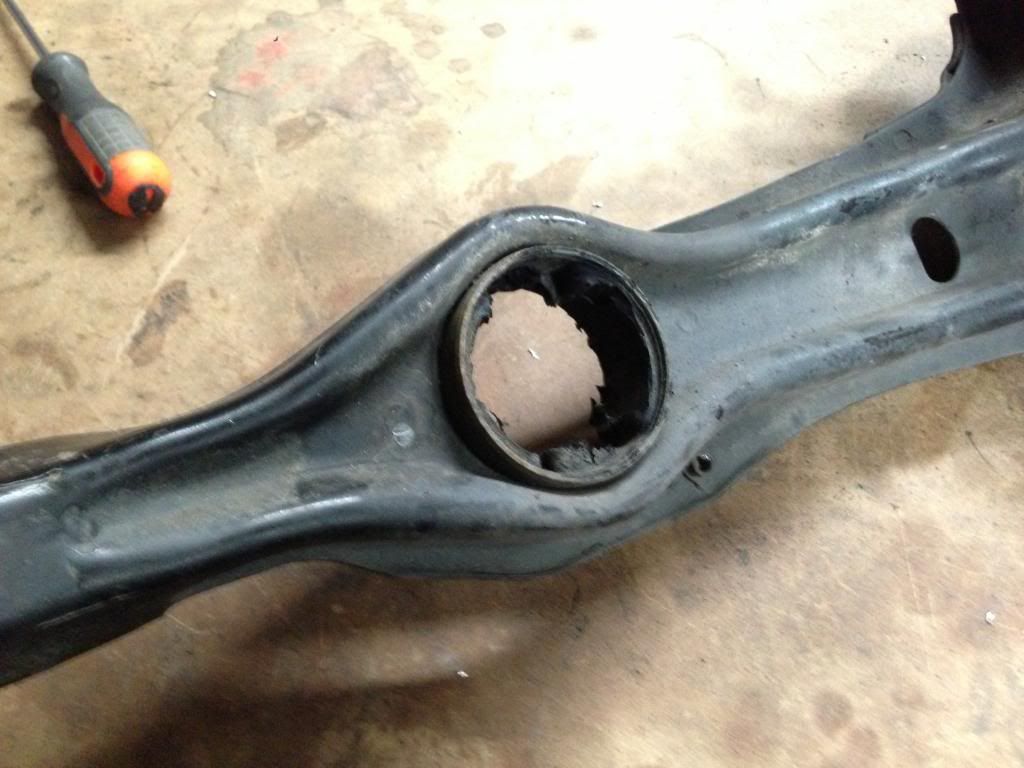
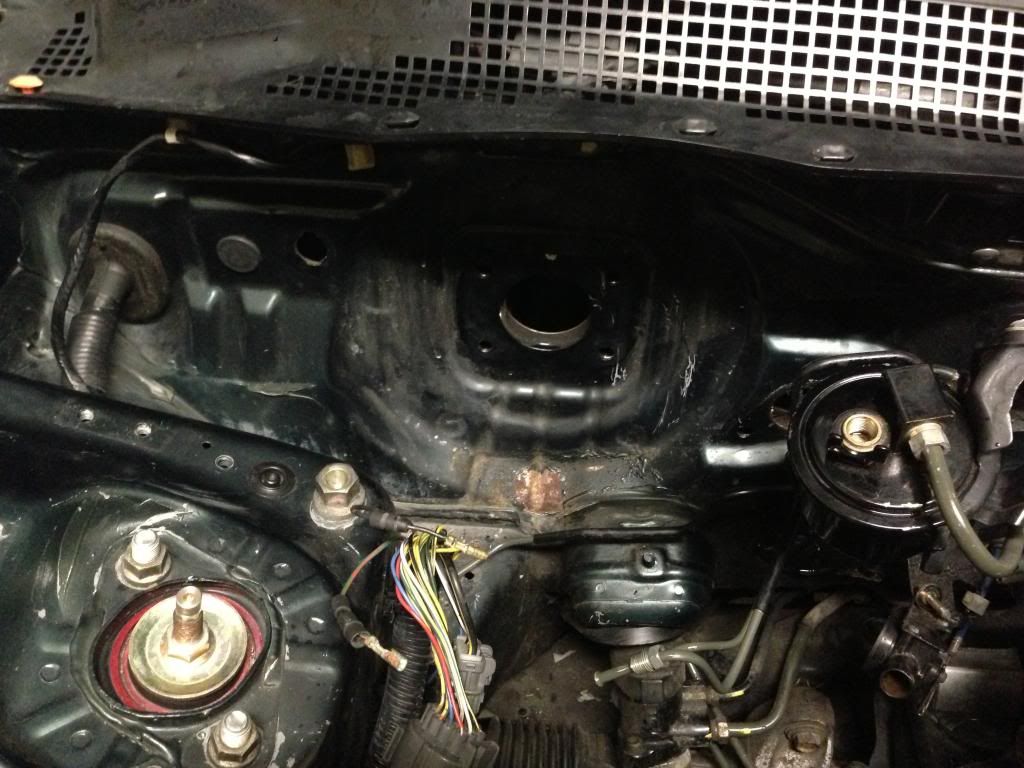
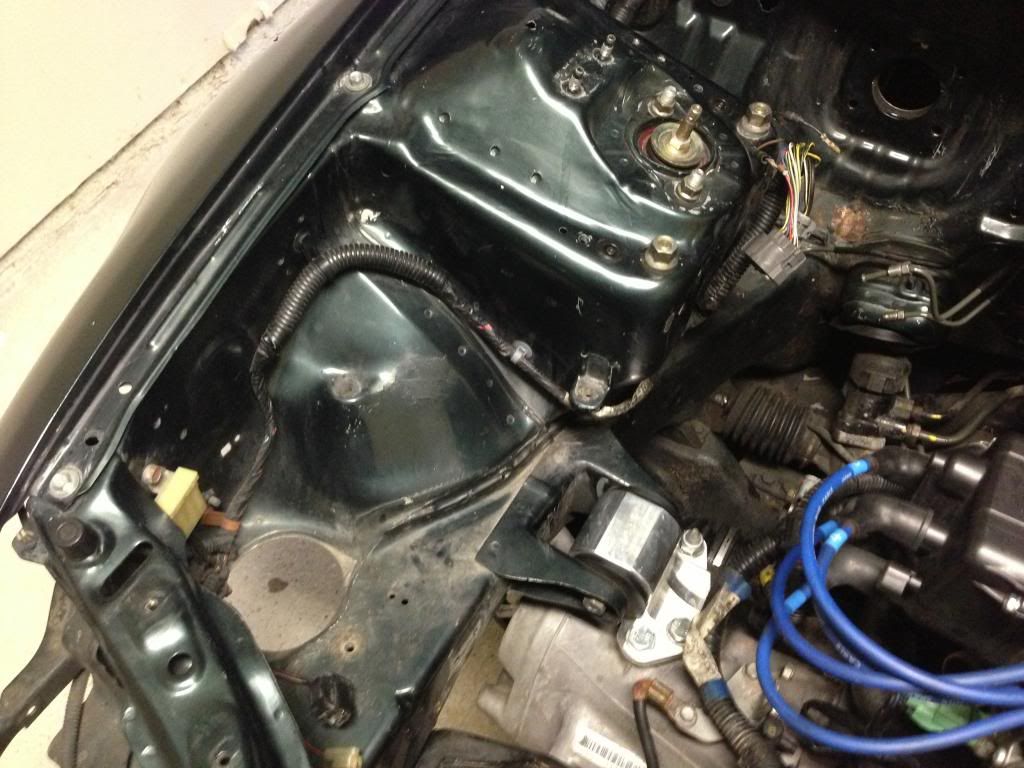
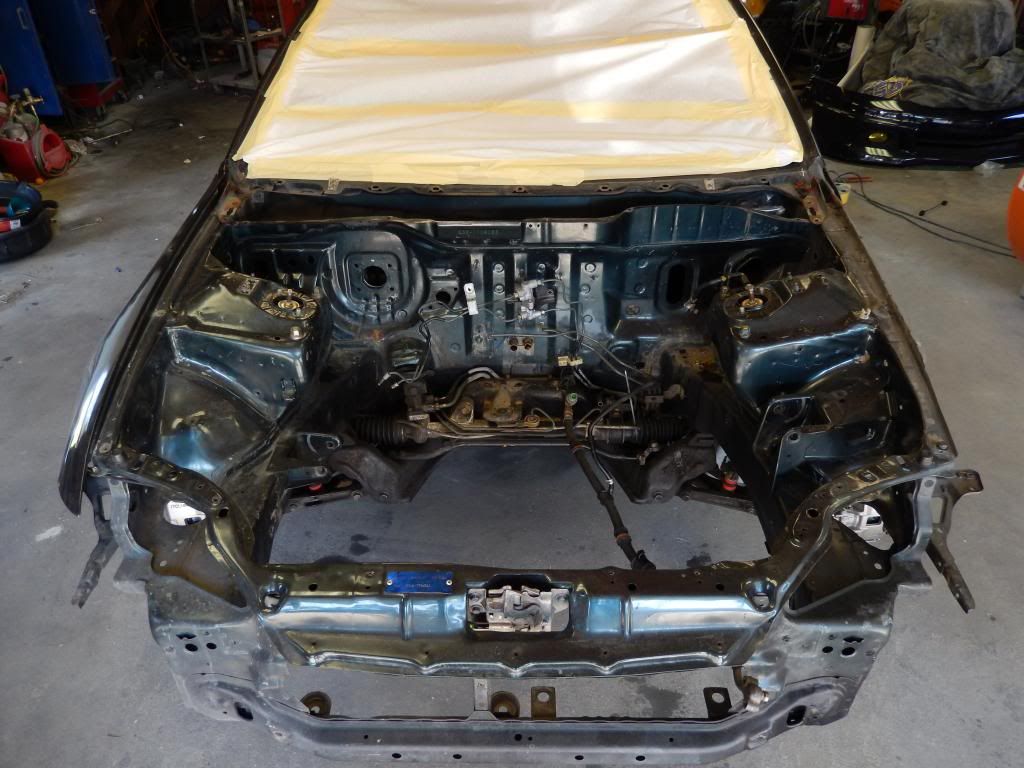
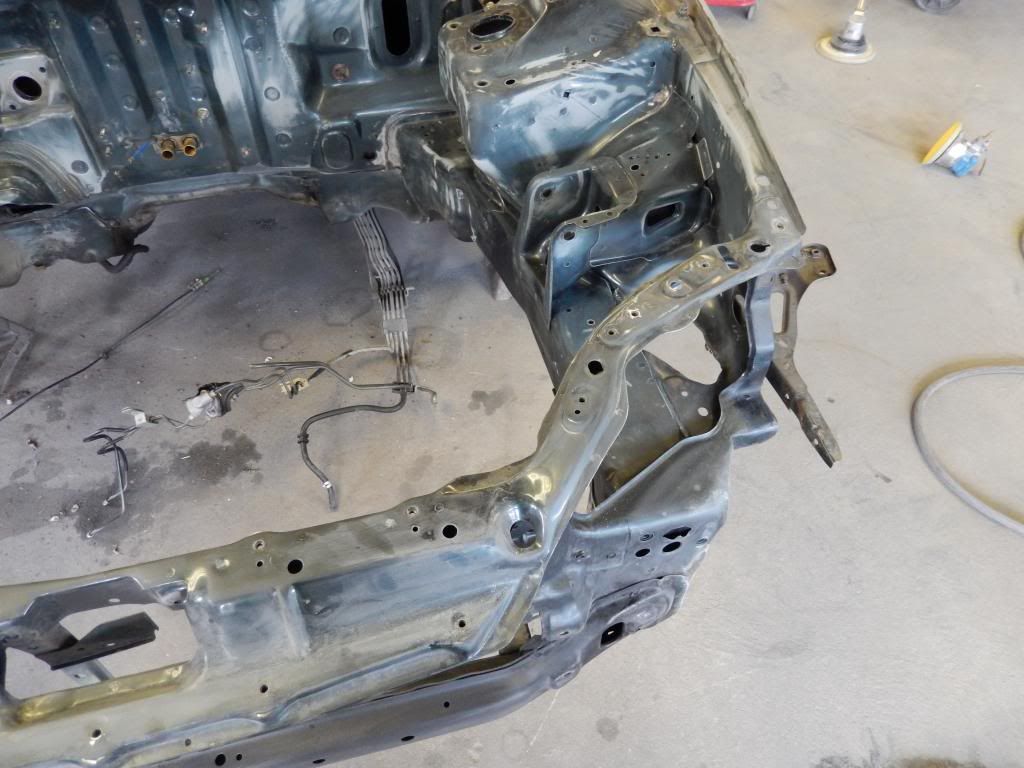
I removed the entire front suspension and subframe.
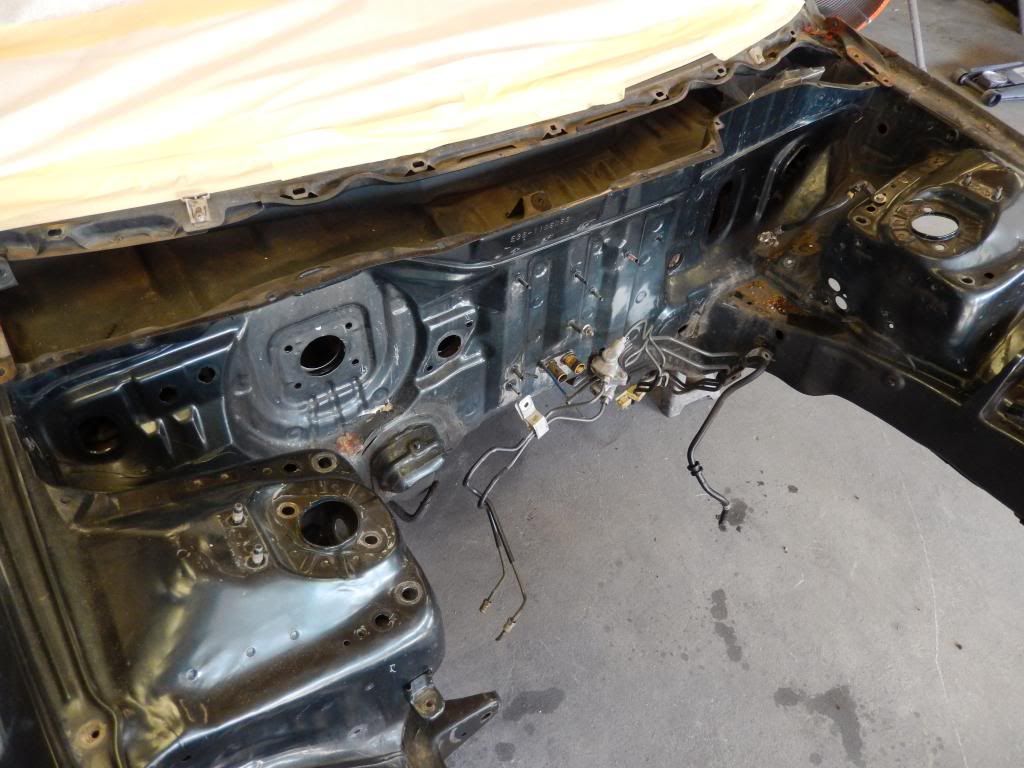
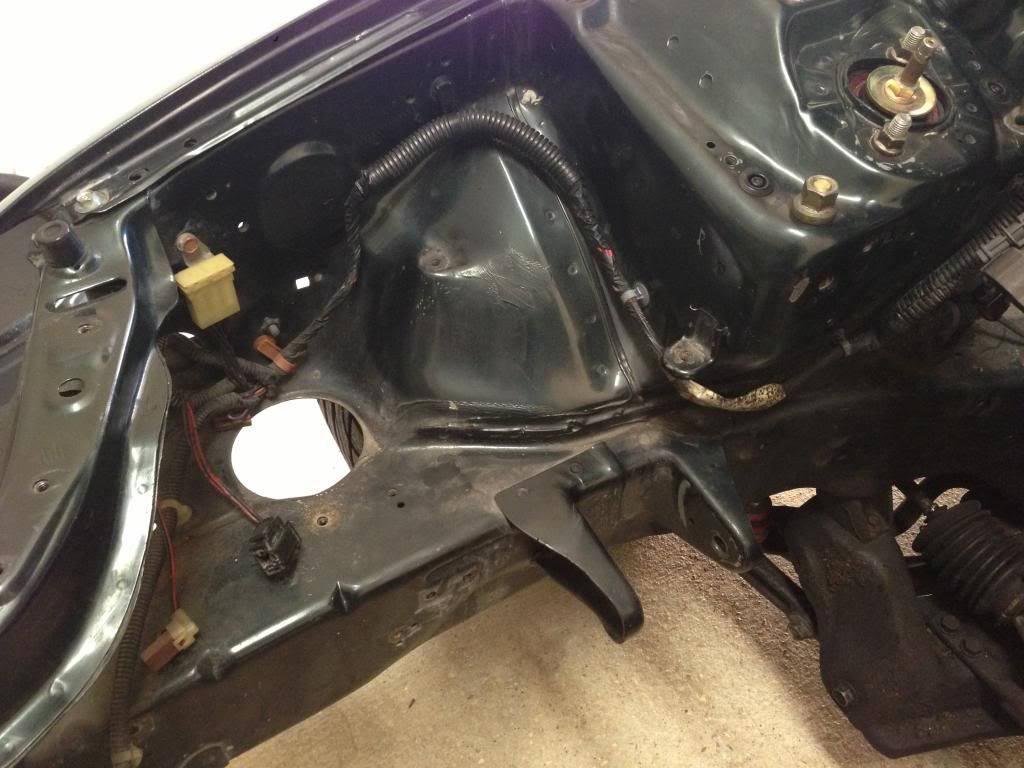
You can see where the leaky cmc had been letting fluid drip down the firewall. It had eaten the paint all under the frame rail and had developed a bit of surface rust. It's a good thing I'm going to fix all of it... This car would have only lasted a few more years until there would be holes in the frame.

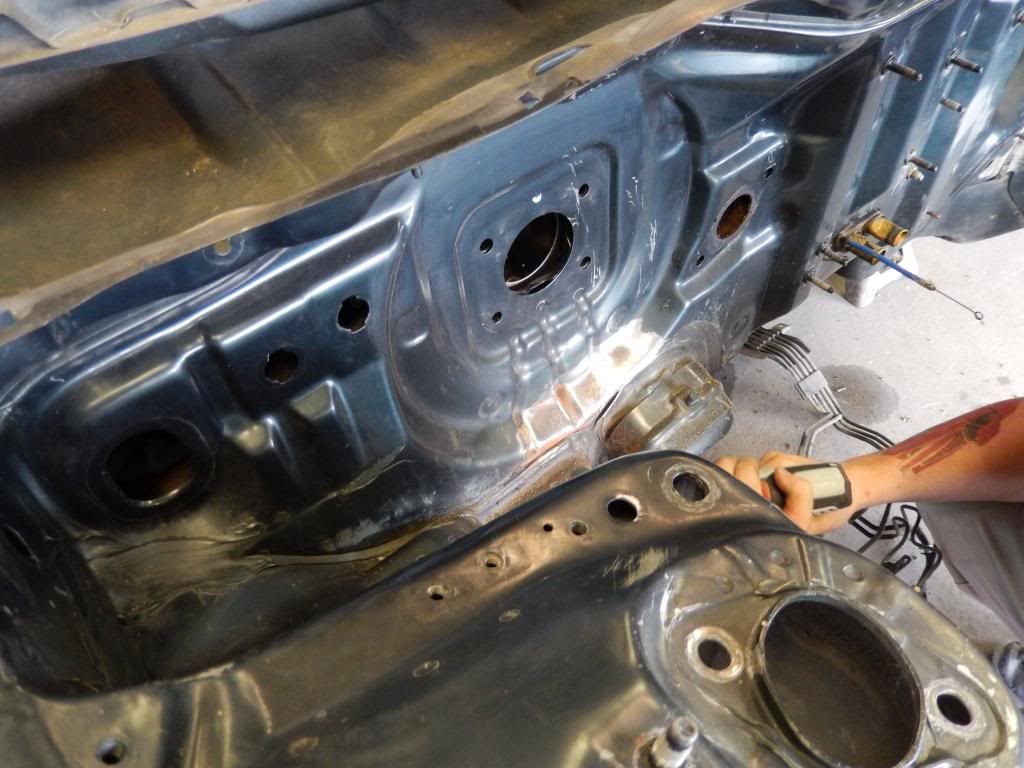
Another thing I noticed was that there had been large patches welded in the wheel arches. I'm assuming that someone had slammed this car down before and cut the factory pinch welds so they wouldn't cut into the tire. I'll fix this as well, even though I'm not going nearly that low.

Same thing on this side.

All of the rust taken care of.
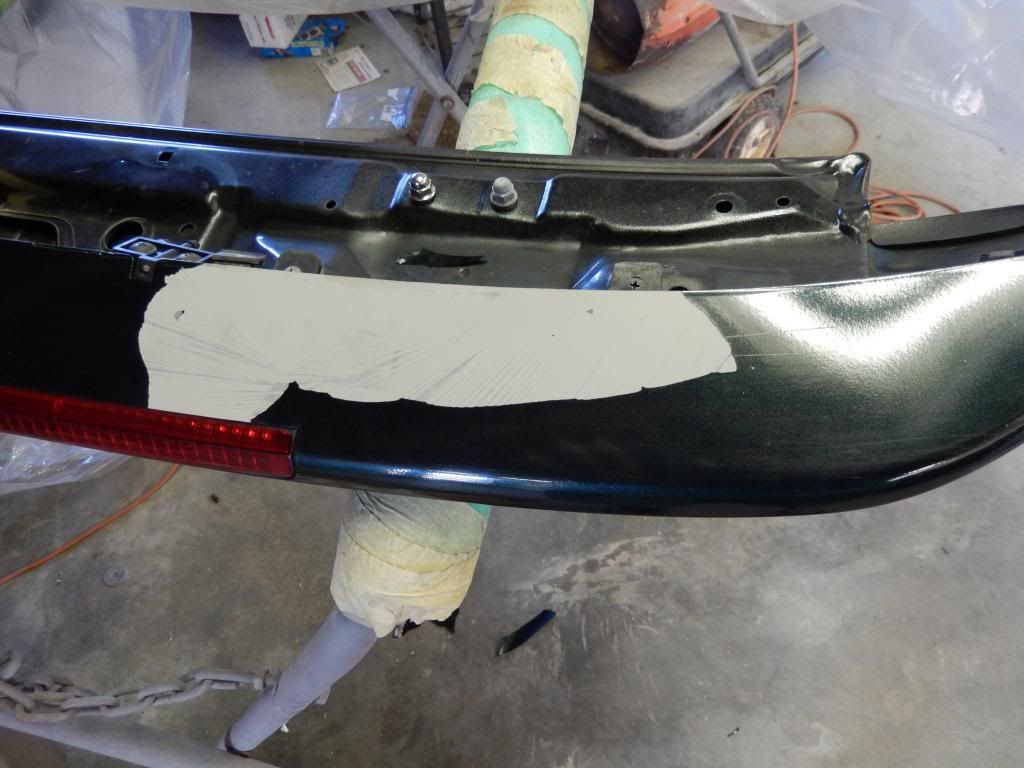
So, this was the biggest deal of the day. We started to sand the car down and after getting into it, we realized just how thick the paint was on this car. It has been painted 3 times before so it was layer on layer on layer. No bueno.
Since the paint on this car was so poor, my painter refused to paint over it. He said the only way he would paint the car is if we stripped all of the old paint off and started over. Well... that's what we did.
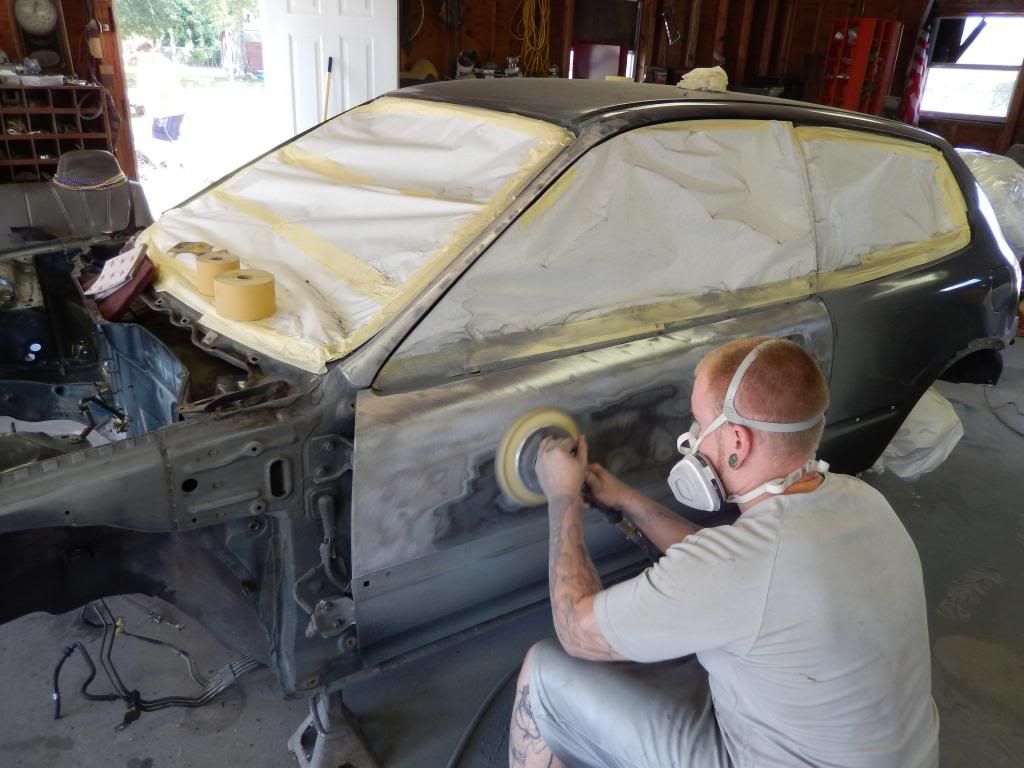

More sanding...
and more sanding...

Almost there....
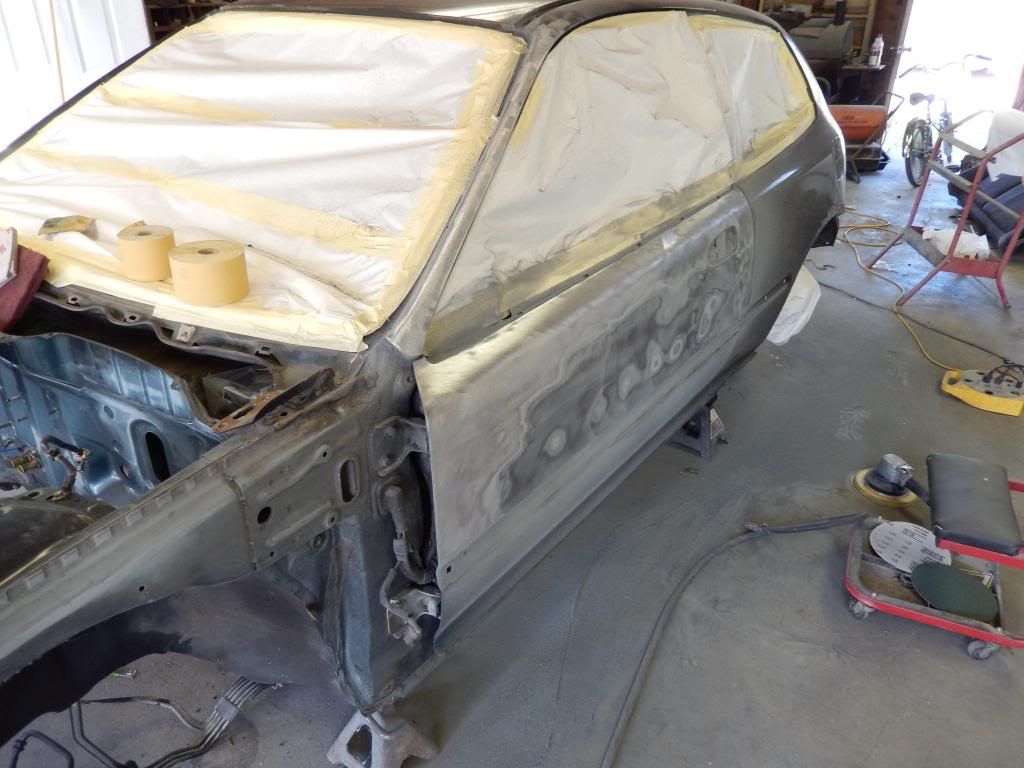
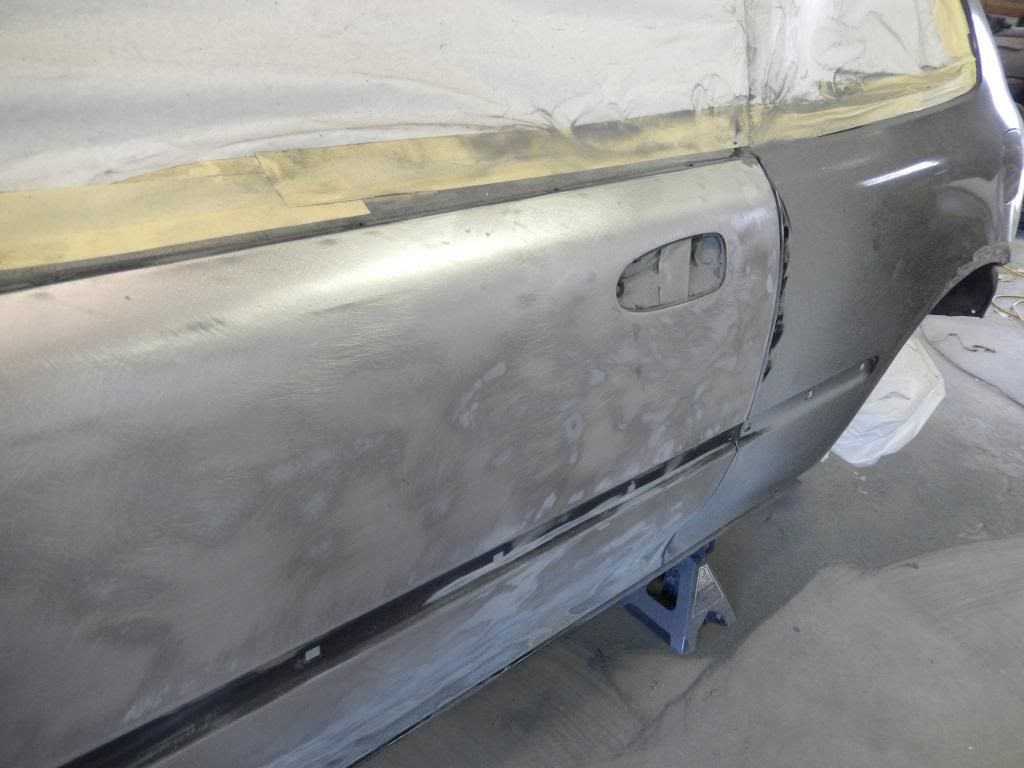
LH door all stripped.

Moving to the quarter panel.
I cleaned and sanded down the wheel wells... I'm not going hardcore and grinding off all of the coating. It will all get a new fresh coat of underspray through. The door jams and fender wells will get a fresh coat of paint.
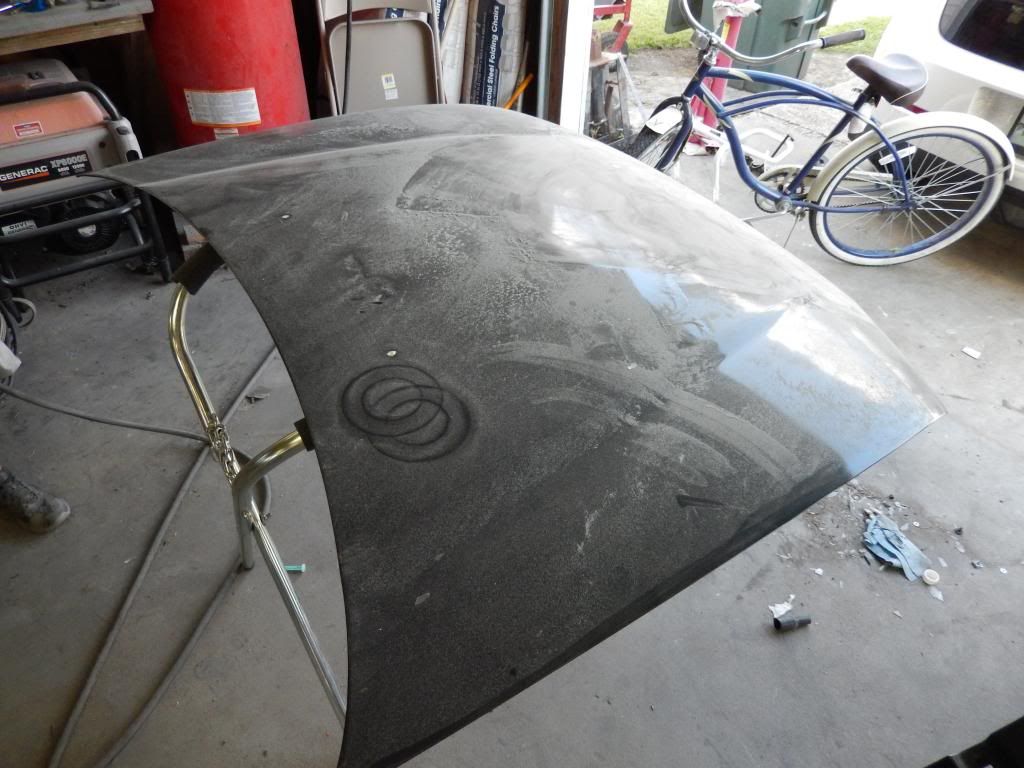
Attempted to block the hood. The paint that was on the car was pretty terrible.
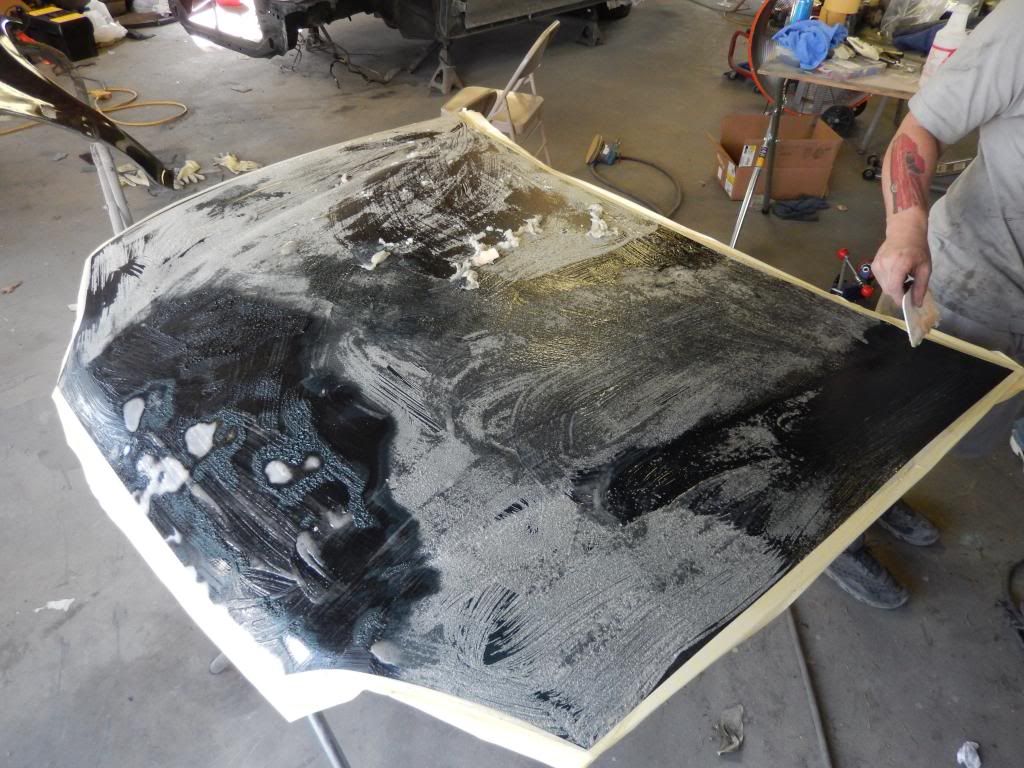
We decided the best thing to do here was to chemically strip the paint and get it back down to the metal. The clear was so cheap that the stripper pulled it off almost immediately upon contact.
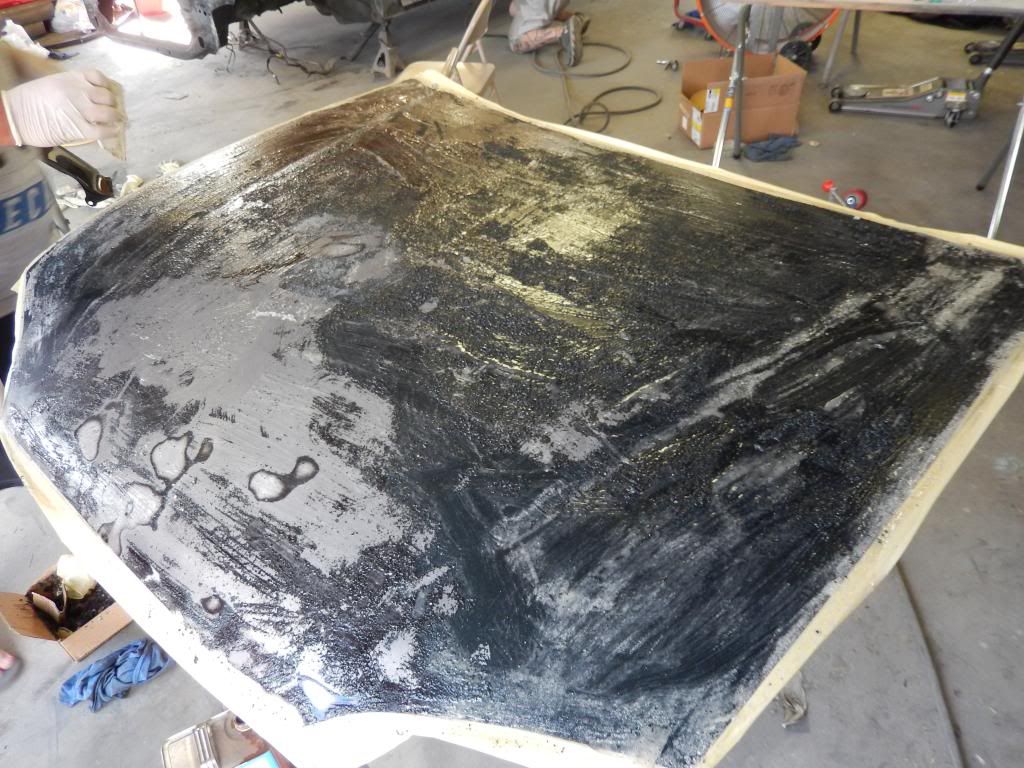
Second coat.

You can see the factory green paint under all of it all. It held up to 3 coats of stripper while the respray paint just oozed off.
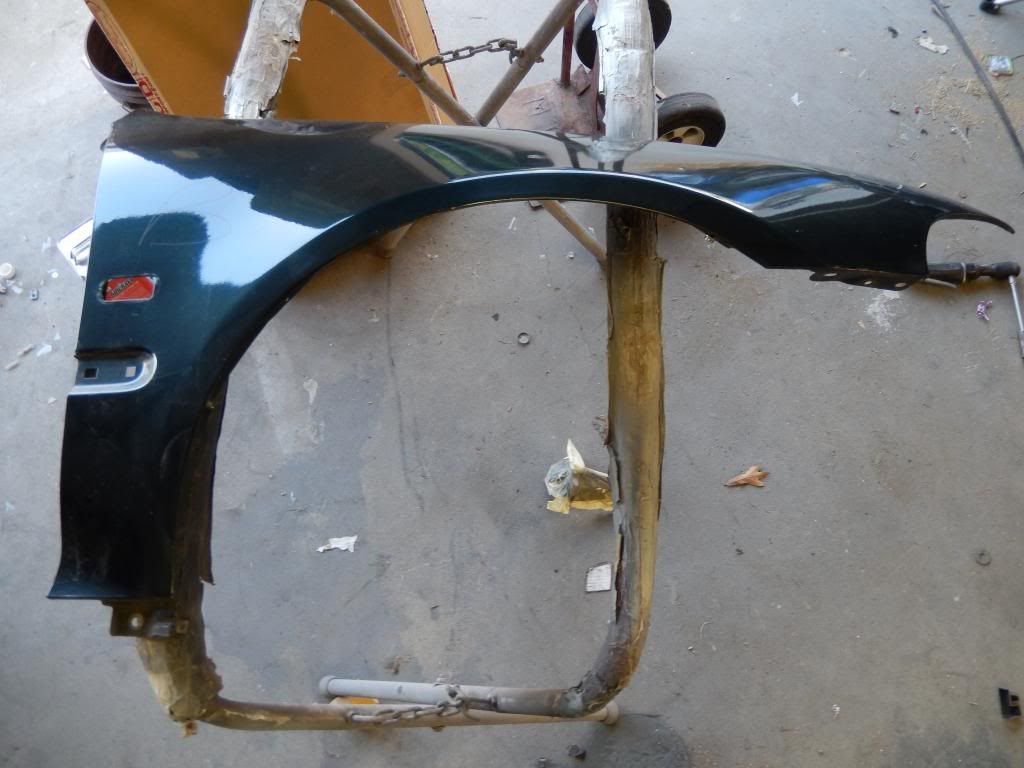
Time to do the only good fender.
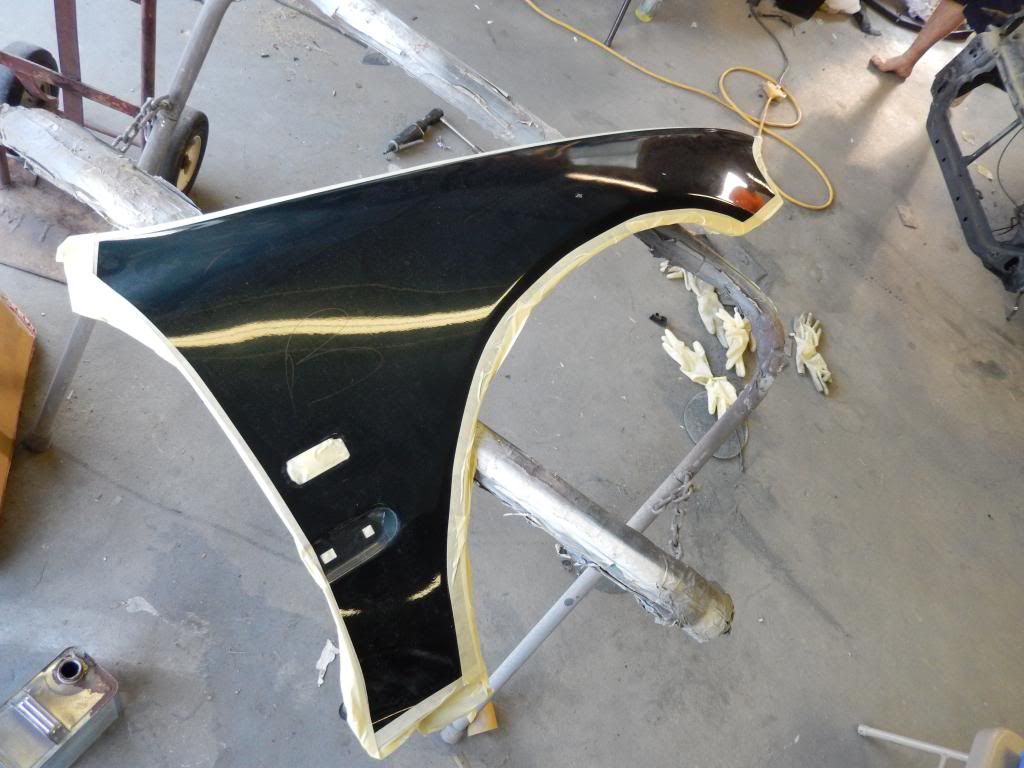
There was a big B on it from us thinking there was body filler in that area. The stripper would tell the story.
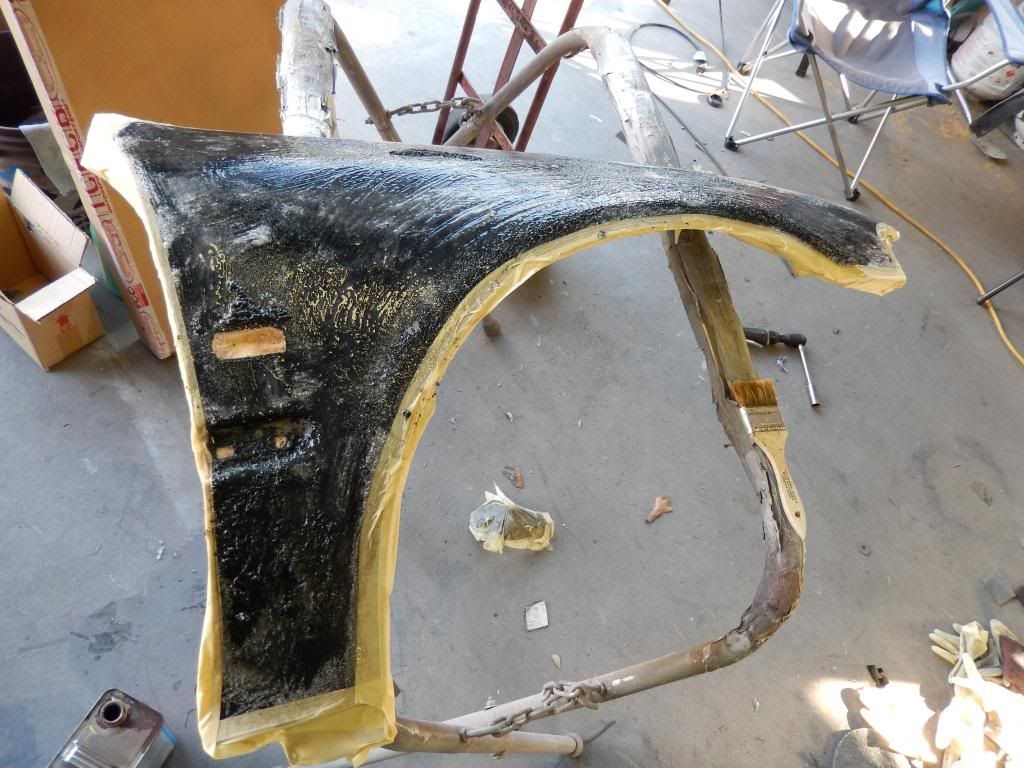
First coat.

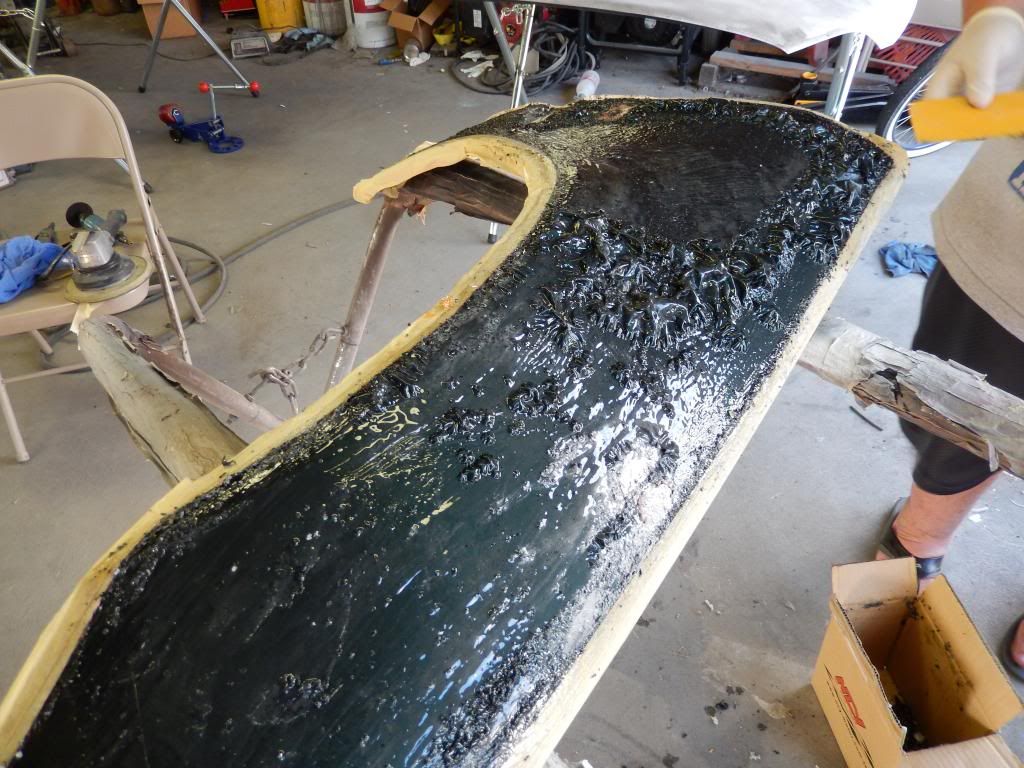
This is nasty ****.

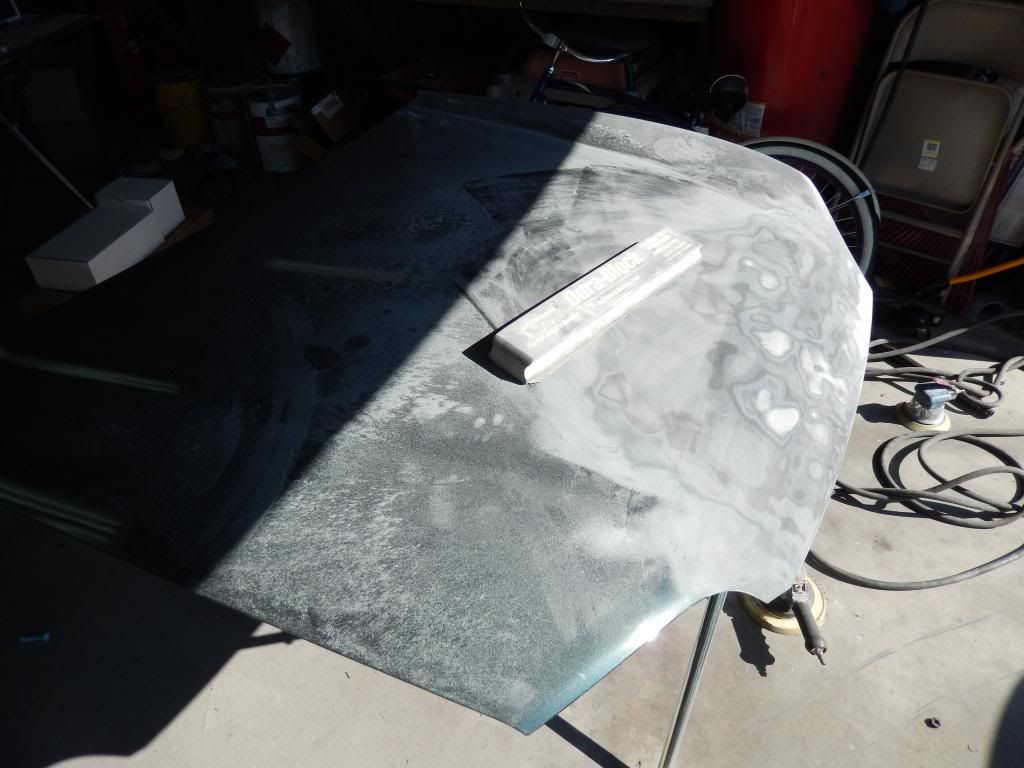
While we waited for the fender to dissolve, I sanded down the rest of the hood. Turns out there was a small patch of filler on the front LH corner.

Getting ready to etch the bare metal since we were almost done for the day.
We were right. The mid section of the fender had a patch of filler. Not bad enough to warrant replacing it like the other side, but still need some love.

First coat of etching primer.
Second


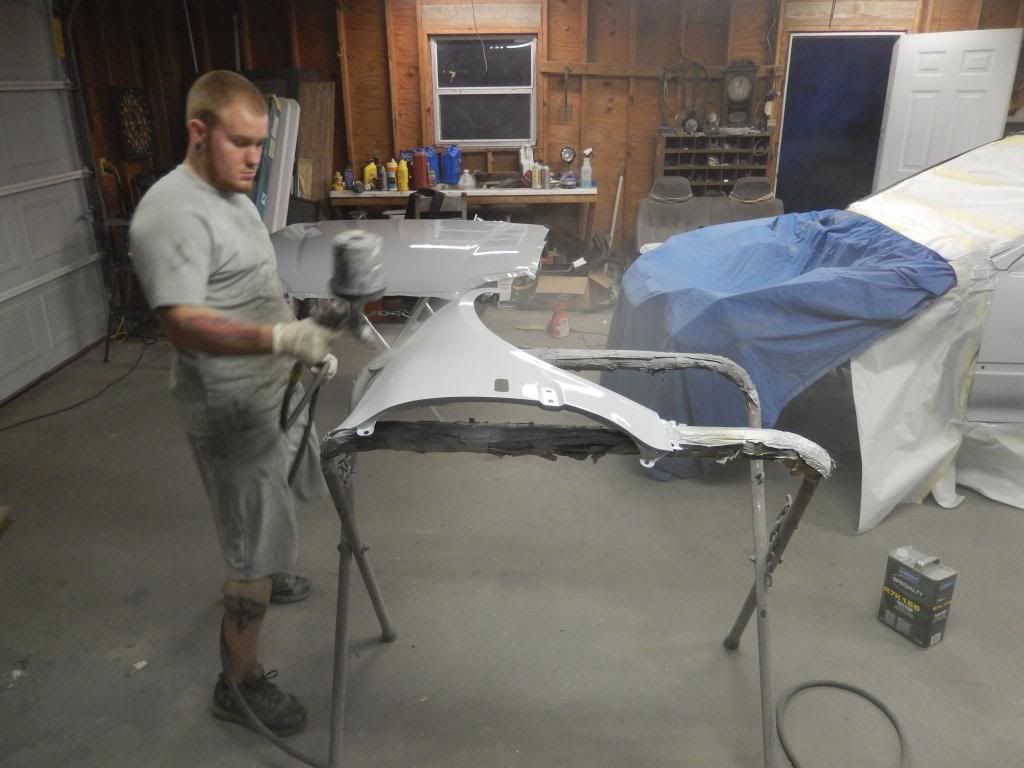
Finally some primer! :bang:
It was kinda sketchy spraying inside his garage but I trust him... he has painted some of best looking cars around here. Over the last 10 years I've had 6 different cars painted by 6 different people. I'm SUPER **** about body and paint work and will accept nothing but perfection, even my closest friends tell me I'm insane. Whatever.
I'll have more updates once a few more parts start showing up and I have another chance to work on it. Thanks for looking!
The car had been put on stands and then all of the glass was removed. I found out that the body shop ended up breaking my bronze tinted windshield while attempting to remove the top molding.
=( So I ordered a replacement glass from HMO today, thankfully Steve had one in stock. Furthering the point of how terrible the paint really was on the car... The paint on the spoiler was peeling off. It doesn't look that bad in pictures, but the paint was really not very good.
I removed the entire front suspension and subframe.
You can see where the leaky cmc had been letting fluid drip down the firewall. It had eaten the paint all under the frame rail and had developed a bit of surface rust. It's a good thing I'm going to fix all of it... This car would have only lasted a few more years until there would be holes in the frame.
Another thing I noticed was that there had been large patches welded in the wheel arches. I'm assuming that someone had slammed this car down before and cut the factory pinch welds so they wouldn't cut into the tire. I'll fix this as well, even though I'm not going nearly that low.
Same thing on this side.
All of the rust taken care of.
So, this was the biggest deal of the day. We started to sand the car down and after getting into it, we realized just how thick the paint was on this car. It has been painted 3 times before so it was layer on layer on layer. No bueno.
Since the paint on this car was so poor, my painter refused to paint over it. He said the only way he would paint the car is if we stripped all of the old paint off and started over. Well... that's what we did.
More sanding...
and more sanding...
Almost there....
LH door all stripped.
Moving to the quarter panel.
I cleaned and sanded down the wheel wells... I'm not going hardcore and grinding off all of the coating. It will all get a new fresh coat of underspray through. The door jams and fender wells will get a fresh coat of paint.
Attempted to block the hood. The paint that was on the car was pretty terrible.
We decided the best thing to do here was to chemically strip the paint and get it back down to the metal. The clear was so cheap that the stripper pulled it off almost immediately upon contact.
Second coat.
You can see the factory green paint under all of it all. It held up to 3 coats of stripper while the respray paint just oozed off.
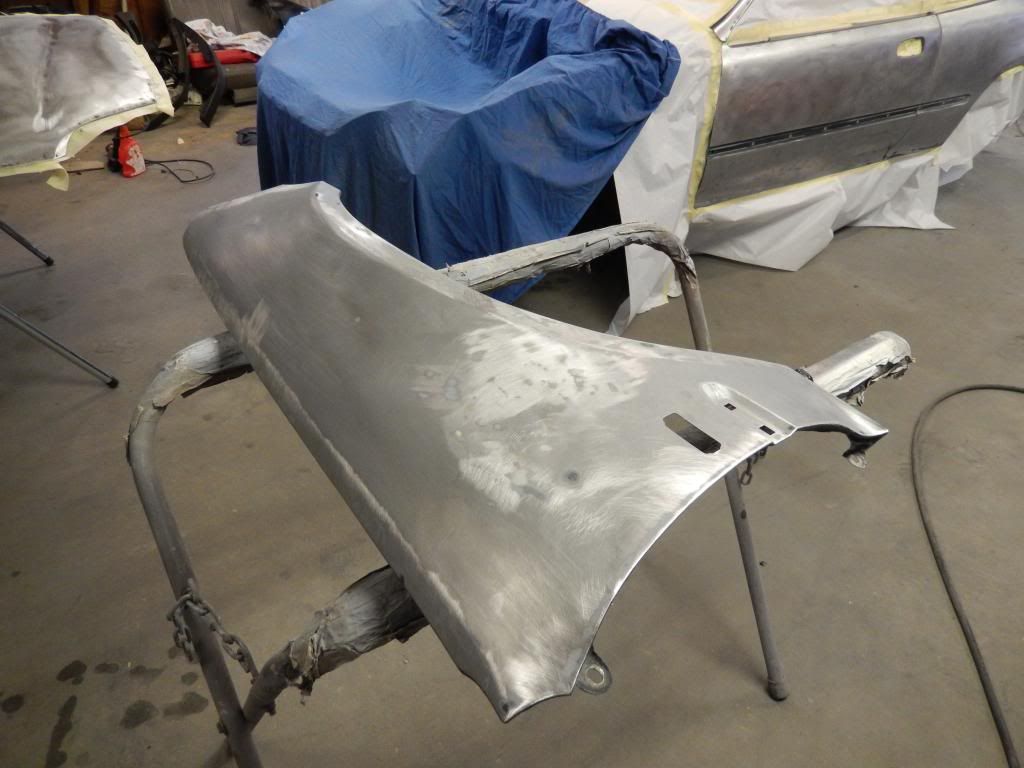
Time to do the only good fender.
There was a big B on it from us thinking there was body filler in that area. The stripper would tell the story.
First coat.
This is nasty ****.
While we waited for the fender to dissolve, I sanded down the rest of the hood. Turns out there was a small patch of filler on the front LH corner.
Getting ready to etch the bare metal since we were almost done for the day.
We were right. The mid section of the fender had a patch of filler. Not bad enough to warrant replacing it like the other side, but still need some love.
First coat of etching primer.
Second
Finally some primer! :bang:
It was kinda sketchy spraying inside his garage but I trust him... he has painted some of best looking cars around here. Over the last 10 years I've had 6 different cars painted by 6 different people. I'm SUPER **** about body and paint work and will accept nothing but perfection, even my closest friends tell me I'm insane. Whatever.
I'll have more updates once a few more parts start showing up and I have another chance to work on it. Thanks for looking!
10-04-2013, 11:03 AM
#7
Honda-Tech Member
Thread Starter
Join Date: Aug 2008
Location: Baton Rouge, LA, USA
Posts: 357
Likes: 0
Received 0 Likes
on
0 Posts
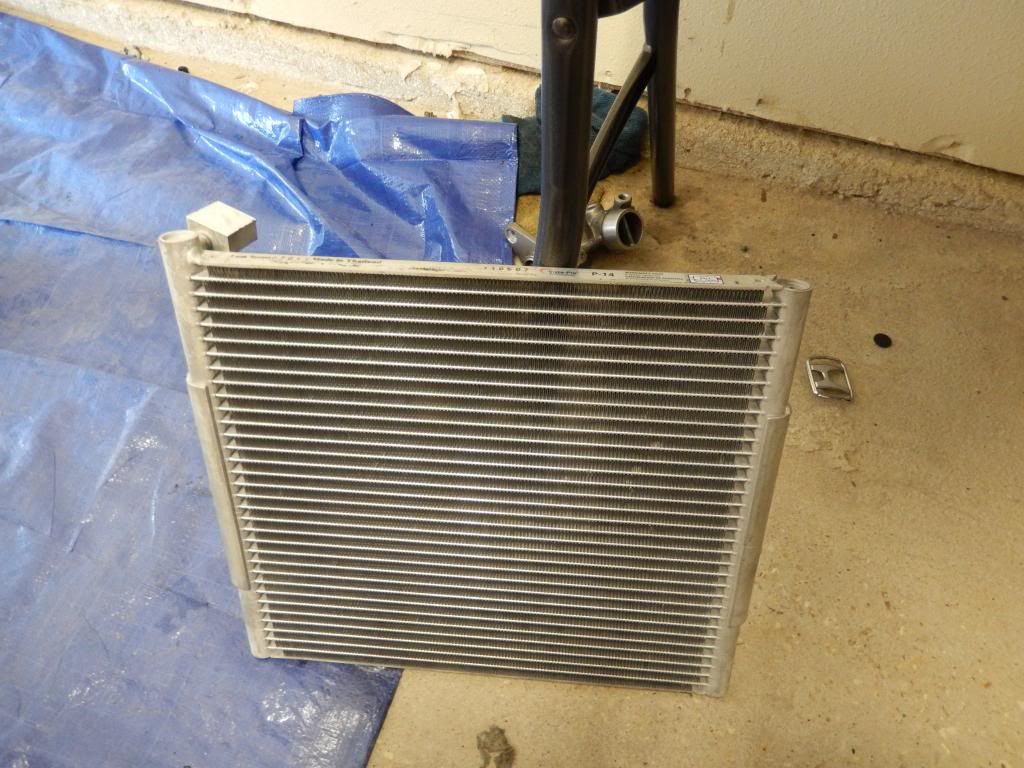
So I did a little more work last night and I finally picked up a new AC condenser and other components to bring this thing back from the dead. The AC in the car cooled well, but it was having trouble cooling at a stand still.
I pulled the condenser out and noticed how old and gross it was. It was so caked full of dirt and grime, no wonder why it wouldn't cool. It was so nasty, you couldn't even see through it.

So I got a new one and to anyone wondering, the LHD and RHD condensers are exactly the same.

I pulled all of the rubber seals off the factory unit and restored them and glued them in place on the new one.

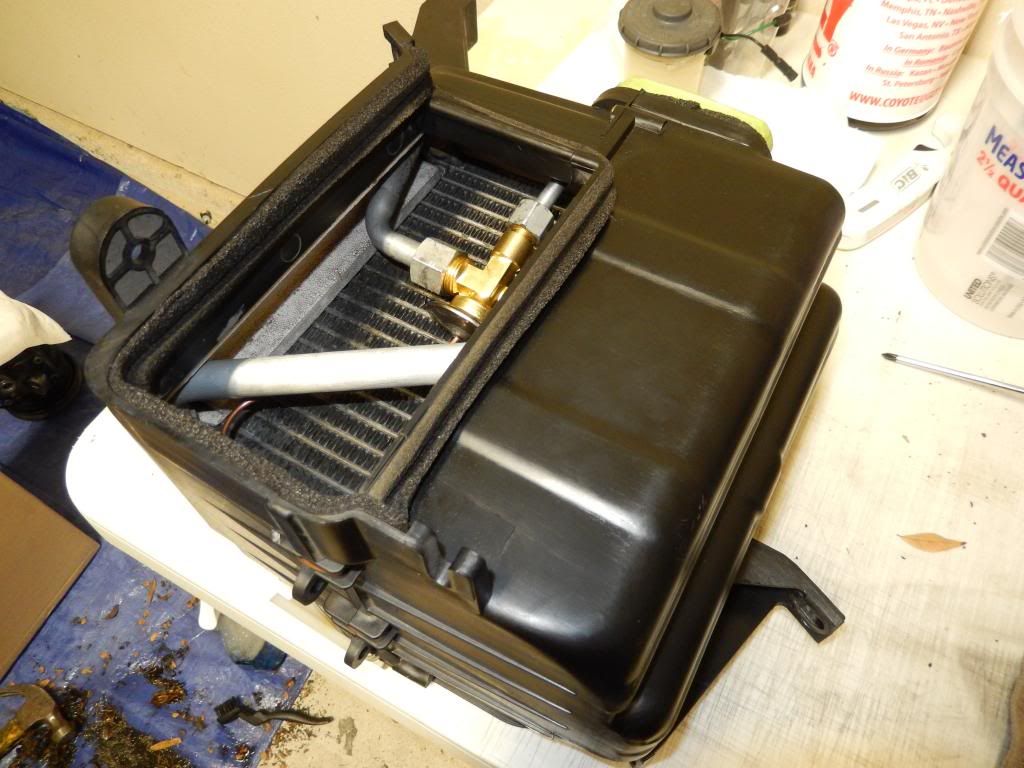
Moving on to the evaporator core, I was told by the previous owner that the expansion valve was bad but he wasn't sure if it was the same as the LHD one.
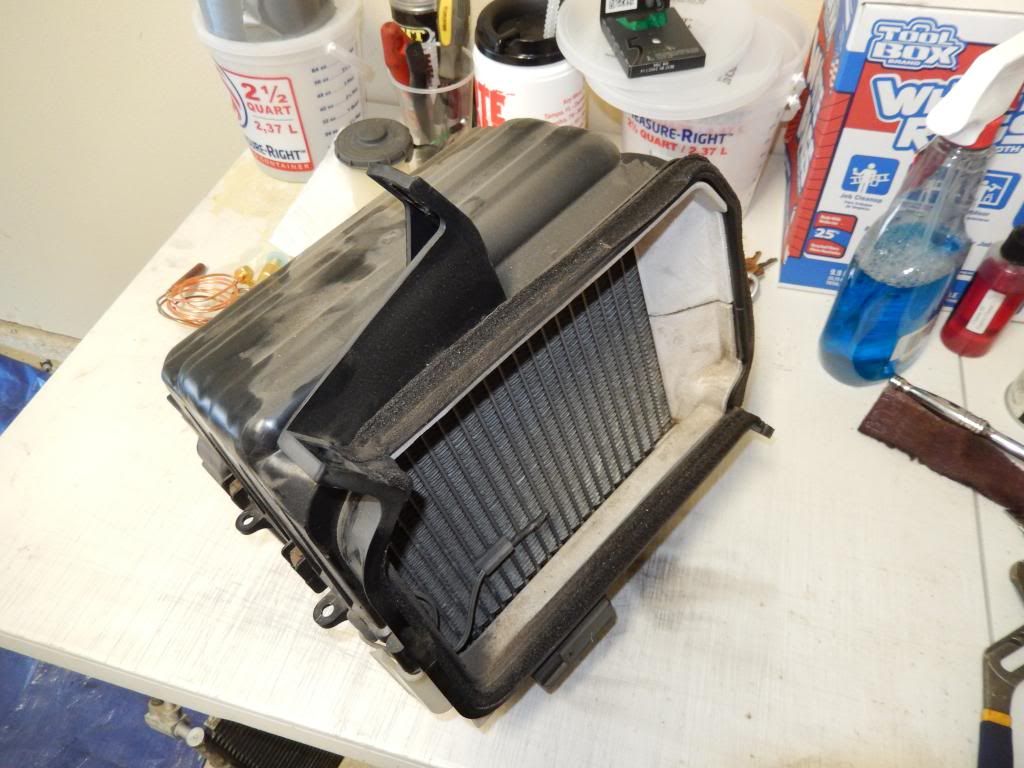

Right away I noticed that it was stuffed with leaves and debris. That will also affect cooling.

Dumped it over and JDM leaves came out!
Unscrew the housing and remove the clips. Dont forget to make a small slit in the seal around the case.
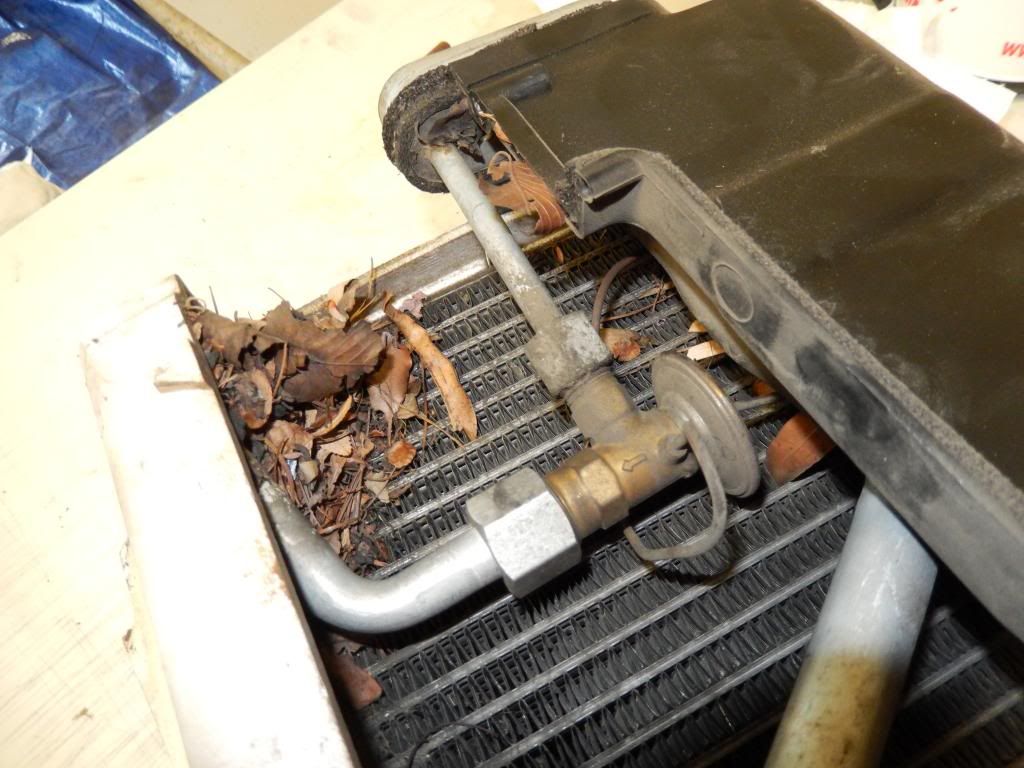
Opened up you can see all of the junk and gunk that was stuck inside.
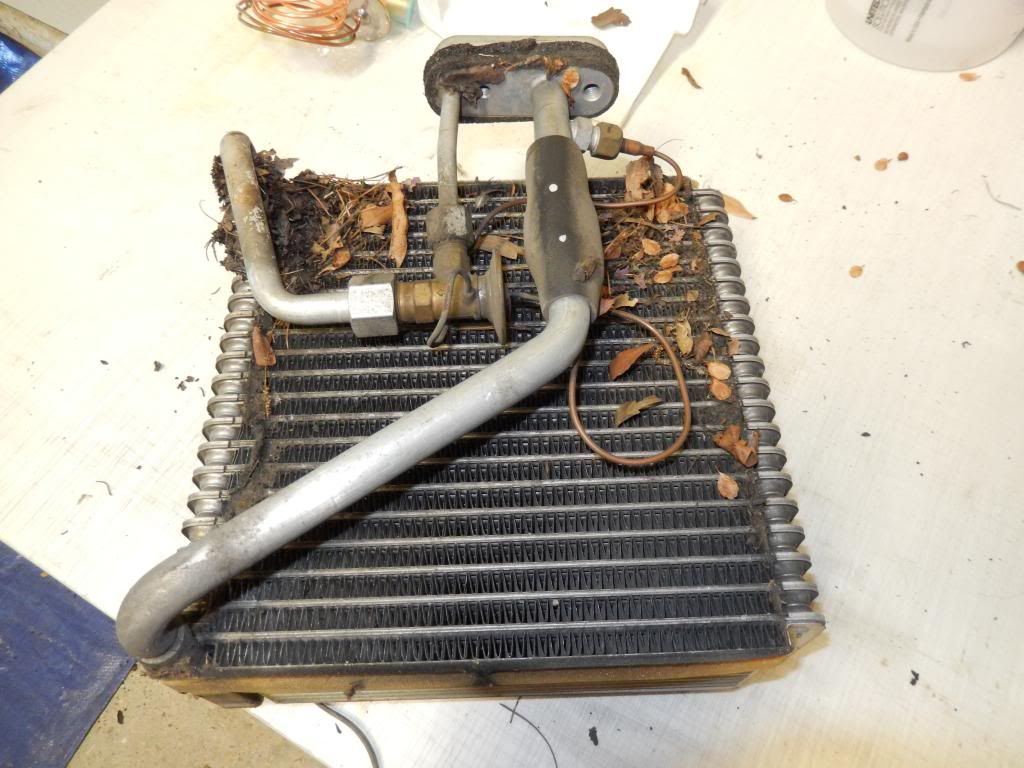
Exposed, it looked like a birds nest. I guess it doesn't look bad for 20 years of build up.

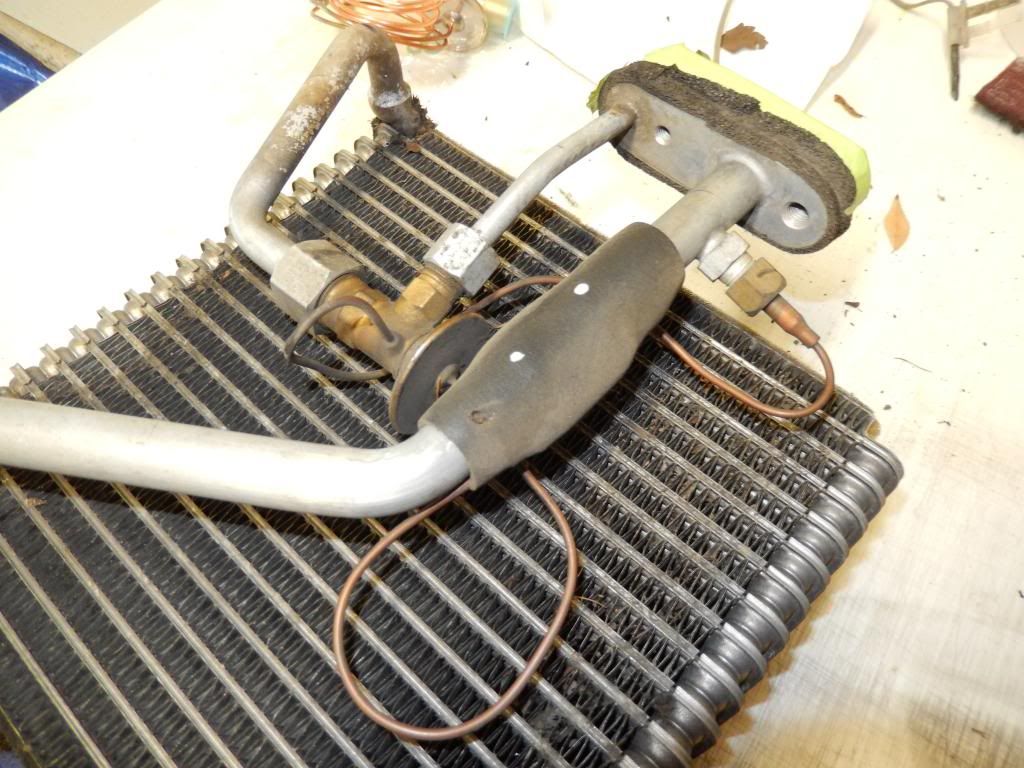
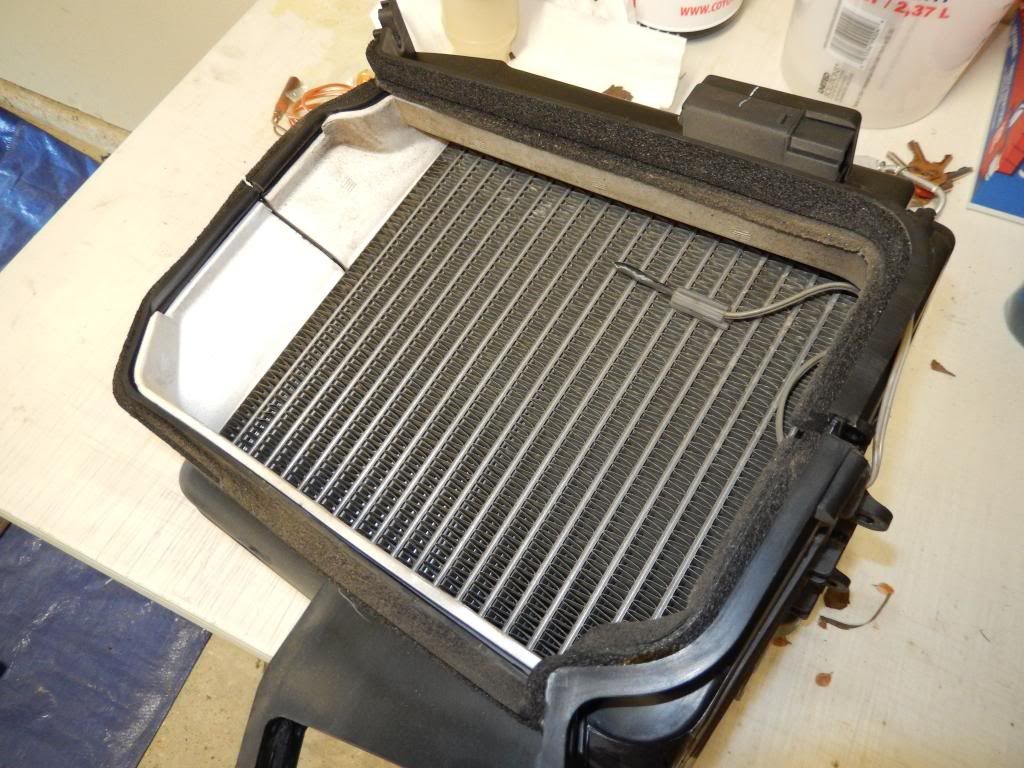
You can see the expansion valve
A little WD40 and it comes right off.
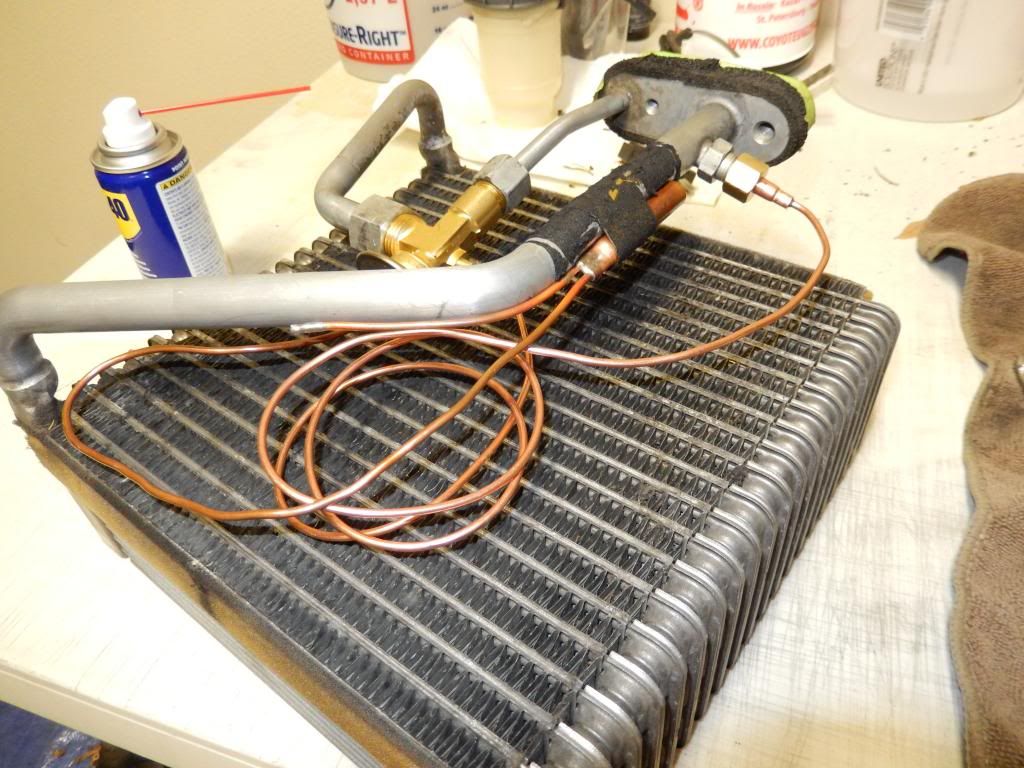
I used one from the autoparts store just to see if I could get it to work right. Turns out it's about 3 times less expensive than the Honda part and it works the same. Only down side is that you have to bend the pipes a little bit, change the o-rings and then route the coil line around a bit since it's like 10x longer than it needs to be.
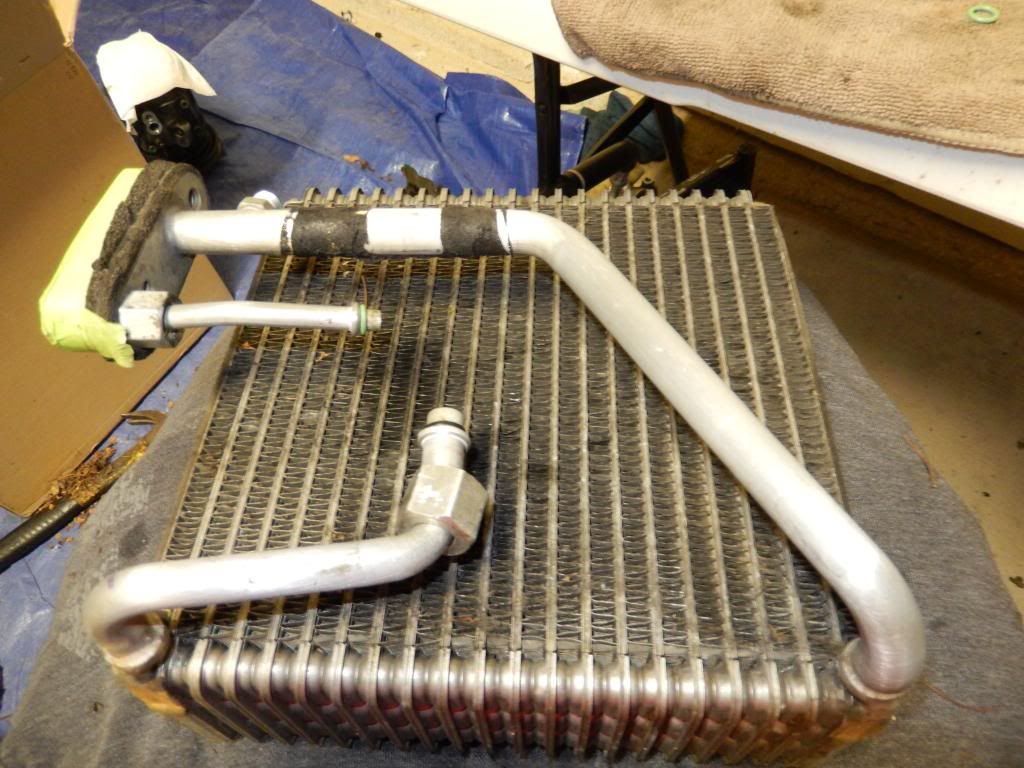
A little bit of foal insulation tape around the tube and it's done.

All cleaned up and ready to go back into the car.
I'm going start doing all of these little projects while the car is out at paint. More coming soon, thanks for looking.
I pulled the condenser out and noticed how old and gross it was. It was so caked full of dirt and grime, no wonder why it wouldn't cool. It was so nasty, you couldn't even see through it.
So I got a new one and to anyone wondering, the LHD and RHD condensers are exactly the same.
I pulled all of the rubber seals off the factory unit and restored them and glued them in place on the new one.
Moving on to the evaporator core, I was told by the previous owner that the expansion valve was bad but he wasn't sure if it was the same as the LHD one.
Right away I noticed that it was stuffed with leaves and debris. That will also affect cooling.
Dumped it over and JDM leaves came out!
Unscrew the housing and remove the clips. Dont forget to make a small slit in the seal around the case.
Opened up you can see all of the junk and gunk that was stuck inside.
Exposed, it looked like a birds nest. I guess it doesn't look bad for 20 years of build up.
You can see the expansion valve
A little WD40 and it comes right off.
I used one from the autoparts store just to see if I could get it to work right. Turns out it's about 3 times less expensive than the Honda part and it works the same. Only down side is that you have to bend the pipes a little bit, change the o-rings and then route the coil line around a bit since it's like 10x longer than it needs to be.
A little bit of foal insulation tape around the tube and it's done.
All cleaned up and ready to go back into the car.
I'm going start doing all of these little projects while the car is out at paint. More coming soon, thanks for looking.
Trending Topics


 10-04-2013, 01:14 PM
#12
Honda-Tech Member
Thread Starter
Join Date: Aug 2008
Location: Baton Rouge, LA, USA
Posts: 357
Likes: 0
Received 0 Likes
on
0 Posts
Yes, it is very nice color. I will be doing a color change though... I'm just not a fan of the Lausanne green. I tried to get used to it but every time I saw it I wanted it to be another color... so... It won't be green for much longer.
10-11-2013, 08:45 AM
#15
Honda-Tech Member
Thread Starter
Join Date: Aug 2008
Location: Baton Rouge, LA, USA
Posts: 357
Likes: 0
Received 0 Likes
on
0 Posts
Small update before the weekend begins.
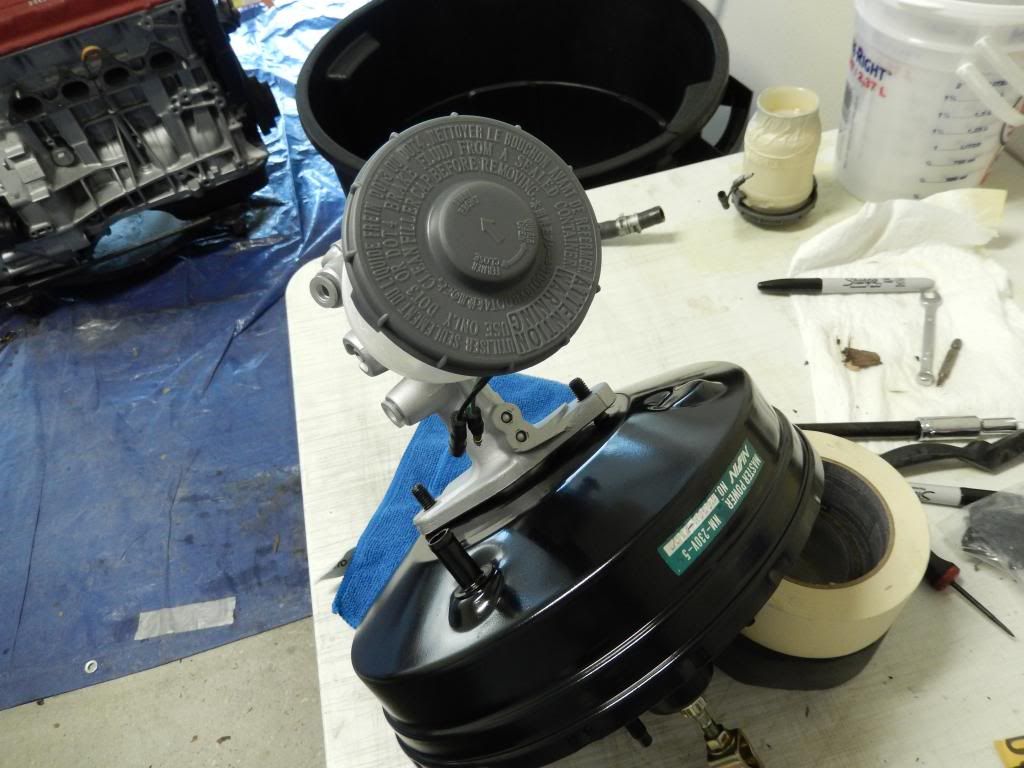
I spent some time the other day cleaning up my booster master cylinder for the EG6.
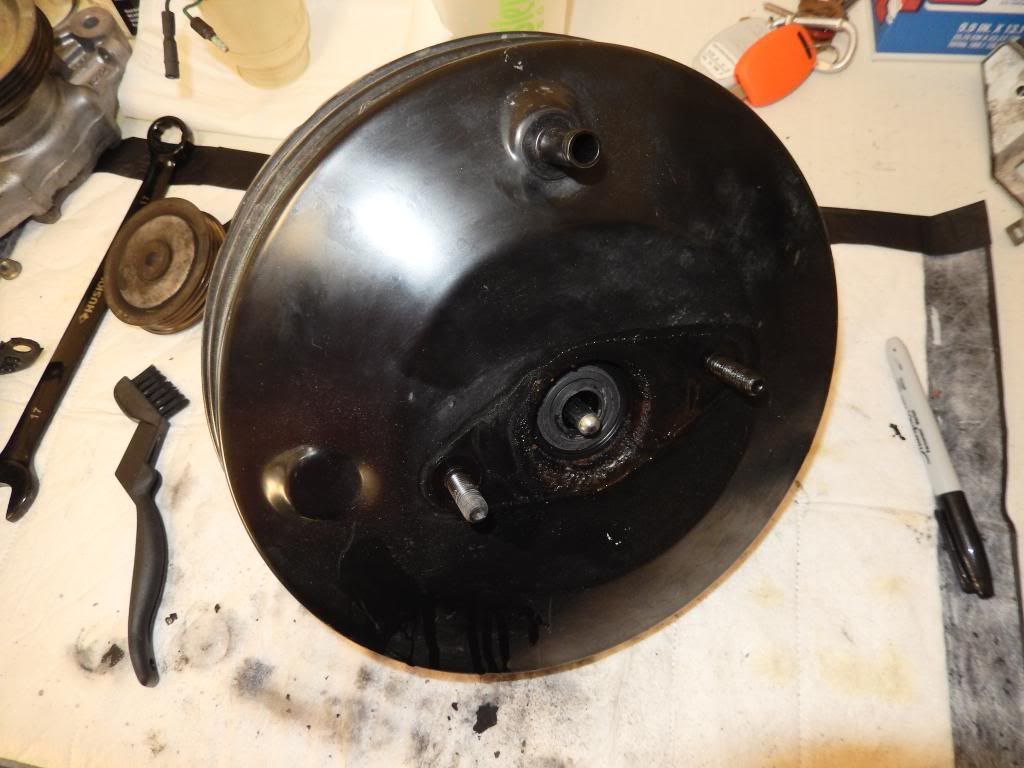
The booster certainly isn't in the worst shape that I have dealt with before so a little cleaning and fresh coat of paint would do it just fine.

My attempt at cleaning the brake reservoir was kind of at a loss since no matter what, you can't really restore the faded and stained plastic. The only option was to buy a new one, and since Honda doesn't sell them in pieces, you have to buy the whole unit.

When it came in I was excited since it looked identical as my RHD one. Buttttttt then I quickly realized that the USDM one sits at a different angle. If I was using the USDM booster it wouldn't be an issue but I don't have one, and I'd like to keep all of the OEM stuff on the car. So.... I took what I could from the new MC and rebuilt the stock one. Thankfully all of the OEM seals were the same size so I just changed all of the o-rings and I was good to go.

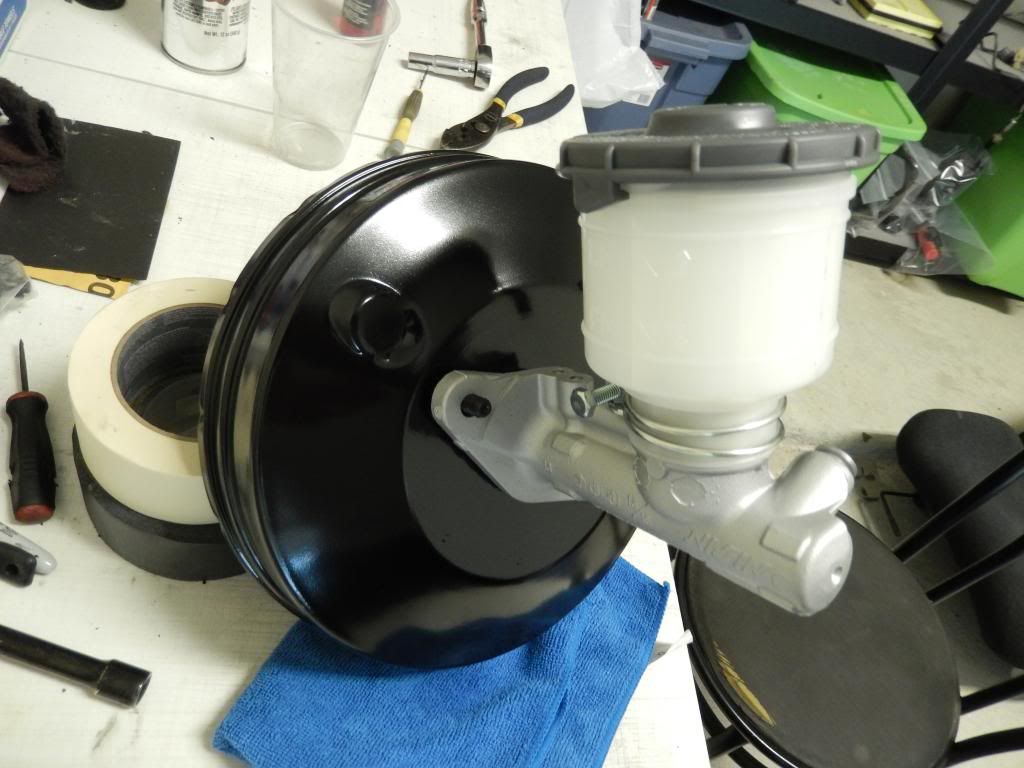
With a fresh reservoir, bracket and a thin coat of silver alumn paint the stock BMC looks perfect. It's a shame I plan on using my socks to cover up this beautiful new piece of plastic...lol
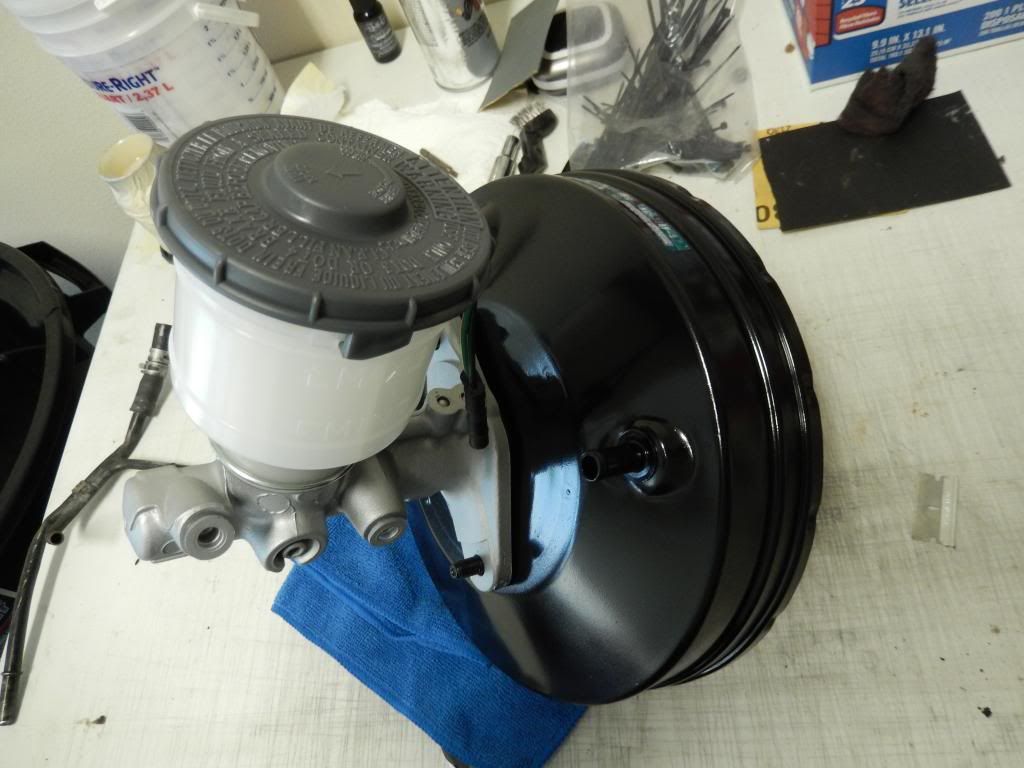
I'm still waiting on my bolts to come back from the plater, so I don't have any nuts and washers to bolt it back together, but this is how it turned out with a fresh coat of paint on the booster.
Got a few more parts in..
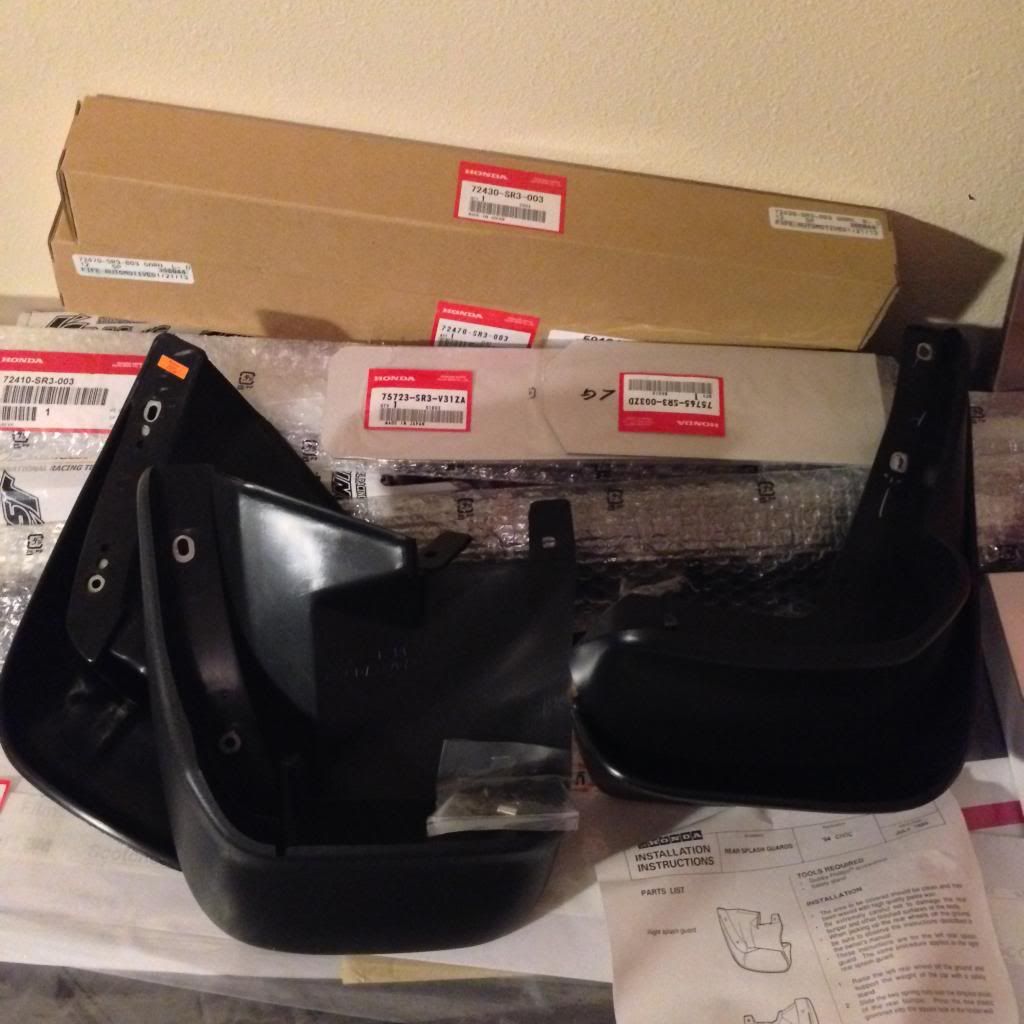
New set of mudflaps
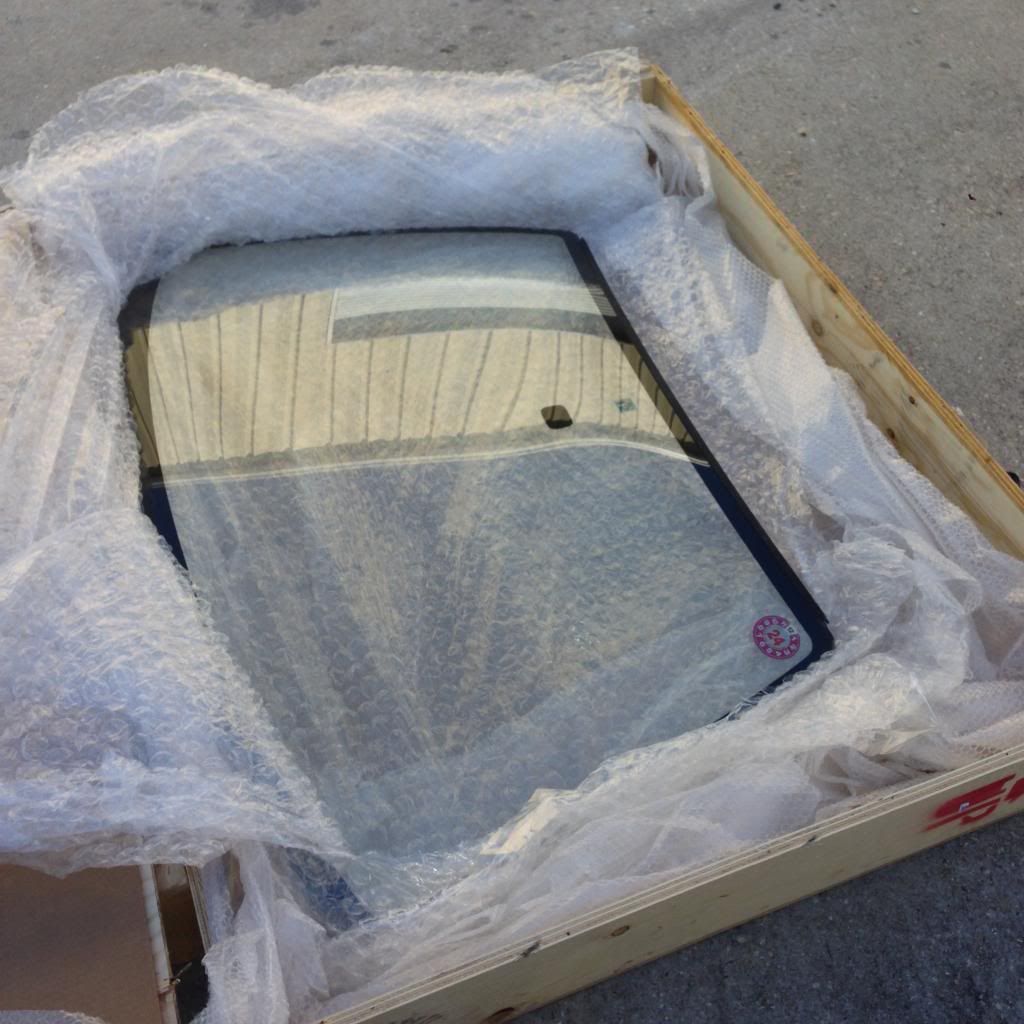
My new bronze windshield finally came in! I was so scared hammering into the crate trying to get it open but the guys at HMO did a badass job at shipping this thing.

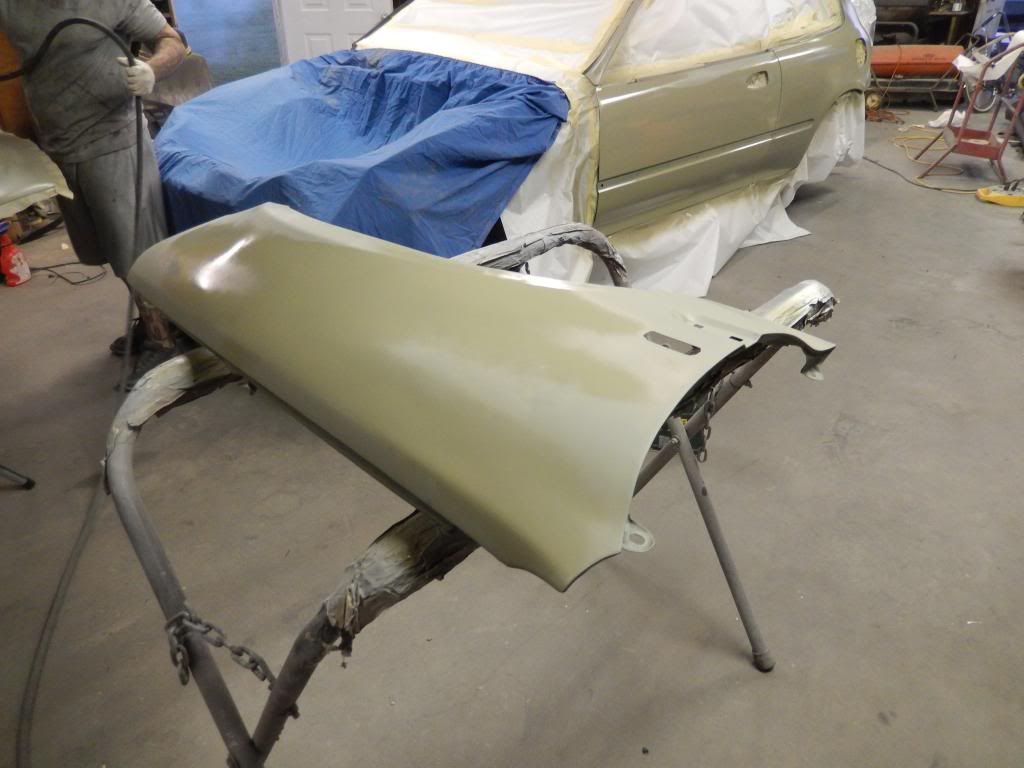
And finally.... mixed some basecoat!!! Hopefully the car will have some color this weekend!!!
Thanks for looking!
I spent some time the other day cleaning up my booster master cylinder for the EG6.
The booster certainly isn't in the worst shape that I have dealt with before so a little cleaning and fresh coat of paint would do it just fine.
My attempt at cleaning the brake reservoir was kind of at a loss since no matter what, you can't really restore the faded and stained plastic. The only option was to buy a new one, and since Honda doesn't sell them in pieces, you have to buy the whole unit.
When it came in I was excited since it looked identical as my RHD one. Buttttttt then I quickly realized that the USDM one sits at a different angle. If I was using the USDM booster it wouldn't be an issue but I don't have one, and I'd like to keep all of the OEM stuff on the car. So.... I took what I could from the new MC and rebuilt the stock one. Thankfully all of the OEM seals were the same size so I just changed all of the o-rings and I was good to go.
With a fresh reservoir, bracket and a thin coat of silver alumn paint the stock BMC looks perfect. It's a shame I plan on using my socks to cover up this beautiful new piece of plastic...lol
I'm still waiting on my bolts to come back from the plater, so I don't have any nuts and washers to bolt it back together, but this is how it turned out with a fresh coat of paint on the booster.
Got a few more parts in..
New set of mudflaps
My new bronze windshield finally came in! I was so scared hammering into the crate trying to get it open but the guys at HMO did a badass job at shipping this thing.
And finally.... mixed some basecoat!!! Hopefully the car will have some color this weekend!!!
Thanks for looking!
10-11-2013, 11:02 AM
#18
Honda-Tech Member
Thread Starter
Join Date: Aug 2008
Location: Baton Rouge, LA, USA
Posts: 357
Likes: 0
Received 0 Likes
on
0 Posts
It isn't going to be gray! haha
I'm going to save the color until some of the car is painted... it won't be anything special, just a factory SiR-S color.
I just got an update from my plater... my hardware is almost done!


You can see how awesome the bolts look after being plated. I'm so ready to get this thing painted and start assembly!!!
I'm going to save the color until some of the car is painted... it won't be anything special, just a factory SiR-S color.
I just got an update from my plater... my hardware is almost done!
You can see how awesome the bolts look after being plated. I'm so ready to get this thing painted and start assembly!!!
10-14-2013, 01:51 PM
#20
Honda-Tech Member
Thread Starter
Join Date: Aug 2008
Location: Baton Rouge, LA, USA
Posts: 357
Likes: 0
Received 0 Likes
on
0 Posts
Update for the week...
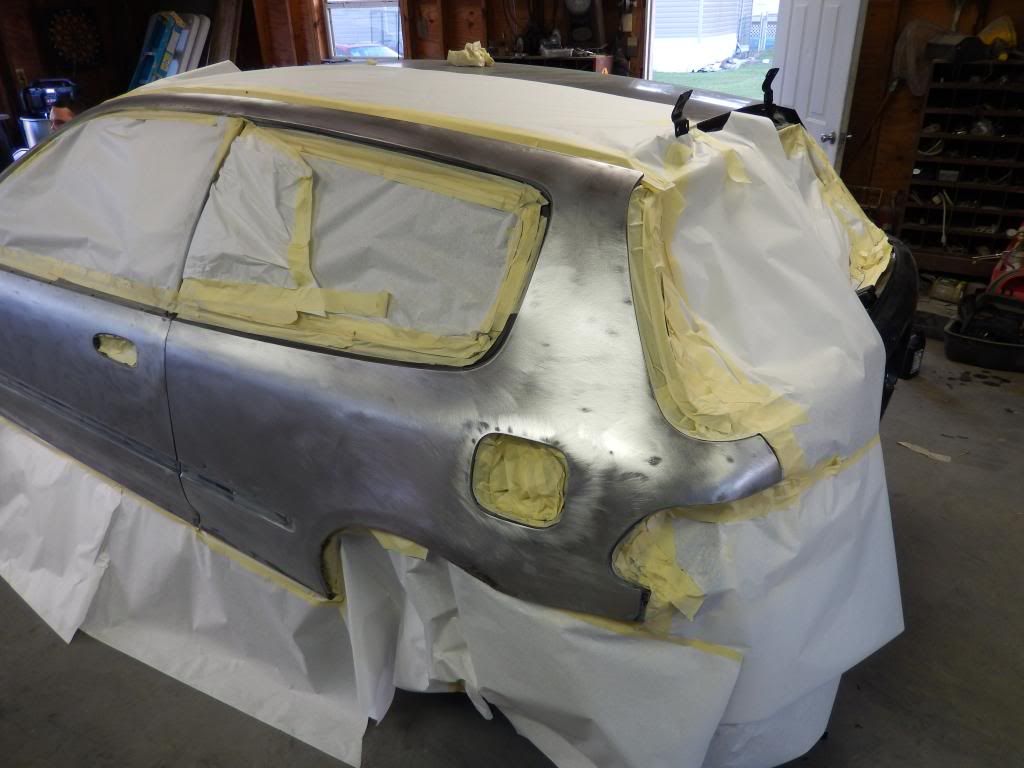
No color on the car as of yet, but there should be some on it this week. We had to get the body work done and finish sanding the car. While I was gone, the rest of the paint was stripped off the roof and other parts of the quarter panel. Thankfully there are only a few little minor dings that need to be addressed before moving on.


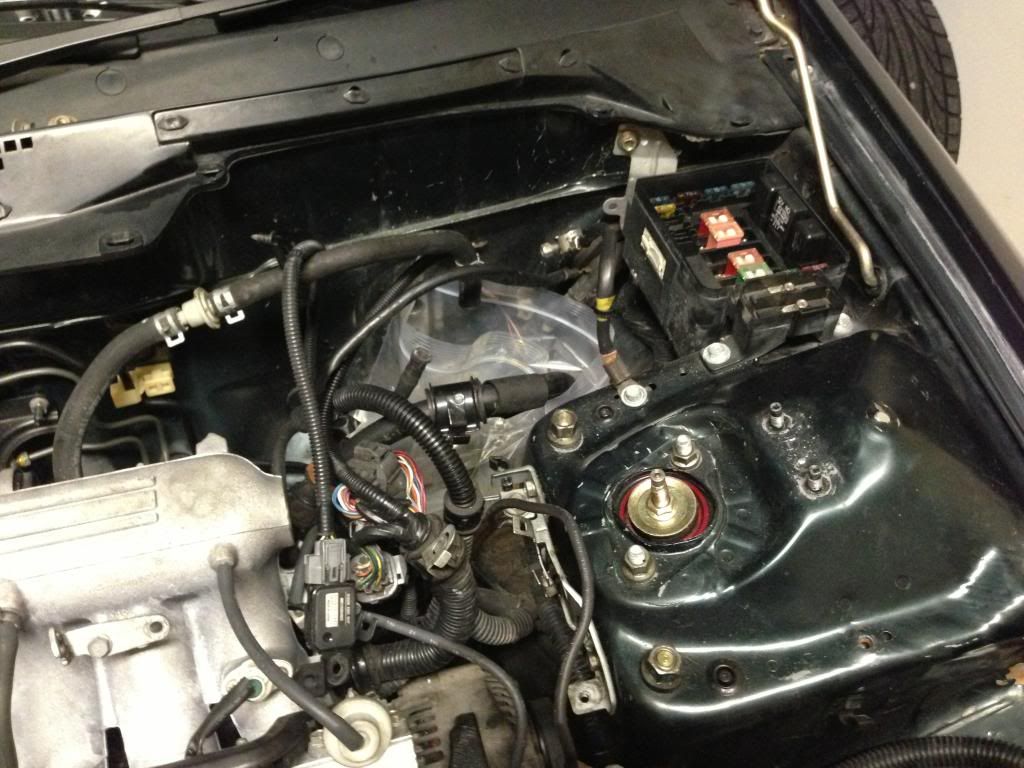
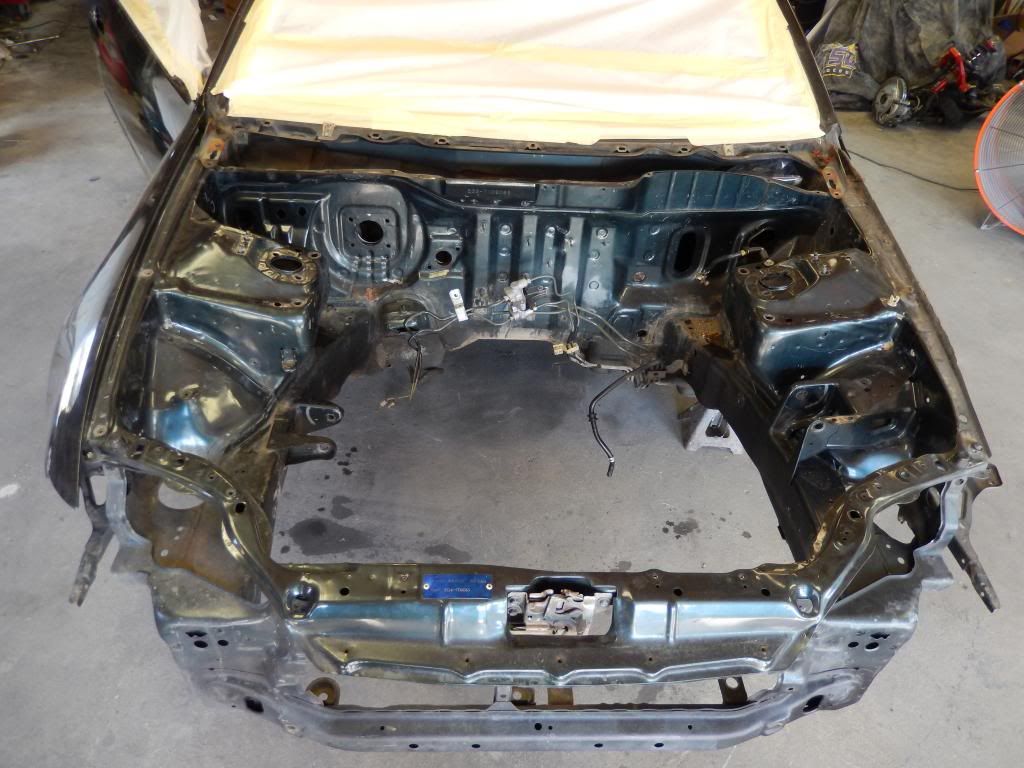
The bay was primed and it pretty close to being ready for paint.


We were getting the car ready to sand the jams and get them ready for primer too.
While we were doing that, my buddy was working on the body work.


All taped up and wiped down with cleaner. Time to sand.

Blocking out the hood...

Driver side jam done. The paint wasn't as thick in here because previous painters didn't remove the doors.

Driver door getting blocked out.

Rear section all scuffed up and ready to paint.

This is the worst panel on the whole car, there are probably 5 small little dings in it.

Pass side jam done. You can see the stock sealer gray under where the stickers used to be.

Rear hatch blocked out, almost ready for another coat of primer.

Driver door blocked and ready for another coat of primer.

Since the top of the hood was stripped, we had to sand down the underside.

Primer time.

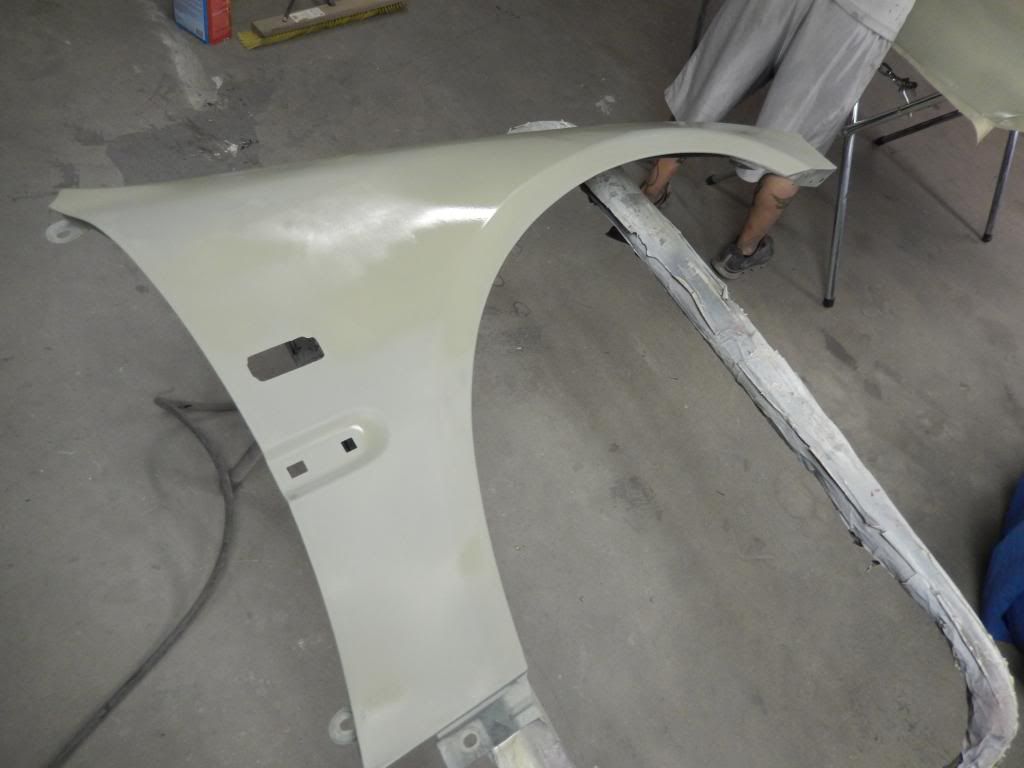
Finished hood ready for primer.

Finshed fender that was blocked and smoother out.


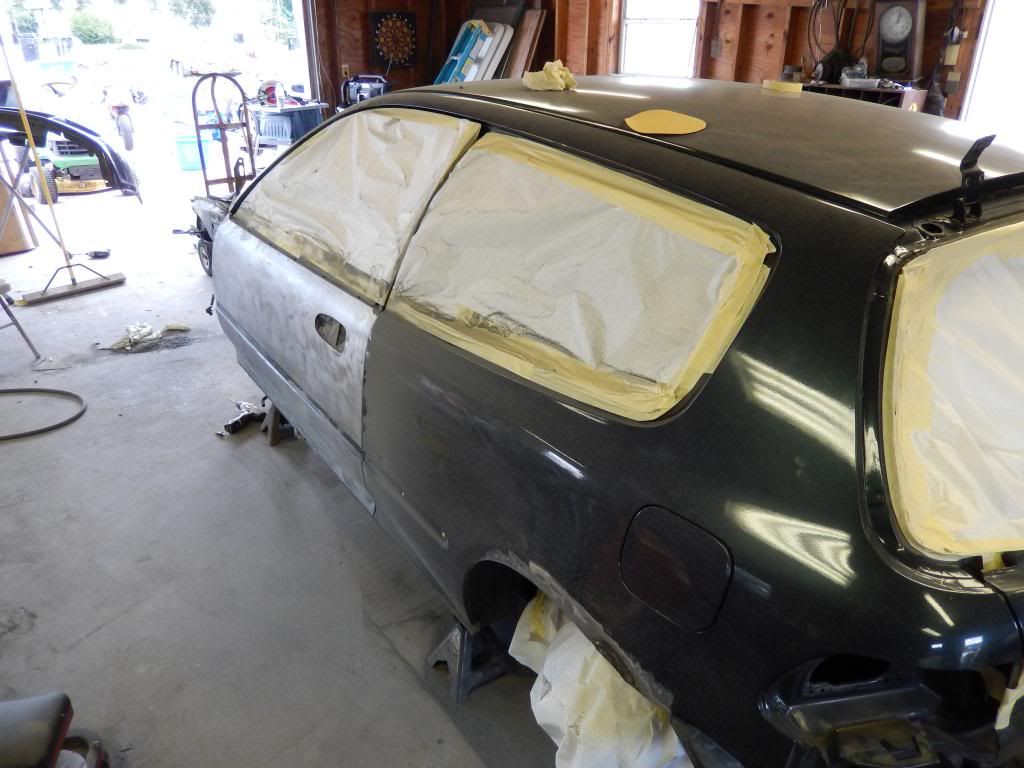
The car was tapped up to prevent over spray getting on all of the freshly sanded parts.


Everything will get blocked one last time and then the final coat of primer will go on. It's getting damn close!! It should be home in the next two weeks!
No color on the car as of yet, but there should be some on it this week. We had to get the body work done and finish sanding the car. While I was gone, the rest of the paint was stripped off the roof and other parts of the quarter panel. Thankfully there are only a few little minor dings that need to be addressed before moving on.
The bay was primed and it pretty close to being ready for paint.
We were getting the car ready to sand the jams and get them ready for primer too.
While we were doing that, my buddy was working on the body work.
All taped up and wiped down with cleaner. Time to sand.
Blocking out the hood...
Driver side jam done. The paint wasn't as thick in here because previous painters didn't remove the doors.
Driver door getting blocked out.
Rear section all scuffed up and ready to paint.
This is the worst panel on the whole car, there are probably 5 small little dings in it.
Pass side jam done. You can see the stock sealer gray under where the stickers used to be.
Rear hatch blocked out, almost ready for another coat of primer.
Driver door blocked and ready for another coat of primer.
Since the top of the hood was stripped, we had to sand down the underside.
Primer time.
Finished hood ready for primer.
Finshed fender that was blocked and smoother out.
The car was tapped up to prevent over spray getting on all of the freshly sanded parts.
Everything will get blocked one last time and then the final coat of primer will go on. It's getting damn close!! It should be home in the next two weeks!
10-14-2013, 02:28 PM
#21
Honda-Tech Member
wow I love it man . I would love to do this to my ctr one day . Its deff a lot of work and dedication . Keep up with the great work I cant wait to see it all done .
 10-14-2013, 04:27 PM
#23
Honda-Tech Member
what grit sand paper did you guys use to sand down the car? 320 or 400? And did you guys wet sand the car? Other than that the car is coming along great. I can't wait to see the final paint on the car.
10-15-2013, 06:19 AM
#24
Honda-Tech Member
Thread Starter
Join Date: Aug 2008
Location: Baton Rouge, LA, USA
Posts: 357
Likes: 0
Received 0 Likes
on
0 Posts
We used all, 180, 320 and 400... just depends on what and where I was sanding. The jams got 320 while the primed and filled spots got 180 and then a 320 DA... then blocked with 400.
10-15-2013, 08:54 AM
#25
Honda-Tech Member
Car is looking great. Love the attention to detail. Looking forward to the finished product. Are you tuck the brake lines as well or just the engine harness?