When you click on links to various merchants on this site and make a purchase, this can result in this site earning a commission. Affiliate programs and affiliations include, but are not limited to, the eBay Partner Network.
Figured I'd post my 87 CRX Si here as well, I'm starting to get traction in getting things done on it.
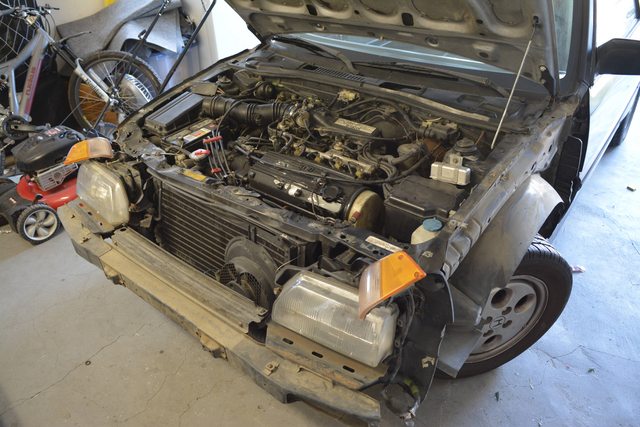
Hi guys, new here, been looking for a relatively cheap project to sink my teeth into, well dirt cheap anyways. So I've been trolling craigslist for San Diego, CA for a bit to find a project worth starting, looking at Civics, Accords, Preludes, etc.... So I was looking for around a week, and here in San Diego, you have to go quick when a good deal comes up. So a 1987 Honda CRX Si pops up on Craigslist for $500. Says it's running and drives great, but the registration is dated back a bit to December of 2015, no biggie, I can get past that easy, considering I'm military and out of state, oh and it wasn't passing smog because it was idling high. The pictures show that the hood was't closing for some reason and the nose panel was gone as well. So I ask the guy if he can show the next day for me as I'm on duty until I get off tomorrow and he was cool with that as well. So next day me and my wife head up to the place, that's really small community north of San Diego, so I check it out the interior wasn't as good as I thought, the pictures didn't show the ratty side of the driver seat, no biggie, still functional. The thing that got me was how smooth the engine sounded after startup, but again the high idle which was around 1500-1600 RPMs. So I look around, the missing nose piece was because of a light front end collision, the radiator core support was bent in good but not enough to damage functionality of the cooling system, so I gotta replace that. Tires weren't bad either, all the normal stuff that happens to a CRX of this age were happening, cracked fenders. Hardly any rust was on the car. So we negotiate the car down to $400 dollars, and do the paper work for me to take it home.
So the drive home was good, before I took of during my inspection found the car had brand new KYB Excel-G/GR-2 shocks on it, which is one less thing I have to replace. The drive was pretty smooth, revs smoothly, the gear box has a bit of grind if I shift too fast, which could be just fluid, might use GM Synchromesh to see if that fixes it.
Done so far:
1. Engine Oil and Filter.
2. Spark Plugs
3. Rotated steering wheel as it was off by 90 degrees.
4. Cleaned out throttle body, had a thick coating of carbon inside it.
5. Burped the cooling system.
Restoration/restomoding has started in earnest, however I didn't get any images of part of what I have already completed so far. So far I am working on repairing the front end, as the front end was for some part damaged as you will see in the images I post. You will also note that I don't have all the money in the world for proper equipment so I'm doing most of this as cheaply and properly as I can, so lots of Rustoleum products are being using to repair damaged parts.
Damage to be repaired:
1. Minor rust cancer in the hood.
-Removed as much rust as I could, prepped with rustoleum converter and filled with bondo. - COMPLETE
-Prepped hood for Rustoleum Auto Primer. - COMPLETE
-Multiple coats of primer applied to hood. - COMPLETE
-Sanded primed hood. - COMPLETE
-Applied Rustoleum Auto Black Paint to hood, multiple cans were used. -Complete
-Wet sand cured paint. - NOT COMPLETED
-Apply more paint if required, might need to add a metallic coat or two.
-Polish with Meguires products.
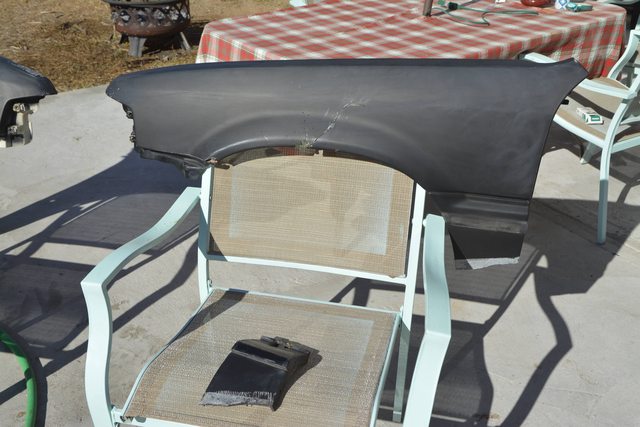
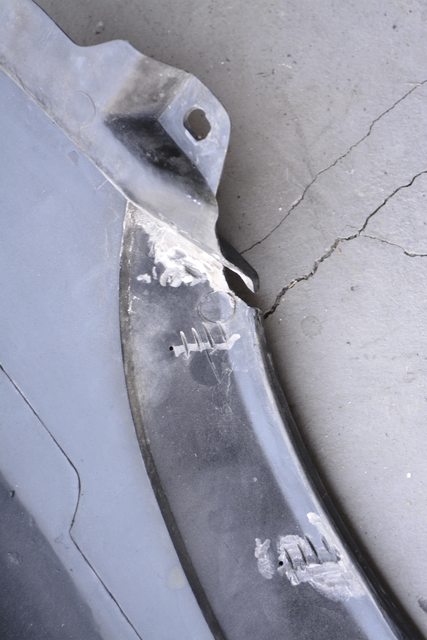
2. Repair Cracked Fenders: (Can't Afford Heeltoe fiberglass replacements at this time)
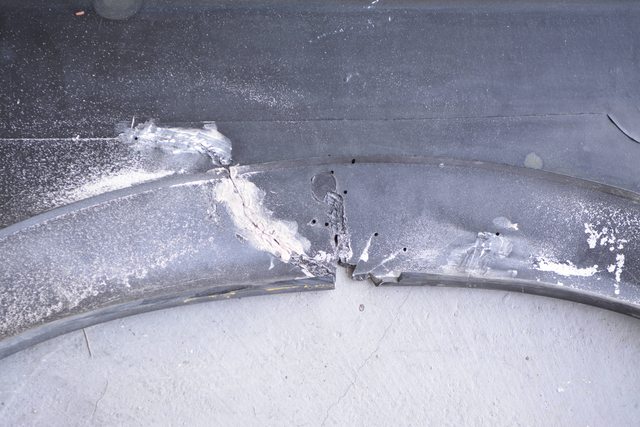
-Remove and drill ends of cracks to prevent further cracking. - COMPLETE
-Clean Fenders. - COMPLETE
-Sand of duct tape residue. - NOT COMPLETE
-Cut crevices across cracks to provide better adhesion strength. - NOT COMPLETE
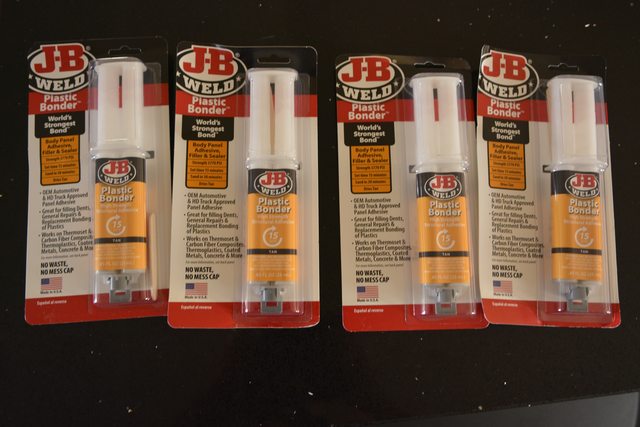
-Apply JB Weld Plastic Repair Product. - NOT COMPLETE
-Sand and prime fenders. - NOT COMPLETE
-Paint outer surface with Rustoleum Auto Paint. - NOT COMPLETE
-Paint Inner surface with truck bed liner. - NOT COMPLETE
I'll post close ups of the how I am doing the repairs later.
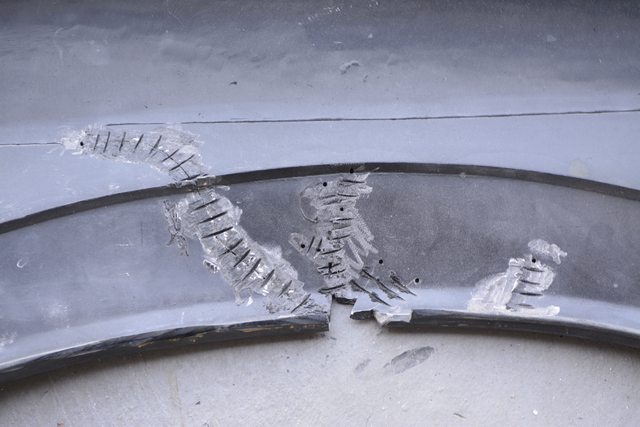
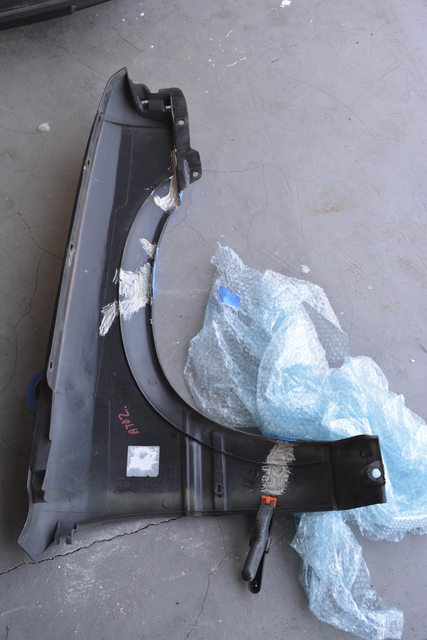
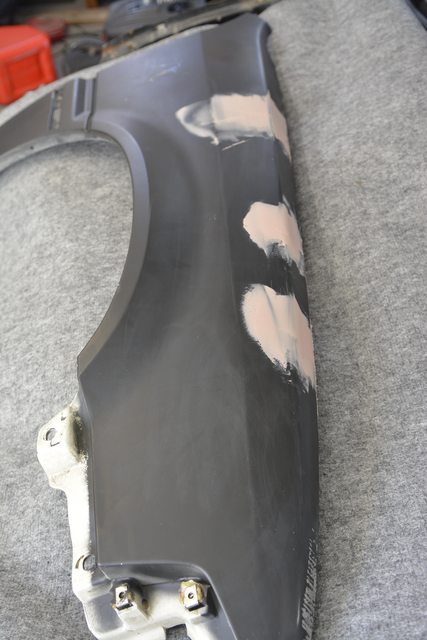
Anyways, progress has been made on repairing the plastic fenders. I am using a combination of JB Weld Plastic Repair on the back for strong bonding and Bondo on the exterior surface to fill in any gaps.
Had to remove someone else's previous repair attempt.
Cut crevices across the cracks to increase bonding strength.
JB Weld Plastic Repair applied to driver side fender.
Bondo applied to exterior of passenger side fender. Will be doing the same for the driver side.

 11-06-2016, 02:08 PM