
Five years and counting: my low budget Integra build
 09-20-2012, 08:33 AM
#51
Honda-Tech Member
Thread Starter
In order to spend more time than necessary on trivial details, I made another modification to the upper water outlet. The alternator relocation kit from PB’s CRX meant there was no room for a conventional radiator and I had to make provisions for a “tucked” radiator. Although this was not my preference, it was born from necessity. So rather than running an “L” shaped radiator fill as I had done on the EG, I decided to relocate the radiator fill on to the upper water outlet. First order of business was to get the desired height. I just found a spare rod of aluminum and put the fill on it to simulate the height.

Then to test the positioning I taped together the fill, the water neck, and the cut aluminum pipe to make sure it was where I wanted it and that it would not sacrifice serviceability.
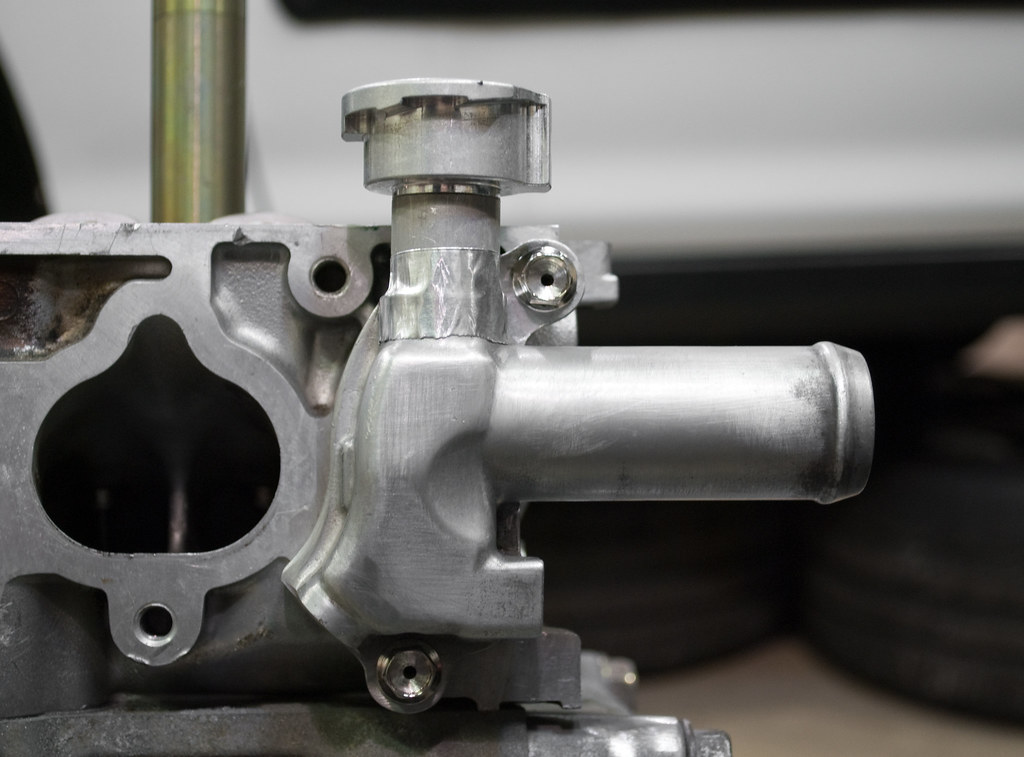
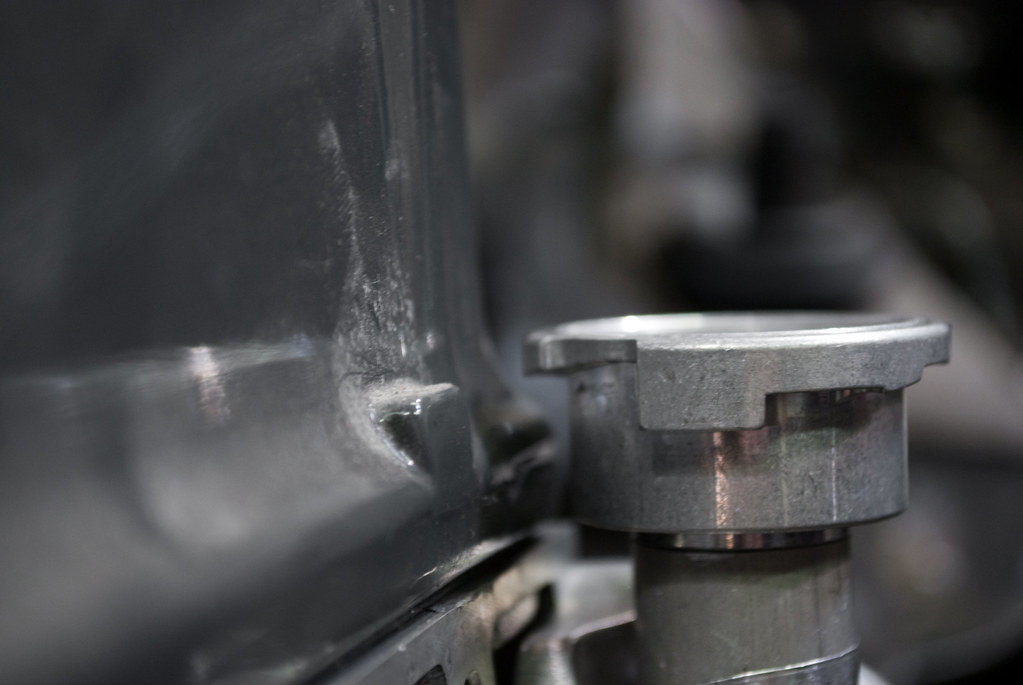
The valve cover slides over perfectly and even has a little “gimme” room as I can cheat it backwards as it’s raised. There’s no contact with the fill or cap as the valve cover is removed or reinstalled.
Then I had Kyle do some welding – not even for the last time on such a small piece. . . I tested it out with my Feel’s cap and everything went as expected. I got the fill from Wizard Cooling because they’re only 1/4 turn before the cap is released meaning I wouldn’t have to turn the wings of the cap into the valve cover. I got a different fill from another company a long time ago that required almost 2/3 turn and surely wouldn’t have worked. Also, thanks to PB for the impromptu use of his spare valve cover. I really love working in a shop where there are so many spare parts lying around.
Some sanding on the weld and a change to 1/8” NPT to -3 AN fitting overflow outlet ad I was finally left with a somewhat finished piece. I still had yet to ask anyone to change the outlet to a -16 AN fitting but I thought this had gone far enough. It was time to stop obsessing over such a small piece and actually get to other areas of the car. This went back on my mock-up engine to plan the intake and radiator arrangement.
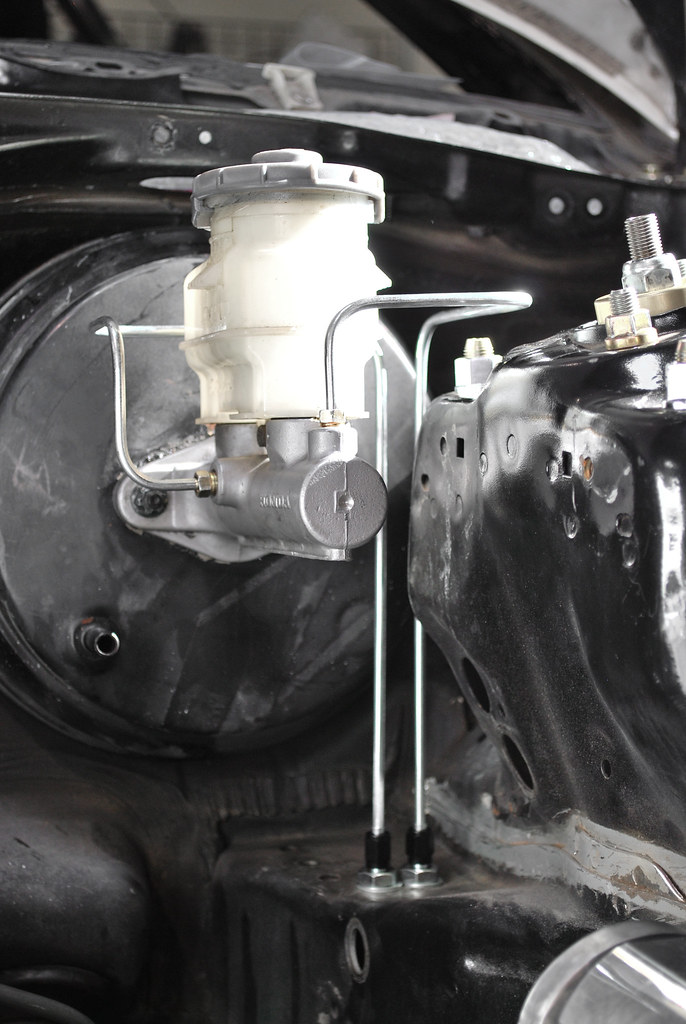
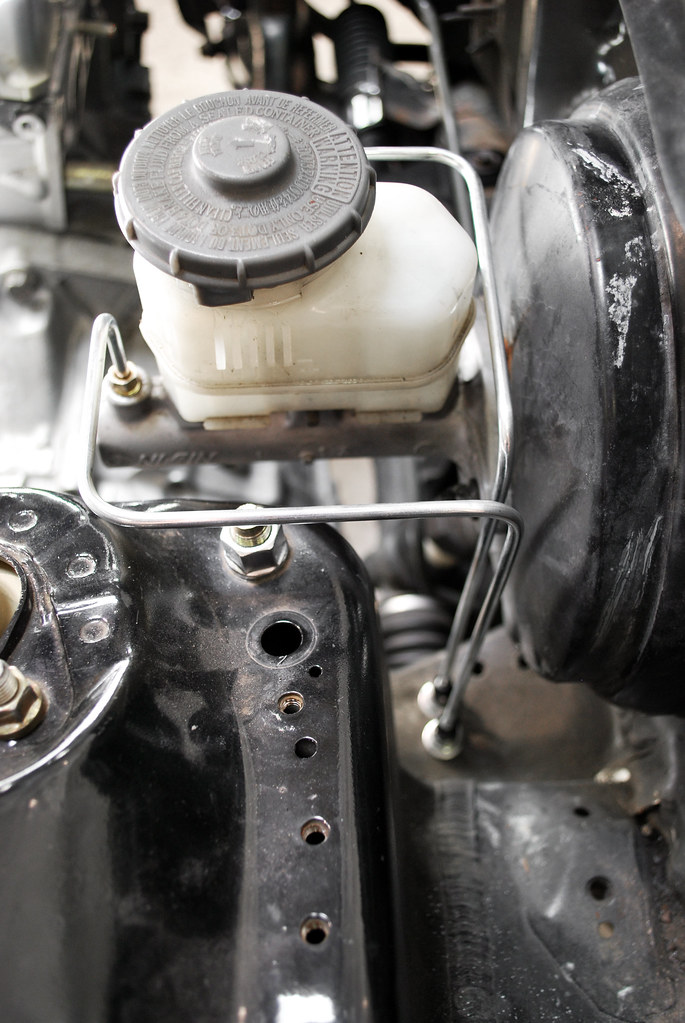
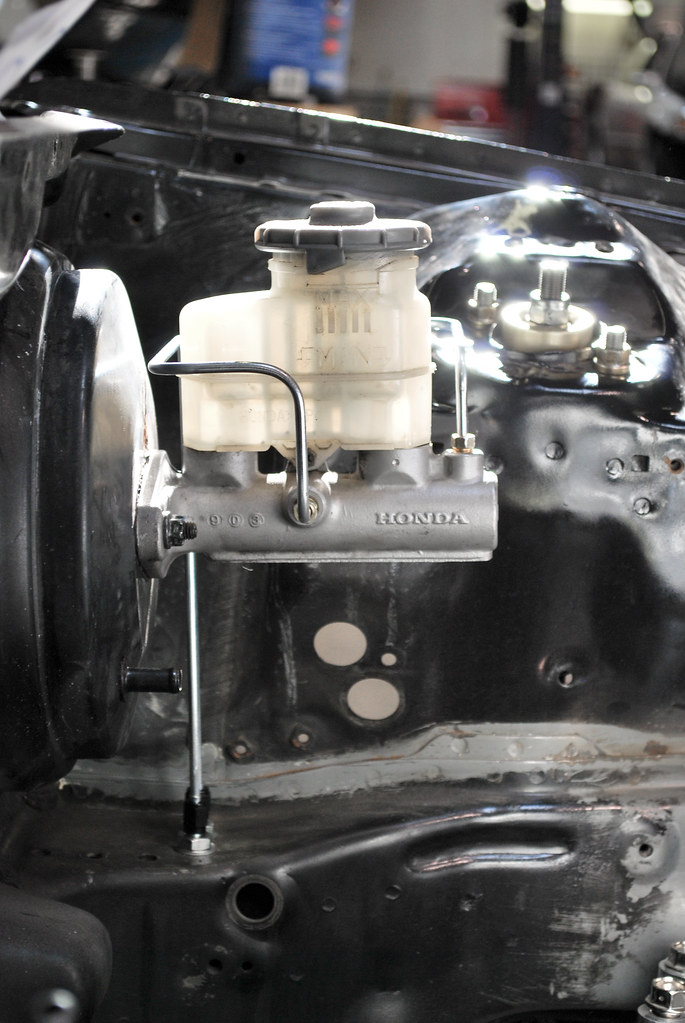
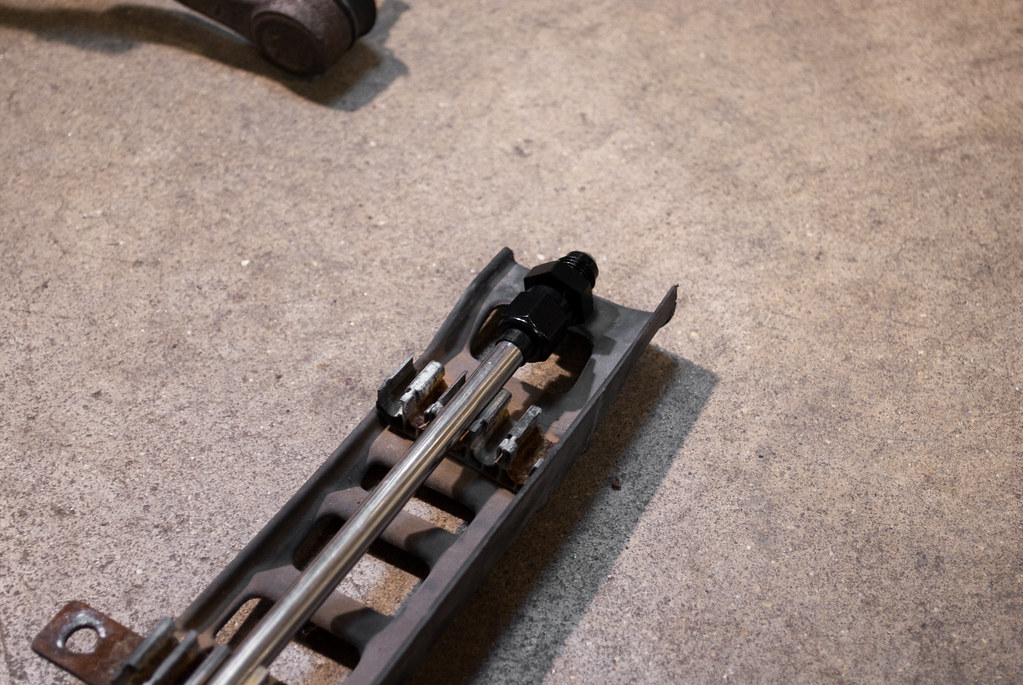
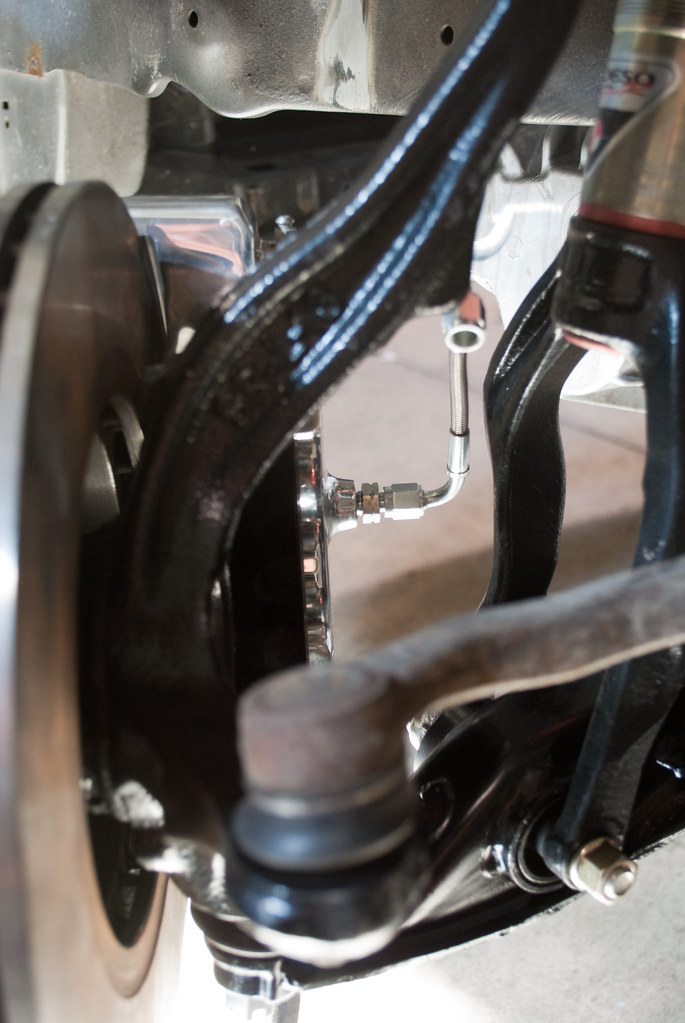
One area I left off to tackle other sections of the build was the front brake lines. I still had them hanging out and finally decided to terminate them with -3 sleeves and nuts.
What is apparent is the black tube nut at the base of the brake lines. What may not be apparent is the silver tube sleeve under the nut. This was planned to mirror the fittings to be used everywhere else in the engine bay. At this point I wasn’t sure if it was going to work but after flaring the line it was too far to go back.
Then to test the positioning I taped together the fill, the water neck, and the cut aluminum pipe to make sure it was where I wanted it and that it would not sacrifice serviceability.
The valve cover slides over perfectly and even has a little “gimme” room as I can cheat it backwards as it’s raised. There’s no contact with the fill or cap as the valve cover is removed or reinstalled.
Then I had Kyle do some welding – not even for the last time on such a small piece. . . I tested it out with my Feel’s cap and everything went as expected. I got the fill from Wizard Cooling because they’re only 1/4 turn before the cap is released meaning I wouldn’t have to turn the wings of the cap into the valve cover. I got a different fill from another company a long time ago that required almost 2/3 turn and surely wouldn’t have worked. Also, thanks to PB for the impromptu use of his spare valve cover. I really love working in a shop where there are so many spare parts lying around.
Some sanding on the weld and a change to 1/8” NPT to -3 AN fitting overflow outlet ad I was finally left with a somewhat finished piece. I still had yet to ask anyone to change the outlet to a -16 AN fitting but I thought this had gone far enough. It was time to stop obsessing over such a small piece and actually get to other areas of the car. This went back on my mock-up engine to plan the intake and radiator arrangement.
One area I left off to tackle other sections of the build was the front brake lines. I still had them hanging out and finally decided to terminate them with -3 sleeves and nuts.
What is apparent is the black tube nut at the base of the brake lines. What may not be apparent is the silver tube sleeve under the nut. This was planned to mirror the fittings to be used everywhere else in the engine bay. At this point I wasn’t sure if it was going to work but after flaring the line it was too far to go back.
 09-20-2012, 11:39 AM
#53
Honda-Tech Member
Nice work! It blows my mind how you have planned out every single detail down to the last nut. Loving the build!
09-20-2012, 04:08 PM
#54
Honda-Tech Member
wow this is some Sirius business keep up the good work. When the cars on the floor post some ground clearance shots of the oil pan if you could. Thanks.
09-21-2012, 10:16 AM
#55
Honda-Tech Member
Thread Starter
Thanks again, guys. I can take pictures once I have an oil pan but it won't do you any good. I've repositioned the motor so if you're using mine as a gauge for clearance in your own car your results will be different. Add to that the variations in ride height, wheel size, tire aspect ratio, etc there's no use in comparing.
09-21-2012, 10:28 AM
#56
Honda-Tech Member
Thread Starter
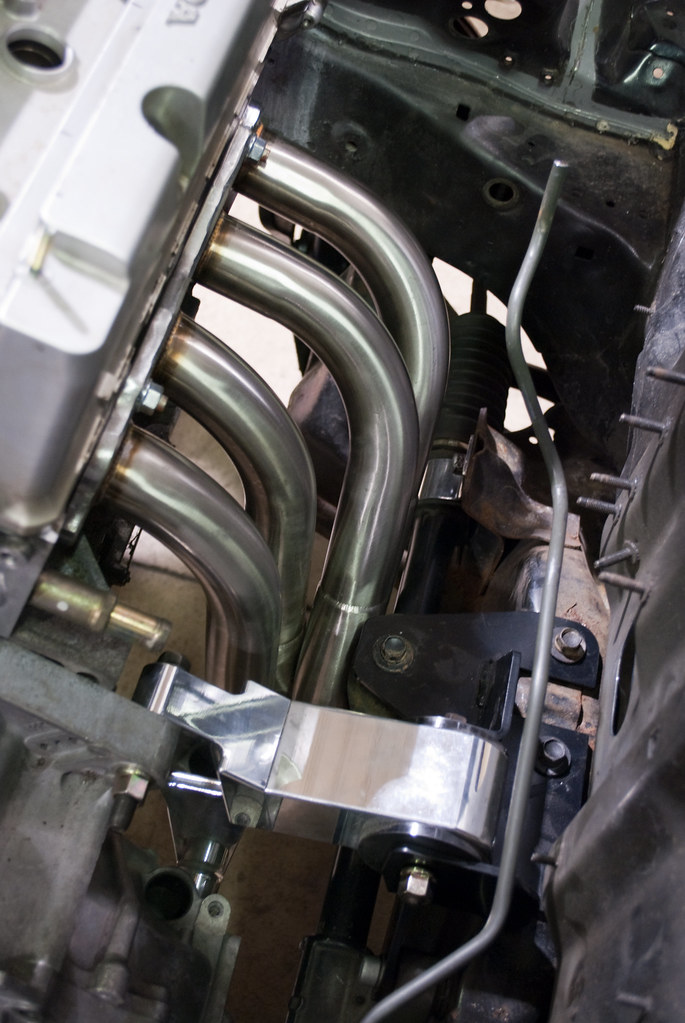
A stroke of good timing came in the form of a K20A2 swap going on at the same time as my car was in its incomplete state. This gave me the opportunity to test some of his off-the-shelf parts with my new engine mount setup. This customer opted to go with a Private Label Manufacturing header which is a replica of common power-producing “custom” swap headers. I wasn’t interested in the brand or the politics, just the fitment.
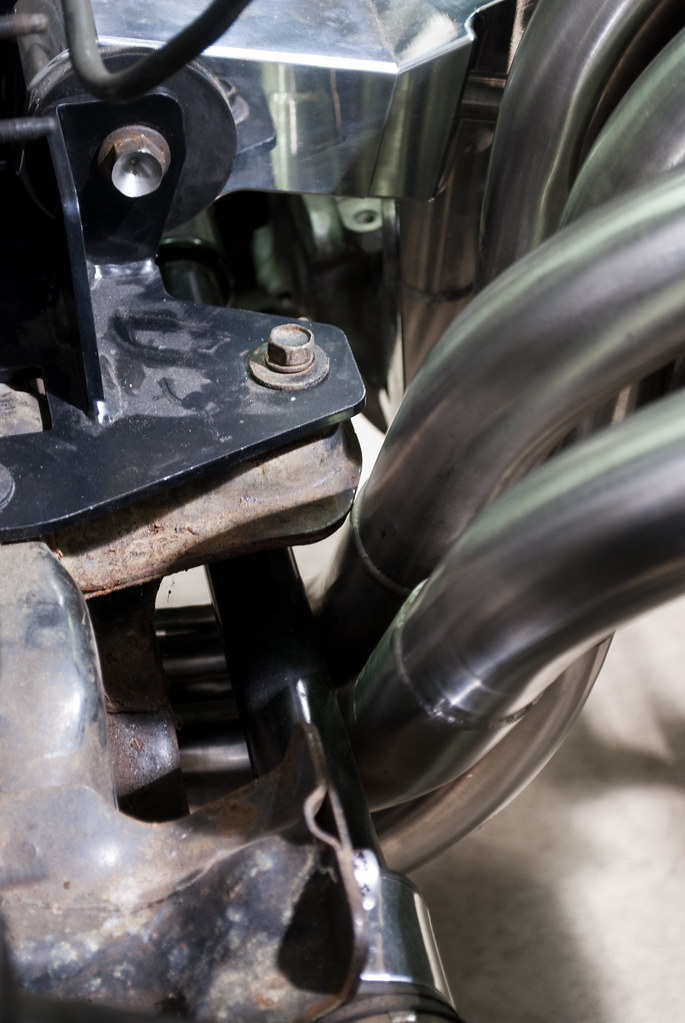
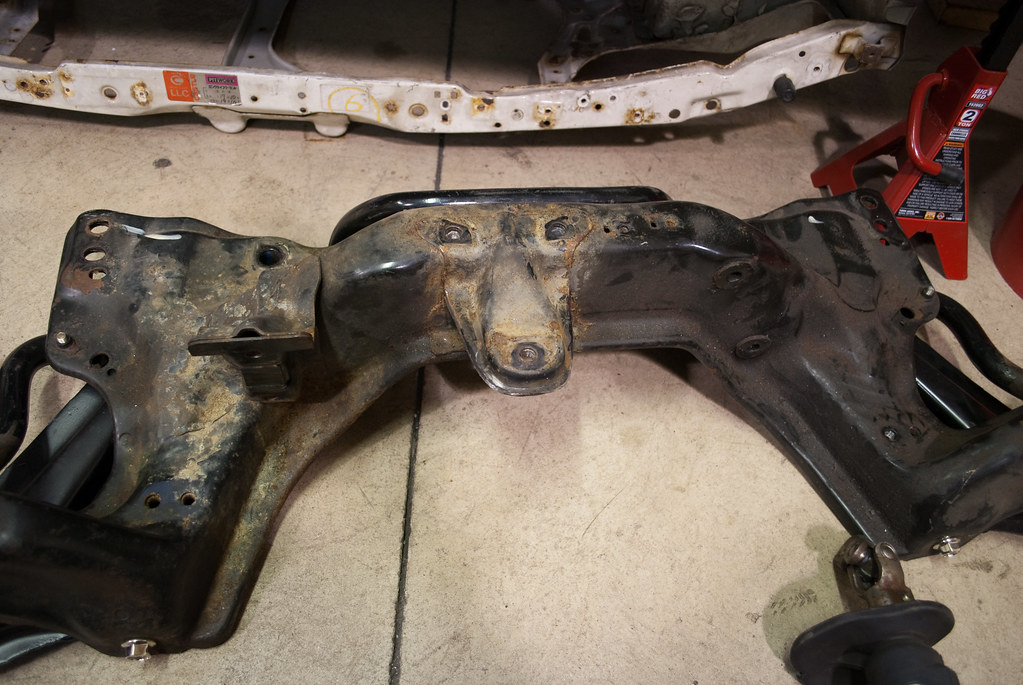
With the engine lower in the front than its typical location the header came into contact with the steering rack subframe. I immediately made plans to trim the subframe down but also wanted to archive the interference so when I called in an order I could give them this information to ensure I didn’t have any contact with a built-to-order header. At this point I wasn’t sure if the engine necessitated a “big tube” design. There seemed to be plenty of room at the back of the engine bay so even a ram-style header might have been beneficial.
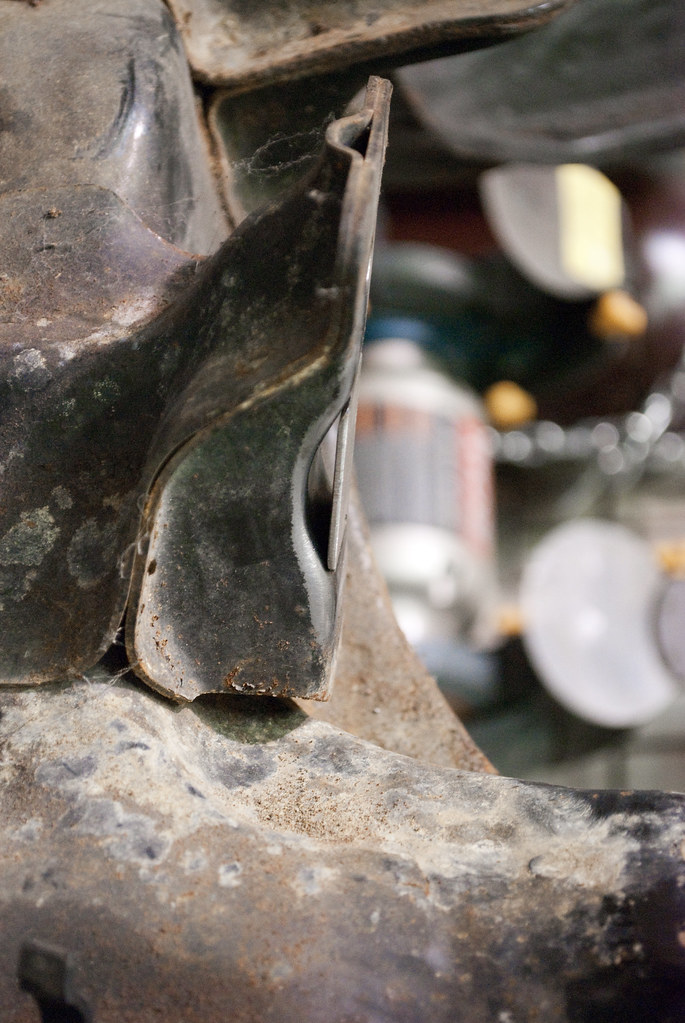
Now that I knew there was going to be a possible interference issue it was time to get down and dirty with the subframe. Once it was off the car my first order of business was to properly mount the manual steering rack. Since it was going on a power steering equipped subframe there was a mounting difference on the passenger side. The power racks are larger and have a recess in the bracket to compensate.

A quick chop of some spare mild steel and the recess was covered. I could have boxed in this entire area to mimic the manual steering subframes but I did not see the need to add extra material and the few ounces that would come with it.
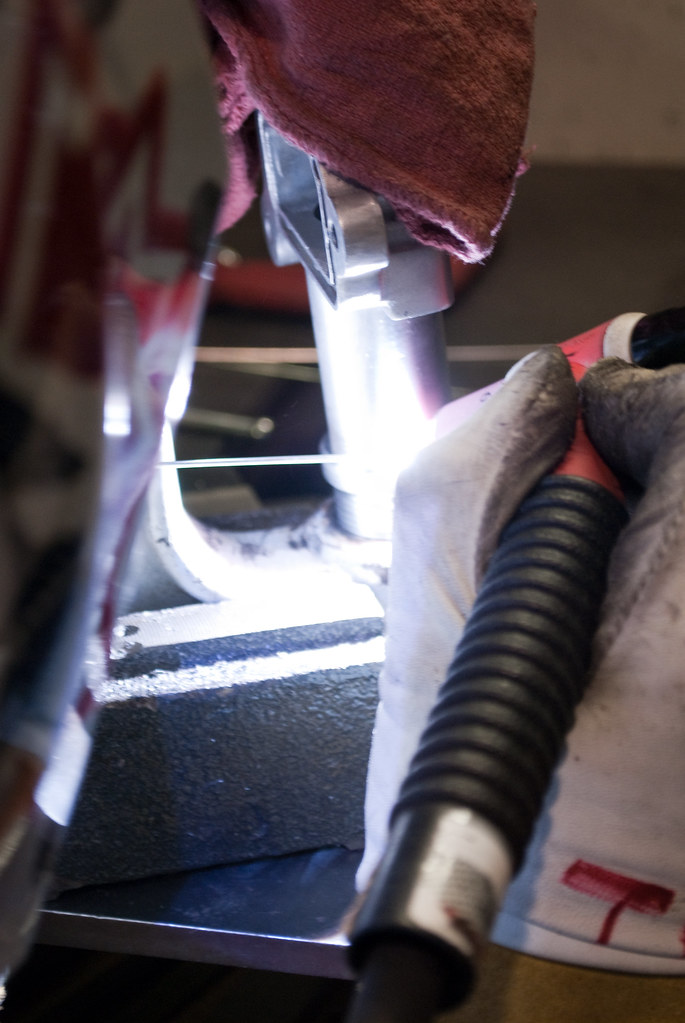
I asked Kyle to lay down a couple quick beads of TIG and voila – a bridge over the valley.
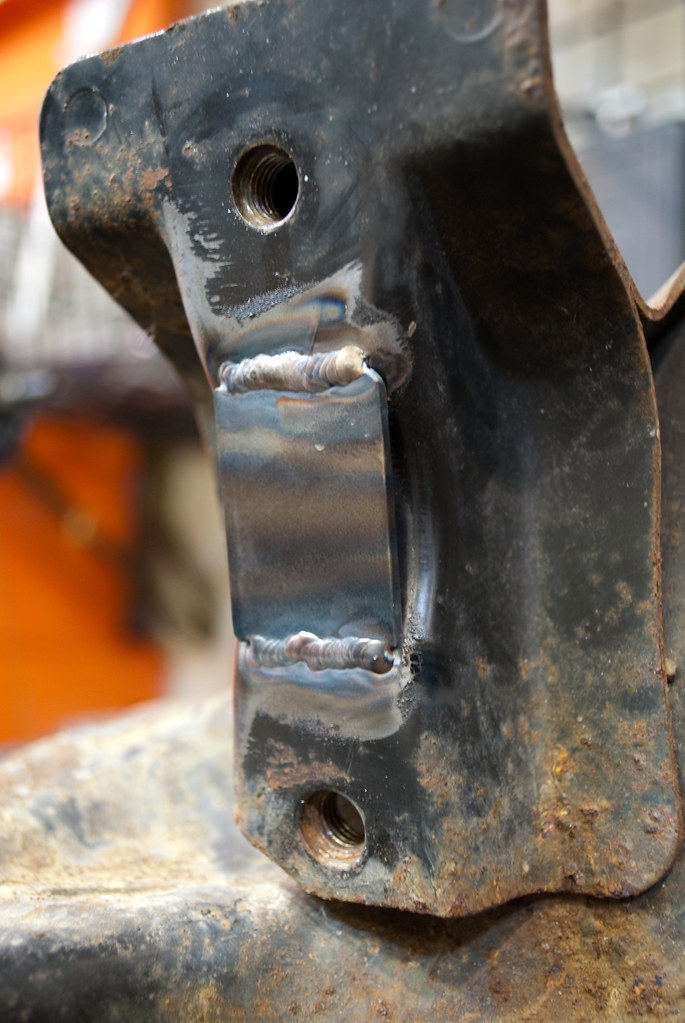
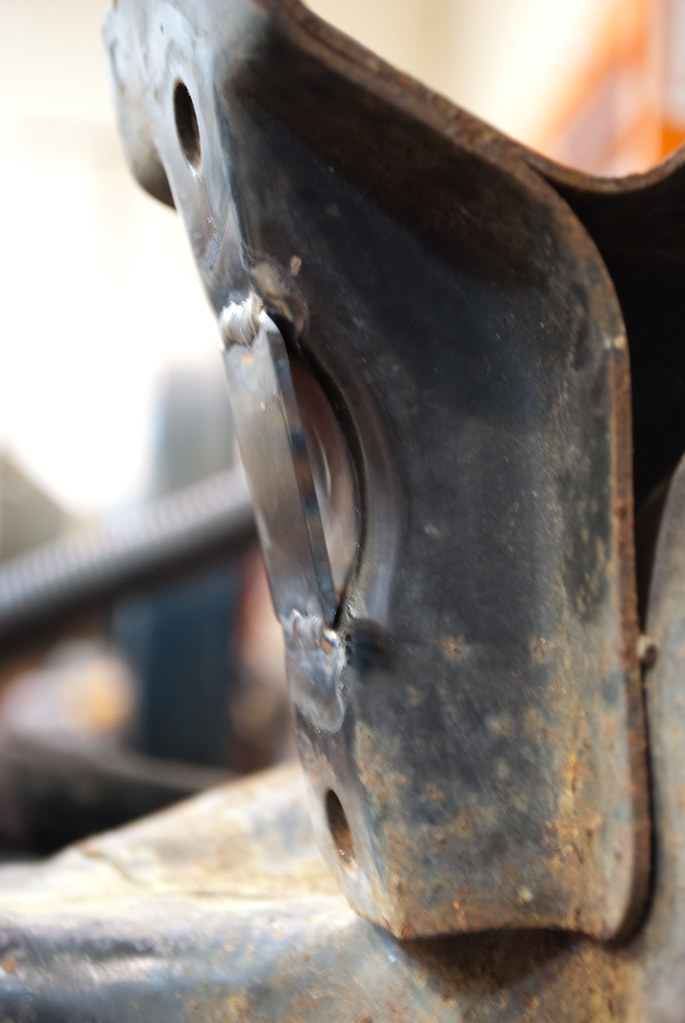
This was now a flush and flat mounting surface for the square-bottomed manual steering rack bushing. This also showcases the aluminum bracket I made for the manual rack. I didn’t get a factory bracket with this rack so instead of buying one from Honda I decided to curve some aluminum and make one of my own. Not a bad outcome.

I know there is an eternal debate over power and manual steering racks, their feel/feedback and lock-to-lock benefits. I don’t plan on tracking this car so my arms won’t fatigue over a 20 minute session of manual rack steering. I also won’t need the lock-to-lock benefits of the better power steering ratio. My 1996 Civic hatch is a manual equipped car from the factory and I never found it tough to steer into tight spots or heavy feeling. Since these two cars are going to run the same size tires I don’t anticipate any negative repercussions. The benefits of manual steering for me outweigh the detractions. Those include a lighter rack (16lb 6oz versus 19lb 14oz) with no pump, lines, wires, cooler, or any of the plumbing run throughout the front of the car. The cleanliness and compounded weight savings fit right in line with the rest of the build.
The second order of business with the subframe out was to add some clearance for the header. There was nothing special about this operation. I just traced out what I thought would be an aesthetically pleasing way to trim for the excess.
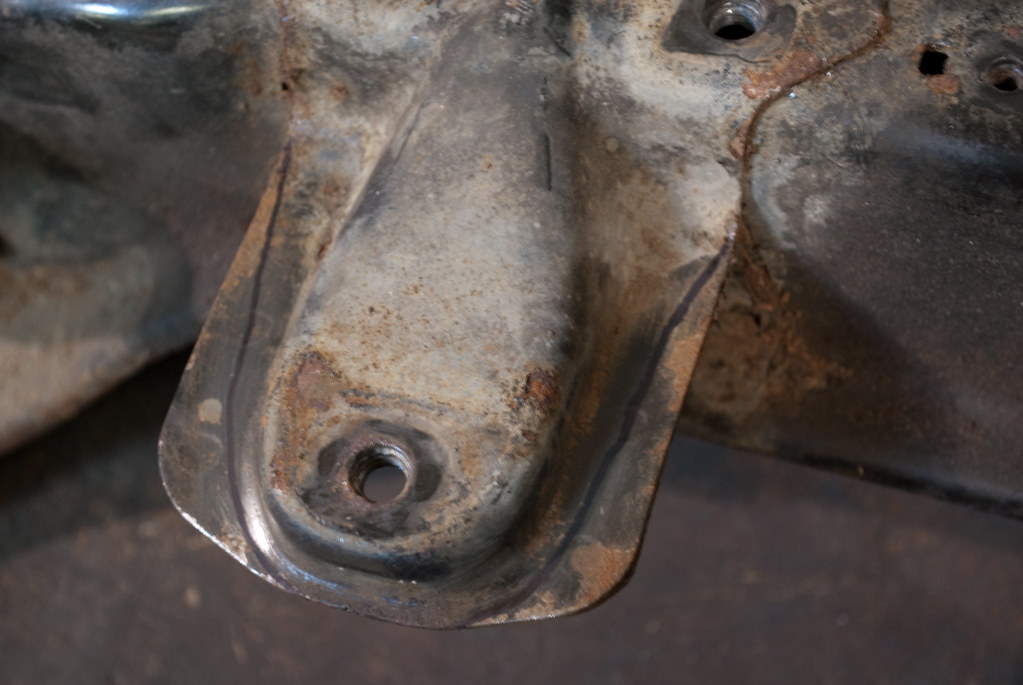
Then I lopped it off with an electric saw and cleaned up the burrs and rough lines with an air-powered die grinder and 3M grinding discs. It wasn’t exactly rocket science. I just had to make sure I took enough material away from the problem area.
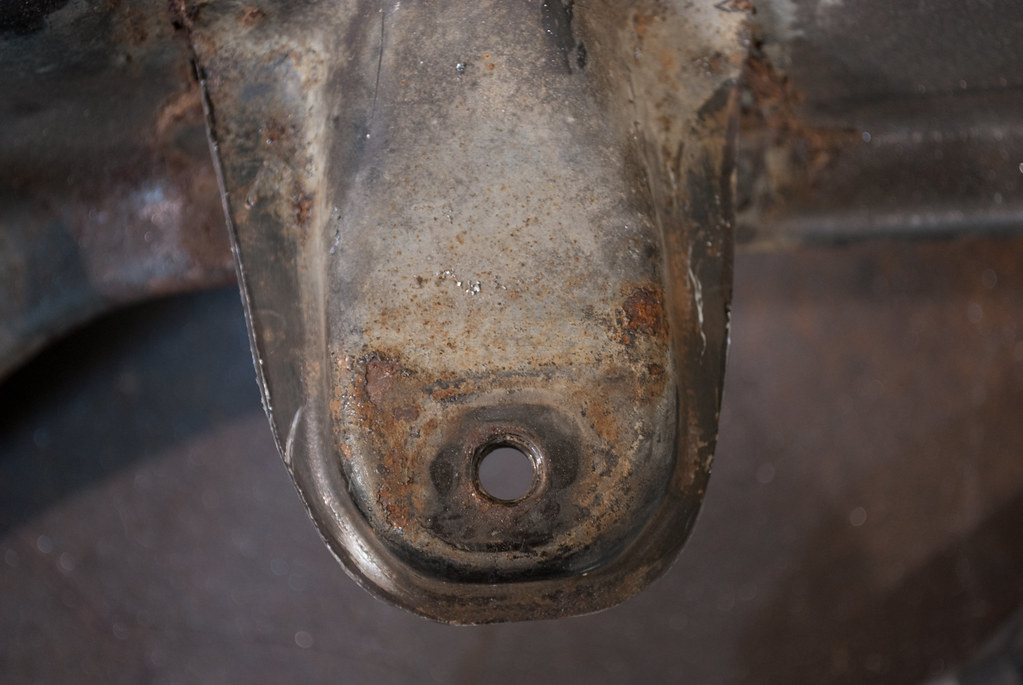
Kyle came to the rescue TIG welding the top and bottom halves together. I had to slice through some of the spot welds so I didn’t want to risk any separation. It’s now much stronger than stock. This also afforded me the clearance necessary to run the header of my choosing.

The subframe needed a little grinding down the weld to make it uniform but this was finally ready for blasting and powdercoat.
With the engine lower in the front than its typical location the header came into contact with the steering rack subframe. I immediately made plans to trim the subframe down but also wanted to archive the interference so when I called in an order I could give them this information to ensure I didn’t have any contact with a built-to-order header. At this point I wasn’t sure if the engine necessitated a “big tube” design. There seemed to be plenty of room at the back of the engine bay so even a ram-style header might have been beneficial.
Now that I knew there was going to be a possible interference issue it was time to get down and dirty with the subframe. Once it was off the car my first order of business was to properly mount the manual steering rack. Since it was going on a power steering equipped subframe there was a mounting difference on the passenger side. The power racks are larger and have a recess in the bracket to compensate.
A quick chop of some spare mild steel and the recess was covered. I could have boxed in this entire area to mimic the manual steering subframes but I did not see the need to add extra material and the few ounces that would come with it.
I asked Kyle to lay down a couple quick beads of TIG and voila – a bridge over the valley.
This was now a flush and flat mounting surface for the square-bottomed manual steering rack bushing. This also showcases the aluminum bracket I made for the manual rack. I didn’t get a factory bracket with this rack so instead of buying one from Honda I decided to curve some aluminum and make one of my own. Not a bad outcome.
I know there is an eternal debate over power and manual steering racks, their feel/feedback and lock-to-lock benefits. I don’t plan on tracking this car so my arms won’t fatigue over a 20 minute session of manual rack steering. I also won’t need the lock-to-lock benefits of the better power steering ratio. My 1996 Civic hatch is a manual equipped car from the factory and I never found it tough to steer into tight spots or heavy feeling. Since these two cars are going to run the same size tires I don’t anticipate any negative repercussions. The benefits of manual steering for me outweigh the detractions. Those include a lighter rack (16lb 6oz versus 19lb 14oz) with no pump, lines, wires, cooler, or any of the plumbing run throughout the front of the car. The cleanliness and compounded weight savings fit right in line with the rest of the build.
The second order of business with the subframe out was to add some clearance for the header. There was nothing special about this operation. I just traced out what I thought would be an aesthetically pleasing way to trim for the excess.
Then I lopped it off with an electric saw and cleaned up the burrs and rough lines with an air-powered die grinder and 3M grinding discs. It wasn’t exactly rocket science. I just had to make sure I took enough material away from the problem area.
Kyle came to the rescue TIG welding the top and bottom halves together. I had to slice through some of the spot welds so I didn’t want to risk any separation. It’s now much stronger than stock. This also afforded me the clearance necessary to run the header of my choosing.
The subframe needed a little grinding down the weld to make it uniform but this was finally ready for blasting and powdercoat.
09-21-2012, 11:55 AM
#57
Honda-Tech Member
Join Date: Dec 2006
Location: Dallas Texas
Posts: 989
Likes: 0
Received 0 Likes
on
0 Posts
09-24-2012, 06:56 AM
#59
Honda-Tech Member
Thread Starter
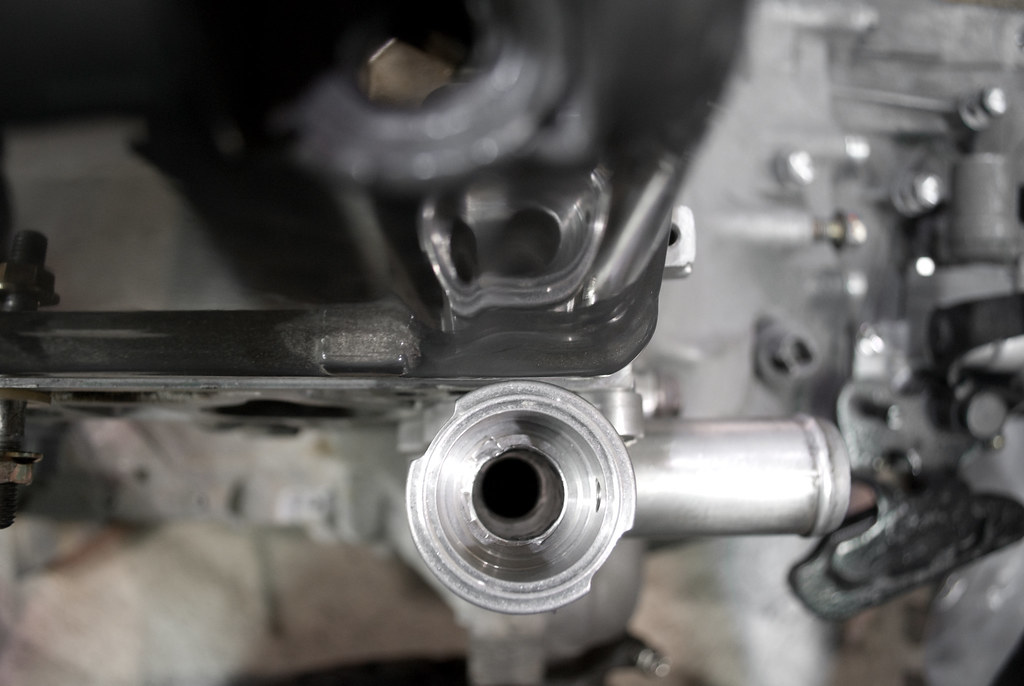
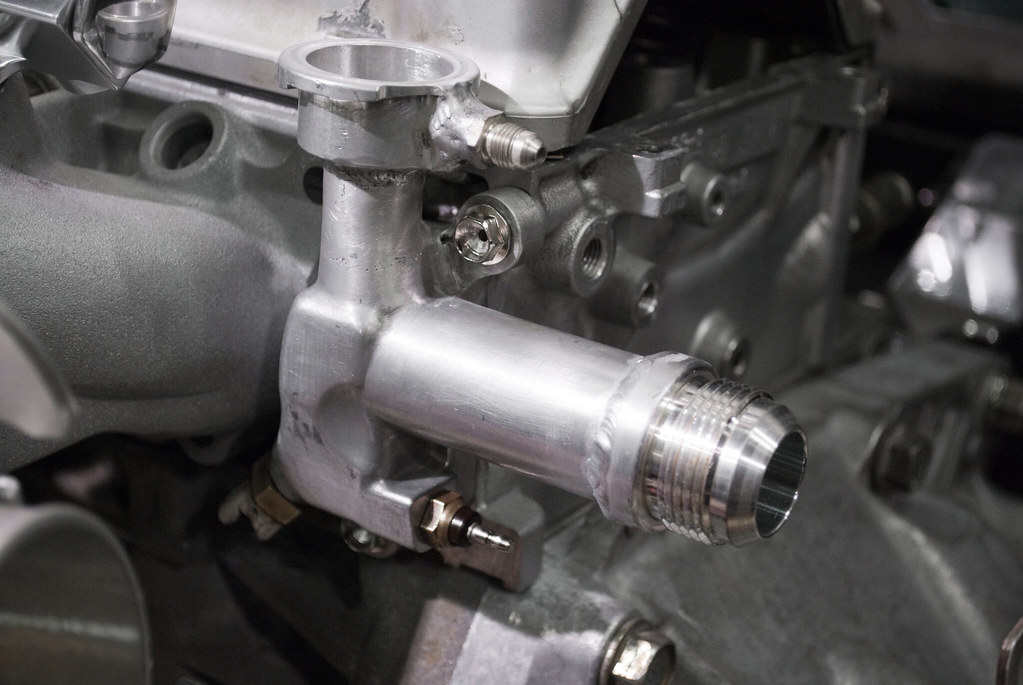
While Kyle was welding, I convinced him that I was going to ask for the last bit of welding on the upper radiator hose outlet. This involved replacing the standard hose outlet with a -16 AN outlet and the overflow outlet with a -3. Everyone asked why I didn’t just leave the overflow outlet threaded in and I didn’t have a good reason other than “I’m an idiot.” Funny thing is I had already tapped the hole larger and threaded the fitting in before asking Kyle to weld it permanently.
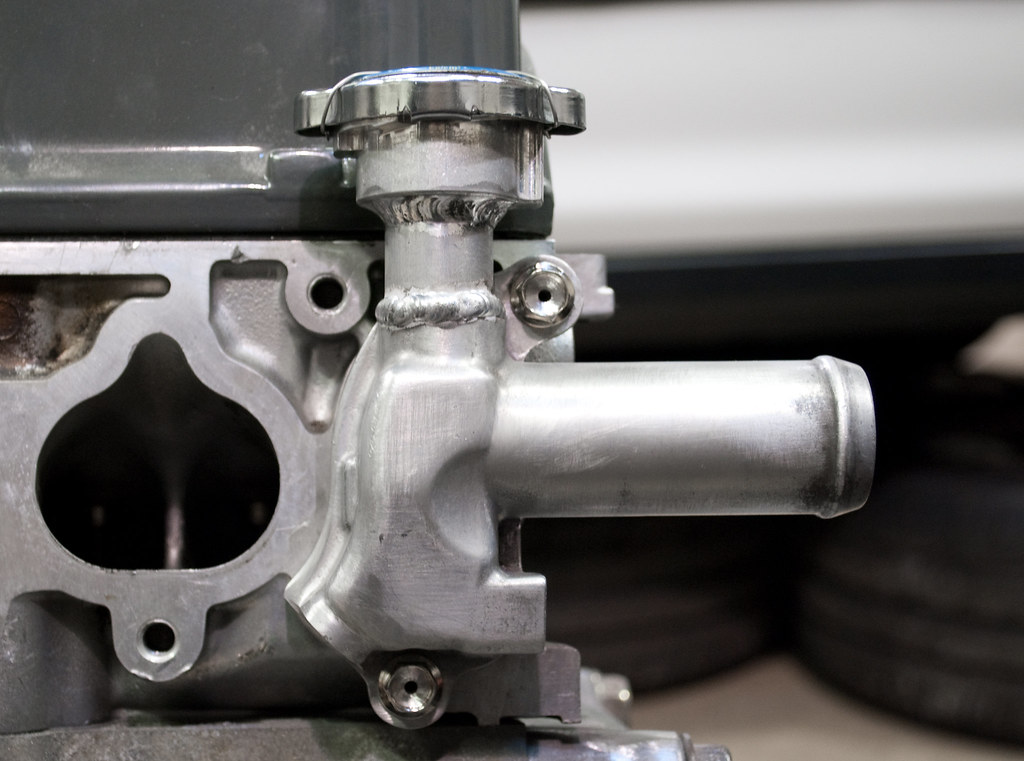
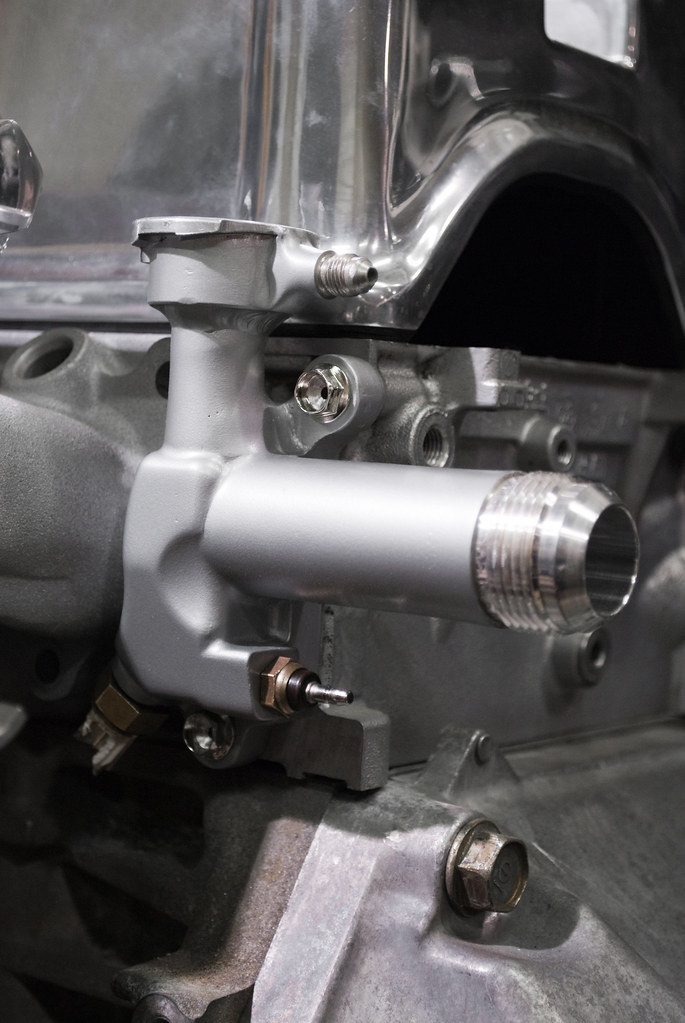
The result was just what I needed: sealed well with enough material for me to take down for a nice smooth appearance.
The final piece was what I hoped to achieve: a re-purposed OEM part that didn’t look aftermarket entirely yet didn’t shot any obvious signs of modification. Everyone who sees it will know the AN fittings aren’t stock but this way they wouldn’t be able to say “Ah ha! I see where you welded everything together!”
At that point, the water outlet had probably 20+ labor hours into it. I spent an entire Sunday sanding the final welds down by hand. If I had to do it over again I could probably cut the time almost in half but there’s no way I want to do it again. As I was getting near to the end of my sanding PB said “You’re ******* insane!” about how much time I spent on such a small piece. When he saw the final result and joked that I was going to do one for him I got to return his “You’re ******* insane!”
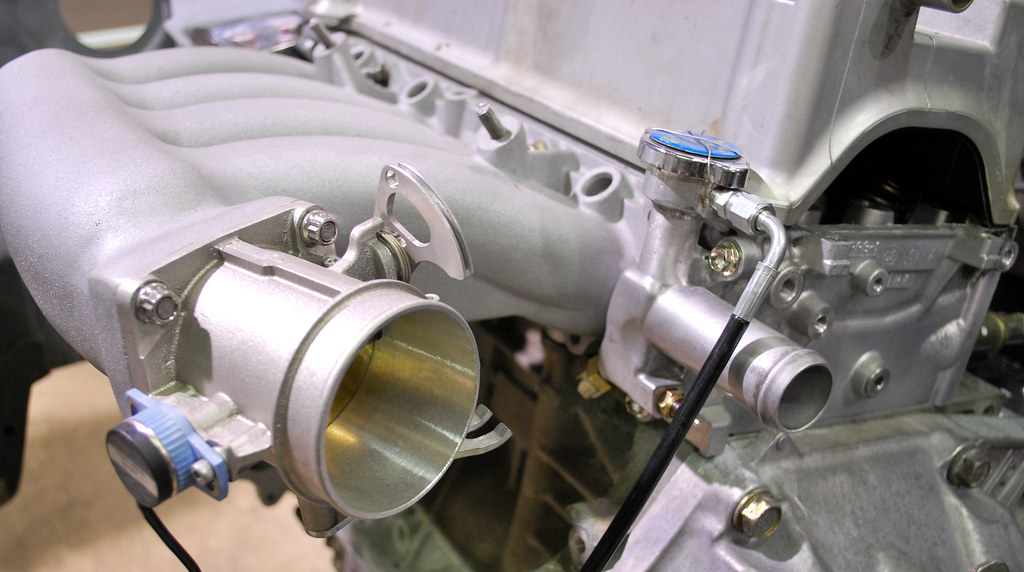
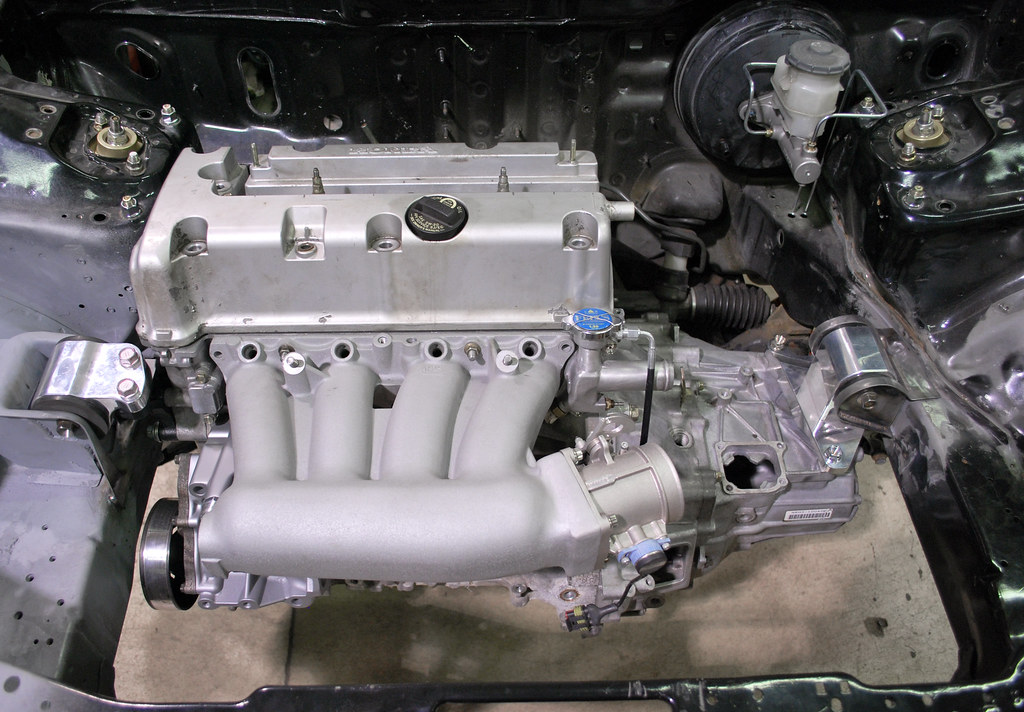
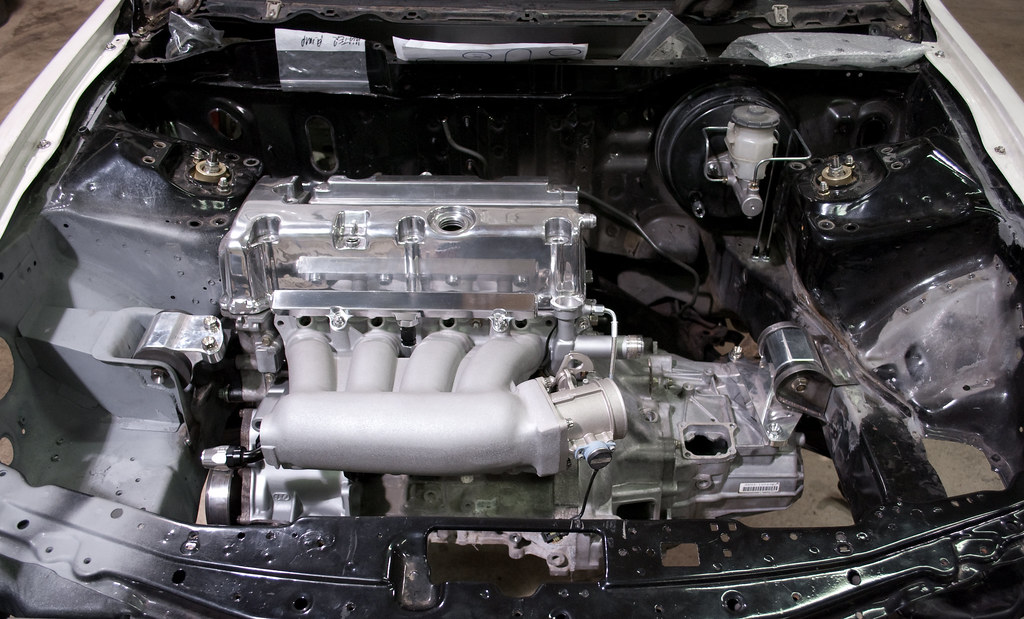
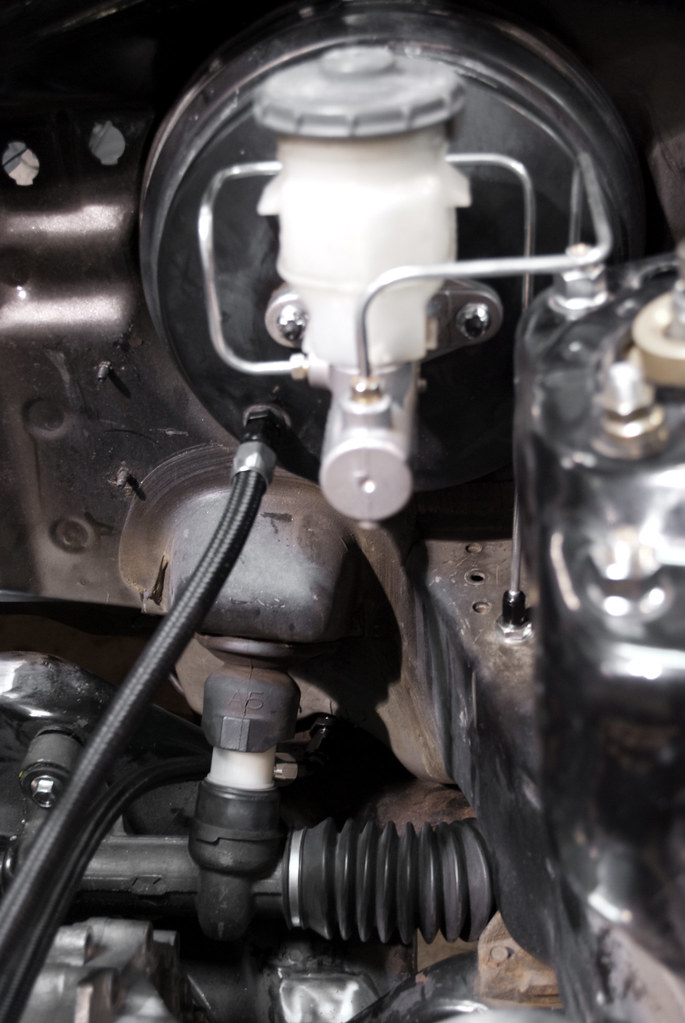
Since it was the end of another weekend I got another chance for a progress picture. I had a lot of AN fittings arrive during the week so I installed some pieces to envision the hose routing. This included the catch can plumbing coming off the top of the water pump housing (I did not have a fitting for the valve cover), the custom Hybrid Racing fuel rail (sans logo and fuel gauge port), and the brake booster.
The result was just what I needed: sealed well with enough material for me to take down for a nice smooth appearance.
The final piece was what I hoped to achieve: a re-purposed OEM part that didn’t look aftermarket entirely yet didn’t shot any obvious signs of modification. Everyone who sees it will know the AN fittings aren’t stock but this way they wouldn’t be able to say “Ah ha! I see where you welded everything together!”
At that point, the water outlet had probably 20+ labor hours into it. I spent an entire Sunday sanding the final welds down by hand. If I had to do it over again I could probably cut the time almost in half but there’s no way I want to do it again. As I was getting near to the end of my sanding PB said “You’re ******* insane!” about how much time I spent on such a small piece. When he saw the final result and joked that I was going to do one for him I got to return his “You’re ******* insane!”
Since it was the end of another weekend I got another chance for a progress picture. I had a lot of AN fittings arrive during the week so I installed some pieces to envision the hose routing. This included the catch can plumbing coming off the top of the water pump housing (I did not have a fitting for the valve cover), the custom Hybrid Racing fuel rail (sans logo and fuel gauge port), and the brake booster.
09-24-2012, 01:28 PM
#60
Honda-Tech Member
Thread Starter
I finally started on the fuel and vacuum lines. I started at the manifold and rail and worked my way back since these were going to be static locations.
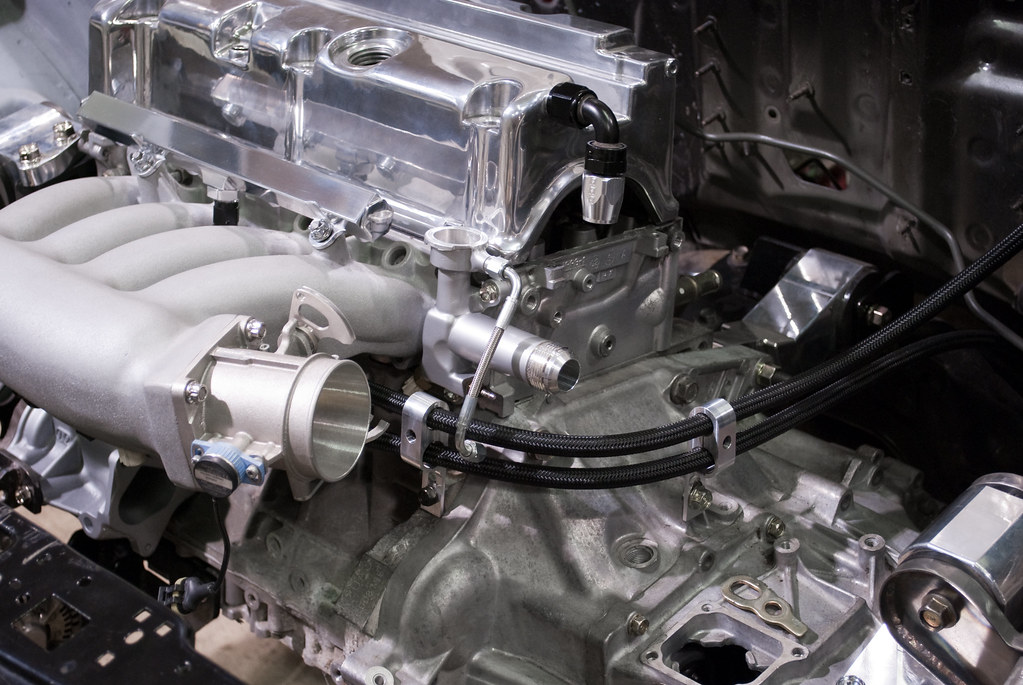
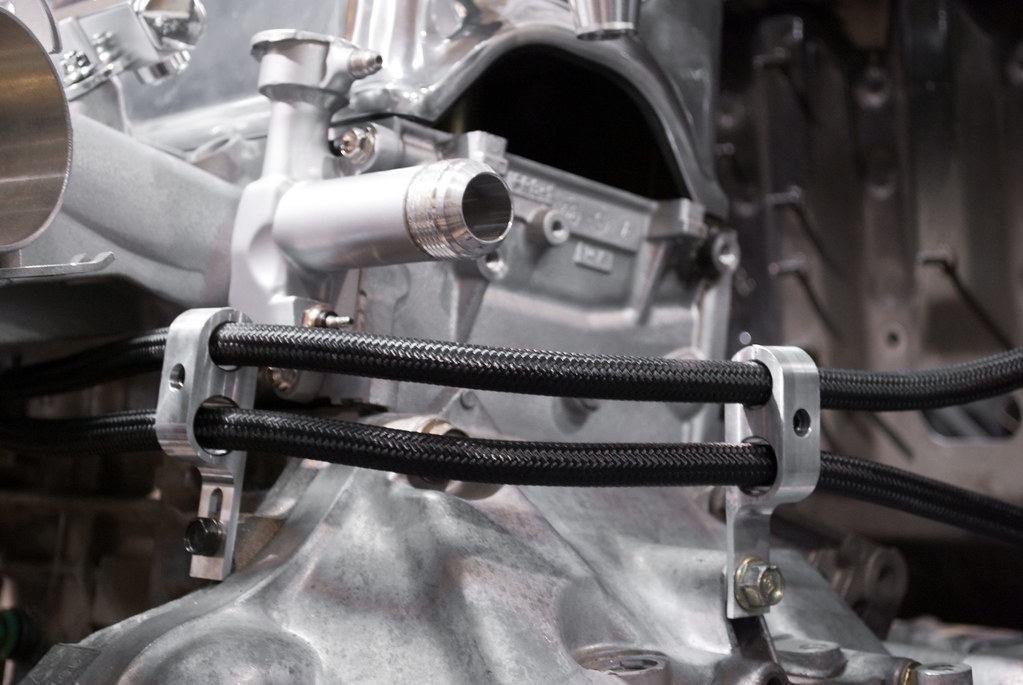
Suja 1 was nice enough to provide some stand-off billet clamps for the line holders. They haven’t been used on many builds but I can think of two other K swaps from Suja 1 using these – one is PB’s CRX and the other is Kon’s EG (R.I.P).
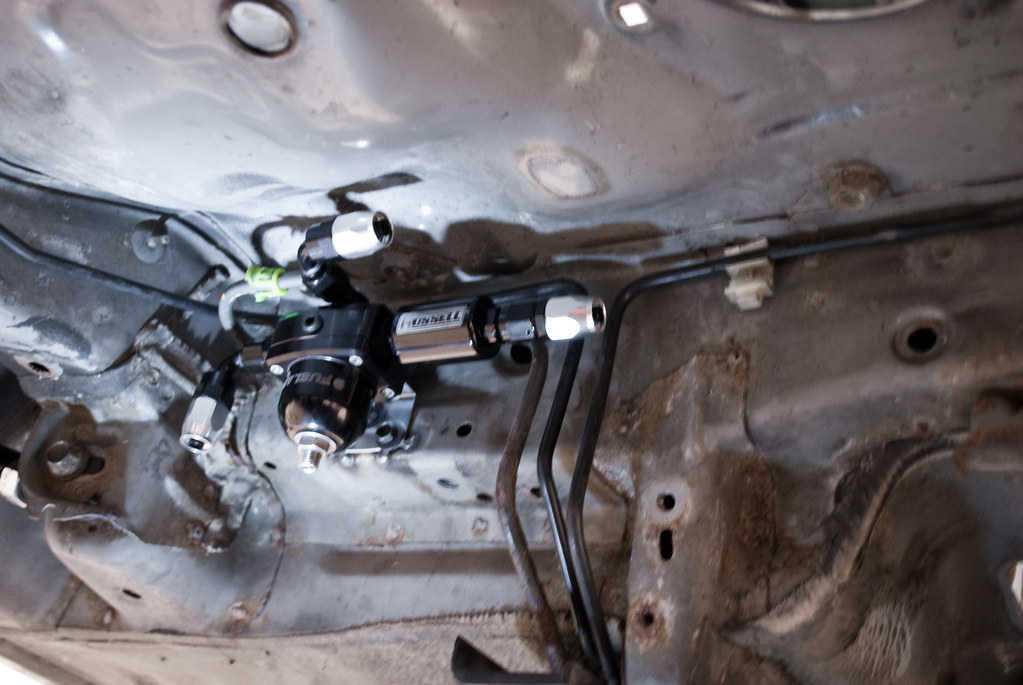
The single fuel line in the engine bay doesn’t mean I did a return-less fuel system. The regulator was relocated to the back for a cleaner look and to take advantage of the fact K swapped cars don’t need to run a vacuum line to the regulator. The mounting was easier than I expected. Rather than make a bracket for the regulator I drilled out some holes in the chassis and installed three 6mm x1.0 nuts (standard 10mm head) and had Brandon tack them into place. The factory Fuel Lab regulator bracket then bolted right up.
The regulator itself with the Russell Performance fuel filter installed. The fuel filter is on the feed side, the return side is now on the “top” of the regulator and the outlet is the 90* fitting opposite the fuel feed.
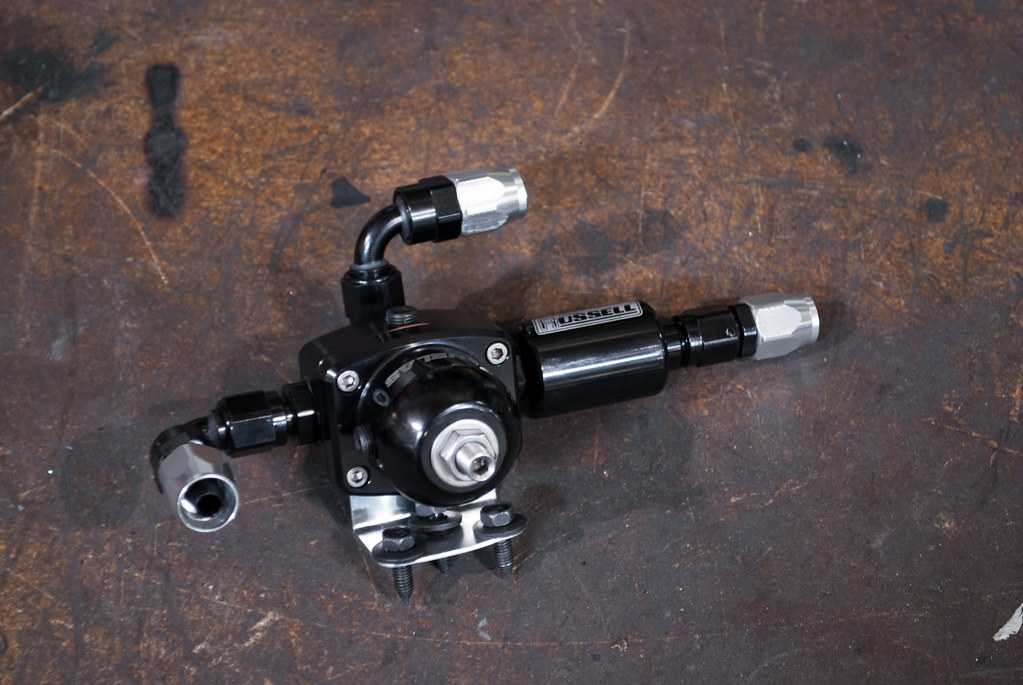
This allowed me to mount the regulator upside-down from its original orientation and put the adjustment screw pointed downward for access. My apologies for the picture but it wasn’t easy to grab a good picture on the ground with so little room.
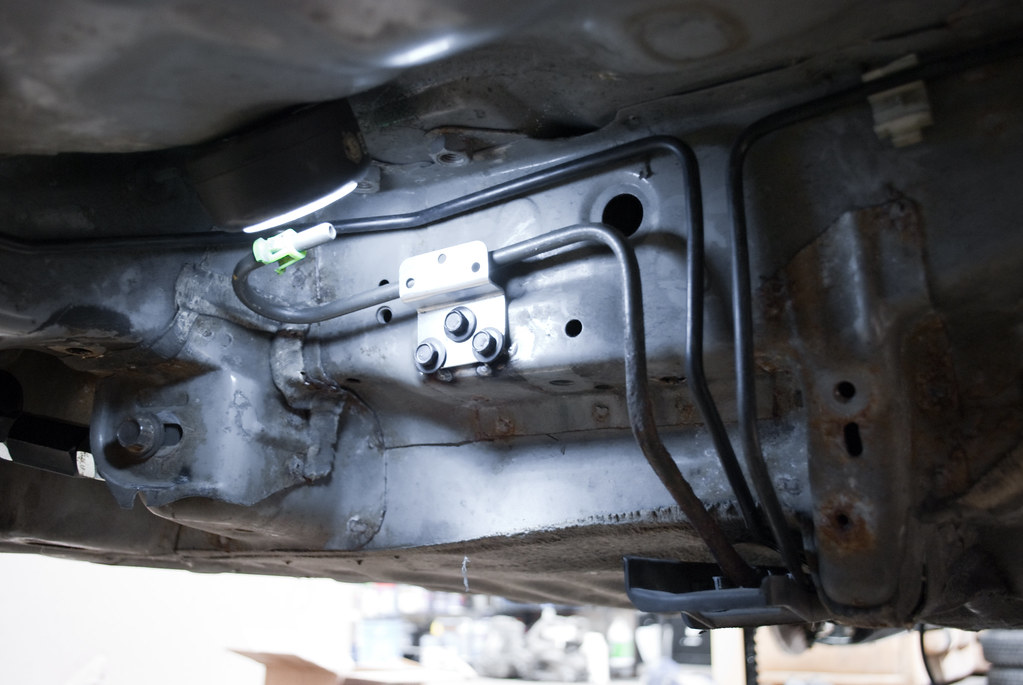
Now that both static ends of the fuel system were complete I focused on the hard line that runs under the car. Normally it’s a 5/16” line which requires a compression type fitting to adapt to an AN line so I swapped it out for a newer (and non-rusted) 3/8” stainless steel line.
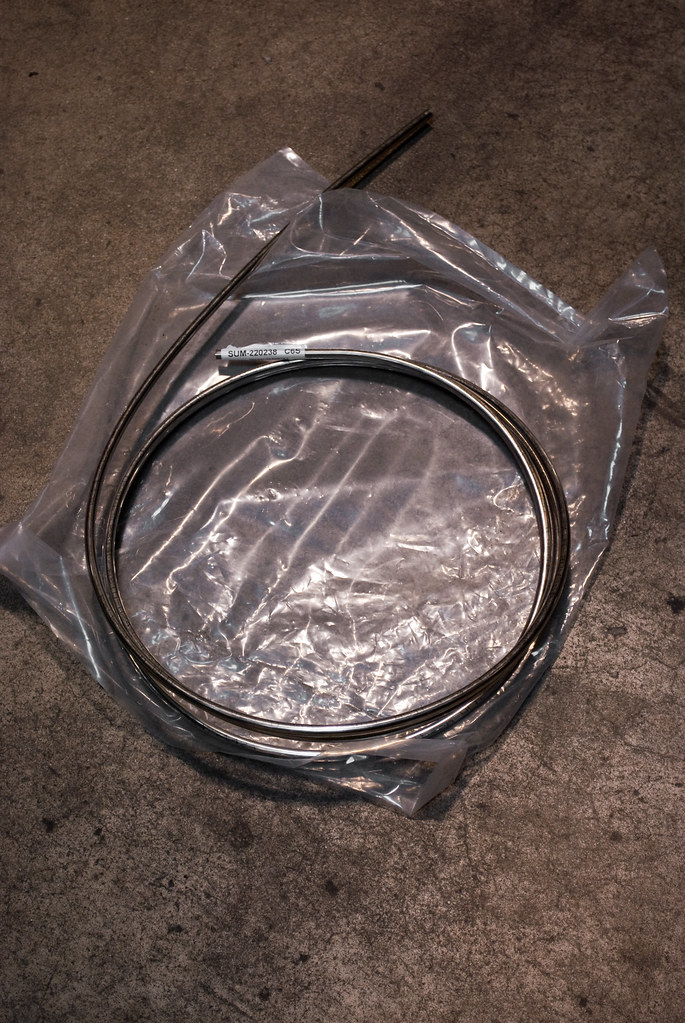
On either end you’ll see the sleeve and nut adapted to a -6 AN union.
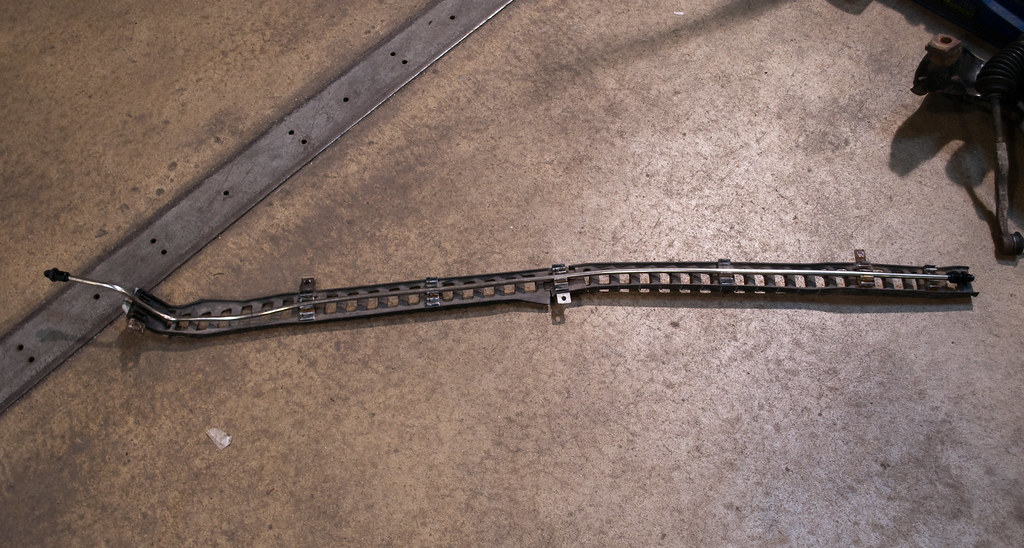

I wanted to make sure that the rear fitting would still be protected by the factory plastic shield so I cut it a little short compared to the factory line.
Once installed the front fitting came out just past the firewall proving accessible to a skilled hand. Obviously it’s easier to get to with the subframe down but the 45* fitting on the braided line isn’t impossible to get to. I never had to service my EG fuel lines since installing them which should always be the case with correctly made lines so I didn't anticipate any problems with these.
Suja 1 was nice enough to provide some stand-off billet clamps for the line holders. They haven’t been used on many builds but I can think of two other K swaps from Suja 1 using these – one is PB’s CRX and the other is Kon’s EG (R.I.P).
The single fuel line in the engine bay doesn’t mean I did a return-less fuel system. The regulator was relocated to the back for a cleaner look and to take advantage of the fact K swapped cars don’t need to run a vacuum line to the regulator. The mounting was easier than I expected. Rather than make a bracket for the regulator I drilled out some holes in the chassis and installed three 6mm x1.0 nuts (standard 10mm head) and had Brandon tack them into place. The factory Fuel Lab regulator bracket then bolted right up.
The regulator itself with the Russell Performance fuel filter installed. The fuel filter is on the feed side, the return side is now on the “top” of the regulator and the outlet is the 90* fitting opposite the fuel feed.
This allowed me to mount the regulator upside-down from its original orientation and put the adjustment screw pointed downward for access. My apologies for the picture but it wasn’t easy to grab a good picture on the ground with so little room.
Now that both static ends of the fuel system were complete I focused on the hard line that runs under the car. Normally it’s a 5/16” line which requires a compression type fitting to adapt to an AN line so I swapped it out for a newer (and non-rusted) 3/8” stainless steel line.
On either end you’ll see the sleeve and nut adapted to a -6 AN union.
I wanted to make sure that the rear fitting would still be protected by the factory plastic shield so I cut it a little short compared to the factory line.
Once installed the front fitting came out just past the firewall proving accessible to a skilled hand. Obviously it’s easier to get to with the subframe down but the 45* fitting on the braided line isn’t impossible to get to. I never had to service my EG fuel lines since installing them which should always be the case with correctly made lines so I didn't anticipate any problems with these.
09-24-2012, 03:28 PM
#61
Honda-Tech Member
Thanks again, guys. I can take pictures once I have an oil pan but it won't do you any good. I've repositioned the motor so if you're using mine as a gauge for clearance in your own car your results will be different. Add to that the variations in ride height, wheel size, tire aspect ratio, etc there's no use in comparing.
 09-25-2012, 03:10 AM
#64
Honda-Tech Member
Join Date: Jul 2003
Location: Alpharetta, GA
Posts: 3,184
Likes: 0
Received 0 Likes
on
0 Posts
Bah, now you're just showing off... 
You and SHG_EasyE make me so mad...
Excellent work as always!
Steve
You and SHG_EasyE make me so mad...
Excellent work as always!
Steve
09-25-2012, 09:23 AM
#65
Honda-Tech Member
Thread Starter
Thanks guys. I'm glad you're enjoying the work. To get this far was a lot of help from a lot of people. I hope I gave enough credit where credit was due.
09-25-2012, 09:23 AM
#66
Honda-Tech Member
Thread Starter
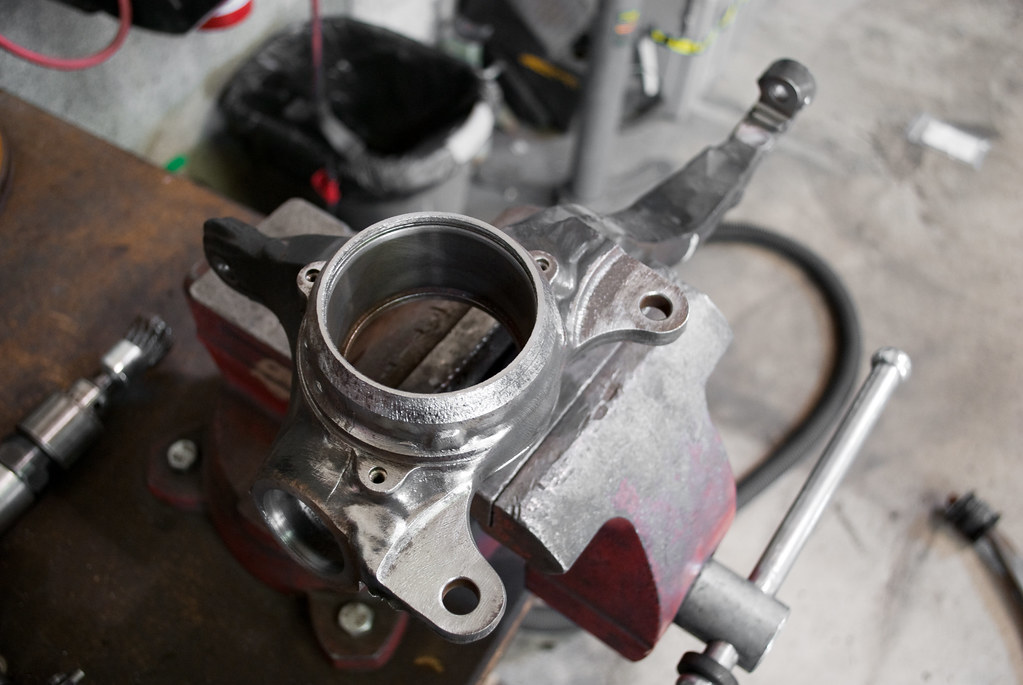
I had these brakes for some time before this shell came into my possession but I needed to redo the assemblies to add clearance between the hub and knuckle. When I tried to press the hub out of one of the original knuckles the bearing came out with it and broke the snap ring free of the housing. It was totally unusable. So I had to source a new one. I wire-wheeled the majority of the rust off and scuffed it so the POR 15 paint would adhere.
After some gloss black engine enamel paint laid over the POR 15 I installed a new bearing and the snap ring. Another earthquake hit when I was taking this picture but you may be able to see where I put anti-seize in the snap ring channel. My least favorite part about wheel bearings on Midwest cars is freeing the snap ring. Hopefully this will make the procedure a non-issue next time.
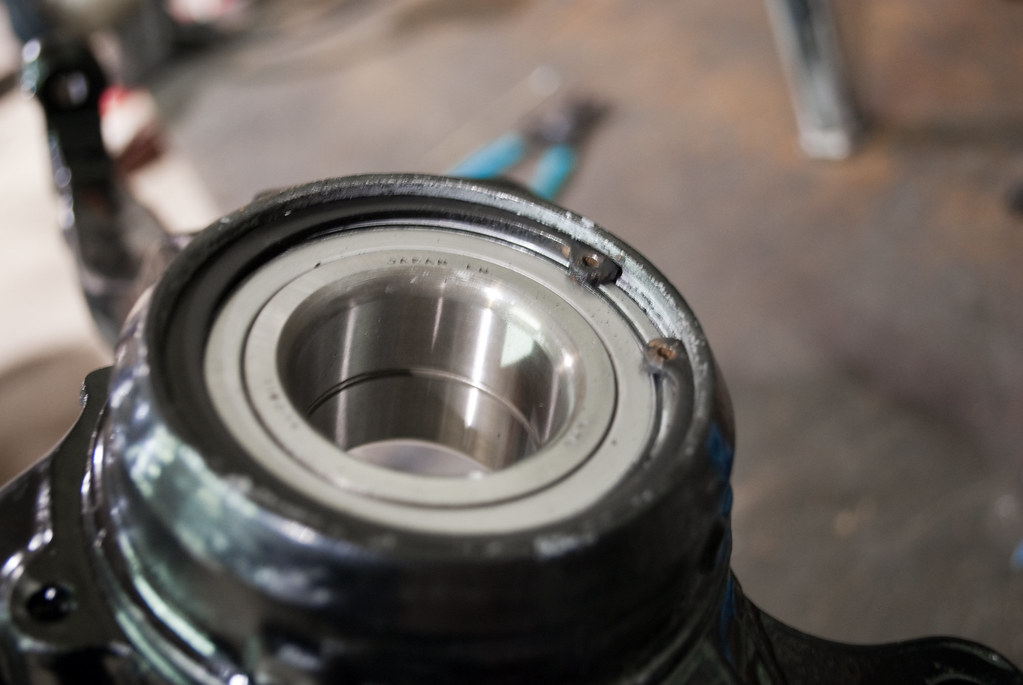
The clearance I needed to increase was between the hub and knuckle and I accomplished this by having some spacers machined that were the same size as the inner race of the bearing. All I really needed was 2mm but that meant disassembling everything and reinstalling new bearings in both knuckles - not cheap or fun.
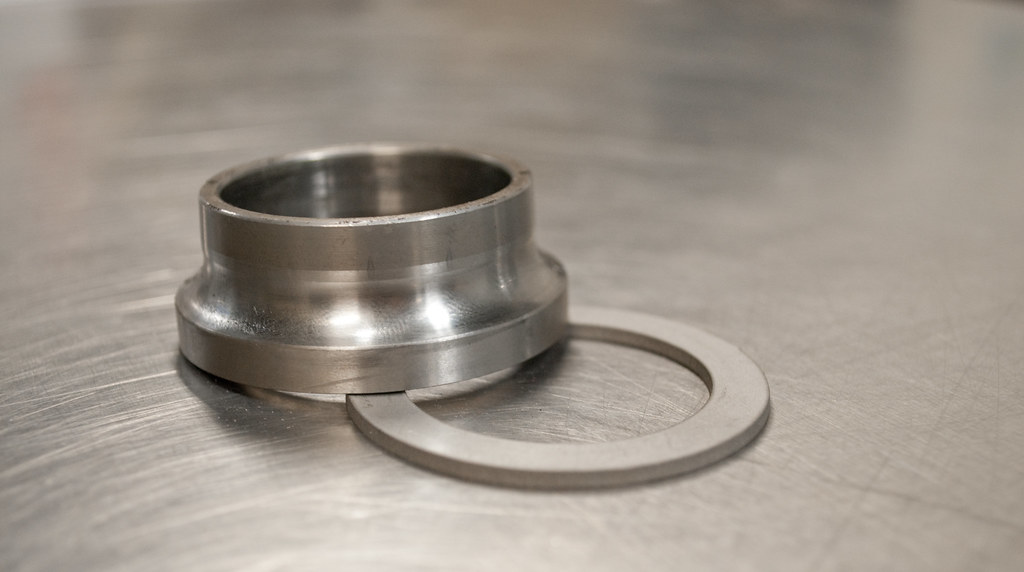
Installed on the hub it’s barely noticeable.
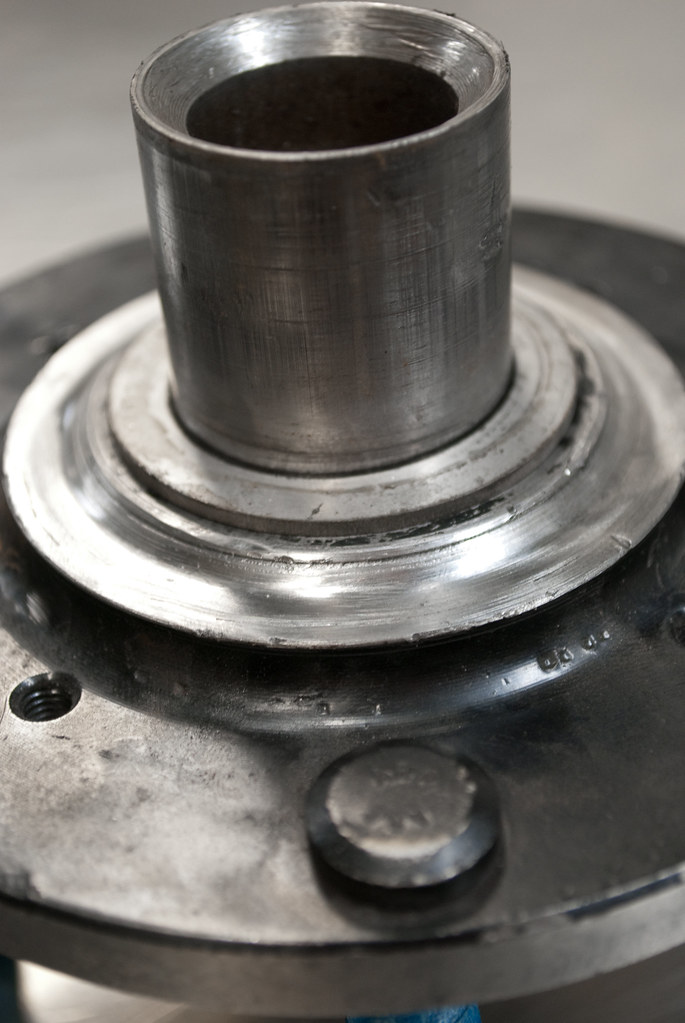
The result is this much clearance and freely spinning assembly. What isn’t detailed here is the 4x114.3 hubs were milled down to be installed in the smaller Civic (DX sized) knuckles. With this combination I was able to fit an 11.8” rotor for wheel clearance.
Then came the reassembly of the front brakes.
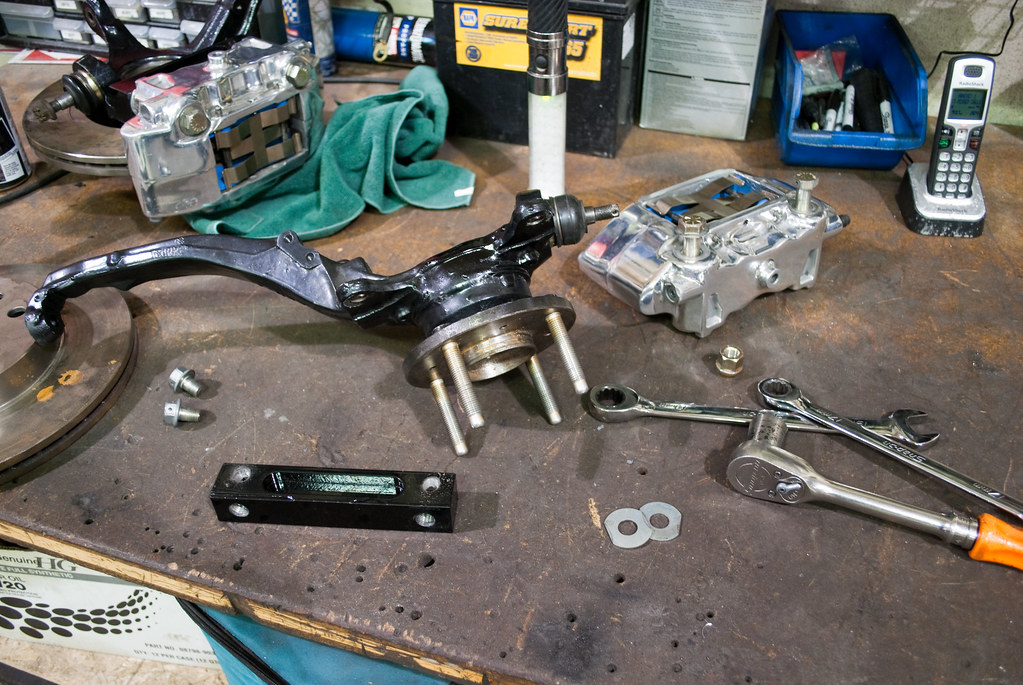
The brackets were originally a very rudimentary design from “Brake Expert” and I had to go through hell and high water to get them. At one point I was afraid I had gotten scammed but they eventually showed up. They were the bare minimum of function – they fit and adapted the calipers. They also were unnecessarily heavy.
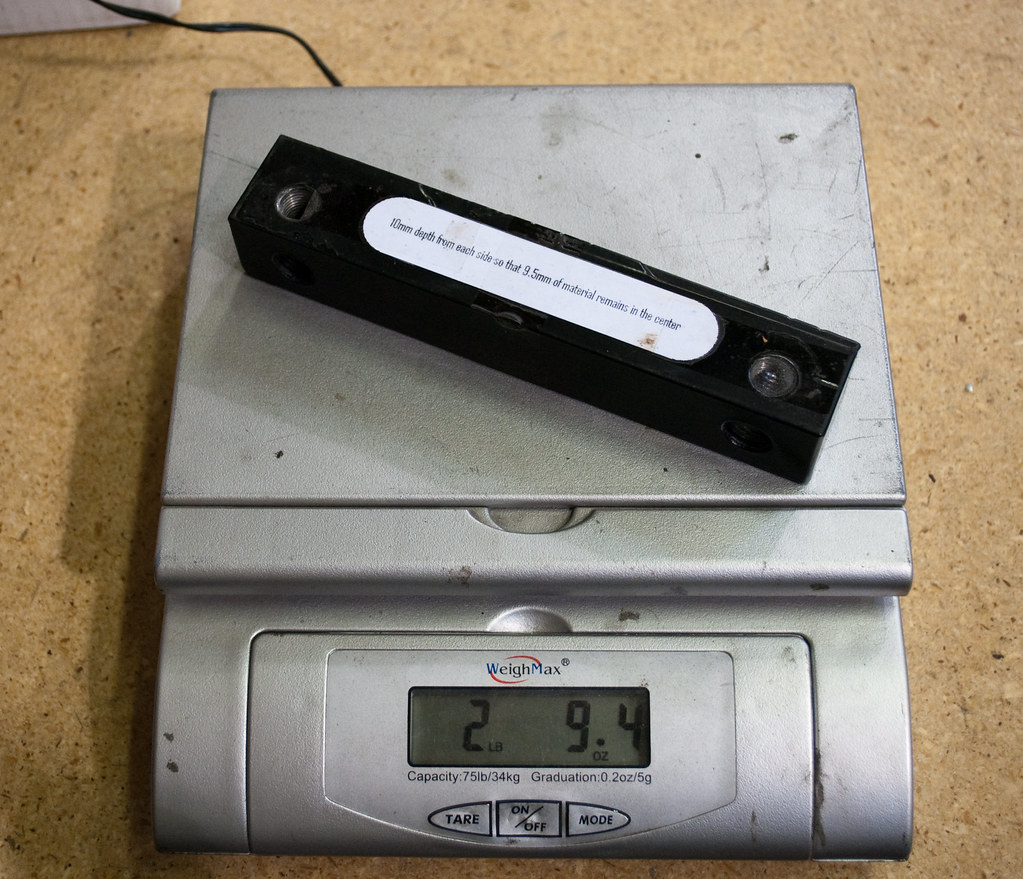
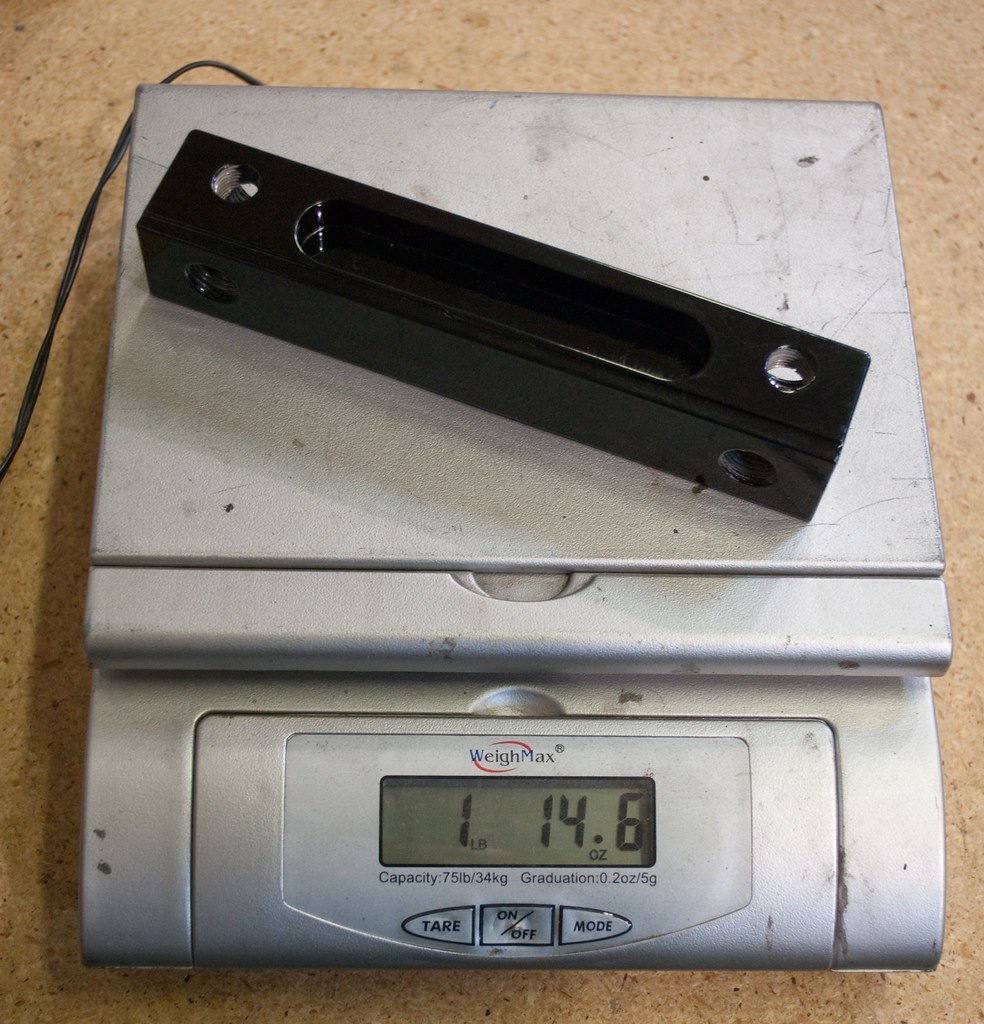
Since Brake Expert had no real access to a machine shop I finished up the brackets by asking TallKyle to mill the center area down 10mm on each side. This still left some material in the center which was more than enough for function. The result was dropping over half a pound from each side!
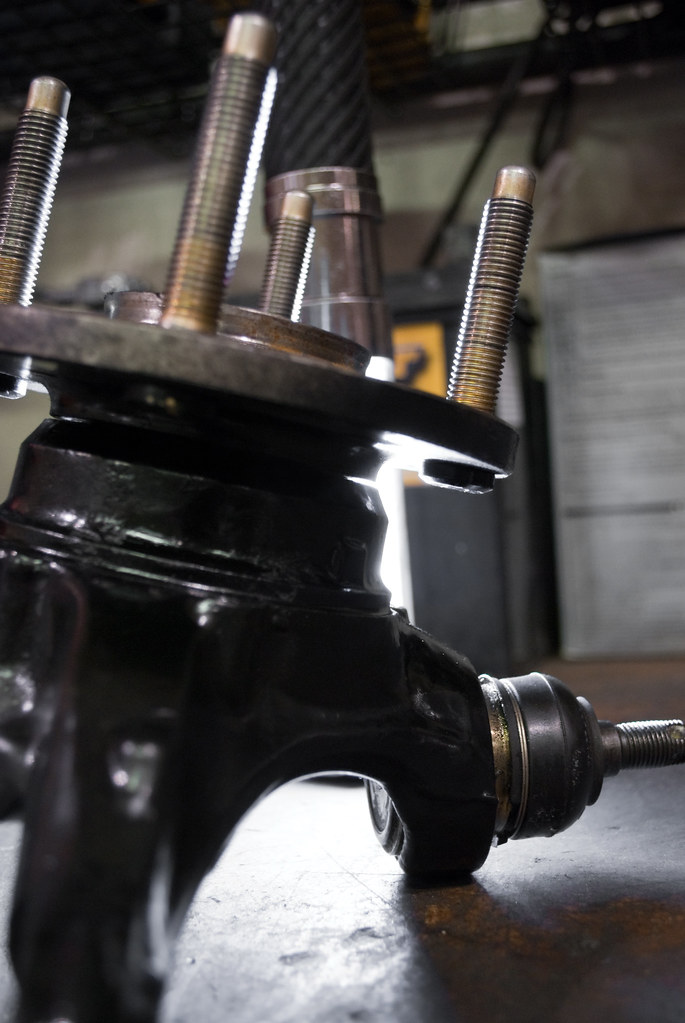
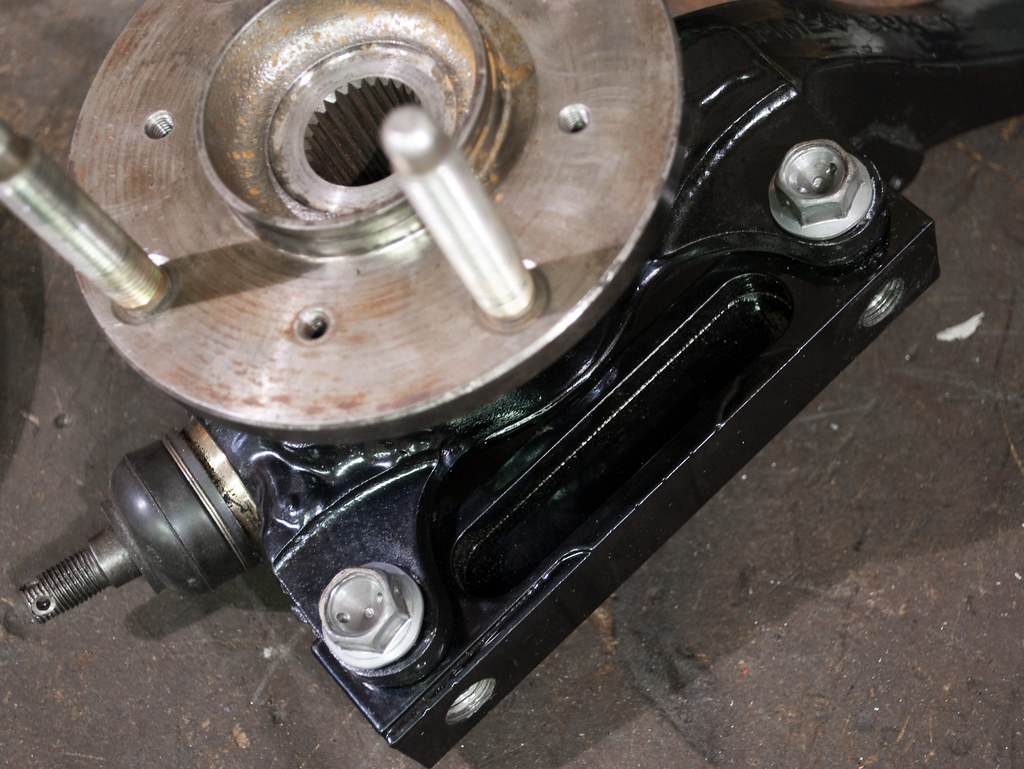
Reinstalling the brackets was simple. The bolts here are drilled for lightness and for safety-wire. Any and all bolts that were drilled out were torqued to their value to ensure they would still be strong enough for their application.
After that the caliper was reinstalled on the bracket and then the assemblies back onto the car.
I performed a lock-to-lock test to make sure the brake lines would clear the shock forks. The RL calipers utilize a reverse-flare fitting so I used -3 to 10x1 fittings and a 90* -3 AN line segment for fitment tests. Everything passed.
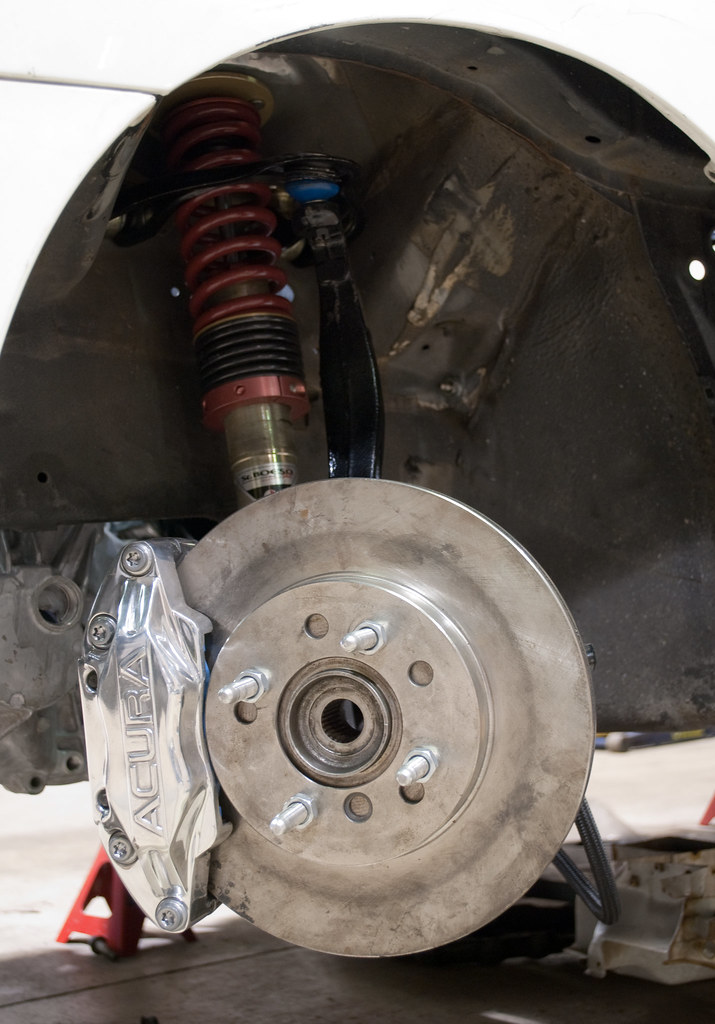
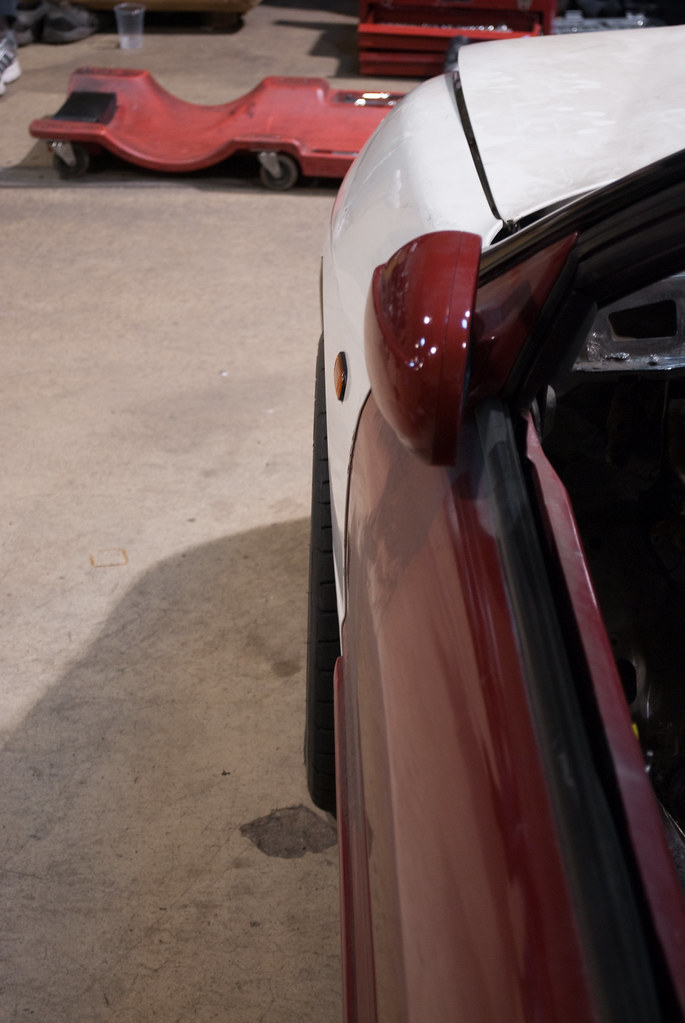
Seeing as how I finally had the brakes installed on all four corners I got anxious and installed the wheels so I could see the car on the ground again. It was quite a site. So much promise yet so much fender gap!
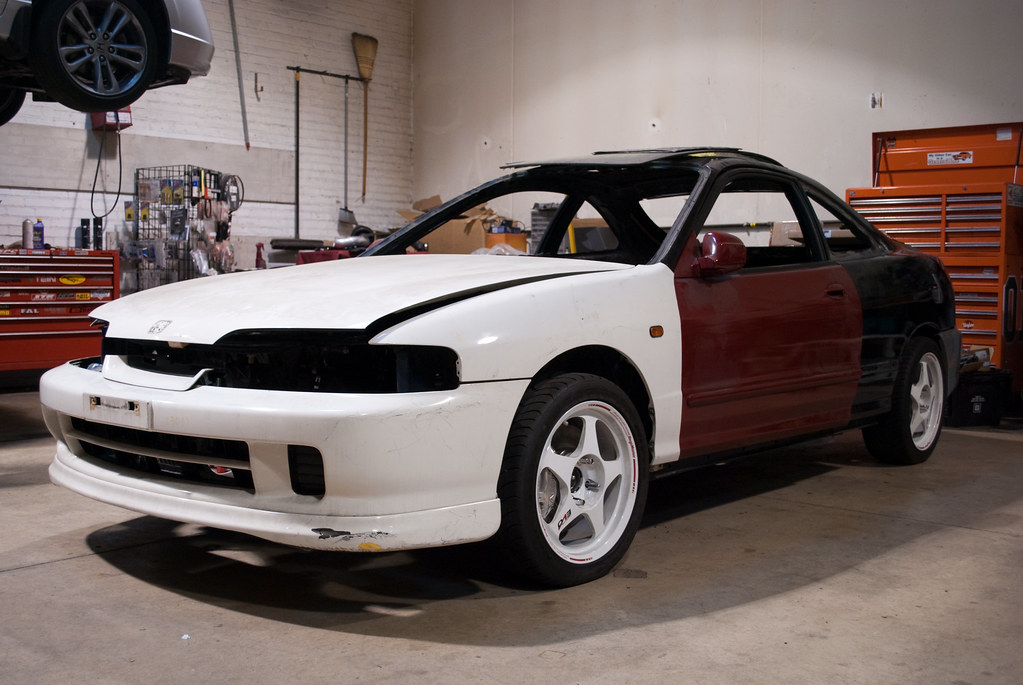
I often forget how big the calipers are until I see them behind a wheel. Although the rotor is only 11.8” the whole assembly has a daunting size. This is all fit snugly behind a 16x7 +35 Regamaster Evo – no spacer necessary.

After some gloss black engine enamel paint laid over the POR 15 I installed a new bearing and the snap ring. Another earthquake hit when I was taking this picture but you may be able to see where I put anti-seize in the snap ring channel. My least favorite part about wheel bearings on Midwest cars is freeing the snap ring. Hopefully this will make the procedure a non-issue next time.
The clearance I needed to increase was between the hub and knuckle and I accomplished this by having some spacers machined that were the same size as the inner race of the bearing. All I really needed was 2mm but that meant disassembling everything and reinstalling new bearings in both knuckles - not cheap or fun.
Installed on the hub it’s barely noticeable.
The result is this much clearance and freely spinning assembly. What isn’t detailed here is the 4x114.3 hubs were milled down to be installed in the smaller Civic (DX sized) knuckles. With this combination I was able to fit an 11.8” rotor for wheel clearance.
Then came the reassembly of the front brakes.
The brackets were originally a very rudimentary design from “Brake Expert” and I had to go through hell and high water to get them. At one point I was afraid I had gotten scammed but they eventually showed up. They were the bare minimum of function – they fit and adapted the calipers. They also were unnecessarily heavy.
Since Brake Expert had no real access to a machine shop I finished up the brackets by asking TallKyle to mill the center area down 10mm on each side. This still left some material in the center which was more than enough for function. The result was dropping over half a pound from each side!
Reinstalling the brackets was simple. The bolts here are drilled for lightness and for safety-wire. Any and all bolts that were drilled out were torqued to their value to ensure they would still be strong enough for their application.
After that the caliper was reinstalled on the bracket and then the assemblies back onto the car.
I performed a lock-to-lock test to make sure the brake lines would clear the shock forks. The RL calipers utilize a reverse-flare fitting so I used -3 to 10x1 fittings and a 90* -3 AN line segment for fitment tests. Everything passed.
Seeing as how I finally had the brakes installed on all four corners I got anxious and installed the wheels so I could see the car on the ground again. It was quite a site. So much promise yet so much fender gap!
I often forget how big the calipers are until I see them behind a wheel. Although the rotor is only 11.8” the whole assembly has a daunting size. This is all fit snugly behind a 16x7 +35 Regamaster Evo – no spacer necessary.
09-25-2012, 03:22 PM
#68
Honda-Tech Member

this a great build. i've learned a whole lot so far and hope to learn more. those RL calipers are gigantic!
are those Tokico coils? i cant really tell...
are those Tokico coils? i cant really tell...
09-26-2012, 07:15 AM
#69
Honda-Tech Member
Join Date: Dec 2006
Location: Dallas Texas
Posts: 989
Likes: 0
Received 0 Likes
on
0 Posts
wow great work on the hub really nice stuff..i like the fact that you kept the plastic protection plate thing on the fuel lines, great idea
09-26-2012, 07:15 AM
#70
Honda-Tech Member
Thread Starter
Thanks again, guys. Good to see some new people following the build.
The coilovers are from a Dutch company called St. Boeso. I picked them up while in Japan since I never heard of them and wanted to try them out to gain experience with new parts. It was these versus Feel's coilovers at the time so I didn't have a bad choice in front of me. These are much more streetable as the spring rates are pretty tame. I just wish I could find out more information about the company. If anyone knows anything like a website or anything, please let me know!
The coilovers are from a Dutch company called St. Boeso. I picked them up while in Japan since I never heard of them and wanted to try them out to gain experience with new parts. It was these versus Feel's coilovers at the time so I didn't have a bad choice in front of me. These are much more streetable as the spring rates are pretty tame. I just wish I could find out more information about the company. If anyone knows anything like a website or anything, please let me know!
 09-27-2012, 09:14 AM
#73
Honda-Tech Member
Join Date: Nov 2008
Posts: 744
Likes: 0
Received 0 Likes
on
0 Posts
nice build.
crazy how much we have in common between yours and my build. lol
i have my battery relocation just pretty much the same as you. haha. and i have sw388's on my build.. planned on doing the RL cals swap and keeping 4 lug.
jdm front also. and k20 swap.
loving the build. doing a great job.
crazy how much we have in common between yours and my build. lol
i have my battery relocation just pretty much the same as you. haha. and i have sw388's on my build.. planned on doing the RL cals swap and keeping 4 lug.
jdm front also. and k20 swap.
loving the build. doing a great job.
09-27-2012, 09:21 AM
#74
I'm loving that water neck. I would soooo ask you to make me one, too bad I'm using a RBC head this time around; the water passage piece on it is as ginormous as it is fugly, lol. Even after cleaning it up some, it looks nothing like a clean PRB head.
Brake lines look great as well. I need to get started on my SS lines; good thing I waited as now, I can take notes!
Brake lines look great as well. I need to get started on my SS lines; good thing I waited as now, I can take notes!
09-27-2012, 09:29 AM
#75
Honda-Tech Member
Join Date: Nov 2008
Posts: 744
Likes: 0
Received 0 Likes
on
0 Posts
speaking of brake lines...
so how excally are you getting to the backside of the fittings on the frame rail? maybe a dumb question but im curious as to how your doing that.
so how excally are you getting to the backside of the fittings on the frame rail? maybe a dumb question but im curious as to how your doing that.