
deschlong's restoration of a '93 Si Hatch - lots of OEM goodness

 04-24-2013, 09:59 AM
#53
^ This looks like the right answer. Did a little research and the 96-00 LCAs are narrower than 92-95 and would require spacers. So, not needed for my application. Thanks for the tip, canadaek.
04-29-2013, 07:18 PM
#57
Some progress.
Got the front coilovers in. A minor hassle since the tool you can rent at the auto parts store doesn't fit between the coils of the stock springs, and I had to compress the spring to reuse the top hats. So, had to hunt for something smaller, which I did manage to find.
Also, in case it isn't clear, I am a suspension n00b. This was my first time dealing with non-stock struts/springs so there was a bit of a learning curve while I figured it all out. Here is a breakout diagram of a stock Honda Civic / Acura Integra front strut.

Part terms are as follows (to help other n00bs):
A. Strut
B. Bump stop
C. Tapered bump stop washer
D. Strut dust cover
E. Dust cover top washer
F. Top hat lower bushing
G. Sleeve (allows top of strut to pass through bushings)
H. Top hat
I. Top hat upper bushing
J. Top nut washer
K. Top nut (screws on to top of strut)
L. Spring
The parts you are reusing for the Tokico RAK502-I setup are "C" and "H".
First one that went in was a bit of an experiment as I figured out at what XX height the threaded perch had to be to get a YY cm wheel-fender gap. I wanted it fairly close to stock (which is 643mm in the front from ground to top of arch), about 2-finger width. Turns out that about 3cm from the bottom of the thread (measured to the bottom of the perch lock washer) gives ~61cm height to the arch, riding on 185/65R14 wheels. I'll have to verify this again as things settle out over the next few days, and adjust as necessary. I'll tell you one thing, it's nice to finally be rid of that dreaded reverse rake.
Pic of passenger side installed. Yes, I am aware that my wheel well is FILTHY, but remember this is a daily driver.

Got the front coilovers in. A minor hassle since the tool you can rent at the auto parts store doesn't fit between the coils of the stock springs, and I had to compress the spring to reuse the top hats. So, had to hunt for something smaller, which I did manage to find.
Also, in case it isn't clear, I am a suspension n00b. This was my first time dealing with non-stock struts/springs so there was a bit of a learning curve while I figured it all out. Here is a breakout diagram of a stock Honda Civic / Acura Integra front strut.
Part terms are as follows (to help other n00bs):
A. Strut
B. Bump stop
C. Tapered bump stop washer
D. Strut dust cover
E. Dust cover top washer
F. Top hat lower bushing
G. Sleeve (allows top of strut to pass through bushings)
H. Top hat
I. Top hat upper bushing
J. Top nut washer
K. Top nut (screws on to top of strut)
L. Spring
The parts you are reusing for the Tokico RAK502-I setup are "C" and "H".
First one that went in was a bit of an experiment as I figured out at what XX height the threaded perch had to be to get a YY cm wheel-fender gap. I wanted it fairly close to stock (which is 643mm in the front from ground to top of arch), about 2-finger width. Turns out that about 3cm from the bottom of the thread (measured to the bottom of the perch lock washer) gives ~61cm height to the arch, riding on 185/65R14 wheels. I'll have to verify this again as things settle out over the next few days, and adjust as necessary. I'll tell you one thing, it's nice to finally be rid of that dreaded reverse rake.
Pic of passenger side installed. Yes, I am aware that my wheel well is FILTHY, but remember this is a daily driver.
 05-01-2013, 12:17 PM
#59
Honda-Tech Member
iTrader: (7)
Join Date: Apr 2005
Location: Between my mind and reality.
Posts: 7,680
Likes: 0
Received 0 Likes
on
0 Posts
I love the direction you are taking this car. Consider me subscribed.
05-05-2013, 08:43 PM
#60
Hi everyone.
No major updates on the car today. I've offered up my garage space for a friend to do some spring tune-up work on his 1982 Honda XL250 motorbike for a couple of days, so I've been occupying myself with a couple of other things.
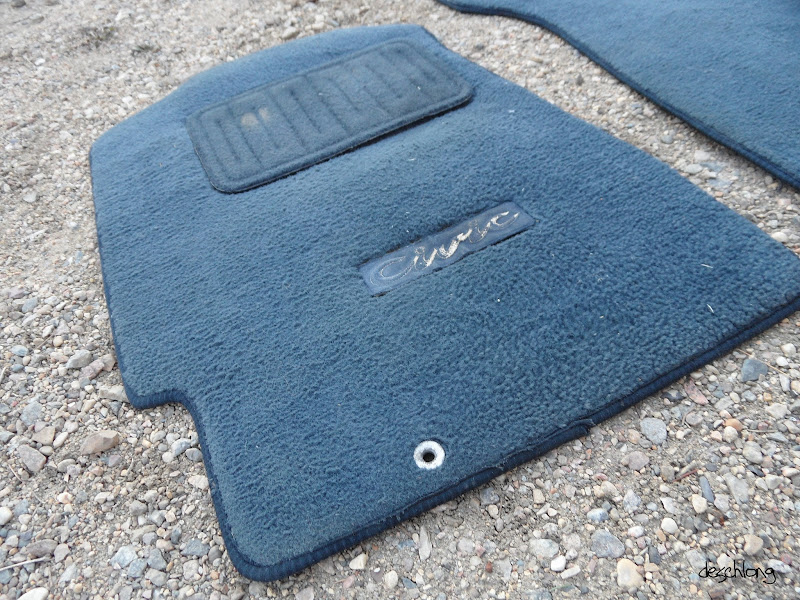
I beat the snot out of and cleaned up some floor mats I picked up to send to a lucky buyer. Blue OEM CDM mats from a 5G Civic Hatchback. Very nice condition:

Also cleaned up some OEM 5G CDM Sedan floor mats in grey... no pics yet since they're still drying. But, the Sedan mats are nearly-new -- likely hidden under the rubber mats that were on top of them in the car for 20 years. Amazing find.
But, went to the wreckers today and here's a little list of what I found:
So, a good day nonetheless even though I did not get a chance to work on the Si.
No major updates on the car today. I've offered up my garage space for a friend to do some spring tune-up work on his 1982 Honda XL250 motorbike for a couple of days, so I've been occupying myself with a couple of other things.
I beat the snot out of and cleaned up some floor mats I picked up to send to a lucky buyer. Blue OEM CDM mats from a 5G Civic Hatchback. Very nice condition:
Also cleaned up some OEM 5G CDM Sedan floor mats in grey... no pics yet since they're still drying. But, the Sedan mats are nearly-new -- likely hidden under the rubber mats that were on top of them in the car for 20 years. Amazing find.
But, went to the wreckers today and here's a little list of what I found:
- OEM CDM/USDM 94-01 Acura Integra front fog lights w/ wiring and switch
- OEM CDM/USDM 94-01 Acura Integra moonroof wind visor
- CDM Acura 1.6EL lower console cup holder + lower DIN pocket (Type K, dark grey)
- Acura 1.6EL / 6G Honda Civic centre arm rest (Type K, dark grey)
- OEM CDM 4G Honda Civic Hatchback Optional Power Windows installation kit (wow, just wow - never thought I'd ever find one of these)
So, a good day nonetheless even though I did not get a chance to work on the Si.
Last edited by deschlong; 05-05-2013 at 09:40 PM.
05-06-2013, 03:44 AM
#61
4G Honda Civic Hatchback Optional Power Windows
Hmmm, wondering if that's what I got on my old crushed Civic 4G.
Hating myself for not taking more care of the parts of that one, bought it for $300 and took the upper arms and ball joints.
At least it had:
Power windows, heated seats, head light washers.
Nice finds though, the floor mats is looking good
05-06-2013, 06:26 AM
#62
Honda-Tech Member
iTrader: (1)

Join Date: Jan 2013
Location: OKC
Posts: 251
Likes: 0
Received 0 Likes
on
0 Posts
Good looking progress. Love the oem. If you find any, really really good condition black civic coupe floor mats, I'd sure take them.
05-06-2013, 08:46 PM
#64
Honda-Tech Member
iTrader: (7)
Join Date: Apr 2005
Location: Between my mind and reality.
Posts: 7,680
Likes: 0
Received 0 Likes
on
0 Posts
How much did you sell those floor mats for? I might have to get with you to find some parts.
05-07-2013, 08:45 AM
#66
4G Honda Civic Hatchback Optional Power Windows
Hmmm, wondering if that's what I got on my old crushed Civic 4G.
Hating myself for not taking more care of the parts of that one, bought it for $300 and took the upper arms and ball joints.
At least it had:
Power windows, heated seats, head light washers.
Nice finds though, the floor mats is looking good
Hmmm, wondering if that's what I got on my old crushed Civic 4G.
Hating myself for not taking more care of the parts of that one, bought it for $300 and took the upper arms and ball joints.
At least it had:
Power windows, heated seats, head light washers.
Nice finds though, the floor mats is looking good
 It is definitely rough. There is still stuff I want to do before it goes to the paint shop; for example, cut the fenders for sidemarkers among other things. Also, I wanted it to be warm outside when I send it in so it's been a long wait. I was hunting on the weekend for a nice hood and tailgate. I already have some here in 95% condition I can work with but if I find something that's totally perfect then I'd just get that. (Prices are dirt cheap here .... $35 for a hood so it's worth going to check.)
05-08-2013, 10:49 AM
It is definitely rough. There is still stuff I want to do before it goes to the paint shop; for example, cut the fenders for sidemarkers among other things. Also, I wanted it to be warm outside when I send it in so it's been a long wait. I was hunting on the weekend for a nice hood and tailgate. I already have some here in 95% condition I can work with but if I find something that's totally perfect then I'd just get that. (Prices are dirt cheap here .... $35 for a hood so it's worth going to check.)
05-08-2013, 10:49 AM
#67
Hi everyone,
Went back the the wreckers to finish pulling the wiring harness for the CDM 4G Civic Optional Power Windows as well as pick up another part for my Civic. But, of course, while there I noticed a few other pieces that escaped me the first time.
Even though I will eventually swap in the JDM trunk box interior, I needed a replacement rear passenger interior quarter panel plastic. Mine has a chip out of it towards the front where the door stepsil meets it. (Don't ask me how this happened - blame the previous owner.) I can't just borrow the one from the VX for the time being due to an unfortunate incident with an unstable 100lb air compressor in the trunk and a sharp left turn that smashed its panel almost in half. (This one you can blame me for.) The VX will inherit this part after I do the trunk box swap.
One item that I was pleased to find ... which possibly many might think is silly ... is an Owner's Manual + additional dealer paperwork for a 1993 Civic Hatchback. Since I am trying to do a full resto, these little additional bits complement the build nicely and ensure it will be as complete as I can get it. (I picked one up a while ago for a 1993 Civic but noticed after I got it home I noticed it was for a Sedan only.)
Other pieces that I also removed were:
- OEM 5G Civic 3-spoke non-SRS steering wheel, 10/10 condition.
- OEM 6G Civic Sedan LHD manual-fold, power heated mirrors w/ switch (from an Acura 1.6EL)
- OEM heated seat switches from a CDM 92-96 Prelude, will fit lots of other Hondas
- OEM map light from an Acura Integra hatchback (there were more of these but I only got one)
- OEM Honda "High"-tone horn (poached from a 92-96 Prelude), to complement the existing "Low" horn on the Si.
- Small grill from the interior temperature monitor / aspirator tube from a 1998 Acura 2.8 CL. This is an item I can potentially use to mount in the Civic's front dash cover when it comes time to retrofit the JDM AUTO Climate Control. No LHD 5G Civic got AUTO Climate Control so I need to get creative to mount the interior temp monitor when I do the retrofit.
05-08-2013, 06:56 PM
#68
Honda-Tech Member
Join Date: Apr 2006
Location: sacramento, ca, 95843
Posts: 578
Likes: 0
Received 0 Likes
on
0 Posts
OEM 5G Civic 3-spoke non-SRS steering wheel, 10/10 condition
if selling how much? shipped 95610
if selling how much? shipped 95610
 05-19-2013, 06:44 AM
#72
Seagull Management
Join Date: Jun 2008
Location: Miramichi, NB, Canada
Posts: 15,150
Likes: 0
Received 24 Likes
on
22 Posts
How did that princess auto coil spring compressor work? Normally I just take my stuff to Honda and get someone to assemble them for me since they have a very nice $1000 wall mounted unit. But if that unit works ok I might pick one up for that kind of a price.
05-19-2013, 07:12 AM
#73
^ It did the job well enough. Not perfect still but got the job done as at least it fit between the coils. Considering I also used it to compress the spring during installation of the new coilovers when adjusting the threaded seat, it was a useful purchase. Only $25, too.
I actually didn't expect to find such an item in Canada. Usually I find I have to go online shopping in the USA to get these little specialty tools.
I actually didn't expect to find such an item in Canada. Usually I find I have to go online shopping in the USA to get these little specialty tools.
05-19-2013, 08:06 AM
#74
Seagull Management
Join Date: Jun 2008
Location: Miramichi, NB, Canada
Posts: 15,150
Likes: 0
Received 24 Likes
on
22 Posts
Gray sells lots of specialty tools, but it's way harder to find a Gray dealer than it used to be, and they usually want just as much as Snap-On. Princess Auto is great for cheap specialty tools you only want to use occasionally, sometimes the quality is surprisingly decent, other times not so much.
05-22-2013, 09:10 AM
#75
Hi everyone,
My focus currently is on getting all sorts of stuff done in order to bring it in for paint. The list of items to do beforehand is fairly short, thankfully:
My focus currently is on getting all sorts of stuff done in order to bring it in for paint. The list of items to do beforehand is fairly short, thankfully:
- Prep front fenders
- I have a replacement front p/s fender which I mounted and test fit on the weekend. The one I have on there has some small dents from hail damage. The replacement is purple though so it will have to wait until after paint to get mounted permanently.
- The d/s is in good condition but there is a minor rub at the door which I need to check out and fix either through an adjustment or a little tap-tapping with the ball peen.
- Both fenders need to have sidemarker holes cut. I used two damaged fenders (original dented one & hail-damaged one) to practice on -- lame, yes, but I know my abilities and considering I have all the steadiness of hand of a Parkinson’s sufferer I am glad I had a couple of practice shots first before tackling the real ones.
- Hood
- I received a free hood in the winter which looked perfect on initial inspection. Now that it’s spring, I took it out for a wash and discovered it’s got a few too many dents for my liking.
- I’ll stick with the original hood which is actually in reasonable condition.
- Front bumper
- I’ll be using the front bumper from the VX which already has fog light holes cut, as well as bumper pole hole, and headlight washer nozzle holes.
- I’ve unmounted the bumper but must remove all the remaining accessory bits.
- Driver’s door
- Current driver’s side door has rust forming along the bottom edge so I have a replacement one.
- This replacement needs to be stripped of all trim and mouldings. It’s white, so it won’t be mounted until after it gets paint.
- Side mirrors
- I have manual mirror shells to be painted and which will accept the Power Heated Folding guts afterwards.
- Door handles
- Not sure if I am better off removing these from the doors to have them re-painted? They are colour-matched already so it would be nice to just freshen them up.
- If I do this, then I’ll install some boring old black ones in the doors temporarily while they’re out.
- Rear lower trunk hatch
- I removed the original as it had a small dent near the key hole. I thought it was interfering with operation of the key cylinder, also, but it turned out this was just due to 20 years of filth building up in the lock unit.
- I had picked up and installed a replacement a long time ago, but I didn’t notice the spot of rust on the bottom centre until much later. This is a very unusual place, and I suspect it was due to a flaw in the original manufacturing. I was tempted to patch up the little rust spot and use it, but someone has since backed into this trunk now and caused a dent (grr). Too many stupid lifted trucks around. Anyway, back to square one so I’m tempted just to use the original hatch and get the dent popped out and use that. Will have to take another look and dig it out from the back of the garage.