
DIY: Hella 1182 Fog light install
 04-30-2007, 09:14 AM
#1
DIY: Hella 1182 Fog Light install/switch install.
Tools needed:
-- Drill and a few drill bits
-- Screw driver
-- 10-12 mm wrench (also a 3/8 in my case)
-- Extra wire and connectors/heat shrink.
***Note: The order in which this DIY is explained is by no means the exact order you have to go in. It's merely what I did. Also, I took some advic e and swapped the back of the fog light around, so the wires are coming out of the TOP instead of the bottom: For a cleaner install.
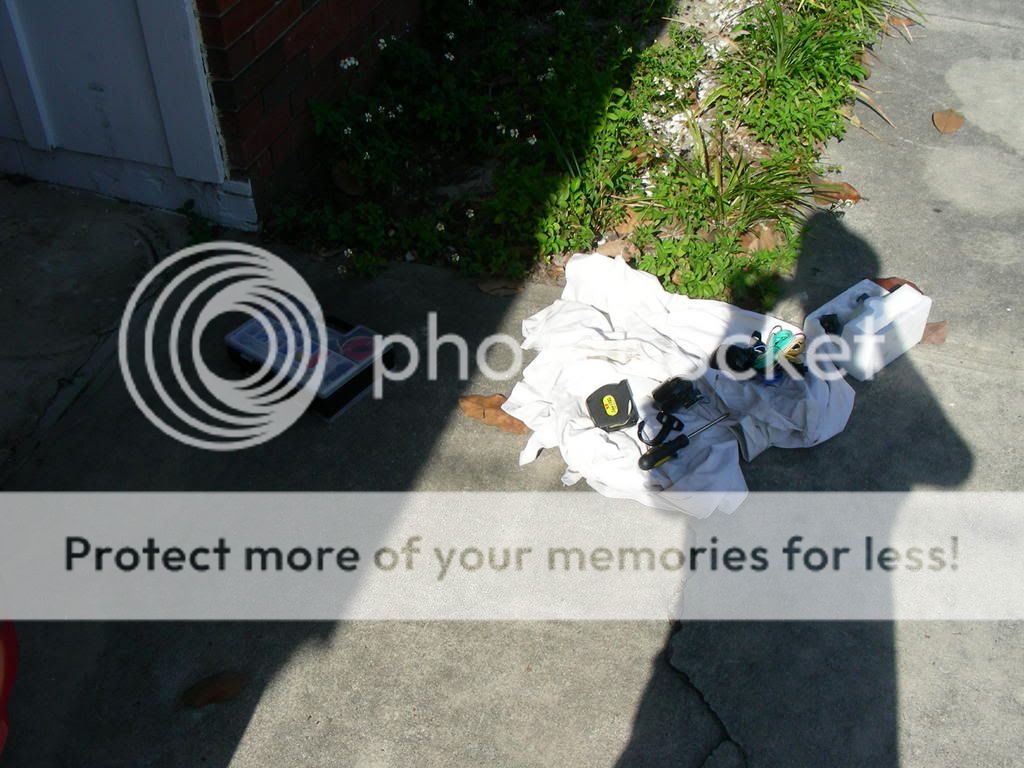
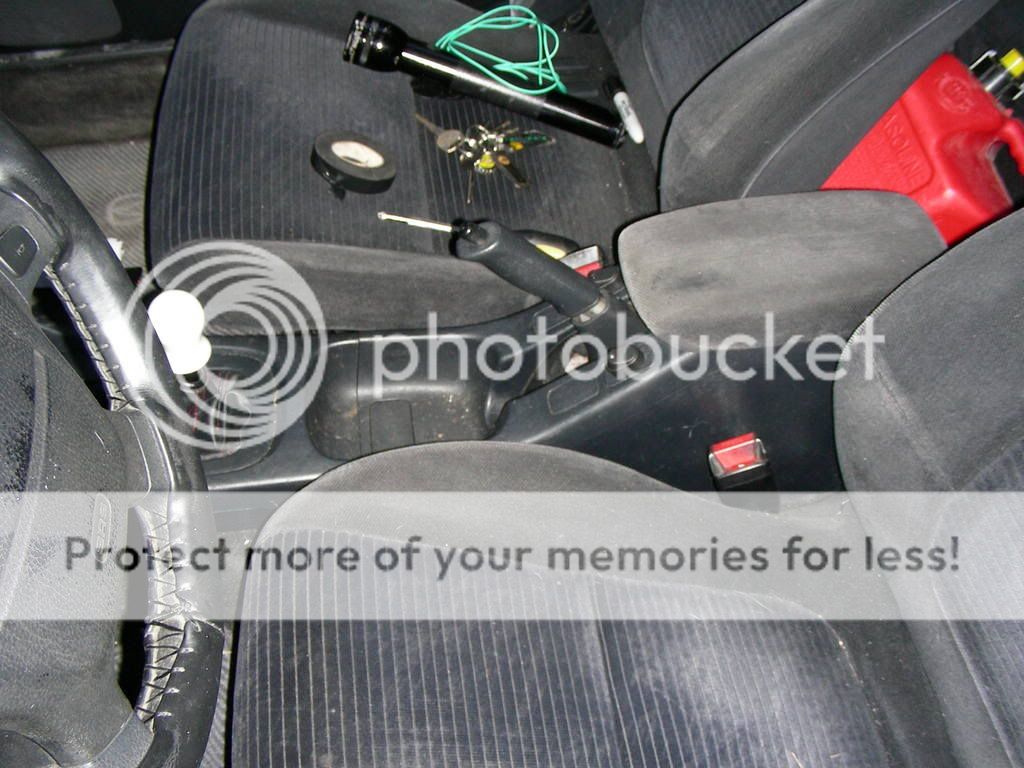
Step 1: Have your fog lights in hand and be ready to drop an hour or 2 into this project. Here's what I'm starting with and my parts.

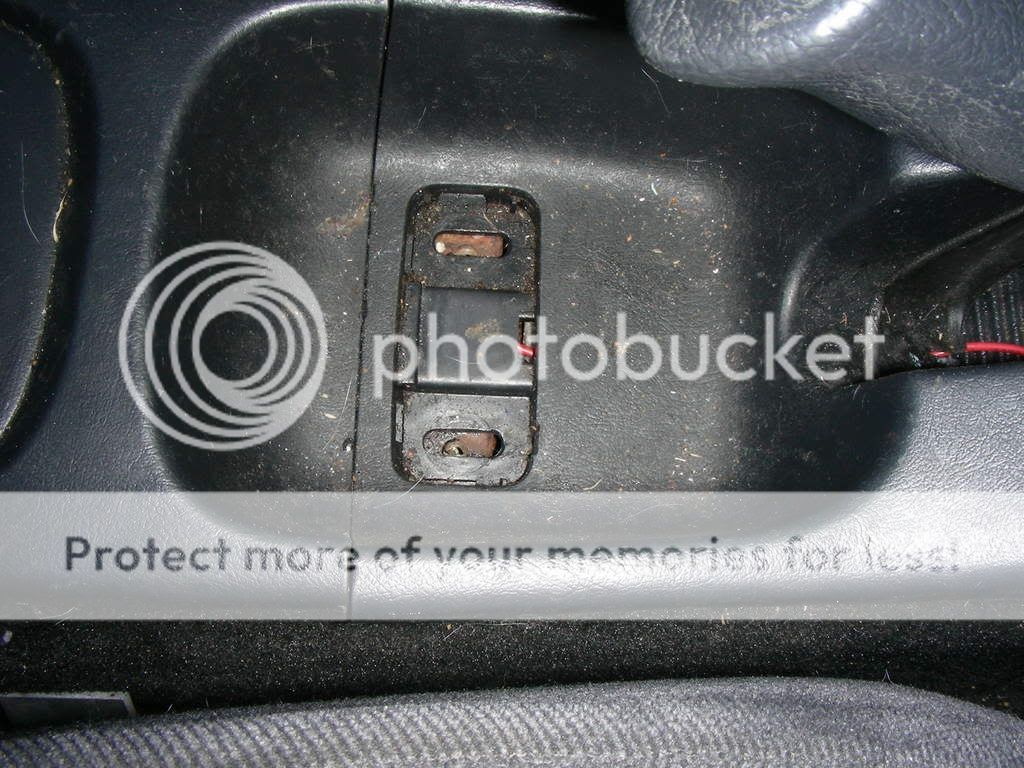
Step 2: ---Interior--- Dissasemble your console. Pretty basic. If you see a screw that looks like it's holding something in, take it out You also have to unplug the cig lighter plug. Yes, I know it's dirty. An uber detail is coming up.
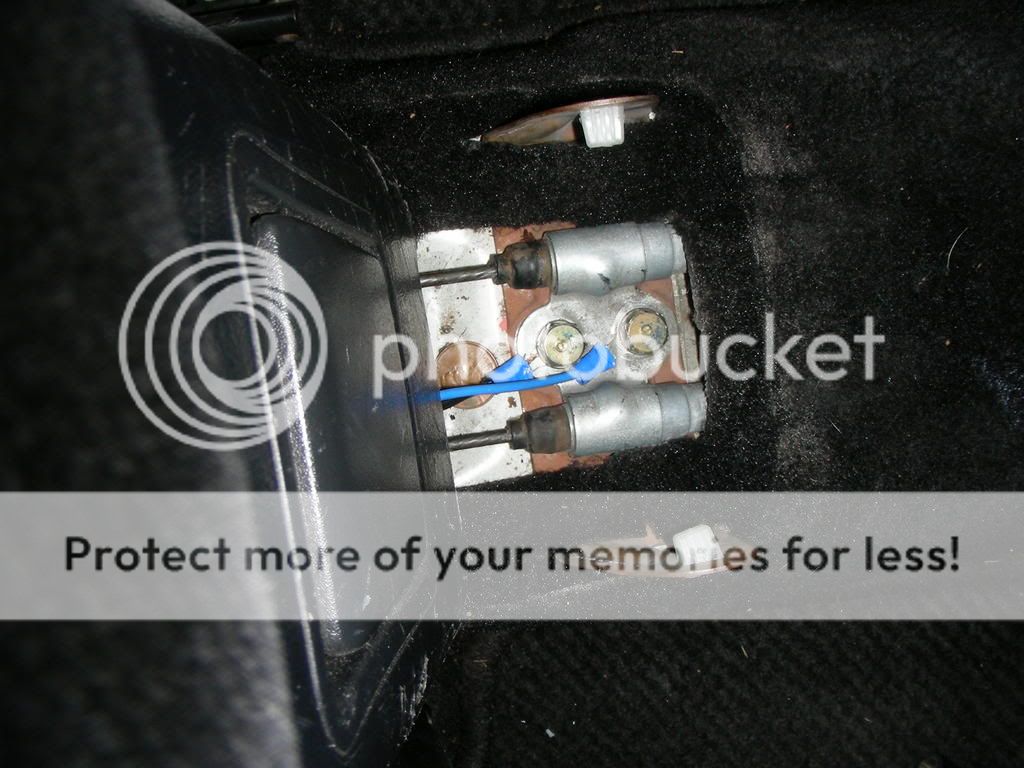
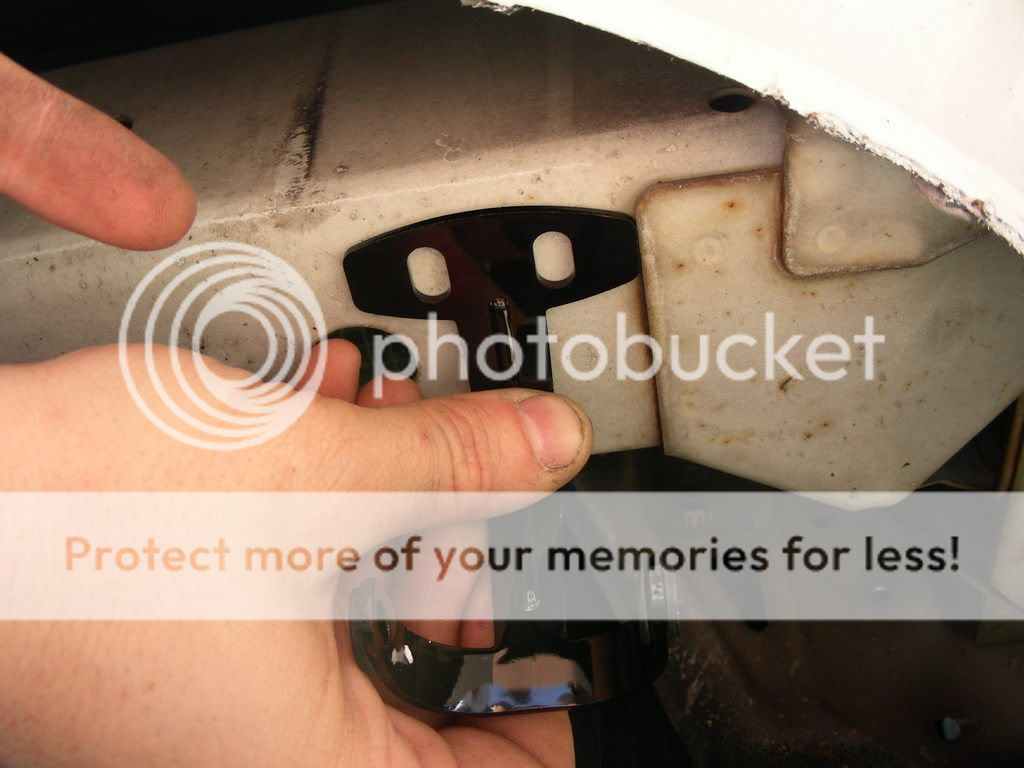
Step 3: Hook up your ground for the switch. As you can see, I chose the little bracket for the E-Brake. The other wire is for my fan switch, FYI. They are 12 mm bolts.
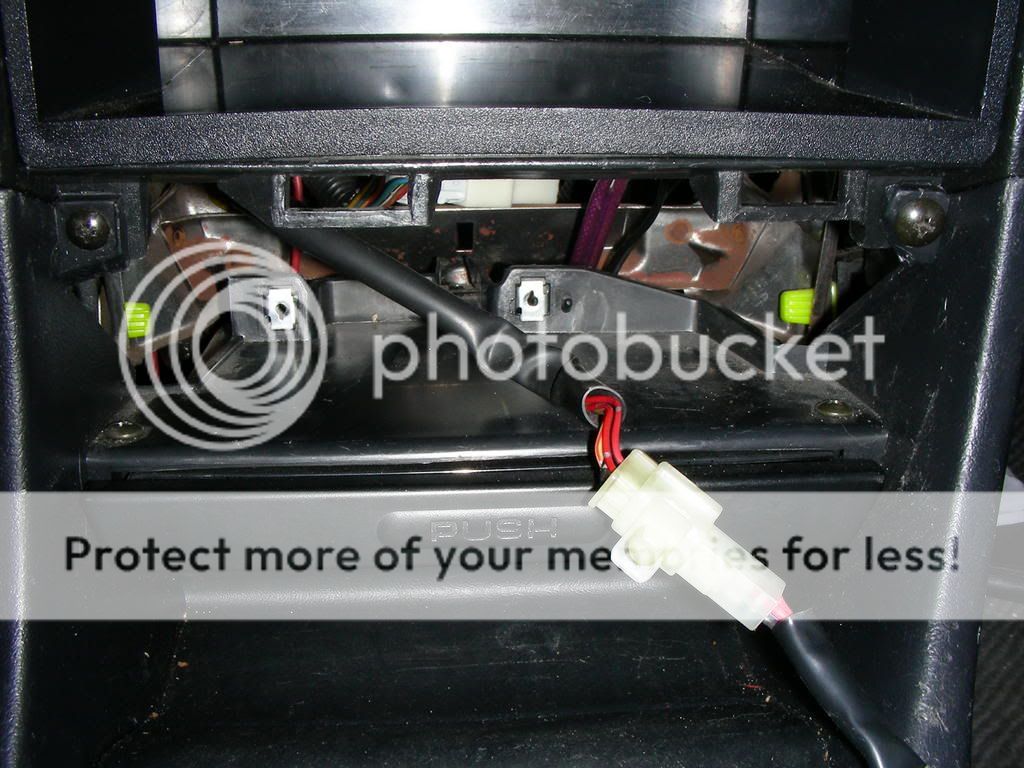
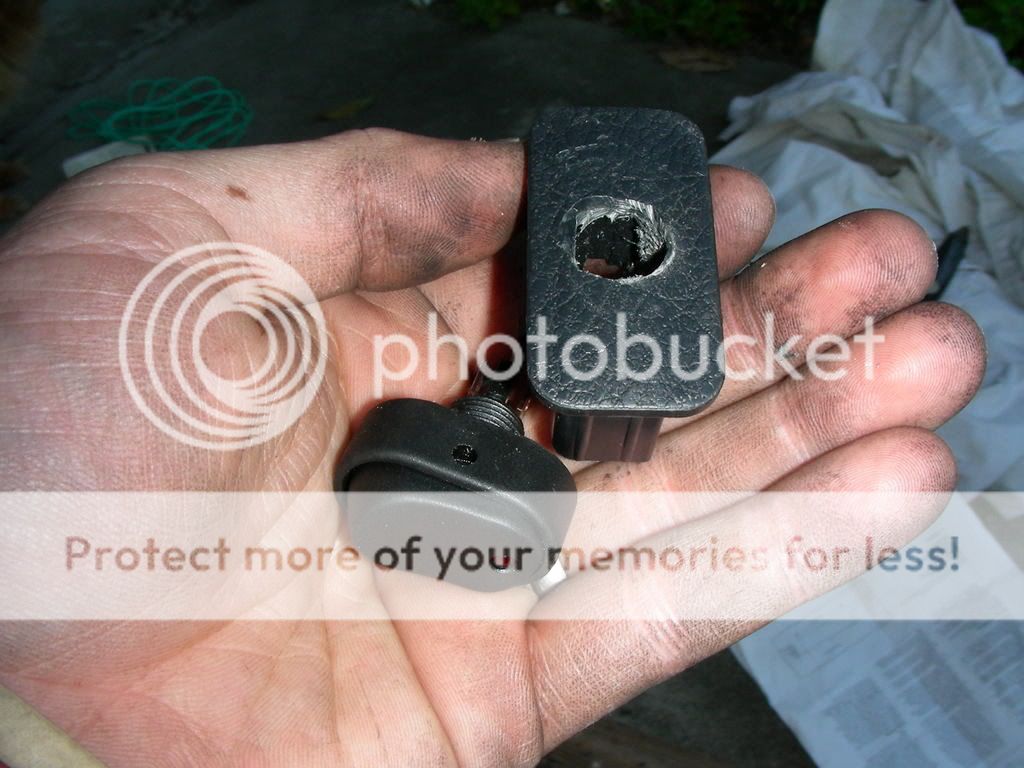
Step 4: Drill out a spot for your switch. Pretty simple, just don't make it too big so it fits snug in the hole.
Now we go under the hood.
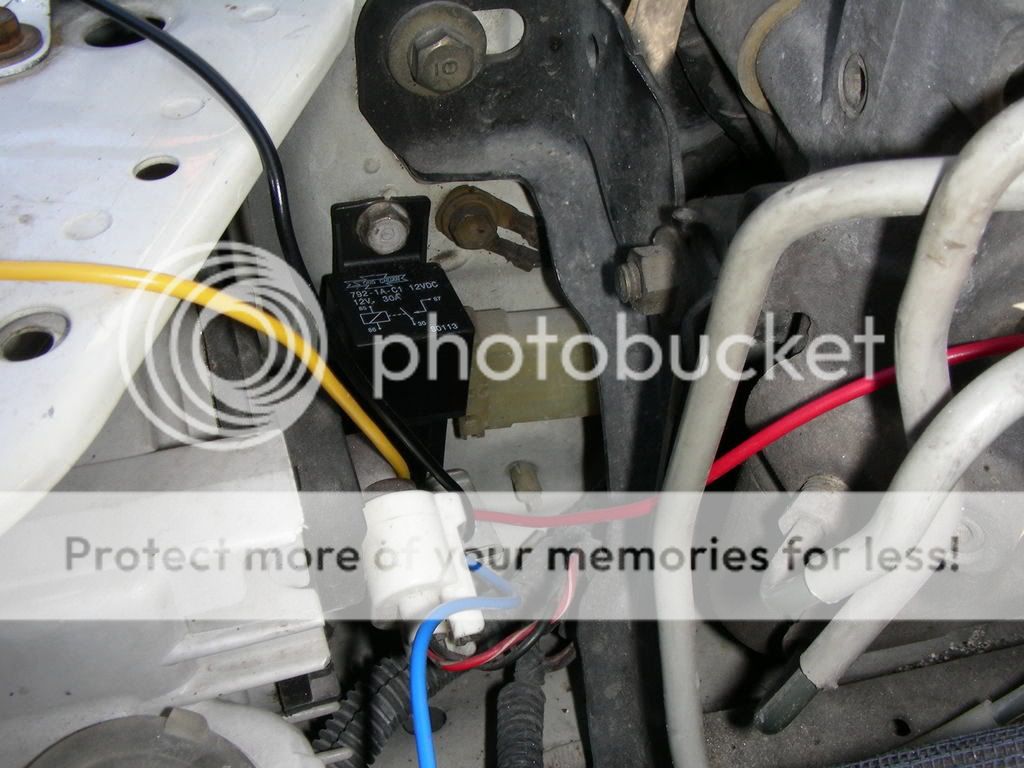
Step 5: Locate a spot to mount your relay. Eli was helping me on this and he did an excellent job on tucking my relay away. Now, you see the wires? Here's what they are:
-- Red/White wire: Battery
-- Yellow wire: Switch
-- Blue wire: Ground
-- Black wire: Power to the fog light
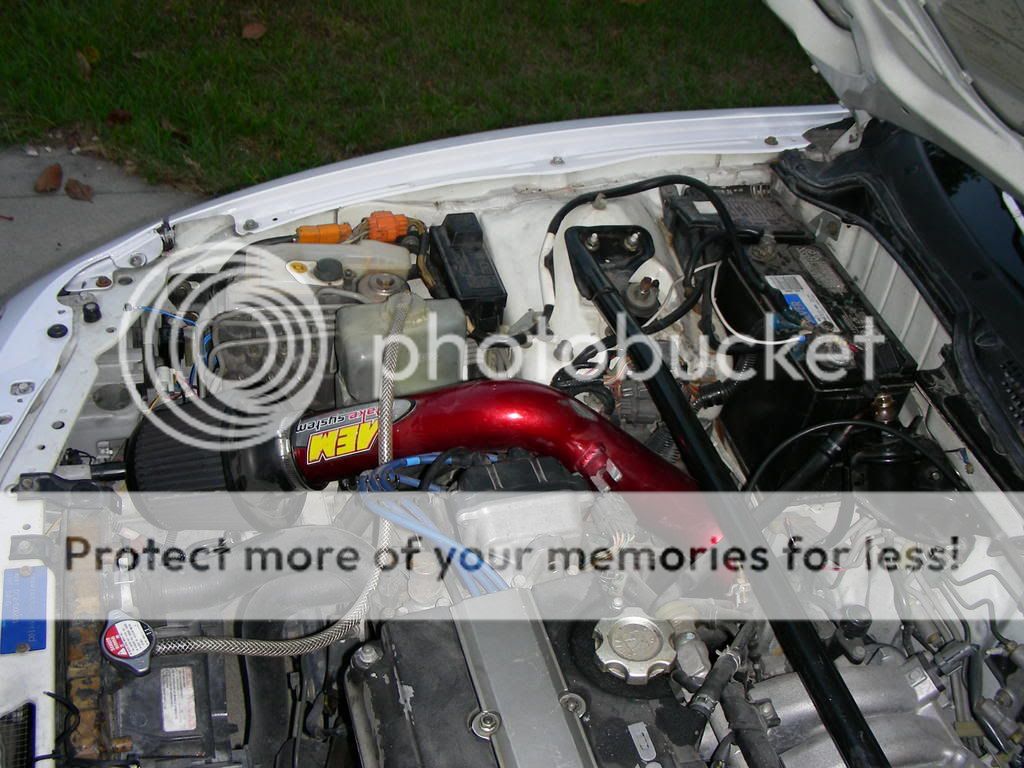
Step 6: Run your wires. I chose to run the wire connecting my fogs to my switch in front of the radiator, hiding it out of the way. I was thinking of PatrickGSR when I was doing this.. So he's pretty much the reason all my wires are tucked away Thanks man.
IF you can't see the wires in the pics, thats a good thing
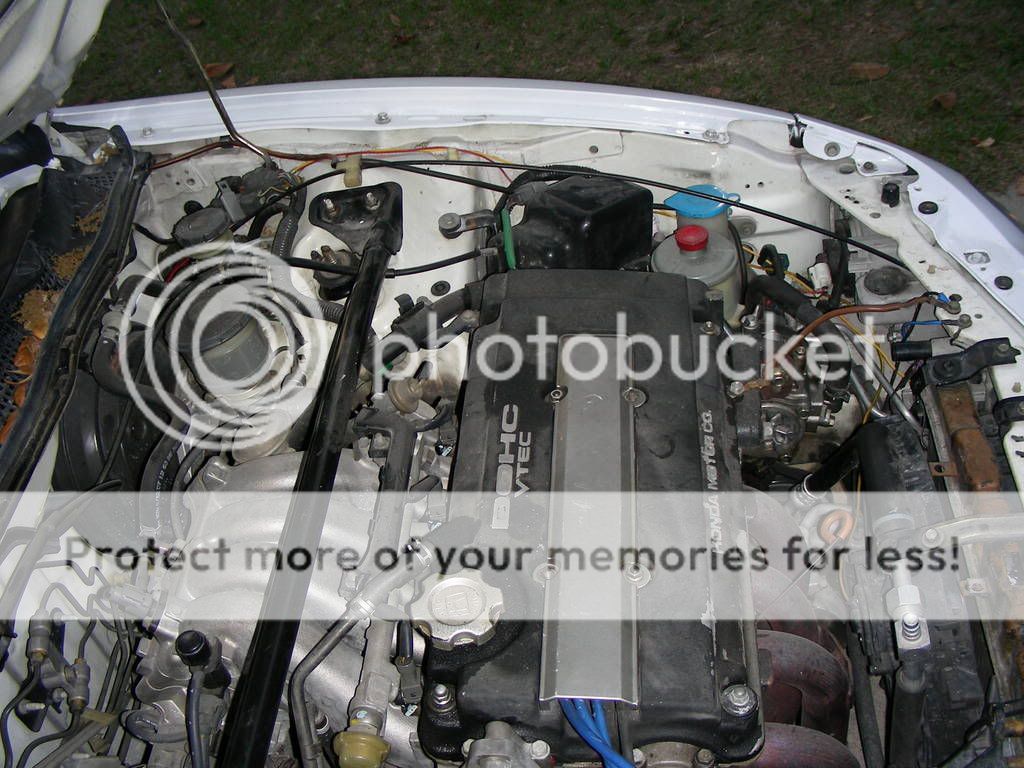
And don't forget to run the black wires to the fog lights.
Step 7: Wire up your switch. Plagarized from my DIY fan switch.
The switch has 3 connections: Earth (your ground) Supply (battery) and Load (guesss what it goes to?). Here's what you want to do:
On this particular switch, there are 3 male ends:
-- Earth (Ground)
-- Load (What your powering, in this case a fan)
-- Supply (Where you're gonna get your power from)
You want to pick a bolt underneath the console to run your ground wire to.
You want to run a wire from the LOAD terminal to the POWER wire on the fan.
You want to run a wire from the SUPPLY to either the battery or a fuse. In this case, I chose to run it to the 10Amp tail light fuse. This way my lights HAVE to be on and I can't accidentally leave the fogs turned on and drain my battery
Be sure to run your wires through the console and through the hole you drilled in the lil plastic piece that pops out (there are 4 of them) in the arm rest.
Easy enough. When your done, put the console back together and tuck yoru wires away nice and neat
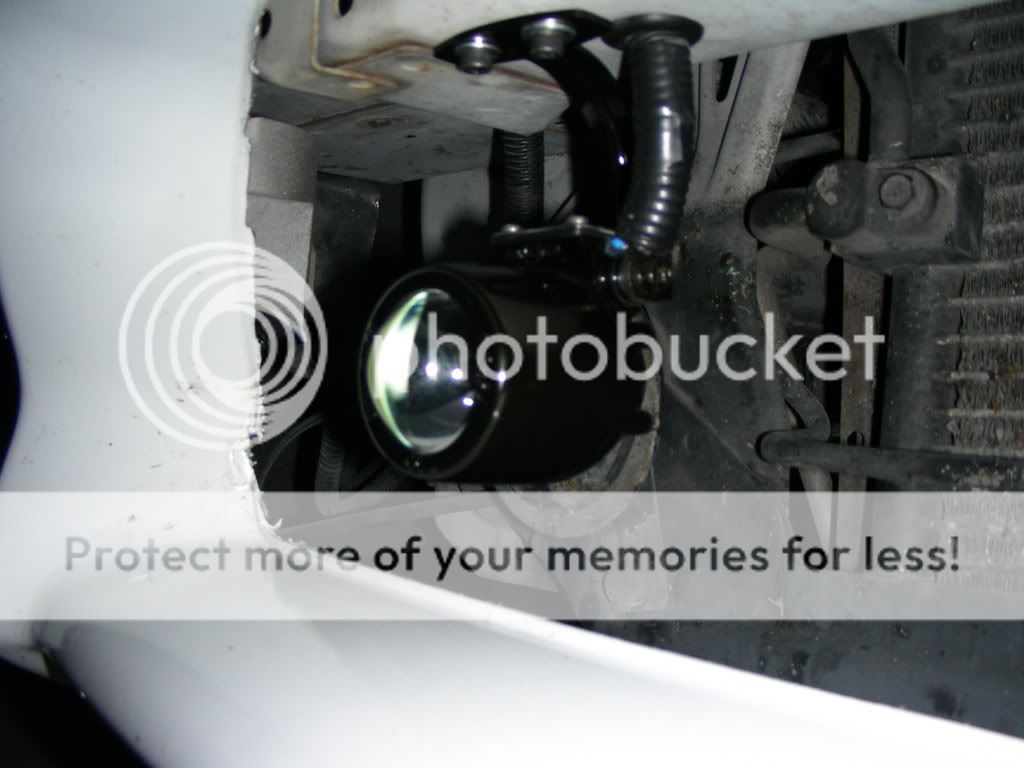
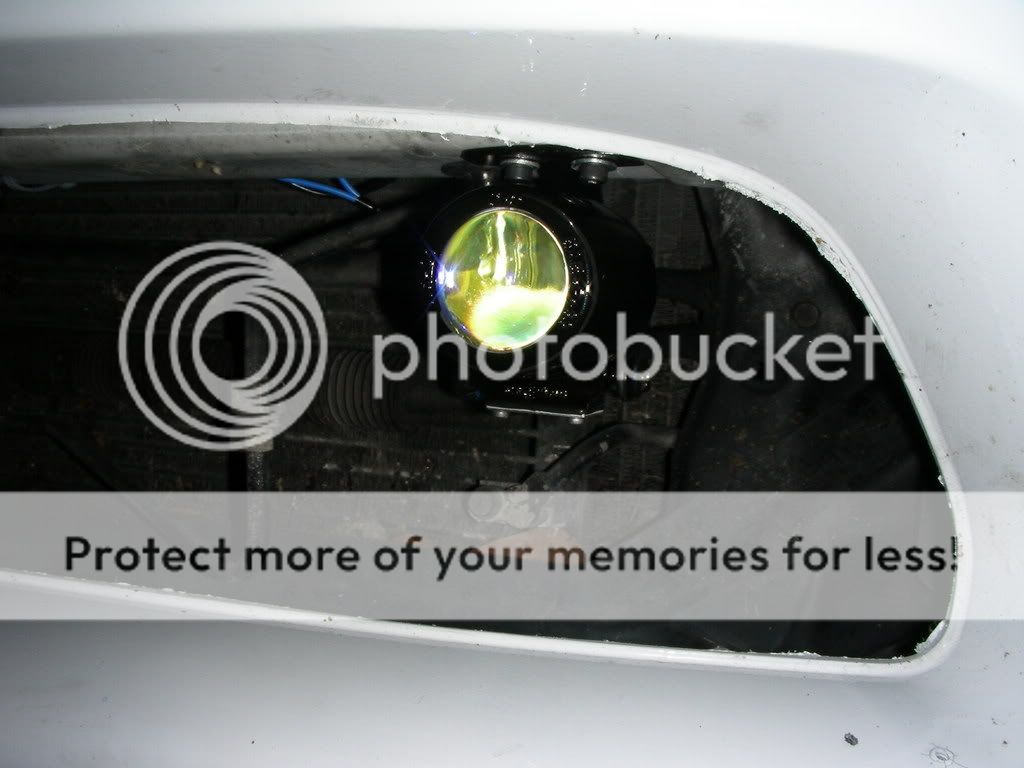
Step 8: Mount your fog lights. Running the wires is tedious, mounting the fogs is the hard part. I picked the below spot to mount my fogs.
Using a marker, I placed my bracket where I wanted it and marked out where I was suppose to drill. Then, using a small bit, I drilled a pilot hole for the larger bit.
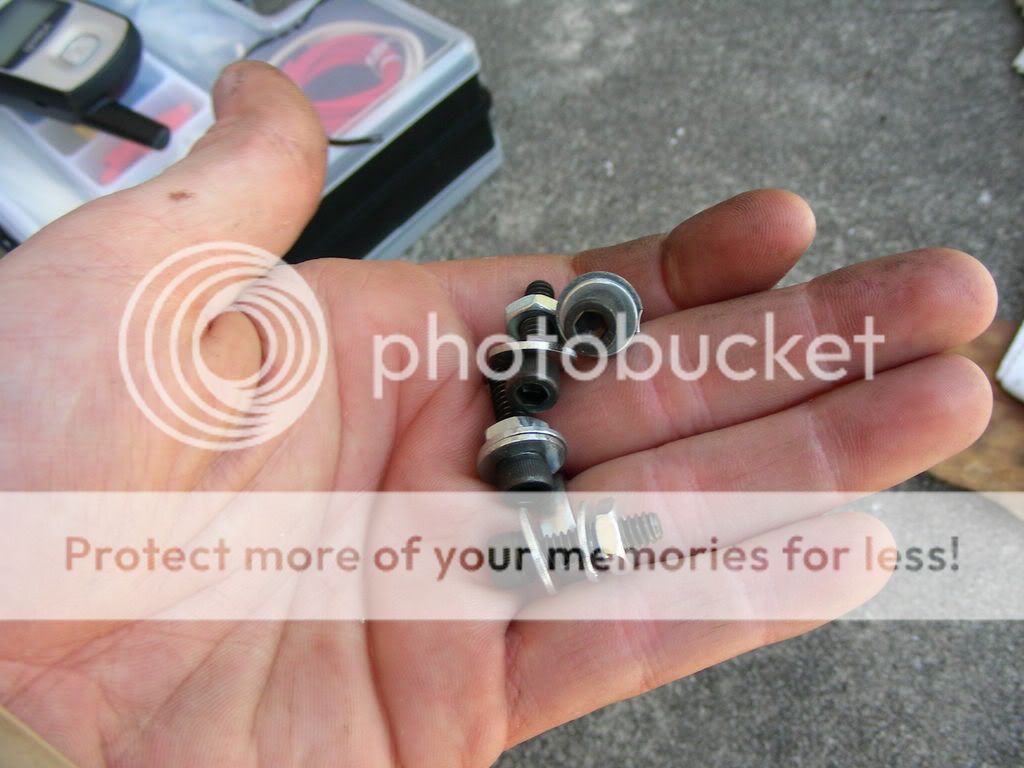
To bolt the bracket on, I snagged some nifty lil Hex bolts to deter theft (they at least won't get the bracket off). Using these, I had to have a hex key and a wrench for the nut to tighten them up.
Step 9: Bolt up your fogs and complete the wiring. AS you can see, Eli did a good job hiding the wires.
Notice anything wrong with the above pic? Probably not. So you know, the fogs are in up-side down We had to take them off and turn them over so the cut-off line was correctly on the road
Here's a pic of them correctly installed.
Step 10: Double check all your wiring and turn those bad boys on!
Unfortunately, the above pic was the last pic of the night: I ran out of memory on BOTH of the mem cards I had I have since then deleted pics off of them and shall take new pics tonight. You're gonna need to aim them, so have yoru screw dirver handy to make the adjustments. Also, have a glove (or a shirt in my case) ready when your doing this, since the lights will need to be on and they get hottttttttttttttt. Don't need you burning yourself.
Overall, they look very good and light up the road rather nicely. I'm pleased. I look forward to driving in the fog/rain with them.
As usual, anything I've left out or anything that is incorrect, please correct me and I'll make the changes to the DIY, since the whole purpose is to aid someone else in their own fog light install.
Enj0y!
Tools needed:
-- Drill and a few drill bits
-- Screw driver
-- 10-12 mm wrench (also a 3/8 in my case)
-- Extra wire and connectors/heat shrink.
***Note: The order in which this DIY is explained is by no means the exact order you have to go in. It's merely what I did. Also, I took some advic e and swapped the back of the fog light around, so the wires are coming out of the TOP instead of the bottom: For a cleaner install.
Step 1: Have your fog lights in hand and be ready to drop an hour or 2 into this project. Here's what I'm starting with and my parts.
Step 2: ---Interior--- Dissasemble your console. Pretty basic. If you see a screw that looks like it's holding something in, take it out
You also have to unplug the cig lighter plug. Yes, I know it's dirty. An uber detail is coming up.Step 3: Hook up your ground for the switch. As you can see, I chose the little bracket for the E-Brake. The other wire is for my fan switch, FYI. They are 12 mm bolts.
Step 4: Drill out a spot for your switch. Pretty simple, just don't make it too big so it fits snug in the hole.
Now we go under the hood.
Step 5: Locate a spot to mount your relay. Eli was helping me on this and he did an excellent job on tucking my relay away. Now, you see the wires? Here's what they are:
-- Red/White wire: Battery
-- Yellow wire: Switch
-- Blue wire: Ground
-- Black wire: Power to the fog light
Step 6: Run your wires. I chose to run the wire connecting my fogs to my switch in front of the radiator, hiding it out of the way. I was thinking of PatrickGSR when I was doing this.. So he's pretty much the reason all my wires are tucked away
Thanks man.IF you can't see the wires in the pics, thats a good thing
And don't forget to run the black wires to the fog lights.
Step 7: Wire up your switch. Plagarized from my DIY fan switch.
The switch has 3 connections: Earth (your ground) Supply (battery) and Load (guesss what it goes to?). Here's what you want to do:
On this particular switch, there are 3 male ends:
-- Earth (Ground)
-- Load (What your powering, in this case a fan)
-- Supply (Where you're gonna get your power from)
You want to pick a bolt underneath the console to run your ground wire to.
You want to run a wire from the LOAD terminal to the POWER wire on the fan.
You want to run a wire from the SUPPLY to either the battery or a fuse. In this case, I chose to run it to the 10Amp tail light fuse. This way my lights HAVE to be on and I can't accidentally leave the fogs turned on and drain my battery
Be sure to run your wires through the console and through the hole you drilled in the lil plastic piece that pops out (there are 4 of them) in the arm rest.
Easy enough. When your done, put the console back together and tuck yoru wires away nice and neat
Step 8: Mount your fog lights. Running the wires is tedious, mounting the fogs is the hard part. I picked the below spot to mount my fogs.
Using a marker, I placed my bracket where I wanted it and marked out where I was suppose to drill. Then, using a small bit, I drilled a pilot hole for the larger bit.
To bolt the bracket on, I snagged some nifty lil Hex bolts to deter theft (they at least won't get the bracket off). Using these, I had to have a hex key and a wrench for the nut to tighten them up.
Step 9: Bolt up your fogs and complete the wiring. AS you can see, Eli did a good job hiding the wires.
Notice anything wrong with the above pic? Probably not. So you know, the fogs are in up-side down
We had to take them off and turn them over so the cut-off line was correctly on the road Here's a pic of them correctly installed.
Step 10: Double check all your wiring and turn those bad boys on!
Unfortunately, the above pic was the last pic of the night: I ran out of memory on BOTH of the mem cards I had
I have since then deleted pics off of them and shall take new pics tonight. You're gonna need to aim them, so have yoru screw dirver handy to make the adjustments. Also, have a glove (or a shirt in my case) ready when your doing this, since the lights will need to be on and they get hottttttttttttttt. Don't need you burning yourself.Overall, they look very good and light up the road rather nicely. I'm pleased. I look forward to driving in the fog/rain with them.
As usual, anything I've left out or anything that is incorrect, please correct me and I'll make the changes to the DIY, since the whole purpose is to aid someone else in their own fog light install.
Enj0y!


Thread
Thread Starter
Forum
Replies
Last Post
mac_24_seven
Acura Integra
3
05-02-2007 10:38 AM
mac_24_seven
Audio / Security / Video
5
05-01-2007 09:56 PM