
Beater to Bearable RS Teg Restoration
 10-13-2015, 09:38 AM
#1
Hey guys, I've been hanging out in the prelude section for the last 10 years but figured I'd poke my head in this area.
Earlier this year I sold my latest prelude. I've owned probably close to 10-12 (I can't even remember how many at this point) preludes over the years. For several years it was boosted and tuned by Kenny Sampson (Turbo Gixxer on here) out of Florida. The final motor I installed was an fully rebuilt H23Vtec. I spent the summer driving my R6 (bike) but with winter coming decided it was time to pick up something else.
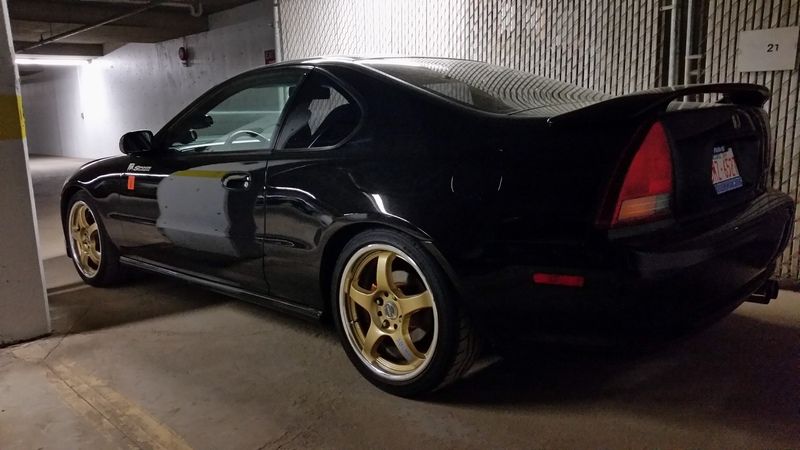
here are a few pictures of my latest prelude.
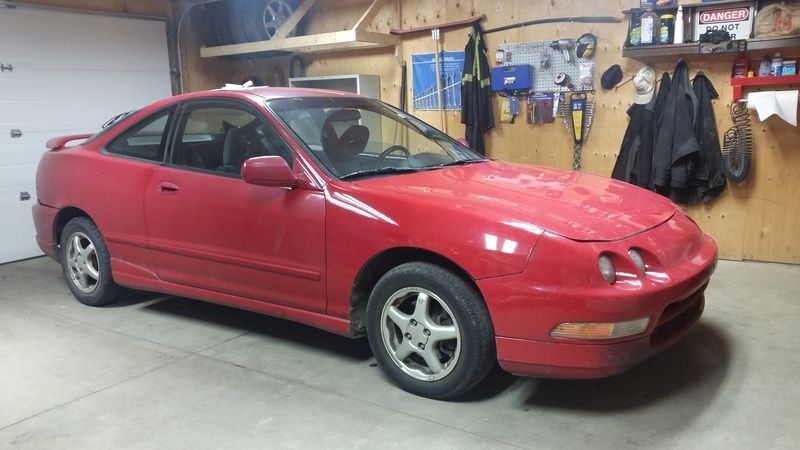
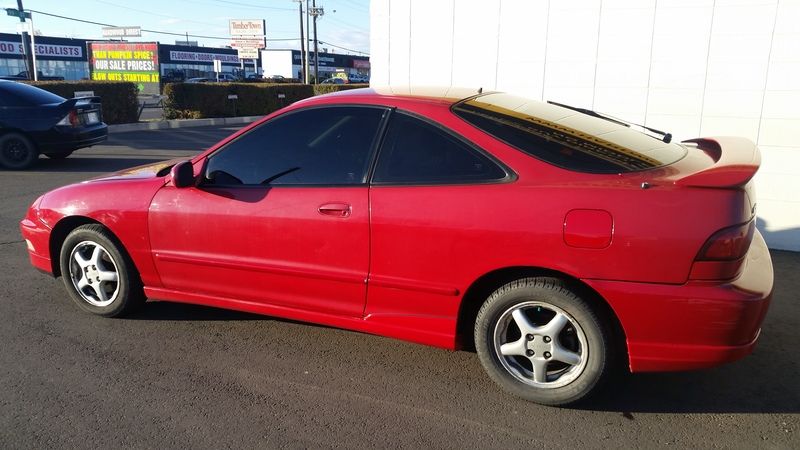
I found this 2000 Integra SE for $2000 on kijiji. After a bit of negotiating I had the guy drive the car to my door for $1700. Not the greatest deal considering everything but I really don't have high expectations when it comes to older Honda's. There was a huge positive though. The car was originally from British Columbia (Vancouver) where there is snow maybe once a year every few years and virtually no pot holes on their roads. So the suspension drives like it is new. I drove down bumpy roads on the test drive and there are no squeaks or creaks which is unreal to me for a 15 year old Honda. The body panels also haven't been rotted away by salt and the timing belt was just done by the previous owner.
The new project
The first order of business was making a list of what needed to be fixed. There was a decent amount of stuff.
THE ORIGINAL CHIT LIST
REPLACED -The radiator was cracked and leaking
FIXED -A coolant hose coming off the fast idle valve was leaking
REPLACED -The thermostat was bad
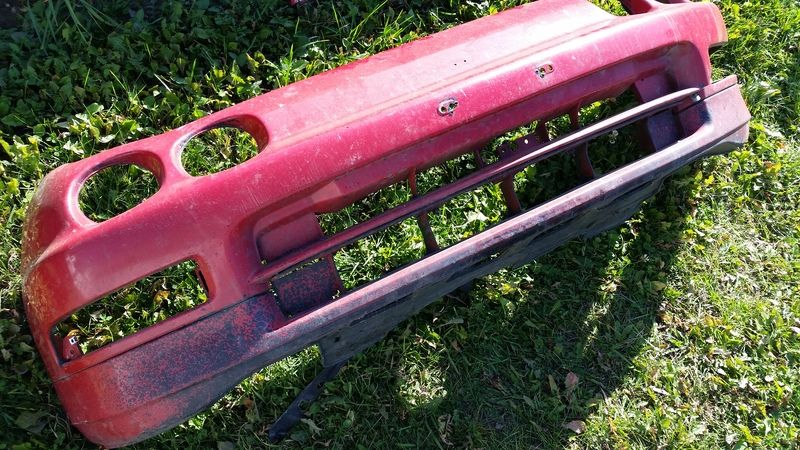
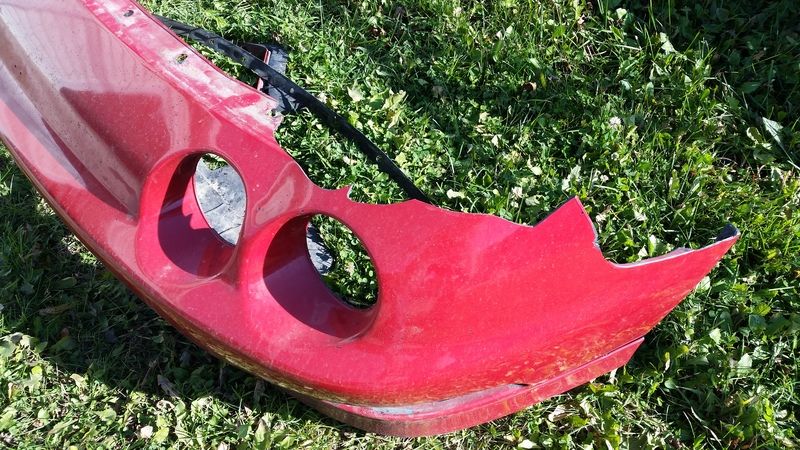
REPLACED -The front bumper was smashed and road rashed like I've never seen before
REPAIRED -The hood was rock chipped to death
REPLACED -Both fenders were rough shape. One had rust, one had bondo
REPLACED -Windshield had some big chips (repaired but unsightly) and sandblasted from years of driving
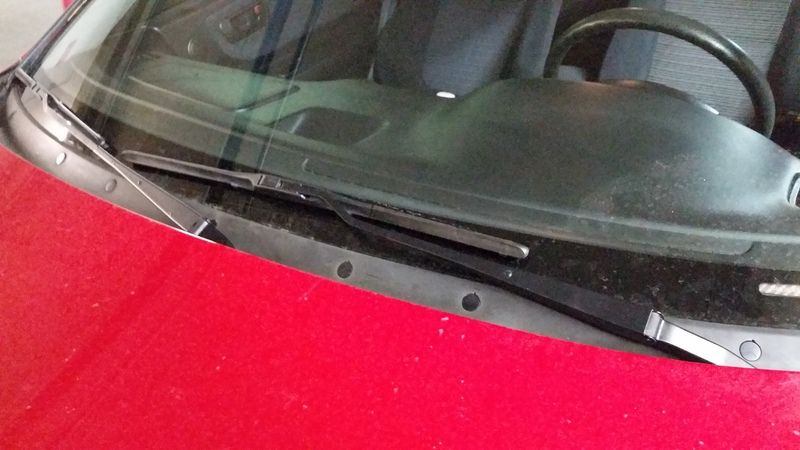
REPLACED -Wiper blades front and rear were hanging off the metal
REPLACED -The muffler had a leak (I didn't realize how bad lol)
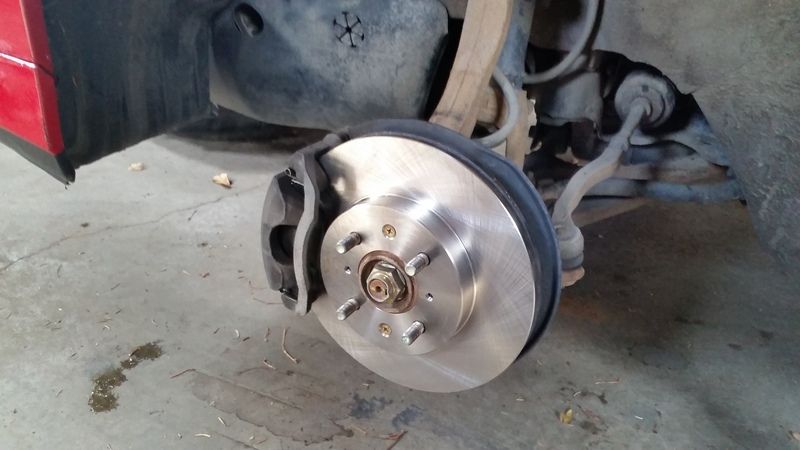
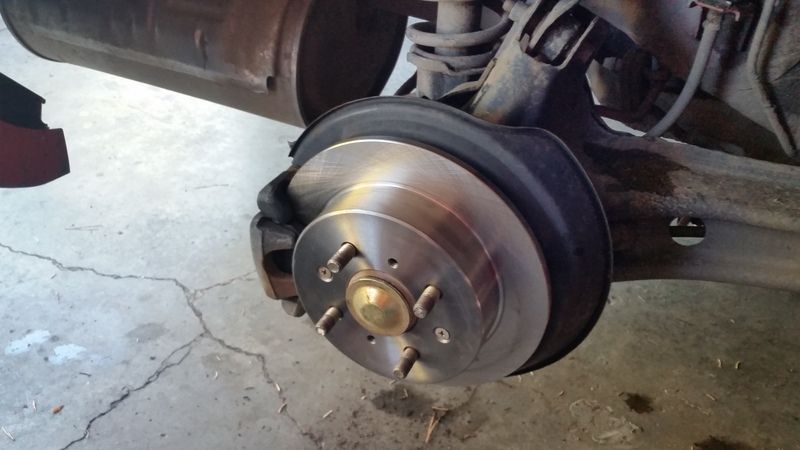
REPLACED -Front and rear rotors were cracked and worn out with next to no metal left
REPLACED -Rear pads were 10% oddly enough fronts were new
CHANGED/FLUSHED -Fluids were shot, brake fluid, clutch, oil, coolant, p/s, and transmission fluid all haven't been changed in over 5 years (minus oil)
REPLACED -Filters were done as well (fuel looks like the original, and the air filter resembled a vacuum bag)
REPLACED -Spark plug tips had maybe a few thousand miles left before there was no more contact point
REPLACED -Valve cover gasket was leaking
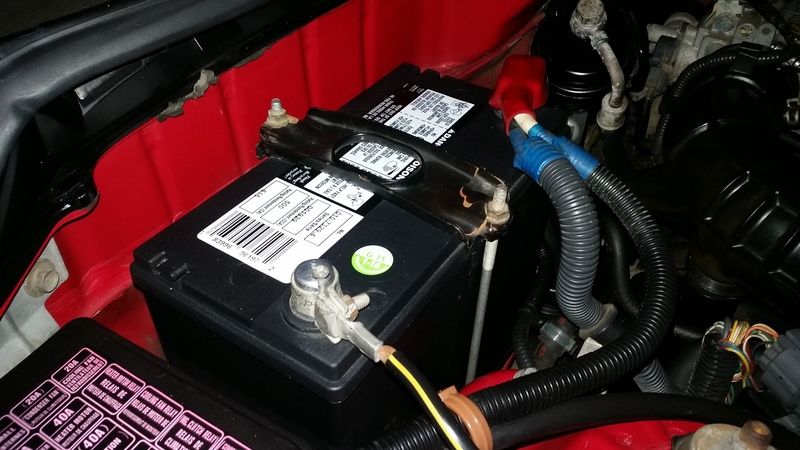
REPLACED -Battery was dead (previous owner jump started it)
ADDED -No battery tie down
REPLACED -Gas cap was damaged
DETAILED -The car was FILTHY (dog hair, engine bay, exterior etc)
REPLACED -Power steering belt was shredded (just about to break)
REPLACED -A/C pump seized (no belt on it and pulley wouldn't turn)
REPLACED -Ground wire shredded (It's amazing it was grounded enough to turn over)
FIXED -High Idle (dirty IACV, vac leak off the intake piping due to an improper hose)
REPLACED -Splash shields missing and environment shield missing
REPLACED -Rear hatch shocks were blown out
REPLACED -A few burnt out bulbs
SOME POSITIVES
-Rear quarters in great shape
-Suspension is in good shape (Edit* Appeared)
-Rare OEM side and rear valance kit
-Speakers all work great and has a Pioneer DEH-1300MP deck
-Timing belt service was done 5000km before purchase
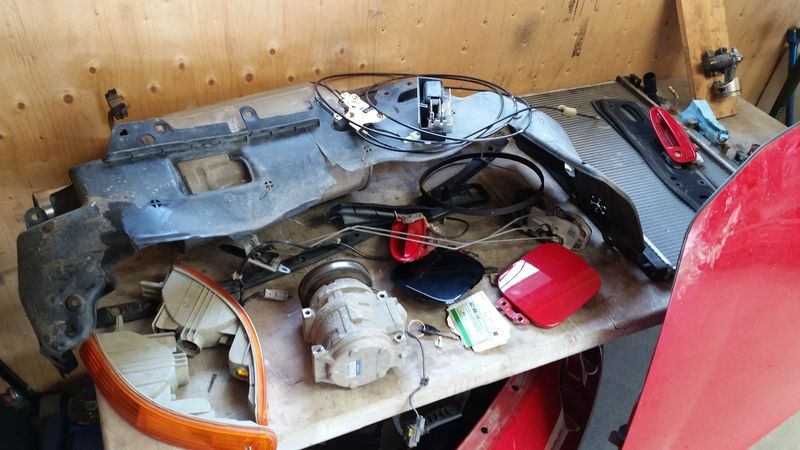
After writing out this list it's actually amazing how easily and quickly I fixed everything. My old neighbor and I went to a local junkyard to search for some parts as well the local part store from some new filters, plugs, belts, fluids etc. I've never had this happen in my life but when we entered the junkyard a 97 Integra LS was just sitting on jackstands untouched and in the same red. We spent a few hours quickly taking every single part needed on my list. In a single trip I had found every single part in perfect working condition. We spent the next 2 days fixing everything on that list, replacing all the fluids, plugs, belts, filters etc.
I don't plan on going crazy with this restoration but I do plan on the following mods to clean it up a little more.
MOD LIST
COMPLETED - Wet sand entire car to restore the showroom shine it once had
COMPLETED - Paint a few brackets in the engine bay
COMPLETED - Paint the header shield
COMPLETED - Paint the valve cover (I have a spare)
COMPLETED - Spoon sock covers (awyah)
COMPLETED - 98+ bumper/headlights/amber signal lights
COMPLETED - LED Cluster/Dash lights
COMPLETED - LED center console lights
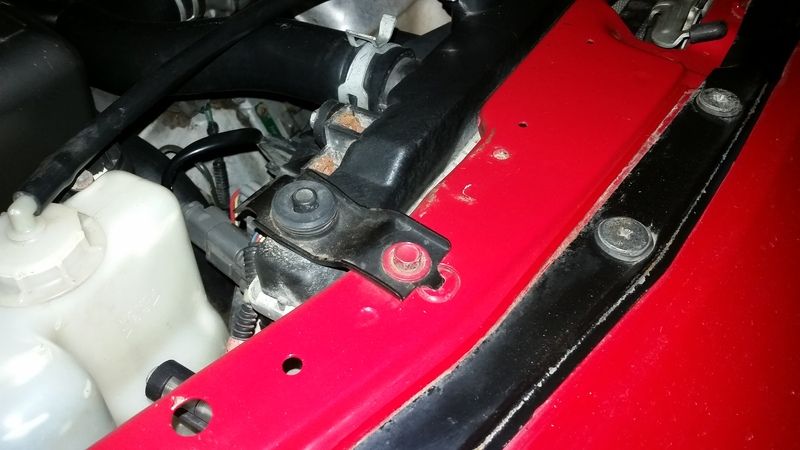
COMPLETED - GSR strut bar/Hardware
COMPLETED - Rain Visors
COMPLETED - Bright white LED license plate bulbs
COMPLETED -Pop a few dents out of the body panels
COMPLETED - Some sort of wheel/tire combo (Buddy Club P1 Wheels Purchased)
COMPLETED - Powder coat wheels white
COMPLETED - Type R front lip
COMPLETED - Rear wiper arm delete
THE EXTRA STUFF I'VE RUN INTO REQUIRED TO FUNCTION LIKE NEW
COMPLETED - Replace new tail light gaskets
COMPLETED - Delete antenna and add OEM plug
COMPLETED - Fix drivers and passenger window rattles
COMPLETED - Fix drivers window motor
COMPLETED - Fix drivers ripped door weather stripping
COMPLETED - Replace power lock module
COMPLETED - Replace random hardware and clips
COMPLETED - Remove aftermarket lock actuator and rods with OEM parts
COMPLETED - Valve adjustment
COMPLETED - Replace header and down pipe gaskets
COMPLETED - Install A/C pump, belt, tensioner, new Dryer, Condenser
COMPLETED - Charge A/C pump with fresh PAG oil and Refrigerant
COMPLETED - Lubricate all chasis points
COMPLETED - Replace inner tie rods
COMPLETED - Replace outer tie rods
COMPLETED - Replace rear sway bar bushings/endlinks
COMPLETED - Replace front sway bar bushings/endlinks
COMPLETED - Replaced rear trailing arm bushings
COMPLETED - Fresh alignment
COMPLETED - Wheel balance
COMPLETED - Replaced all crusty engine bay hardware
- Replace drivers seat
- Por15 all wheel wells
- Paint muffler black and polish exhaust tip
1998-2001 ACURA INTEGRA HELMS MANUAL
http://files.clubcivicquebec.com/Man...ice_Manual.pdf
Earlier this year I sold my latest prelude. I've owned probably close to 10-12 (I can't even remember how many at this point) preludes over the years. For several years it was boosted and tuned by Kenny Sampson (Turbo Gixxer on here) out of Florida. The final motor I installed was an fully rebuilt H23Vtec. I spent the summer driving my R6 (bike) but with winter coming decided it was time to pick up something else.
here are a few pictures of my latest prelude.


I found this 2000 Integra SE for $2000 on kijiji. After a bit of negotiating I had the guy drive the car to my door for $1700. Not the greatest deal considering everything but I really don't have high expectations when it comes to older Honda's. There was a huge positive though. The car was originally from British Columbia (Vancouver) where there is snow maybe once a year every few years and virtually no pot holes on their roads. So the suspension drives like it is new. I drove down bumpy roads on the test drive and there are no squeaks or creaks which is unreal to me for a 15 year old Honda. The body panels also haven't been rotted away by salt and the timing belt was just done by the previous owner.
The new project

The first order of business was making a list of what needed to be fixed. There was a decent amount of stuff.
THE ORIGINAL CHIT LIST
REPLACED -The radiator was cracked and leaking
FIXED -A coolant hose coming off the fast idle valve was leaking
REPLACED -The thermostat was bad
REPLACED -The front bumper was smashed and road rashed like I've never seen before
REPAIRED -The hood was rock chipped to death
REPLACED -Both fenders were rough shape. One had rust, one had bondo
REPLACED -Windshield had some big chips (repaired but unsightly) and sandblasted from years of driving
REPLACED -Wiper blades front and rear were hanging off the metal
REPLACED -The muffler had a leak (I didn't realize how bad lol)
REPLACED -Front and rear rotors were cracked and worn out with next to no metal left
REPLACED -Rear pads were 10% oddly enough fronts were new
CHANGED/FLUSHED -Fluids were shot, brake fluid, clutch, oil, coolant, p/s, and transmission fluid all haven't been changed in over 5 years (minus oil)
REPLACED -Filters were done as well (fuel looks like the original, and the air filter resembled a vacuum bag)
REPLACED -Spark plug tips had maybe a few thousand miles left before there was no more contact point
REPLACED -Valve cover gasket was leaking
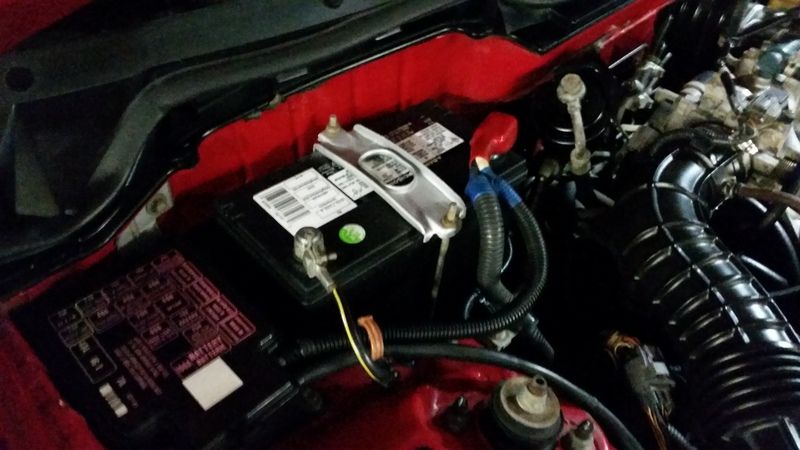
REPLACED -Battery was dead (previous owner jump started it)
ADDED -No battery tie down
REPLACED -Gas cap was damaged
DETAILED -The car was FILTHY (dog hair, engine bay, exterior etc)
REPLACED -Power steering belt was shredded (just about to break)
REPLACED -A/C pump seized (no belt on it and pulley wouldn't turn)
REPLACED -Ground wire shredded (It's amazing it was grounded enough to turn over)
FIXED -High Idle (dirty IACV, vac leak off the intake piping due to an improper hose)
REPLACED -Splash shields missing and environment shield missing
REPLACED -Rear hatch shocks were blown out
REPLACED -A few burnt out bulbs
SOME POSITIVES
-Rear quarters in great shape
-Suspension is in good shape (Edit* Appeared)
-Rare OEM side and rear valance kit
-Speakers all work great and has a Pioneer DEH-1300MP deck
-Timing belt service was done 5000km before purchase
After writing out this list it's actually amazing how easily and quickly I fixed everything. My old neighbor and I went to a local junkyard to search for some parts as well the local part store from some new filters, plugs, belts, fluids etc. I've never had this happen in my life but when we entered the junkyard a 97 Integra LS was just sitting on jackstands untouched and in the same red. We spent a few hours quickly taking every single part needed on my list. In a single trip I had found every single part in perfect working condition. We spent the next 2 days fixing everything on that list, replacing all the fluids, plugs, belts, filters etc.
I don't plan on going crazy with this restoration but I do plan on the following mods to clean it up a little more.
MOD LIST
COMPLETED - Wet sand entire car to restore the showroom shine it once had
COMPLETED - Paint a few brackets in the engine bay
COMPLETED - Paint the header shield
COMPLETED - Paint the valve cover (I have a spare)
COMPLETED - Spoon sock covers (awyah)
COMPLETED - 98+ bumper/headlights/amber signal lights
COMPLETED - LED Cluster/Dash lights
COMPLETED - LED center console lights
COMPLETED - GSR strut bar/Hardware
COMPLETED - Rain Visors
COMPLETED - Bright white LED license plate bulbs
COMPLETED -Pop a few dents out of the body panels
COMPLETED - Some sort of wheel/tire combo (Buddy Club P1 Wheels Purchased)
COMPLETED - Powder coat wheels white
COMPLETED - Type R front lip
COMPLETED - Rear wiper arm delete
THE EXTRA STUFF I'VE RUN INTO REQUIRED TO FUNCTION LIKE NEW
COMPLETED - Replace new tail light gaskets
COMPLETED - Delete antenna and add OEM plug
COMPLETED - Fix drivers and passenger window rattles
COMPLETED - Fix drivers window motor
COMPLETED - Fix drivers ripped door weather stripping
COMPLETED - Replace power lock module
COMPLETED - Replace random hardware and clips
COMPLETED - Remove aftermarket lock actuator and rods with OEM parts
COMPLETED - Valve adjustment
COMPLETED - Replace header and down pipe gaskets
COMPLETED - Install A/C pump, belt, tensioner, new Dryer, Condenser
COMPLETED - Charge A/C pump with fresh PAG oil and Refrigerant
COMPLETED - Lubricate all chasis points
COMPLETED - Replace inner tie rods
COMPLETED - Replace outer tie rods
COMPLETED - Replace rear sway bar bushings/endlinks
COMPLETED - Replace front sway bar bushings/endlinks
COMPLETED - Replaced rear trailing arm bushings
COMPLETED - Fresh alignment
COMPLETED - Wheel balance
COMPLETED - Replaced all crusty engine bay hardware
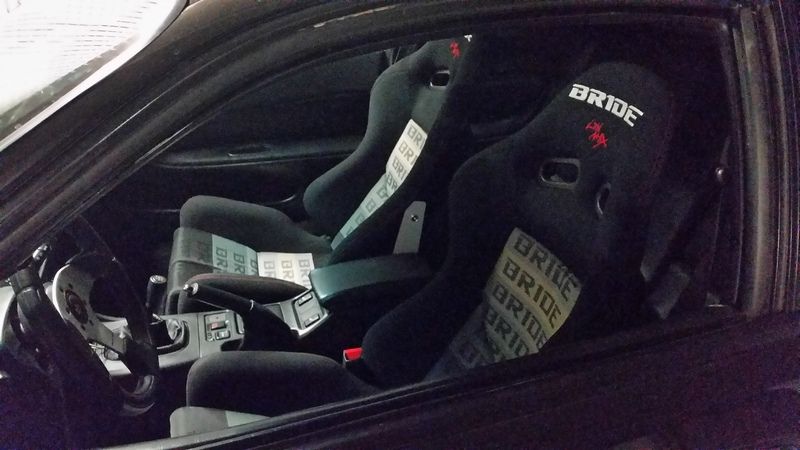
- Replace drivers seat
- Por15 all wheel wells
- Paint muffler black and polish exhaust tip
1998-2001 ACURA INTEGRA HELMS MANUAL
http://files.clubcivicquebec.com/Man...ice_Manual.pdf
Last edited by Prudz_lude; 02-18-2017 at 09:18 PM.
 10-13-2015, 09:39 AM
#2
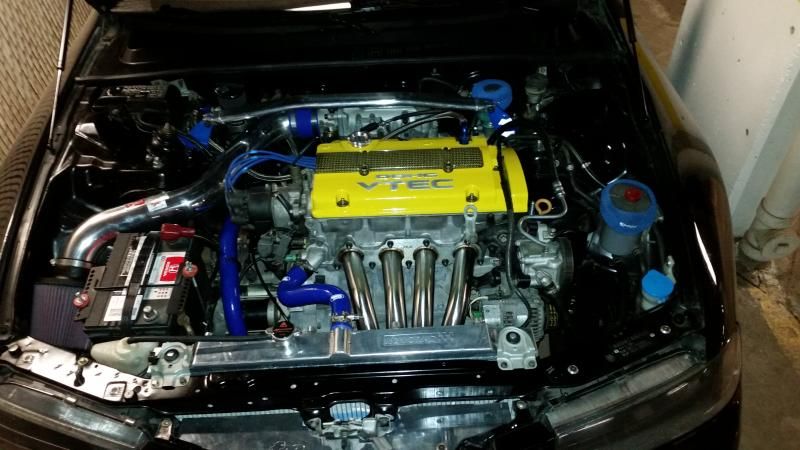
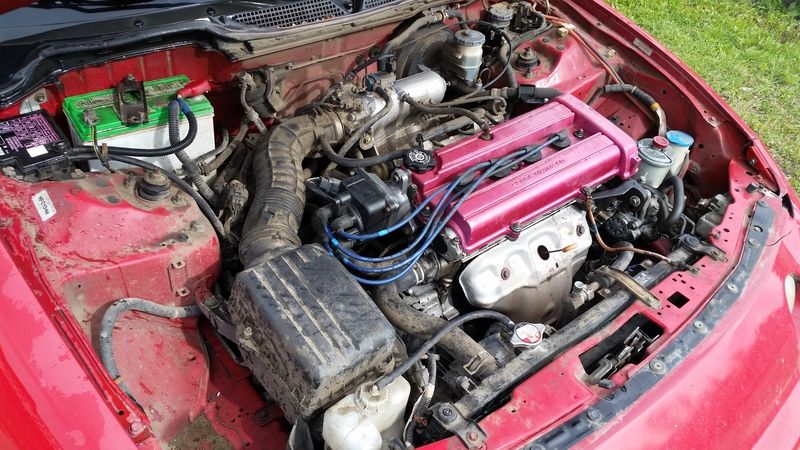
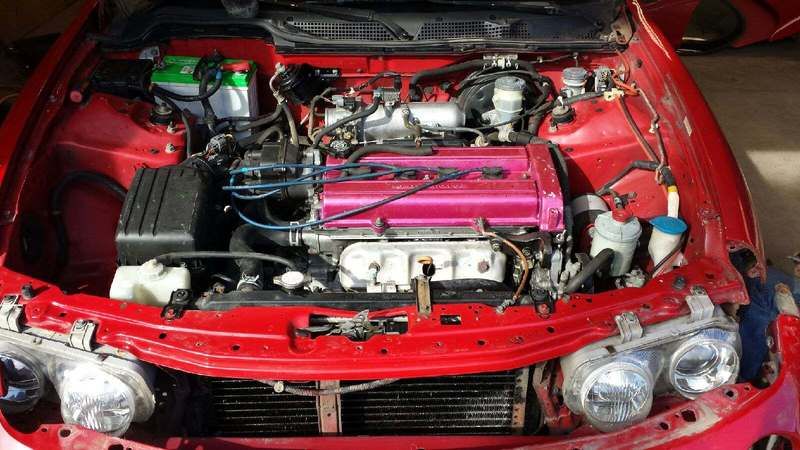
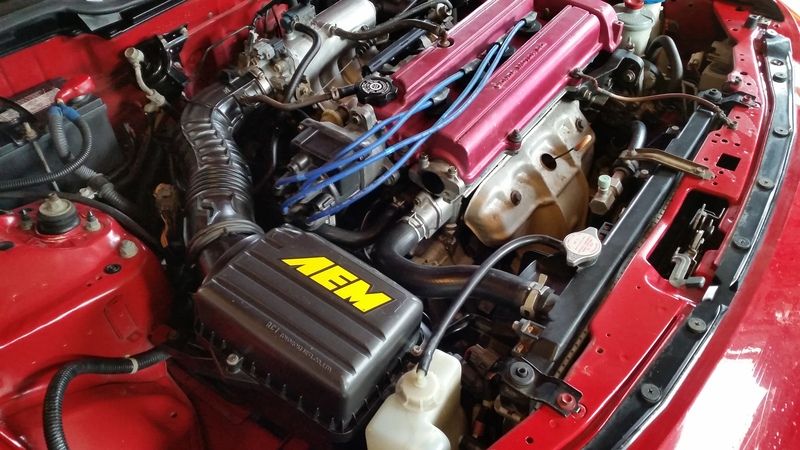
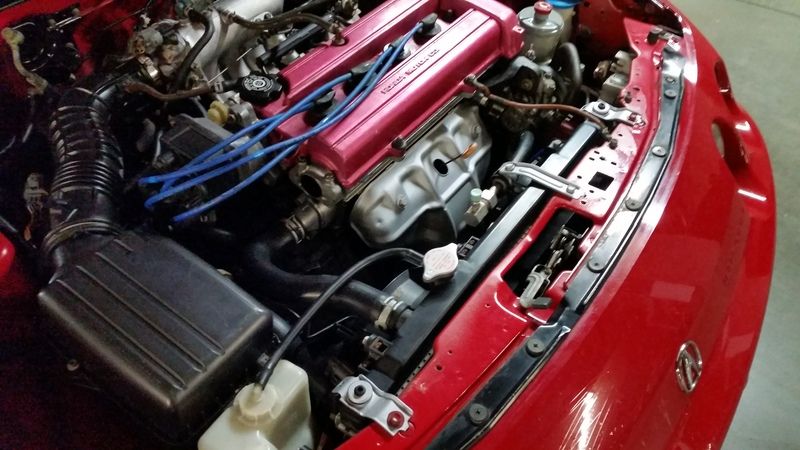
The engine bay in all it's glory... my neighbour had wiped off a layer of dirt with brake cleaner from the intake manifold at this point.
Some junkyard goodies

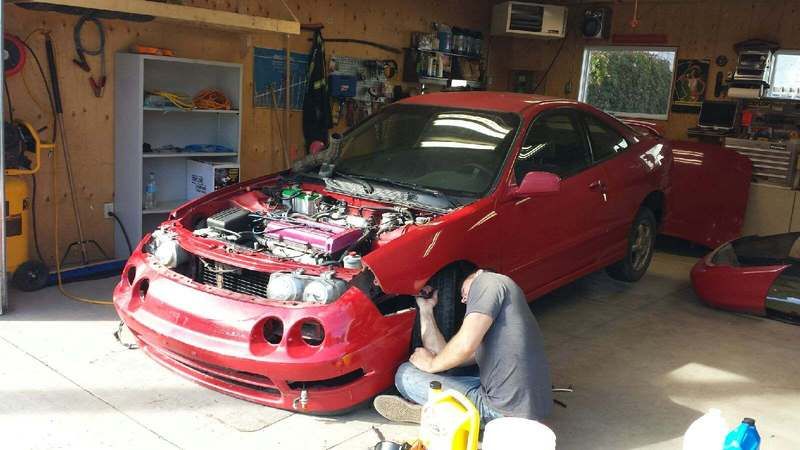
Action shot of me wrenching away on the car
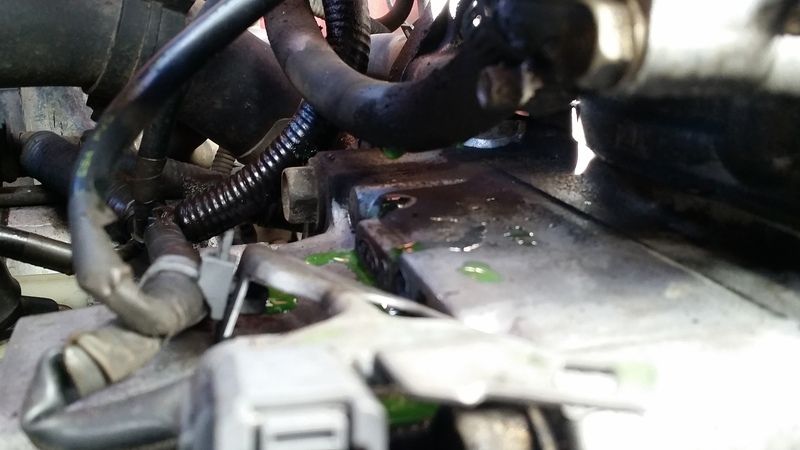
Leaking hose
Lovely muffler repair job from the previous owner... Ya, that's gorilla tape.
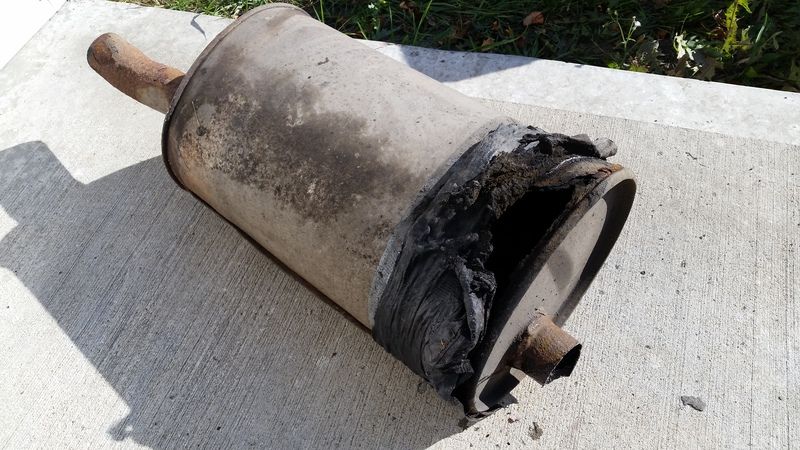
lol, just lol.
Brake job
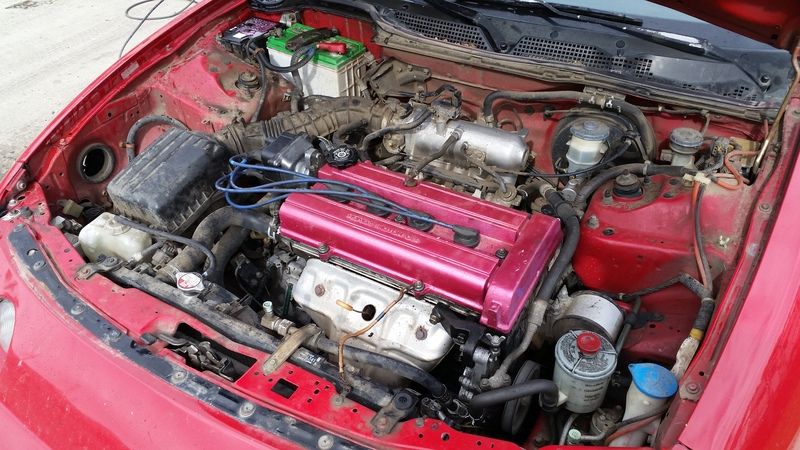
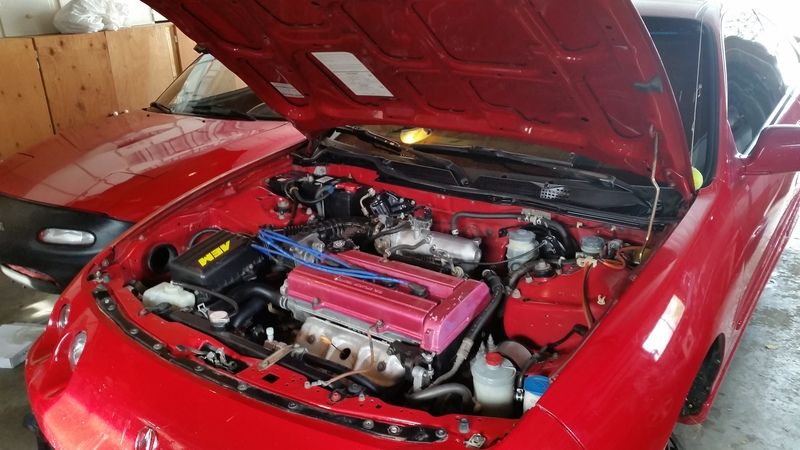
The bay after a chunk of the work was finished and finally rinsed off.
Tint also finally got done :0


Some junkyard goodies


Action shot of me wrenching away on the car

Leaking hose

Lovely muffler repair job from the previous owner... Ya, that's gorilla tape.

lol, just lol.


Brake job


The bay after a chunk of the work was finished and finally rinsed off.


Tint also finally got done :0

Last edited by Prudz_lude; 06-13-2016 at 09:38 PM.
10-13-2015, 10:09 AM
#3
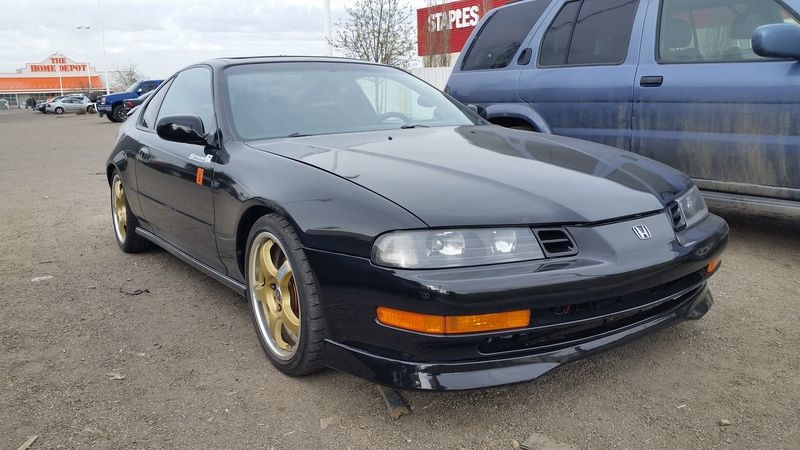
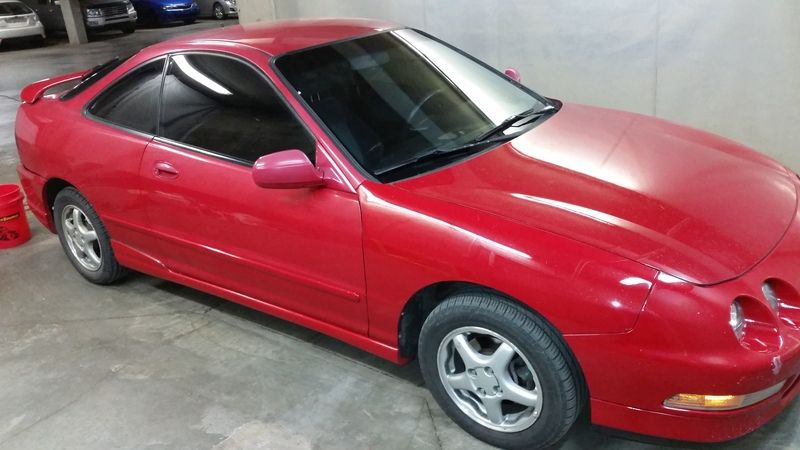
As you can see I had the car completely limo tinted  I also began playing with paint correction. The neglect over the years is to much for a power polisher and heavy compounds unfortunately. I will be wet sanding the entire car to restore the shine it once had. Here are a few pictures I took along the way.

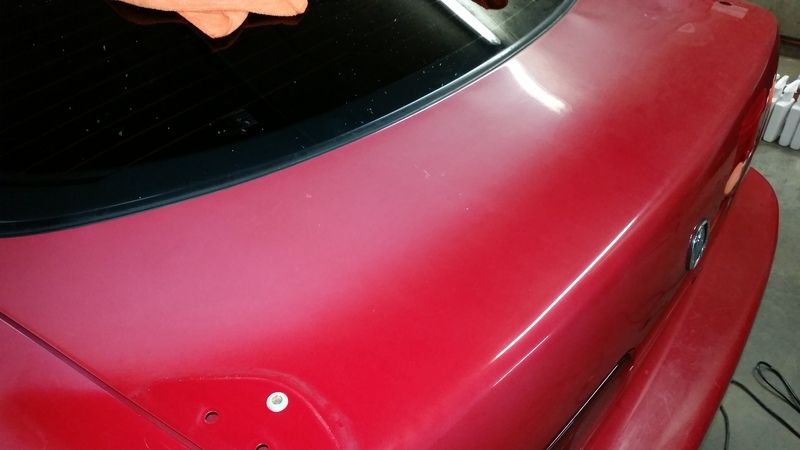
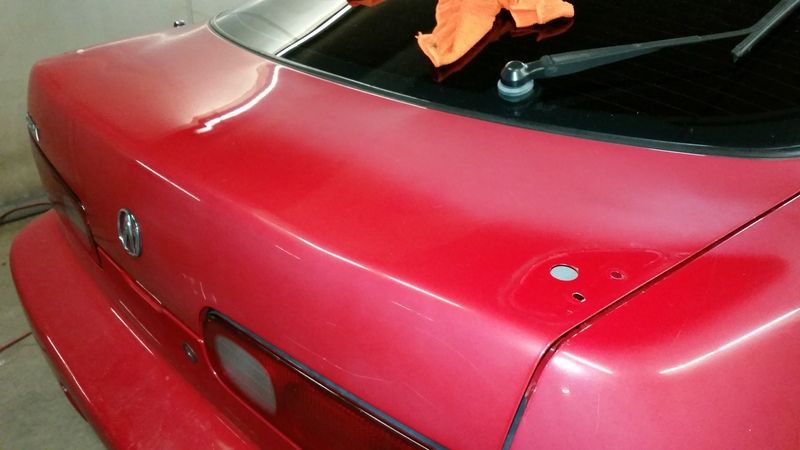
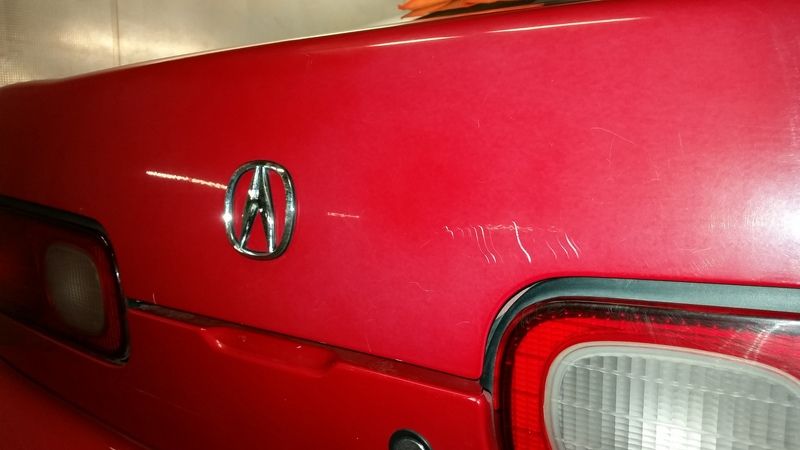
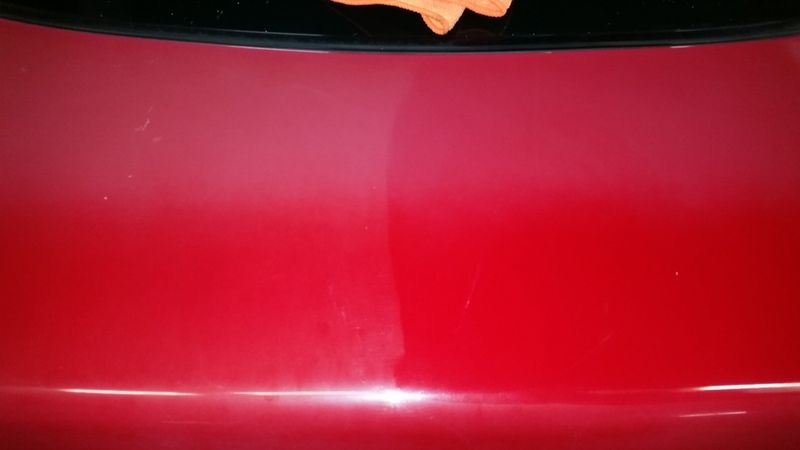
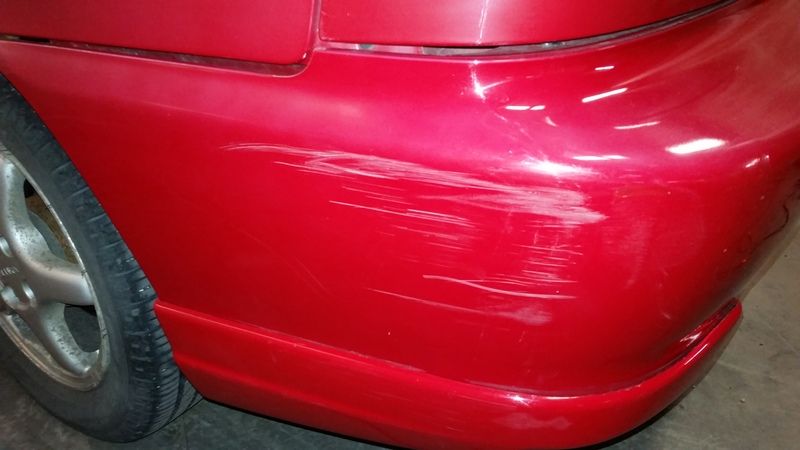
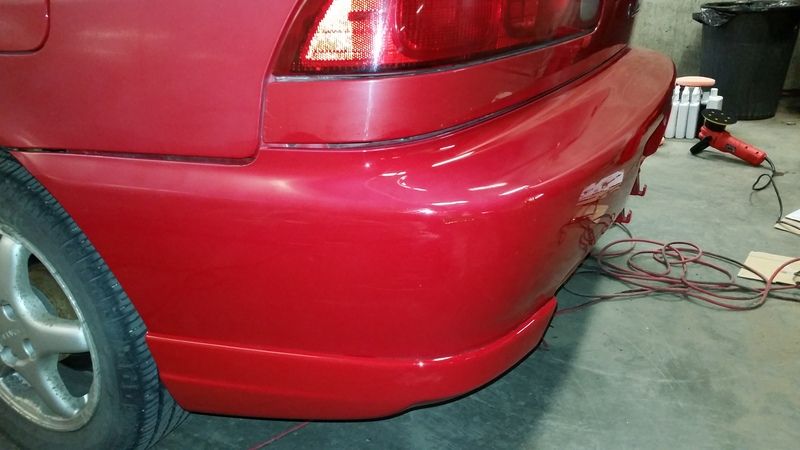
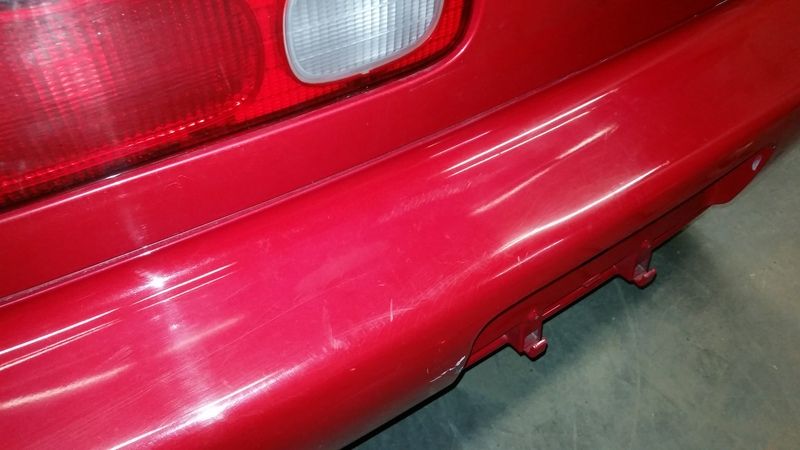
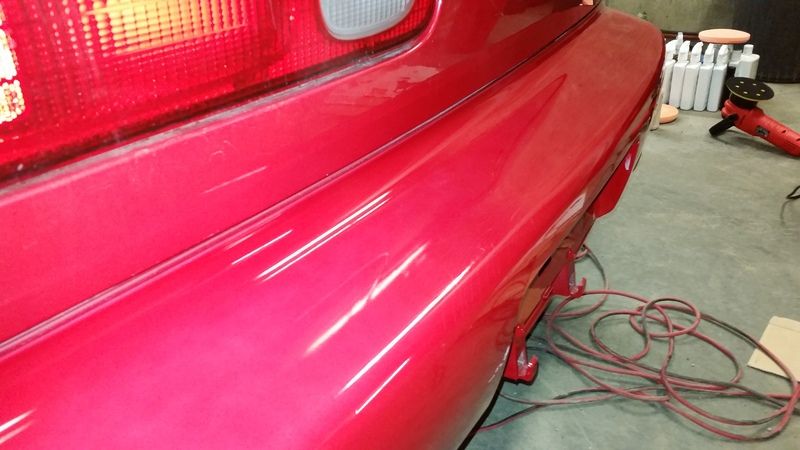
More to come over the next little while in my quest for a slow daily driver lol
I also began playing with paint correction. The neglect over the years is to much for a power polisher and heavy compounds unfortunately. I will be wet sanding the entire car to restore the shine it once had. Here are a few pictures I took along the way.


More to come over the next little while in my quest for a slow daily driver lol
10-13-2015, 11:47 PM
#6
Honda-Tech Member
i'm amazed to see the quarters look good considering the muffler, not bad how much was it? in Toronto area it would be in the 2K +/- ish range. I wouldn't be able to get over the paint shades I trashed the last integra I bought cause the guy fucked up the paint lolz, but good luck man.
10-14-2015, 07:28 AM
#7
I agree the paint is driving me crazy but knowing it can be restored is why I bought it. Honda/Acura uses a base/clear paint process so I can sand some clear off to restore the colour. If it was a single stage paint job I'd be kind of hooped. Much trickier to clean faded paint up. The car has potential though and is driving solid now so I'm pretty happy with it so far. I don't plan on taking it to the level my prelude was at though. My old prelude was boosted several times, god knows how many motor swaps etc. I just need a cheap/clean daily, although it's a little boring with the b18b1 :p
Last edited by Prudz_lude; 06-02-2017 at 09:26 AM.
Trending Topics
 10-14-2015, 11:04 AM
#9
lol killing my hopes one post at a time :p Ya, I'm hoping it is salvageable otherwise i'll probably just sell it, cry a little insisde, or respray it. I'm picky when it comes to paint and after painting 3 cars I'm happy not to paint anymore.
Last edited by Prudz_lude; 05-08-2016 at 07:09 PM.
10-20-2015, 02:02 PM
#11
Bit of an update!
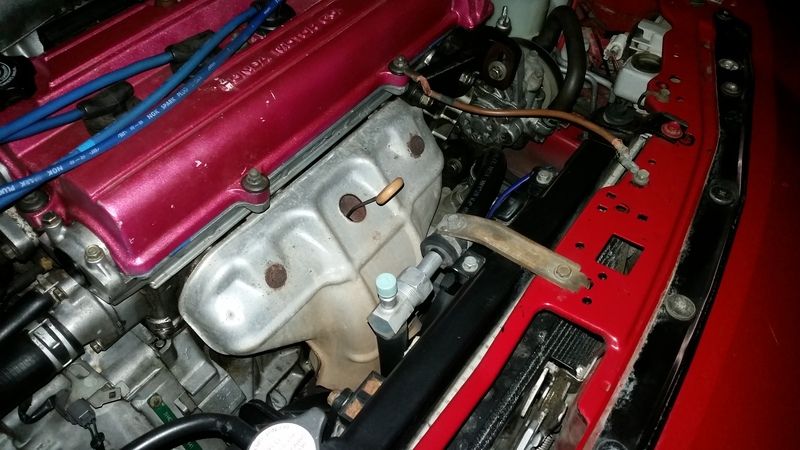
I finally got around to painting some of the ugly brackets in my engine bay, heat shield, and the worn out wiper blades. I wanted to paint the radiator brackets black but it turns out the two cans I had were both silver so I just said **** it, w/e. They all turned out nicer than before at least.
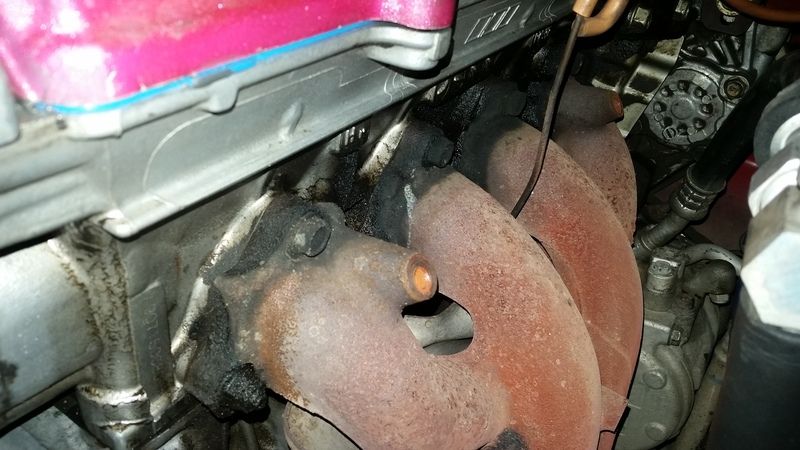
When I pulled off the heat shield I discovered why my car made a burnt oil smell under acceleration sometimes. The leaking valve cover gasket I fixed had been a massive oil leak at one point! I've never seen oil be able to cake onto a header like this before. Most oil that hits a header just burns away. This was something else lol. At least the smell is going to be gone once I pressure wash it away tonight.
The brackets and wipers prepped for paint
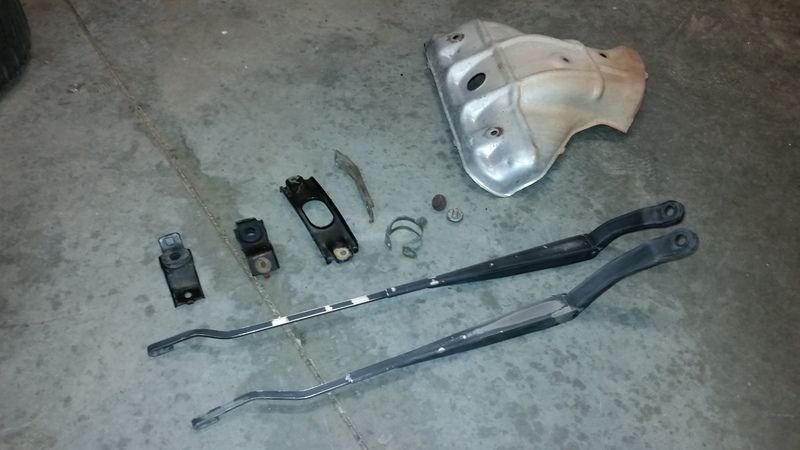
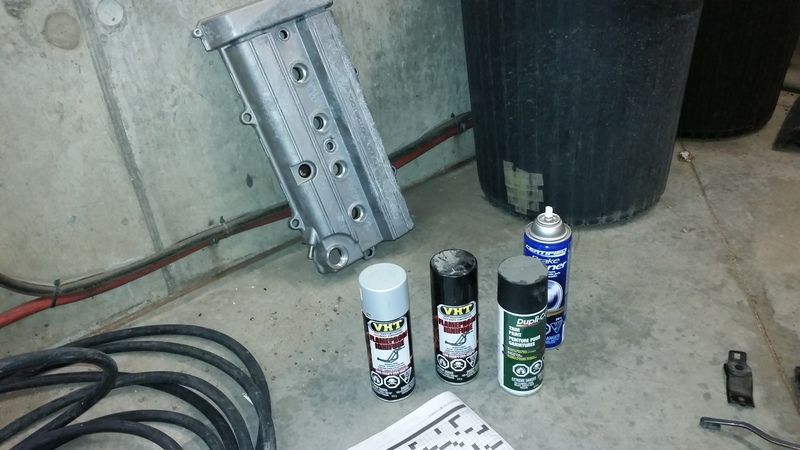
Valve cover will be getting painted wrinkle black sometime next week. I picked a spare up at the junkyard for $10 and stripped it down.
And the aftermath
A friend of mine sold all his Honda's and had these laying around. He sold them to me for $30. I couldn't say no even though I don't have nice rims for them yet. I did find a set of Mugen mf10l's locally in white 15" with some nice tires but someone else has dibs on them and the seller won't let me take them until the other guy pays or bails since he accepted a deposit. Odds are not in my favour, oh well.
That's all for now. I'm hoping to do the transmission flush, power steering pump swap and fluid change and possibly the a/c recharge on Sunday.
I finally got around to painting some of the ugly brackets in my engine bay, heat shield, and the worn out wiper blades. I wanted to paint the radiator brackets black but it turns out the two cans I had were both silver so I just said **** it, w/e. They all turned out nicer than before at least.
When I pulled off the heat shield I discovered why my car made a burnt oil smell under acceleration sometimes. The leaking valve cover gasket I fixed had been a massive oil leak at one point! I've never seen oil be able to cake onto a header like this before. Most oil that hits a header just burns away. This was something else lol. At least the smell is going to be gone once I pressure wash it away tonight.


The brackets and wipers prepped for paint

Valve cover will be getting painted wrinkle black sometime next week. I picked a spare up at the junkyard for $10 and stripped it down.

And the aftermath


A friend of mine sold all his Honda's and had these laying around. He sold them to me for $30. I couldn't say no even though I don't have nice rims for them yet. I did find a set of Mugen mf10l's locally in white 15" with some nice tires but someone else has dibs on them and the seller won't let me take them until the other guy pays or bails since he accepted a deposit. Odds are not in my favour, oh well.

That's all for now. I'm hoping to do the transmission flush, power steering pump swap and fluid change and possibly the a/c recharge on Sunday.
10-20-2015, 08:44 PM
#12
Hype-R Stalker
A friend of mine sold all his Honda's and had these laying around. He sold them to me for $30. I couldn't say no even though I don't have nice rims for them yet. I did find a set of Mugen mf10l's locally in white 15" with some nice tires but someone else has dibs on them and the seller won't let me take them until the other guy pays or bails since he accepted a deposit. Odds are not in my favour, oh well.
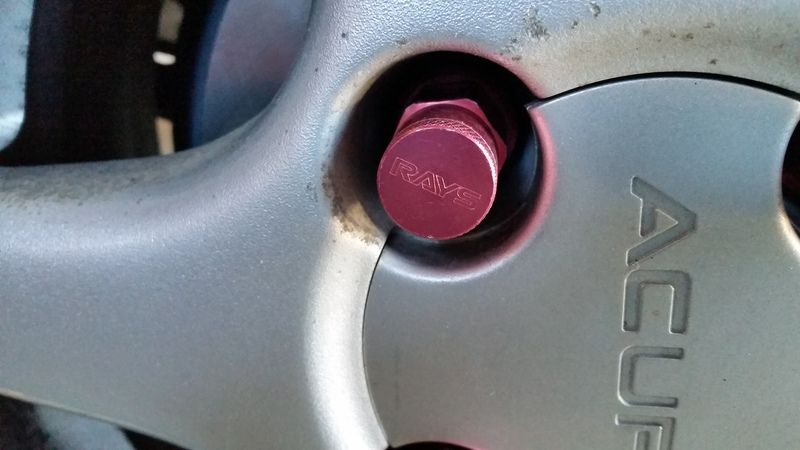
I would keep your stock lugs on those wheels. They're most likely the wrong seat since they're volk/aftermarket lugs.
10-28-2015, 02:37 PM
#14
Update for today,
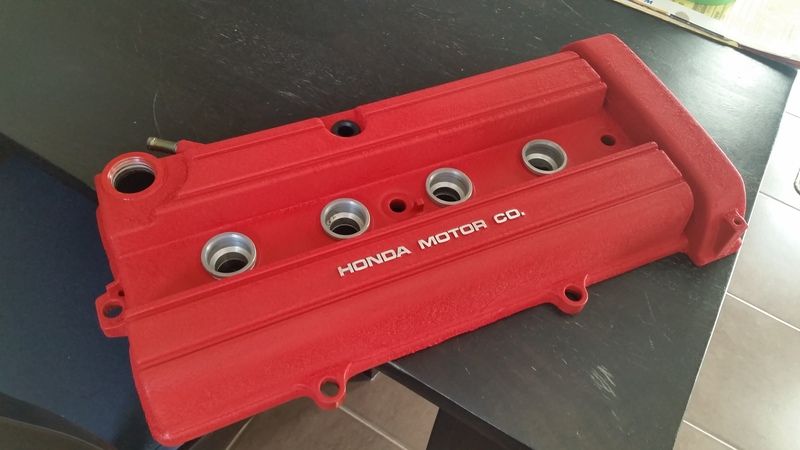
I stopped by Canadian tire and picked up a couple things. Picked up some VHT wrinkle red paint to clean up my spare valve cover and finally get rid of that ugly pink cover that currently ruins my engine bay. I also bought an A/C recharge kit so I can finally pull moisture out of the cabin and enjoy ice cold A/C come summer. I'm thinking i'll take apart the system and replace the rubber seals just to be sure.
Next stop was at the Honda dealer. I bought some MTF and some power steering fluid. The power steering pump will be getting done hopefully some time in the next week along with the rest of the work. I'm hoping to do a valve adjustment (it's real quiet but I can hear a few valves are out) as well.
Final stop was by the bodyshop supplies store. I got some 1500 and 2000 grit sand paper so that I can do the wet sand on the car. This will start to get tackled most likely in a week. I want to get it done before snow hits so the car has fresh sealant and wax on the paint.
The final shot of the valve cover. It turned out decent. There are a couple areas that could have been nicer but it was from paint being layered thicker than others. I found the can sprayed quiet a bit of paint so it was difficult to do thin coats, overall I'm happy. This isn't a show car and anything is better than pink.
More to come soon. It's slowly becoming less of a beater.
I stopped by Canadian tire and picked up a couple things. Picked up some VHT wrinkle red paint to clean up my spare valve cover and finally get rid of that ugly pink cover that currently ruins my engine bay. I also bought an A/C recharge kit so I can finally pull moisture out of the cabin and enjoy ice cold A/C come summer. I'm thinking i'll take apart the system and replace the rubber seals just to be sure.
Next stop was at the Honda dealer. I bought some MTF and some power steering fluid. The power steering pump will be getting done hopefully some time in the next week along with the rest of the work. I'm hoping to do a valve adjustment (it's real quiet but I can hear a few valves are out) as well.
Final stop was by the bodyshop supplies store. I got some 1500 and 2000 grit sand paper so that I can do the wet sand on the car. This will start to get tackled most likely in a week. I want to get it done before snow hits so the car has fresh sealant and wax on the paint.
The final shot of the valve cover. It turned out decent. There are a couple areas that could have been nicer but it was from paint being layered thicker than others. I found the can sprayed quiet a bit of paint so it was difficult to do thin coats, overall I'm happy. This isn't a show car and anything is better than pink.

More to come soon. It's slowly becoming less of a beater.
10-28-2015, 07:55 PM
#15
Cool Cool Island Breezes. BOY-EE
iTrader: (1)
Join Date: Sep 2006
Location: TRILLINOIS....WAY downtown, jerky.
Posts: 11,953
Likes: 0
Received 4 Likes
on
4 Posts
You're going to damage those aluminum lugnuts by forcing them to seat the stock wheels....which have a different type of seat. Compare the stock lug nuts to the aftermarket cone shaped ones.
Nice job on the restoration, though.
Nice job on the restoration, though.
 11-04-2015, 05:51 PM
#23
Crazy Honda Guy
Should fit, you just to add bolts to any non vtec chassis to bolt up. There are many choices of good aftermarket strut bars to though
I did this on my LS

I did this on my LS
 11-05-2015, 01:44 AM
#24
You shouldn't have any clearance issues. The mounting holes are there under those black plastic caps. You'll just need to come up with some hardware to mount it.
11-05-2015, 10:53 AM
#25
Cool, thanks guys. I like the look of OEM parts especially on a build like this. The GSR bar is solid but also a factory part. If I start doing suspension mods it will be factory type r parts most likely.