
aMac's 94 GSR build thread: Project "Aeris" Lots of DIY's and pics!

 03-06-2007, 07:38 PM
#52
Honda-Tech Member
Join Date: Feb 2007
Posts: 600
Likes: 0
Received 0 Likes
on
0 Posts
Hey nice diy work. By the way how did you get your gauge cluster to light up blue.
The stock is yellow white light. How did you change it.
I want to do mine in red.
Can you help me out a bit on the lighting.
The stock is yellow white light. How did you change it.
I want to do mine in red.
Can you help me out a bit on the lighting.
03-06-2007, 10:56 PM
#53
76.169.175.137

Join Date: Jun 2006
Location: So Cal....yes, i know, ca, USA
Posts: 2,659
Likes: 0
Received 0 Likes
on
0 Posts
<TABLE WIDTH="90%" CELLSPACING=0 CELLPADDING=0 ALIGN=CENTER><TR><TD>Quote, originally posted by almostboostedgsr »</TD></TR><TR><TD CLASS="quote">Hey nice diy work. By the way how did you get your gauge cluster to light up blue.
The stock is yellow white light. How did you change it.
I want to do mine in red.
Can you help me out a bit on the lighting. </TD></TR></TABLE>
dude are you serious?...3 phillip screws and red light bulbs from autozone
its all common sence just remove the bezel and LOOK
The stock is yellow white light. How did you change it.
I want to do mine in red.
Can you help me out a bit on the lighting. </TD></TR></TABLE>
dude are you serious?...3 phillip screws and red light bulbs from autozone
its all common sence just remove the bezel and LOOK
03-06-2007, 11:04 PM
#54
Honda-Tech Member
Join Date: Feb 2007
Location: New Milford, Ct, usa
Posts: 1,494
Likes: 0
Received 0 Likes
on
0 Posts
yeah i did green, to match my cd player. didnt look as good as i thaught since the redline and needles dont get show much of the light.
anyway to get to the bulbs you remove 2 philips screws from the top of the bezel. once you remove that there 3 more screws holding the cluster in place, one on top, and one on each side. its real easy to do. the bulb size is 168/194 i think.
anyway to get to the bulbs you remove 2 philips screws from the top of the bezel. once you remove that there 3 more screws holding the cluster in place, one on top, and one on each side. its real easy to do. the bulb size is 168/194 i think.
03-07-2007, 03:21 AM
#55
Wide Angled LED's
Go there for the bulbs you need. Scroll down a lil bit and you'll see the wide angled LED's, which is what you want. You need to order 3 bulbs to do the cluster.
<TABLE WIDTH="90%" CELLSPACING=0 CELLPADDING=0 ALIGN=CENTER><TR><TD>Quote, originally posted by CW_98gsr »</TD></TR><TR><TD CLASS="quote">dude are you serious?...3 phillip screws and red light bulbs from autozone. its all common sence just remove the bezel and LOOK</TD></TR></TABLE>
Some people are'nt as mechanically inclined as others man.. Yes, it's an uber easy and simple thing to do, but if you don't know, it can seem much more complicated and intimidating than it really is. My suspension scared the crap out of me and it was a very easy process once I got into it.
<TABLE WIDTH="90%" CELLSPACING=0 CELLPADDING=0 ALIGN=CENTER><TR><TD>Quote, originally posted by Jay J »</TD></TR><TR><TD CLASS="quote">Is that not the OE drivers door? </TD></TR></TABLE>
Yes, it is. Maybe looks different to you because my buddy broke my handle off like 2 weeks ago. Freakin n00b He went to open my door and lost his balance some how ??? I don't understand really how he did it but he did and has since then bought me a new handle, which I've yet to install.
<TABLE WIDTH="90%" CELLSPACING=0 CELLPADDING=0 ALIGN=CENTER><TR><TD>Quote, originally posted by Blahblah718293 »</TD></TR><TR><TD CLASS="quote">you also managed to squeeze some window tints in there between projects. also, are you gonna do a diy for the gauge installation? ive been wanting to get a volt and oil gauge and i have no idea how to install it.
very clean db8 by the way, love the blades </TD></TR></TABLE>
Window tint will be $148.00. It's not a high priority at the moment cause I just roll w/my windows down most of the time Plus, chics dig messed up/purple window tint! jk
And yes, I'll do a write up on the gauge install. It's really not that difficult and people are afraid of running a manual oil pressure gauge since your gonna have oil going into your engine compartment.. But I've installed several and have never had a leak. I've got LED's that'll go in them as well which I'm hoping to look killer.
And thanks for the comments guys.. It's appreciated. If your liking how it looks now, your gonna love it when it's done. And I personally can't wait till I get to put my IM and cams in and go to a dyno And then to the track I go!
Modified by mac_24_seven at 6:29 AM 3/7/2007
Go there for the bulbs you need. Scroll down a lil bit and you'll see the wide angled LED's, which is what you want. You need to order 3 bulbs to do the cluster.
<TABLE WIDTH="90%" CELLSPACING=0 CELLPADDING=0 ALIGN=CENTER><TR><TD>Quote, originally posted by CW_98gsr »</TD></TR><TR><TD CLASS="quote">dude are you serious?...3 phillip screws and red light bulbs from autozone. its all common sence just remove the bezel and LOOK</TD></TR></TABLE>
Some people are'nt as mechanically inclined as others man.. Yes, it's an uber easy and simple thing to do, but if you don't know, it can seem much more complicated and intimidating than it really is. My suspension scared the crap out of me and it was a very easy process once I got into it.
<TABLE WIDTH="90%" CELLSPACING=0 CELLPADDING=0 ALIGN=CENTER><TR><TD>Quote, originally posted by Jay J »</TD></TR><TR><TD CLASS="quote">Is that not the OE drivers door? </TD></TR></TABLE>
Yes, it is. Maybe looks different to you because my buddy broke my handle off like 2 weeks ago. Freakin n00b
He went to open my door and lost his balance some how ??? I don't understand really how he did it but he did and has since then bought me a new handle, which I've yet to install.<TABLE WIDTH="90%" CELLSPACING=0 CELLPADDING=0 ALIGN=CENTER><TR><TD>Quote, originally posted by Blahblah718293 »</TD></TR><TR><TD CLASS="quote">you also managed to squeeze some window tints in there between projects. also, are you gonna do a diy for the gauge installation? ive been wanting to get a volt and oil gauge and i have no idea how to install it.
very clean db8 by the way, love the blades </TD></TR></TABLE>
Window tint will be $148.00. It's not a high priority at the moment cause I just roll w/my windows down most of the time
Plus, chics dig messed up/purple window tint! jk And yes, I'll do a write up on the gauge install. It's really not that difficult and people are afraid of running a manual oil pressure gauge since your gonna have oil going into your engine compartment.. But I've installed several and have never had a leak. I've got LED's that'll go in them as well which I'm hoping to look killer.
And thanks for the comments guys.. It's appreciated. If your liking how it looks now, your gonna love it when it's done. And I personally can't wait till I get to put my IM and cams in and go to a dyno
And then to the track I go!Modified by mac_24_seven at 6:29 AM 3/7/2007
03-07-2007, 03:46 AM
#56
Prince of Zamunda
Join Date: Nov 2002
Location: Socal CA
Posts: 6,391
Likes: 0
Received 0 Likes
on
0 Posts
<TABLE WIDTH="90%" CELLSPACING=0 CELLPADDING=0 ALIGN=CENTER><TR><TD>Quote, originally posted by mac_24_seven »</TD></TR><TR><TD CLASS="quote">
Yes, it is. Maybe looks different to you because my buddy broke my handle off like 2 weeks ago. Freakin n00b He went to open my door and lost his balance some how ??? I don't understand really how he did it but he did and has since then bought me a new handle, which I've yet to install.
</TD></TR></TABLE>
Seems like its been repainted, the white is different.At least that's what it shows like on my calibrated monitor
Yes, it is. Maybe looks different to you because my buddy broke my handle off like 2 weeks ago. Freakin n00b
He went to open my door and lost his balance some how ??? I don't understand really how he did it but he did and has since then bought me a new handle, which I've yet to install.</TD></TR></TABLE>
Seems like its been repainted, the white is different.At least that's what it shows like on my calibrated monitor
03-07-2007, 05:32 AM
#57
Blahblah718293 Man, your avatar gave me a sick and twisted idea..Not only that but I found it funny. But, it seemed in-complete.. So, I took a lil time and modified it.. Here's what your new avatar should be (blast me and my twisted mind!!)

<chuckles> I hate monkey's.
And, As far as I know it's the same door. Doesn't look any different to me in the pic nor in person.
Also... on a completely unrelated comment... My post count was reset yet AGAIN! What the heck 
Modified by mac_24_seven at 6:44 AM 3/7/2007
<chuckles> I hate monkey's.
And, As far as I know it's the same door. Doesn't look any different to me in the pic nor in person.
Also... on a completely unrelated comment... My post count was reset yet AGAIN! What the heck
Modified by mac_24_seven at 6:44 AM 3/7/2007
 03-07-2007, 12:24 PM
#62
<TABLE WIDTH="90%" CELLSPACING=0 CELLPADDING=0 ALIGN=CENTER><TR><TD>Quote, originally posted by jappwr »</TD></TR><TR><TD CLASS="quote">She's progressing well, keep up the good work.......... </TD></TR></TABLE>
The man I bought the car from.
Doin my best.. She'll be pretty soon enough.
And.. I may even have an extra special suprise in a week or 2, if the deal goes though
</TD></TR></TABLE>The man I bought the car from.
Doin my best.. She'll be pretty soon enough.
And.. I may even have an extra special suprise in a week or 2, if the deal goes though
03-09-2007, 02:38 PM
#63
<sighs> Well, I removed the putty crap on my cluster and bought some JB weld. Figured out that I didnt mix it together like I shoudl have (ALWAYS READ THE DIRECTIONS!!! )
Anyway, so I put some JB weld on it and went to work.. Decided thazt it wasn't coming out the way I wanted too (flaking off and stuff, no good)
SO, I borrowed some fiberglass stuff from my dad. Now, I have messed w/fiberglass ONE other time in my life... and it didnt turn out good BUT, I'm older and wiser now and.. well.. <sighs> we'll see.
As of right now, I've fiberglassed the bottom half of the pods in and I'm gonna let ti dry all night before I work on the top half tomorrow. I'm gonna do evrything that I can to get my cluster/gauges in this weekend.
I'll update w/pic as soon as I'm done w/my mess
)Anyway, so I put some JB weld on it and went to work.. Decided thazt it wasn't coming out the way I wanted too (flaking off and stuff, no good)
SO, I borrowed some fiberglass stuff from my dad. Now, I have messed w/fiberglass ONE other time in my life... and it didnt turn out good
BUT, I'm older and wiser now and.. well.. <sighs> we'll see.As of right now, I've fiberglassed the bottom half of the pods in and I'm gonna let ti dry all night before I work on the top half tomorrow. I'm gonna do evrything that I can to get my cluster/gauges in this weekend.
I'll update w/pic as soon as I'm done w/my mess
03-10-2007, 06:48 PM
#65
Well, I got alot accomplished on my lil gauge cluster today  I think it's gonna turn out pretty good, though I don't think I'm gonna be installing it this weekend or anything ( I really wanted to
  )... unless I can make some BIG strides on it tomrrow, but I think time is gonna be agaisnt me.. We'll see. I'll post pics at the end of the day to at least show my progress and get opinions.
I think you guys are gonna like it (hope so anyway :S)
I will however be done with shaving the license plate holes no matter what tomorrow. I'll have the DIY and whatnot w/pics as well when I update in the evening.
I think it's gonna turn out pretty good, though I don't think I'm gonna be installing it this weekend or anything ( I really wanted to )... unless I can make some BIG strides on it tomrrow, but I think time is gonna be agaisnt me.. We'll see. I'll post pics at the end of the day to at least show my progress and get opinions. I think you guys are gonna like it (hope so anyway :S)
I will however be done with shaving the license plate holes no matter what tomorrow. I'll have the DIY and whatnot w/pics as well when I update in the evening.
03-11-2007, 05:33 PM
#66
Alrighty then!
I am one, whipped white boy. My arms hurt.. My back hurts.. I've been hard at it today and actually got alot accomplished!
First of all.. My bumper.
Here is the step by step of what I did to shave the license plate holes.
Tools needed:
Safety goggles
Dremel w/grinding wheel
Rubbber gloves
Fiberglass kit
Bondoe
Bondoe smoother thing
Sanding bar thingy
220 grit dry/wet sandpaper
A good warm day, some time and music.
This is what we start out with.
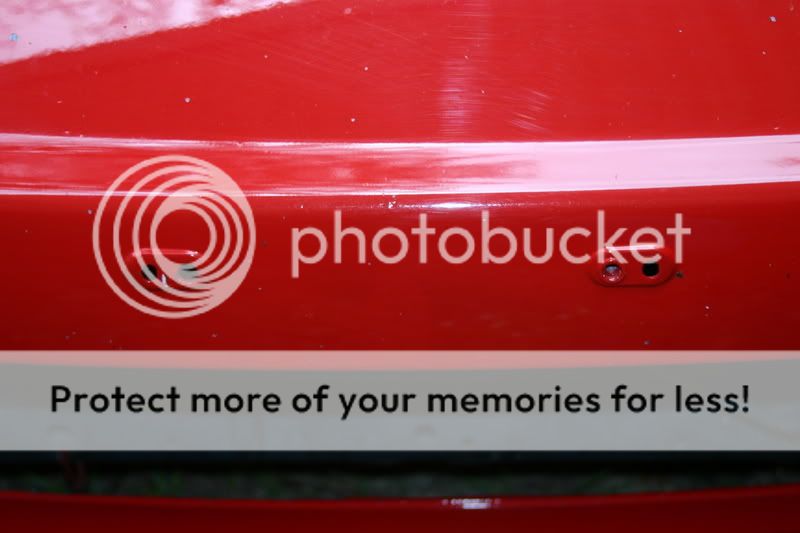
Step 1: Tape off area around the holes
You really could probably skip this step, honestly.. But I did it anyway
Step 2: Grind off the raised part of the bumper
Be sure to have yoru goggles on, cause stuff flys around pretty good. Try to make it as smooth as you can.
On the driver side part, there was a little bracket behhind the holes that seemed to be built into the bumper. I just kept grinding untill I could remove it.
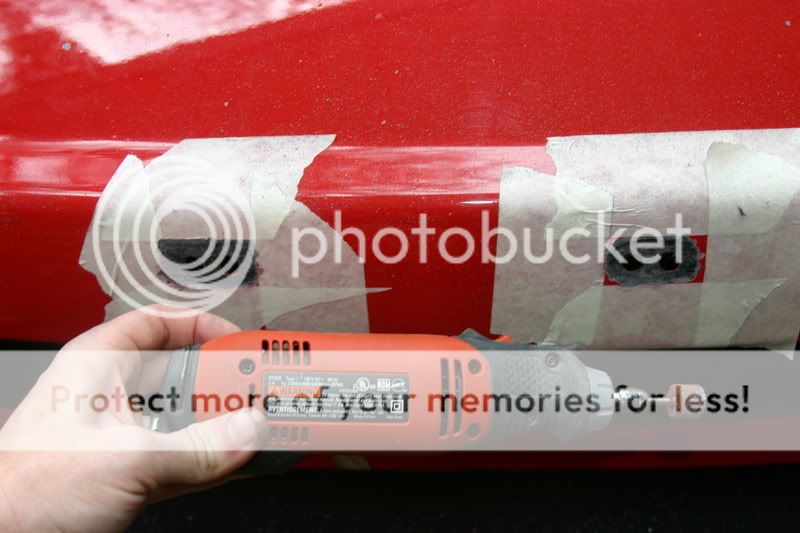
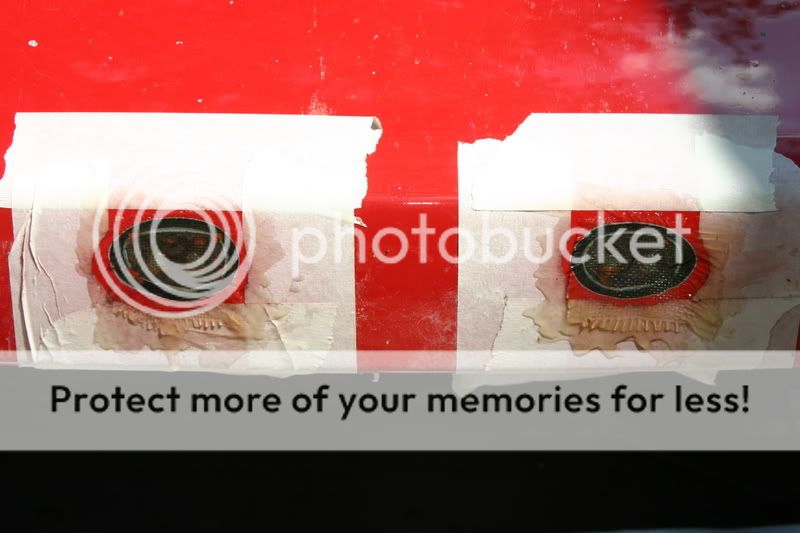
Step 3: Time for the fiberglass
If you've never messed w/fiberglass, I would strongly suggest practicing w/it and familiarize yourself w/mixing it and layering it and whatnot.
I cut out about a 2x2 square from the sheet of fiberglass. I then mized up the gelatin and added hardener. Next, I placed the square I cut over the holes and dipped my finger in the mixed gelatin and rubber it over the little square of fiberglass. I did this untill it was completely soaked. I tried not to get too much so it would'nt run, since it'll just be more that you have to sand in the future.
Step 4: Sand the fiberglass.
I used the 200 grit wet sandpaper along w/a lil rubber sanding bar thingy. I highly suggest using this, since if you sand it by hand only, you can leave grooves since yoru hand/fingers aren't flat. Using the bar, your sure to get a nice, even sand. I sanded it untill it was good and flush, holding the water hose so it was washing away all the residue. Periodically check the smoothness w/your finger.
WARNING!! DO NOT HAVE TAPE ON THE BUMPER WHEN YOU LAY THE FIBERGLASS!!!!
Unless you want this to happen...
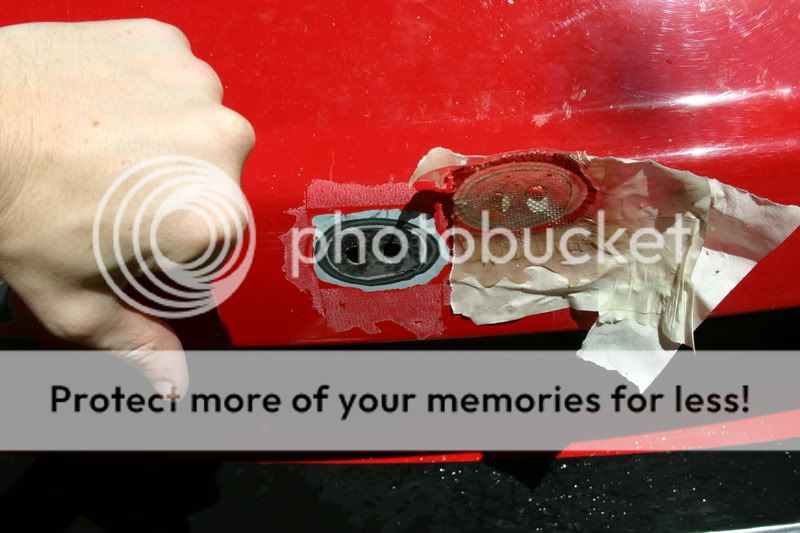
i'm a n00b. I was trying to not get fiberglass resin all over the place.. but look what it got me. Hey, you live and learn.. I never said I was a pro
Step 5: Break out the Bondoe
Mixing the Bondoe isnt hard, just read the directions and be sure once you've added the hardener, to mix it up realll good, untill it's all a kinda reddish/pink color.
Using yoru handy dandy bondoe smoother/applicator thingy, apply bondoe over a good size area, making sure it's nice and flat (or at least as flat as you can get it).
Make it look like so.
Notice I've got it over an area much bigger than my holes.. That way, I'm sure to get bondoe evreywhere I need it to be. The excess you can just sand off.
Step 5: Sand her down!
Once you've let the bondoe get good and dry, break out the sander again and start sanding away. Be sure to sand over a good area, not spending too much time on one small spot, since you want it all to be level. Once your satisfied wthats it's good and smooth.. run yoru finger over the whole thing. Any bumpers or indention that you can feel...Thats bad. It'll show up when you paint. Either continue sanding or add more Bondoe and sand it down again. You want it as close to perfectly smooth as you possibly can.

And there ya have it folks.. Shaved bumper holes. I'm not finished with it yet.. I'll be painting the car soon (hopefully, and yes, I'LL be painting it.. my dad informs me of this today)
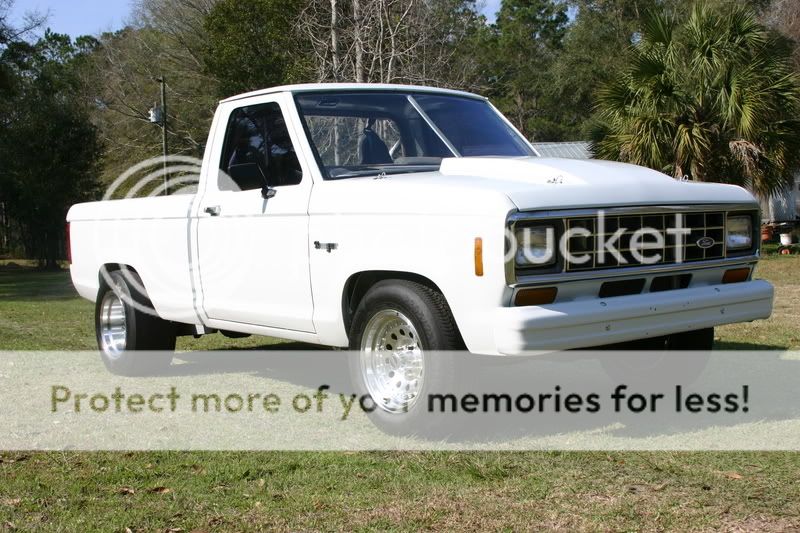
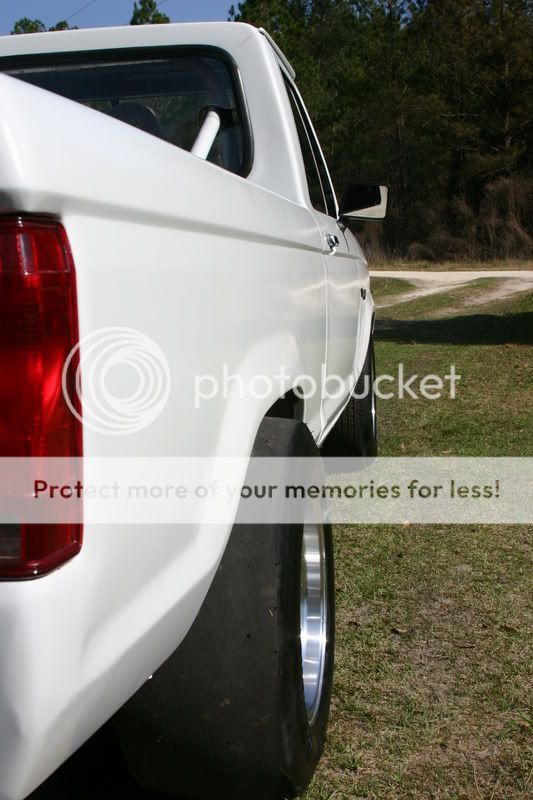
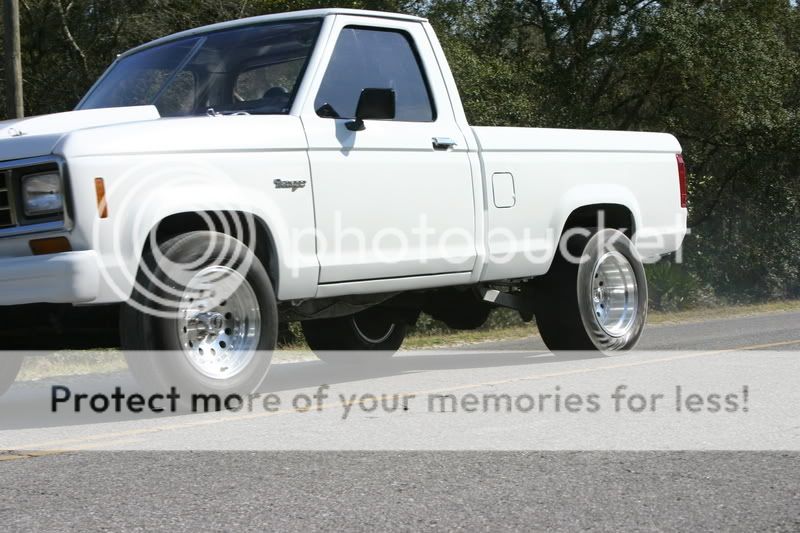
And speaking of painting, I know this has nothing to do with Imports, but this is the color my car is going to be. My dad has an extra gallon of this exact white that will be used on my car.
And, FYI, this is a 1987 Ford Ranger w/a hevily built 351 Windsor w/175 shot of the giggly stuff. With 150 hp jets w/worn out slicks, it went 10.6 @126 mph (yes, I have timeslips. PM if you want any more info on itm I doubt you will). You can thank my dad for being an incredible mechanic and turning this DAILY DRIVER (yes, it has a tag, all lights gets 14 mpg too) into a monster. A wonderful father/son project
You can see the wrinkle walls doing their job
Comments are always welcome on the DYI. If you have any other info or tips on how to make it beter, please, don't flame, just let me know and I'll be more than happy to revise it.
Up next.... Polishing wheels: The beginning.... (Que dramatic music)
Modified by mac_24_seven at 1:46 PM 3/26/2007
I am one, whipped white boy. My arms hurt.. My back hurts.. I've been hard at it today and actually got alot accomplished!
First of all.. My bumper.
Here is the step by step of what I did to shave the license plate holes.
Tools needed:
Safety goggles
Dremel w/grinding wheel
Rubbber gloves
Fiberglass kit
Bondoe
Bondoe smoother thing
Sanding bar thingy
220 grit dry/wet sandpaper
A good warm day, some time and music.
This is what we start out with.
Step 1: Tape off area around the holes
You really could probably skip this step, honestly.. But I did it anyway
Step 2: Grind off the raised part of the bumper
Be sure to have yoru goggles on, cause stuff flys around pretty good. Try to make it as smooth as you can.
On the driver side part, there was a little bracket behhind the holes that seemed to be built into the bumper. I just kept grinding untill I could remove it.
Step 3: Time for the fiberglass
If you've never messed w/fiberglass, I would strongly suggest practicing w/it and familiarize yourself w/mixing it and layering it and whatnot.
I cut out about a 2x2 square from the sheet of fiberglass. I then mized up the gelatin and added hardener. Next, I placed the square I cut over the holes and dipped my finger in the mixed gelatin and rubber it over the little square of fiberglass. I did this untill it was completely soaked. I tried not to get too much so it would'nt run, since it'll just be more that you have to sand in the future.
Step 4: Sand the fiberglass.
I used the 200 grit wet sandpaper along w/a lil rubber sanding bar thingy. I highly suggest using this, since if you sand it by hand only, you can leave grooves since yoru hand/fingers aren't flat. Using the bar, your sure to get a nice, even sand. I sanded it untill it was good and flush, holding the water hose so it was washing away all the residue. Periodically check the smoothness w/your finger.
WARNING!! DO NOT HAVE TAPE ON THE BUMPER WHEN YOU LAY THE FIBERGLASS!!!!
Unless you want this to happen...
i'm a n00b. I was trying to not get fiberglass resin all over the place.. but look what it got me. Hey, you live and learn.. I never said I was a pro
Step 5: Break out the Bondoe
Mixing the Bondoe isnt hard, just read the directions and be sure once you've added the hardener, to mix it up realll good, untill it's all a kinda reddish/pink color.
Using yoru handy dandy bondoe smoother/applicator thingy, apply bondoe over a good size area, making sure it's nice and flat (or at least as flat as you can get it).
Make it look like so.
Notice I've got it over an area much bigger than my holes.. That way, I'm sure to get bondoe evreywhere I need it to be. The excess you can just sand off.
Step 5: Sand her down!
Once you've let the bondoe get good and dry, break out the sander again and start sanding away. Be sure to sand over a good area, not spending too much time on one small spot, since you want it all to be level. Once your satisfied wthats it's good and smooth.. run yoru finger over the whole thing. Any bumpers or indention that you can feel...Thats bad. It'll show up when you paint. Either continue sanding or add more Bondoe and sand it down again. You want it as close to perfectly smooth as you possibly can.
And there ya have it folks.. Shaved bumper holes. I'm not finished with it yet.. I'll be painting the car soon (hopefully, and yes, I'LL be painting it.. my dad informs me of this today
)And speaking of painting, I know this has nothing to do with Imports, but this is the color my car is going to be. My dad has an extra gallon of this exact white that will be used on my car.
And, FYI, this is a 1987 Ford Ranger w/a hevily built 351 Windsor w/175 shot of the giggly stuff. With 150 hp jets w/worn out slicks, it went 10.6 @126 mph (yes, I have timeslips. PM if you want any more info on itm I doubt you will). You can thank my dad for being an incredible mechanic and turning this DAILY DRIVER (yes, it has a tag, all lights
gets 14 mpg too) into a monster. A wonderful father/son project You can see the wrinkle walls doing their job
Comments are always welcome on the DYI. If you have any other info or tips on how to make it beter, please, don't flame, just let me know and I'll be more than happy to revise it.
Up next.... Polishing wheels: The beginning.... (Que dramatic music)
Modified by mac_24_seven at 1:46 PM 3/26/2007
03-12-2007, 05:32 AM
#69
Originally Posted by kingciresdc
slam that bitch
Funtion over form in this case.
Anyway...Here's the work I did on the blades yesterday. This is a work in progress thing here.. I may be able to finish these wheels or I may get something different.. all depends. But, since I still have em, I'll do what I can.
I started out with this wheel, since it was teh worst and pretty much the only one w/curbing (not done by me)
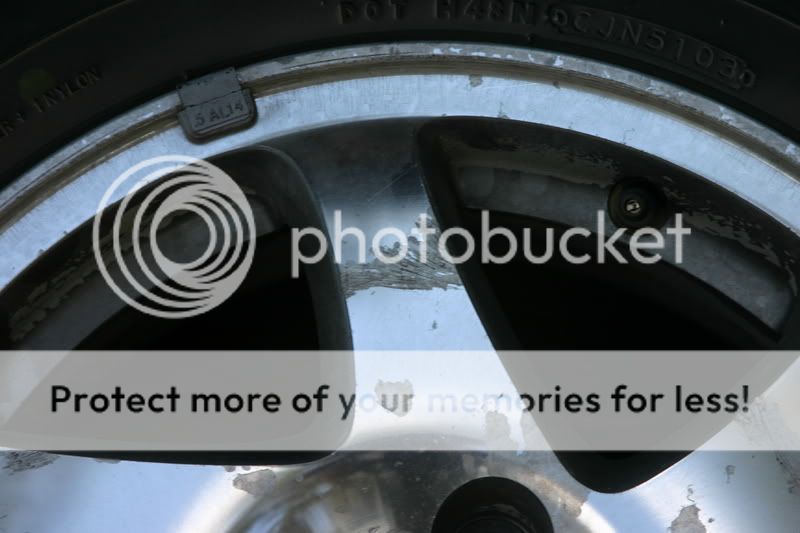
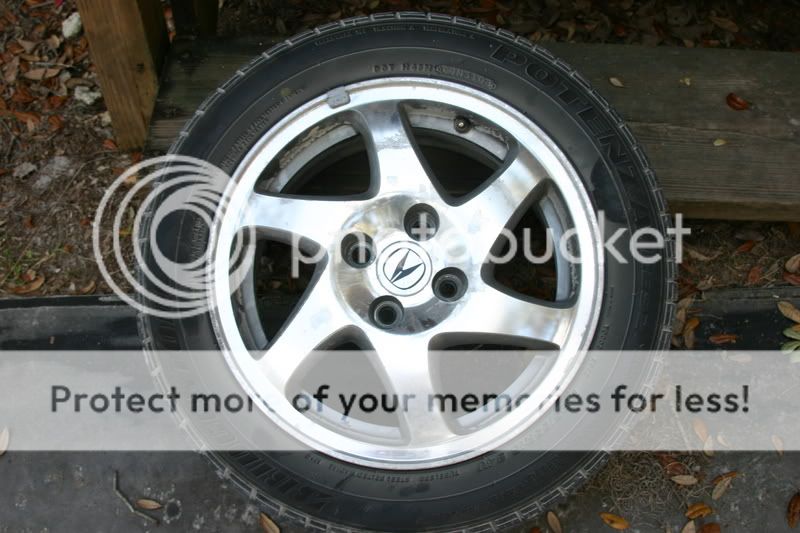
I broke out the sandpaper and went to town on it.. AFter a good 15-20 mins, I ended up with this (the curbing was pretty deep :S)
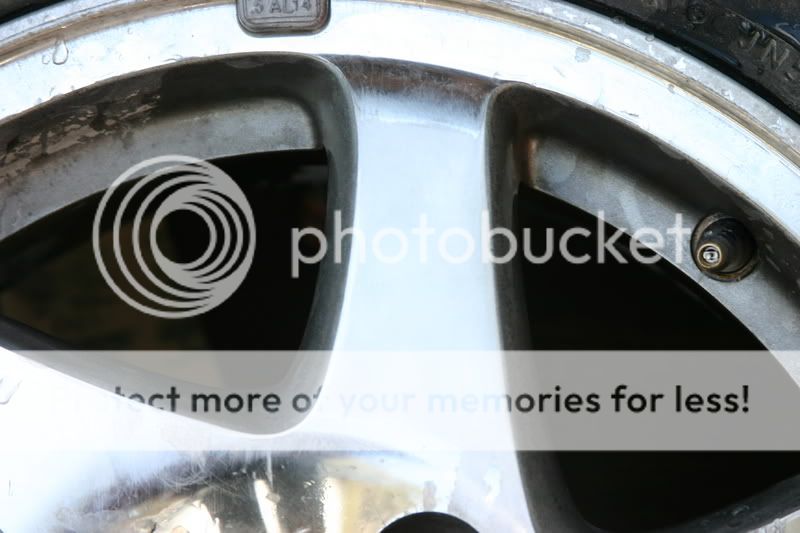
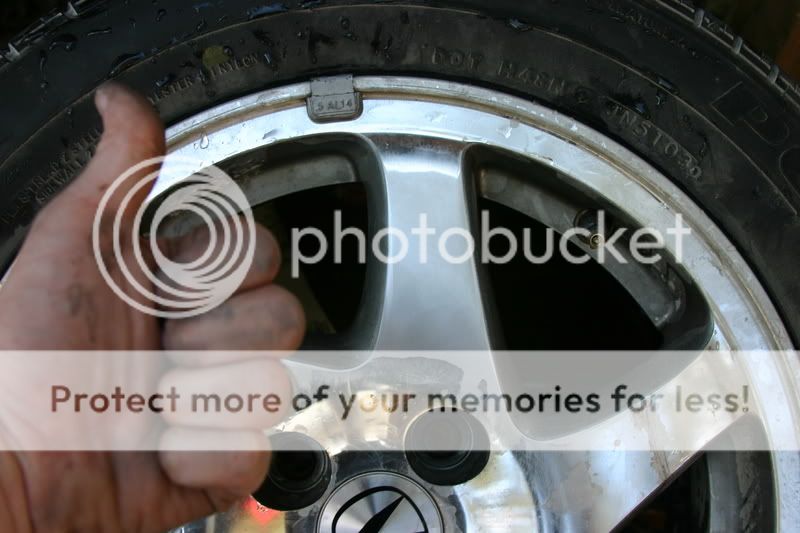
I then proceeded to continue sanding down the rest of the wheel, intermittingly stopping to work on my front bumper and gauge cluster.
After another 10 mins or so on the ONE wheel, I stood back and admired my hard work and said..
"Man, this really sucks."
I packed up, went to my parents and broke out the air sander. After about 15-20 mins, I had this:
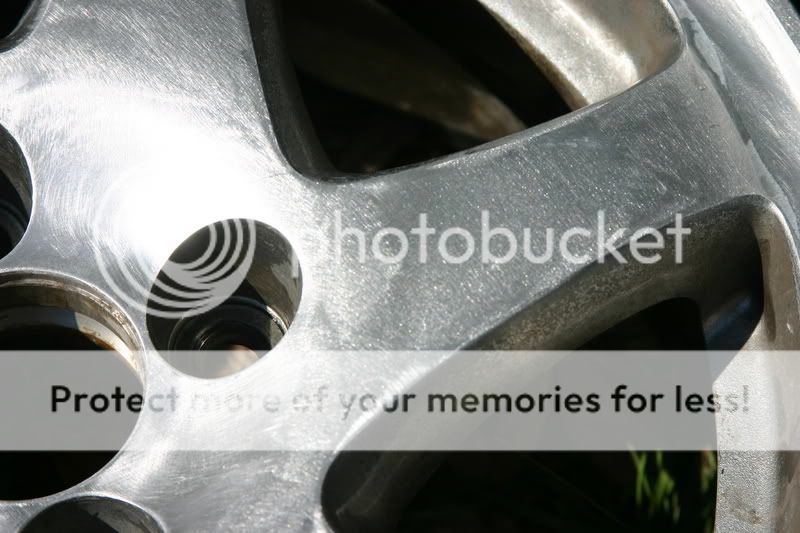
Air tools FTW!!!!!!

So, all the wheels are a good 90-95% done. I was having trouble around the edge of the lip w/the air sander, so I just left it alone and resolved to doing it later w/the correct sanding tools.
I believe the grit was 180 on the sandpaper, BTW.
So, after a few hours work, I was finished getting the factory finish off the wheels and any lil knicks and whatnot they accumulated over the years. Look for these baby's to be shining like chrome in the future!
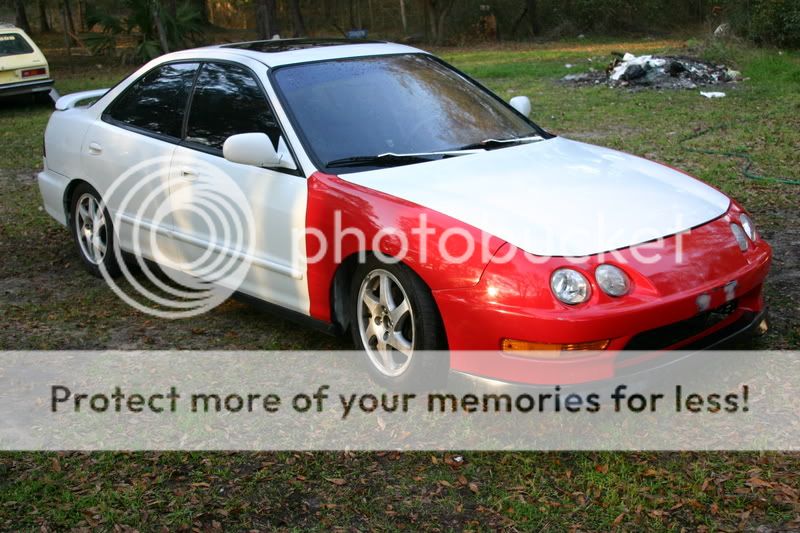
And, since I had my wifes camera, I decided to snag some pics in a couple of cool places in town. It's a shame I'm a sucky photographer and my car looks like crap, or else they might actually be nice. When it's all painted and looking sweet, I'll have my wife snap some pics (she's a photographer
)Enjoy.
BTW, I apologize for the pics being ever so slightly blurry :S

The driver of the semi was in it watching TV w/his dowg when I pulled up. He looked out the window and I told em I was taking pics..He looked at me like I was a retard and went back to watching TV
Freakin n00b.

Representin the walmart crew y0!
I didn't think I was going to get over the crest of the hill.


Again, I apologize for the blurry pics.
Next up................. My gauge cluster
( Uber dramatic music plays...)
03-12-2007, 09:09 AM
#70
Honda-Tech Member
Join Date: May 2005
Location: Orange Park, FL, USA
Posts: 1,693
Likes: 0
Received 0 Likes
on
0 Posts
You're going to have one kick *** 4dr!
I work at an Acura dealership in Jacksonville.
Call the number below if you need anything!
Or PM me!
I work at an Acura dealership in Jacksonville.
Call the number below if you need anything!
Or PM me!
03-12-2007, 12:08 PM
#74
<TABLE WIDTH="90%" CELLSPACING=0 CELLPADDING=0 ALIGN=CENTER><TR><TD>Quote, originally posted by hXc-DC2 »</TD></TR><TR><TD CLASS="quote">Looks 100x better than when you first got it. I'd say ditch the wing though, although I'm biased.<---Wingless</TD></TR></TABLE>
Ya know, I've put alot of thought into that. I've looked at alot of pics w/sedans and no wing. While it looks very clean, it also makes the rear of the car look too empty (to me anyway).
I mean, up front, you've got a lip but in the rear you have nothing. The factory GSR wing isn't very big, but it's enough to break up the empty space in the back. Know what I'm sayin?
Now, for a while, I was contemplating the JDM ITR sedan wing, which looks very cool, and fairly inexpensive but I decided it's too much. Again, the factory teg wing is subtle enough for me. Plus, it's functional! Not that I'll ever get fast enough for it to be any use to me
Modified by mac_24_seven at 1:28 PM 3/12/2007