
DIY: Skunk2 lowering spring install
 08-02-2007, 08:06 PM
#1
Who?
Thread Starter
Join Date: Dec 2000
Location: NJ
Posts: 4,910
Likes: 0
Received 0 Likes
on
0 Posts
Well my wifes Nissan Altima was slowly going down the crapper, so we went and picked her up a 2007 LX sedan.
Found her a set of RSX wheels for sale in the classifieds a day after we bought it and tossed the steelies/hubcaps.
4x4 madness ensued...

...so i purchased a set of springs to bring the height down a bit and spent a couple hours today throwing them in.
Here's how it went:
I started in the front by jacking that pig up and properly supporting it on some jack stands.


Open the hood, pull the rubber trim back and remove the covers on each side to expose the 3 bolts holding the strut to the tower.


On the underside you'll see the brake and ABS line brackets attached to the strut.

Remove the brake line bracket using a 12mm socket and pull the ABS bracket out by squeezing the backside with a pair of pliers.

Now take a 17mm socket and a 19mm wrench and remove the upper / lower bolts holding the strut to the knuckle. Make sure you place a jack under the rotor to support the weight. I know i wasn't in the mood to rebuild an inner CV.

Go back to the top and break out the 14mm socket. Believe it or not, it actually fits and you can reach all 3 bolts with it. You can also take your 17mm socket and loosen the bolt holding the top hat on the strut now if you'd like, but DO NOT completely remove it!!!! You'll see why in a sec...

Pull the strut out while carefully avoiding anything damag-able (yeah i just made that up). Get out your spring compressors and start tightening them down, one side at a time, until there is no pressure on the top hat.

Get out your metric allen wrench set and find a 17mm socket you don't mind destroying. Place the socket over the bolt and stick the allen wrench in through the center. Find a pair of pliers, grasp the socket with them and turn. (Yeah the pic sucks! Let's see you hold all that and snap a pic at the same time. )
)

Remove the top hat. Un-compress the spring and switch all the rubber bits over, like so.

Once that's done, it's back to the allen wrench, socket, pliers thing. No need for the compressors this time around though.
Now before you reinstall the whole deal, make sure the arrow on the top hat is facing towards the front of the car. See it?

Alright NOW you can start putting it all back in.

BUT before you go tightening all those bolts back up. Now would be a good time to slap some good ole ANTI SEIZE lube on them.

You'll thank yourself the next time you need to take any of this crap apart...
Now onto the rear!!!
You know the drill here. Jack it up and put it on stands.

Throw the jack under the LCA to relieve some weight and grab the 14mm socket to remove the bolt holding the shock.

Next thing you want to do is remove the swaybar endlink (my god that thing is puny), you'll need your metric allen set and a 14mm open end here. Then remove the brake and ABS brackets like you did in the front.


Take your 14mm socket and remove the bolt holding the upper control arm.


Lower the jack. Remove and replace the spring with the new one. Re-install everything. Don't forget your buddy ANTI SEIZE and...
Viola!!! The rear is done!

Unfortunately i didn't get a chance to take any pics of the car after i was finished. It was too dark. Maybe tomorrow.
* Disclaimer *
If you screw your car or yourself up attempting this. It's your own damn fault. Don't blame me... Oh and i'm not a professional photographer either.
Modified by JV at 7:39 AM 8/3/2007
Found her a set of RSX wheels for sale in the classifieds a day after we bought it and tossed the steelies/hubcaps.
4x4 madness ensued...

...so i purchased a set of springs to bring the height down a bit and spent a couple hours today throwing them in.
Here's how it went:
I started in the front by jacking that pig up and properly supporting it on some jack stands.


Open the hood, pull the rubber trim back and remove the covers on each side to expose the 3 bolts holding the strut to the tower.


On the underside you'll see the brake and ABS line brackets attached to the strut.

Remove the brake line bracket using a 12mm socket and pull the ABS bracket out by squeezing the backside with a pair of pliers.

Now take a 17mm socket and a 19mm wrench and remove the upper / lower bolts holding the strut to the knuckle. Make sure you place a jack under the rotor to support the weight. I know i wasn't in the mood to rebuild an inner CV.

Go back to the top and break out the 14mm socket. Believe it or not, it actually fits and you can reach all 3 bolts with it. You can also take your 17mm socket and loosen the bolt holding the top hat on the strut now if you'd like, but DO NOT completely remove it!!!! You'll see why in a sec...

Pull the strut out while carefully avoiding anything damag-able (yeah i just made that up). Get out your spring compressors and start tightening them down, one side at a time, until there is no pressure on the top hat.

Get out your metric allen wrench set and find a 17mm socket you don't mind destroying. Place the socket over the bolt and stick the allen wrench in through the center. Find a pair of pliers, grasp the socket with them and turn. (Yeah the pic sucks! Let's see you hold all that and snap a pic at the same time.
)
Remove the top hat. Un-compress the spring and switch all the rubber bits over, like so.

Once that's done, it's back to the allen wrench, socket, pliers thing. No need for the compressors this time around though.
Now before you reinstall the whole deal, make sure the arrow on the top hat is facing towards the front of the car. See it?

Alright NOW you can start putting it all back in.

BUT before you go tightening all those bolts back up. Now would be a good time to slap some good ole ANTI SEIZE lube on them.

You'll thank yourself the next time you need to take any of this crap apart...
Now onto the rear!!!
You know the drill here. Jack it up and put it on stands.

Throw the jack under the LCA to relieve some weight and grab the 14mm socket to remove the bolt holding the shock.

Next thing you want to do is remove the swaybar endlink (my god that thing is puny), you'll need your metric allen set and a 14mm open end here. Then remove the brake and ABS brackets like you did in the front.


Take your 14mm socket and remove the bolt holding the upper control arm.


Lower the jack. Remove and replace the spring with the new one. Re-install everything. Don't forget your buddy ANTI SEIZE and...
Viola!!! The rear is done!

Unfortunately i didn't get a chance to take any pics of the car after i was finished. It was too dark. Maybe tomorrow.
* Disclaimer *
If you screw your car or yourself up attempting this. It's your own damn fault. Don't blame me... Oh and i'm not a professional photographer either.
Modified by JV at 7:39 AM 8/3/2007
 08-02-2007, 08:21 PM
#3
Honda-Tech Member
Join Date: Nov 2005
Location: SoCAL
Posts: 2,168
Likes: 0
Received 0 Likes
on
0 Posts

<TABLE WIDTH="90%" CELLSPACING=0 CELLPADDING=0 ALIGN=CENTER><TR><TD>Quote, originally posted by originalg00kster »</TD></TR><TR><TD CLASS="quote">nice DIY!
cant wait to get me some springss.</TD></TR></TABLE>
aww your not dropped yet?
08-03-2007, 10:35 AM
#7
Honda-Tech Member
Join Date: Apr 2005
Location: 1904/772
Posts: 2,380
Likes: 0
Received 0 Likes
on
0 Posts
<TABLE WIDTH="90%" CELLSPACING=0 CELLPADDING=0 ALIGN=CENTER><TR><TD>Quote, originally posted by Nighthawk R18 »</TD></TR><TR><TD CLASS="quote">
aww your not dropped yet? </TD></TR></TABLE>
unfortunately..not =[.
soon though..will be getting money soon. so should be getting a bunch of stuff..
aww your not dropped yet?
</TD></TR></TABLE>unfortunately..not =[.
soon though..will be getting money soon. so should be getting a bunch of stuff..
Trending Topics
08-04-2007, 07:56 AM
#8
Join Date: Apr 2007
Posts: 157
Likes: 0
Received 0 Likes
on
0 Posts
As ive installed the same skunk2 springs myself, i would strongly suggest that you loosen the top nut on the strut pretty far almost to the point that it is off before you remove the front struts(not completely!). its not going to be as easy as holding a socket with pliers and using an allen wrench. use a deep offset metric closed wrench and a quality metric allen wrench. And all of this will absolutely, positively throw off your alignment and you will not have the DIY skills to align it yourself. Be smart, get it done.
08-06-2007, 09:26 AM
#10
what is the real point of making sure that the arrow is facing foward when u reinstall the shocks???? what if u install them and do no have the arrow foward??? will it do anything. let me know. i know a few people who didnt even see that until now, so im just asking why
08-06-2007, 09:29 AM
#11
Honda-Tech Member
Join Date: Nov 2005
Location: SoCAL
Posts: 2,168
Likes: 0
Received 0 Likes
on
0 Posts
when i heard squeaking in my suspension when i go over bumps after i lowered it. i took it apart again, and thats when i noticed the arrows. i pointed them toward the engine. it got a LITTLE better. but eh
08-06-2007, 05:42 PM
#12
Who?
Thread Starter
Join Date: Dec 2000
Location: NJ
Posts: 4,910
Likes: 0
Received 0 Likes
on
0 Posts
<TABLE WIDTH="90%" CELLSPACING=0 CELLPADDING=0 ALIGN=CENTER><TR><TD>Quote, originally posted by JV »</TD></TR><TR><TD CLASS="quote">Unfortunately i didn't get a chance to take any pics of the car after i was finished. It was too dark. Maybe tomorrow.</TD></TR></TABLE>
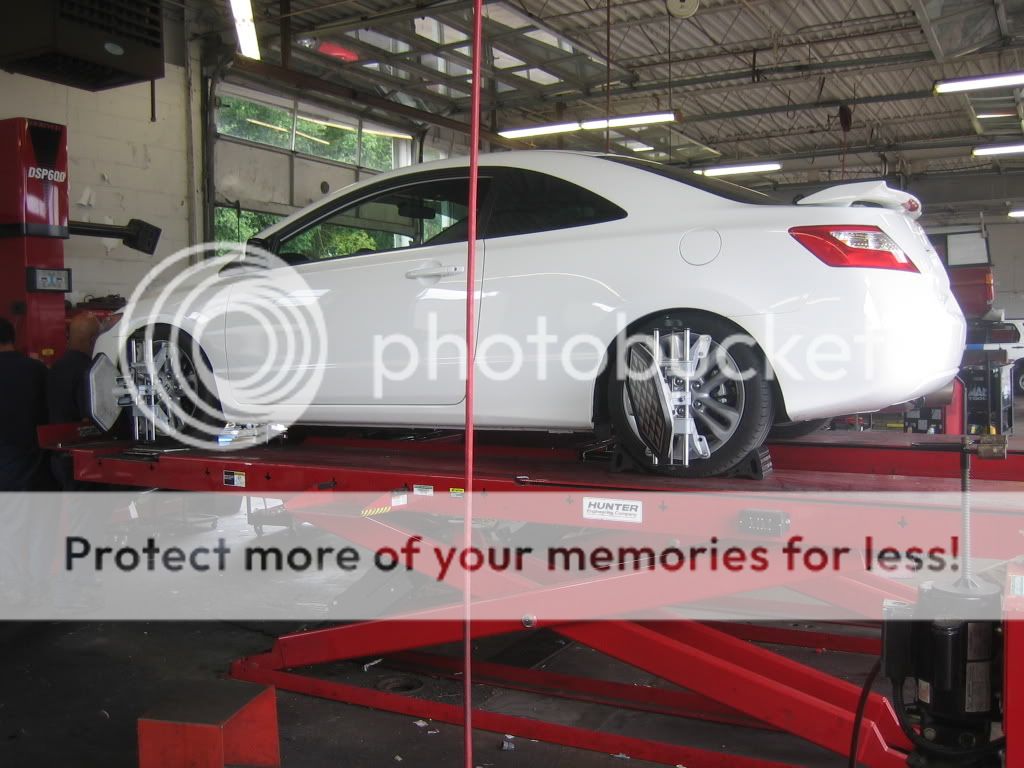
Ok. Not exactly tomorrow and not exactly the best picture, but here it is...

I'll give an update on the ride quality as soon as i get time to actually take it for an extended ride.
Ok. Not exactly tomorrow and not exactly the best picture, but here it is...

I'll give an update on the ride quality as soon as i get time to actually take it for an extended ride.
10-24-2007, 08:02 AM
#16
Member
Join Date: Sep 2005
Location: Let me warn ya. Northern California
Posts: 1,063
Likes: 0
Received 0 Likes
on
0 Posts
good write up 
i'll use this write up when i go to instal a set of coilovers, if that day ever comes.
i'll use this write up when i go to instal a set of coilovers, if that day ever comes.

Thread
Thread Starter
Forum
Replies
Last Post