
SHG is back! Easy's EP3 goes under the knife...
 09-01-2011, 07:22 PM
#1576
Honda-Tech Member
Thread Starter
Join Date: Dec 2003
Location: True Honda Enthusiast
Posts: 12,680
Likes: 0
Received 1 Like
on
1 Post
So guys here is a bittersweet update...
Finally found a sweet deal on a Mugen replica wing and bit the bullet after putting it off for over a year. I knew a replica wasnt going to fit perfect but the seller advertised it in good condition and it was already painted. I thought I had caught another sweet deal but after opening a paypal dispute, waiting 3 weeks to get the wing, then it finally arriving with about 2 feet of bubble wrap hanging off of it (nothing else) I knew I had some serious work ahead of me.
Despite all that I still got it for less than a new wing so I guess it could have been worse.
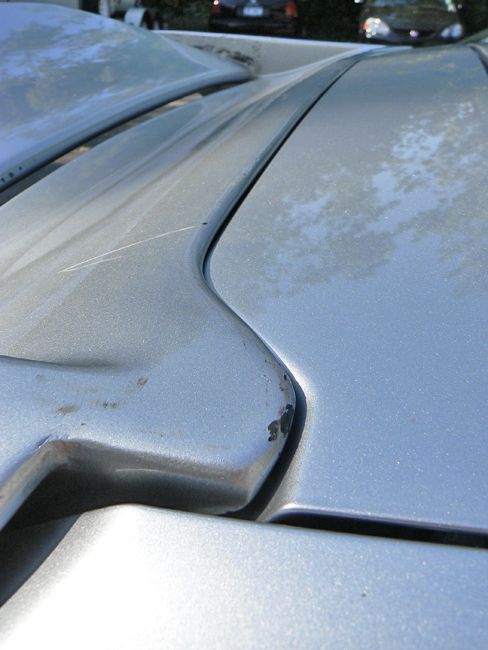
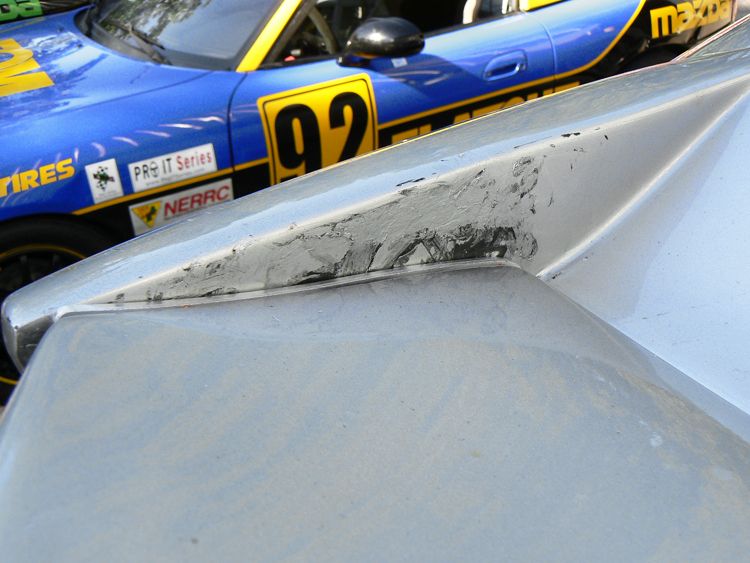
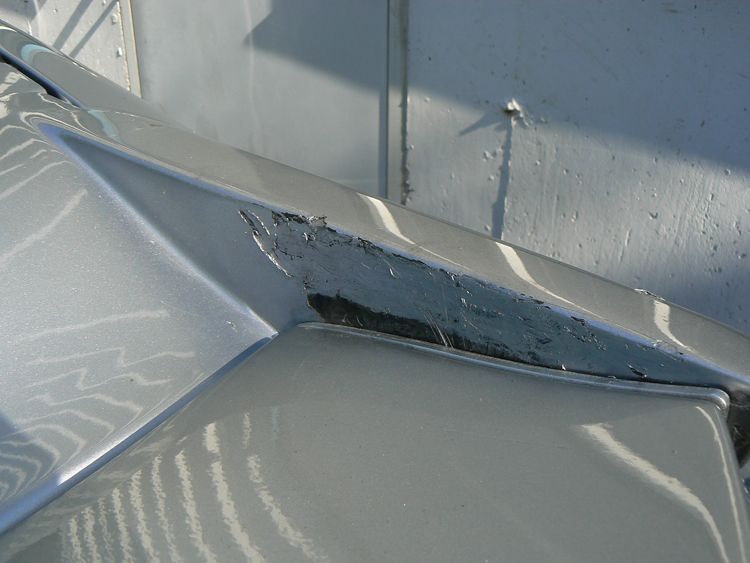
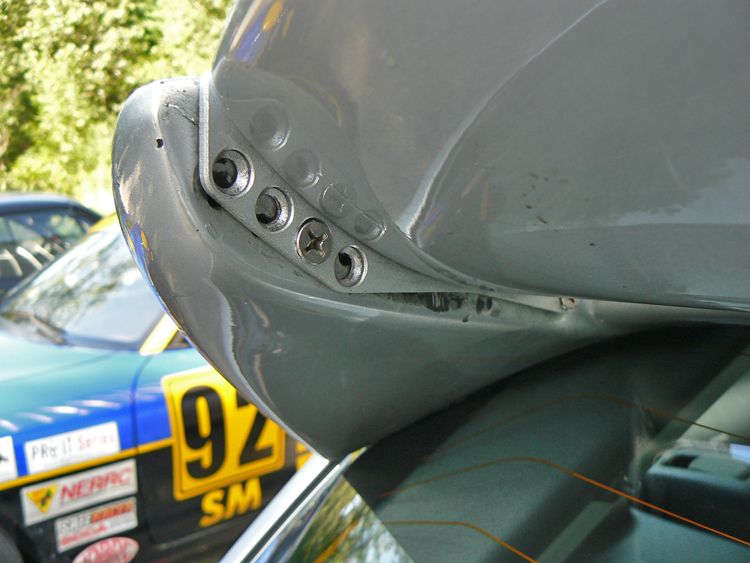
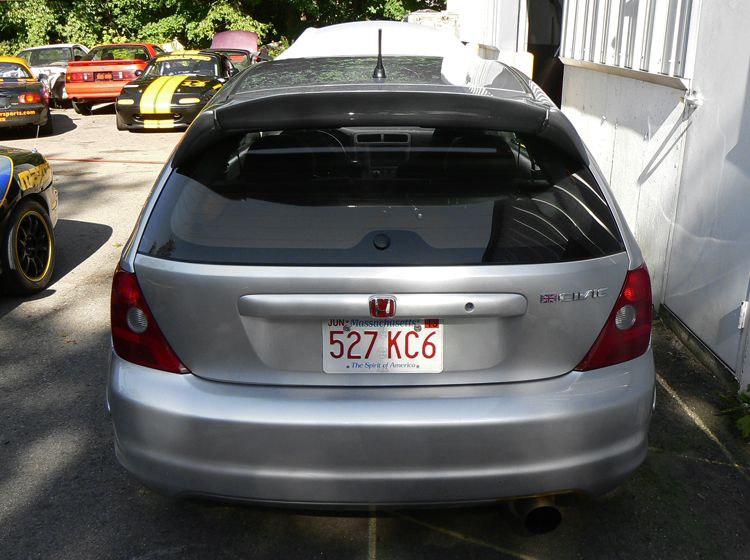
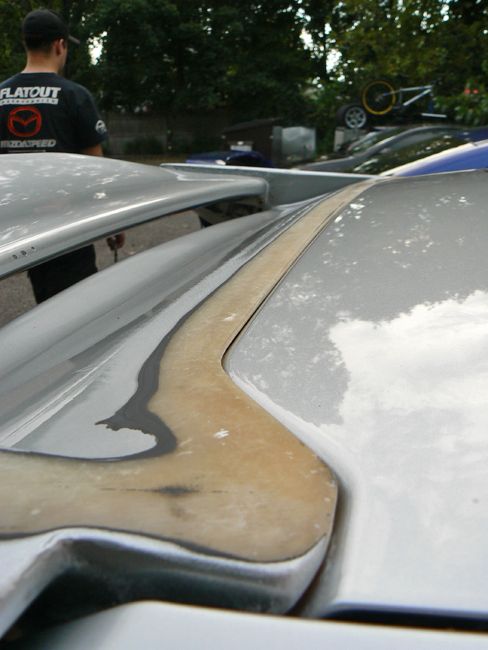
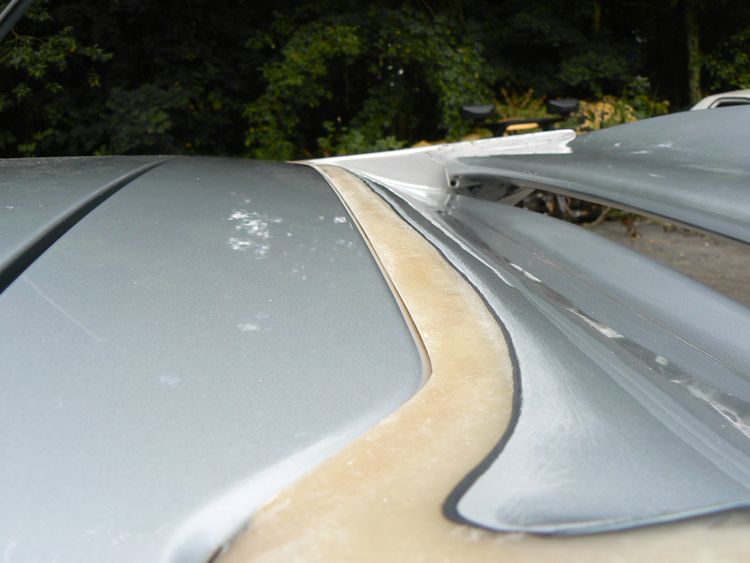
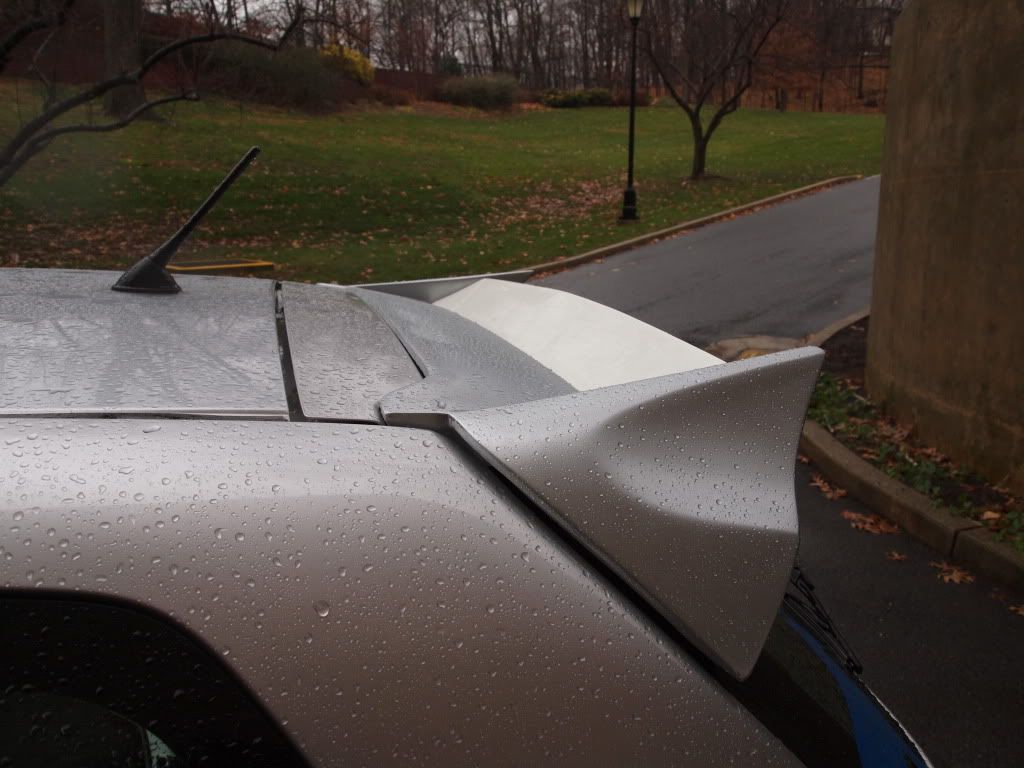
So here are pictures of the first test fit. As you can see its horrible. the part where it mounts to the car is all wrong and looks like total ****. The leading edge is too fat and "puffy", the wing as a whole sits too high and the contour as viewed from above is totally off. Time to get to work...

.
.
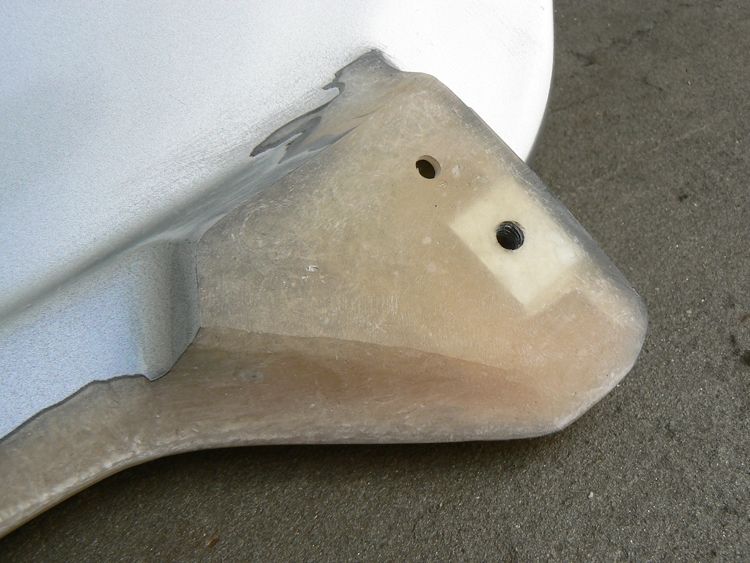
Here you can see how other parts of the wing are totally f'ed up and will need some work
Finally found a sweet deal on a Mugen replica wing and bit the bullet after putting it off for over a year. I knew a replica wasnt going to fit perfect but the seller advertised it in good condition and it was already painted. I thought I had caught another sweet deal but after opening a paypal dispute, waiting 3 weeks to get the wing, then it finally arriving with about 2 feet of bubble wrap hanging off of it (nothing else) I knew I had some serious work ahead of me.
Despite all that I still got it for less than a new wing so I guess it could have been worse.
So here are pictures of the first test fit. As you can see its horrible. the part where it mounts to the car is all wrong and looks like total ****. The leading edge is too fat and "puffy", the wing as a whole sits too high and the contour as viewed from above is totally off. Time to get to work...
.
.
Here you can see how other parts of the wing are totally f'ed up and will need some work
 09-01-2011, 07:29 PM
#1577
Honda-Tech Member
Yikes! I thought your car was aesthetically perfect the way it was but im interested to see how the spoiler turns out.
09-01-2011, 07:32 PM
#1578
Honda-Tech Member
Join Date: Jul 2002
Location: 9/11/01 WTC Never Forget, United States Of America
Posts: 6,487
Likes: 0
Received 0 Likes
on
0 Posts
Dam E that wing looks terrible but I know with your skills and patience the outcome of it will be amazing.
09-01-2011, 07:33 PM
#1579
Honda-Tech Member
Thread Starter
Join Date: Dec 2003
Location: True Honda Enthusiast
Posts: 12,680
Likes: 0
Received 1 Like
on
1 Post
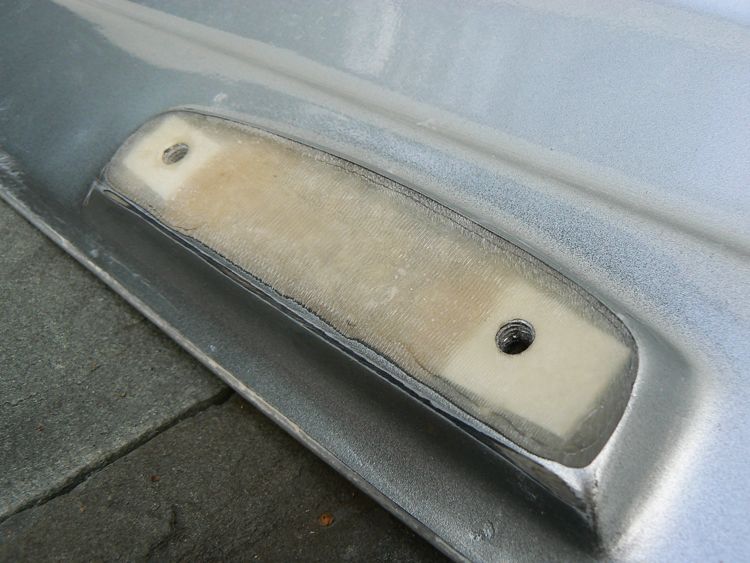
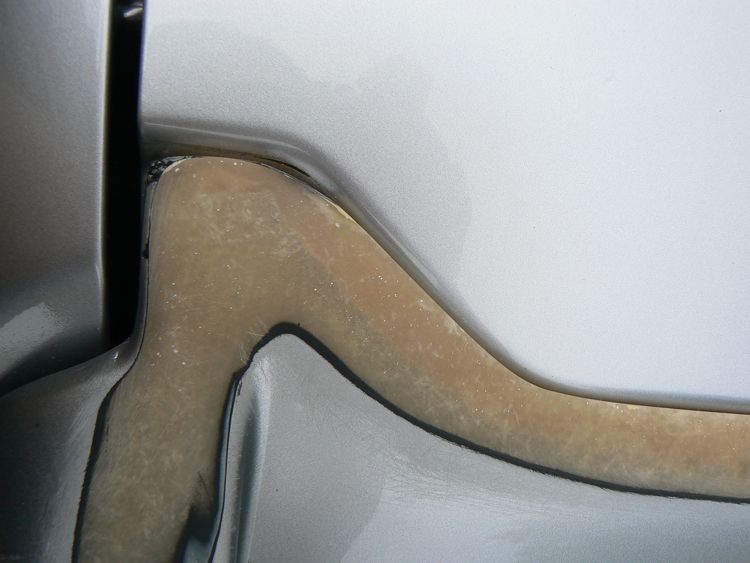
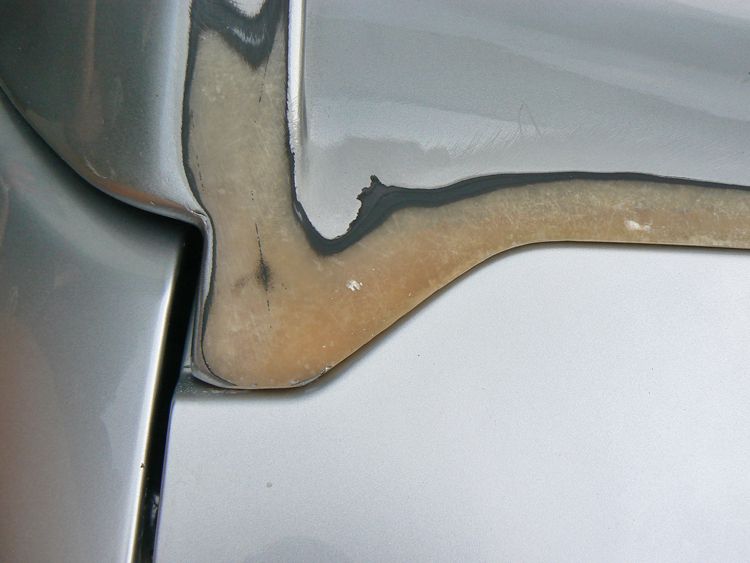
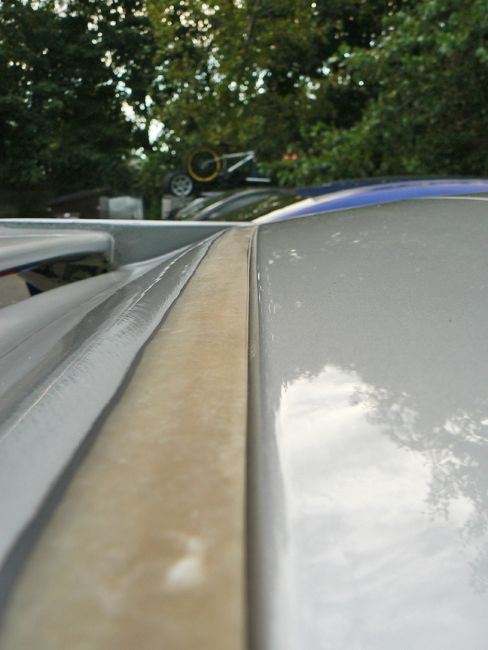
And here it is after about 5 hours of grinding, DA'ing, and blocking. The goal was to get the wing to sit nice and flush like the OEM unit.
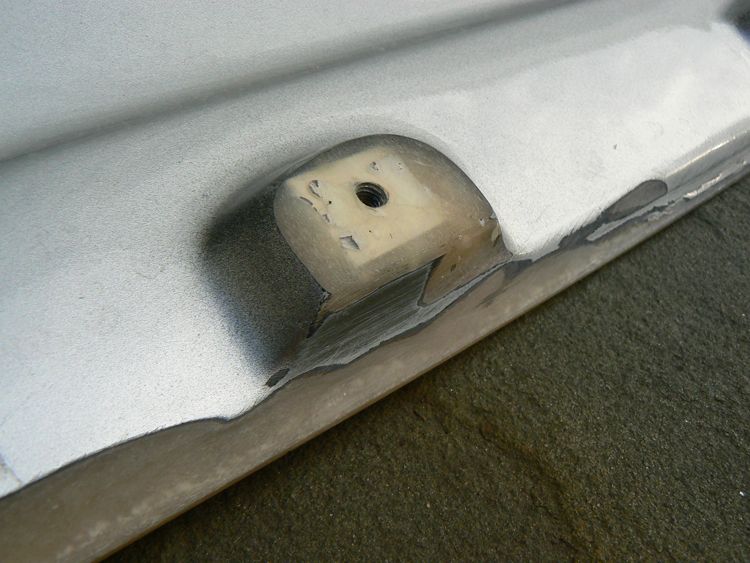
I started by reshaping the contour (viewed from above) so that the wing would clear the recess in the hatch. Then I started grinding down material from the underside where the wing mounts, aswell as some other areas that were interfering with the fitment.
After I took down as much material as I could off the bottom I started working on the top edge, again cutting it down to meet up nice and flush. Im about 60% there in these photos. A couple spots need a little more work, then I need to start building up the corners that dont quite fill out the body line.
.
.
09-02-2011, 06:54 AM
#1582
Honda-Tech Member
Ain't no thang for the master of perfection. I have no doubt that the wing will fit and look like a dream when you're finished with it.
 09-02-2011, 05:17 PM
#1584
Honda-Tech Member
Thread Starter
Join Date: Dec 2003
Location: True Honda Enthusiast
Posts: 12,680
Likes: 0
Received 1 Like
on
1 Post
Thanks guys! Hopefully I can get this thing up to my standards! Ive got monday off so Im going to spend the day putting in work on it. Also have some other little projects going on this weekend, update tonight 
09-02-2011, 07:36 PM
#1585
Honda-Tech Member
man, thats how my bc wing looked, I spent hours on sanding down the inner holes on the underside.. never thought of doing the top.. I got pissed and ended up with a hack saw in my hand..
I did find however, If you take the bolted wing off and sand down the outer sides, you'll free it up from rubbing like it did.. Obviously some people just slap **** on their cars and call it a day, hence why its painted and looks like ****.. I did with the bc wing, and the stock one went back one two days later..cause it looked like ****!
I did find however, If you take the bolted wing off and sand down the outer sides, you'll free it up from rubbing like it did.. Obviously some people just slap **** on their cars and call it a day, hence why its painted and looks like ****.. I did with the bc wing, and the stock one went back one two days later..cause it looked like ****!
09-05-2011, 06:29 AM
#1586
Honda-Tech Member
Thread Starter
Join Date: Dec 2003
Location: True Honda Enthusiast
Posts: 12,680
Likes: 0
Received 1 Like
on
1 Post
I just dont get why its so hard to make a replica part fit like the original... THERES ALREADY ONE TO WORK OFF OF! Its not like theyre making these things from scratch!
Eh, regardless Ive got a new project cooking, parts should start coming in shortly. Something Ive never seen done on an EP before, and addresses one of the biggest problems with this chassis
Eh, regardless Ive got a new project cooking, parts should start coming in shortly. Something Ive never seen done on an EP before, and addresses one of the biggest problems with this chassis
09-05-2011, 06:35 AM
#1587
 09-05-2011, 08:58 AM
#1588
Honda-Tech Member
Join Date: Dec 2006
Location: Dallas Texas
Posts: 989
Likes: 0
Received 0 Likes
on
0 Posts
I just dont get why its so hard to make a replica part fit like the original... THERES ALREADY ONE TO WORK OFF OF! Its not like theyre making these things from scratch!
Eh, regardless Ive got a new project cooking, parts should start coming in shortly. Something Ive never seen done on an EP before, and addresses one of the biggest problems with this chassis
Eh, regardless Ive got a new project cooking, parts should start coming in shortly. Something Ive never seen done on an EP before, and addresses one of the biggest problems with this chassis
Is this what you mentioned to me?
 09-05-2011, 07:49 PM
#1590
Honda-Tech Member
Join Date: Aug 2007
Location: Lightning Capital, FL.
Posts: 520
Likes: 0
Received 0 Likes
on
0 Posts
I know this might be digging up the grave, but -- loving how you did the black suede inserts! I'm working on doing some inserts on my EP3 right now as well, but with some red suede I bought at my local fabric store. I read the page you did the inserts on and you're definitely right about it being a pain.. Tucking in the fabric on the edges and with spray glue is a chore.. Issue i'm having is when I cut away the excess fabric to contour to the panel, it ends up fraying on the edges...
Any tips/advice for this? I'd much appreciate it!
BTW -- Love the build and your eye to detail. Subscribed!
Any tips/advice for this? I'd much appreciate it!
BTW -- Love the build and your eye to detail. Subscribed!
09-06-2011, 04:21 AM
#1591
Honda-Tech Member
Thread Starter
Join Date: Dec 2003
Location: True Honda Enthusiast
Posts: 12,680
Likes: 0
Received 1 Like
on
1 Post
Thanks for the props man. I actually didnt have a problem with fraying on the fabric I used, but some good advice is to NOT use spray adhesive... I used it when I did my recaro fabric inserts and it let go a week later. A buddy of mine also used it to do some black suede (got the material from me) in his car and it started coming loose only a few days later.
You should use this glue called fabri-tac. It comes in a clear squeezable bottle with a thin tip. Squeeze it on over the insert surface on the door one small area at a time, and spread it out with a small brush. Lay the fabric down where you spread it out, then apply the glue to the next section and keep going until the whole panel is covered.
You should use this glue called fabri-tac. It comes in a clear squeezable bottle with a thin tip. Squeeze it on over the insert surface on the door one small area at a time, and spread it out with a small brush. Lay the fabric down where you spread it out, then apply the glue to the next section and keep going until the whole panel is covered.
09-06-2011, 07:06 AM
#1593
Honda-Tech Member
Join Date: Aug 2007
Location: Lightning Capital, FL.
Posts: 520
Likes: 0
Received 0 Likes
on
0 Posts
Thanks for the props man. I actually didnt have a problem with fraying on the fabric I used, but some good advice is to NOT use spray adhesive... I used it when I did my recaro fabric inserts and it let go a week later. A buddy of mine also used it to do some black suede (got the material from me) in his car and it started coming loose only a few days later.
You should use this glue called fabri-tac. It comes in a clear squeezable bottle with a thin tip. Squeeze it on over the insert surface on the door one small area at a time, and spread it out with a small brush. Lay the fabric down where you spread it out, then apply the glue to the next section and keep going until the whole panel is covered.
You should use this glue called fabri-tac. It comes in a clear squeezable bottle with a thin tip. Squeeze it on over the insert surface on the door one small area at a time, and spread it out with a small brush. Lay the fabric down where you spread it out, then apply the glue to the next section and keep going until the whole panel is covered.
Cool thanks a lot for the tips! I was using a spray adhesive, but I am going to go back and do it all over again. With so many adhesives out there it's hard to say which one will work well and be durable through interior heat temperatures when the car is sitting and etc. I will be updating my build thread over on the "other forum", lol.
 09-06-2011, 08:37 PM
#1595
Honda-Tech Member
Join Date: Dec 2006
Location: Dallas Texas
Posts: 989
Likes: 0
Received 0 Likes
on
0 Posts
Gtr eh....I think I'd rather have the EP3
Or hold out for the new NSX >: )
09-07-2011, 05:49 AM
#1596
Flattery Will Get You Everywhere
Join Date: Jan 2009
Location: dayton ohio
Posts: 1,557
Likes: 0
Received 0 Likes
on
0 Posts
09-07-2011, 06:14 PM
#1597
Honda-Tech Member
Thread Starter
Join Date: Dec 2003
Location: True Honda Enthusiast
Posts: 12,680
Likes: 0
Received 1 Like
on
1 Post
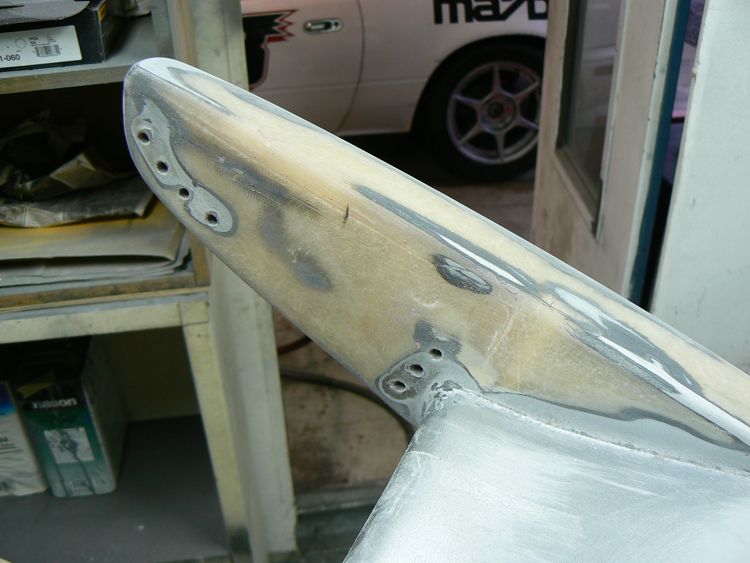
Hey guys, heres what Ive been working on over the weekend... Ive got about 7 hours into it now and Im still blocking with 80 and 180 grit. Once all the high spots are taken down I can lay filler where need be and then block again to fill the low spots.
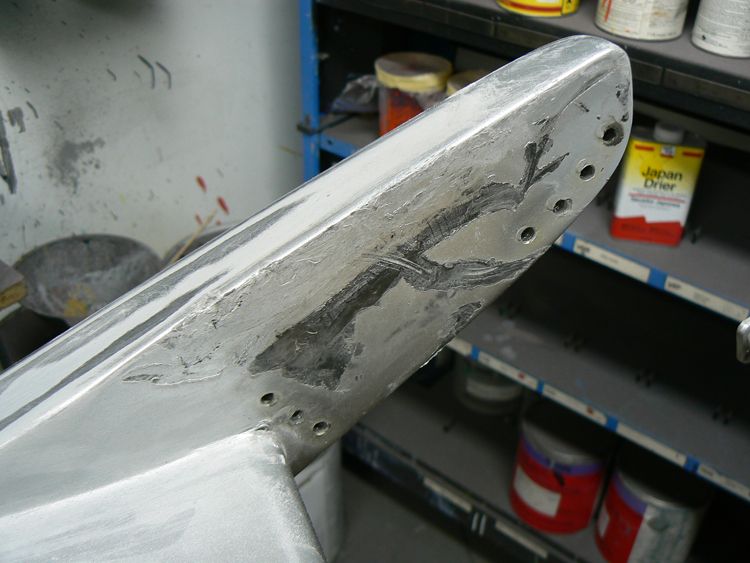
So after I got the mating surface to the hatch close to where it needs to be I moved to the rest of the wing, starting with gouged up blade mounting area...
Here is the right side before blocking...
.
.
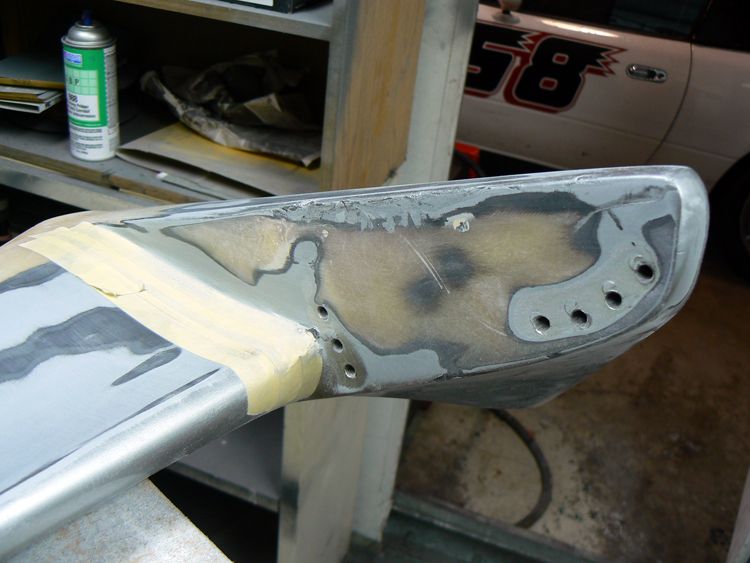
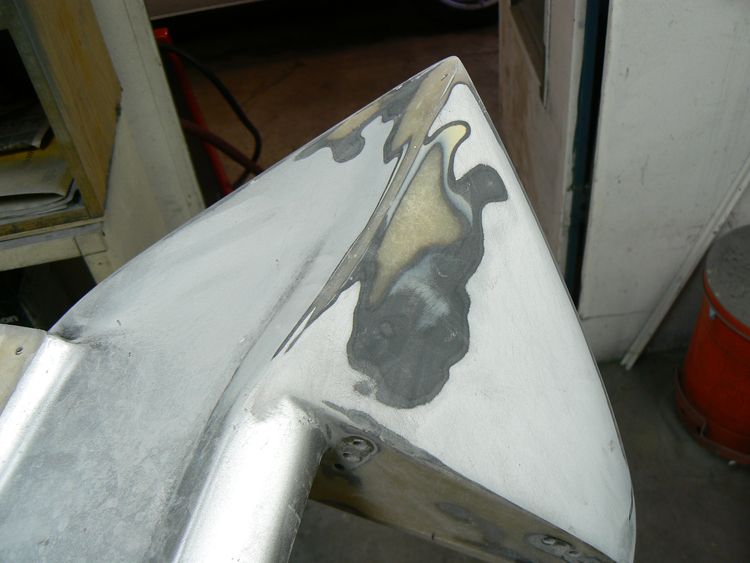
Partially done (notice the tape to protect the adjacent surface from getting messed up while blocking with 80 grit)
.
.
And the left side all done...
.
.
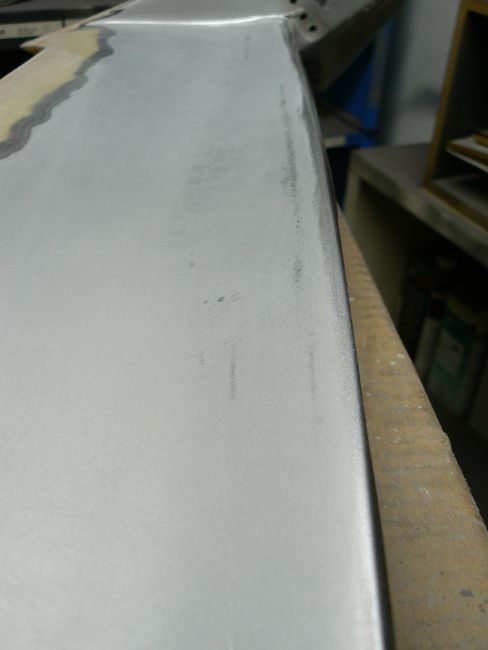
Here is the left end blocked with 180 grit ... so many high spots!

.
.
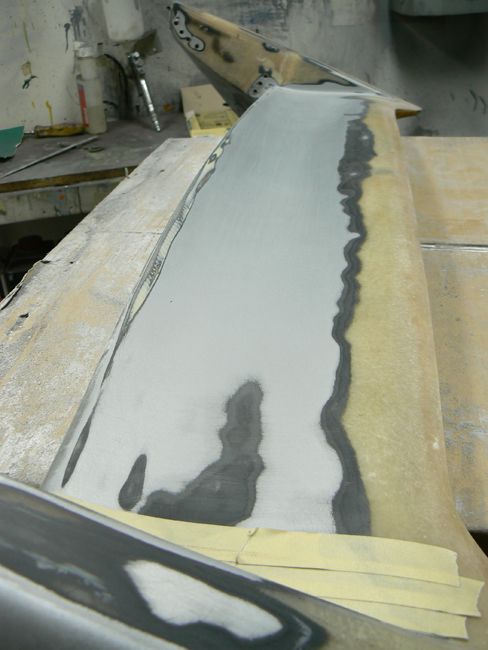
Here is the center of the wing after a light pass with 180 grit to pick out the low spots and uneven surfaces... You can see there are creases in the surface where the paper didnt come in contact with the paint
.
.
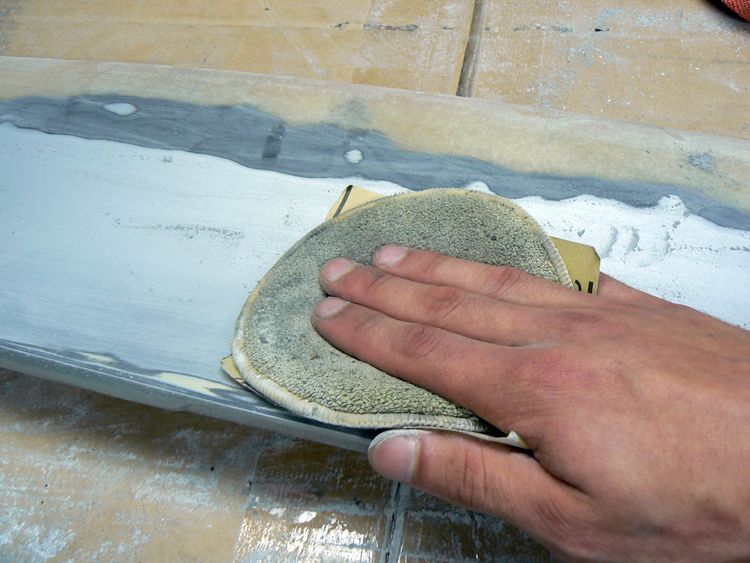
I used a waxing pad behind the paper for the contoured areas where i couldnt use the block... It helps alot to even out the pressure for a more even finish.
.
.
Heres the center all done in 180
So after I got the mating surface to the hatch close to where it needs to be I moved to the rest of the wing, starting with gouged up blade mounting area...
Here is the right side before blocking...
.
.
Partially done (notice the tape to protect the adjacent surface from getting messed up while blocking with 80 grit)
.
.
And the left side all done...
.
.
Here is the left end blocked with 180 grit ... so many high spots!
.
.
Here is the center of the wing after a light pass with 180 grit to pick out the low spots and uneven surfaces... You can see there are creases in the surface where the paper didnt come in contact with the paint
.
.
I used a waxing pad behind the paper for the contoured areas where i couldnt use the block... It helps alot to even out the pressure for a more even finish.
.
.
Heres the center all done in 180