
How to install Ground Controls with Koni Yellows in a 88-91 CRX
 03-25-2013, 06:38 AM
#1
Honda-Tech Member
Thread Starter
iTrader: (2)
Join Date: Oct 2010
Posts: 1,080
Likes: 0
Received 0 Likes
on
0 Posts
Well here is my update that is going to double as a how to on the installation and building of Koni Sports (Yellows) and Ground Controls with and without aftermarket top hats...
This is my first attempt at a write up and I am doing it because these things do NOT come with directions lol.
***Koni Sport Yellows and Ground Control Installation write up for 88-91 CRX***
Step 1 - Get all of your parts together from all of the different boxes and have them readily available for the install.
Step 2 - Remove old shock and strut and spring assembly from the car. You will need the top hats if you didnt buy new ones.
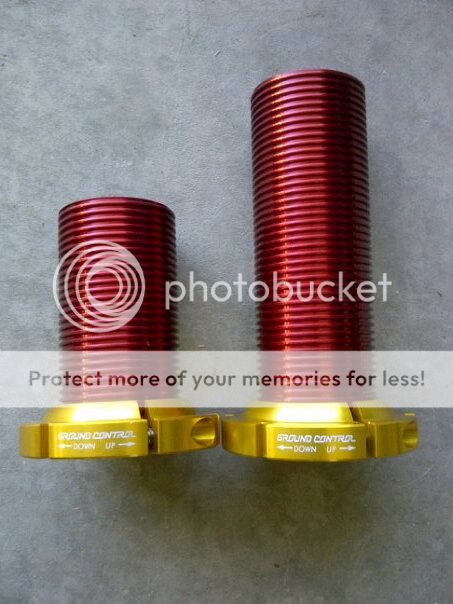
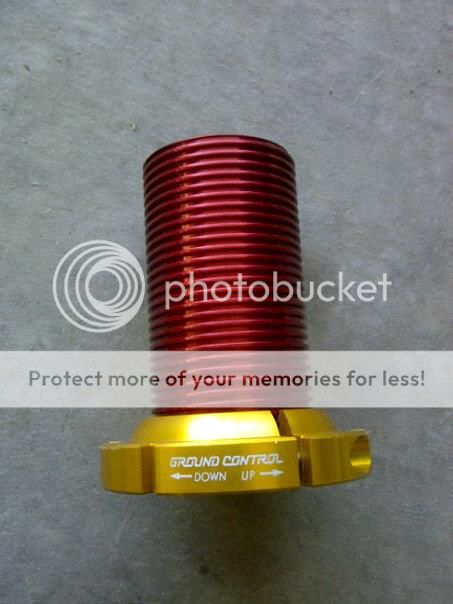
Step 3 - Look at your ground control sleeves. One is taller than the other. The tall ones goes on the rear end of the car. The short ones go on the front...
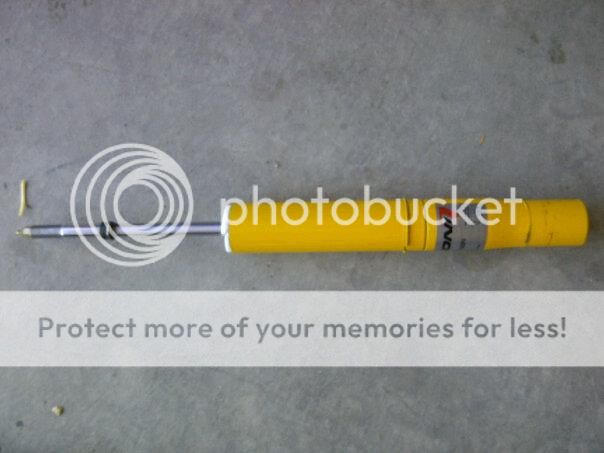
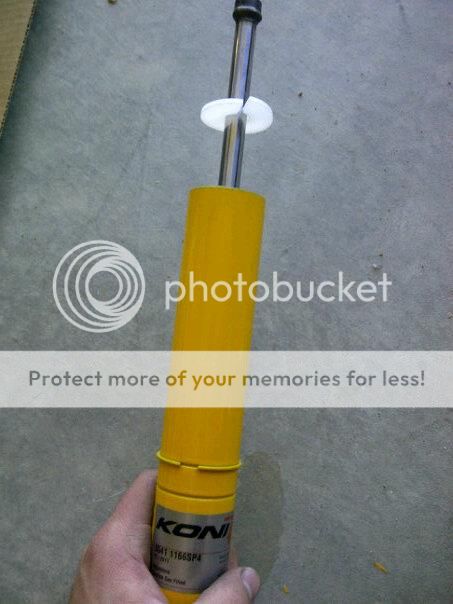
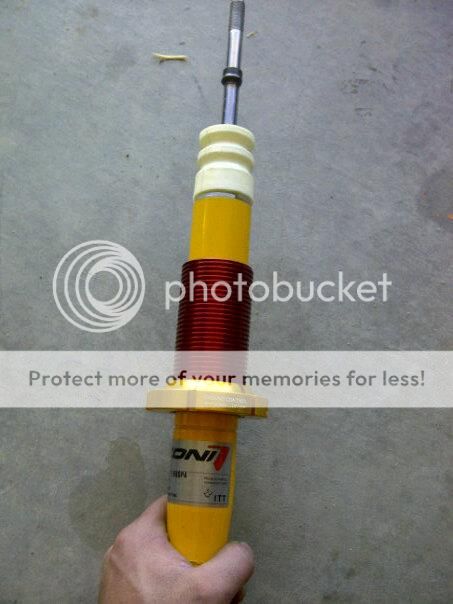
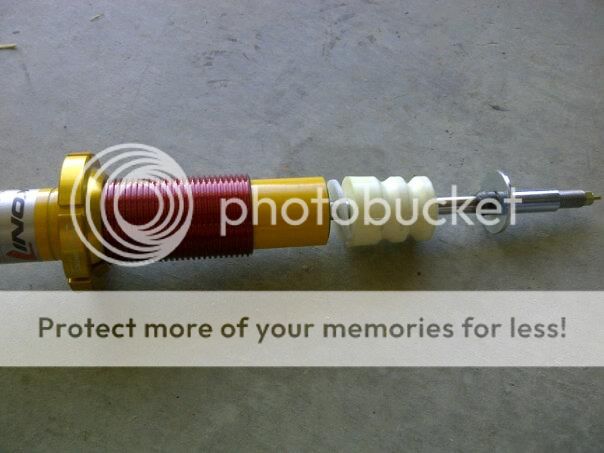
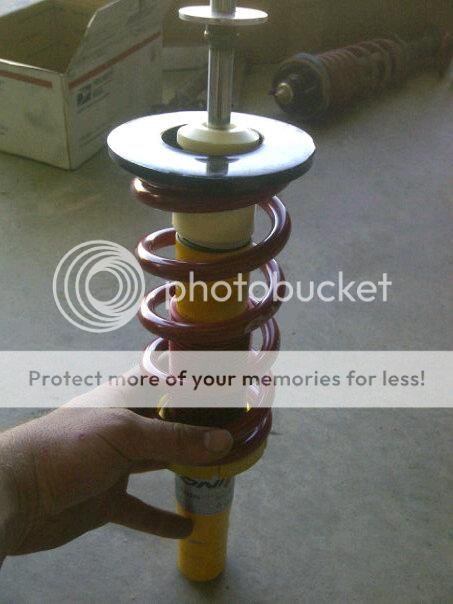
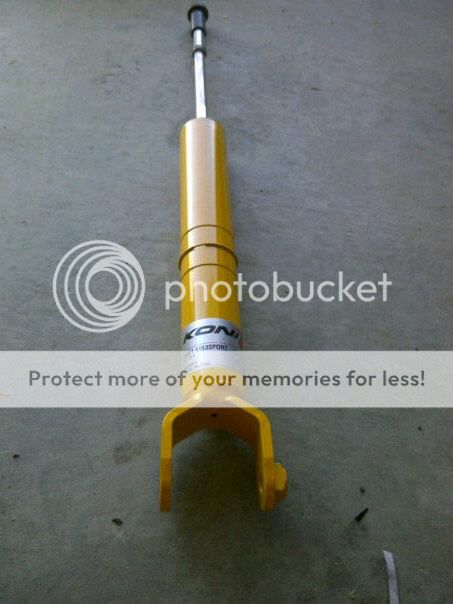
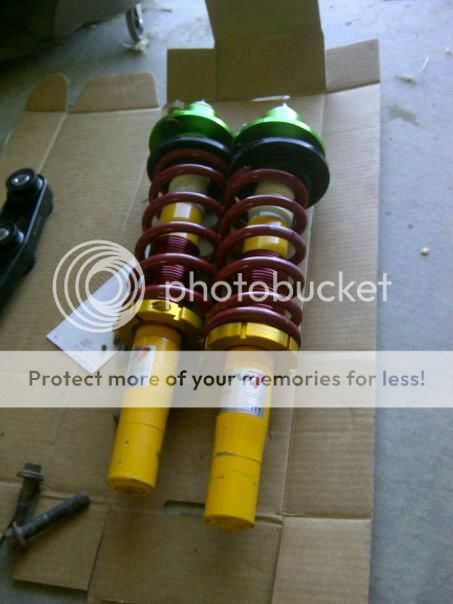
Step 4 - Grab the front shock. It is the one that is just round at the bottom. Lay out all of the things you will need. Like this. You need the springs as well I didnt have it in the picture.
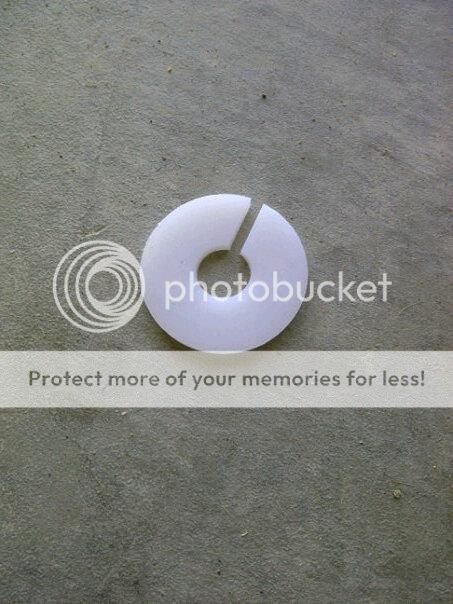
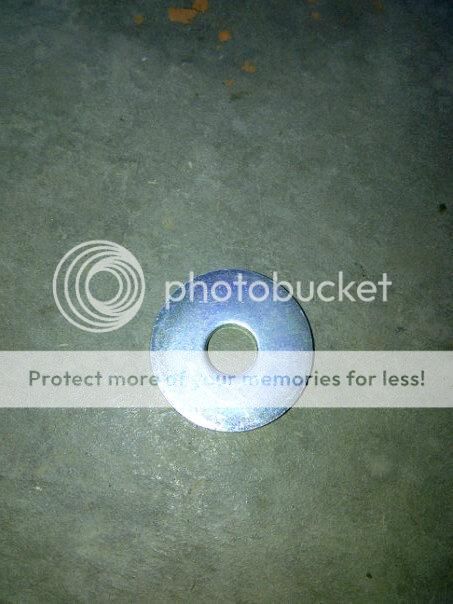
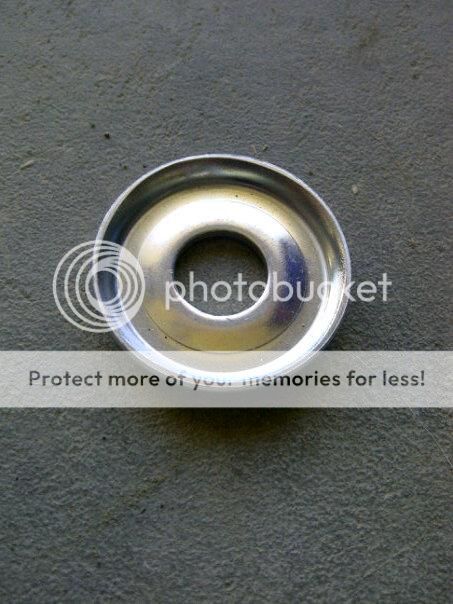
Step 5 - Grab the shock and install the plastic washer. It just pushes on.
This shock.
This washer.
Installed.
Step 6 - Grab the short ground control sleeve and slide it on.
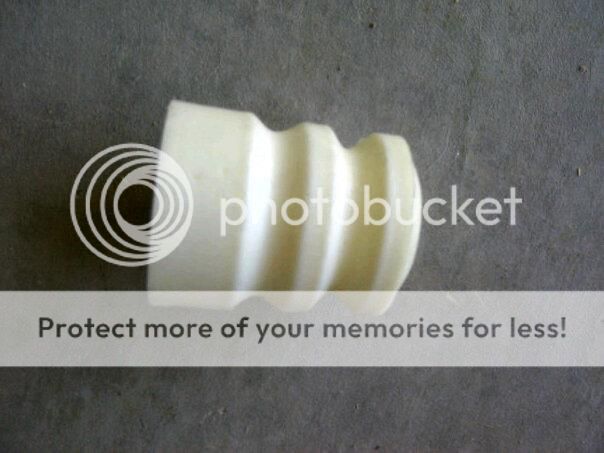
Step 7 - Find the bump stop and grab it and put it on.
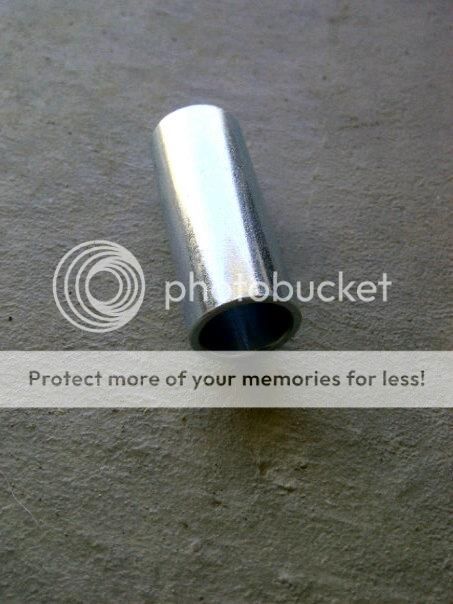
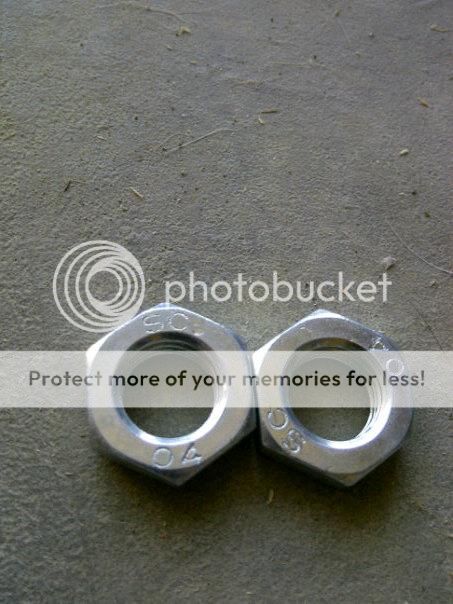
Step 8 - Find the washer and the metal sleeve put them on. The washer goes on first. These came with your Konis...
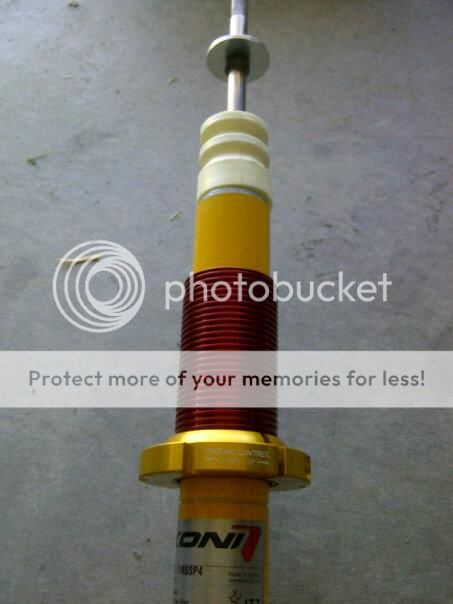
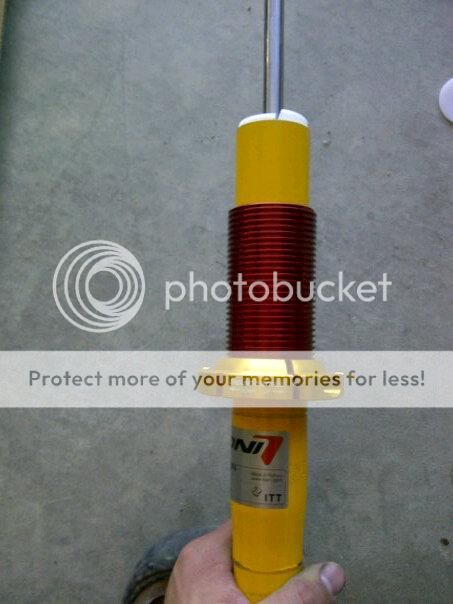
This is what you have so far.
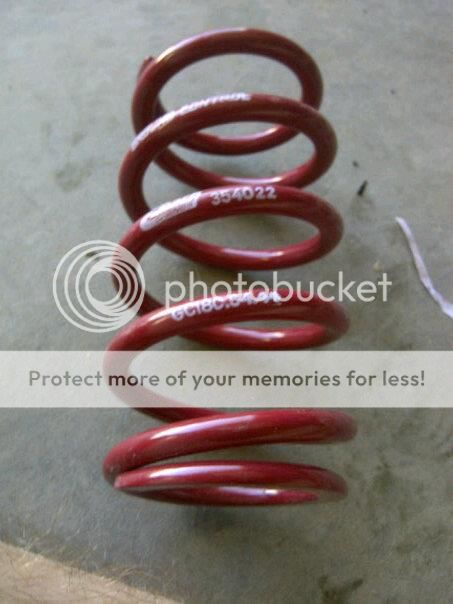
Step 9 - Grab whatever spring you are putting on the front. I am just running the recomended from Ground Control off the shelf rate for the front at 350.
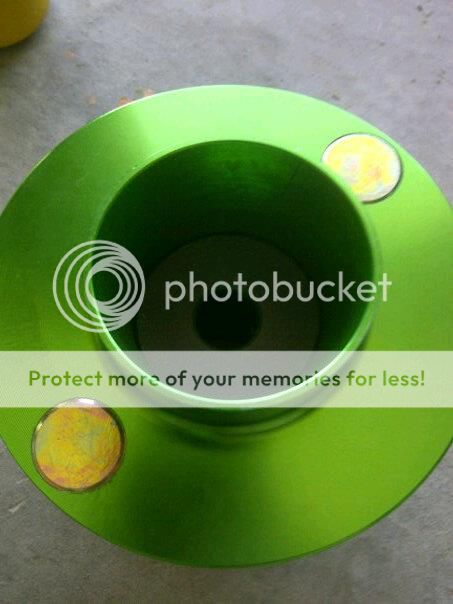
Step 10 - Find your top hat. - This is where things change if you bought aftermarket extended ones.
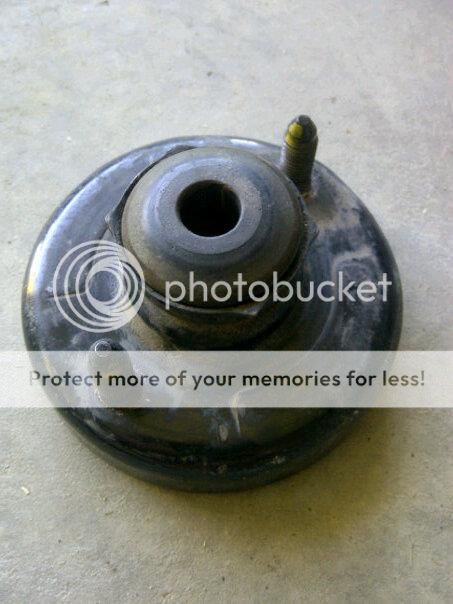
If you are using the stock top hat remove it from the old front spring and shock assembly. Inspect the rubber bushings on it to make sure they are alright too.
Stock Top Hat
Step 10a - This is for you guys with new extended top hats. Take your extended top hat out and install the included bushing into the top.
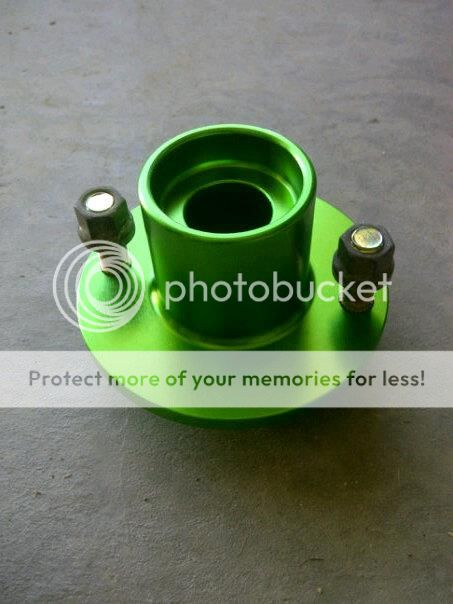
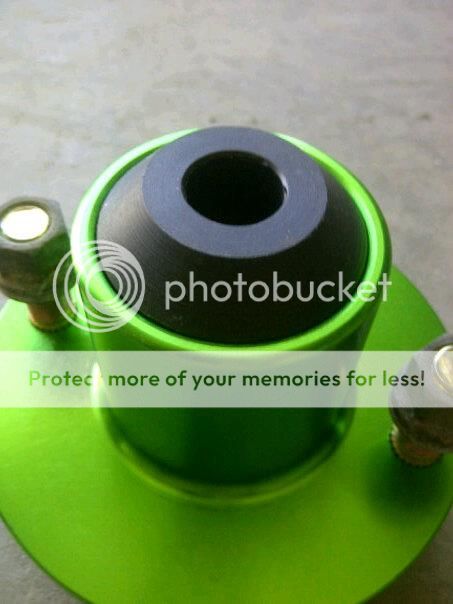
Step 10b - Install a second bushing into the bottom of the top hat. The smaller side goes down. So it should look like an upside down ice cream cone.
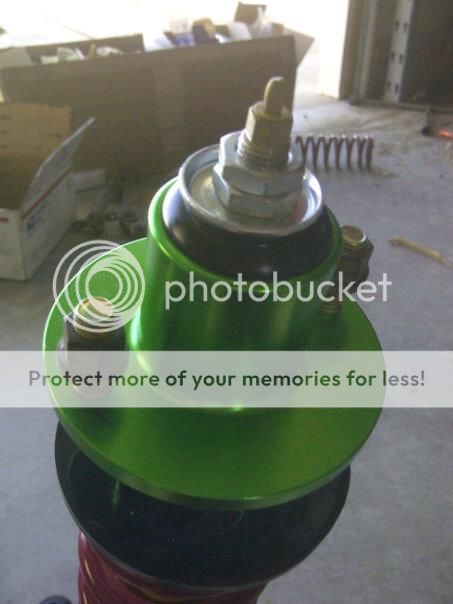
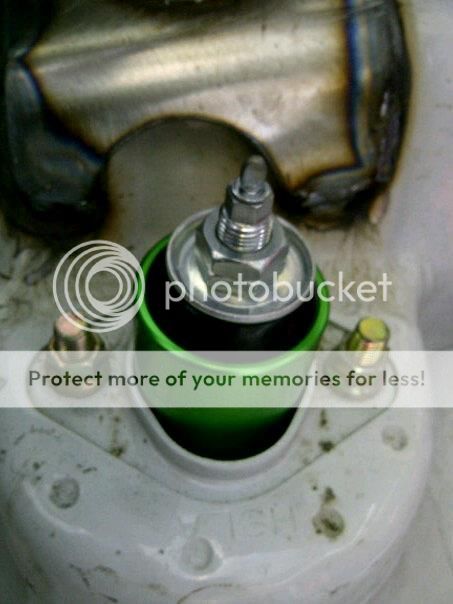
Step 11 - Put the top hat on!
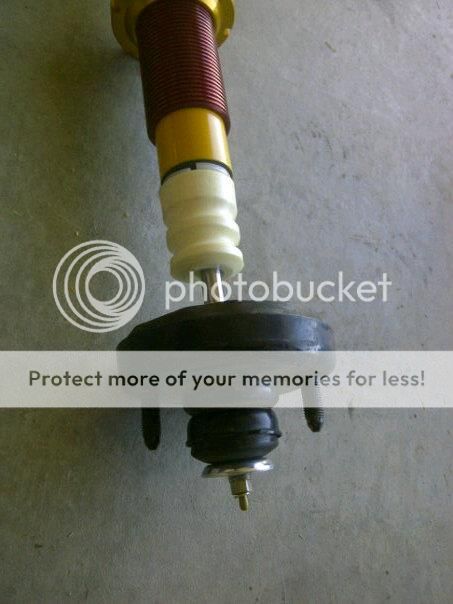
Step 11a - if you have the extended top hats put the new rubber piece from GC on so it fits your top hat.
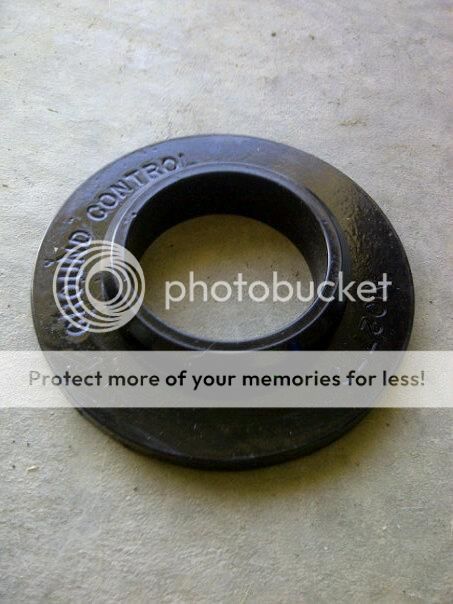
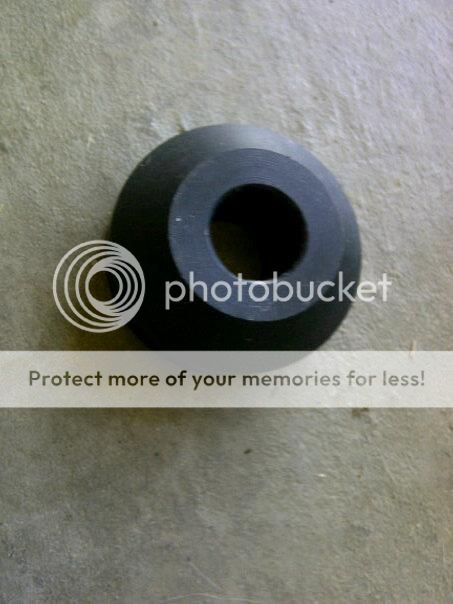
Step 12 - Find this and install it facing up so it makes a bowl.
Step 13 - Add these two nuts on one at a time! The second will lock them in place.
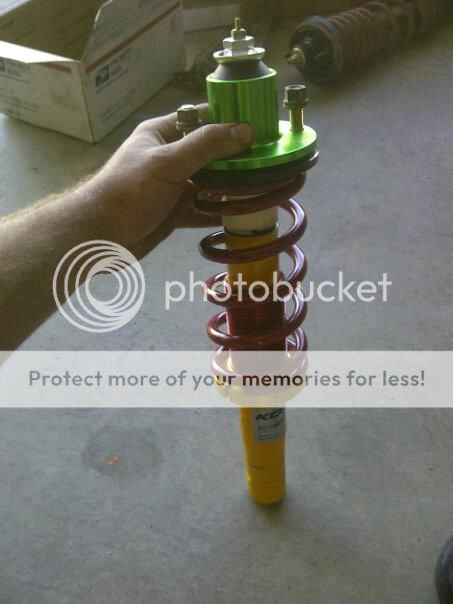
Step 14 - Double check they look like this.
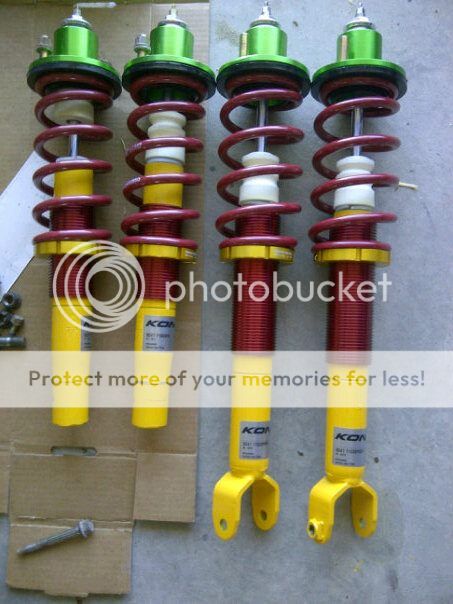
Repeat the process using the rear shocks now, but use these pieces instead.
Rear shocks look like this.
Use the taller ground control sleeve. This one.

Use this spring instead.
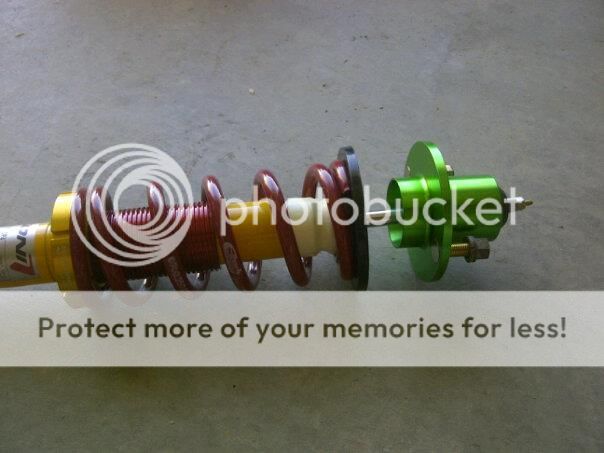
annnnd you should end up with them looking like this!
PM me if you have questions...
Very Low


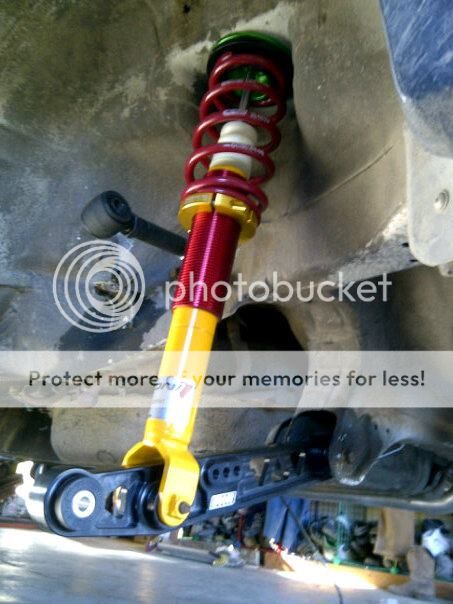
Setup to drive...


Final shots! After driving a few hundred miles and letting them settle... Dont mind the color change haha...


This is my first attempt at a write up and I am doing it because these things do NOT come with directions lol.
***Koni Sport Yellows and Ground Control Installation write up for 88-91 CRX***
Step 1 - Get all of your parts together from all of the different boxes and have them readily available for the install.
Step 2 - Remove old shock and strut and spring assembly from the car. You will need the top hats if you didnt buy new ones.
Step 3 - Look at your ground control sleeves. One is taller than the other. The tall ones goes on the rear end of the car. The short ones go on the front...
Step 4 - Grab the front shock. It is the one that is just round at the bottom. Lay out all of the things you will need. Like this. You need the springs as well I didnt have it in the picture.
Step 5 - Grab the shock and install the plastic washer. It just pushes on.
This shock.
This washer.
Installed.
Step 6 - Grab the short ground control sleeve and slide it on.
Step 7 - Find the bump stop and grab it and put it on.
Step 8 - Find the washer and the metal sleeve put them on. The washer goes on first. These came with your Konis...
This is what you have so far.
Step 9 - Grab whatever spring you are putting on the front. I am just running the recomended from Ground Control off the shelf rate for the front at 350.
Step 10 - Find your top hat. - This is where things change if you bought aftermarket extended ones.
If you are using the stock top hat remove it from the old front spring and shock assembly. Inspect the rubber bushings on it to make sure they are alright too.
Stock Top Hat
Step 10a - This is for you guys with new extended top hats. Take your extended top hat out and install the included bushing into the top.
Step 10b - Install a second bushing into the bottom of the top hat. The smaller side goes down. So it should look like an upside down ice cream cone.
Step 11 - Put the top hat on!
Step 11a - if you have the extended top hats put the new rubber piece from GC on so it fits your top hat.
Step 12 - Find this and install it facing up so it makes a bowl.
Step 13 - Add these two nuts on one at a time! The second will lock them in place.
Step 14 - Double check they look like this.
Repeat the process using the rear shocks now, but use these pieces instead.
Rear shocks look like this.
Use the taller ground control sleeve. This one.
Use this spring instead.
annnnd you should end up with them looking like this!
PM me if you have questions...
Very Low
Setup to drive...
Final shots! After driving a few hundred miles and letting them settle... Dont mind the color change haha...
 03-25-2013, 06:55 PM
#2
Honda-Tech Member

Join Date: Oct 2011
Posts: 62
Likes: 0
Received 0 Likes
on
0 Posts
I did the koni's and GC's but when I did mine someone put coilovers on it before I did
So a lot of my stuff was missing
My question is what goes in between the spring and top hat on the front?
Mine squeaks for some reason
So a lot of my stuff was missing
My question is what goes in between the spring and top hat on the front?
Mine squeaks for some reason
03-25-2013, 07:21 PM
#3
Honda-Tech Member
The round black thing. Upper spring perch insulator. You can order oem for $15 each, or like $5 each aftermarket (MOOG).
03-28-2013, 10:15 AM
#5
Honda-Tech Member
Join Date: Oct 2011
Posts: 7
Likes: 0
Received 0 Likes
on
0 Posts
http://www.koni-na.com/pdf/1150-5006-1.pdf
The Ground Control instructions for '92-'00 Civic/Del Sol and '94-'01 Integra have a note that says "Remove Stock Upper Spring Perch". i called Ground Control and they confirmed that the note refers to the rubber spring perch insulator. But it might be worth it to use the insulator to quiet things down for a slight loss of performance.
Last edited by Del Solid; 04-02-2013 at 07:46 PM.
Trending Topics
06-11-2023, 02:13 PM
#9
Honda-Tech Member
You are an absolute legend for posting this, I have been trying to just figure out how to do this exact setup, and 2 hours later, I find this post and realize I'm missing my bump stops and was going to put it together without the plastic washer and added the bottom spring perch when I didn't need to. THANKS SO MUCH FOR TALING THE TIME TO WRITE THIS UP AND KEEPING THE PICS ACTIVE!!

Thread
Thread Starter
Forum
Replies
Last Post
mt-fly-boy-25
Honda CRX / EF Civic (1988 - 1991)
15
03-25-2013 06:39 AM
mtflyboy25
Suspension & Brakes
4
03-14-2013 03:15 AM
DIYMIKE
Suspension & Brakes
1
02-02-2008 10:17 PM
rasta420
Honda CRX / EF Civic (1988 - 1991)
20
01-25-2004 11:40 PM