
DIY Internal Engine Coatings, First Attempt, Check it out................
 05-01-2007, 07:31 PM
#1
Honda-Tech Member
Thread Starter
I've been wanting to try this for a while. I had pretty good luck with DIY exhaust coatings ( https://honda-tech.com/zerothread?id=1608324 ), so I figured I'd give it a shot. I wanted to do a ceramic piston top coating and dry film lubricant skirt coating. I figured I'd do the bearings as well.
Note, this is the first time that I've tried this, so if I fucked up, well that's to be expected. If you know of anything that I could do differently to improve the process, then please leave some feedback.
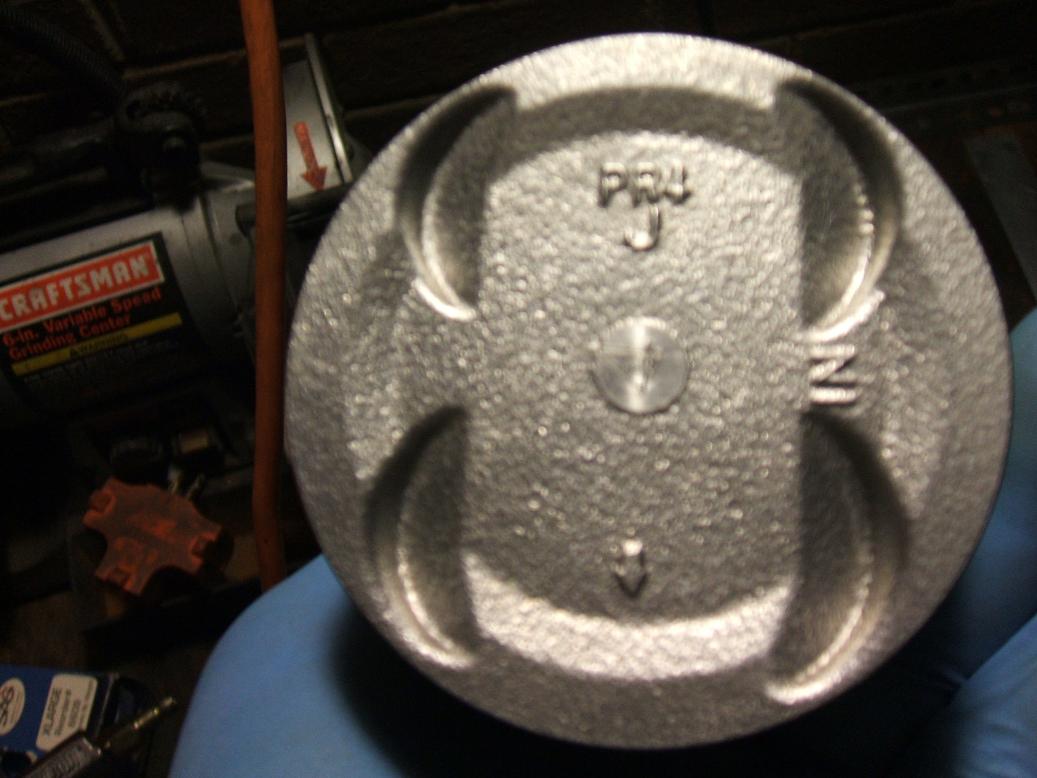
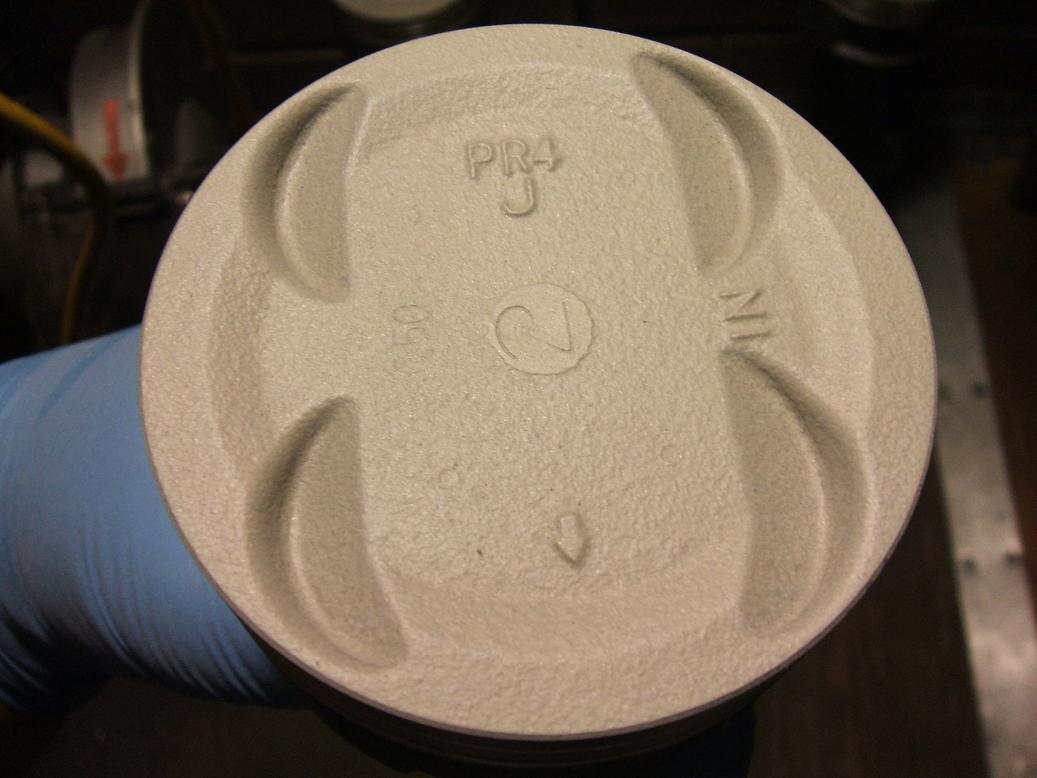
First up is the Victims, a set of new 81.5mm Nippon Power PR4 knockoff pistons that I got for a budget B16 turbo build and some bearings (I decided not to do my new $1000 custom Wisecos ):
):

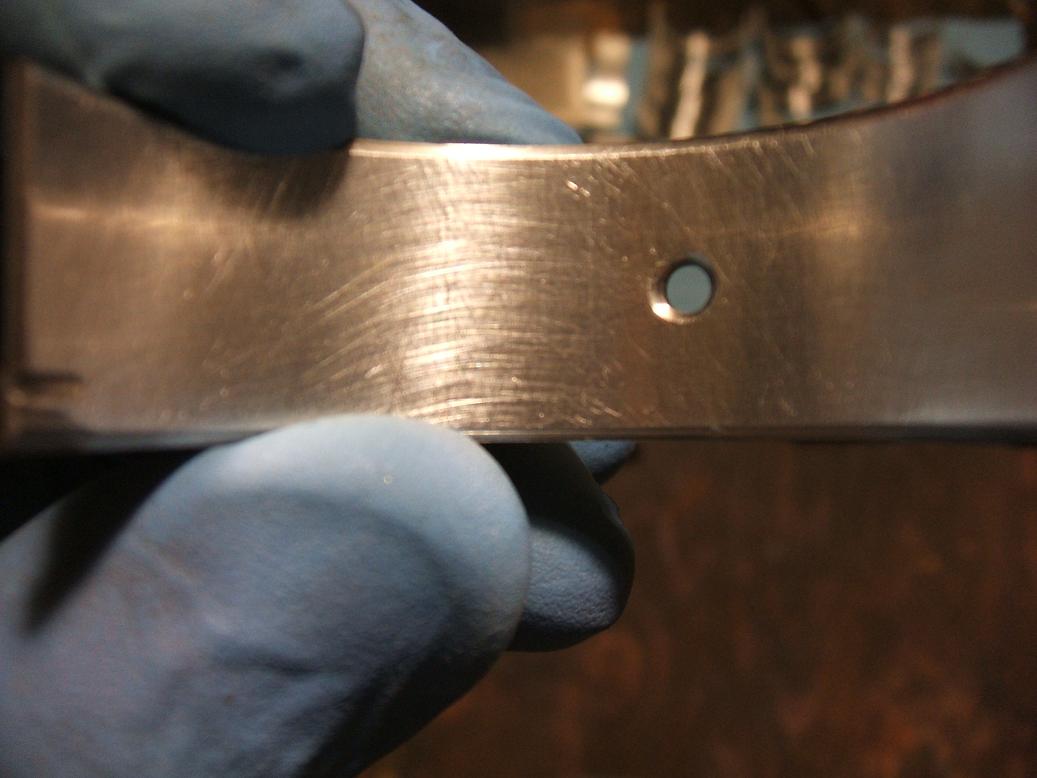
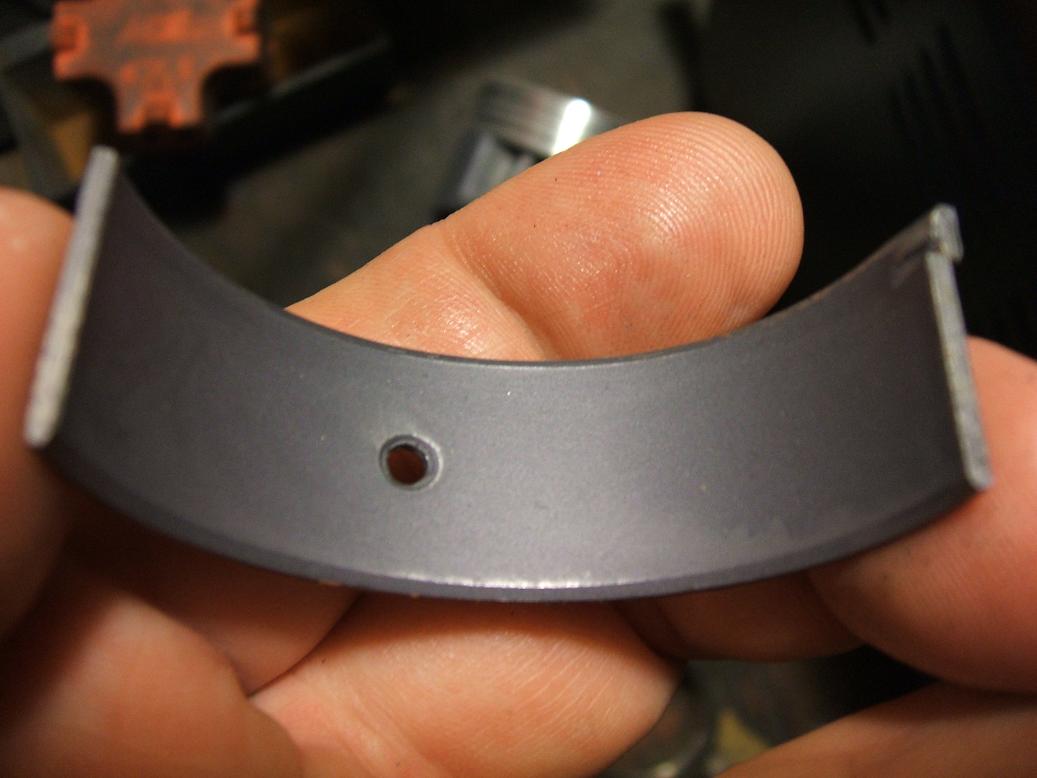
The directions say to sandblast the surface to be coated, and that is essential for exhaust coating, but I really can't see sandblasting my bearings or my pistons, so I cleaned them and roughed up the surface a bit with some steel wool and brake cleaner, then toweled them dry and blew out all the little bits of steel wool with compressed air. Here's the surface of a bearing and the top of the piston after cleaning:
Here's the pistons all lined up and ready for me to coat:

My weapon of choice, a $9.00 airbrush, great for applying a very thin coating:

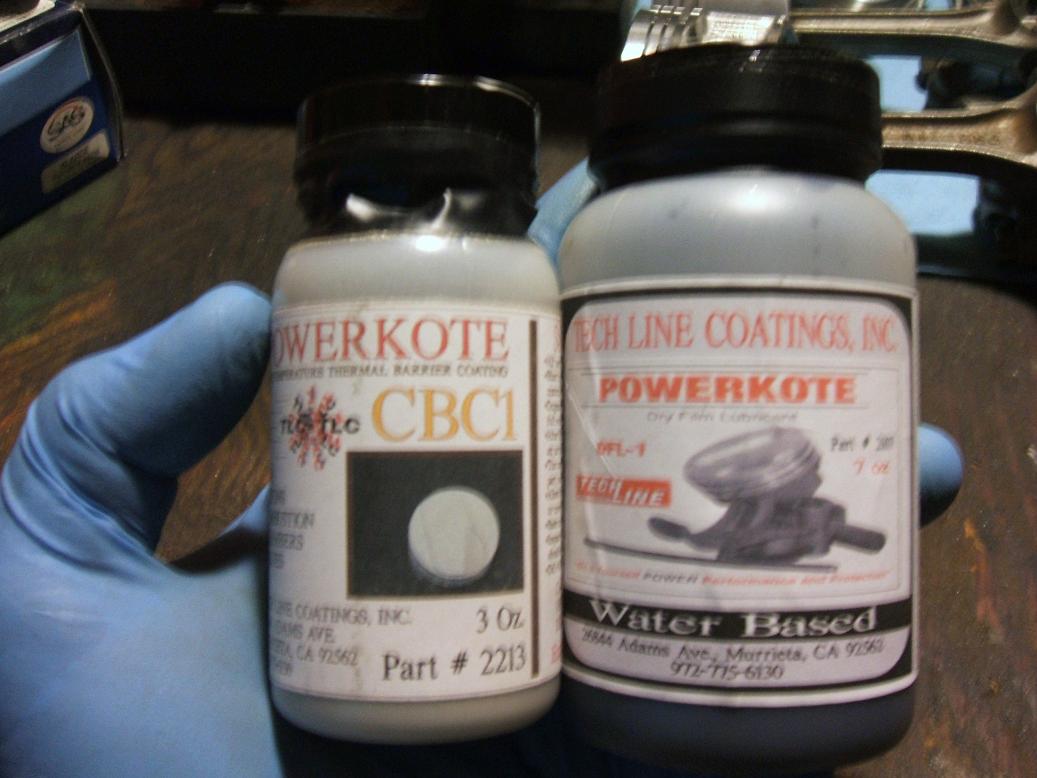
And the ammunition, Tech Line DFL-1 Dry Film Lubricant and Tech Line CBC-1 Thermal Barrier Coating. I can probably coat a dozen sets of internals with this much coating, a little bit goes a long way:
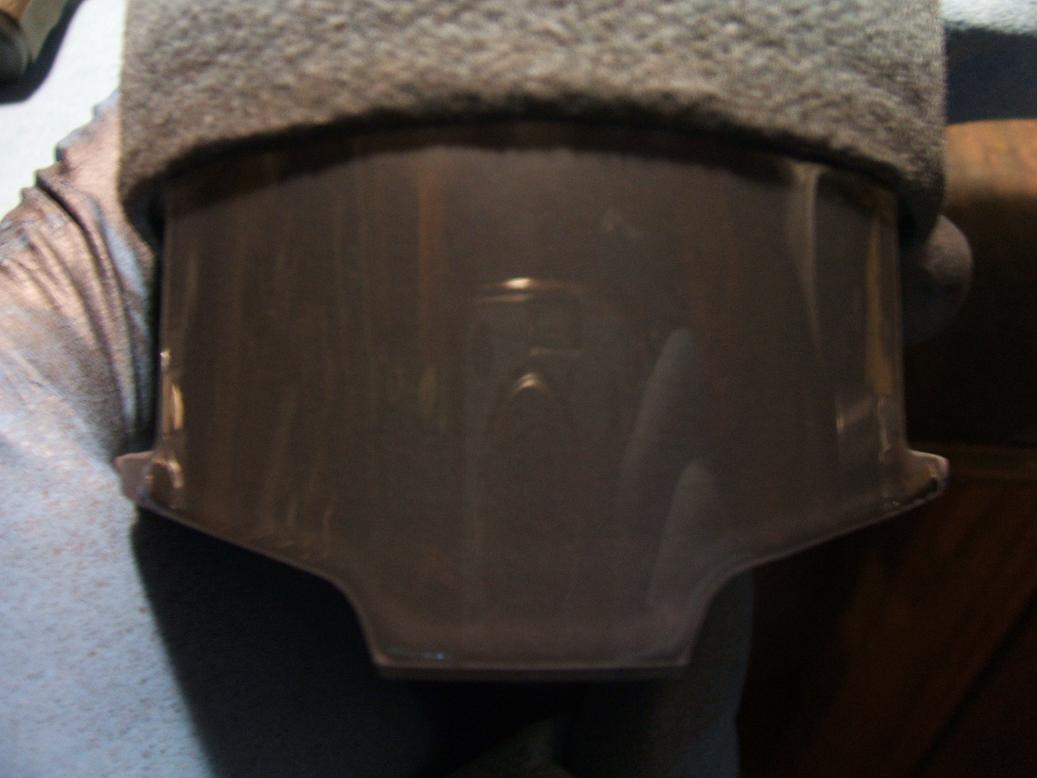
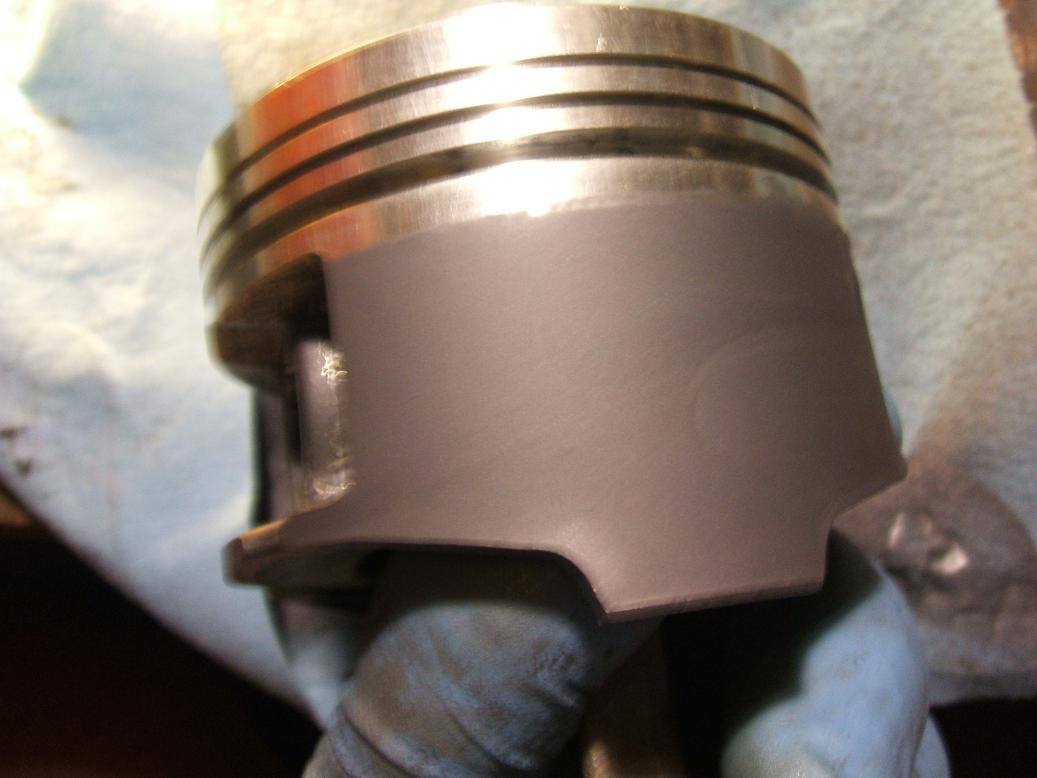
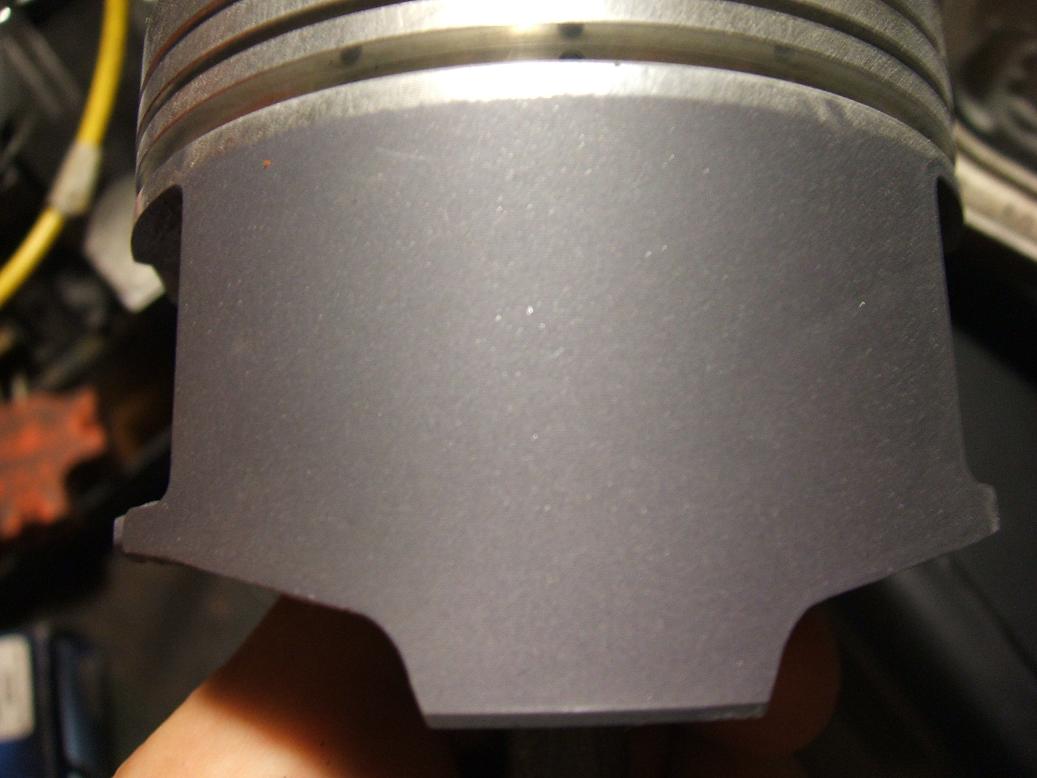
The dry film lube is really thin, so it's really runny. I had problems getting complete coverage without it pooling up near the bottom of the skirt. I think the fix for this is to get it on there quickly and set the piston at an angle so that the excess runs to a spot on the piston where I can just trim the drop where it pools up with a knife. I had a few spots near the edge of the skirt where I had to shave it a bit, but nothing major. Here's a shot of it wet on the skirt. The towel wrapped around the top is to mask off the ring grooves:
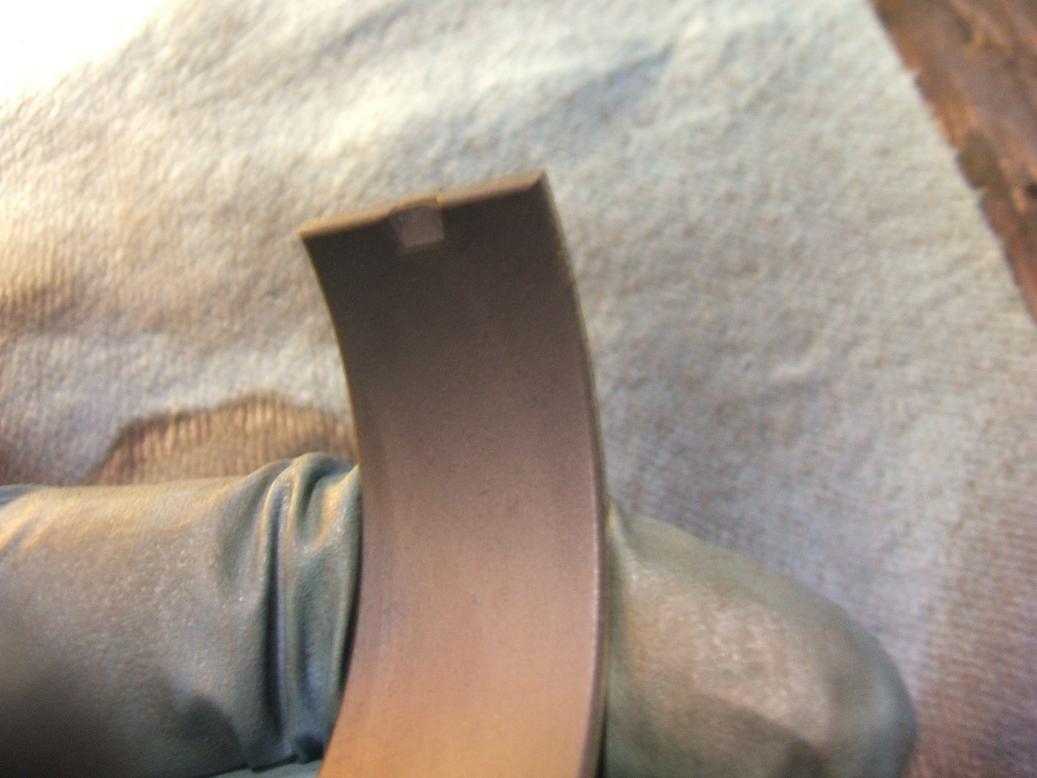
It looks really thick going on, but it quickly dries to a very thin layer. The coating also dries so quickly that it likes to foul the airbrush nozzle, causing the spray to be spotty. I found that if I wiped the nozzle frequently with a towel it kept it clear and kept the spray pattern uniform. Here's some pics of a skirt and bearing, coated and dried, but not yet baked. If you look closely at the bearing surface, then you can see some little spots where the nozzle was getting a bit fouled. This one was done before I figured out that I had to wipe the nozzle frequently:
Because the stuff is so runny, I ended up just spraying too much on the bearings and setting them on a towel upside down so the excess could run off. This stuff requires moderation and patience to get right, unfortunately I don't have any moderation or patience:
The piston top coating was much easier to deal with, it's a lot thicker than the skirt coating. It was hard to spray evenly and it took me a couple of pistons before I figured out that I needed to start at the edge of the piston and save the middle for last, otherwise you get way too much coating on the piston. Even so, I put this stuff on too thick, it was just so easy to apply after the runny coating that I went a little nuts with it. Here's the top of a coated piston, dried but not baked:
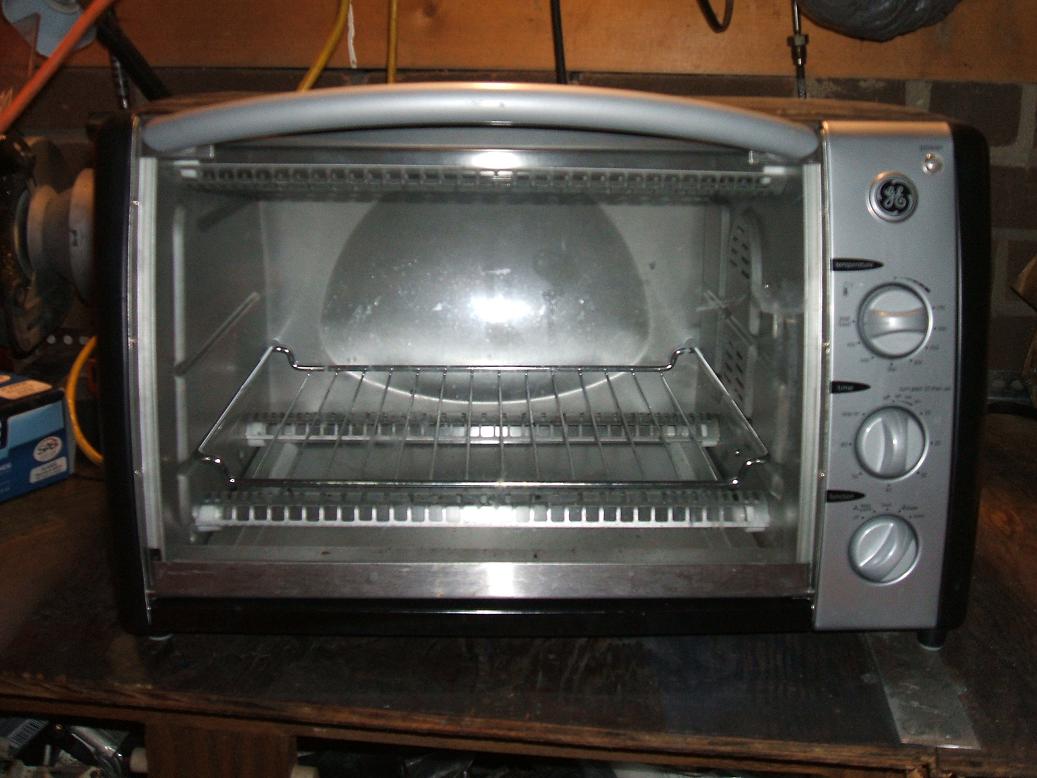
It's time for the oven, I used a $29 Walmart counter-top convection oven. The coatings need to cure at >300 degrees for one hour, and it should do the job. Both coatings are water based, so technically I should be able to bake them in my food oven, but I feed my kids stuff from that oven so I coughed up the $29 just to be safe:
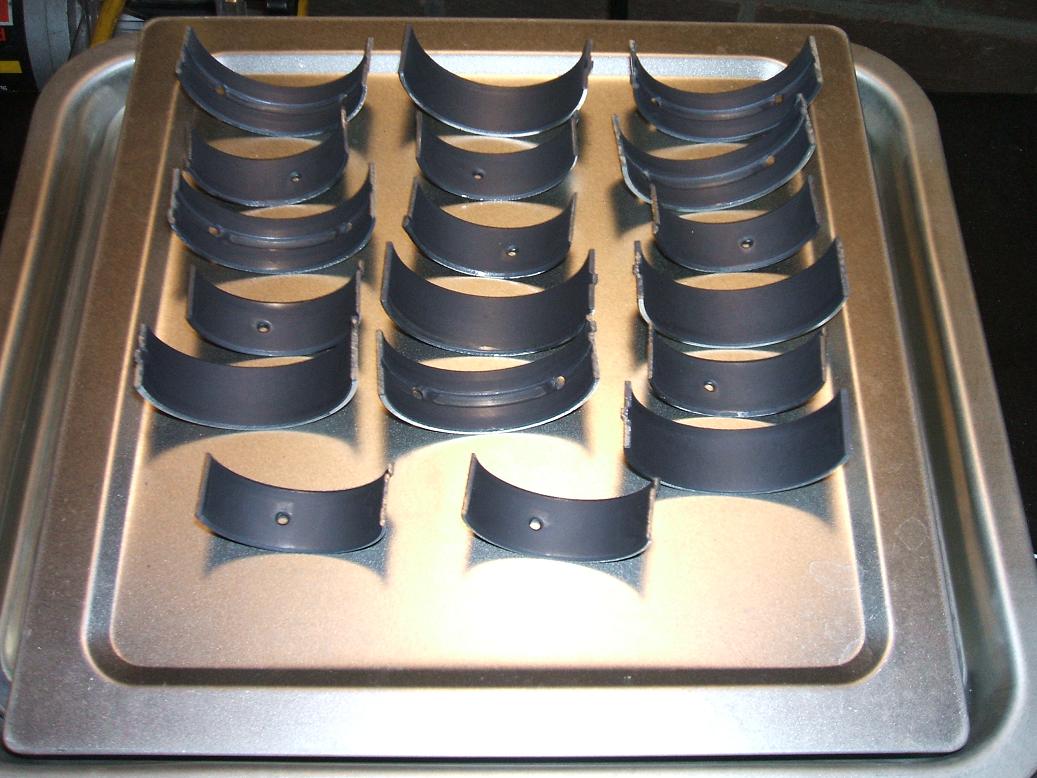
Pistons and bearings ready for baking:

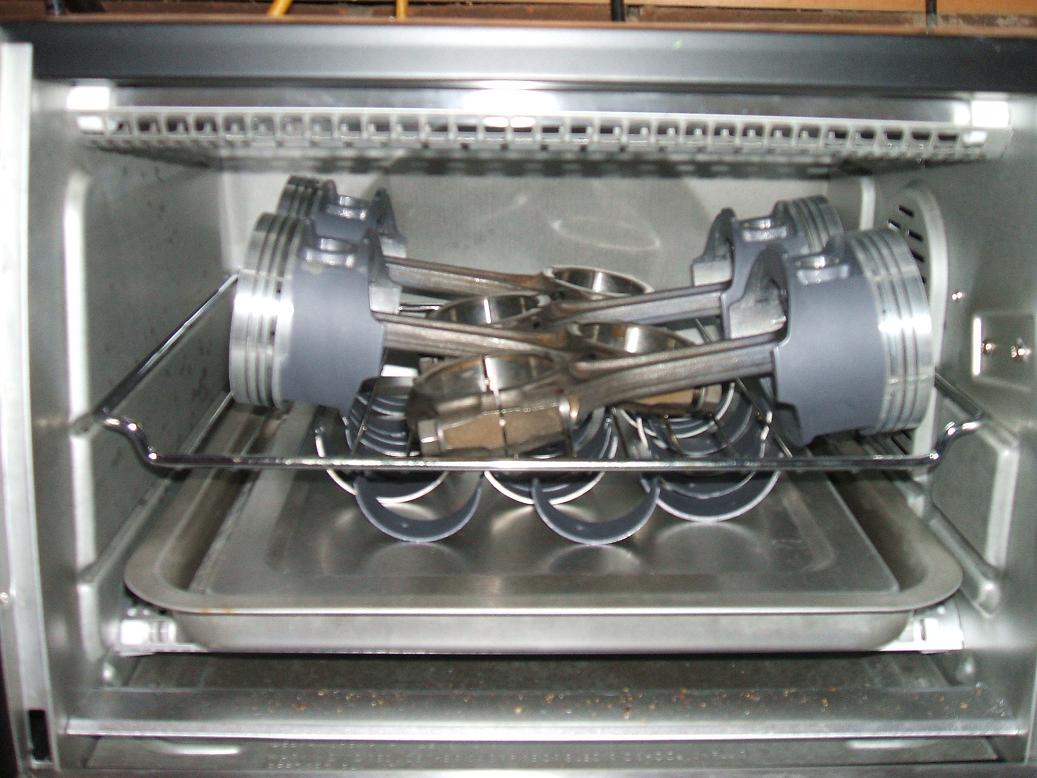
Everything fit in it really well:
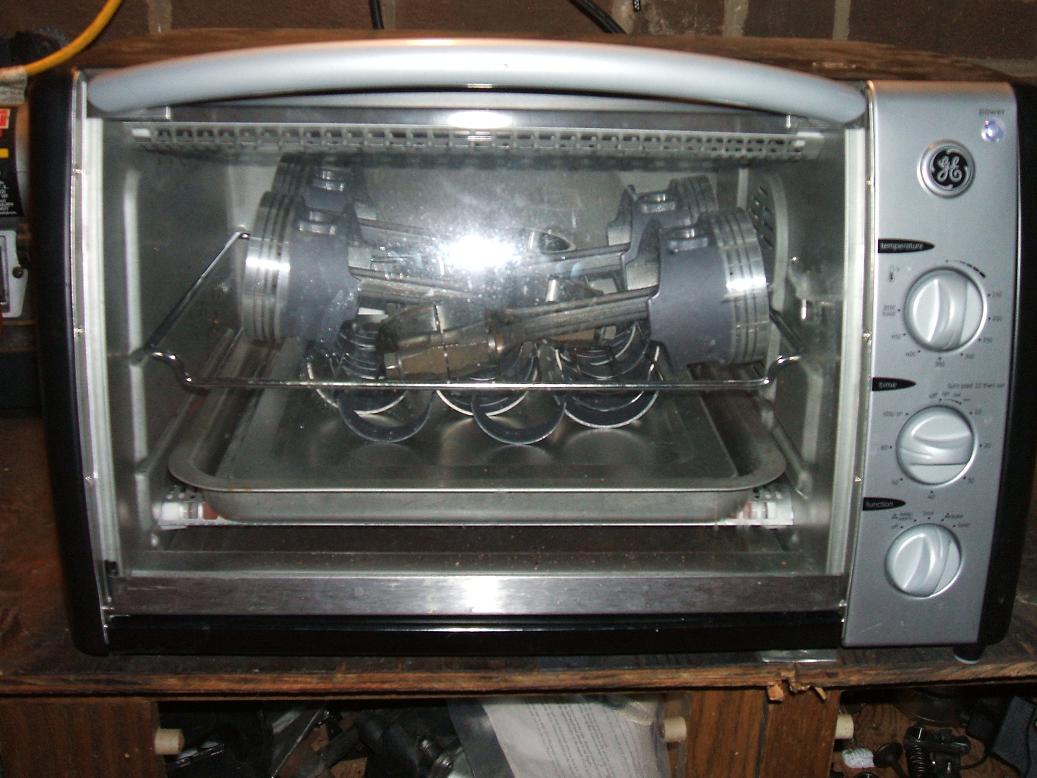
Baking at 350 degrees for a bit over an hour:
And the results, The bearings and piston skirts came out really nice. The coating baked in to where I could see the machining marks on the skirts and surface scratches on the bearings from the steel wool (It's hard to see in the pictures, but I had to drop the resolution on them or this thread would take an hour to load). The directions say that this doesn't add anything significant to the dimension of the parts, and it looks like that might be true. I don't have a bearing micrometer, I'll have to go see JDogg and get him to check these out. The clearances were correct before I coated them so I'll have to see if they are still right:
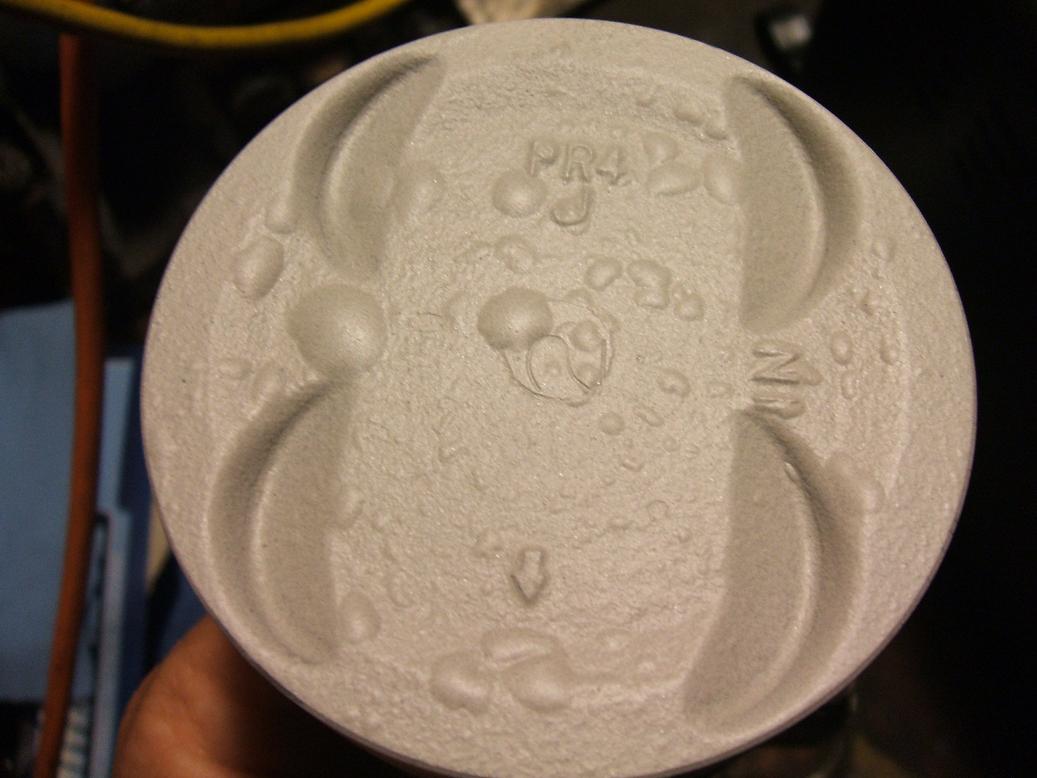
And now for the bad news, I fucked up the top coating. I think that I just put it on way too thick, either that or I need to do better surface prep, but one piston came out almost decent, so I think the fault was in my application, especially since I thought at the time I was coating these that I was putting way too much on them. I'll put these on the wire wheel and try it again another time. Here's pics of the best and worst pistons:

Note, this is the first time that I've tried this, so if I fucked up, well that's to be expected. If you know of anything that I could do differently to improve the process, then please leave some feedback.
First up is the Victims, a set of new 81.5mm Nippon Power PR4 knockoff pistons that I got for a budget B16 turbo build and some bearings (I decided not to do my new $1000 custom Wisecos
): The directions say to sandblast the surface to be coated, and that is essential for exhaust coating, but I really can't see sandblasting my bearings or my pistons, so I cleaned them and roughed up the surface a bit with some steel wool and brake cleaner, then toweled them dry and blew out all the little bits of steel wool with compressed air. Here's the surface of a bearing and the top of the piston after cleaning:
Here's the pistons all lined up and ready for me to coat:
My weapon of choice, a $9.00 airbrush, great for applying a very thin coating:
And the ammunition, Tech Line DFL-1 Dry Film Lubricant and Tech Line CBC-1 Thermal Barrier Coating. I can probably coat a dozen sets of internals with this much coating, a little bit goes a long way:
The dry film lube is really thin, so it's really runny. I had problems getting complete coverage without it pooling up near the bottom of the skirt. I think the fix for this is to get it on there quickly and set the piston at an angle so that the excess runs to a spot on the piston where I can just trim the drop where it pools up with a knife. I had a few spots near the edge of the skirt where I had to shave it a bit, but nothing major. Here's a shot of it wet on the skirt. The towel wrapped around the top is to mask off the ring grooves:
It looks really thick going on, but it quickly dries to a very thin layer. The coating also dries so quickly that it likes to foul the airbrush nozzle, causing the spray to be spotty. I found that if I wiped the nozzle frequently with a towel it kept it clear and kept the spray pattern uniform. Here's some pics of a skirt and bearing, coated and dried, but not yet baked. If you look closely at the bearing surface, then you can see some little spots where the nozzle was getting a bit fouled. This one was done before I figured out that I had to wipe the nozzle frequently:
Because the stuff is so runny, I ended up just spraying too much on the bearings and setting them on a towel upside down so the excess could run off. This stuff requires moderation and patience to get right, unfortunately I don't have any moderation or patience:
The piston top coating was much easier to deal with, it's a lot thicker than the skirt coating. It was hard to spray evenly and it took me a couple of pistons before I figured out that I needed to start at the edge of the piston and save the middle for last, otherwise you get way too much coating on the piston. Even so, I put this stuff on too thick, it was just so easy to apply after the runny coating that I went a little nuts with it. Here's the top of a coated piston, dried but not baked:
It's time for the oven, I used a $29 Walmart counter-top convection oven. The coatings need to cure at >300 degrees for one hour, and it should do the job. Both coatings are water based, so technically I should be able to bake them in my food oven, but I feed my kids stuff from that oven so I coughed up the $29 just to be safe:
Pistons and bearings ready for baking:
Everything fit in it really well:
Baking at 350 degrees for a bit over an hour:
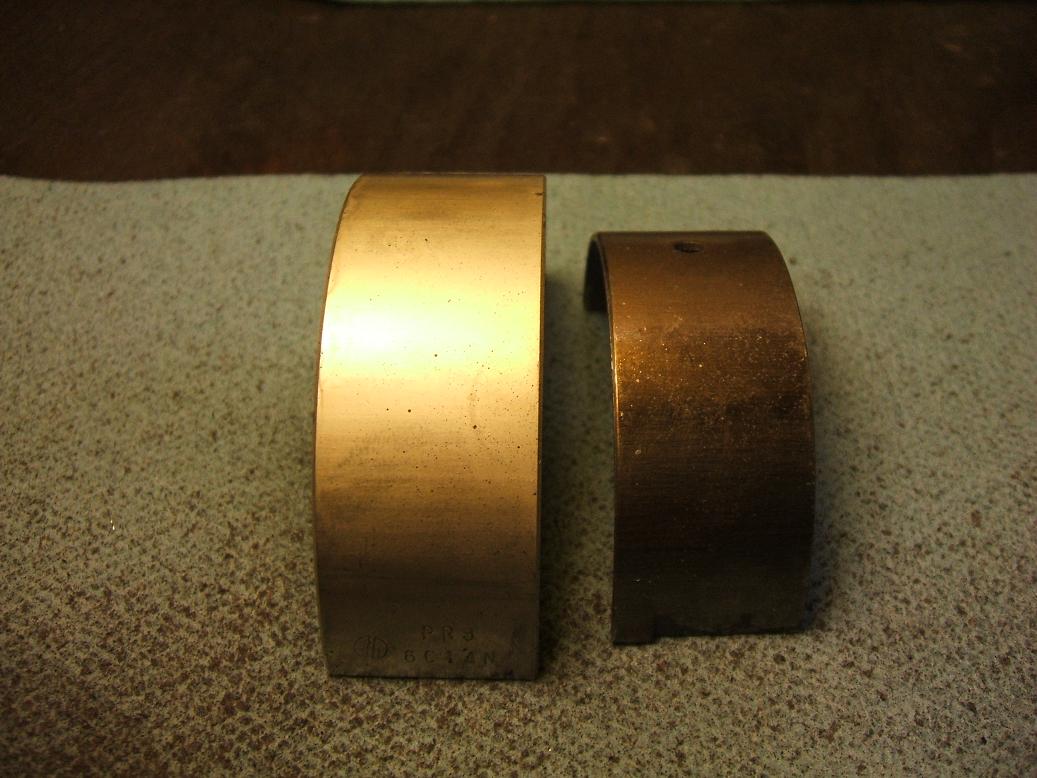
And the results, The bearings and piston skirts came out really nice. The coating baked in to where I could see the machining marks on the skirts and surface scratches on the bearings from the steel wool (It's hard to see in the pictures, but I had to drop the resolution on them or this thread would take an hour to load). The directions say that this doesn't add anything significant to the dimension of the parts, and it looks like that might be true. I don't have a bearing micrometer, I'll have to go see JDogg and get him to check these out. The clearances were correct before I coated them so I'll have to see if they are still right:
And now for the bad news, I fucked up the top coating. I think that I just put it on way too thick, either that or I need to do better surface prep, but one piston came out almost decent, so I think the fault was in my application, especially since I thought at the time I was coating these that I was putting way too much on them. I'll put these on the wire wheel and try it again another time. Here's pics of the best and worst pistons:

 j/k but nice maybe ill give it a try
05-01-2007, 08:51 PM
j/k but nice maybe ill give it a try
05-01-2007, 08:51 PM
#3
Honda-Tech Member
Join Date: Sep 2003
Location: Austin, Republic of Texas
Posts: 3,234
Likes: 0
Received 0 Likes
on
0 Posts
thermal barrier went on too thick. Takes a bit of practice, but once you get it right, its easy after that. Mine bake on and look perfectly uniform accross the tops.
Might also be a prep issue - any contaminates on the surface will botch the job. I sometimes pre-cook them to bake out any oils, etc on the surface. If they cook at 350 for a while and come out clean, you are good to go. Any oil or grease will cook and stain the surface when you pre-cook them and you can see it easily and re-clean them.
Best of luck with your project.
06-03-2007, 11:40 PM
#4
Honda-Tech Member
Thread Starter
It took me a bunch of tries, but I finally got the piston top coating applied correctly. There were two big issues with it:
Surface Prep - Nothing short of sandblasting the hell out of these things worked. I tried roughing up the surface with sandpaper or a wire wheel, but the stuff peeled right off. I tried cleaning up the tops with some 240 grit sand at low PSI, just to clean it up, but no joy. I finally blasted it good with some 70 grit aluminum oxide at 120 PSI and that did the trick. It's the same surface as I use for exhaust coatings, I guess that's just what the top coating needs to adhere properly.
Consistent and Thin Application - The top coating is some thick stuff, and it has a bad tendency to coat the inside of the spray gun, messing up the needle valve and causing a very inconsistent spray pattern. After a few tries the gun was useless and I had to completely disassemble it and scrape the hardened coating off of the internal parts. I always clean my gun with brake cleaner immediately after I use it, but the brake cleaner just doesn't cut through the top coating. After I got the gun cleaned out and I could put down a thin, consistent layer of coating with good coverage, I had no problems applying it to the piston tops.
Here's the blasted piston, ready for coating:
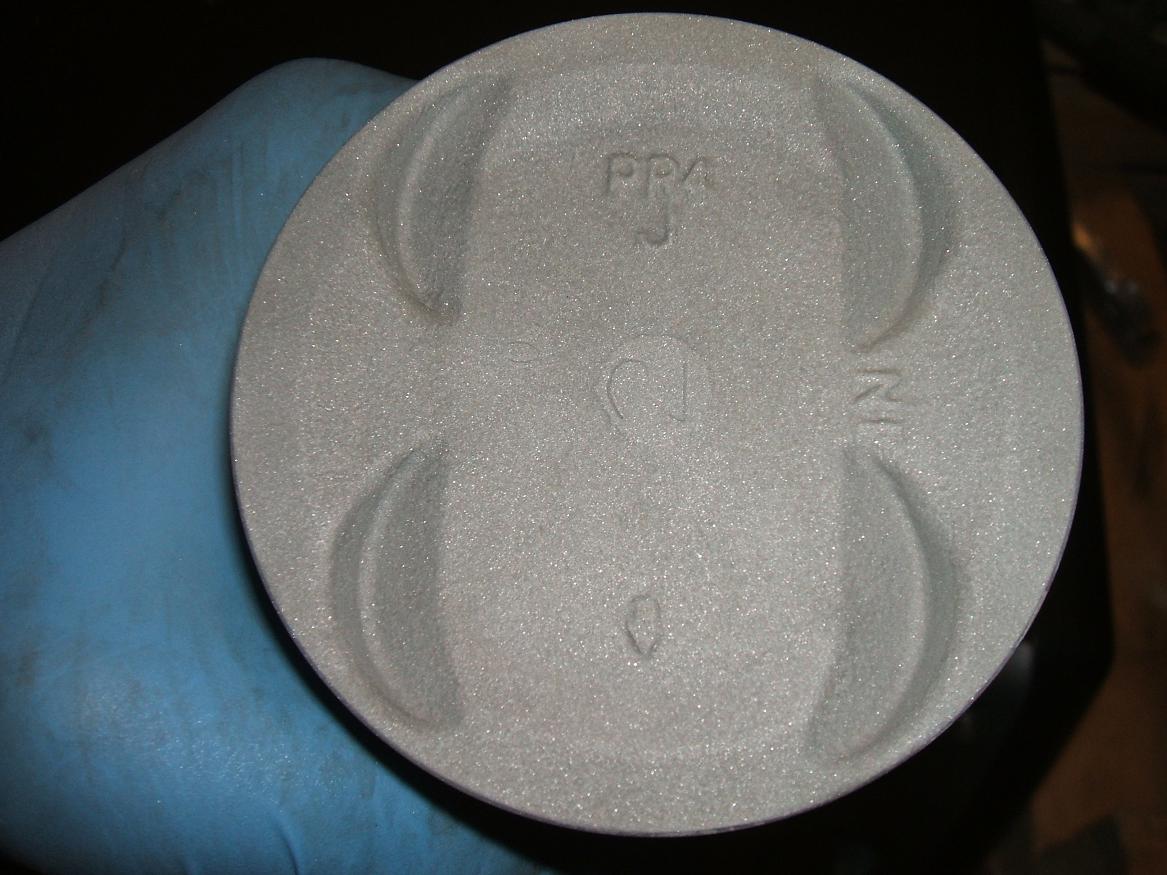
Here's the coated piston, fresh out of the oven, no bubbles or flaking:

Surface Prep - Nothing short of sandblasting the hell out of these things worked. I tried roughing up the surface with sandpaper or a wire wheel, but the stuff peeled right off. I tried cleaning up the tops with some 240 grit sand at low PSI, just to clean it up, but no joy. I finally blasted it good with some 70 grit aluminum oxide at 120 PSI and that did the trick. It's the same surface as I use for exhaust coatings, I guess that's just what the top coating needs to adhere properly.
Consistent and Thin Application - The top coating is some thick stuff, and it has a bad tendency to coat the inside of the spray gun, messing up the needle valve and causing a very inconsistent spray pattern. After a few tries the gun was useless and I had to completely disassemble it and scrape the hardened coating off of the internal parts. I always clean my gun with brake cleaner immediately after I use it, but the brake cleaner just doesn't cut through the top coating. After I got the gun cleaned out and I could put down a thin, consistent layer of coating with good coverage, I had no problems applying it to the piston tops.
Here's the blasted piston, ready for coating:
Here's the coated piston, fresh out of the oven, no bubbles or flaking:
 this is awesome, i can't believe i missed this
08-07-2007, 11:35 AM
this is awesome, i can't believe i missed this
08-07-2007, 11:35 AM
#6
Honda-Tech Member
Join Date: Nov 2003
Location: SE, PA, usa
Posts: 1,743
Likes: 0
Received 0 Likes
on
0 Posts
Haha yeah good stuff....any updates on these parts? Have the been put to use?
08-07-2007, 01:08 PM
#7
Honda-Tech Member
Join Date: Feb 2005
Location: Heinola, Finland
Posts: 1,364
Likes: 0
Received 0 Likes
on
0 Posts
<TABLE WIDTH="90%" CELLSPACING=0 CELLPADDING=0 ALIGN=CENTER><TR><TD>Quote »</TD></TR><TR><TD CLASS="quote">Both coatings are water based, so technically I should be able to bake them in my food oven, but I feed my kids stuff from that oven so I coughed up the $29 just to be safe:</TD></TR></TABLE>
Yeah good choice, because even if they're water based, they're not non-toxic, actually water based chemicals are worse, because when they're absorbed into the body, they stay in.
Yeah good choice, because even if they're water based, they're not non-toxic, actually water based chemicals are worse, because when they're absorbed into the body, they stay in.
Trending Topics
02-26-2010, 08:42 PM
#8
Honda-Tech Member
Thread Starter
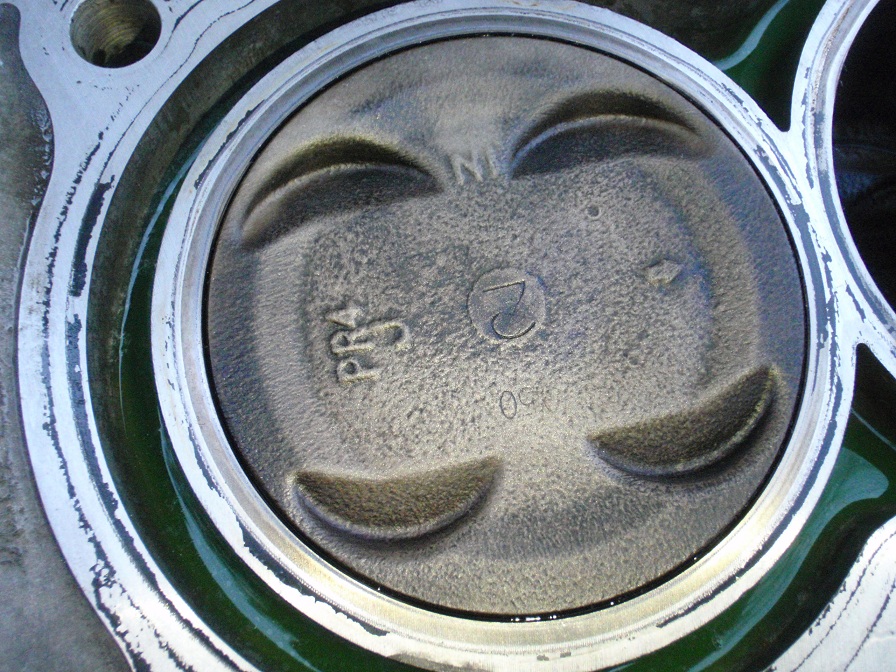
It's been a couple of years, and I had to replace the head so I got a look at the pistons. This is from a B16 running 10-11 PSI of boost. The coating looks good, still intact with no flaking, and the motor runs great:
02-27-2010, 12:44 AM
#9
Honda-Tech Member
Join Date: Apr 2003
Location: 60ft garage, CA, USA
Posts: 5,365
Likes: 0
Received 0 Likes
on
0 Posts
Wow, looks great! Very little carbon buildup too. I guess carbon doesnt like to stick to that stuff? Is that a side benefit?
02-27-2010, 01:00 AM
#10
Honda-Tech Member
Thread Starter
I don't know, but it definitely wasn't carboned up like a normal piston. I did run a paper towel with some WD40 on it over the top of the piston to clean it up a little bit for the picture, but I can take a picture of one of the other pistons that I didn't clean up.
03-02-2010, 04:50 AM
#12
Honda-Tech Member
wow that coating held up well.....i thought those things flake/wear off after a while....
04-25-2010, 02:09 PM
#13
Honda-Tech Member
Join Date: Jan 2008
Location: Malta, ny, USA
Posts: 987
Likes: 0
Received 0 Likes
on
0 Posts
what type of coating is that and whats the benafit of coating besides no carbon build up, thanks
04-25-2010, 04:15 PM
#15
Honda-Tech Member
Thread Starter
The coating type, and pictures of the coating containers, is in the first post. More info can be found here:
http://www.techlinecoatings.com/hi-p...-coatings.html
The main benefit is heat shielding. Heat goes out your exhaust instead of going into your pistons. Here's the marketing stuff from the people that make it:
"CBC-1™ provides reduced part temperature, resistance to detonation, increased combustion chamber efficiency. More efficient oxidation of fuel also occurs, leading to increased power output. CBC-1™ allows minimal transfer of heat through the coated surface thus reducing part operating temperature as well as reducing the load on the cooling system."
On a side note, the car is my daily driver, running 10 PSI of boost and operating flawlessly.
04-25-2010, 04:19 PM
#16
Honda-Tech Member
Thread Starter
I've heard this from others who have taken engines apart and seen the coating flaking off after a very short period of time. I'm guessing that if you use the correct coating and apply it correctly that it lasts, but as I found out when I started this, there are more ways to apply it incorrectly than there are to apply it correctly. You need to be very meticulous about surface prep, cleanliness, and uniform application or this stuff will not adhere correctly.
04-25-2010, 04:47 PM
#18
Honda-Tech Member
Thread Starter
Check the Techline site for prices, it was almost three years ago that I did this and I don't remember.
04-26-2010, 06:58 AM
#20
Honda-Tech Member
iTrader: (1)
Join Date: Jan 2002
Location: Nowhere and Everywhere
Posts: 29,530
Likes: 0
Received 52 Likes
on
46 Posts
Pretty awesome update. Looks like some good stuff. Makes you wonder why these types of coatings aren't used as part of the factory original build.

Thread
Thread Starter
Forum
Replies
Last Post
Elwuudz
All Motor / Naturally Aspirated
11
05-28-2008 02:40 PM