When you click on links to various merchants on this site and make a purchase, this can result in this site earning a commission. Affiliate programs and affiliations include, but are not limited to, the eBay Partner Network.
I have a couple of posts on this forum...asking questions and the like, so I figured I would finally introduce myself before I get into this build thread. My name is Dillon and I have been autocrossing for about three years now and I just got into HPDE events as of last season. This has been my weapon of choice for all of this time:
After graduating college, I decided that I wanted to stop tracking and autocrossing my daily so that I could spend less time working on my car on the weekends and worrying about breaking things. So, I began looking for a couple of different cars...
My list included such cars as:
BMW E36
Acura Integra DC2
or a 92-95 Honda Civic
After months of searching, I found this EJ2 coupe with the only mods being a painted bash bezel, a Skunk2 Exhaust, and a radio. I didn't see any quarter panel rust or subframe rust up front, and when I took it for a test drive the car pulled well and ran very nicely. The bushings were all shot, but these would be removed anyway in favor of some hard rubber bushings from PIC Performance in the end.
I ended up paying $1,000 before taxes and tags for the car. The owner was a very nice guy who wasn't trying to squeeze blood out of a rock like most owners of good-condition, older Hondas do.
The owner did mention replacing a head gasket on the engine, and I do suspect that he didn't measure for warpage before replacing the head gasket. I do smell fuel in the coolant, but I have autocrossed this car twice so far and I have dailied it for a long time while I was fixing my RSX and I never had any overheating issues...
Needless to say, I will be addressing this problem in the future.
Parking her in my new crib:
Now, here's the plan for this car:
I originally wanted to buy a fully prepped race car to do wheel-to-wheel racing with NASA in the Honda Challenge, however my student loans and living expenses disagreed with my aspirations.
As a result, I am taking this car and I will be turning it into a fun track day car and relatively competitive autocross car for either STS or just a fun car for one of the street-prepared classes.
So far, here is what I am doing to the car:
*Coilovers
*Bushings
*Integra brakes, front AND rear
*91 Civic EX 15/16 Master Cylinder
*StopTech Stainless Brake Lines
*Adjustable upper camber arms in the front
*Adjustable rear camber and toe
*Hawk DTC60 pads up front
*15" wheels
*Sticky tires in 205 or 225 mm width (currently I have some 225 mm slicks, but if I want to run STS, I will most likely be getting RE-71R's)
*ATE Gold Brake Fluid
*Stock motor
*Stock transmission without LSD
*Stock seats
*Stock steering wheel
And that's it...
The goal for this car overall is to be fast around the corners, fun to drive, and driveable to and from the track.
Next season my goal is to have a B16A2 in this car and some safety gear, including a properly set up harness, racing seat, roll bar, steering wheel, HANS device, and some fire-proof clothing if I get the money.
As soon as I bought the car, I obviously washed it and inspected it from head to toe. I changed the coolant, changed the oil, bled the brakes, ordered new brake pads for the front, ordered new shoes for the rear, and ordered new rotors for the front as well.
Boy, this car is fun. It's light and you can feel it. There's something about a lightweight car from the 90's that just gets me going. It reminds me of a Miata with FWD and I like that. I daily drove it to and from work to get a feel for it for a while, and you really have to learn how to carry momentum while driving it because of its lack of power...but I like that too.
After getting the car driveable and playing around with it a little bit on the road, I decided to get to work with acquiring parts. I replaced my white-painted dash bezel with a new OEM one and I also replaced the OEM clock with a working one, just because I wanted the car to be mint:
As you can see, I also put the OEM Honda radio back in for the hell of it, but soon after swapped it back out in favor of one with a CD drive...I will be working on fixing the antenna soon so that I can also get radio in the car while driving it on the weekends:
While picking up these OEM parts from a trashed EJ Sedan, I also got me a new Honda symbol for the front of my car since there wasn't one when I bought it! Yay Honda!
After buying some OEM stuff, I decided to start hoarding parts for the build itself. A friend of mine who races a GSR in Honda Challenge told me that one of the best brake setups I could buy would be a full, OEM Integra GSR brake setup (which is the same as any other Integra, aside from the Type-R). He then told me to throw some DTC60 pads up front and some cheap AutoZone pads in the rear. So, I began looking for Integra brakes!
One weekend, I drove to an autocross event to co-drive my friend's Subaru Impreza L Wagon with a JDM WRX motor swap and a ton of suspension work, brake work, and other stuff. At the end of the event, a guy who I had been talking with about picking up a full brake swap from a '94 GSR responded to my text, saying he could meet me that evening. I immediately packed up, got some pizza from a local store, and made the two-hour drive to go pick up my new brake setup!
Next, I started researching what spring rates I would need to run in order to not have too much body roll while on slicks (since I was originally going to slowly build this into a Honda Challenge H2 car). The thread where I was asking these questions is actually on this site, and you can see it here:
Basically, some of the great members here on this site referred me to a sweet deal on some Koni/GC coilovers that were revalved to SPSS3 specs for stiffer valving. These Konis also came with the Eibach Race Springs in 500#/f 600#/r configuration. The price was great, and so was the condition of these coilovers, so needless to say, I pulled the trigger:
While sitting on the couch, ordering these coilovers, I also began looking for some autocross events to attend with my Civic, just to give her a shakedown. I scheduled my first event with the Philly SCCA and anxiously awaited the results of my entry with the "Civic with Fart Can" sponsored by "Fart Can Racing."
When I went back to work after that weekend, my friend stumbled upon a crackhead deal on some brand new Team Dynamics Racing Wheels with 225 Hoosier R6 and R7 slicks in used condition on a Miata Facebook page. The seller was going through some hard times with his family, and he needed the money for his setup. He was getting out of racing and selling his stuff to help with some medical bills, and these wheels and tires were part of his inventory that he was liquidating.
Of course, when you find a good deal on the internet, the vultures will begin circling, so I had to move quick to ensure that I would get these before anyone else. I made plans with the guy to meet directly after work, and I made the forty-minute drive to go and check out these slicks for myself.
When I got there, the guy was super nice. He told me about the heart-breaking story that led to his need to sell off all of his racing stuff and he showed me all of his stuff. He had two Miatas, a big trailer, a bunch of sweet dailies, and a great house in a nice neighborhood. I offered him ten dollars less than what he was asking and he took the deal. $440 dollars later and I had some slicks in the hatch of my RSX:
And with my first autocross event with the Civic coming up on THAT weekend, I quickly found some conical lug nuts (open-ended) at Pep-Boys, and bought them so that I could mount these slicks and get to driving!
When I got to the event and got the car tech'd, everyone was laughing because my Civic was at stock ride-height, on stock suspension, with some really wide slicks. I didn't care. I was there to shake the car down and have a blast in my new Civic! In grid, I was revving my engine and telling everyone to "dig race me bro" because I am a troll.
Then I ran the car. After my first heat, I had a smile from ear-to-ear. I was laughing my a** off with joy because it was so much fun to get all of the oversteer due to the toe-steer in the rear of these cars and man-handle the heavy, manual steering that I wasn't accustomed to with the RSX. I got a lot of attention because of all of the body roll, and our local photographer even posted this photo to his page (we normally have to pay for his photos), asking "got body roll?" So much fun!
Before ending the season, I made one more trip to South Jersey (SJ) to run with the SJR SCCA in my Civics last autocross before being torn down for her build.
With the racing season over, I began tearing down the Civic so that I could put the new suspension on the car. I put her up on jack stands, I took the wheels off, took the front, lower, and upper control arms off, took the knuckles off, took the rear trailing arms off, and I plugged all of the brake lines to prevent brake fluid from getting all over my floor.
Here are some pics of the condition of the suspension before I took it all off. (Woooo, take it off!) ...sorry...
While under the car, I began inspecting for rust or anything suspect, since I didn't give it THAT thorough of a look-over when I first bought it...
After looking it over, my original sentiment was confirmed. The car was in great condition (and still is). I couldn't find any rot on the monocoque, I didn't see any rust that I didn't see before, and the only real issue was the rotted bushings (which is to be expected of a car this old).
With the car on jack stands, and with my new suspension pretty much ready to go into the car, I started doing some of the dirty work. Here are some pics of the car with suspension components taken off:
Thanks to my good friend Joe who builds custom mega trucks and has his own bad-*** garage with a bunch of sweet tools, I had access to a 20-ton press and more. This allowed me to start pressing out my bushings.
Before I show you that process however, check out some of this guy's stuff. It's pretty amazing. This is Joe's Ranger that he built himself:
Here's the Bronco that Joe built for his friend:
When I say that this guy builds his own stuff, he really does build his own stuff. He doesn't just buy a lift kit and throw it on a truck. He designs the suspension, welds it all together, makes custom driveshafts, custom wheels, and pieces together parts from other cars to make it all work. I honestly can't speak to his craftsmanship given my lack of knowledge in this area, but I can tell you his work is very impressive.
Now that you've listened to a shameless plug for my friend, check out the process I went through after I got the Civic up on jack stands! (Sorry again, lol)
Here's me pushing the RTA bushing out of one arm with the help of my good friends oxygen and acetylene:
Here are some pics of the RTA's after the bushings had been pressed out and after I started removing various things to ensure I would have no issues with seized bolts in the future (Joe has an excessive supply of PB Blaster and a really good impact gun )
After pressing out some bushings, I sat down and started looking for ITR rear LCA's. If you know anything about the ITR vs. the regular Integras and the 92-01 Civics, you'll know that the rear LCA's are BASICALLY the same (slight differences in length and mounting point distances from the chassis, etc) for all of those models, EXCEPT for the Integra Type-R. This makes running ITR shocks and springs a bit difficult with a non-ITR suspension, if you know what I mean. So, I ended up picking these up for $100. Not an amazing price, but not too bad.
Then I started doing research on bushings to use in my new suspension. I had a couple of considerations for different bushing materials, and started asking around for pros and cons associated with them all. Here are the materials and the pros and cons associated with them that I found:
*Polyurethane
-Pros
*cheap
*a lot of manufacturers produce them
*easy to install (not accounting for pressing the bushings out)
-Cons
*stiction if not lubed frequently
*need to be lubed frequenty (not accounting for graphite-impregnated poly)
*long-term cold flow
*Spherical
-Pros
*literally the best option in terms of performance, lol
*free movement between suspension arms and uprights/chassis mounting points
*No stiction (essentially)
*No cold flow (essentially)
*Removal of stored energy in articulation points due to low elasticity (think metal vs rubber)
-Cons
*Noisy
*If they get dirt inside of them, they can malfunction (apparently)
*VERY EXPENSIVE ()
*Hard rubber
-Pros
*Cheap
*Most similar to OEM configuration (OEM is always more reliable in MY mind)
*less deflection on race tires vs. OEM
*Low cold flow
-Cons
*It's not spherical
*If installed incorrectly on the RTA, suspension can act weird and bushings will wear more quickly
*PITA to install
*Does not eliminate stored energy in articulation points (as spherical does)
*Not spherical (did I mention that already)?
After considering my options and looking for a long time, I decided to buy some PIC Performance bushings for the non-ITR and deal with the shock mounting bushings separately, since apparently those were the only bushings that weren't supposed to fit the ITR...you will later see that this was not the case, leading to one of the largest roadblocks for my build in terms of time, not difficulty of install or whatever.
Here are some pics of the PIC/Suja1 Bushing Kit from PIC Performance from their website:
With my bushing kit finally ordered, I began pressing them in. If you know anything about installing bushings in Hondas, you know that the installs have to be done correctly. From what I understand, some instructions go as far as using the proper torque specs on bolts holding different arms to the chassis and etc.
Another thing that is of importance is the orientation of the RTA bushings with respect to the RTA and the chassis as well-- since incorrect "clocking" of these bushings can result in excessive bushing wear and odd behavior at the rear end of the car.
With my paranoid, misinformed ***, I also applied that same ideology to the compliance bushings for the front, lower control arms...only to realize that after installing these, these bushings move fairly easily. Here is the process for removal and installation of my front suspension components:
You can see that these bushings were worn, and cracked...in different positions than intended from the factory, out of the box...and ultimately not satisfactory for racing use...or even street driving:
Some of the bushings came out easily:
Some did not:
Here is the front, lower control arm compliance bushing installed on the control arm. Note that there are markings on it because I originally thought I had to clock them like the RTA bushings:
This is some of the math that I did to clock them, simulating full droop. In retrospect, this was pretty useless, but I think math is cool so I'm going to post it anyway lol:
Next, I installed the PIC Bushings into the upper camber arm mounts. You can actually install these at an offset for more or less caster, but I didn't want to play around with the caster since double wishbone doesn't need as much caster as macpherson strut (something I learned from the DC5:
For upper control arms, I bought some cheap eBay ones with adjustable slots for the upper ball joint. I will check the torque specs on these mounting bolts frequently and use Loc-Tite to ensure that they do not come loose during track days. From what I understand, whether you buy the $40 dollar arms or the $200 arms, they will loosen up regardless.
Maybe I'll switch to the PCI ones in the future to avoid these problems, but for now I simply torqued the upper control arms to the mounting bracket with enough force to ensure that they would not fall off of the car while allowing for smooth movement relative to the chassis.
Here is everything installed on the front of the car:
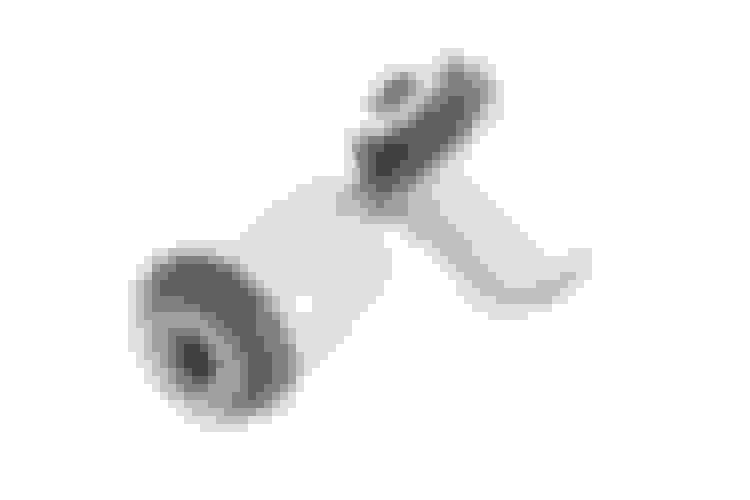
While installing the bushings, I noted a problem with the ITR LCA's. Originally, PIC Performance told me that all I would need to buy separately from their kit to run my ITR LCA's would be the shock eyelet bushings for the ITR shock, since the mounting point for most Civic and Integra shocks is different from the mounting point for the ITR shock. See below:
However, when I tried to install the inboard and outboard bushings for my ITR LCA's, I found out that the diameter of PIC's bushings was almost 4 mm greater than the inner diameter of my ITR LCA's and was still around 4 mm larger than the outer diameter of my OEM bushings...meaning that I did not have the right inboard and outboard bushings for these LCA's.
I was still not convinced and began measuring my ITR LCA bushings to reconfirm what I was finding in the shop. Lo' and behold, I confirmed what I was thinking with a series of measurements I took with my Mitutoyo Caliper:
So, I decided that I would send my measurements to my friend at Avant Manufacturing to custom-make me some delrin bushings for my inboard and outboard holes on my ITR LCA's and also for my shock eyelets.
I decided to go with delrin because of its low coefficient of friction, low cost relative to spherical, low likelihood of cold deformation, and ease to machine.
After deciding to do that I also finished putting in my RTA bushings. To do this, I had to take some pictures of the original mounting positions of the bushings in the rear camber arms and in the rear trailing arms:
By doing this, I could correctly position the mounting tabs on the rear trailing arm (RTA) bushings with the rear trailing arms and I could correctly position the mounting tabs on the rear camber arms as well. After figuring out the mounting orientations, I pressed the new bushings into the RTA's. You can see both arms side-by-side below:
Below you will see the lines I drew to align the mounting tabs on these bushings with the RTA's perfectly:
In addition, you will note that these bushings can be pressed further inward or outward when looking at the side of the RTA's. They are supposed to be flush with the outside of the RTA, where it begins to curve. This ensures they are installed like the OEM units:
When installing bushings designed for OEM mounting arms (think of the two arms mounting the RTA to the chassis), the bushings are the perfect outer diameter to fit the OEM hole size. My eBay camber and toe arms are slightly larger than the stock, OEM arms.
Luckily, Joe has an argon-inerted mig welder that I could use. So, I ground down the edges of the camber arms in his vise with a dremel and got all of the zinc coating off of the cheap, chinese metal. We then placed them on his press, ground his welder to the press, and got to tack welding!
Currently the car is awaiting its delrin bushings from my buddy Eric at Avant Mfg, and then it will be done for the most part. I will need to bench-bleed the MC, install the MC and the stainless brake lines I bought, and bolt everything together! Oh, and did I mention how my engine was having a fuel-smell-in-coolant-problem?
Paid $60 for this and put it in the hatch of my RSX:
Okay, so I've updated as much as I could in the previous sections. The fourth reserved post of mine is taken up, and I also added content to the third reserved post...so read up!
In the meantime, I will continue to show you guys (and gals) the progress that I have made during this build.
If you recall, I said that the eyelet bushings on the ITR shocks were not replaceable with the PIC kit, so I had to custom-make delrin bushings for them. Here is the process of me pushing them out, measuring them, and the drawings I got back from Avant Mfg:
I also began putting together my alarm system from Viper. I didn't want anything crazy-- just something to tell me if people were messing with my Civic by making loud noises. I also wanted to make it very stealth, but I am not going to share details since it's an alarm system for a reason...kabeesh?
Clearly someone has been in here before...:
As of now the alarm system is completely finished and I am waiting on the bushings from my friend. I already have some ATE Gold brake fluid, stainless lines, and a 15/16 MC. I may start looking for ITR sway bars and an Integra steering rack to shorten my lock-to-lock steering ratio from 4.0 to about 3.2.
Here's what the interior of my car looks like ATM:
I used tennis racquet handle tape from Wal-Mart and secured it using cut-in-half electric tape strips for now. When I get a proper harness, seat, and roll-bar setup, I will look into an actual aftermarket steering wheel. For now, however, I will save money here and get good grip out of the wheel. A good Subaru friend of mine did this before a track day and I loved the feel...so now I am trying it on my Civic.
Anyway...keep in touch to see the rest of the build...again, this is meant to be a simplistic build...but I am trying to build a fast, reliable, competitive, cheap car and I think that this Civic is one of my best bets...
Great build, loving the thread. This is a lot easier to relate to than the "million dollar" builds we see on TV and stuff. I love that you started by refreshing the entire suspension. Shows you have your priorities straight. Some spend a fortune on powerful motors and then skimp on the important stuff.
Just a FYI, the ITR rear LCAs are only $66.56 a piece on acurapartsnow.com, brand new with bushings and everything. Would have saved you a lot of hassle and probably money as well.
I have to say; you sir, deserve a golden star. Extremely informative and helpful thread. Please keep it going. I hardly ever reply on posts because of all the bashing and negative feedback from forum members, but this is one thread i am glad to follow.
I am looking to get into HPDE in the near future, and hopefully time attack shortly after. I currently own a 00 EK hatch with a fairly decent built GSR/B16 motor. I'll need to replace piston rings pretty soon ( I did not allow time for break in right after install was completed and drove the car from FL to TX). I know, I'm an idiot. Therefore I'm thinking of putting in forged pistons and rods while i'm at it (future turbo plans).
My next step will definitely be upgraded brakes (OEM of course) and suspension. Being that i'm a noob at this, I know i'll have tons of questions, but i'd rather follow your thread and hopefully you can answer them with the write up. Keep up the good work.
Wow, thanks for the love guys. I did not expect to get this response!
Great build, loving the thread. This is a lot easier to relate to than the "million dollar" builds we see on TV and stuff. I love that you started by refreshing the entire suspension. Shows you have your priorities straight. Some spend a fortune on powerful motors and then skimp on the important stuff.
Just a FYI, the ITR rear LCAs are only $66.56 a piece on acurapartsnow.com, brand new with bushings and everything. Would have saved you a lot of hassle and probably money as well.
My hobby is not profitable, and in fact it is probably one of the least profitable hobbies...and I only track and autocross Hondas. It's not like I'm competing in LeMans here. So yeah, keeping this car fast, fun, reliable, and reasonably priced was the top priority for my Civic.
And agh, f**k! If I had known that I would have just bought them there. I literally purchased hard rubber bushings for 50 bucks...so I would have had a new set of arms AND hard rubber bushings for a little more than what I paid for the used units.
Damn...oh well.
I have to say; you sir, deserve a golden star. Extremely informative and helpful thread. Please keep it going. I hardly ever reply on posts because of all the bashing and negative feedback from forum members, but this is one thread i am glad to follow.
I am looking to get into HPDE in the near future, and hopefully time attack shortly after. I currently own a 00 EK hatch with a fairly decent built GSR/B16 motor. I'll need to replace piston rings pretty soon ( I did not allow time for break in right after install was completed and drove the car from FL to TX). I know, I'm an idiot. Therefore I'm thinking of putting in forged pistons and rods while i'm at it (future turbo plans).
My next step will definitely be upgraded brakes (OEM of course) and suspension. Being that i'm a noob at this, I know i'll have tons of questions, but i'd rather follow your thread and hopefully you can answer them with the write up. Keep up the good work.
Nice man. Brakes and suspension are definitely up there on the priorities list when you're going to be hitting the twisties. Look into good pads, good fluid, good stainless lines, and get some decent extreme summer performance tires. Go do some autocross events first, get used to pushing the car to its limits, then go hit up NASA and attend an instructed HPDE event.
The instructed events are usually pretty expensive (appx 325 bucks) but they are worth it because you learn a lot about driving and being safe on the track.
So, my friend Eric at Avant has been swamped with work on the delrin bushings, but he said he would do them when he has spare time even when I told him he didn't have to do them if he didn't have the time.
In the meantime, I do still want to finish my project car, so I pulled the trigger on some HardRace Hard Rubber Bushings for the ITR LCA's and on some shock eyelet bushings for my Integra shocks.
HardRace inboard and outboard ITR Rear LCA bushings:
I also have acquired some brake parts that I need to install while I am waiting on these damn bushings! So impatient! Here is my 15/16 MC and stainless brake lines awaiting installation:
And while I have been idle, I also bought this sweet vise and installed it in my garage! It's a "Dunlap" vise made in America.. Apparently it's Sears' old economy brand from around 1930-1940. Paid $40 with shipping!
And since we're all still waiting for the car to be put back together, here's another shot of the Civic from that one autocross I did with the Philly region:
Look into good pads, good fluid, good stainless lines, and get some decent extreme summer performance tires.
I totally agree. I am doing quite a bit of reading to gain as much info as possible before i hit the track. I have some Nitto NT450's that I purchased for my GSR blades when i began building my engine. They are roughly 5 years old and have approximately 90% thread left. I have driven my car less than 2k miles in 5 years. Which is why I need to put it back on the road. I plan on running these tires to the wires (lol), while learning and sharpening my skills. I do plan on getting either 15x8 or 16x8 rims in the future, with some good performance extreme tires, like you mentioned.
Go do some autocross events first, get used to pushing the car to its limits, then go hit up NASA and attend an instructed HPDE event.
I will do autoX for a day or two, just to get a better understanding of the dynamics of my car. Even though I have owned this car for over 6 years, i've never pushed it to it's limits before (well, at least not on curves and hard turns - straight line racing is a different ball game). I will most definitely attend quite a few instructed HPDE events before attempting to enter time trial events. I know this will help me hone my skills, and also get a better idea of the "actual" modifications that i will need to move forward.
What mods are you looking to do exactly?
Actually, i have done quite a lot already. Way before i even thought of trying out HPDE. I wanted to build an all-motor, reliable and fun hatch, and i think i did.
Engine wise, I am running a JDM B18c block with CTR pistons & GSR rods/crank, Clevite race bearings, All seals and washers are Honda OEM, ARP bolts/head studs, and Hytech headers. I mated that with a B16 head, Brian Crower; stage 2 NA cams, dual valve springs & retainers, Skunk2; cam gears, throttle body and fuel rail, and Edelbrock intake mani. Like i mentioned, being that piston rings need replacing, i might as well throw in some forged pistons and rods to make it a bit stronger and ready for turbo. I'm thinking CP pistons and Eagle rods.
Tranny - I'm running a b16 with type R LSD and ACT stage 3 clutch. I might replace/upgrade the clutch when i have my pistons/rods installed (In prep for turbo), being that the motor will be out anyways.
Fuel & Engine management - Walbro 255 (I might replace to run E85), RC 440 injectors (I might replace for ID to run E85) and Hondata s300. Currently on stock GSR injectors and stock P06 ECU, as it's never been tuned.
Suspension & Brakes
- Tein springs with KYB shocks, SI discs all around, Beaks tie bar, No name LCA's and camber kit. I'm looking into your similar coil over setup; Ground Control and Konis. I'm also thinking of swapping for GSR calipers and possibly a bigger front rotor (Acura legend?) with some very good pads. Also GSR or Type R master cylinder with 1" bore. I know braking is the biggest concern in this type of game.
From what i have read and now understand; I have too many parts to go fast, but not enough to slow down or balance the car out. My game plan is to replace the pistons and rods, install S300 and injectors and tune it. I want to try and autoX once or twice after that, to get a better understanding for acceleration and control. Then upgrade the brakes and suspension. Now go to instructor led HPDE and learn the basics. Once I'm comfortable, determine which turbo setup i want to install. Not looking for insane numbers, nor do i want to sleeve the block either. Once installed, complete a few more HPDE to refine my skills with new power added, then pursue time attacks.
I am in no hurry to jump into this very addicting hobby, so i plan on taking my time to build it right. Other mods, such as aero, roll cage and what not, i'll determine after i get some good amount of track time. Sorry for the long write up, but instead of creating a new post, i figured i could share my some info here in hopes to learn more about the game. Being that you are building your car from scratch and seem to be very knowledgeable about this drug.. lol. If you or anyone else sees anything wrong with my logic so far (constructive criticism of course), or if there is anything in my setup that needs changing, please feel free to advise. Like i said, i plan on taking my time to do it right, kinda like you Dilbones, except, you are hammering thru this project..
As soon as I bought the car, I obviously washed it and inspected it from head to toe. I changed the coolant, changed the oil, bled the brakes, ordered new brake pads for the front, ordered new shoes for the rear, and ordered new rotors for the front as well.
As far as the brakes are concerned, I know that you initially mentioned bleeding the brakes, and then went ahead and installed a new master cylinder. Did you get new fluid thru all of the lines, or is the old fluid still in parts of the lines?
When I got my truck (2000 Ford F150), when I put on new brake pads on the front, I went out and bedded them in, and the brakes got hot enough that I could barely stop. I then went ahead, removed as much brake fluid (which was probably the original fluid with possibly six years of use) I could from the master cylinder, put in new fluid, and then bled to each wheel until I was sure that the old fluid was flushed out - the old fluid was dirty enough that I could see a definite change when the new fluid got thru. Main thing I'm saying, is to make sure that you've thoroughly flushed out the old fluid, and then do that periodically. Honda are nice that there isn't any screen on the master cylinder reservoir (like my Audi has), so it is easy to remove the fluid from the reservoir when needed. - Jim
I didn't replace the master cylinder yet, but that is some interesting information sir.
I know that I will need to do a full flush of the system with DOT 4 fluid since I only put clean DOT 3 in when I first bought the car since I was only street and auto-x driving it.
I plan on using ATE Gold (ATE Blue) for my fluid. Previously I used Motul RBF600 and never had a problem, but everyone recommends I make the switch for pedal feel.
Okay, DJLobo, I'll try and address different parts of your reply to give you the most help I can for getting into track and auto-x driving.
I have some Nitto NT450's that I purchased for my GSR blades when i began building my engine. They are roughly 5 years old and have approximately 90% thread left.
Just know that old tires don't grip as well basically. They handle heat differently too. Make sure that the tires aren't cracked at all, but keep in mind when you're going for 30 minutes straight on the track, tires and brakes are the last thing to cheap out on.
Protect your investment, yourself, and those around you by making sure your tires are safe.
Like i mentioned, being that piston rings need replacing, i might as well throw in some forged pistons and rods to make it a bit stronger and ready for turbo.
Is there any reason you feel you need to boost your car? I'm just curious.
I'm also thinking of swapping for GSR calipers and possibly a bigger front rotor (Acura legend?) with some very good pads. Also GSR or Type R master cylinder with 1" bore. I know braking is the biggest concern in this type of game.
GSR calipers and all other 94-01 Integra calipers are the same, aside from the Type-R. The 1" MC is overkill for anything smaller than the ITR calipers. You really don't need anything bigger than Integra brakes. It's a relatively common setup to run:
Integra brake rotors and calipers
Hawk DTC 60 Pads up front
Cheap AF rear pads (eBay or Autozone. Seriously)
Stainless Lines
DOT 4 fluid
I am running a non-ABS 15/16" MC from a 91 Civic EX because I didn't want to complicate the build by adding ABS. However, note that ABS will actually improve your performance around the track, contrary to what many novice drivers think.
I was made aware of this at the end of the season by my friend who is an instructor with NASA, my friend who runs Honda Challenge, and another friend who is now doing time trials in an ITR.
My game plan is to replace the pistons and rods, install S300 and injectors and tune it. I want to try and autoX once or twice after that, to get a better understanding for acceleration and control. Then upgrade the brakes and suspension. Now go to instructor led HPDE and learn the basics. Once I'm comfortable, determine which turbo setup i want to install. Not looking for insane numbers, nor do i want to sleeve the block either. Once installed, complete a few more HPDE to refine my skills with new power added, then pursue time attacks.
My only advice for this passage is that it seems like you are planning on doing A LOT of mods on your journey.
It's kind of like...
Motor > auto-x a little > brakes and suspension > HPDE a little > BOOST (lol) > HPDE > Time attack
My progression would be
Fix piston rings > get good pads, fluid, and stainless lines on your CURRENT brake setup > seat time, seat time, seat time > and THEN think about mods you want to make.
If your struts aren't blown and your brakes are from the 99-01 Si, your suspension and brake setup is more than adequate. Just beef up your pad compound and lines and fluid.
If your motor is already as modified as it is, fix it to where it needs to be and leave it alone.
If your tires are unsafe, then replace them.
Also, P.S.
When I started driving in the midwest, everyone drove the shittiest cars as fast as possible. All-season tires, no power, heavy, stock suspension, stock brakes...but they were all way faster than me with all of my mods.
I spent two seasons learning on crappy tires and when I finally switched to better tires, I learned that I could push the car faster and faster and faster run after run and still drop time.
Keep in touch bro, and if you have any other questions.
I still consider myself a noob as well since I only have four track days under my belt and two years of auto-x. I spend all of my spare time reading about driving and cars...so I do know a thing or two.
But there are so many people out there willing to help. Ask questions and remain open-minded!!
So update. I got my bushings for my ITR control arms yesterday and today I decided I would press them into the control arms. First, however I made sure that they would fit in between the chassis mounts and that they were the correct diameters.
I decided that I would try to use my new vise as a press to get the bushings into the control arms.
I tapped the bushings in at first, then I began pressing.
I decided I needed a little more force to simulate tons of force pressing the bushings in...and given that I had used my dad's old vise to press in and out ball joints before, I decided to do the same with this vise and a cheater bar....
Bye bye new vise -__-
So, I decided to see if my friend Joe could lend me a hand, but as luck would have it, he was busy...so after months and months of borrowing this guy's press, I decided to just buy my own.
Honestly I'm not sure how worth it this press will be in the long run, given that I don't want to **** my neighbors off with banging and loud cracks of rust breaking off of bearing sleeves while they're being pressed out. However, it made me very happy tonight, because I was able to do my work in my own sanctity.
What a blessing.
I quickly got to work laying out the bushings and pressing them in.
You will see that one end of these bushings is fatter than the other. This is because one side of the control arm has a smaller bore than the other for the inboard and outboard holes.
HardRace really got the fitment on point with these bad boys. I wish I purchased them from the start, despite PIC's astronomically greater customer service!
Finally, here are all of the bushings pressed in:
If nothing comes up tomorrow, my shock bushings SHOULD be here. Hopefully they are a direct replacement for koni's lower shock mount bushings.
So, I didn't get my shock eyelet bushings, but I did start putting my suspension on my car.
When putting disk brakes onto the Civic, it is necessary to have the correct hydraulic and hand brake cables to replace the old ones with.
Given that I never took the parking brake cable off of the car and I just cut it where it connects to the trailing arm, and given what I just mentioned, I figured I would begin by removing my parking brake cable.
Then, after crawling around under my not-so-high-off-the-ground civic and busting my ***, I started prepping the suspension from the GSR donor car to go onto the Civic.
I had to take the parking brake cables off of the rear calipers, slide them through the rear trailing arms, and Mark everything driver side and passenger side.
I also had to tighten a wheel stud onto the hub of one of my arms since it was loose.
I used some left over koni hardware to get this job done!
Finally, I got all of the bolts into their respective threads after harvesting some of the bolts from the OEM trailing arms using some heat (torch) and a breaker bar, and I mounted the right, rear suspension.
When I finally get the suspension in and both shocks installed, I will torque all of the bolts down for the bushings, AFTER I find the ride height I desire and after I align it.
I'm coming close to crunch time as I only have a month before racing season starts!
When putting disk brakes onto the Civic, it is necessary to have the correct hydraulic and hand brake cables to replace the old ones with.
Given that I never took the parking brake cable off of the car and I just cut it where it connects to the trailing arm, and given what I just mentioned, I figured I would begin by removing my parking brake cable.
As far as putting on rear disk brakes, take a look at thread https://honda-tech.com/suspension-br...egras-3044628/ in the Sticky section of the Suspension & Brake forum. A page or two down, it has some info about putting on the rear disks. - Jim
As far as putting on rear disk brakes, take a look at thread https://honda-tech.com/suspension-br...egras-3044628/ in the Sticky section of the Suspension & Brake forum. A page or two down, it has some info about putting on the rear disks. - Jim
Sounds good buddy. I've read that already and I've been told about various cables I should purchase from various different models.
I think I will settle with the extra length and perhaps the less functional parking brake as a result of the hatch cable...sadly.
Anyway, today I finished the following:
*installed stainless steel brake lines all around
*bled and installed 15/16 master cylinder
*and I finished installing BOTH rear trailing arms and LCA's
It doesn't sound like a lot, but I do this stuff only on work days after I get home since I am with friends or family on the weekends.
It's one of the reasons I decided to make this build so cheap and simple.
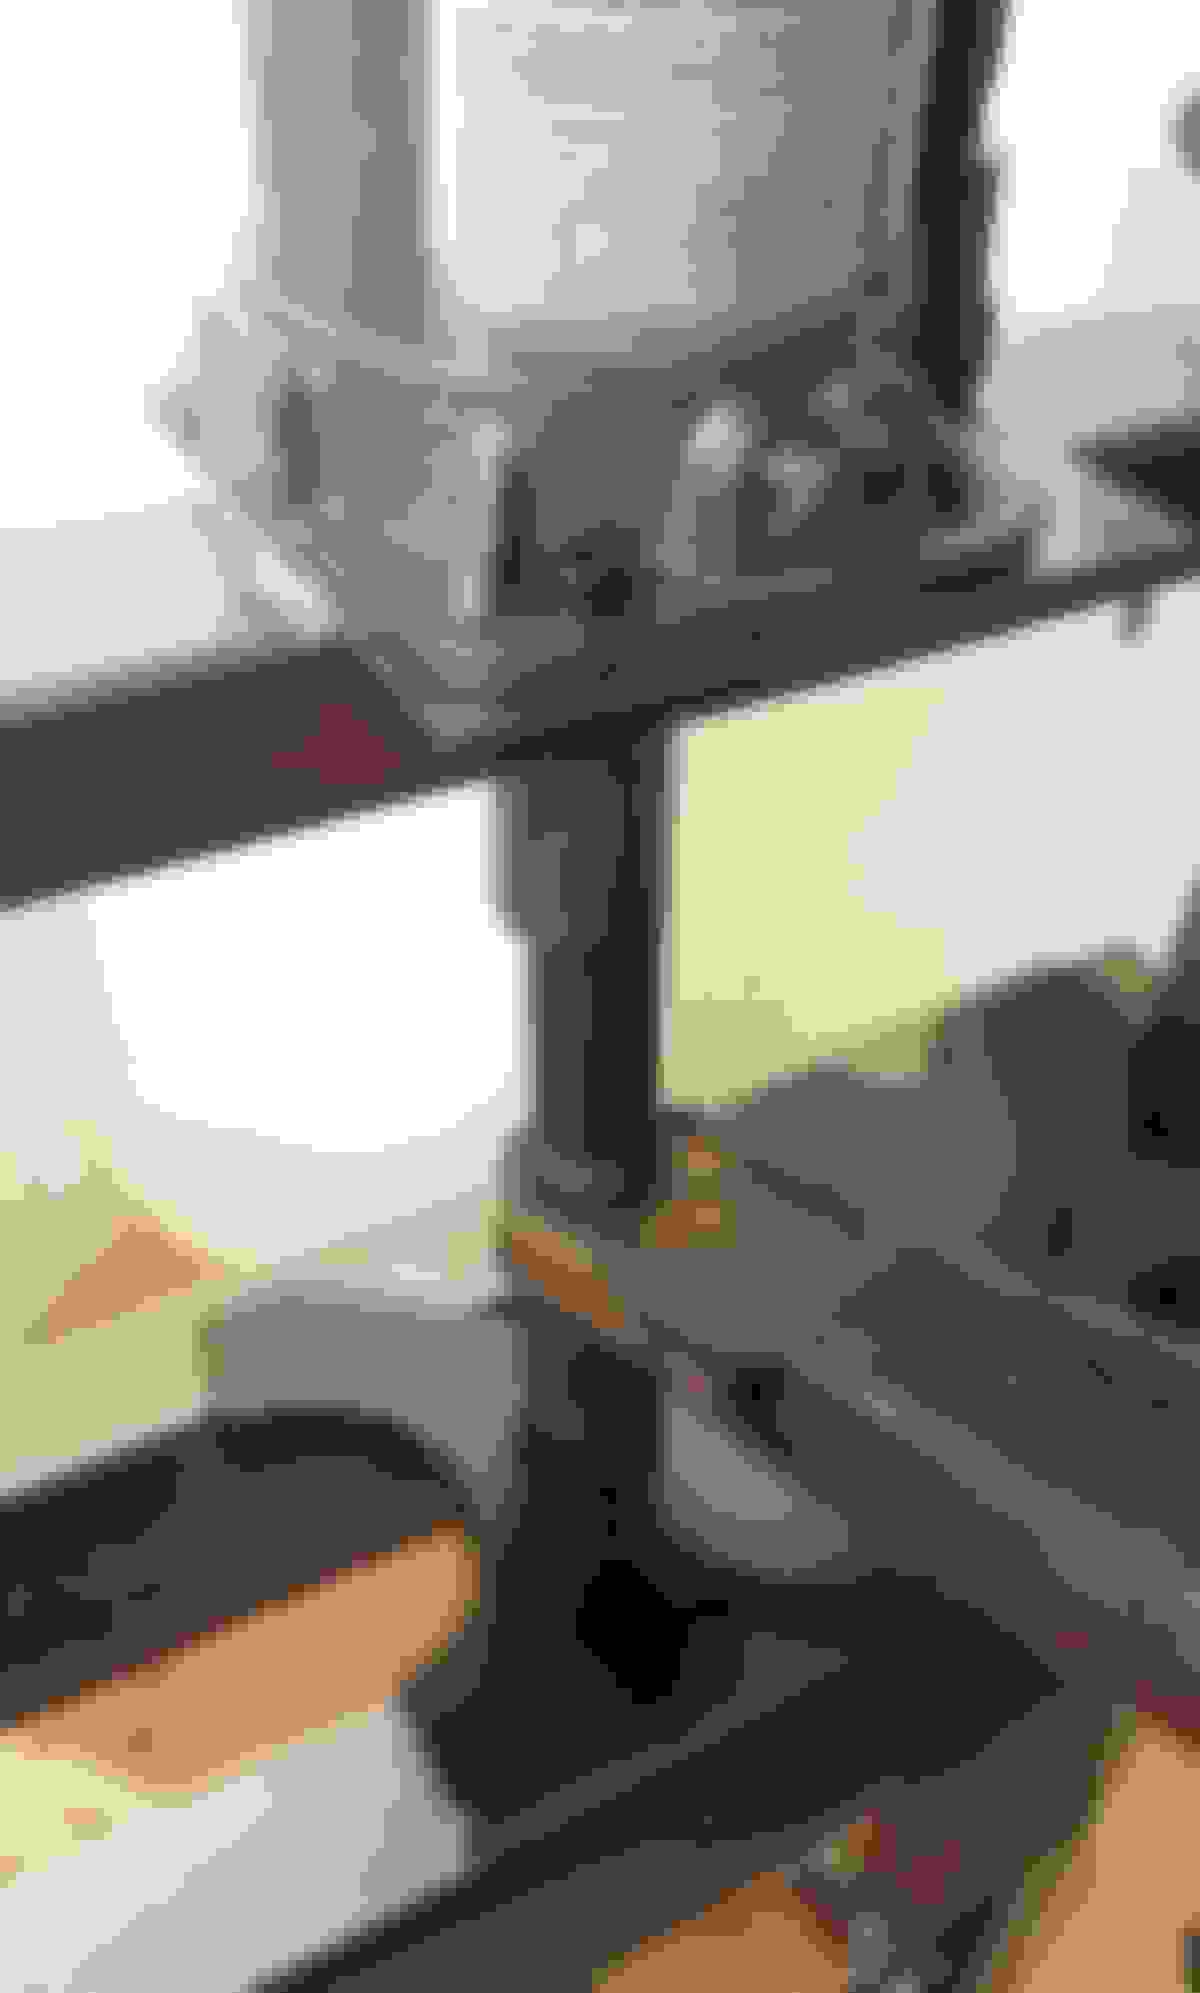
Anyway, here are some photos of the installed suspension and the installed stainless lines:
And here is my "bench bleeding setup" lol:
I took some vacuum tubing, inserted it into the holes, sealed the edges where the tubes met up with the master cylinder using some grease, looped them back into the mc reservoir, and zip-tied them to the reservoir and got to pumping the mc with my hand.
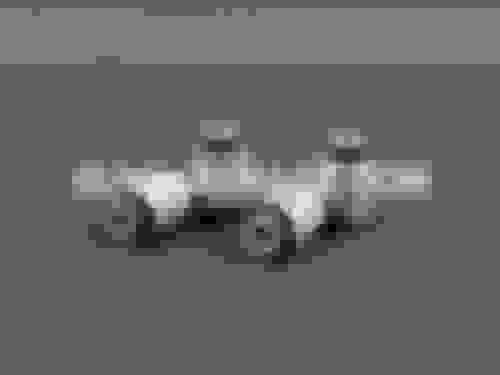
Here, you can see the size comparison between the original (13/16?) mc and the 15/16:
Here it is installed in the car:
Tomorrow, I will hopefully finish the shocks if the bushings come in.
If the bushings are slightly smaller, they will need to be welded into the shocks.
If they are slightly bigger, they will need to be ground down.
Hopefully they fit perfectly and I can get this car on the ground.
Can't wait to see how everything turns out. Your car is looking great by the way!
Thank u sir! Autocross and HPDE events will be the true test of this car's functionality...so wish me luck..
Tonight I got my OEM replacement bushings that were supposed to fit into the eyelet where the rear ITR shocks mount to the LCA. Unfortunately, the eyelets on the Showa shocks from Honda probably don't match up in size to those on the konis.
As a result, my bushings did not fit, and I had to get creative.
Remember how I said I had to weld in the PIC bushings to the rear camber and toe arms? Well, I had to press cheap, eBay bushings out of those cheap, eBay arms to do so.
Those cheap, eBay bushings, however, never got thrown out...and when I got to digging in my box of stuff, I found out I still had them.
I also found out that they fit the koni shocks!!!
The interference fit was a bit snug, but other than that, the fitment would work great.
Next, I had to figure out which bolts to use for the shocks on the rear LCA's.
I knew that the bolts for the EJ2 Shocks were too long, so I could have used a washer to fix that problem, but I only had one of these bolts left over.
I knew that the toe arm bolts were the correct diameter and thread pitch, but they did not have enough thread to make me feel comfortable with putting them on such a crucial part.
However, the camber arm had a perfectly sized bolt in terms of length, and the majority of the bolt was smooth where the shock would sit. So I said whatever, and used that bolt to mount the shock to the arm.
The bolts in the middle are the ones I chose:
I compressed the Shocks and held them tight with some zip ties, then mounted them. First the eyelet bolts, then I decompressed the Shocks and allowed them into the rear strut tower and tightened them down.
Tomorrow, I will probably try and get the car on the ground
Big news for Chelsea (my Civic). She's on the ground finally! It wasn't easy, but I got there with some patience and care...
With the rear suspension fully bolted onto the car, I had a couple of tasks ahead of me. Firstly, I had to route my hand brake cables to the new trailing arms and up through the cabin. I decided to use my cables that came with my Integra arms and it wasn't easy..
Below you will find a shitty picture of how I routed the brake cable through the rear trailing arm:
After figuring that out, I bought new hardware, new gaskets, some rtv sealant, and I mocked my midpipe back up to the car.
I had to take it off to get to the brake cables.
When I went back into the car to try and reconnect my parking brake cables to my hand brake lever, I ran into some issues.
There is a metal bracket that threads onto a metal stud that is riveted to the ebrake lever. When you get the brake cables into this metal bracket, it allows you to actuate the rear brakes by pulling on these cables with the brake lever.
Below you will see the bracket I am talking about with the cables installed:
This is also where you tighten or loosen the cable to make your ebrake tighter or looser.
My problem was that I could not figure out, for the life of me, how to get these integra brake cables into the bracket with the bracket still attached to the brake lever.
So in my mind, I had to order the correct brake cables that I was told to order during a discussion I had with someone who completed the build before-- 94-99 integra sedan cables.
However, after I ordered them on the weekend, I decided to give it another shot and install the brake cables a different way while I waited on my shipment. I did this on monday, after I got home from my girl's crib.
It turned out that if I attached the bracket to the ebrake lever, unbolted the ebrake, and pulled the cables by the lever until I could bolt the lever back to the chassis, I could correctly adjust the cables.
On Tuesday, I got my first shipment of rotors and rear pads from **** Auto, and tire the rear rotors and pads on to test my ebrake cable.
And what do you know, the integra cables worked fine. Whether they work as well as an oem setup,i am not sure, but they clamp these rotors down good and they stopped the car from rolling when I got her on the ground.
Next, I had to go up front to get my rotors off. Since the asshat before me decided to install the rotor set screws, I had to give them a little love with a BFH, a MAP gas torch, and some penetrating spray. Did I mention, I needed to give the screws a little love?
So, I got my centric rotors on the front, my used pads, and I bolted everything together. Then I checked the thread engagement on my studs (over u turns, happily) while installing my wheels to see how she sat on the ground!
Forgive my pictures. My garage is tight and its hard to get good shots of my car.
Now I have to decide whether I want to run these slicks and buy a set of street wheels and tires, or whether I want to do away with the slicks as a whole and run rs3's.
I also have to set ride height, align the car, bleed the brakes, buy more ate gold brake fluid, and buy dtc60 pads, and I should be done if all goes well.

 01-16-2016, 07:21 AM


 )
)


 )
)