
ATTN body repair pros: Wheel Arch Repair - Looking for guidance
 01-28-2016, 09:33 AM
#1
I'm gearing up to tackle my rear wheel arches on my teg, i have some donor panels to use for the replacement. the wheel arch lip is pretty trashed on both sides down by the rear seat. they seem to still be intact the rest of the way around...and when i say intact, i mean not rotted through. they are still rusty. my goal is to only replace what i absolutely have to.
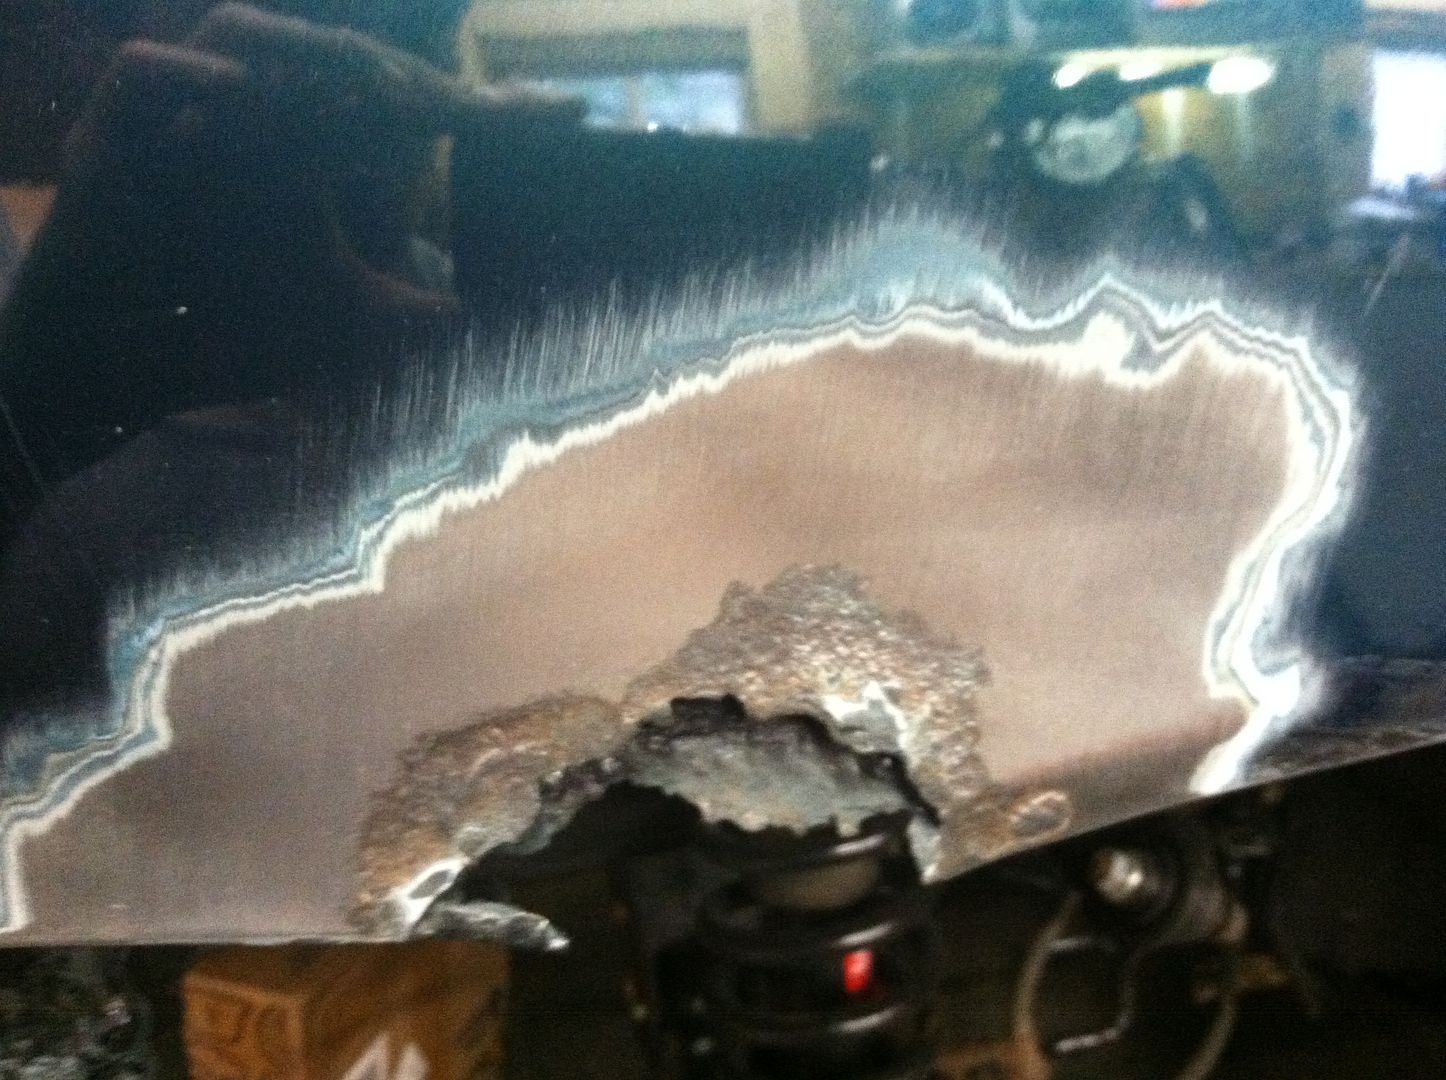
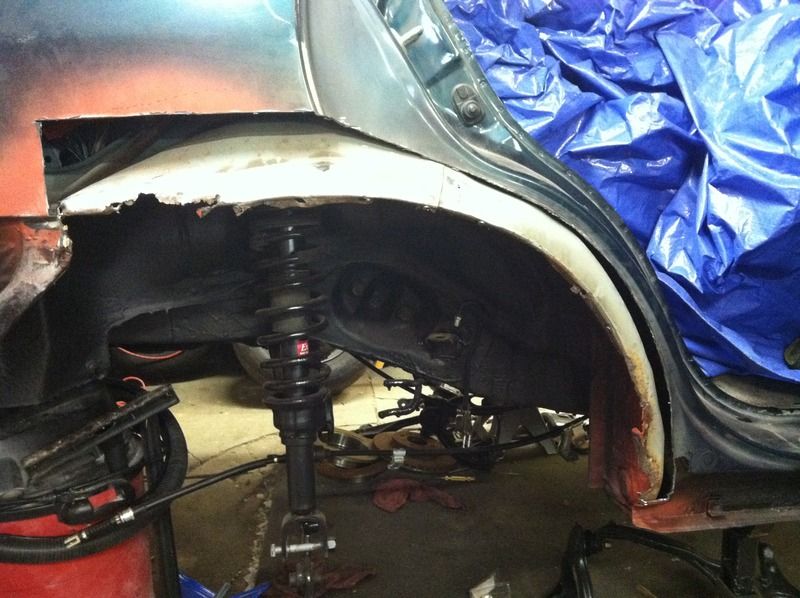
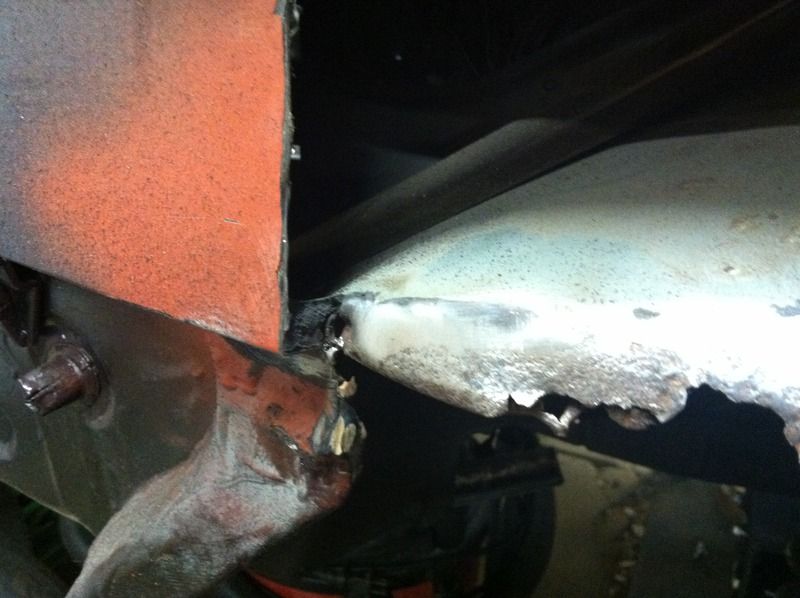
here is a pic of the bad side where i did some exploratory grinding. the rust doesnt seem to be present anywhere else on the outer panel. hopefully the inner is the same.
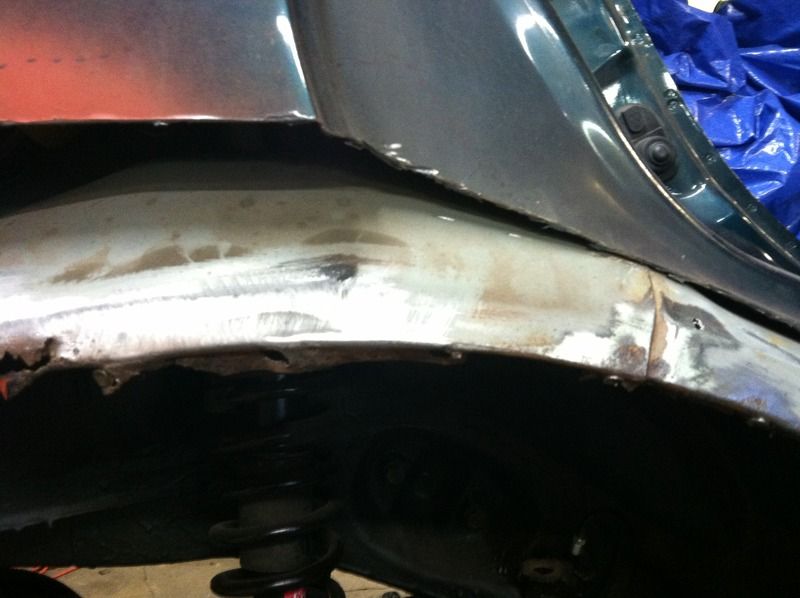
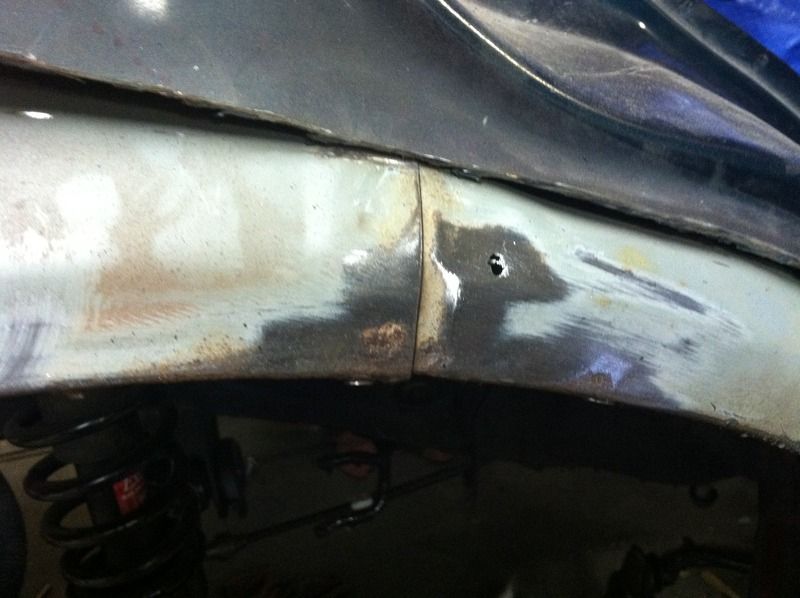
i circled some areas that i'm not sure about with the wheel arch area, but first here was my original plan.
only cut out what i absolutely need to, repair the inner panel as needed, and then 3m panel bond adhesive in the replacement (using a flange tool to make the panels sit correctly).
i do have welder, but it is a flux welder. i do not have access to a mig welder and i really do not intend on buying one for this project. i read that the flux is way to hot to weld this thin of a panel so that lead me to the adhesive. also with the welder i was worried about panel warping with the heat.
after taking a closer look at the wheel arch area, i think i may not have a choice but to use my flux welder on a few parts because i do not see how i can make the adhesive and flanging work. i have read that with the flux on the min setting and a slower speed with decent wire it wont blow through, but it wont be pretty either. Here is the bad side of the car and my idea.
the plan now is (maybe?) cut the outer panel similar to the outline i have. its free hand in photoshop so its not pretty... then make any repairs needed to the inner panel. flange and adhesive the lip of the arch and where it would connect to the main body panel of the car above the wheel, and then weld where the right side of the arch meets the door jam area. input on this? also, i'm not real sure where is best to make the cut on the panel on the right side of that wheel arch.
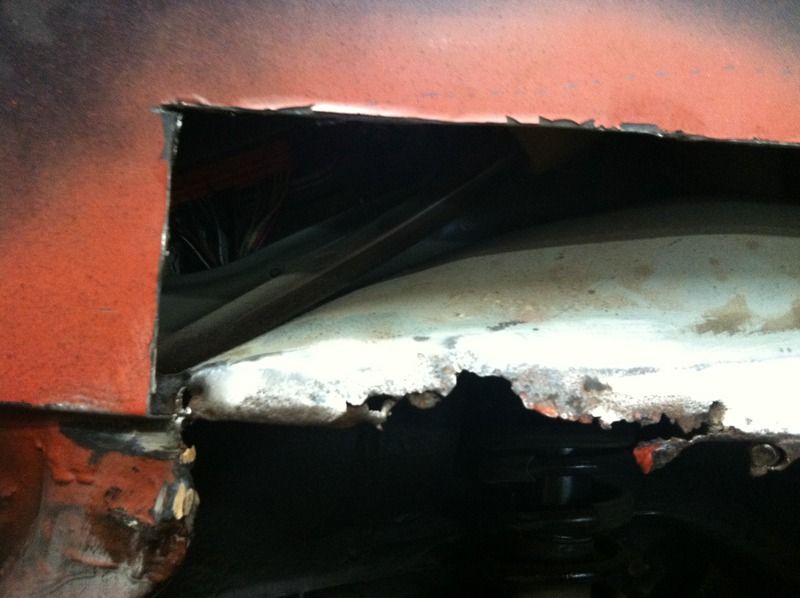
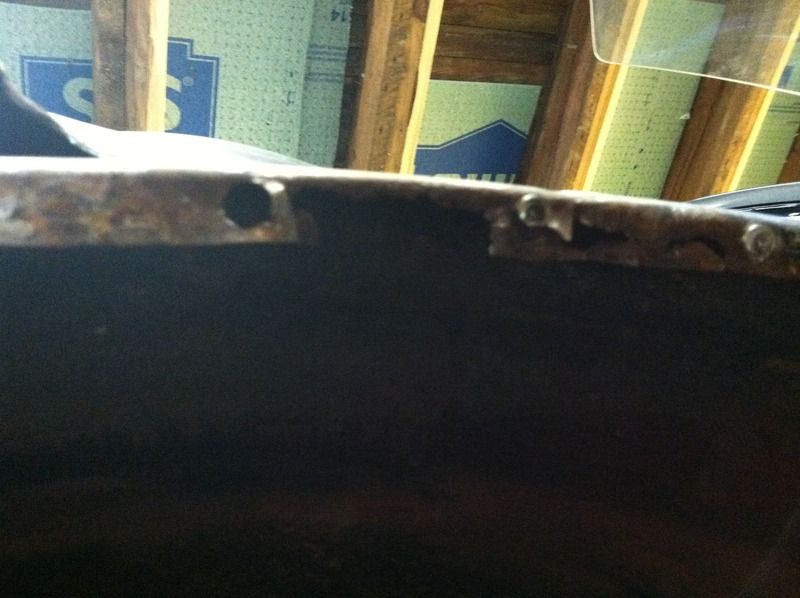
here is a pic of just the doorjam area of the wheel arch.
i'm a little lost on what is the best place to cut this part of the arch off the car and also to make it easier on myself to reinstall the new piece.
can i use just the panel bonding adhesive for this repair, or am i better to use my flux in that door jam area?
any advice is very much appreciated. not quite ready to start this process just yet, but i want to get my game plan nailed down way before i'm ready to start this.
here is a pic of the bad side where i did some exploratory grinding. the rust doesnt seem to be present anywhere else on the outer panel. hopefully the inner is the same.

i circled some areas that i'm not sure about with the wheel arch area, but first here was my original plan.
only cut out what i absolutely need to, repair the inner panel as needed, and then 3m panel bond adhesive in the replacement (using a flange tool to make the panels sit correctly).
i do have welder, but it is a flux welder. i do not have access to a mig welder and i really do not intend on buying one for this project. i read that the flux is way to hot to weld this thin of a panel so that lead me to the adhesive. also with the welder i was worried about panel warping with the heat.
after taking a closer look at the wheel arch area, i think i may not have a choice but to use my flux welder on a few parts because i do not see how i can make the adhesive and flanging work. i have read that with the flux on the min setting and a slower speed with decent wire it wont blow through, but it wont be pretty either. Here is the bad side of the car and my idea.

the plan now is (maybe?) cut the outer panel similar to the outline i have. its free hand in photoshop so its not pretty... then make any repairs needed to the inner panel. flange and adhesive the lip of the arch and where it would connect to the main body panel of the car above the wheel, and then weld where the right side of the arch meets the door jam area. input on this? also, i'm not real sure where is best to make the cut on the panel on the right side of that wheel arch.
here is a pic of just the doorjam area of the wheel arch.

i'm a little lost on what is the best place to cut this part of the arch off the car and also to make it easier on myself to reinstall the new piece.
can i use just the panel bonding adhesive for this repair, or am i better to use my flux in that door jam area?
any advice is very much appreciated. not quite ready to start this process just yet, but i want to get my game plan nailed down way before i'm ready to start this.
 01-28-2016, 05:30 PM
#2

You have a basic idea, Sadly the rust is coming from the inside out. Don't be surprised if you find more once you start cutting. Cut as little as you need to, use the part you cut off as a templet. You can also use the replacement panel as a templet. You are going to need Seam seal and short hair bondo. Just make sure when you cut you don't cut into overlapping panels. Also make sure you cant save part of the dog bone by sand blasting it. On the wheel well arch you can grind vs cutting as it can be a pain.
01-29-2016, 04:18 AM
#3
You have a basic idea, Sadly the rust is coming from the inside out. Don't be surprised if you find more once you start cutting. Cut as little as you need to, use the part you cut off as a templet. You can also use the replacement panel as a templet. You are going to need Seam seal and short hair bondo. Just make sure when you cut you don't cut into overlapping panels. Also make sure you cant save part of the dog bone by sand blasting it. On the wheel well arch you can grind vs cutting as it can be a pain.
not a total noob when it comes to bodywork, but this will definitely be the most "advance" stuff i'll be attempting body repair wise.
01-29-2016, 06:05 PM
#4
Its the part you have painted red. Yes seam seal, it might cover a gap or pin hole that might of formed when installing. you don't need to use seam seal on the panel that's facing out just like the wheel well arch. Make sure to use tiger hair bondo as its water resistance and will fill any pin holes on the panel facing out.
01-29-2016, 06:23 PM
#5
ah got it. i think the outer part of that dog bone is too far gone then, part of the lip is missing on the inside. if the inner part is ok, i can repair that. i'll try and get some better pics this weekend while i'm in the garage.
01-30-2016, 06:17 PM
#6
Honda-Tech Member
Join Date: Oct 2012
Location: CT
Posts: 53
Likes: 0
Received 0 Likes
on
0 Posts
HI, guys
I am also preparing to do the same exact job to my CIVIC. The one thing that i've never used before is the 3M adhesive you mention and the whole flanging thing. Is flanging the same as routing out wood, for example, you need to "roat" out some wood for your, House, door frame that that the door hinge sit flush and is even with the rest of the door frame. So, is "flanging" the same where I gring/sand down the edge of the new panel, say half way thin and do the same to the body where it's attaching? Sorry if i got complicated here, I like to understand things down to each detail.
Last question is it necessary to make or have the inner wheel well lip/edge, where all road debree and salt and crap collect?
Thank you.
02-01-2016, 01:44 AM
#7
No sure on wood, the most I ever made from wood was a co2 car. Basically your trying to remove the spot welds from like the wheel well arch. You do want the lip, its where two pieces of metal join and somewhat hold the panel up.
Trending Topics
02-01-2016, 10:05 AM
#8
Honda-Tech Member
Join Date: Oct 2012
Location: CT
Posts: 53
Likes: 0
Received 0 Likes
on
0 Posts
Okay, thanks i understand now that it's functional not for looks.
The reason i mentioned the wood scenario was because that's what i'm familiar with. So would you say that "flanging" is just feathering both the body and the new panel to a point where there isn't a seam. Basically getting it so that the new panel piece isn't sitting on top of the body?
The reason i mentioned the wood scenario was because that's what i'm familiar with. So would you say that "flanging" is just feathering both the body and the new panel to a point where there isn't a seam. Basically getting it so that the new panel piece isn't sitting on top of the body?
02-01-2016, 10:40 AM
#10
Honda-Tech Member
Join Date: Oct 2012
Location: CT
Posts: 53
Likes: 0
Received 0 Likes
on
0 Posts
Perfect you have answered my question, thank you very much. Now to see if they make an electric flanger, no compressor available.
02-01-2016, 10:57 AM
#11
eastwood does have a manual one, like a pair of pliers. check out there, i was going to buy one of them but i'm still not sure what direction i'm going to take with my repair. if you get to yours first take pictures so i can figure out what i'm going to do lol
02-12-2016, 10:26 PM
#13
those hand tools are a paint literally I have a set. Yes The flatter you can get the part of metal to sit the less body work you have to do.
05-19-2016, 08:52 AM
#14
i'm bumping this back up as i've started this terrifying process lol
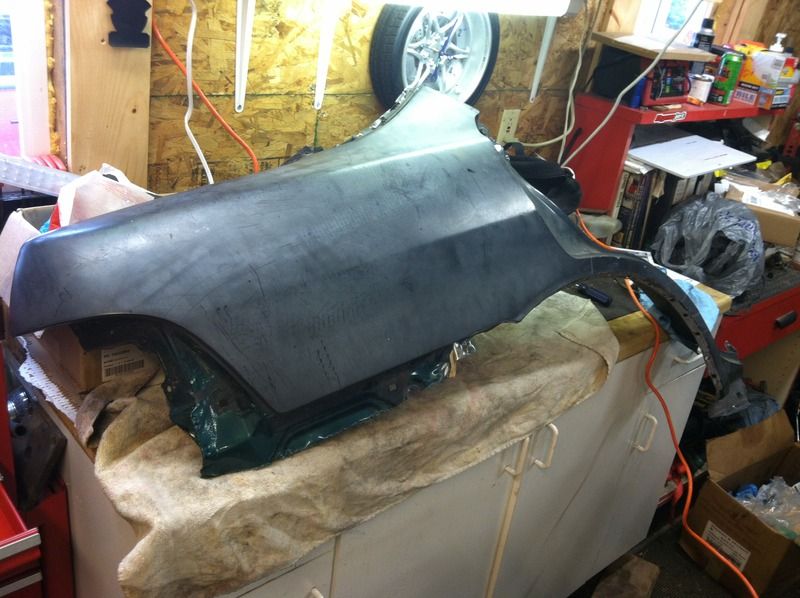
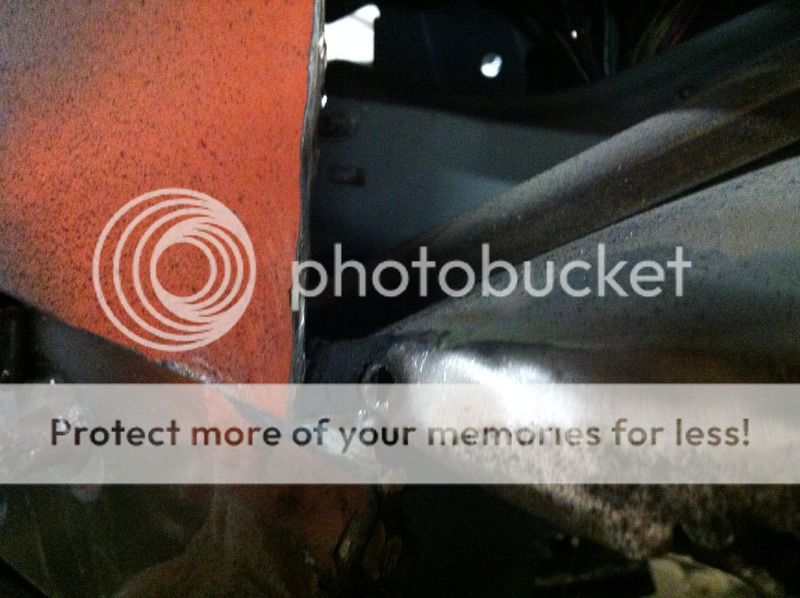
i cut this piece off the car to start the rear rust repair. i'm starting small, because i dont want to have to cut off more than i need and replace more than i need. so a few things i'm finding out so far. the rust to the inner panel is pretty bad. the outer is not bad at all other than what you could plainly see.
cut this off
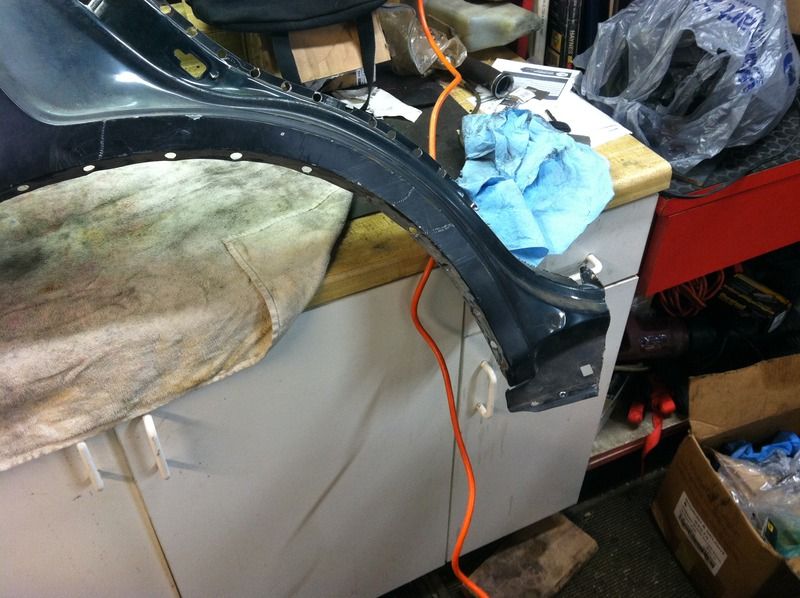
exposed this portion of the wheel arch and inner panel.
you can see how trashed the inner panel is in the lip area


so far, i actually do not anticipate needing to cut off any additional outer panel for rust repair, maybe to get better access to the inner panel for repair.
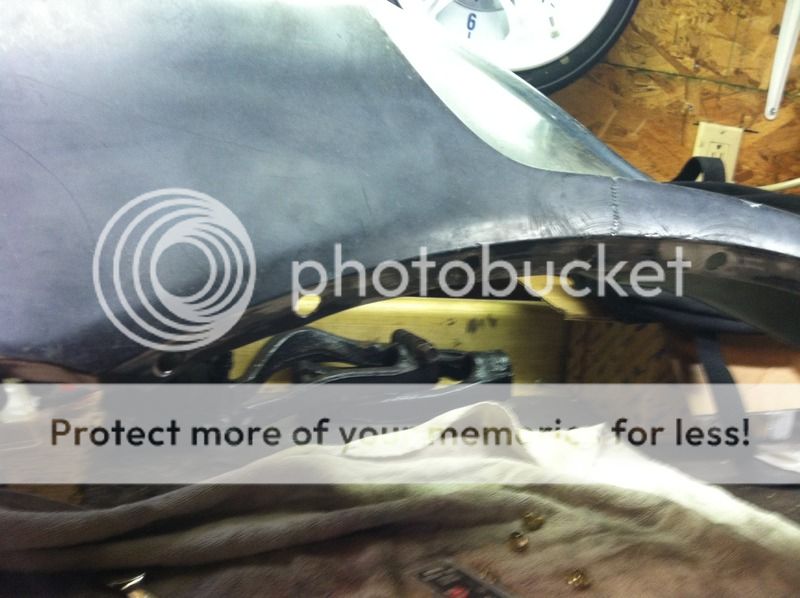
luckily, i have one of these for both sides
and the inner panels they came with are in decent shape, so i;ll probably end up cutting material off these ones and welding them to the car

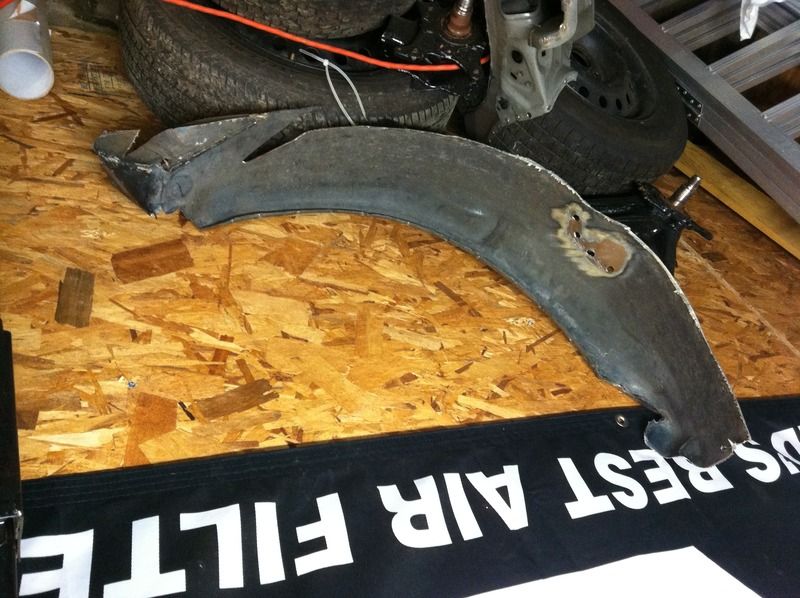
so, this is definitely more than the body work i'm used to and have previous experience with. it probably shows lol. if i take my time, and keep doing my research, hopefully this will turn out ok. i've thrown the idea out the window of panel adhesive this entire repair, there will definitely be some welding here. i will still use the adhesive in the wheel lip are.
this weekend, i need to remove the rest of this panel. you can see i left a little bit in this picture here:

i think i was afraid of cutting into something structural, but from the donor panel i have it looks like it is still part of the outer panel.
then i think i will grind down the coating on this inner panel in the lip area and see where the bad metal stops, get that cut out and get my replacement piece ready to go.
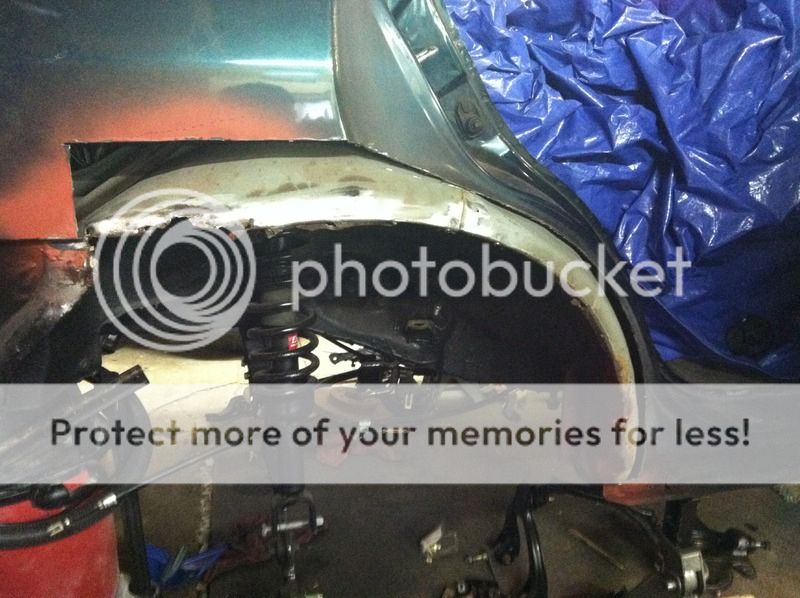
i'm aslo going to grind this area down further to see if i need to go back into the outer panel any further. i'll pull away that rubberized strip to see if rust is forming back there. if not, i think i'm good with cutting material away from the outer panel, what do you guys think?
and i have a question regarding fixing this...someone (me..) got a little too enthusiastic separating the outer panel from the inner panel on the donor pieces, what is the easiest way to get this arch lips back into the correct shape?

i cut this piece off the car to start the rear rust repair. i'm starting small, because i dont want to have to cut off more than i need and replace more than i need. so a few things i'm finding out so far. the rust to the inner panel is pretty bad. the outer is not bad at all other than what you could plainly see.
cut this off

exposed this portion of the wheel arch and inner panel.

you can see how trashed the inner panel is in the lip area


so far, i actually do not anticipate needing to cut off any additional outer panel for rust repair, maybe to get better access to the inner panel for repair.
luckily, i have one of these for both sides


and the inner panels they came with are in decent shape, so i;ll probably end up cutting material off these ones and welding them to the car


so, this is definitely more than the body work i'm used to and have previous experience with. it probably shows lol. if i take my time, and keep doing my research, hopefully this will turn out ok. i've thrown the idea out the window of panel adhesive this entire repair, there will definitely be some welding here. i will still use the adhesive in the wheel lip are.
this weekend, i need to remove the rest of this panel. you can see i left a little bit in this picture here:

i think i was afraid of cutting into something structural, but from the donor panel i have it looks like it is still part of the outer panel.
then i think i will grind down the coating on this inner panel in the lip area and see where the bad metal stops, get that cut out and get my replacement piece ready to go.

i'm aslo going to grind this area down further to see if i need to go back into the outer panel any further. i'll pull away that rubberized strip to see if rust is forming back there. if not, i think i'm good with cutting material away from the outer panel, what do you guys think?

and i have a question regarding fixing this...someone (me..) got a little too enthusiastic separating the outer panel from the inner panel on the donor pieces, what is the easiest way to get this arch lips back into the correct shape?

 05-19-2016, 09:57 PM
#15
Shit Posts: 15
Are you taking about the lip bent outwards ?
If so, a rubber mallet and some semi-good hits all along the lip will push it back into place.
If so, a rubber mallet and some semi-good hits all along the lip will push it back into place.
05-20-2016, 07:43 AM
#17
Shit Posts: 15
A hammer with consistent hits all around the arch lip should take it back to its original even form.
07-08-2016, 02:10 PM
#18
Seagull Management
Join Date: Jun 2008
Location: Miramichi, NB, Canada
Posts: 15,150
Likes: 0
Received 24 Likes
on
22 Posts
You're far, far better off using the entire donor quarter. Drill out the spot welds inside the door, this leaves you with very little bodywork in that area, plus you'll have much less chance of a rust issue. To splice in the rear C pillar section you'll want to make your cut an inch and a half or so lower than where the replacement piece comes to, then cut that extra piece out so the replacement piece butts up against the original C pillar. Use the piece you cut out as a sleeve in behind so you have something solid to weld to. Drill the spotwelds out inside the trunk opening. Any existing seam is easy, simply drill the spotwelds out, put the new piece in place and plug weld where you drilled out the original spot welds.
By splicing at the C pillar you have a very small section to fill and make smooth, you'll have much less blocking and it will be a lot easier for an amateur to make it look straight. The same goes for the rocker. The only other major seam will be under the rear bumper and honestly it wont make a whole lot of difference how pretty it is no one will see it with the bumper on. By only cutting out the small section you've already done it will be much harder to make it look straight and it will be much, much more likely to rust through at the seam. Make sure you use a waterproof fiberglass filler before using lightweight bodyfill or putty or you will have rust problems down the road.
By splicing at the C pillar you have a very small section to fill and make smooth, you'll have much less blocking and it will be a lot easier for an amateur to make it look straight. The same goes for the rocker. The only other major seam will be under the rear bumper and honestly it wont make a whole lot of difference how pretty it is no one will see it with the bumper on. By only cutting out the small section you've already done it will be much harder to make it look straight and it will be much, much more likely to rust through at the seam. Make sure you use a waterproof fiberglass filler before using lightweight bodyfill or putty or you will have rust problems down the road.

Thread
Thread Starter
Forum
Replies
Last Post