
1st Gen RL Stereo/Gauge Cluster Removal How-To...
 11-06-2013, 10:47 AM
#1
Honda-Tech Member
Thread Starter
Join Date: Jun 2008
Location: Bailey, CO, USA
Posts: 17
Likes: 0
Received 0 Likes
on
0 Posts
Gauge Cluster/Stereo Removal How-To
I picked up a used 2002 RL and it needed the temp gauge bulb replaced. The Nav system is non-functioning and I want to replace it and the stereo with a DVD player and video monitor so they are secondary reasons to dig into the dash and figure out how to do both.
To remove the gauge cluster you have to remove the upper console, or at least detach it at the top so the right end of the gauge cluster bezel will come free.
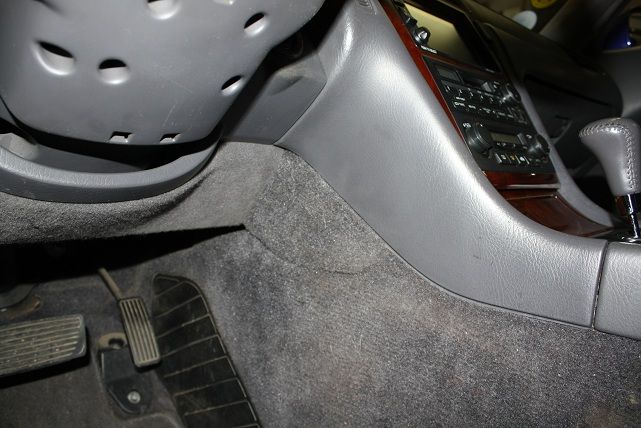
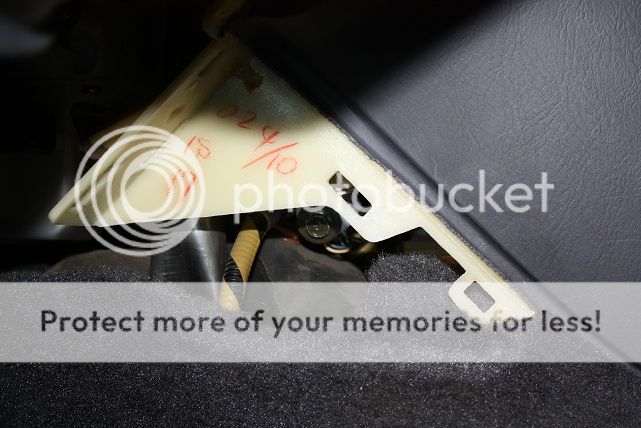
Remove the small, triangular lower carpet pieces by pulling them straight off. They’re held on with clips so be prepared go hunting for the ones that pop off when you pull the panels off. Behind each panel you’ll see a 6mm bolt (10mm head) that holds the bottom of the entertainment/HVAC center in place. No need to remove the bolts at this point. There are two more to be un-covered and removed.


Put the transmission in neutral or D4 (just so it’s centered).
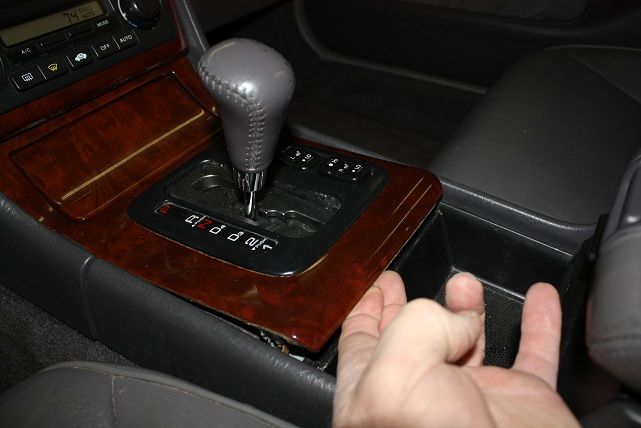
Remove the console panel and gear shift trim in one piece by pulling up on the rear of the console panel to release the clips. The actual shifter gate stays behind with the shifter mechanism.
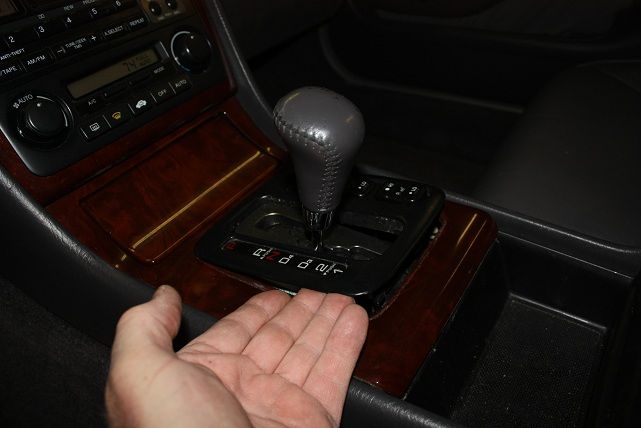
Now reach under the console panel and push the shifter trim up to release the clips holding it in place.
Remove the bulb for the gear select indicator, un-plug the two seat heater switches and then remove the shifter trim piece.
Note: The console panel has a couple hooks to hold it in the front, upper corners.
Pull up on the console panel to release all the clips being mindful of the hooks. Once free, disconnect the lighter socket and remove the console panel. Now is the perfect time to clean up the console pieces and around the shifter itself if needed.

Now look under the upper console for the other two 6mm bolts holding it in place.
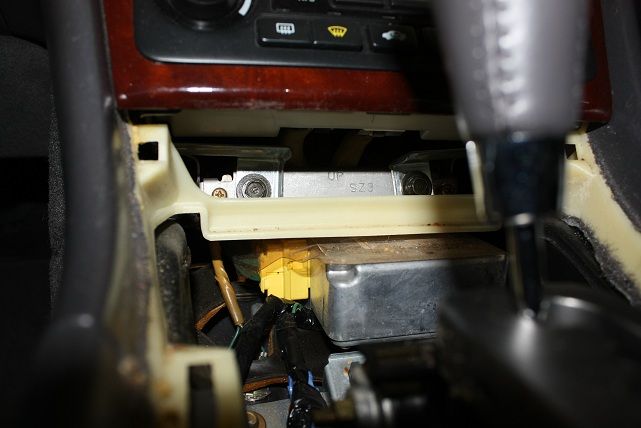
Remove these and the other two under the trim pieces on each side of the console.
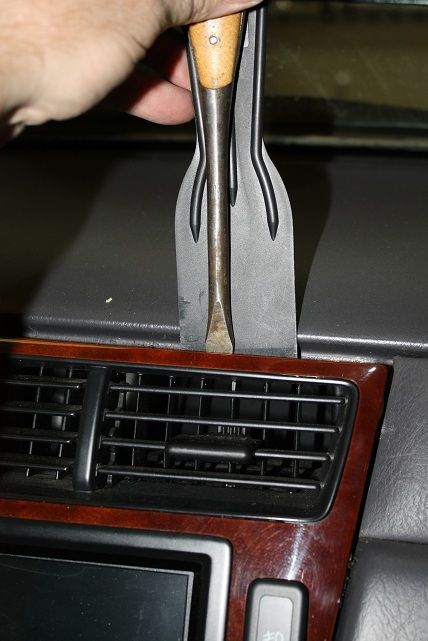
The upper console can now be pulled out on the bottom a bit as it only being held in by the four clips along the top of the center air vent. To release these, I used a 2” plastic putty knife and a very wide std. screwdriver. I started on the right side and worked towards the left. Once one clip comes free, the other release pretty easily. And, yes, you will probably need to go hunting for one or two of them.
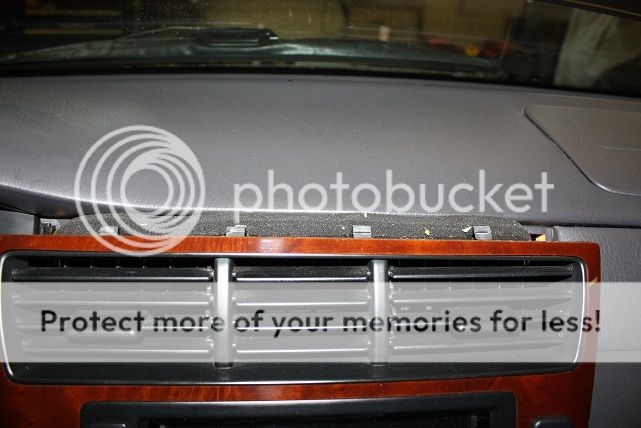
Here’s a pic showing the locations of the four clips. The two in the middle are lined up pretty close the vent dividers. The outside ones are almost in the center of the two adjustable vents.
At this point, if getting the gauge cluster out is your goal, there’s no need to go any further in taking out the upper console. It only needs to be separated enough to get the right end of the cluster bezel free.
Once the four clips are free and you can pull the upper console out freely, start disconnecting all the switches, stereo/NAV and HVAC controls. I counted 11 or 12! After all the connectors are unplugged, pull the center console straight out.
If getting the stereo/NAV system out is your goal then you’re done. If getting to the gauge cluster is your mission, there’s more to do.
Remove the lower dash panel by pulling on it to release the clips. Again, several went flying on me so be prepared to go hunting for them. Be careful removing the section around the ignition key. It seemed like it would be easy to break off if not patient.

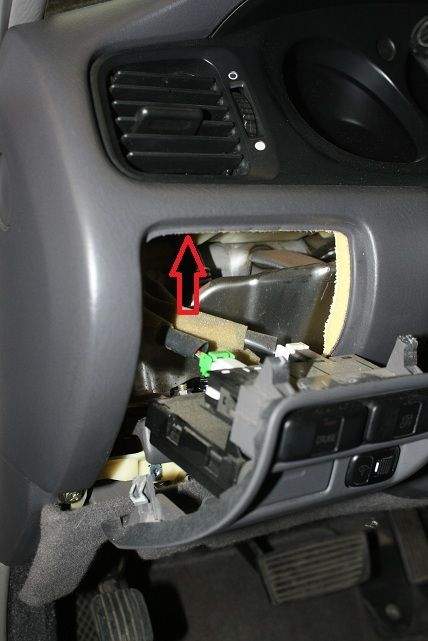
Remove the drivers switch panel by removing the screw below the e-brake release and pulling it out from the bottom. You can unplug the switches and get it out of the way, but I left it hanging without issue. Pulling this switch panel gains you access to the clip holding the lower left corner of the cluster bezel/air vent in place.
Remove the two screws in the top of the cluster bezel.
Now comes the tricky part: Removing the bezel.
Lower the steering wheel and extend it out so you have as much room as you can get to work. It takes some finesse but start by getting under the top and pull it out, then work on getting the clips on the right side to come free. Work towards the left and release the clip under the air vent once the bezel seems free (Sorry, I really couldn’t take pics and pull the bezel out at the same time). Once the bezel is free, unplug the trip/temp select/reset switch and remove the bezel completely.
Getting the gauge cluster out is now just a matter of removing four screws, pulling the cluster out enough to get to the plugs to disconnect them and removing the cluster.
The cluster itself comes apart for access to almost all the bulbs. There are a few that are soldered to the circuit board but the majority are � turn socket types.
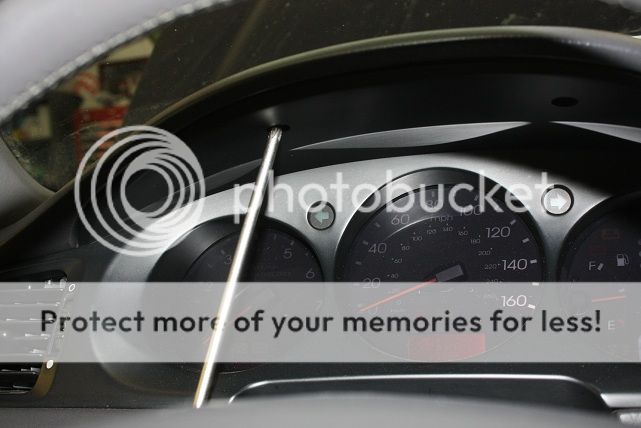
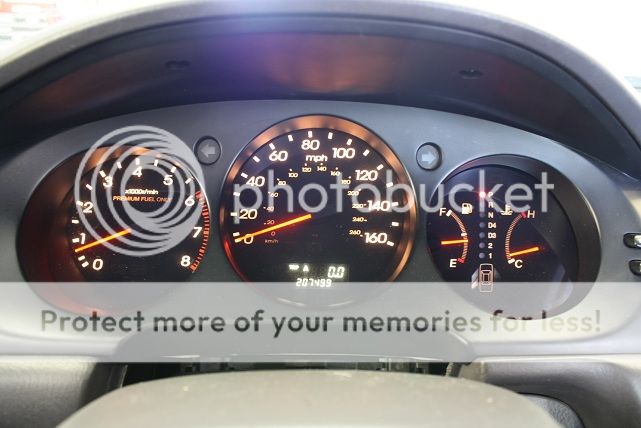
Remove the white plastic cover then separate the circuit board from the cluster frame by removing all the screws holding the gauges in-place. Now you can replace what bulbs are out and pull any “nuisance lights” if needed (I have an SRS warning light so I pulled it until my brother can put a scanner on it and figure out what’s the cause). My temp gauge bulb was out so I couldn’t see the needle. All fixed now…
I picked up a used 2002 RL and it needed the temp gauge bulb replaced. The Nav system is non-functioning and I want to replace it and the stereo with a DVD player and video monitor so they are secondary reasons to dig into the dash and figure out how to do both.
To remove the gauge cluster you have to remove the upper console, or at least detach it at the top so the right end of the gauge cluster bezel will come free.
Remove the small, triangular lower carpet pieces by pulling them straight off. They’re held on with clips so be prepared go hunting for the ones that pop off when you pull the panels off. Behind each panel you’ll see a 6mm bolt (10mm head) that holds the bottom of the entertainment/HVAC center in place. No need to remove the bolts at this point. There are two more to be un-covered and removed.
Put the transmission in neutral or D4 (just so it’s centered).
Remove the console panel and gear shift trim in one piece by pulling up on the rear of the console panel to release the clips. The actual shifter gate stays behind with the shifter mechanism.
Now reach under the console panel and push the shifter trim up to release the clips holding it in place.
Remove the bulb for the gear select indicator, un-plug the two seat heater switches and then remove the shifter trim piece.
Note: The console panel has a couple hooks to hold it in the front, upper corners.
Pull up on the console panel to release all the clips being mindful of the hooks. Once free, disconnect the lighter socket and remove the console panel. Now is the perfect time to clean up the console pieces and around the shifter itself if needed.
Now look under the upper console for the other two 6mm bolts holding it in place.
Remove these and the other two under the trim pieces on each side of the console.
The upper console can now be pulled out on the bottom a bit as it only being held in by the four clips along the top of the center air vent. To release these, I used a 2” plastic putty knife and a very wide std. screwdriver. I started on the right side and worked towards the left. Once one clip comes free, the other release pretty easily. And, yes, you will probably need to go hunting for one or two of them.
Here’s a pic showing the locations of the four clips. The two in the middle are lined up pretty close the vent dividers. The outside ones are almost in the center of the two adjustable vents.
At this point, if getting the gauge cluster out is your goal, there’s no need to go any further in taking out the upper console. It only needs to be separated enough to get the right end of the cluster bezel free.
Once the four clips are free and you can pull the upper console out freely, start disconnecting all the switches, stereo/NAV and HVAC controls. I counted 11 or 12! After all the connectors are unplugged, pull the center console straight out.
If getting the stereo/NAV system out is your goal then you’re done. If getting to the gauge cluster is your mission, there’s more to do.
Remove the lower dash panel by pulling on it to release the clips. Again, several went flying on me so be prepared to go hunting for them. Be careful removing the section around the ignition key. It seemed like it would be easy to break off if not patient.
Remove the drivers switch panel by removing the screw below the e-brake release and pulling it out from the bottom. You can unplug the switches and get it out of the way, but I left it hanging without issue. Pulling this switch panel gains you access to the clip holding the lower left corner of the cluster bezel/air vent in place.
Remove the two screws in the top of the cluster bezel.
Now comes the tricky part: Removing the bezel.
Lower the steering wheel and extend it out so you have as much room as you can get to work. It takes some finesse but start by getting under the top and pull it out, then work on getting the clips on the right side to come free. Work towards the left and release the clip under the air vent once the bezel seems free (Sorry, I really couldn’t take pics and pull the bezel out at the same time). Once the bezel is free, unplug the trip/temp select/reset switch and remove the bezel completely.
Getting the gauge cluster out is now just a matter of removing four screws, pulling the cluster out enough to get to the plugs to disconnect them and removing the cluster.
The cluster itself comes apart for access to almost all the bulbs. There are a few that are soldered to the circuit board but the majority are � turn socket types.
Remove the white plastic cover then separate the circuit board from the cluster frame by removing all the screws holding the gauges in-place. Now you can replace what bulbs are out and pull any “nuisance lights” if needed (I have an SRS warning light so I pulled it until my brother can put a scanner on it and figure out what’s the cause). My temp gauge bulb was out so I couldn’t see the needle. All fixed now…


Thread
Thread Starter
Forum
Replies
Last Post