

DIY: Baffled catch can. Step by step with pics included.

DIY: Catch can build
Note: Again, you don't have to do this in the order I specified. But for the sake of the DIY, this is the order I'm suggesting. As long as you end up with whats at the bottom of the page, you're doin ok
Tools needed:
(2) 3/8 x 3/8 Hose barbs
(1) 1/2 x 3/8 Hose barb
1/2" thread tap
6"-7" of 1/2 pipe
Drill w/assorted bits
Knife, something sharp (O used scissors )
)
Step 1: Gather all your materials and get ready to have some fun!
Step 2: Flatten out the top of your cap. The key hole thing needs to go so you have a flat surface. Use a hacksaw to cut it off.
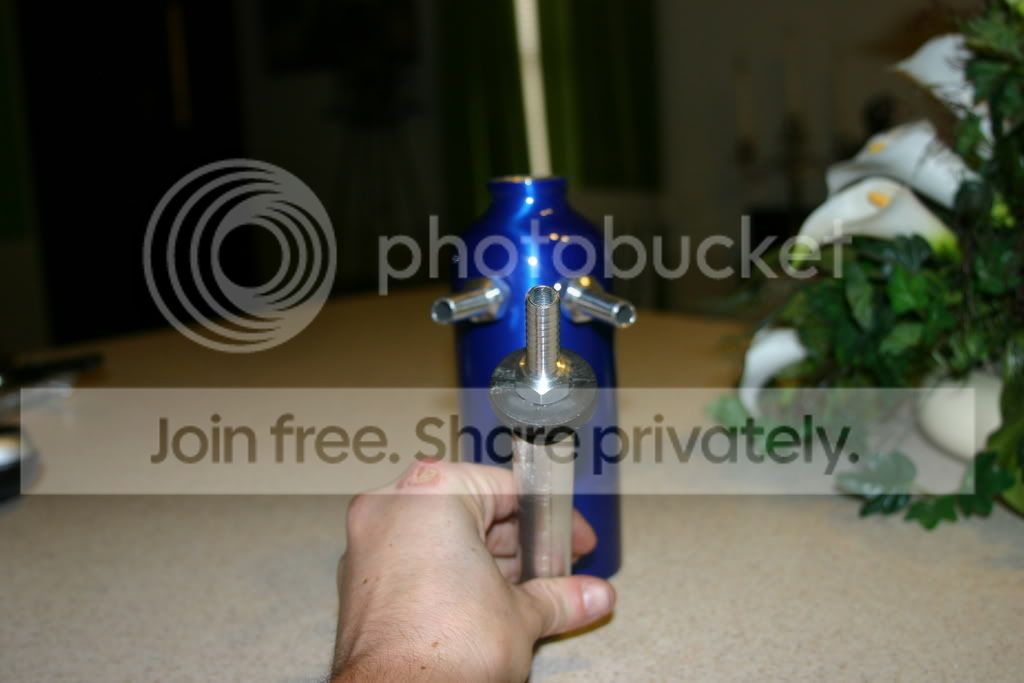
Step 3: Drill al hole in the top. I don't remember the size drill bit I used, but I made the hole juuuuuuuuuuuuuust big enough so the 3/8x1/2 hose bard screwed into it.
Step 4: Cut your pipe to the length you want. I eyeballed a piece that was in a bin at work, so I'm just guessing on the size (around 6"-7").
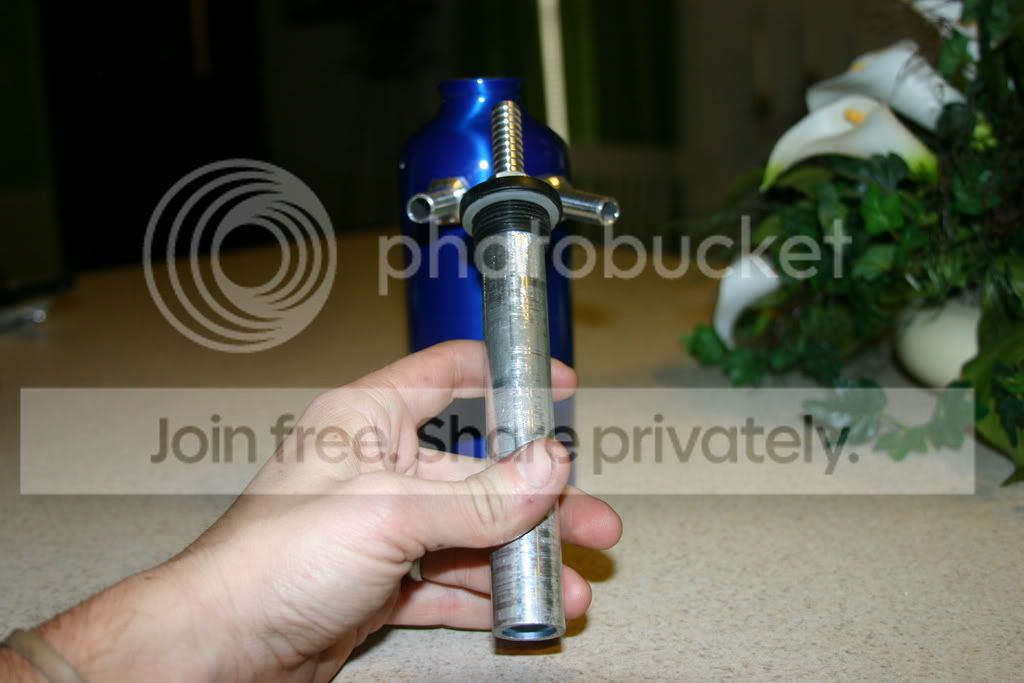
Step 5: Tap the pipe. You'll want to get your tap and thread the inside of the pipe so your hose barb will screw in.
Step 6: Shave the inside of the plastic cap/grind down the threaded end of the pipe. You can do either or both (I did both). The goal is for the pipe to slide far enough into the cap so you can thread the hose barb into it, keeping the pipe in one place and stopping it from falling into your can.
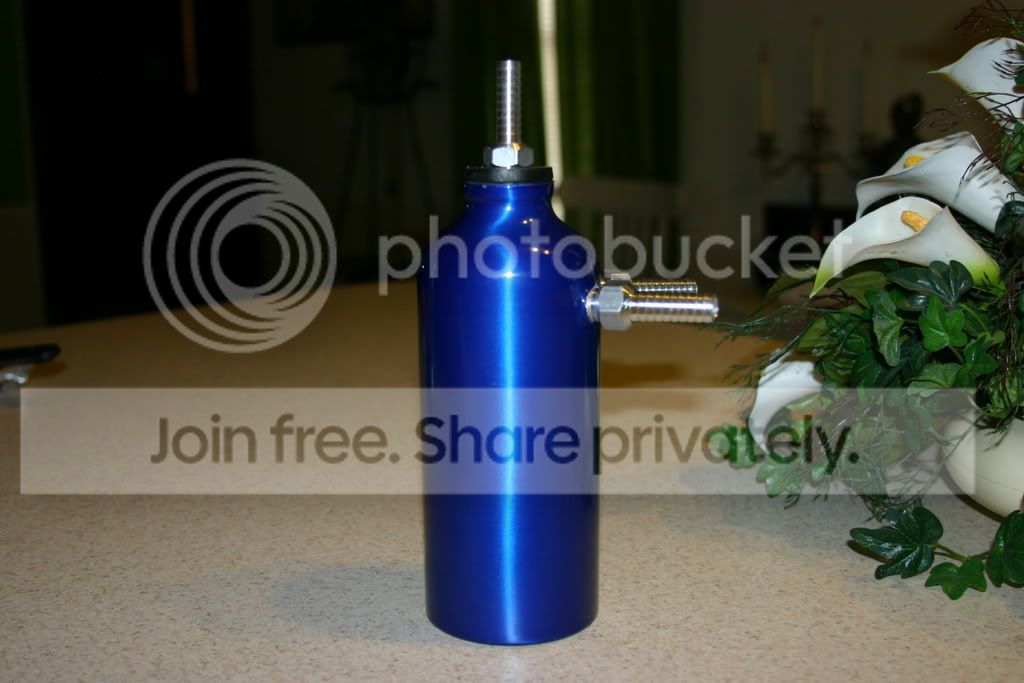
Step 7: Drill the 2 holes for the 3/8 x 3/8 hosebarbs. I started out w/a 1/14 drill bit and worked my way up to 1/2" The metal is very thin, so be careful not to push too hard on the drill and dent around where you are drilling. Be even MORE careful when the drill goes through the can, so that it doesn't go through too hard and you dent BEHIND the hole on the other side.
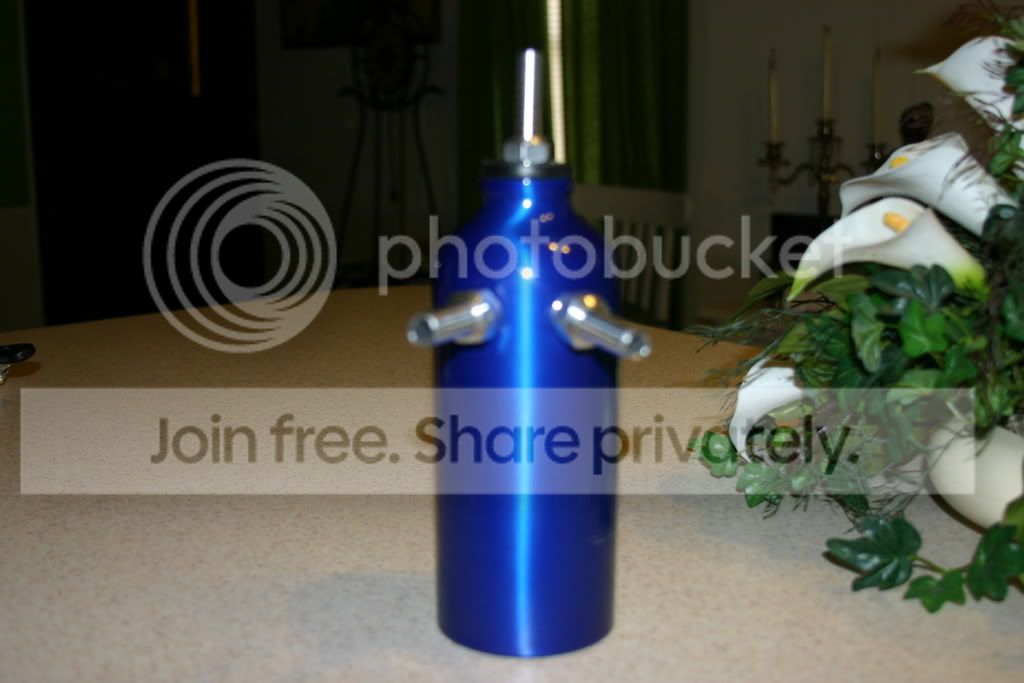
Step 8: Step back and enjoy your uber hone-made, baffled catch can!

Excuse the nasty lookin burn on my knuckle. It's from my header. I did it when I was removing my power steering belt. I assure you the burn is very, very clean.
If I have time and the wife is out doing whatever, I might do the install this weekend. We'll see. In the meantime, all I need to do is get some silicone and go around where the hosebarb screws into the cap to seal it off. I think the ones in the side have a good enough seal.
Questions, comments?
Enj0y!
Note: Again, you don't have to do this in the order I specified. But for the sake of the DIY, this is the order I'm suggesting. As long as you end up with whats at the bottom of the page, you're doin ok
Tools needed:
(2) 3/8 x 3/8 Hose barbs
(1) 1/2 x 3/8 Hose barb
1/2" thread tap
6"-7" of 1/2 pipe
Drill w/assorted bits
Knife, something sharp (O used scissors
)Step 1: Gather all your materials and get ready to have some fun!
Step 2: Flatten out the top of your cap. The key hole thing needs to go so you have a flat surface. Use a hacksaw to cut it off.
Step 3: Drill al hole in the top. I don't remember the size drill bit I used, but I made the hole juuuuuuuuuuuuuust big enough so the 3/8x1/2 hose bard screwed into it.
Step 4: Cut your pipe to the length you want. I eyeballed a piece that was in a bin at work, so I'm just guessing on the size (around 6"-7").
Step 5: Tap the pipe. You'll want to get your tap and thread the inside of the pipe so your hose barb will screw in.
Step 6: Shave the inside of the plastic cap/grind down the threaded end of the pipe. You can do either or both (I did both). The goal is for the pipe to slide far enough into the cap so you can thread the hose barb into it, keeping the pipe in one place and stopping it from falling into your can.
Step 7: Drill the 2 holes for the 3/8 x 3/8 hosebarbs. I started out w/a 1/14 drill bit and worked my way up to 1/2" The metal is very thin, so be careful not to push too hard on the drill and dent around where you are drilling. Be even MORE careful when the drill goes through the can, so that it doesn't go through too hard and you dent BEHIND the hole on the other side.
Step 8: Step back and enjoy your uber hone-made, baffled catch can!
Excuse the nasty lookin burn on my knuckle. It's from my header. I did it when I was removing my power steering belt. I assure you the burn is very, very clean.
If I have time and the wife is out doing whatever, I might do the install this weekend. We'll see. In the meantime, all I need to do is get some silicone and go around where the hosebarb screws into the cap to seal it off. I think the ones in the side have a good enough seal.
Questions, comments?
Enj0y!
<TABLE WIDTH="90%" CELLSPACING=0 CELLPADDING=0 ALIGN=CENTER><TR><TD>Quote, originally posted by forumnoobie »</TD></TR><TR><TD CLASS="quote">I bet your header got a few choice words.  </TD></TR></TABLE>
Actually. NO! I gritted my teeth and kept going.. I was in a time crunch. I only had about a minute to remove the belt.
I didn't have time for pain.
</TD></TR></TABLE>Actually. NO! I gritted my teeth and kept going.. I was in a time crunch. I only had about a minute to remove the belt.
I didn't have time for pain.

Thread
Thread Starter
Forum
Replies
Last Post
Corksil
Honda Civic / Del Sol (1992 - 2000)
4
Dec 27, 2009 09:33 AM
twentyhurtz
Acura Integra
7
Sep 21, 2006 04:33 PM
BlueShadow
Forced Induction
4
May 31, 2005 11:21 PM