

How to: Install universal fogs on a 5th gen + Bonus RSX seats installed!


Thread Starter
Honda-Tech Member
Joined: Apr 2006
Posts: 724
Likes: 0
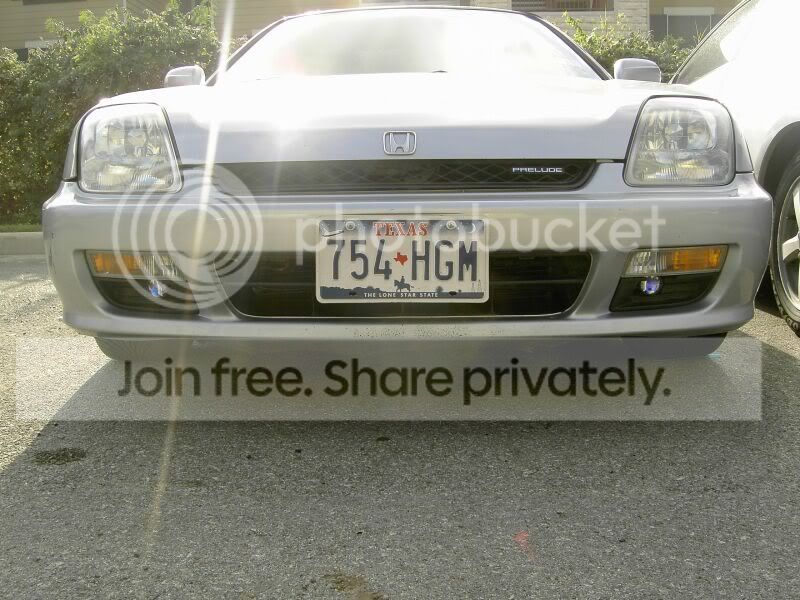
This project tooke me a while to complete b/c I didnt have all the tools needed...Living away from home sucks for things like this  . Well anways I bought some projector fogs from Auto Zone for 40 bucks and the only extra thing needed was four 8-32 screws with nuts that 1.5" long (plus tools offcourse). I am doing a paper on "instructions" so I did this for it so i am just gonna copy and paste...Sorry in advance for the long read.
Wiring
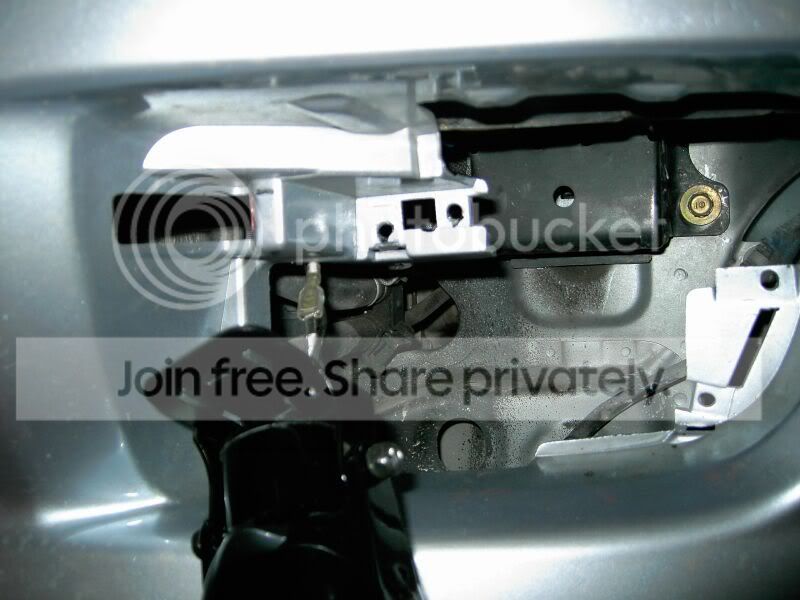
1. Feed the white and red wire through the firewall from the engine to the cabin, which is located next to the steering wheel in the engine bay as shown in Fig. 2.
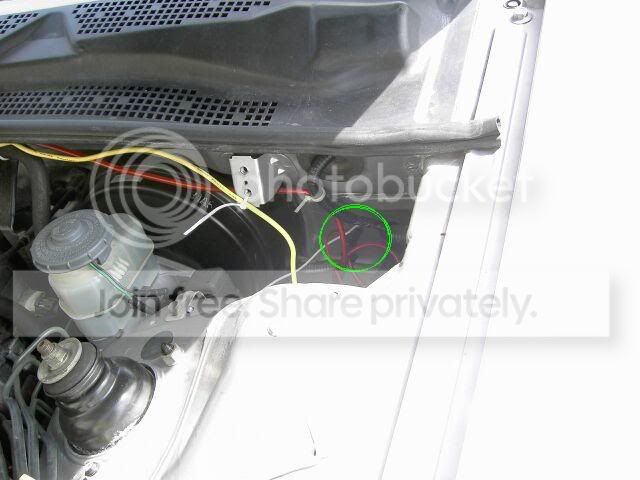 Fig. 2
2. Pop the panel out, located by the center console in the driver side, loosen the marked bolt in Fig. 3 a little bit with the 10mm socket, slide the hooked side of the black wire under the bolt, securely tighten it, and pop the panel back on.
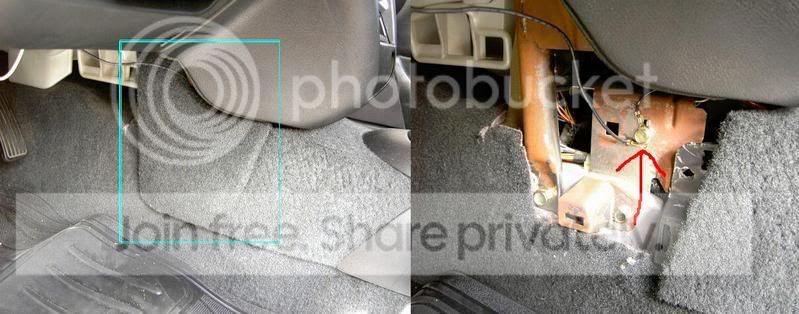 Fig. 3
3. Attach the other end of black wire to the switch where it says �GROUND,� attach the red wire to the switch where it says �POWER,� and attach the white wire to the switch where it says �ACC� as in Fig. 4.
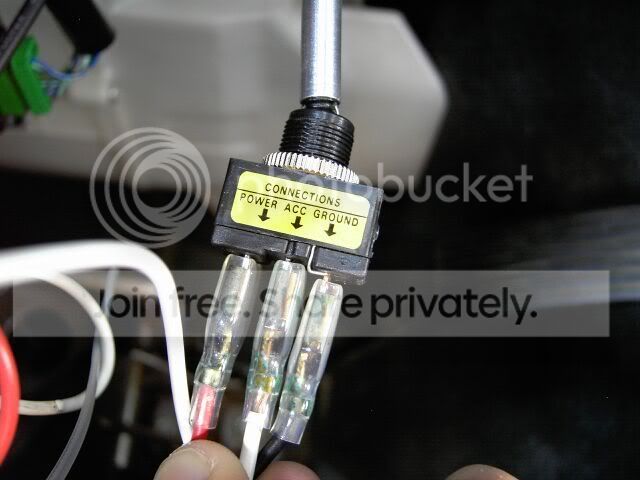 Fig. 4
4. Take the other end of the white wire towards the driver side headlight; attach the blue wire to the white wire and take the other end of the blue wire towards the passenger side headlight.
5. Take the hooked side of the red wire towards the battery and attach it to the bolt of the positive battery wire.
6. Loosen the marked bolt in Fig. 5 by the battery using the 10mm socket, slide the hooked side of one of the black wires under the bolt, and securely tighten the bolt. Take the other end of the black wire and lead it to the bottom of the bumper where the passenger side fog cover sits.
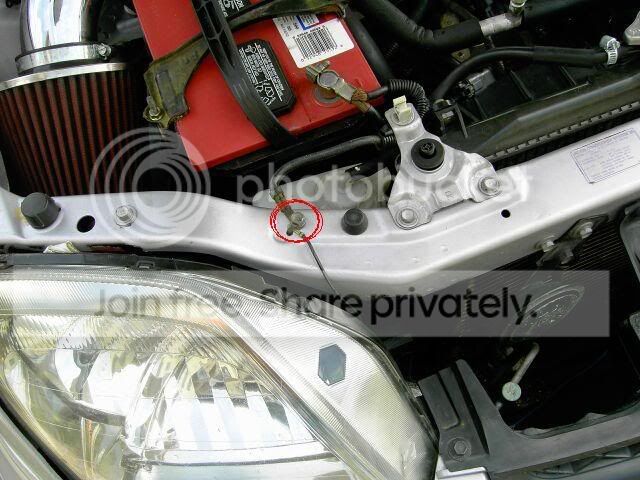 Fig. 5
7. Loosen the marked bolt on the right side of the engine bay, as shown in Fig. 6, using the 10mm socket, slide the hooked side of the last black wire under the bolt, and securely tighten the bolt. Take the other end of the black wire and lead it to the bottom of the bumper where the driver side fog cover sits.
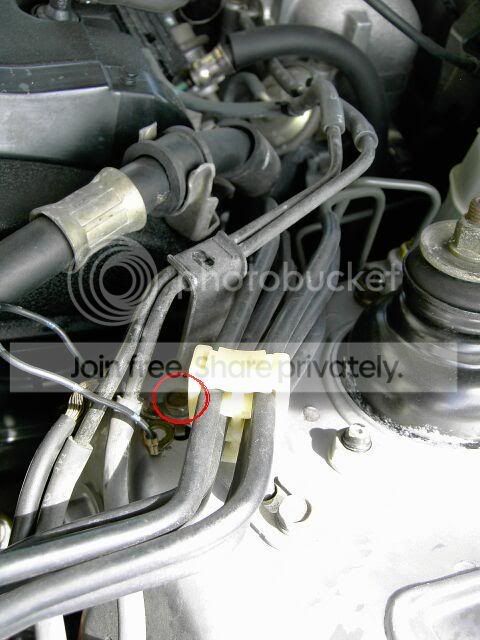 Fig. 6
Installing the Fog lights
8. Loosen the screw, shown in Fig. 7, for the driver-side turn signal using the Philips screwdriver, take it out of the bumper, and unhook the wires. Repeat for the passenger-side.
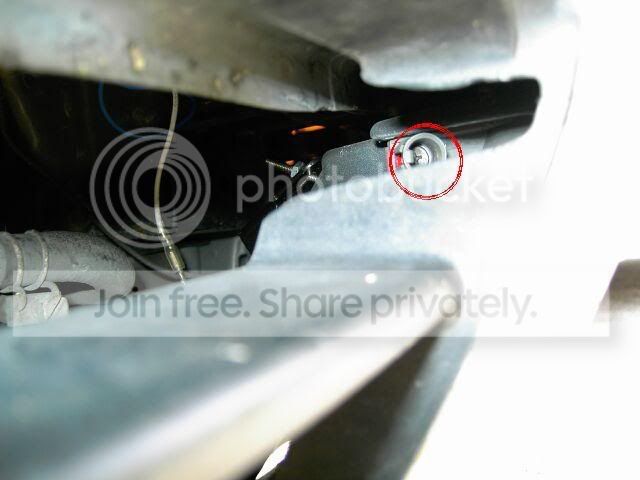 Fig. 7
9. Take out both of the fog covers by pulling on them.
10. Attach the white wire from a fog light to the white wire from step 4 through the opening left by the driver-side fog cover. Also attach the black wire from the fog light to the black wire in step 7 through the opening left by the driver-side fog cover.
11. Take the second fog light and attach its white wire to the blue wire from step 4 through the opening left by the passenger-side fog cover. Also attach the black wire from the fog light to the black wire in step 6 through the opening left by the passenger-side fog cover.
12. Take one of the fog lights and put the bracket against the two holes shown in Fig. 8. Put a screw through each one of the holes and screw in the nut from the back of each screw. Repeat for the other side.
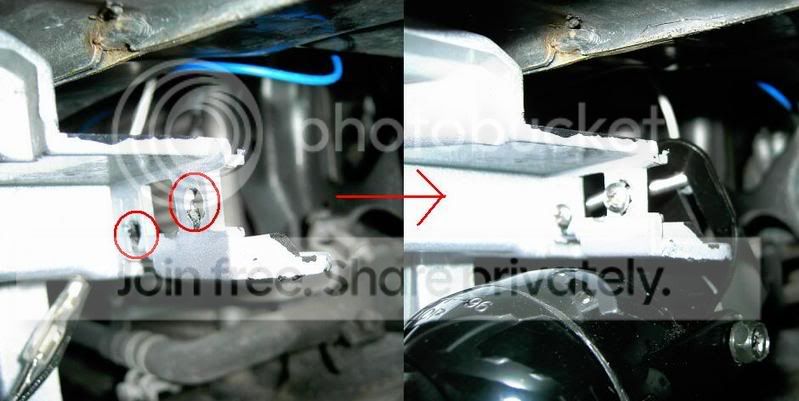 Fig. 8
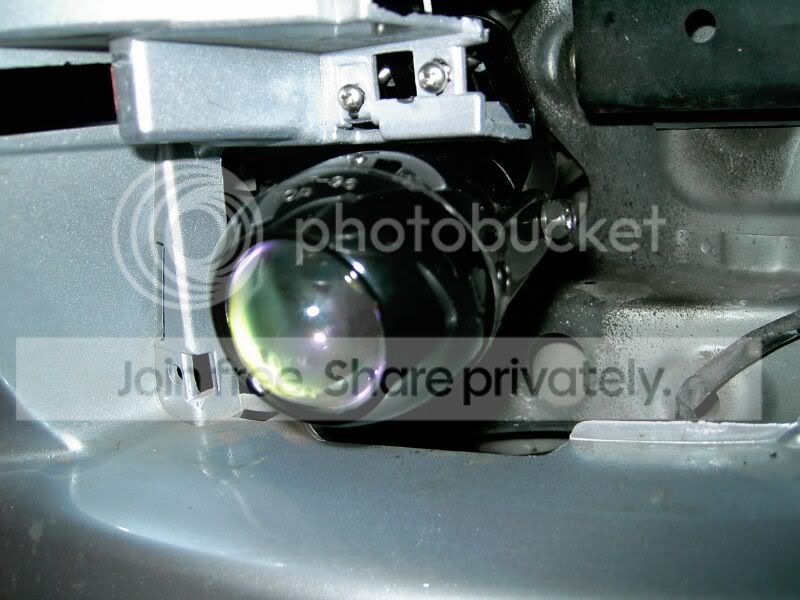
13. Aim both of the fog lights so they are parallel to the ground.
Cutting the Fog Covers to Fit Around the Fog Lights and Finishing Touches
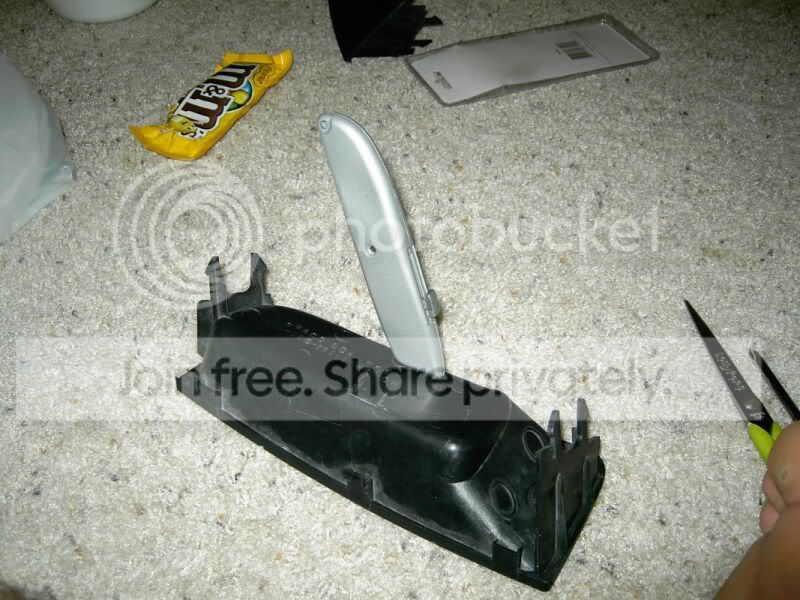
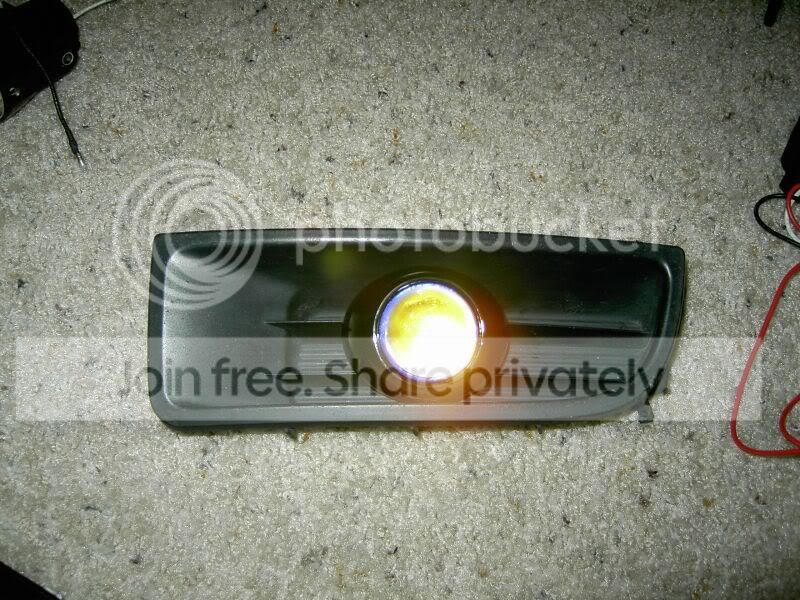
14. Place the driver-side fog cover in front of the fog light; using a pen, eyeball the shape of the fog light on to the back of the fog cover. Repeat for the passenger-side.
CAUTION: The cutter is extremely sharp. Be careful to not let it slip while applying pressure because it could lead to excessive bleeding and/or a finger or two being cut off.
15. Cut around the pen markings with the cutter and be careful to not stray away from the markings too much. Do this for both of the fog covers.

16. Snap on the driver-side fog cover to its original place and make sure it fits around the fog light well. Repeat for the passenger-side.
17. Rewire the driver-side turn signal, place it back to its original place, and securely tighten the screw back in using the Philips screwdriver. Repeat for the passenger-side.
18. Use the wire ties to secure the red, white, and blue wires in the engine bay.
19. Reconnect the positive and negative battery wires to the battery.
20. Turn the switch to the �ON� position and enjoy!


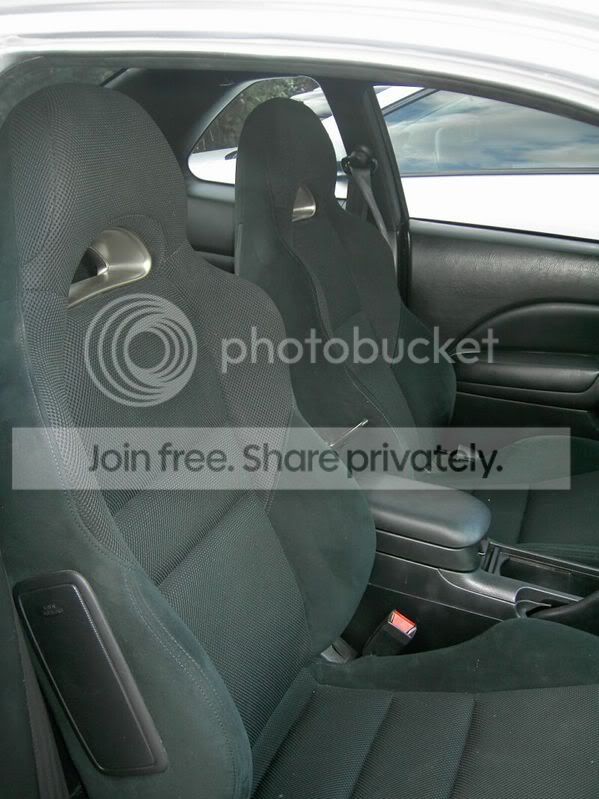
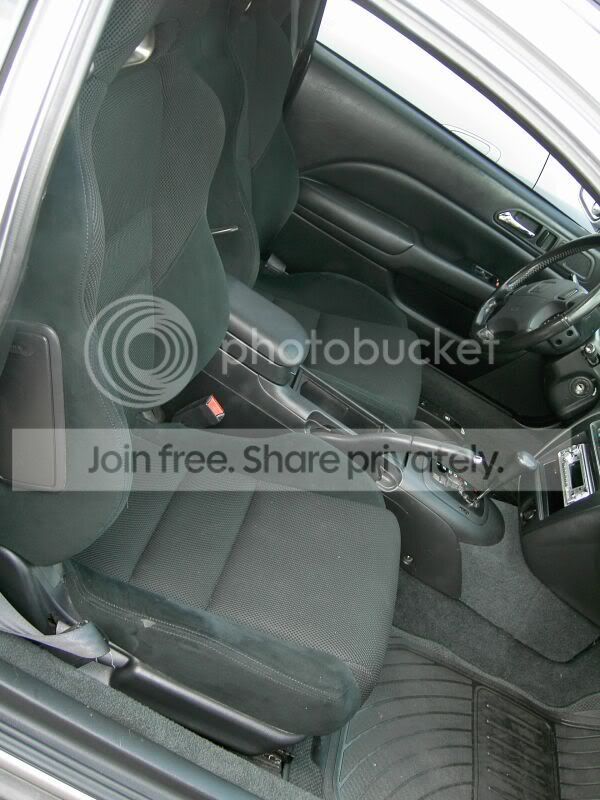
Now for the installed RSX seats ...I left the rear and closest to console bracket alone and took off the other brackets. I took out the those three brackets from the prelude seat and welded it on to the RSX seats... Wala:
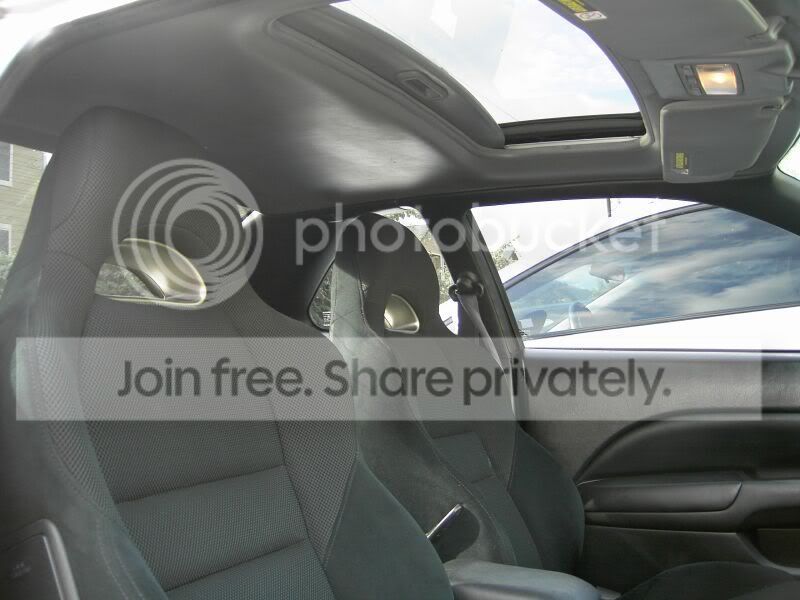

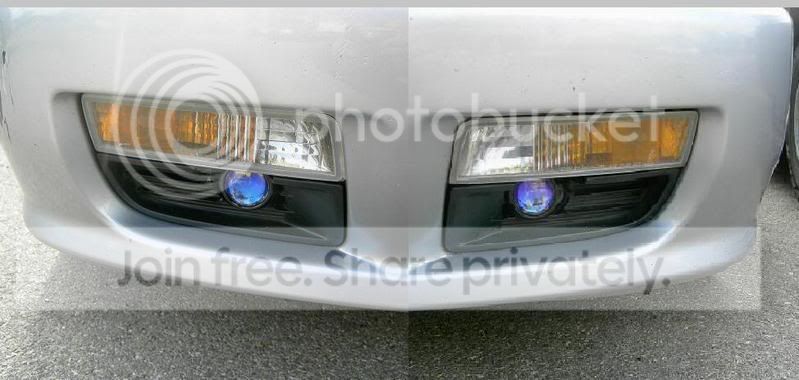
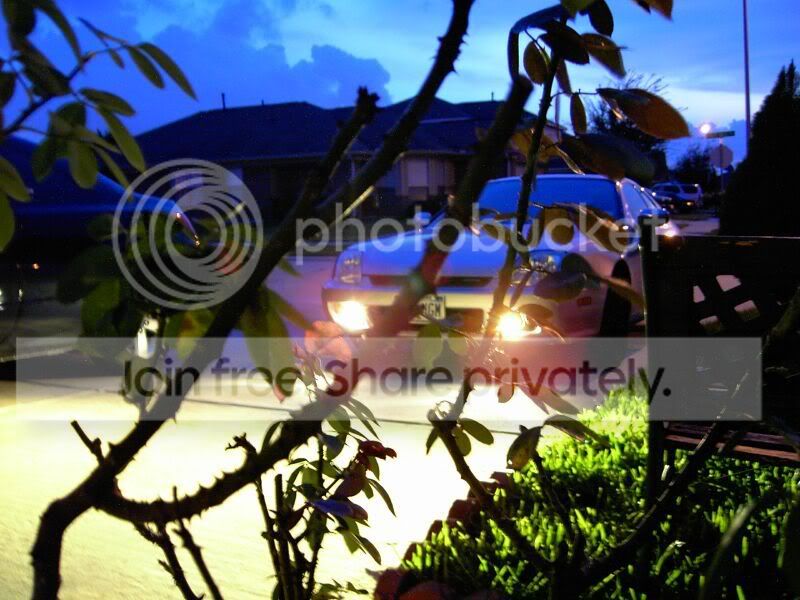
I think both the lights and the seats look good Ok now only if i can get the stupid Light dial thing to work for as a switch for my fogs...Can anyone help me ? I know u r suppose to use a relay but i dont know much about it...all i know is that the lights are 12v55wh3 so dont know what amp relay to get or how to connect it. Any help would be appreiated. Thanks for looking
Modified by hamadiscool at 7:45 PM 10/1/2006
Modified by hamadiscool at 6:35 PM 11/8/2006
. Well anways I bought some projector fogs from Auto Zone for 40 bucks and the only extra thing needed was four 8-32 screws with nuts that 1.5" long (plus tools offcourse). I am doing a paper on "instructions" so I did this for it so i am just gonna copy and paste...Sorry in advance for the long read.Wiring
1. Feed the white and red wire through the firewall from the engine to the cabin, which is located next to the steering wheel in the engine bay as shown in Fig. 2.
Fig. 22. Pop the panel out, located by the center console in the driver side, loosen the marked bolt in Fig. 3 a little bit with the 10mm socket, slide the hooked side of the black wire under the bolt, securely tighten it, and pop the panel back on.
Fig. 3 3. Attach the other end of black wire to the switch where it says �GROUND,� attach the red wire to the switch where it says �POWER,� and attach the white wire to the switch where it says �ACC� as in Fig. 4.
Fig. 44. Take the other end of the white wire towards the driver side headlight; attach the blue wire to the white wire and take the other end of the blue wire towards the passenger side headlight.
5. Take the hooked side of the red wire towards the battery and attach it to the bolt of the positive battery wire.
6. Loosen the marked bolt in Fig. 5 by the battery using the 10mm socket, slide the hooked side of one of the black wires under the bolt, and securely tighten the bolt. Take the other end of the black wire and lead it to the bottom of the bumper where the passenger side fog cover sits.
Fig. 57. Loosen the marked bolt on the right side of the engine bay, as shown in Fig. 6, using the 10mm socket, slide the hooked side of the last black wire under the bolt, and securely tighten the bolt. Take the other end of the black wire and lead it to the bottom of the bumper where the driver side fog cover sits.
Fig. 6Installing the Fog lights
8. Loosen the screw, shown in Fig. 7, for the driver-side turn signal using the Philips screwdriver, take it out of the bumper, and unhook the wires. Repeat for the passenger-side.
Fig. 79. Take out both of the fog covers by pulling on them.
10. Attach the white wire from a fog light to the white wire from step 4 through the opening left by the driver-side fog cover. Also attach the black wire from the fog light to the black wire in step 7 through the opening left by the driver-side fog cover.
11. Take the second fog light and attach its white wire to the blue wire from step 4 through the opening left by the passenger-side fog cover. Also attach the black wire from the fog light to the black wire in step 6 through the opening left by the passenger-side fog cover.
12. Take one of the fog lights and put the bracket against the two holes shown in Fig. 8. Put a screw through each one of the holes and screw in the nut from the back of each screw. Repeat for the other side.
Fig. 813. Aim both of the fog lights so they are parallel to the ground.
Cutting the Fog Covers to Fit Around the Fog Lights and Finishing Touches
14. Place the driver-side fog cover in front of the fog light; using a pen, eyeball the shape of the fog light on to the back of the fog cover. Repeat for the passenger-side.
CAUTION: The cutter is extremely sharp. Be careful to not let it slip while applying pressure because it could lead to excessive bleeding and/or a finger or two being cut off.
15. Cut around the pen markings with the cutter and be careful to not stray away from the markings too much. Do this for both of the fog covers.
16. Snap on the driver-side fog cover to its original place and make sure it fits around the fog light well. Repeat for the passenger-side.
17. Rewire the driver-side turn signal, place it back to its original place, and securely tighten the screw back in using the Philips screwdriver. Repeat for the passenger-side.
18. Use the wire ties to secure the red, white, and blue wires in the engine bay.
19. Reconnect the positive and negative battery wires to the battery.
20. Turn the switch to the �ON� position and enjoy!
Now for the installed RSX seats
...I left the rear and closest to console bracket alone and took off the other brackets. I took out the those three brackets from the prelude seat and welded it on to the RSX seats... Wala:I think both the lights and the seats look good
Ok now only if i can get the stupid Light dial thing to work for as a switch for my fogs...Can anyone help me ? I know u r suppose to use a relay but i dont know much about it...all i know is that the lights are 12v55wh3 so dont know what amp relay to get or how to connect it. Any help would be appreiated. Thanks for lookingModified by hamadiscool at 7:45 PM 10/1/2006
Modified by hamadiscool at 6:35 PM 11/8/2006
Member
Joined: May 2004
Posts: 1,420
Likes: 0
are those the optilux 20 dollar fogs??? lol if so i have them
they work great for the price. good job on install.
edit: just read the first part of your writeup. bleh if i would have known, i would have showed you the link to the site that sells that similar kit (brand name optilux, made by hella, or so they claim)
for $26 shipped.
Modified by petern101 at 11:32 PM 10/1/2006
Honda-Tech Member
Joined: Jan 2006
Posts: 683
Likes: 0
From: USA
Looks like you really hacked up those inserts to install the foglights, whatever happened with your original holes that you posted in your other thread?
The oval you had cutout for the lights originally was a lot nicer.
The oval you had cutout for the lights originally was a lot nicer.
Trending Topics
Thread Starter
Honda-Tech Member
Joined: Apr 2006
Posts: 724
Likes: 0
<TABLE WIDTH="90%" CELLSPACING=0 CELLPADDING=0 ALIGN=CENTER><TR><TD>Quote, originally posted by MilanoLude »</TD></TR><TR><TD CLASS="quote">Looks like you really hacked up those inserts to install the foglights, whatever happened with your original holes that you posted in your other thread?
The oval you had cutout for the lights originally was a lot nicer.
</TD></TR></TABLE>
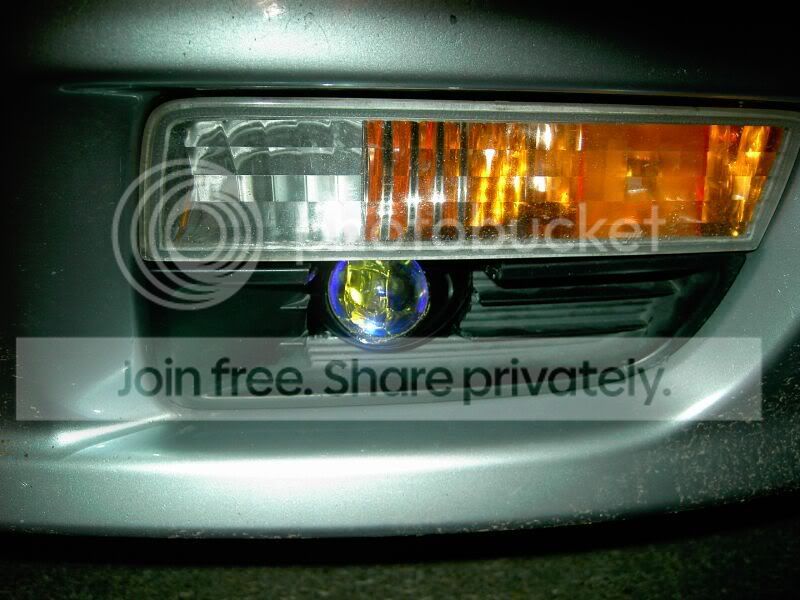
LOL that was just a demonstration, i just unscrewed the projector and placed it on top of the fog cover. The cool thing is u can not see hacked up stuff unless ur staring at it point blank. I wish i could use the dremel ...the only tools i used was what was available at the dollar store
The oval you had cutout for the lights originally was a lot nicer.
</TD></TR></TABLE>LOL that was just a demonstration, i just unscrewed the projector and placed it on top of the fog cover. The cool thing is u can not see hacked up stuff unless ur staring at it point blank. I wish i could use the dremel
...the only tools i used was what was available at the dollar store
Thread Starter
Honda-Tech Member
Joined: Apr 2006
Posts: 724
Likes: 0
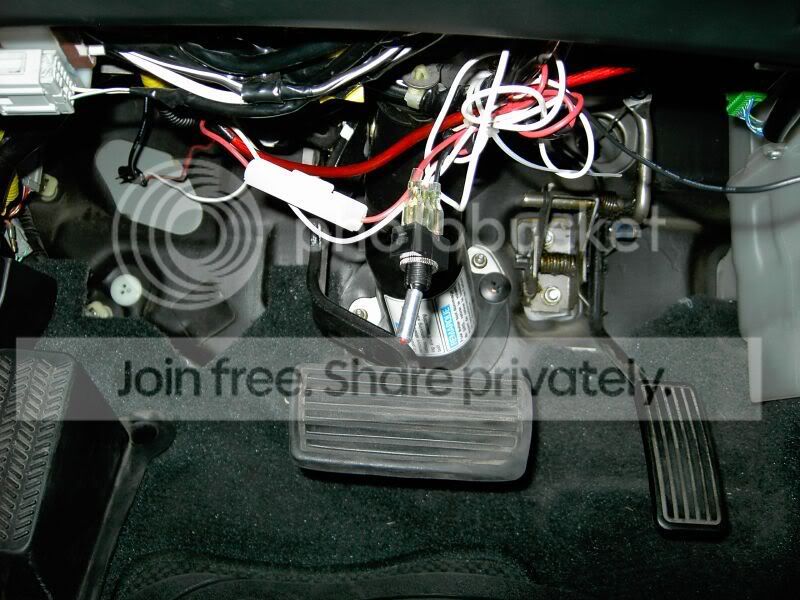
now if someone can help me to get this switch to work instead of the ghetto one....
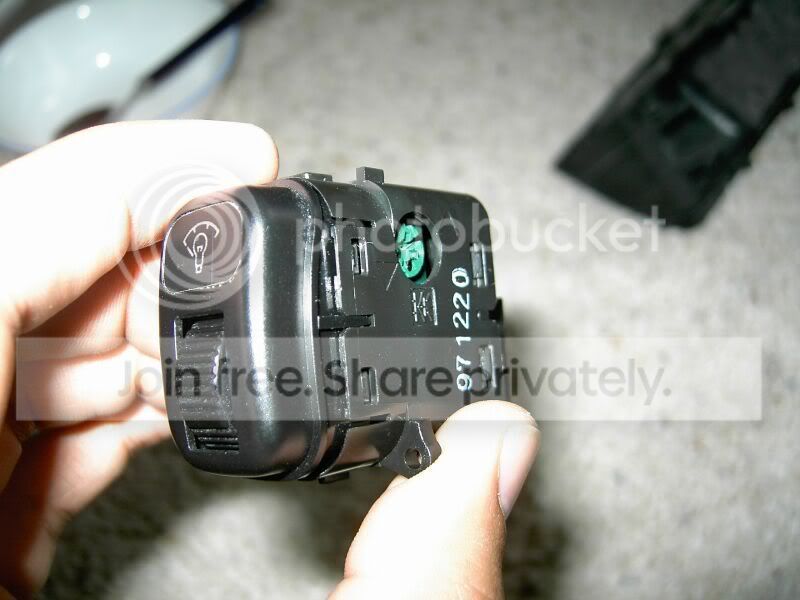
It would be so awsome...I know i need a relay but not sure what ampage and how to install it...thanks
It would be so awsome
...I know i need a relay but not sure what ampage and how to install it...thanks

Thread Starter
Honda-Tech Member
Joined: Apr 2006
Posts: 724
Likes: 0
<TABLE WIDTH="90%" CELLSPACING=0 CELLPADDING=0 ALIGN=CENTER><TR><TD>Quote, originally posted by ek9bmxer »</TD></TR><TR><TD CLASS="quote">buy oem !! and u wouldnt had to go threw all that trouble</TD></TR></TABLE>
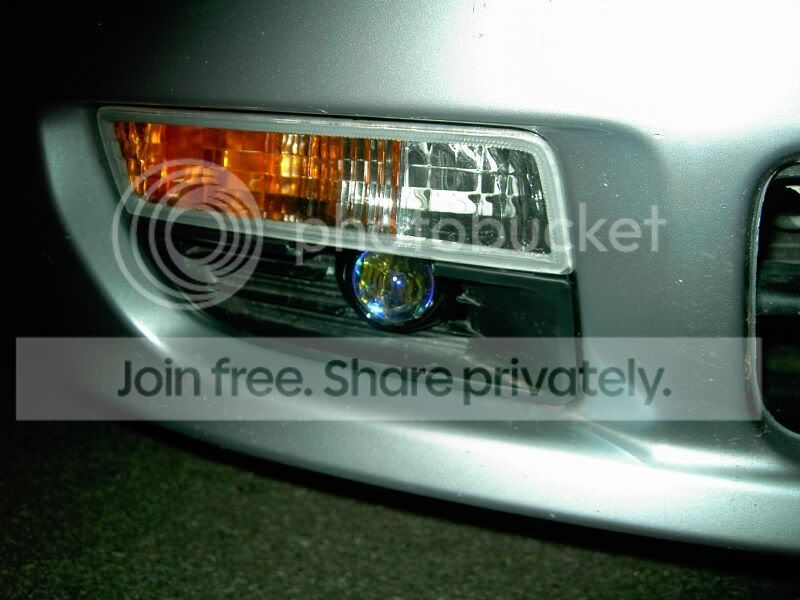
LOL...oem too expensive, this was cheap,fun, and same light output if not better. I would love to get jdm ones because they make the car look complete but i think these look good also especialy cause the projector matches nortic mist color thing...in my book this was a good project and i can hopefully test their potentional soon....winter is coming
Modified by hamadiscool at 8:42 PM 11/4/2006
Thread Starter
Honda-Tech Member
Joined: Apr 2006
Posts: 724
Likes: 0
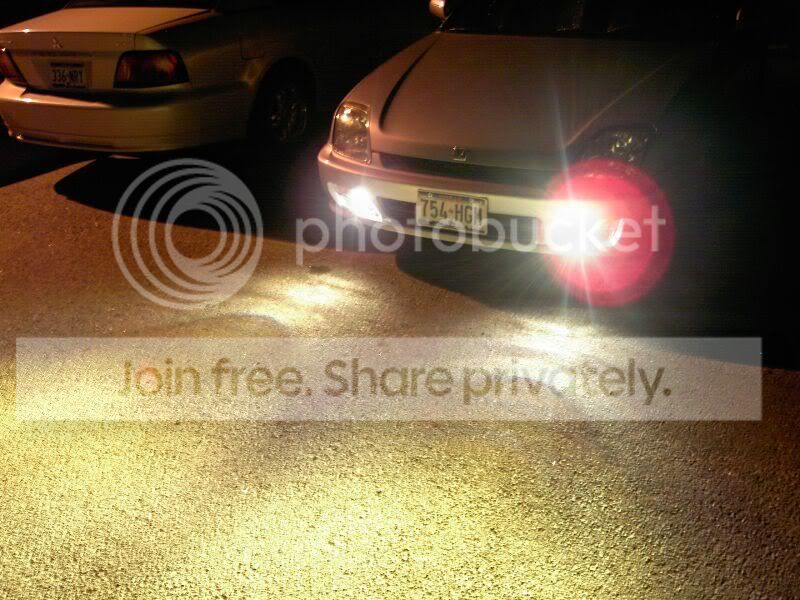
they are definetely higher than stock. Comfortable but if I were to sit up straight as i could then i would touch the ceiling (i am 6ft1inch). Lights look good at night, light up in front of the car and sides real well. hehe. Thanks for the comments and would be appreiate more thoughts on the fogs
Honda-Tech Member
Joined: Mar 2001
Posts: 5,695
Likes: 0
From: DFW, USA
<TABLE WIDTH="90%" CELLSPACING=0 CELLPADDING=0 ALIGN=CENTER><TR><TD>Quote, originally posted by hamadiscool »</TD></TR><TR><TD CLASS="quote">Anyone got ideas for the switch?!?! Thanks</TD></TR></TABLE>
set the switch up inside the little pocket under your side switchs
set the switch up inside the little pocket under your side switchs
Thread Starter
Honda-Tech Member
Joined: Apr 2006
Posts: 724
Likes: 0
Cloth>>>>>Leather....Dont worry about extreme weather or sliding around while turning hard
Thread Starter
Honda-Tech Member
Joined: Apr 2006
Posts: 724
Likes: 0
<TABLE WIDTH="90%" CELLSPACING=0 CELLPADDING=0 ALIGN=CENTER><TR><TD>Quote, originally posted by prelude1897 »</TD></TR><TR><TD CLASS="quote">set the switch up inside the little pocket under your side switchs</TD></TR></TABLE>
I meant the oem light dial thing to work with the fogs any help would be apprieated
I meant the oem light dial thing to work with the fogs
any help would be apprieated

Honda-Tech Member

Joined: Oct 2002
Posts: 1,733
Likes: 1
<TABLE WIDTH="90%" CELLSPACING=0 CELLPADDING=0 ALIGN=CENTER><TR><TD>Quote, originally posted by hamadiscool »</TD></TR><TR><TD CLASS="quote">
I meant the oem light dial thing to work with the fogs any help would be apprieated</TD></TR></TABLE>
Isnt that the switch to adjust the light intensity of the dash lights? Does that normally control the fog lights? or are you trying to rig it to control the intensity of the fog lights? The OEM fog light switch should be a push button switch.
I meant the oem light dial thing to work with the fogs
any help would be apprieated</TD></TR></TABLE>Isnt that the switch to adjust the light intensity of the dash lights? Does that normally control the fog lights? or are you trying to rig it to control the intensity of the fog lights? The OEM fog light switch should be a push button switch.
Thread Starter
Honda-Tech Member
Joined: Apr 2006
Posts: 724
Likes: 0
<TABLE WIDTH="90%" CELLSPACING=0 CELLPADDING=0 ALIGN=CENTER><TR><TD>Quote, originally posted by profroopchan »</TD></TR><TR><TD CLASS="quote">Isnt that the switch to adjust the light intensity of the dash lights? Does that normally control the fog lights? or are you trying to rig it to control the intensity of the fog lights? The OEM fog light switch should be a push button switch. </TD></TR></TABLE>
Ya i know, I have an extra Emergency light switch i could use that but the connection for that or dash light one is the same ...They both need RELAYS and i dont know how to wire that. Thanks
Ya i know, I have an extra Emergency light switch i could use that but the connection for that or dash light one is the same ...They both need RELAYS
and i dont know how to wire that. Thanks