Honda: Why Are My Tires Wearing Unevenly?
Regardless of the cause, uneven tire wear is your car's way of telling you something is wrong. Fixing the problem will improve handling, safety, and piece of mind. Ignoring it could mean a break down or an accident. Continue reading to find out what is causing the tires on your Honda Accord or Civic to wear unevenly.
This article applies to the Honda Civic/Del Sol (1992-2000), and Accord (1990-2002).
Uneven tire wear requires you to perform some analysis in order to isolate the cause. Any number of situations can cause your tires to wear unevenly. Among the causes are tire pressure, vehicle alignment, worn components, driving habits, or simply failing to rotate the tires. In this article some of the major issues are addressed.

Materials Needed
- Tire pressure gauge
- Jack and jack stands
- Pry bar
- Lug wrench
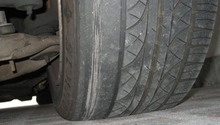
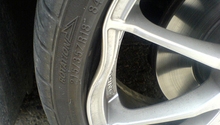
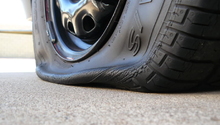
Step 1 – Visually inspect the tires
Observe the tire for even tread wear. Uneven patterns indicate various situations. If worn in the middle, a radial tire is under-inflated. If worn evenly on the edges, it’s over-inflated. Asymmetrical wear (unevenly worn on one side or the other) usually indicates worn suspension components. It can also indicate the vehicle’s alignment is off. Hard, tight cornering will wear the outer edge of a tire. Always round your corners out and corner at lower speeds to keep the tire from wrapping under, or from wearing in specific areas of the tread versus even weight distributed wear.

Pro Tip
Regular wheel alignments are a good idea. Plan on doing this yearly for peace of mind.
(Related Article: How Check Your Tire Tread - Honda-Tech.com)
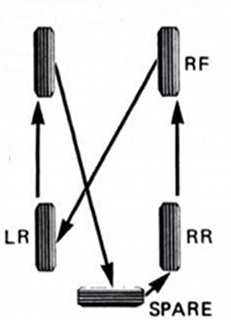
Step 2 – Rotate the tires
Rotate the tires in order to reduce wear. Tires are rotated in patterns. A general rule of thumb is to rotate a tire to the opposite corner. This way, the tire will spin in the opposite direction while going from steering axle to non-steering axle. This situation produces the most even wear. If you have a full sized spare, be sure to rotate that tire in as well. It will provide the best wear and prolong your tire’s life.
Pro Tips
- Rotate to opposite corners from the current tire location.
- Rotate the spare even if you have to change the rims in order to match.
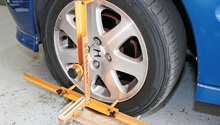
Step 3 – Check for loose components
You can inspect for loose components in a number of ways. With the vehicle on the ground, grab the top of the tire and shake it the best you can. If you notice any looseness or feel rattling, something is loose. Typical culprits are suspension components or bearings. You can also observe the steering under the STATIONARY car, while a friend moves the steering wheel side to side.
Raise the wheel off the ground, and support the vehicle on its body at the jacking point (recommended in the owner’s manual). Shake the wheel to check for any looseness. Use a pry bar or lug wrench inserted into the rim to lever the wheel, and check for looseness.
Pro Tip
Use a rag to sleeve the pry bar or lug wrench to keep from gouging or scratching your rims.
Step 4 – Check the alignment
Eyeballing the alignment will be difficult. Because tolerances are so tight, alignment is best left to a qualified shop. Only extreme conditions will be visible. For example, a bad toe-in will show the tires to point severely inwards, while a bad camber will show the tire as pointing in or out at the top.
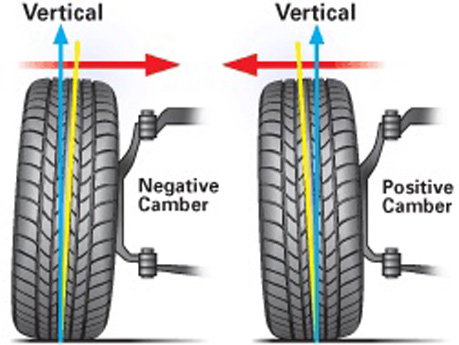
Figure 3. Camber in relation to tire vertical alignment. 
Figure 4. Diagram of toe-in and toe-out.
(Related Article: How to Align Your Tires - Honda-Tech.com)
Related Discussions
- Uneven Tire Wear After Lowering - Honda-Tech.com
- Bad Tire Wear - Honda-Tech.com
- Rear Tires Getting Weird Wear - Honda-Tech.com
- Bad Tire Wear, Alignment Good - Honda-Tech.com
- 98 Civic EX Uneven Tire Wear - Honda-Tech.com