Honda Civic: Why is My Check Engine Light Flashing?
Do you see that check engine light in your dash? That... is your Honda Civic's worst nightmare. Continue reading to find out why.
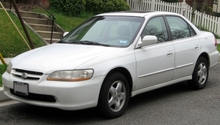
This article applies to the Honda Civic (1992-2000).
All modern cars have an on-board computer system known as the engine control unit (or ECU). And if you're reading this, your Honda Civic most likely has one. Through a series of sensors and actuators, an ECU controls the major components of your car for it to function properly and efficiently. So when the check engine light (CEL) in your car's instrument panel turns on, the ECU is putting out a signal that something has malfunctioned and is causing a problem. To determine where exactly the source of this problem is, you need an on-board diagnostics (OBD) scan tool to access the ECU and retrieve diagnostic trouble codes (DTCs). Each DTC correlates to a description of where, how, and why the problem persists. Follow the diagnostic steps below to find the root of your CEL problem.

Materials Needed
- OBD-I or OBD-II scan tool
- Deep socket, extension, and ratchet
- Multimeter
- Rubber gloves
- Metal Phillips screwdriver
Step 1 – Which scan tool to use?
It is simple. 5th generation (1992-1995) Honda Civics require the use of an OBD-I scan tool, and 6th generation (1996-2000) Honda Civics require the use of an OBD-II scan tool. These scanners plug into the data link connector (DLC) of the Civic's ECU to obtain the diagnostic trouble codes (DTCs).
- For 5th generation Civics, the DLC and ECU are located behind the kick panel in the passenger's side foot well.
- For 6th generation Civics, the DLC and ECU are located behind the hood latch in the driver's side foot well.
The cost for OBD-I and OBD-II scan tools both start at $20.
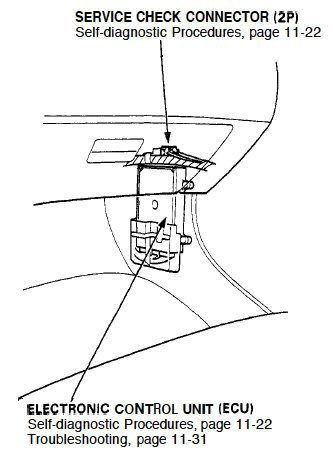
Figure 1. Location of ECU for Honda Civics (1992-1995). 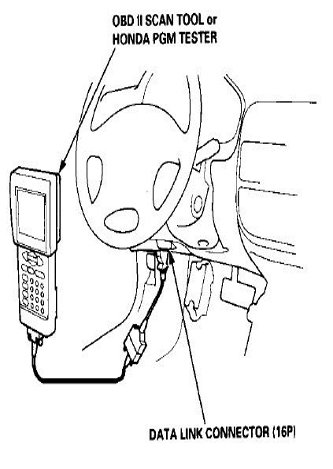
Figure 2. Location of ECU for Honda Civic (1996-2000).
Pro Tip
Most auto parts stores will scan your car, and provide you with the DTCs for free.
Featured Video: How to Pull Honda Codes Without a Scanner
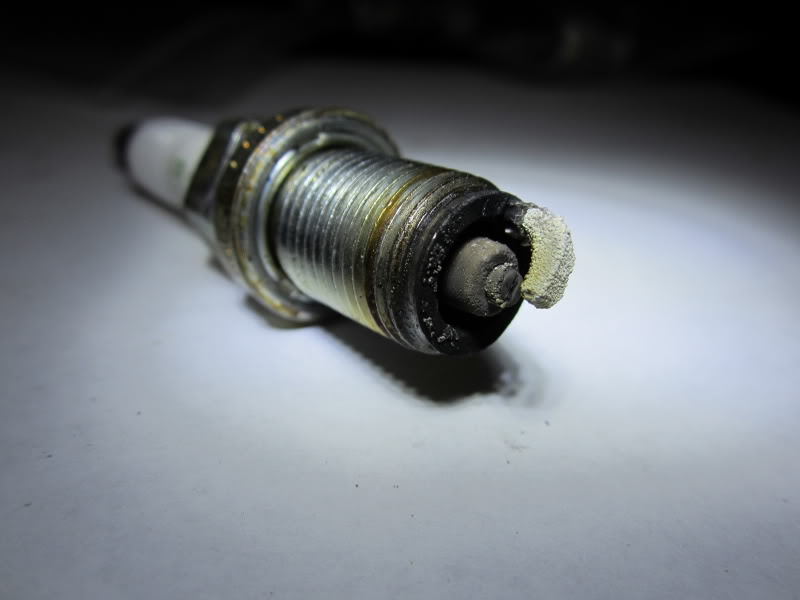
Step 2 – Check the spark plugs and wires
The spark plugs may be worn or corroded. Also, there may be breaks in the plug wires. Anything that prevents a spark from occurring causes the engine to misfire. To check the spark plugs and wires:
- Let the engine cool, and put on rubber gloves.
- First, check if the spark plug wires are loose. Tighten them if they are.
- Detach the spark plug wires, and visually inspect them for splits or tears. Also, check if the boot is burnt or fouled.
- Use a deep socket, extension, and ratchet to remove a spark plug.
- Reattach the spark plug wires if they are intact.
- Hold the spark plug thread against any metal part of the engine to ground it.
- Have a friend crank the engine.
- You should see a spark in between the plug gaps, and it should be a bright white flash.
- If the spark ignites outside of the gap or the spark color is yellow or orange, then the spark is weak.
- Check the remaining spark plugs.
Replace the spark plug wires if they are fouled. A new set of wires costs between $25 to $75. If the spark plugs are producing a weak spark or no spark at all, a replacement set starts at $12, and runs up to $50 for performance plugs.
If the spark plugs and wires are in tact, move on to the following step.
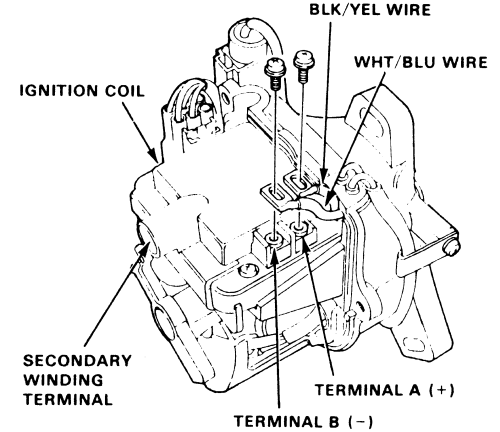
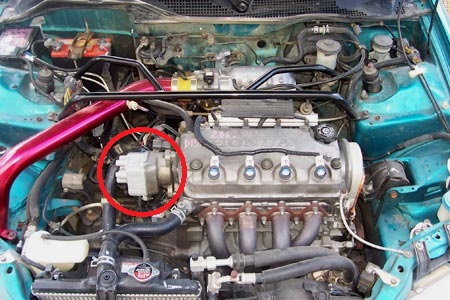
Step 3 – Check the ignition coil
The ignition coil transforms the car battery's low voltage to a voltage high enough to create a strong electric spark. A faulty ignition coil may cause the CEL to switch on.
- Set your multimeter to read the resistance (ohms) of a circuit.
- Touch the ignition coil wires with each lead of the multimeter.
- The multimeter should give a reading between 0.75 and 0.81 ohms of resistance.
- Then, touch one lead of the multimeter to one contact of the ignition coil, and place the other lead directly inside the coil's terminal.
- The multimeter should give a reading between 10,000 and 11,000 ohms of resistance.
If the ignition coil is not giving out the proper readings, it must be replaced. A replacement coil costs around $60.
If the the ignition coil is in working condition, move on to the following step.
Step 4 – Check the distributor
The distributor cap may not seat the spark plug wires properly, or the rotors may be damaged as well as faulty. To check the distributor:
- Unplug the ignition coil.
- Remove the spark plug wires. Label each wire because they must be reattached to the same point they were removed from.
- Hold a metal screwdriver to the metal of a plug wire.
- Then, place the metal screwdriver near the electrode of the distributor.
- Have a friend crank the engine.
- If there is no spark, there may be a faulty connection in the distributor.
- If there is a spark, remove the distributor cap.
- Visually inspect if the cap is clean.
- Then, check the distributor rotors and contact points for rust, burns, or oxidation.
If any part of the distributor is not firing, the assembly will need to be replaced. A replacement distributor costs between $75 to $150.
If the distributor and spark plug wires are properly firing as well as in tact, move on to the following step.
Step 5 – Check the fuel injectors
Leaking, clogged, or faulty fuel injectors may cause the CEL to switch on. The fuel injectors spray an exact amount of fuel into the cylinder to maintain a balanced air/fuel mixture. To check the fuel injectors:
- First, unbolt the fuel rails and disconnect the fuel injectors.
- Visually inspect the fuel injectors for cracks or burns.
- Disconnect the fuel injector wire connectors.
- Set your multimeter to read the resistance (ohms) of a circuit.
- Touch each lead of your multimeter to the fuel injector's male terminal contacts.
- The multimeter should give a reading between five and seven ohms of resistance.
If the fuel injectors are faulty and not giving out the proper reading, they will need to be replaced. The cost of a new set starts at $100.

Related Discussions, and Site
- Honda Civic: How to Pull CEL Codes (with Code Lists) - Honda-Tech.com
- Discussion: Civic Check Engine Light Blinking - Honda-Tech.com
- How to Tell if You Have a Faulty Distributor - CarsDirect.com