

AdReNaLiN's First Manifold

Thread Starter
Honda-Tech Member
Joined: May 2003
Posts: 631
Likes: 0
From: Brisbane, QLD, Australia
Hey guys,
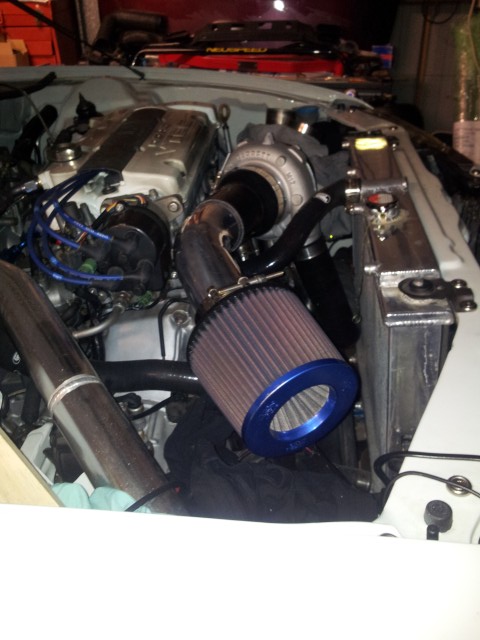
I thought I'd get some constructive comments on my manifold so far. It's a top mount for a GT3071R on a H22 Prelude.
I'm very new to TIG welding and manifold fabrication - but we've all got to start somewhere right?
I used a Rage Mitre Saw and made a jig to clamp the pipe to.
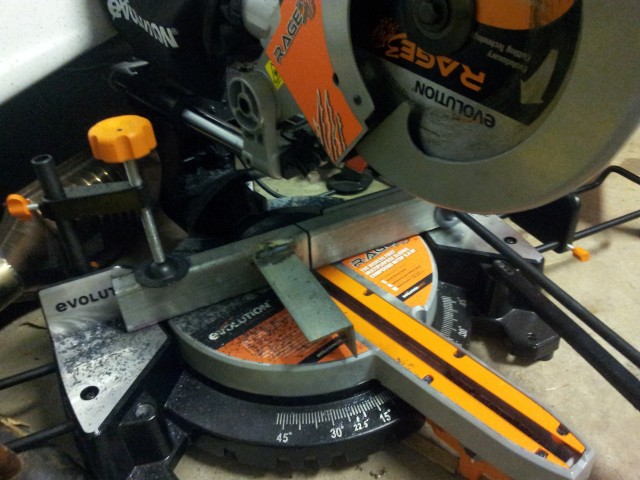
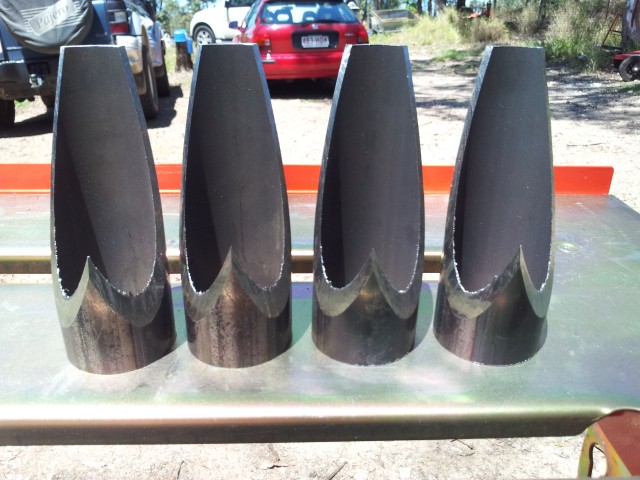
Then I cut up my collector pieces and ended up with this:
Then I welded them together and ended up with this:
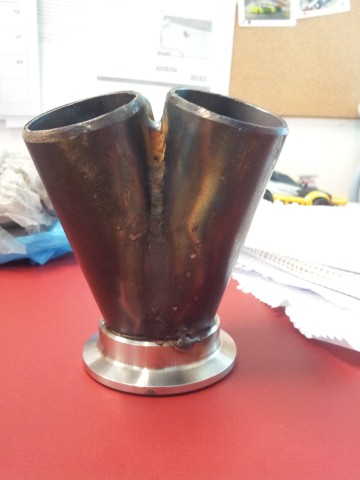

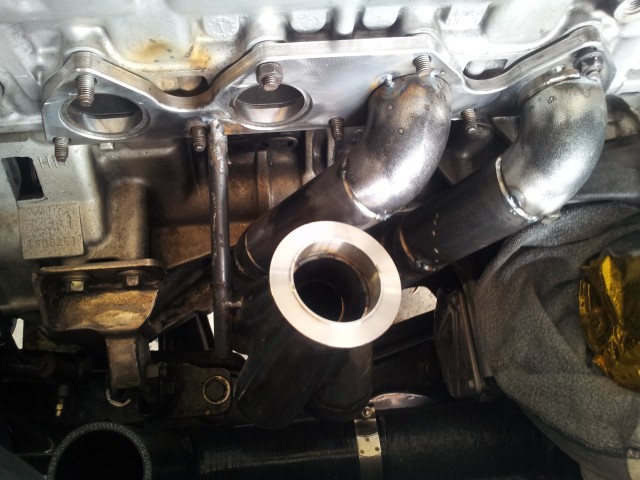
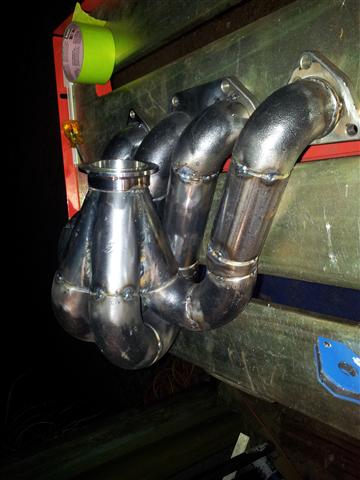
So after an eventful day of welding / fabrication, we came up with this:
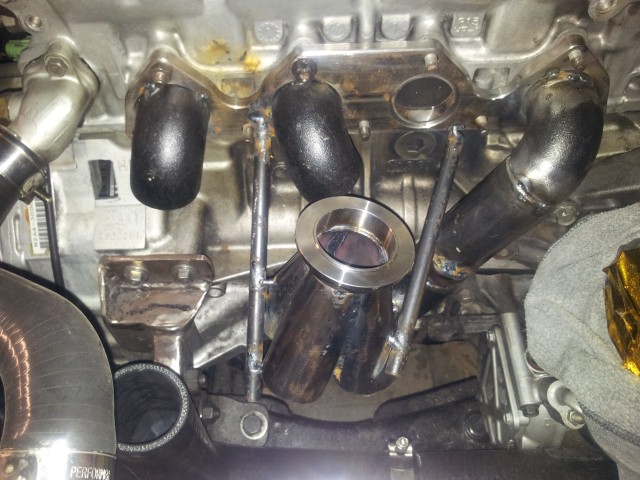
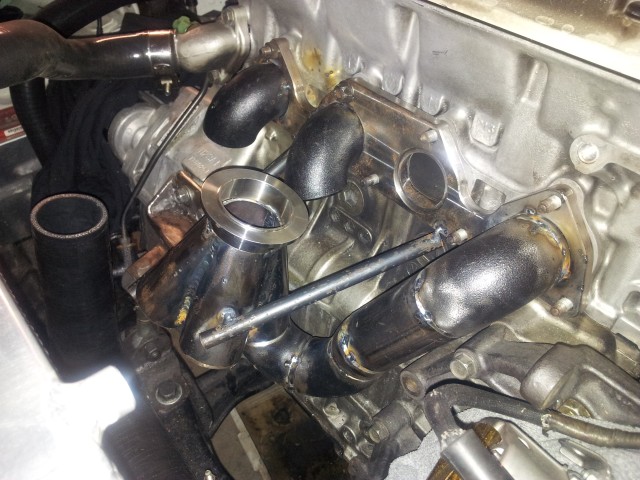
I've positioned the collector in the right spot with some steel bar temporarily, then tacked up the first runner.
The steel bar will get removed once it's all complete.
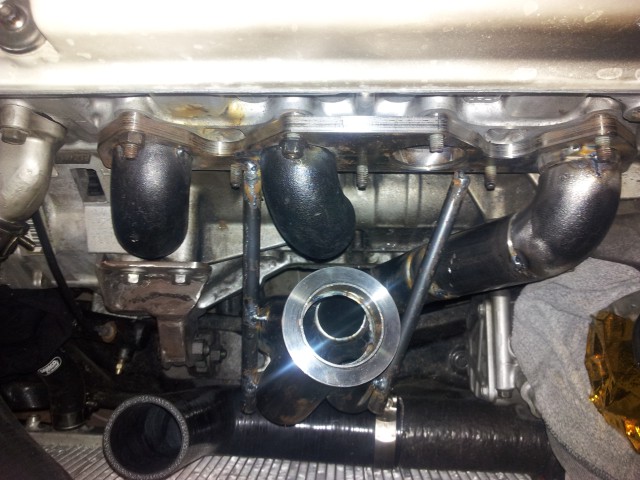
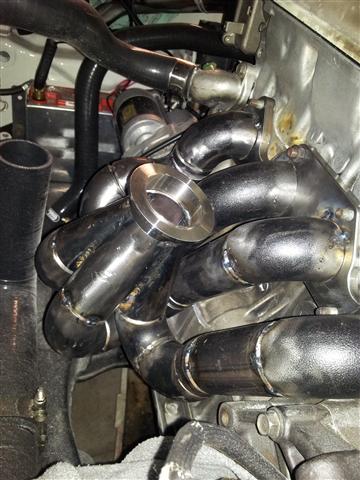
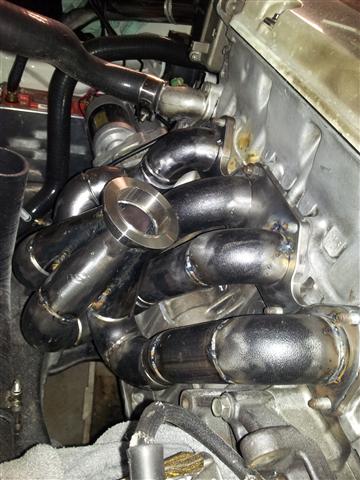
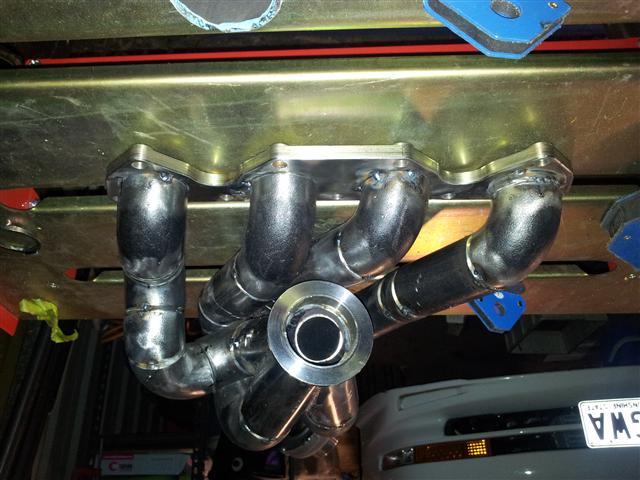
Onto the #2 runner. Here's some images:
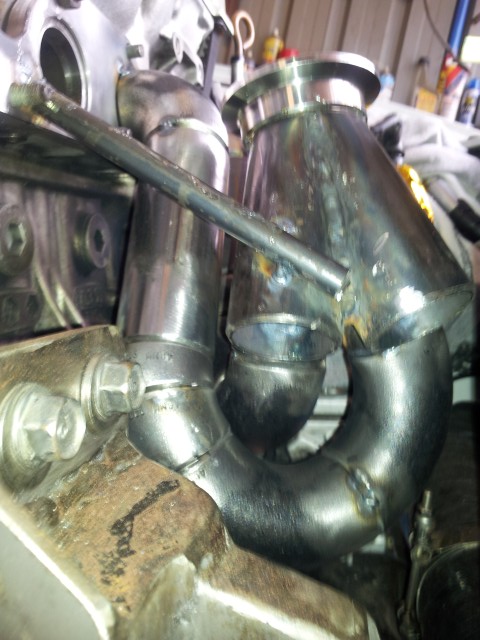
I think I spent about an hour trying to get the last little bend to fit up. It's painful, but I'm really happy with how it's turning out.
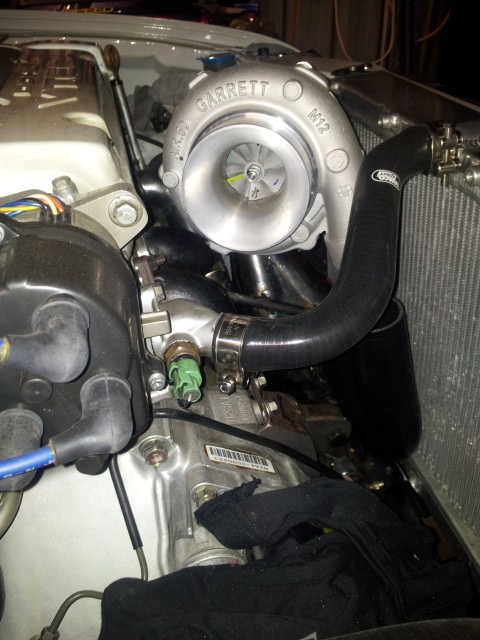
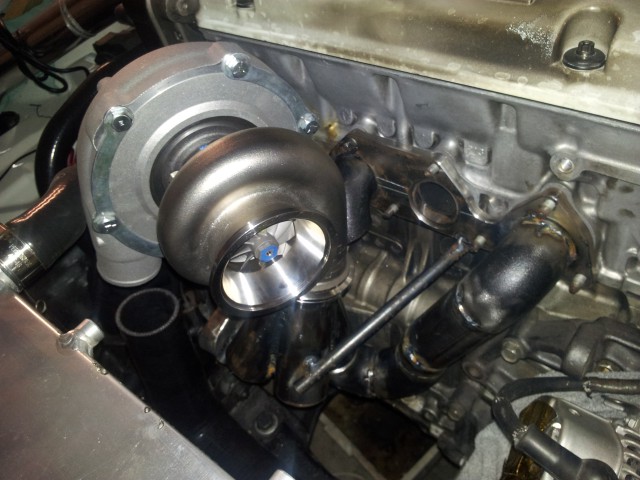
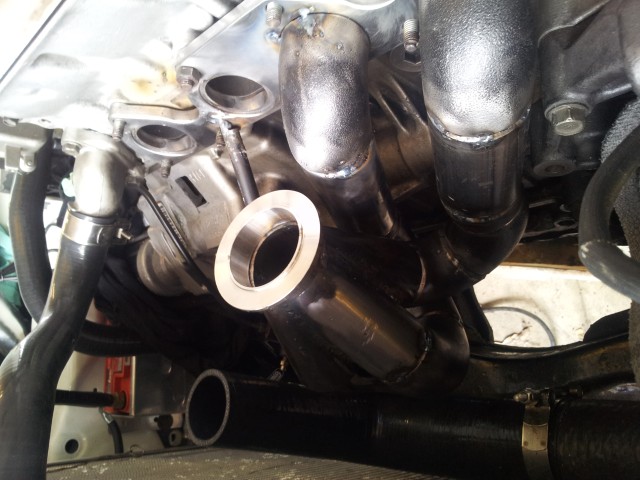
So as you can see, the turbo manifold is now fully tacked up.
I'm probably going to try and complete the rest of the down pipe and wastegate setup before I fully weld the whole thing.
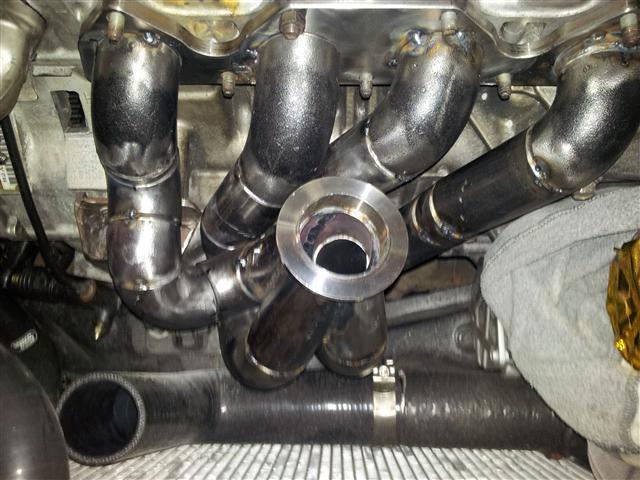
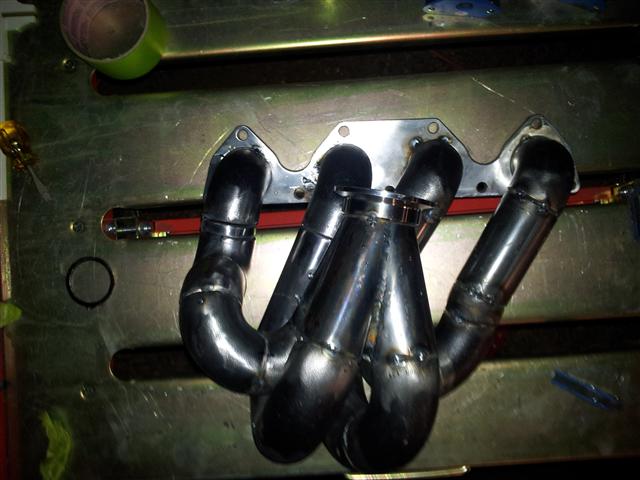
The kink on #1 clears the A/C bracket.
The bends on #4 are to clear the front engine mount and the turbo.
The wastegate will port directly out of the collector with a smooth bend to keep the flow and minimise boost creep.
I'll probably do the wastegate port last because I'll know the position of the dump pipe for clearance.
I'm open to critiques on the manifold design and the welding.
I thought I'd get some constructive comments on my manifold so far. It's a top mount for a GT3071R on a H22 Prelude.
I'm very new to TIG welding and manifold fabrication - but we've all got to start somewhere right?
I used a Rage Mitre Saw and made a jig to clamp the pipe to.
Then I cut up my collector pieces and ended up with this:
Then I welded them together and ended up with this:
So after an eventful day of welding / fabrication, we came up with this:
I've positioned the collector in the right spot with some steel bar temporarily, then tacked up the first runner.
The steel bar will get removed once it's all complete.
Onto the #2 runner. Here's some images:
I think I spent about an hour trying to get the last little bend to fit up. It's painful, but I'm really happy with how it's turning out.
So as you can see, the turbo manifold is now fully tacked up.
I'm probably going to try and complete the rest of the down pipe and wastegate setup before I fully weld the whole thing.
The kink on #1 clears the A/C bracket.
The bends on #4 are to clear the front engine mount and the turbo.
The wastegate will port directly out of the collector with a smooth bend to keep the flow and minimise boost creep.
I'll probably do the wastegate port last because I'll know the position of the dump pipe for clearance.
I'm open to critiques on the manifold design and the welding.
Honda-Tech Member
Joined: Dec 2002
Posts: 1,559
Likes: 0
From: Boston City of Champions!
not bad for a first time. try to get your spots welds a little cleaner. specially if you plan on breaking them off later to reweld. id prob have to mig tack mine for mock up.
also try to build a head sink for the head flange when you weld it together. so section little by little. try not to warm the flange.
also try to build a head sink for the head flange when you weld it together. so section little by little. try not to warm the flange.


Honda-Tech Member
Joined: Apr 2011
Posts: 530
Likes: 0
From: Kingston, Ontario
i would finish weld everything on the manifold before you do the downpipe and wg recirc.
the manifold will move a little bit when you tighten it up with a nicely penetrated weld and might cause your exhaust or WG recirc to not line up and leak.
the manifold will move a little bit when you tighten it up with a nicely penetrated weld and might cause your exhaust or WG recirc to not line up and leak.
Thread Starter
Honda-Tech Member
Joined: May 2003
Posts: 631
Likes: 0
From: Brisbane, QLD, Australia
not bad for a first time. try to get your spots welds a little cleaner. specially if you plan on breaking them off later to reweld. id prob have to mig tack mine for mock up.
also try to build a head sink for the head flange when you weld it together. so section little by little. try not to warm the flange.
also try to build a head sink for the head flange when you weld it together. so section little by little. try not to warm the flange.
I'm planning on bolting the head flange to a thick piece of steel to act as a heat sink before welding it. Definately don't want to warp the flanges.
Thanks.
Surely with a flex pipe in the downpipe there would be enough give to let the exhaust line up after fully welding?
Trending Topics

Honda-Tech Member
Joined: Feb 2010
Posts: 502
Likes: 0
some, but not much...you don't want to rely on the flex bellow to line you up. you want for there to be no flex in it when it is sitting in the car, so that you can allow for maximum flex when the car is under load, thats what they're made for

Honda-Tech Member
Joined: Feb 2009
Posts: 26
Likes: 0
looks good! However I know that grinding tungsten is quite the burden in a time crunch, but in the end its always good to have a few spare tungsten pre-ground in case you contaminate it. That orange haze you see around some of the tacks will contaminate the weld when you go to finish welding it.
Thread Starter
Honda-Tech Member
Joined: May 2003
Posts: 631
Likes: 0
From: Brisbane, QLD, Australia
Should I try to grind off the orange haze? Is the orange haze caused by lack of a sharp tungsten?
I'm using a scratch start tig so its difficult to be precise sometimes.
I'm using a scratch start tig so its difficult to be precise sometimes.
Honda-Tech Member
Joined: Feb 2009
Posts: 26
Likes: 0
I've always found that if you try to start the arc out of the side of the tungsten the point will have a better chance at staying sharp but as you get more familiar with welding i'm sure you'll find a system that will work.
Honda-Tech Member
Joined: Aug 2007
Posts: 432
Likes: 0
From: barrie, canada
I used to mig tack my manifolds, then tig them after. I found that when it was out of the engine bay on the bench i could make nice little tig tacks around all the joints then I would grind out all the mig tacks before fully welding. Hope that helps you.
Honda-Tech Member
Joined: Sep 2011
Posts: 131
Likes: 0
yeah you really want to completely weld that up before you move on, especially if you are not building a jig to keep it in the same position while you weld. You would be surprised at how much it moves when you weld. Sometimes you will get lucky, but other times you will be cursing yourself when nothing lines up.
Thread Starter
Honda-Tech Member
Joined: May 2003
Posts: 631
Likes: 0
From: Brisbane, QLD, Australia
I am listening to you guys when you tell me to weld the manifold completely... I'm just trying to make sure I have enough clearance for everything before fully welding.
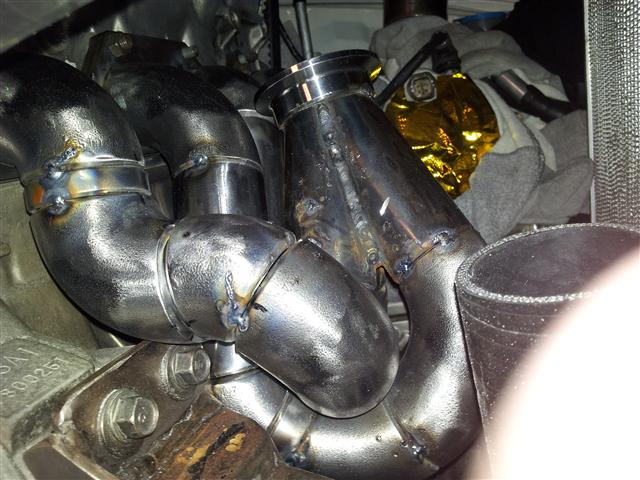
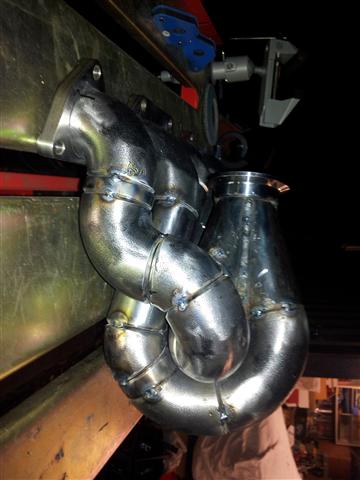
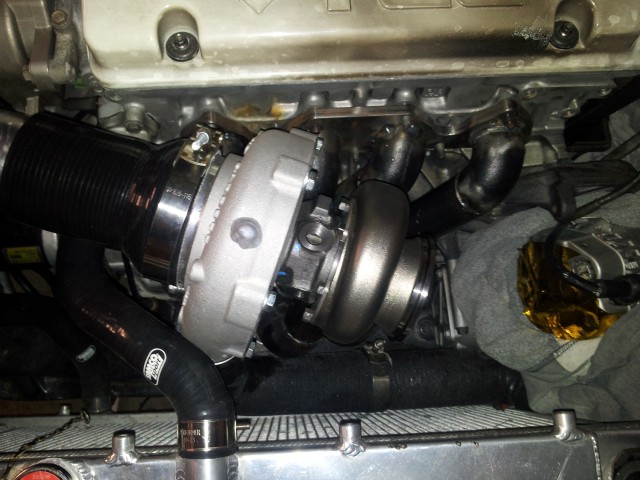
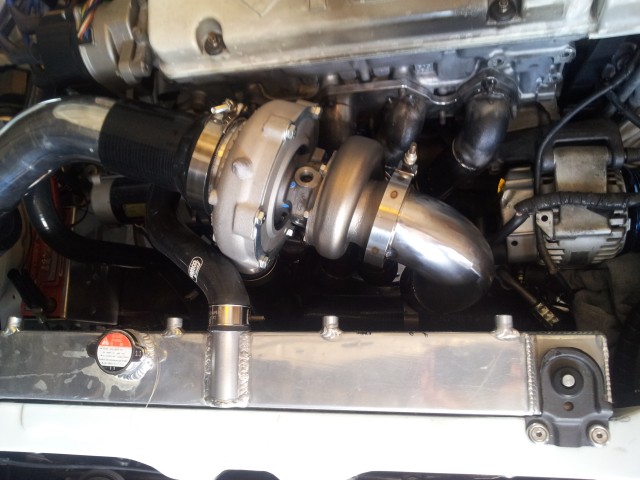
Did some work on the down pipe last night... it's a lot tighter than anticipated.
I'm not happy with it currently.
Did some work on the down pipe last night... it's a lot tighter than anticipated.
I'm not happy with it currently.
Thread Starter
Honda-Tech Member
Joined: May 2003
Posts: 631
Likes: 0
From: Brisbane, QLD, Australia
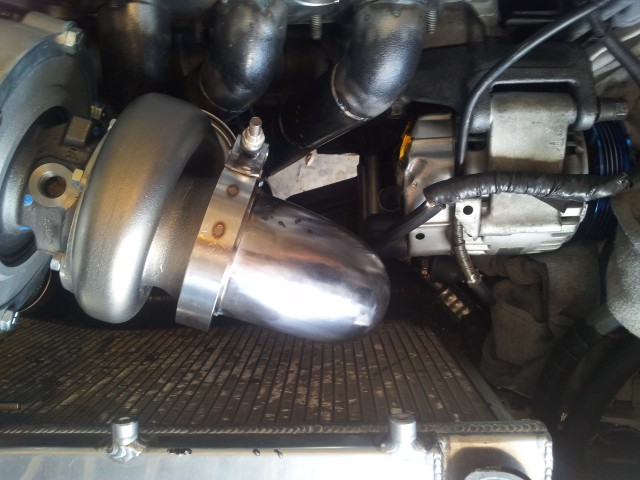
What kind of clearance is OK for a a dump pipe from an alternator? I've seen these things die from heat before and I just want to make sure it's going to be ok.

Thread Starter
Honda-Tech Member
Joined: May 2003
Posts: 631
Likes: 0
From: Brisbane, QLD, Australia
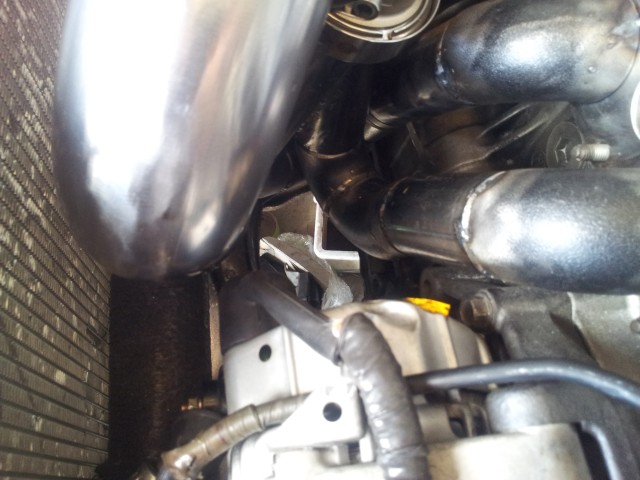
To make clearance for the wastegate and to clear the alternator more, I think I'm going to have to make pie cuts for the down pipe instead of the donut bend I've used in the pictures.
I cant see any other way around it unfortunately.
I cant see any other way around it unfortunately.

Thread
Thread Starter
Forum
Replies
Last Post
RCautoworks
Welding / Fabrication
24
Mar 8, 2008 10:52 AM
BuBBa y0!
Forced Induction
27
Oct 19, 2007 10:35 PM