

Rebuilding a B18C1 shortblock

Thread Starter


Joined: Mar 2004
Posts: 7,149
Likes: 3
From: Near Philly, USA
After this weekends visit to a 1/8 th mile strip about 100 miles from Downingtown, the old engine started to smoke pretty good. Maybe I hit the rev limit one time too many. I thought about doing a leakdown and compression test but what's the point when the motor has seen 150+ dyno pulls and 90K+ miles. It made plenty of power and still does but pushing oil sucks.
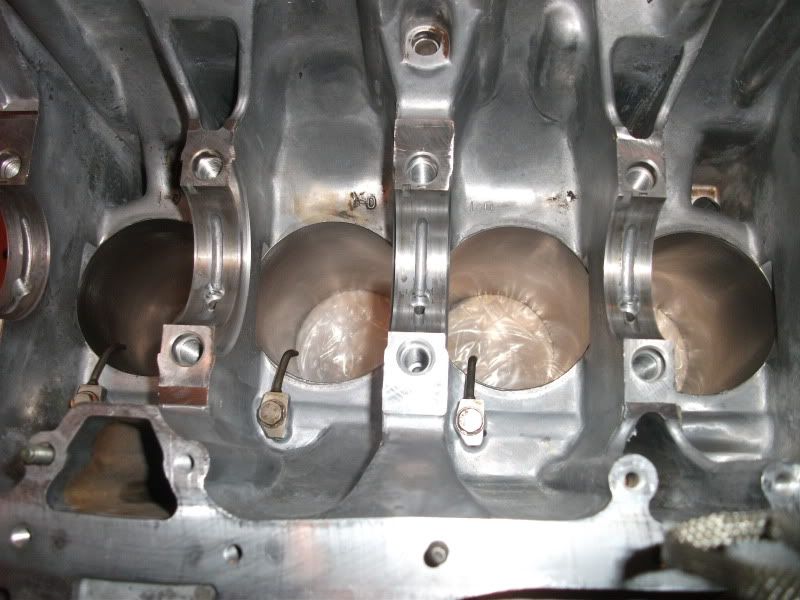
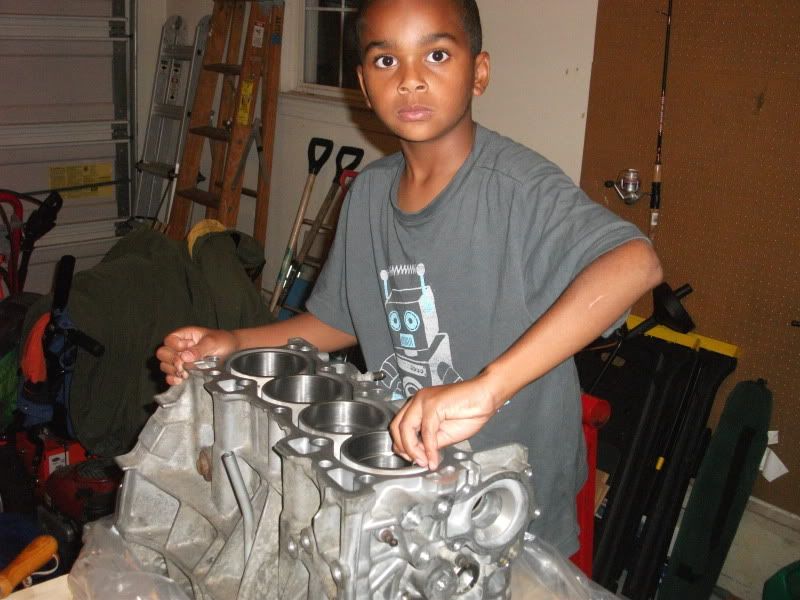
So, the once and future IMW intern and I dis-assembled the block on a computer cart.
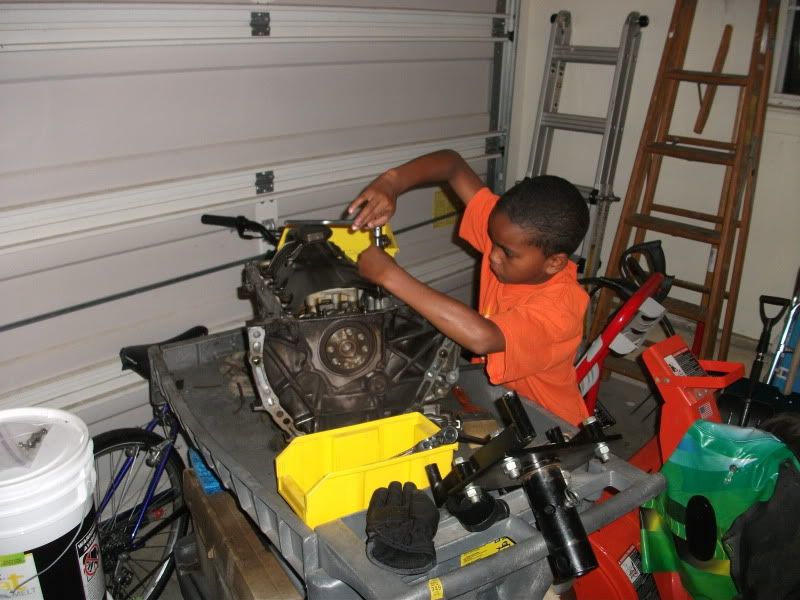
Lol, I told Wes to take the pick-up and windage tray off and he did. The kick of it is he's 9 yrs old.
Once we got the block stripped, I proceeded to determine the existing bearing sizes so we can go about the process of sizing new bearings for more of a performance build. Here is a little chart I thought some of folks with interest in engine building might find useful.
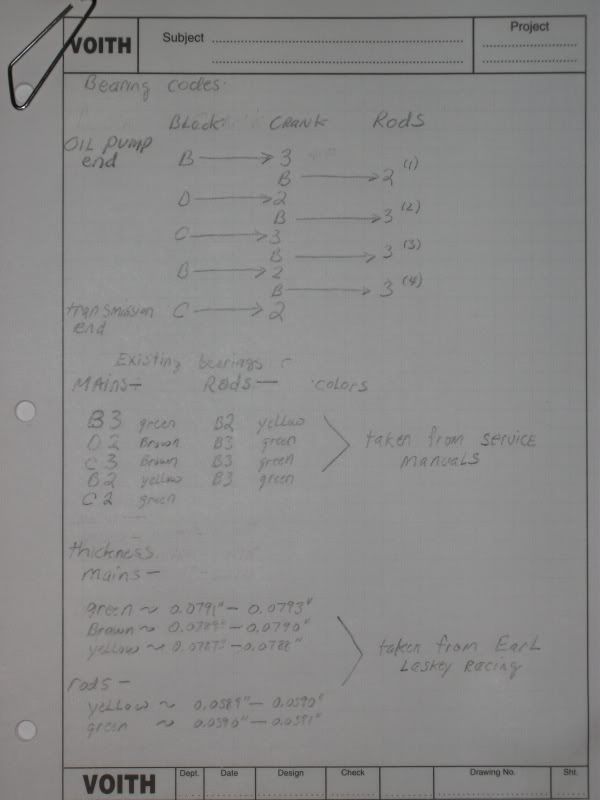
I tried to arrange the chart such that one could read the codes from the block, crank, and rods and lay them out in way that would make it easy to determine the bearings.
My next step will be to plastigauge the existing bearings to find the clearances.
So, the once and future IMW intern and I dis-assembled the block on a computer cart.
Lol, I told Wes to take the pick-up and windage tray off and he did. The kick of it is he's 9 yrs old.
Once we got the block stripped, I proceeded to determine the existing bearing sizes so we can go about the process of sizing new bearings for more of a performance build. Here is a little chart I thought some of folks with interest in engine building might find useful.
I tried to arrange the chart such that one could read the codes from the block, crank, and rods and lay them out in way that would make it easy to determine the bearings.
My next step will be to plastigauge the existing bearings to find the clearances.

Honda-Tech Member
Joined: Mar 2010
Posts: 245
Likes: 0
From: Buffalo Area
Was there a video of your son in a turbo k series coupe? It looks like him that was a funny video, and I apologize if thats completely wrong. Looks like this should be a good build I'll stay tuned.
Thread Starter
Joined: Mar 2004
Posts: 7,149
Likes: 3
From: Near Philly, USA
Yes, that is Wes in the video.


Trending Topics
Thread Starter
Joined: Mar 2004
Posts: 7,149
Likes: 3
From: Near Philly, USA
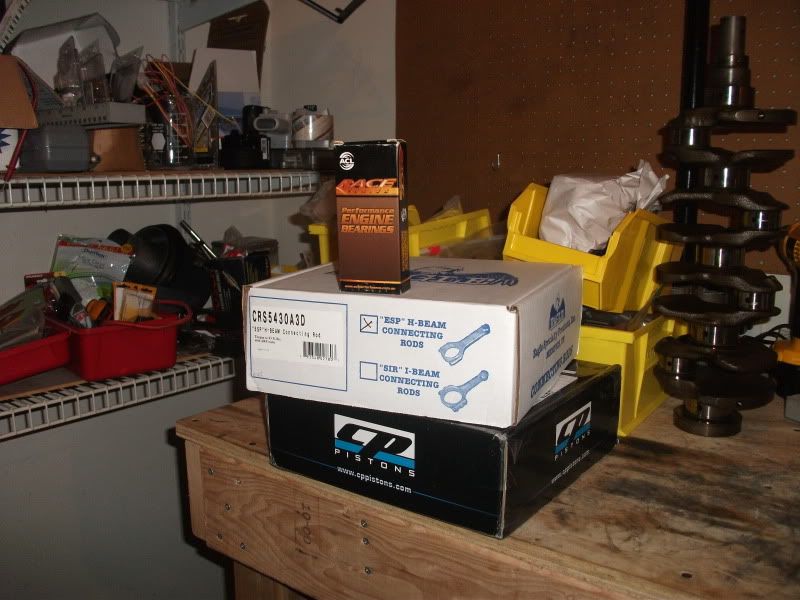
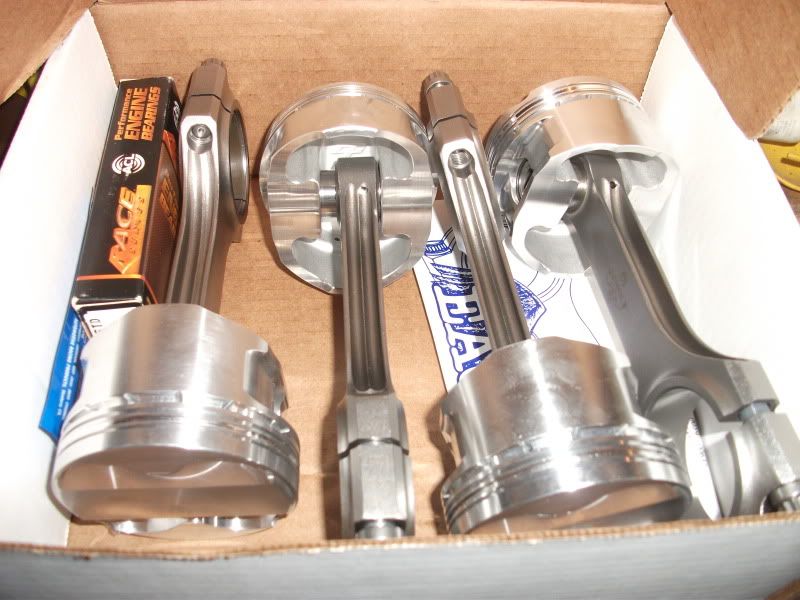
I just got a set of Eagle rods, thanks Juan. I also completed a plastigauge check of the original rods and bearing and the new rods and an original bearings.
Rod OEM Rod NEW Rod bearing color
#1 ~0.0018 ~0.0018 yellow
#2 ~0.002 ~0.002 green
#3 ~0.002 ~0.002 green
#4 ~0.002 ~0.002 green
Based on this info, I will go with a set of ACL rod bearings. They are all green which should get me to ~ 0.002 for all bearings.
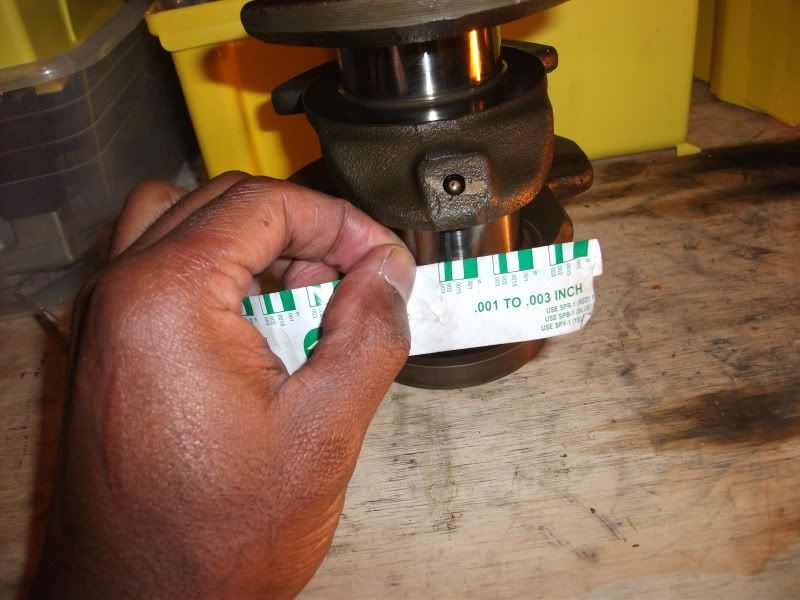
Here is a pic of the plasitigauge for the OEM bearings.
Rod OEM Rod NEW Rod bearing color
#1 ~0.0018 ~0.0018 yellow
#2 ~0.002 ~0.002 green
#3 ~0.002 ~0.002 green
#4 ~0.002 ~0.002 green
Based on this info, I will go with a set of ACL rod bearings. They are all green which should get me to ~ 0.002 for all bearings.
Here is a pic of the plasitigauge for the OEM bearings.
Thread Starter
Joined: Mar 2004
Posts: 7,149
Likes: 3
From: Near Philly, USA


B*a*n*n*e*d
Joined: Jul 2010
Posts: 776
Likes: 0
From: Earldasquirrel
good luck with the build man, there is plenty of power in the bottom end with proper clearances... id recommend going with strictly oem bearings because thats the best way to get the most precise tolerances
Honda-Tech Member

Joined: Feb 2003
Posts: 9,820
Likes: 12
From: schooling kids in ny, usa
i dont think its too loose. its just on the high side of factory limits, and for a car making much more than oem power with higher rpm its not out of control. my 500hp engine is .0018 on the rods and .002 on the mains. got about 2000 miles so far no issues
I didn't say TOO loose but it is beyond the factory limits. .0017" is the new limit on the mains (.0019 on #3) and .0020" on the rods according to the FSM.
The rod clearance is a little looser than the mains, why is that? You just told me your engine is tighter on the rods than the mains, thats backwards. Im not saying it will explode tomorrow, I want to understand the engine building strategy.
The rod clearance is a little looser than the mains, why is that? You just told me your engine is tighter on the rods than the mains, thats backwards. Im not saying it will explode tomorrow, I want to understand the engine building strategy.
Thread Starter
Joined: Mar 2004
Posts: 7,149
Likes: 3
From: Near Philly, USA
Before I answer your question see below.
Originally Posted by mar778c
Here's my set-up:
Drivetrain-
Block- B18C1, OEM gsr crank + rods, 81.5 mm RS machine pistons (PTW 0.002"), OEM main bearings (bearing clearance 0.0018"), and ACL rod bearings (bearing clearance 0.0018")
Head- B16A2, stock port, stock valves
VT- Supertech springs H1002D, and 2002 rsx type-s retainers
Cams- Pro2 intake and Blox C exhaust
TB- Professional Products 68 mm
Ignition- Stock Dizzy, wires, and NGK 8's
Fuel Delivery- Walbro 255 and ID1000
EMS- OBD-1 converison, chipped P28, neptune'd
Trans- S4C, cable to hydro bracket, and CC stg 2 clutch
Turbocharger-
Turbo- Holset H1C model 3531456, 18 cm^2 exhaust housing with 3" v-band (DIY)
Manifold- Mini-ramhorn 1.5" sch 10 fitting (DIY), (Importdps)
Wastegate- Tial 38 mm
Oiling- GE Vtec sandwich plate, -4AN stainless braid (feedside), 12 mm x 1.5 to -4AN flare, -10AN stainless braid (return side)
Hotside charge piping- 2.5" Aluminum piping (Dynamic Performance)
Coldside charge piping - 3.0" ALuminum piping (Dynamic Performance)
Intercooler- Precision 600 Hp (Importdps)
BOV- Tial 50 mm
Map sensor - GM 3 bar
Downpipe- 3.0" stainless steel (IMW)
Exhaust- 3.0" stainless steel (Synapse Motorsports)
Parts (Importdps, Xenocron, and Verocious)
Tuning (IMW)
The purpose of the original thread was was to make a manifold that would produce power power and not creep excessively. I would say on both accounts this effort was successful.
See link below.
https://honda-tech.com/forums/forced-induction-16/stg-1-boosting-my-hatch-fab-mainfold-2888738/
And the plots
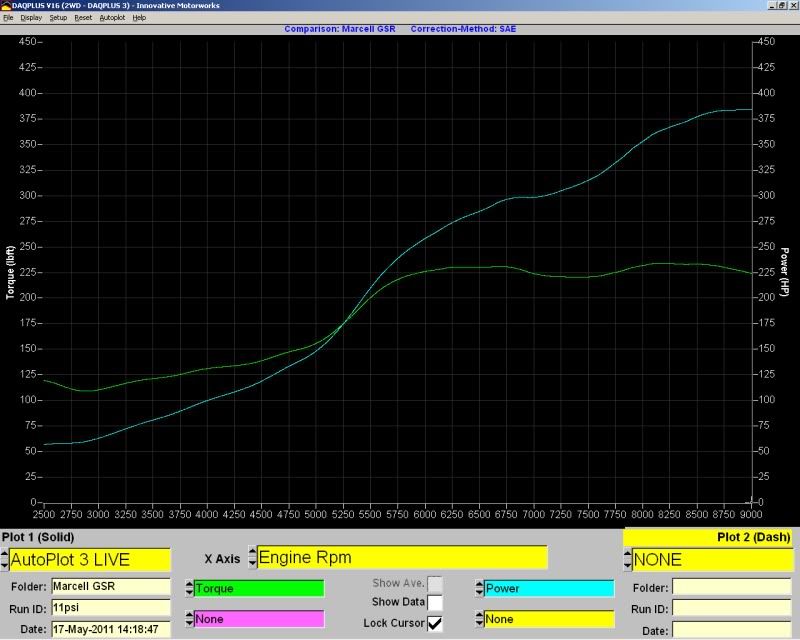
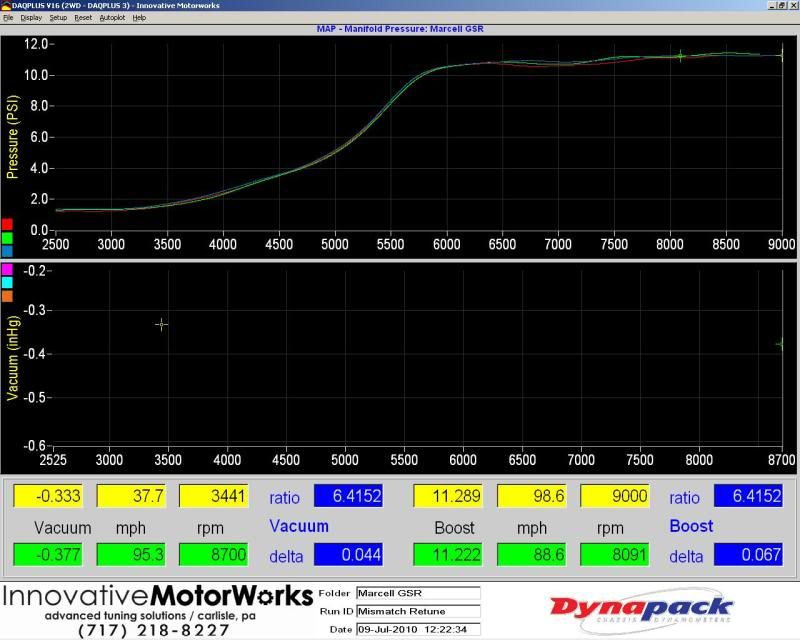
It produces 387 whp and 225 ft-lbs @ 9000 rpm.
Yes, I build them loose and they seem to last a good while. The 0.002" may be pushing the limit but the FSM is not relevant for this job because this is 500+ whp motor with forged pistons and rods.
Thread Starter
Joined: Mar 2004
Posts: 7,149
Likes: 3
From: Near Philly, USA
Thread Starter
Joined: Mar 2004
Posts: 7,149
Likes: 3
From: Near Philly, USA
Update:
I dropped the block off last week for a bore and hone. Hopefully, I will have it back by the weekend.
I remember being asked about ring gap clearance. Below are the calcs for how I determine ring gap clearance.
PTW = 0.004" (thanks d-rob)
bore_dia = 81.5 mm/25.4 mm = 3.20866 in
tot_dia = bore_dia+PTW
tot_dia = 3.20866"+0.004" = 3.21266 in
top_ring gap = 3.21266*0.006" = 0.019"
0.006" is the spec confirmed for +500 whp turbo applications by CP tech support.
2nd ring gap = top_ring gap+0.004"
2nd ring gap = 0.019"+0.004" = 0.023
CP tech support recommended the following ranges for this application:
top ring gap = 0.018~0.020"
2nd ring gap = 0.023~0.025"
Thread Starter
Joined: Mar 2004
Posts: 7,149
Likes: 3
From: Near Philly, USA
I got the block back from the machine shop. A little bore and hone and mild clean up.
Thanks Joe@NAPA machine shop East York.
I stopped by IMW today and installed the pistons on the rods.
I got home and re-install the piston oil squirters.
And the once and future IMW intern proceeded to check ring gaps.
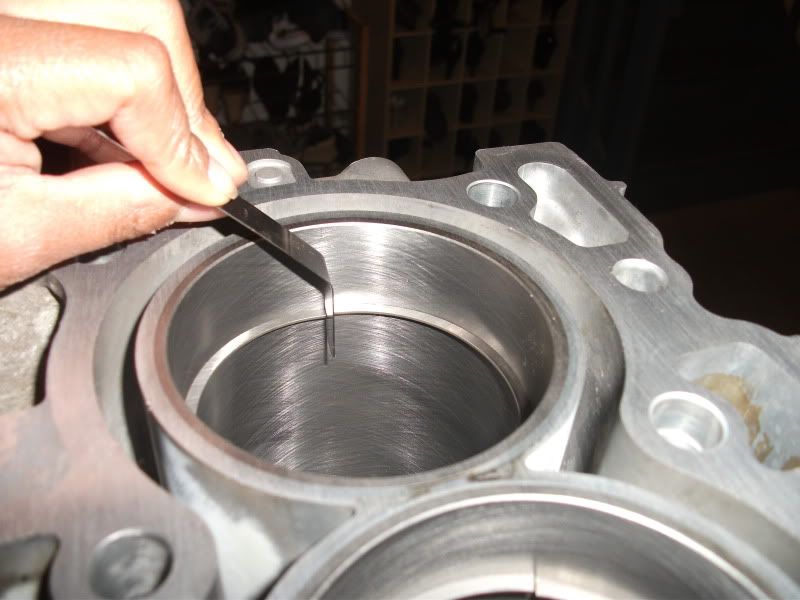
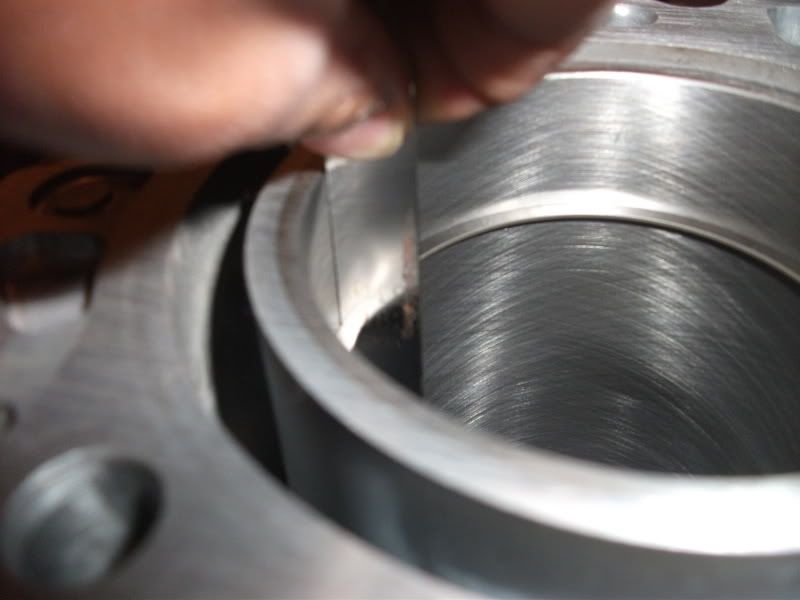
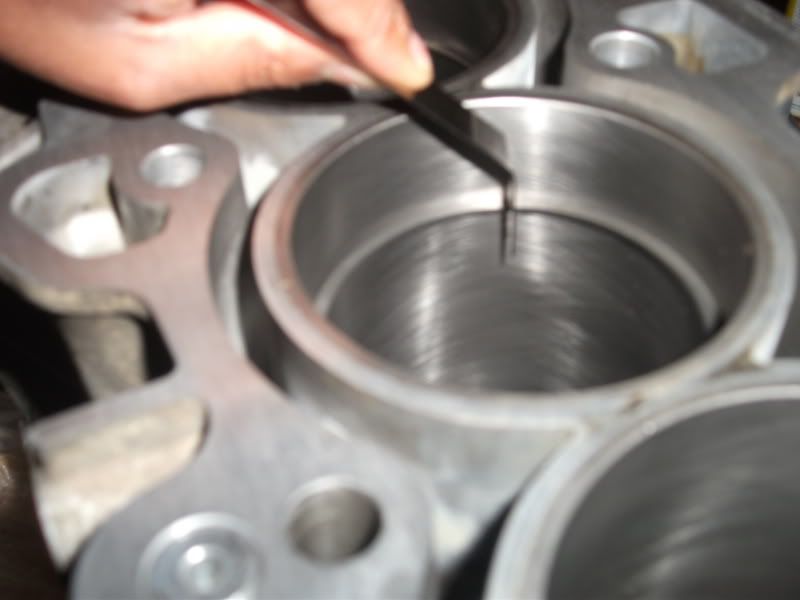
We will commence with the serious re-build on Sat.
Thanks Joe@NAPA machine shop East York.
I stopped by IMW today and installed the pistons on the rods.
I got home and re-install the piston oil squirters.
And the once and future IMW intern proceeded to check ring gaps.
We will commence with the serious re-build on Sat.
Honda-Tech Member
Joined: Dec 2003
Posts: 1,026
Likes: 0
From: Pittsburgh, PA, US
Im building my GSR too with almost the same set up but ill be running wiseco pistons. I work in a machine shop so i have all kind of mesuring tools to go over things plus is my first built so ill b double checking everything, but good luck with urs, is looking good.