

Red stitching refresh- MEGA TECH!

Soo, as everyone knows our red stitching fades fairly easily especially if your caR was left outside and baked alive its entire life. This is going to show you the cheapest way to refresh your red stitching (college style). My example today is the original center consol arm rest from my '98. Since my car will never see a second of track time this is wonderful upgrade and perfect for you west coasters. Enjoy and feel free to ask questions.
Parts needed:
1- Red Sharpie ultra fine point permanent marker.
2- Part with OEM red stitching.
3- Time and steady hand.
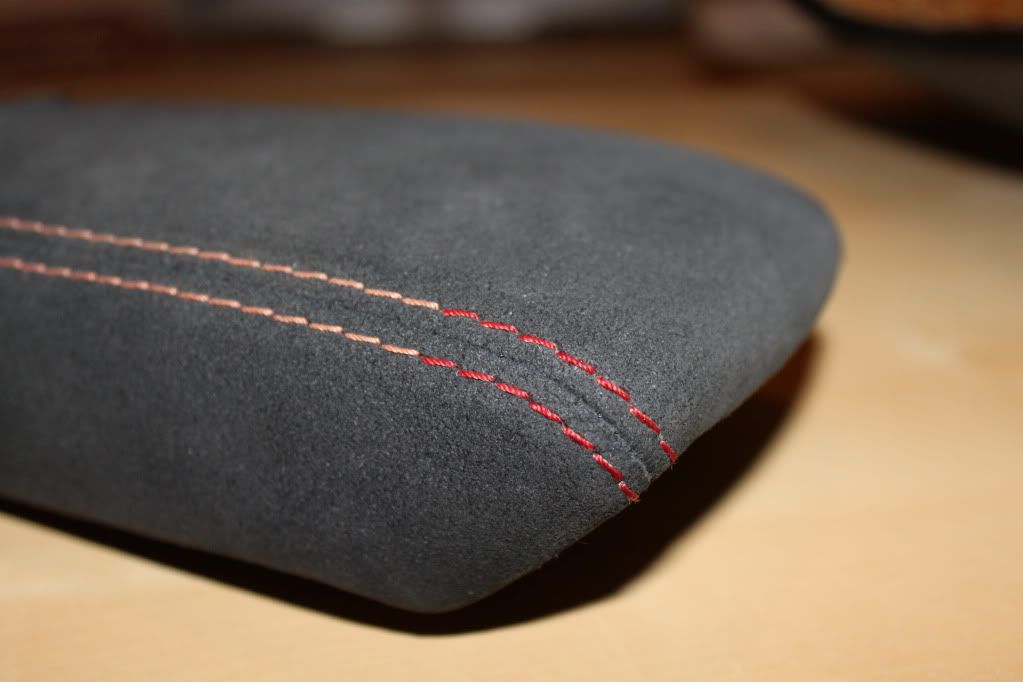
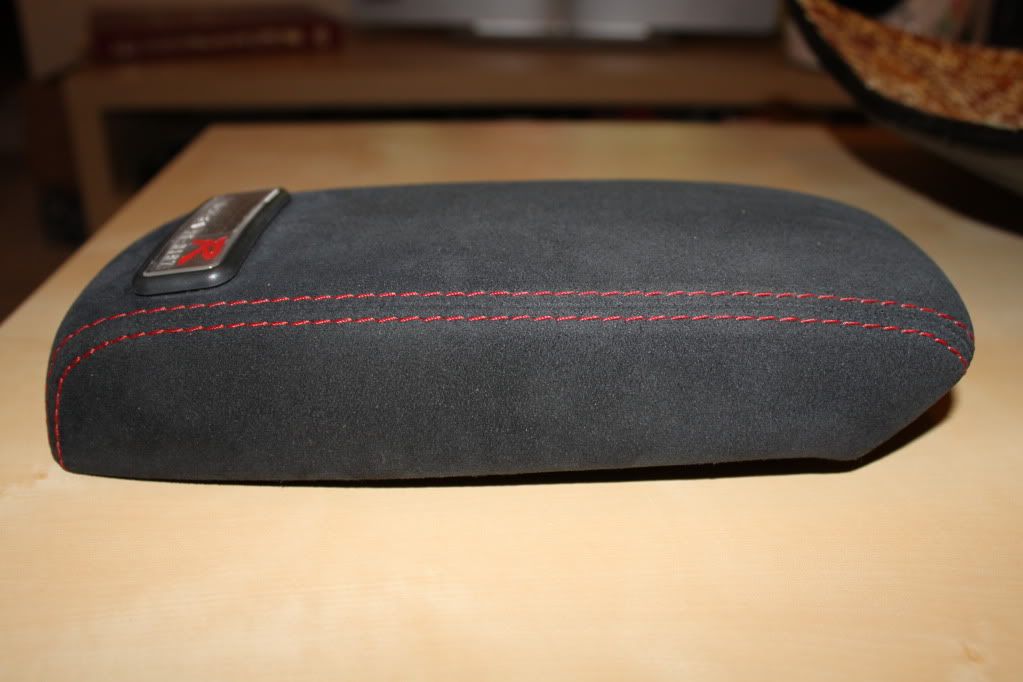
Here is what my 13yr. old center consol looked like before:

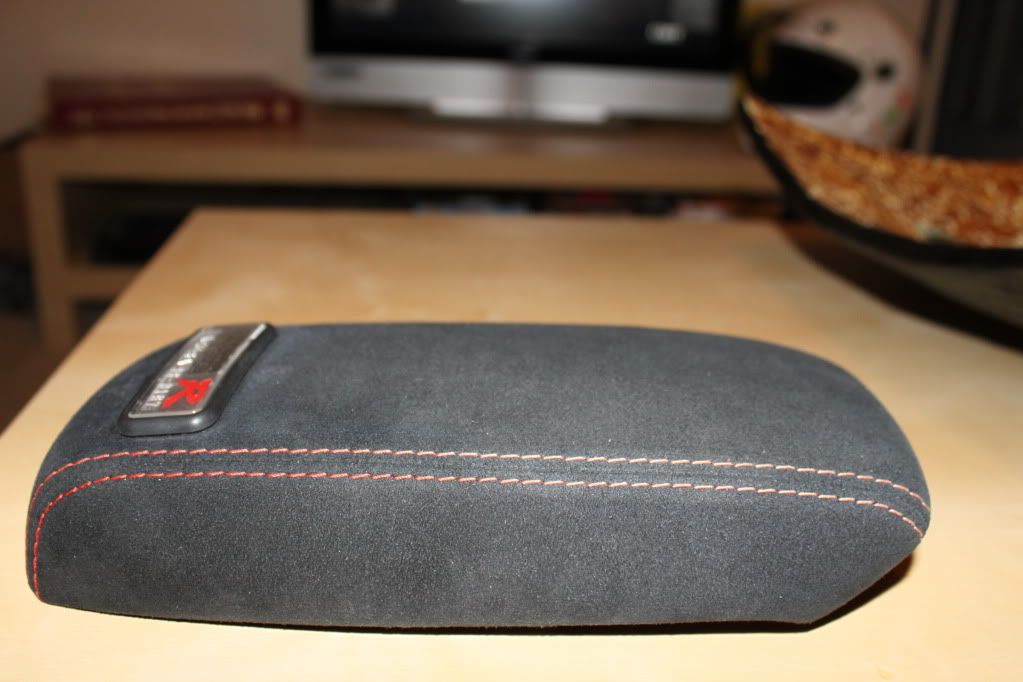
You can really see where the sun hit this car and where the bolster of the seat protected some of the red stitching.
Look at the color difference from under side and where the sun hit.
PROCEDURE
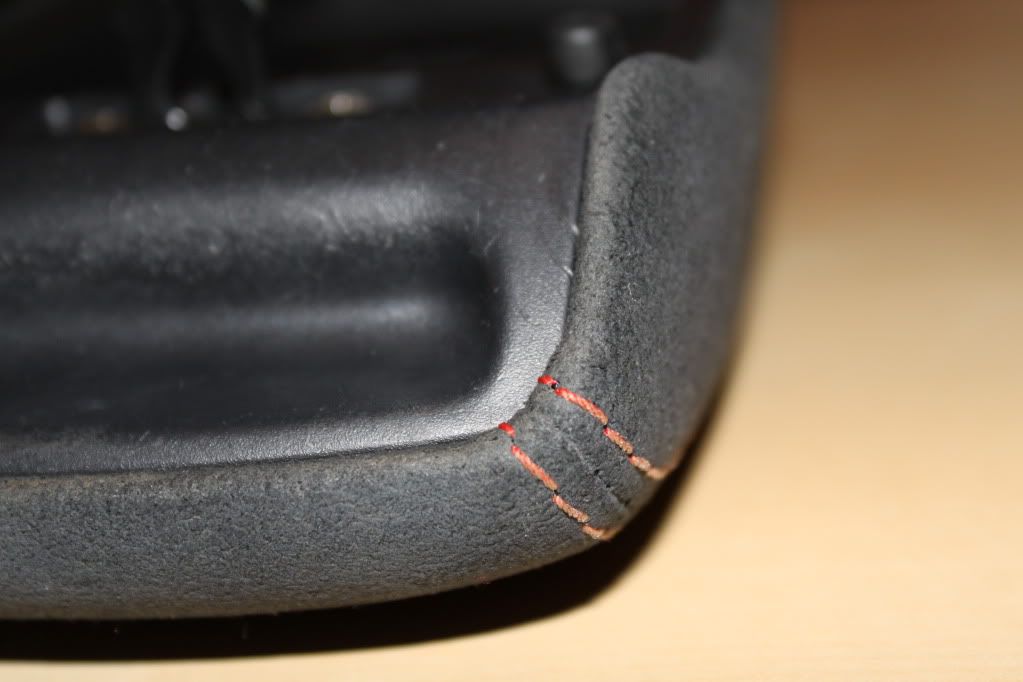
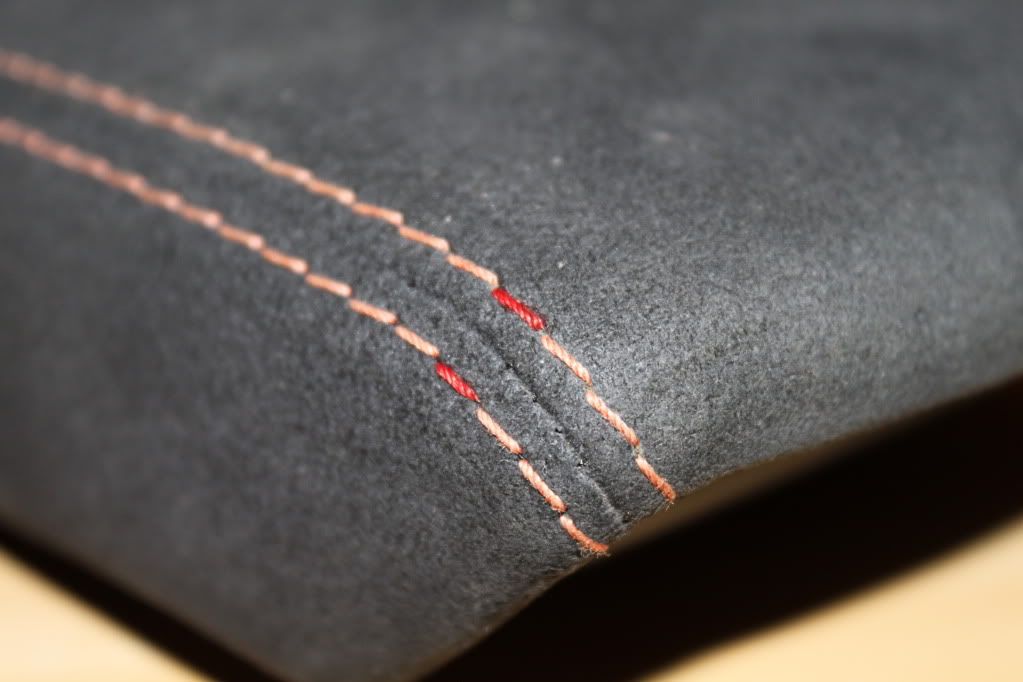
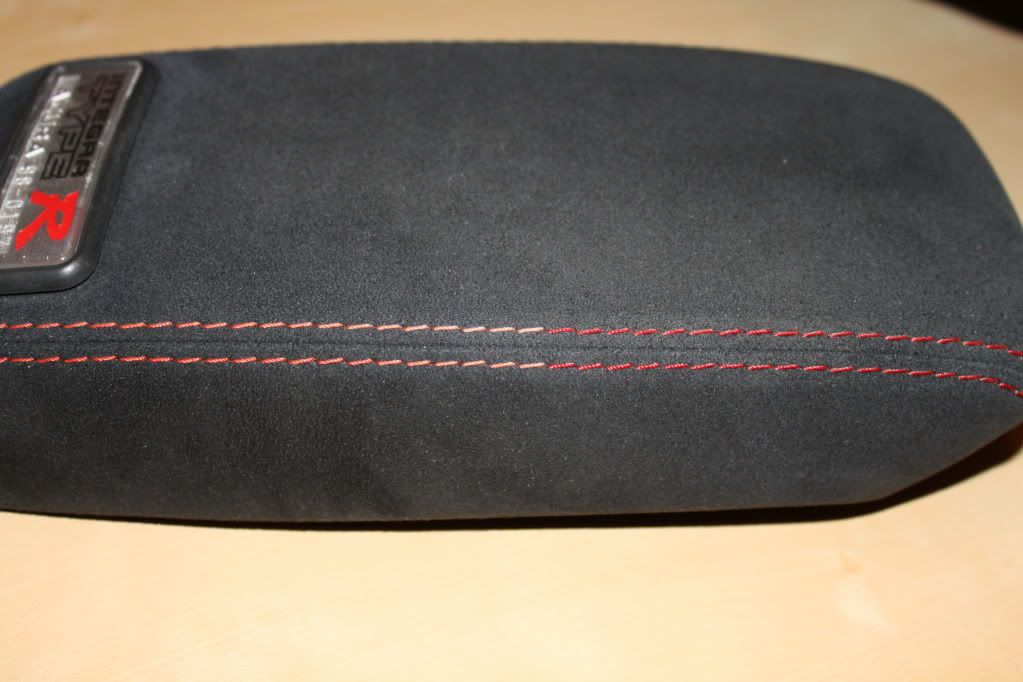
--Start at one end of the stiching, gently coloring one stitch at a time, followed by doing the stitch directly under or over it. This will prevent your natural american urge to do everything the laziest (and sloppiest) way possible. If you are careful, this will help to prevent you from skipping from one stitch to the other without lifting, which will discolor the black felt material.
Do it like THIS (I did not start on the end for this demonstration but I would have other wise):
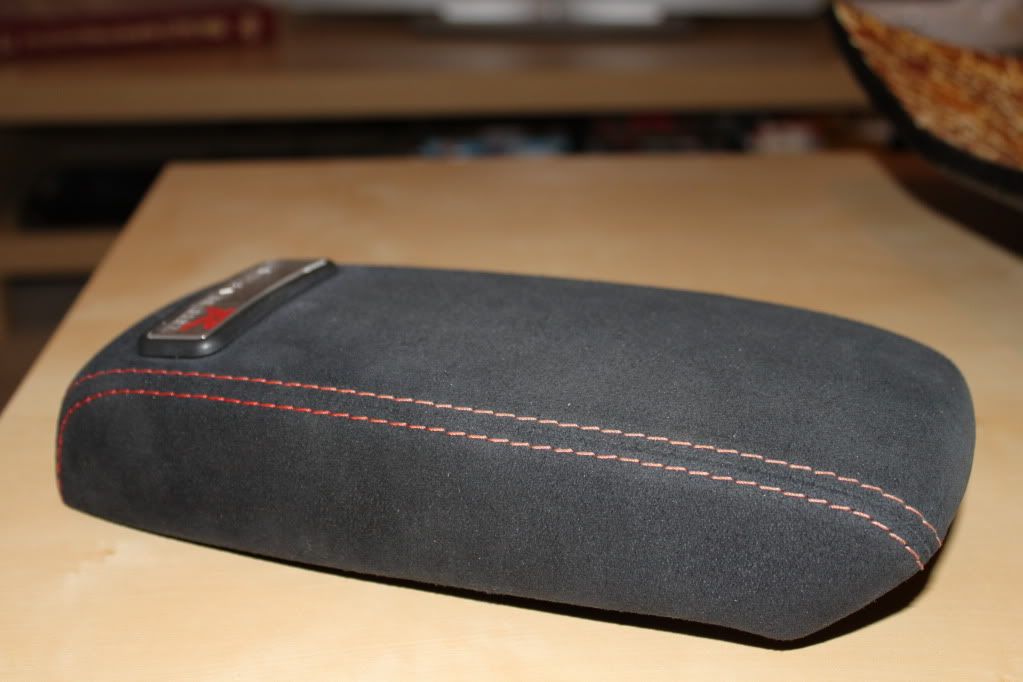
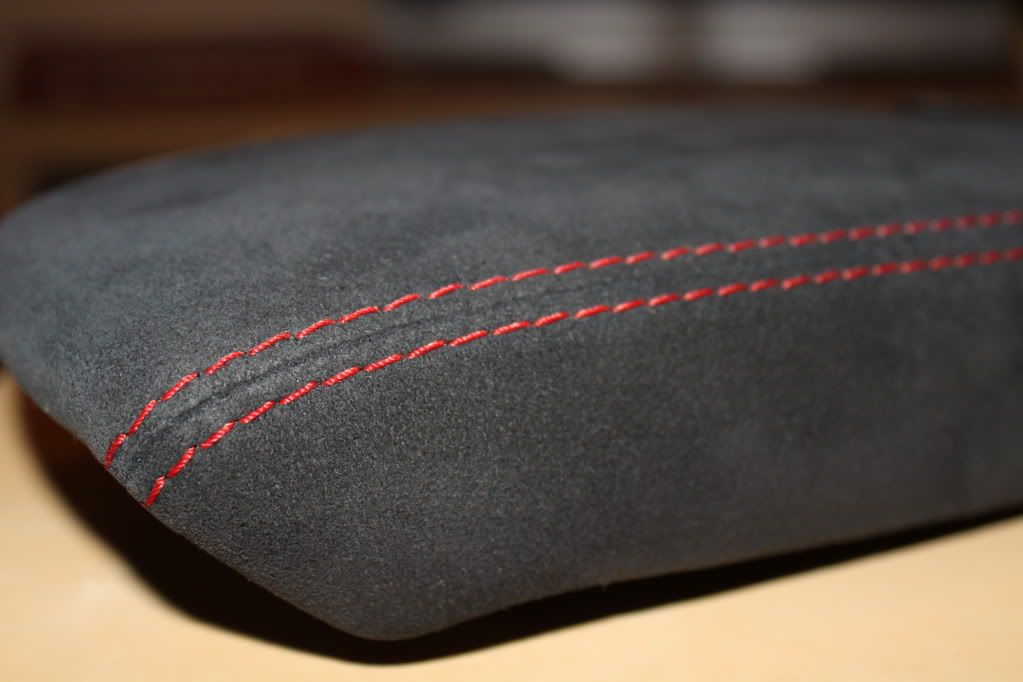
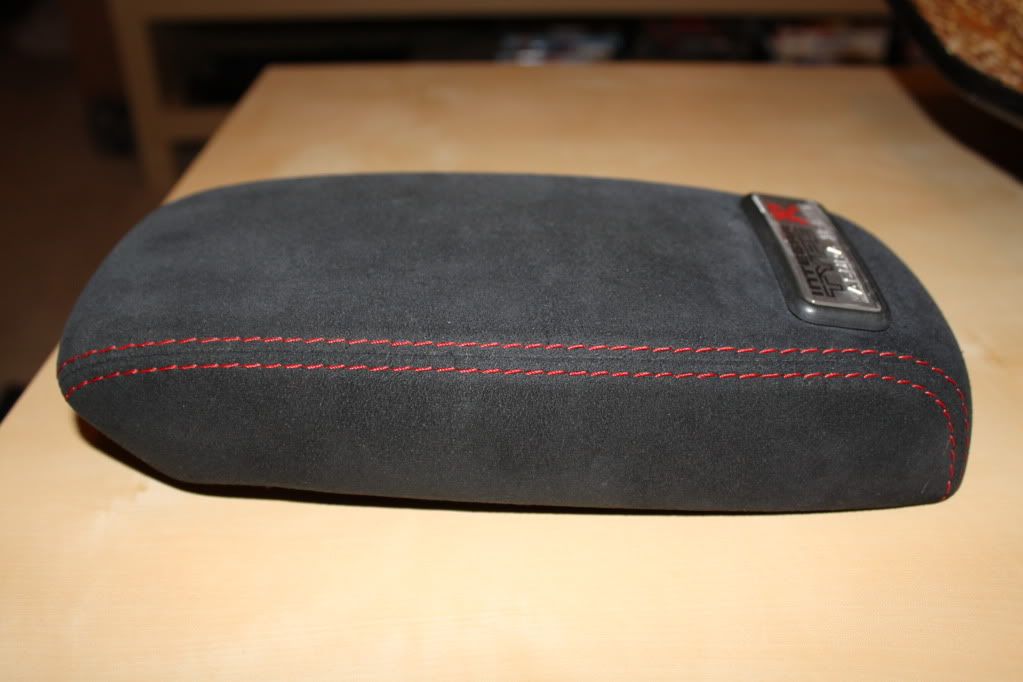
Ok here is the finished product:
This can be used on any of the same OEM Honda red stitched pieces. I have personally also done USDM seats and a JDM non-SRS wheel. Be extremely careful if you are doing a steering wheel as it is easier to have "over strokes" or messups show up on the leather of the wheel.
*On a side note this is pixor intensive because I am trying out my new camera and a DSLR for the first time.
-Nate
Parts needed:
1- Red Sharpie ultra fine point permanent marker.
2- Part with OEM red stitching.
3- Time and steady hand.
Here is what my 13yr. old center consol looked like before:
You can really see where the sun hit this car and where the bolster of the seat protected some of the red stitching.
Look at the color difference from under side and where the sun hit.
PROCEDURE
--Start at one end of the stiching, gently coloring one stitch at a time, followed by doing the stitch directly under or over it. This will prevent your natural american urge to do everything the laziest (and sloppiest) way possible. If you are careful, this will help to prevent you from skipping from one stitch to the other without lifting, which will discolor the black felt material.
Do it like THIS (I did not start on the end for this demonstration but I would have other wise):
Ok here is the finished product:
This can be used on any of the same OEM Honda red stitched pieces. I have personally also done USDM seats and a JDM non-SRS wheel. Be extremely careful if you are doing a steering wheel as it is easier to have "over strokes" or messups show up on the leather of the wheel.
*On a side note this is pixor intensive because I am trying out my new camera and a DSLR for the first time.
-Nate


^Yes it was in my college budget to do this
Thanks jdmeg6b18b.. I compared it to the part that had probably never seen sun or very little and it was almost a perfect match. I think the red looks a little darker in my pics because the black is faded so bad aswell and is more like a very dark grey.
Thanks jdmeg6b18b.. I compared it to the part that had probably never seen sun or very little and it was almost a perfect match. I think the red looks a little darker in my pics because the black is faded so bad aswell and is more like a very dark grey.
Trending Topics

Accident Prone
Joined: May 2010
Posts: 2,418
Likes: 1
From: The runoff of a track near you.
looks good. but i dont have a steady hand so i will do that american thing  i figure this would work on seats as well? though would take 5x longer
i figure this would work on seats as well? though would take 5x longer
Honda-Tech Member
Joined: Mar 2002
Posts: 1,529
Likes: 0
From: my cats breath smells like cat food
Looks good, I would be worried about it bleeding later on from my arm being on it or something like that. Still, a huge improvement, especially considering the cost.
I have done steering wheels and seats with this same method and have not experienced it bleeding (on me or clothes), if it ever has there is such a small amount of ink its not noticable. Though I have noticed that the steering wheel I did seemed to fade ever so slightly over time/hard track use, but then again I guess so did the OG honda dye.
If you're worried about the middle seam inbetween the stitches, you can buy thin masking tape for that as well; it's the same stuff used when doing pinstriping on cars. Any hardware store should carry it.
Glad to hear the thread is useful... On an unrelated note, my dads side of the fam. is from Bucks County PA, Doylestown area if I remember correctly??

ahhh hahaha! I did this about a year and a half ago to my DC5 wheel during a lunch break.. it helps a lot, but of course it doesn't last all that long. Keep a fine tip red Sharpie in my armrest!
The wheels get dirty quick from grimy hands and such, you should take a damp cloth and wipe it down. Its suprising how dirty they get.

Thread
Thread Starter
Forum
Replies
Last Post